Well, it’s been quite an eventful week on a national and global level, what with the resignation of our government, the inauguration of a new POTUS, and the introduction of a curfew and other stricter measures here. I frequently needed to remind myself to keep breathing.
On a personal level, one uneventful week follows another. And that’s a good thing in a way – it means that we’re OK.
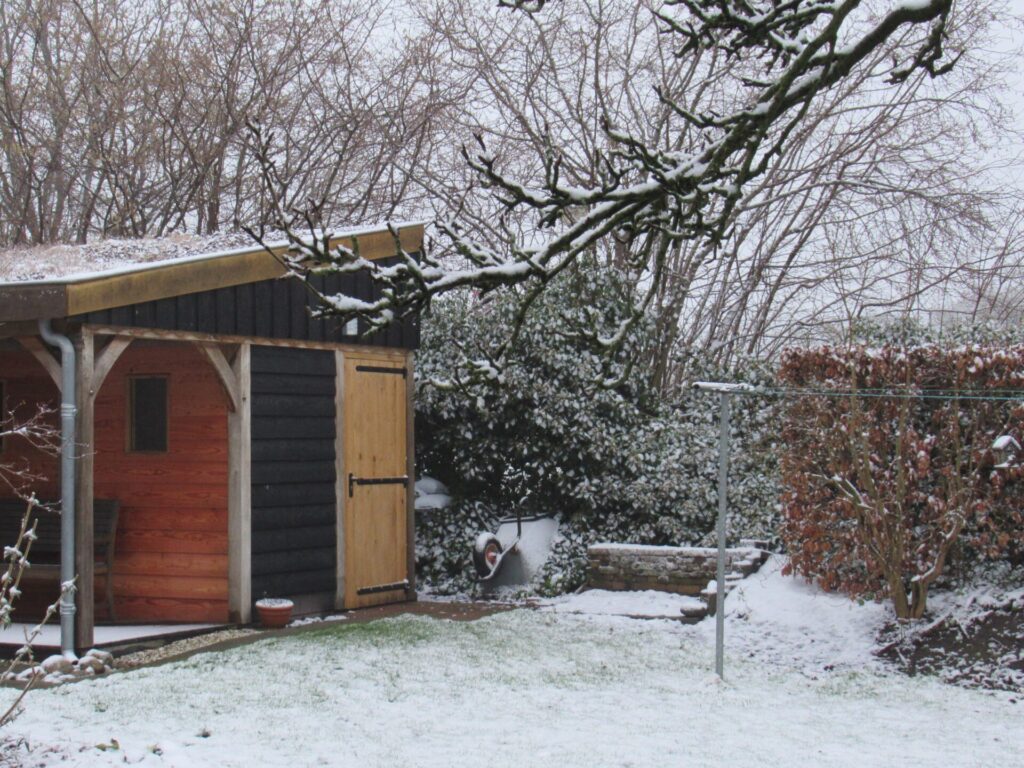
THE event of our past week was SNOW! Last Saturday it started snowing in the evening, when it was already dark. On Sunday morning, I could hear rain drops pattering on the roof, but the garden still looked lovely with its thin white blanket.
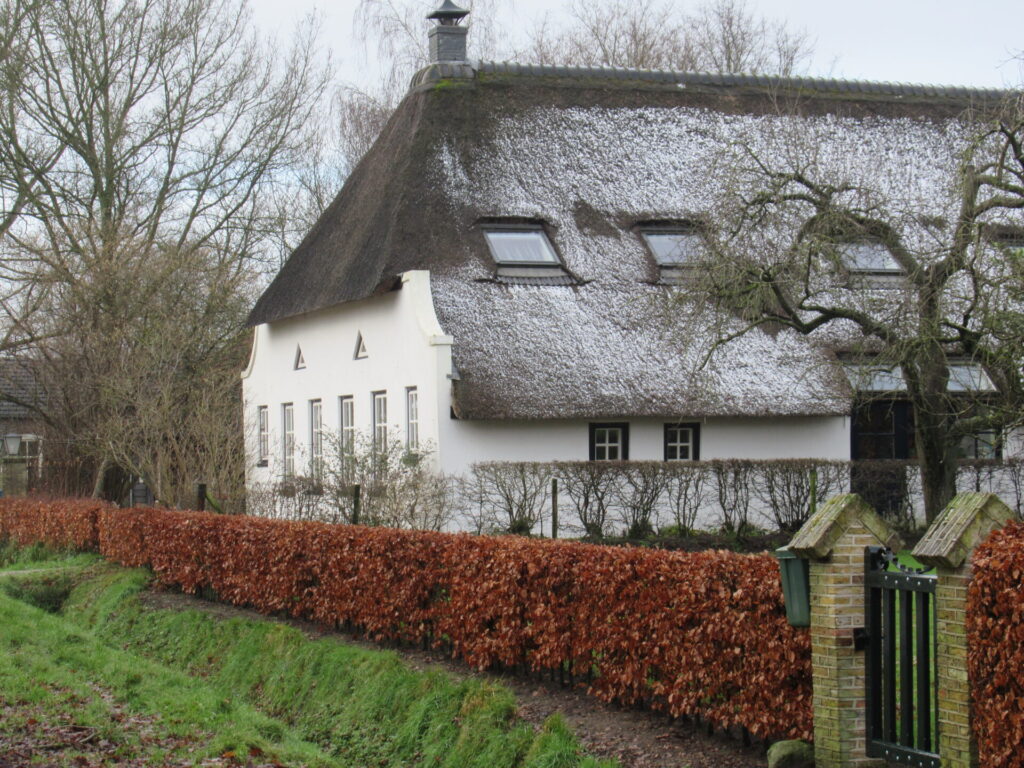
When I went for a bicycle ride after lunch, there were just a few patches of snow left. It stayed longest on the thatched roofs of some farmhouses.
An hour or two later all of the snow had gone.
Ah, well, it was lovely while it lasted. Snow days are a rare pleasure.
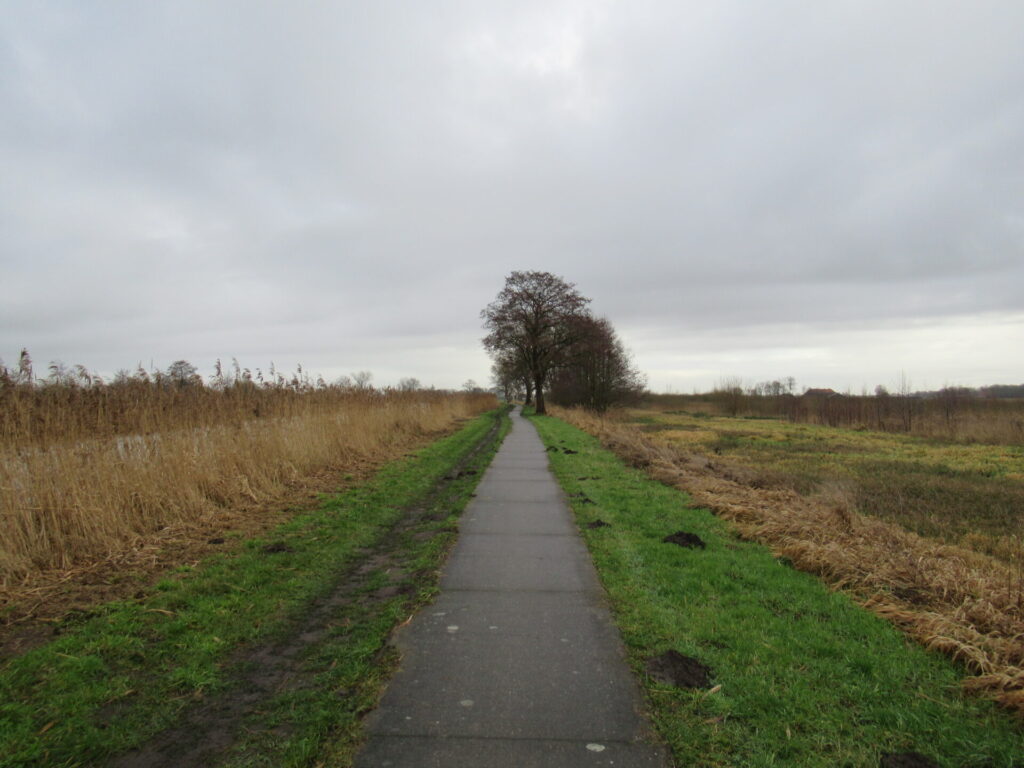
Now we’re back to more ordinary January days – dark, windy and rainy. A good time to bring some sunshine inside.
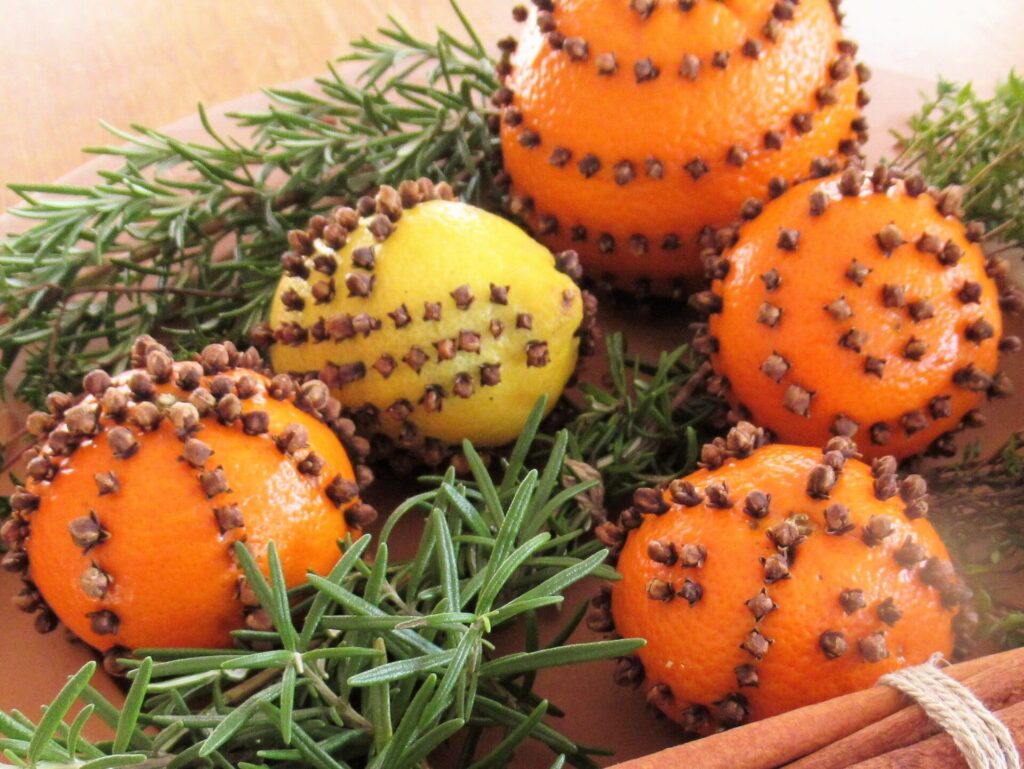
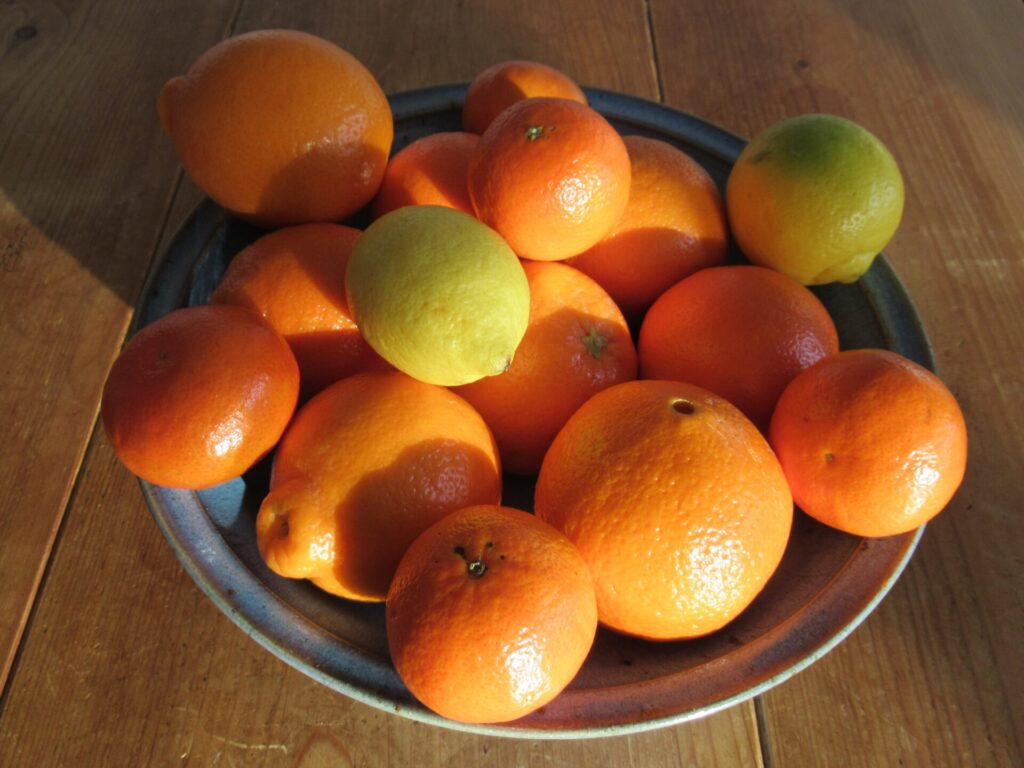
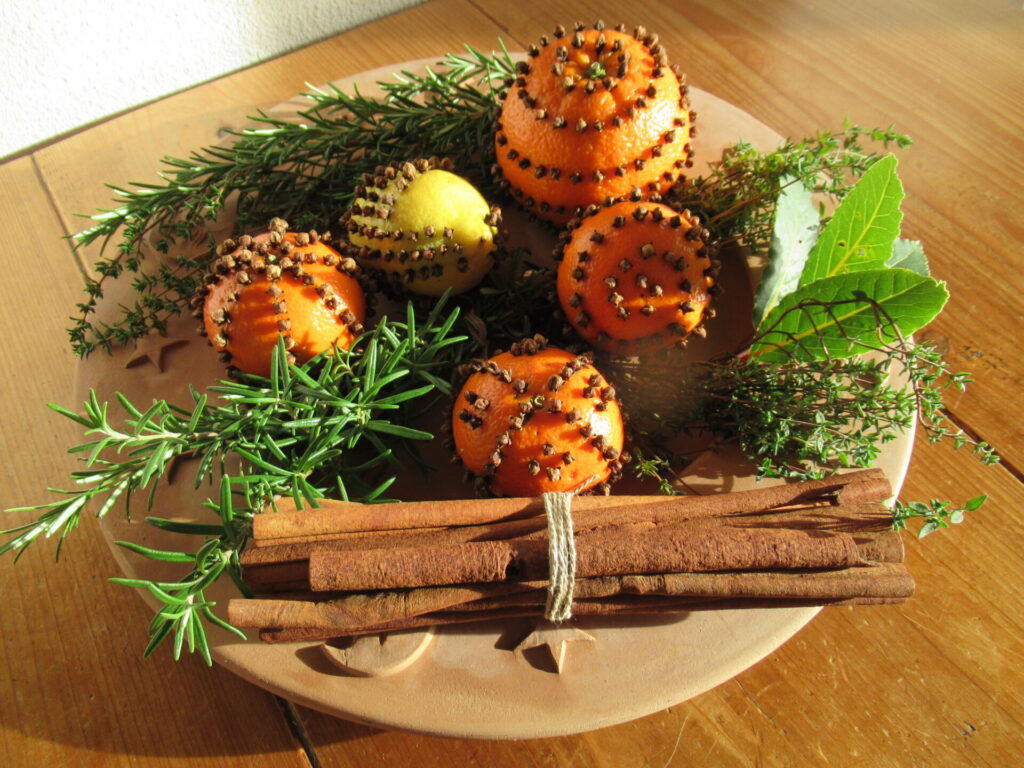
To do that, I filled a large platter with decorated citrus fruit, taking pictures during the process to share here. (I was lucky that the sun peeked out from behind the clouds now and then, giving the fruit a cheerful glow.)
It all starts with gathering everything that is needed. First of all, different kinds of citrus fruit.
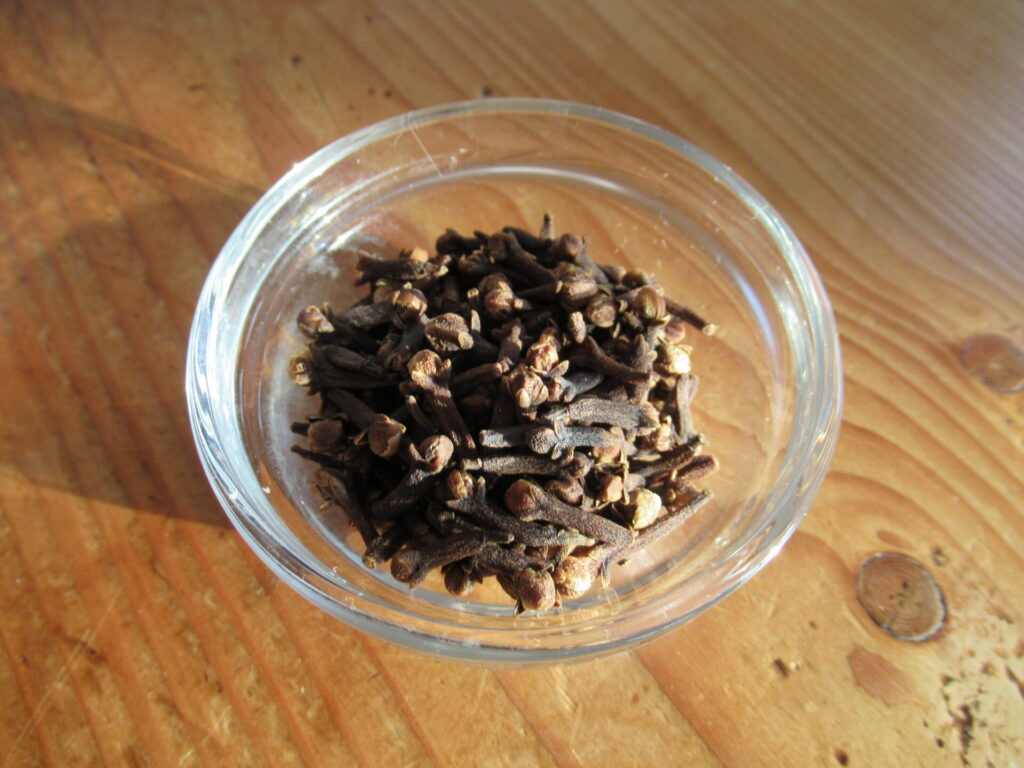
Lots and lots of cloves. (For 1 orange, 1 lemon and 3 tangerines I used 45 grams of cloves.)
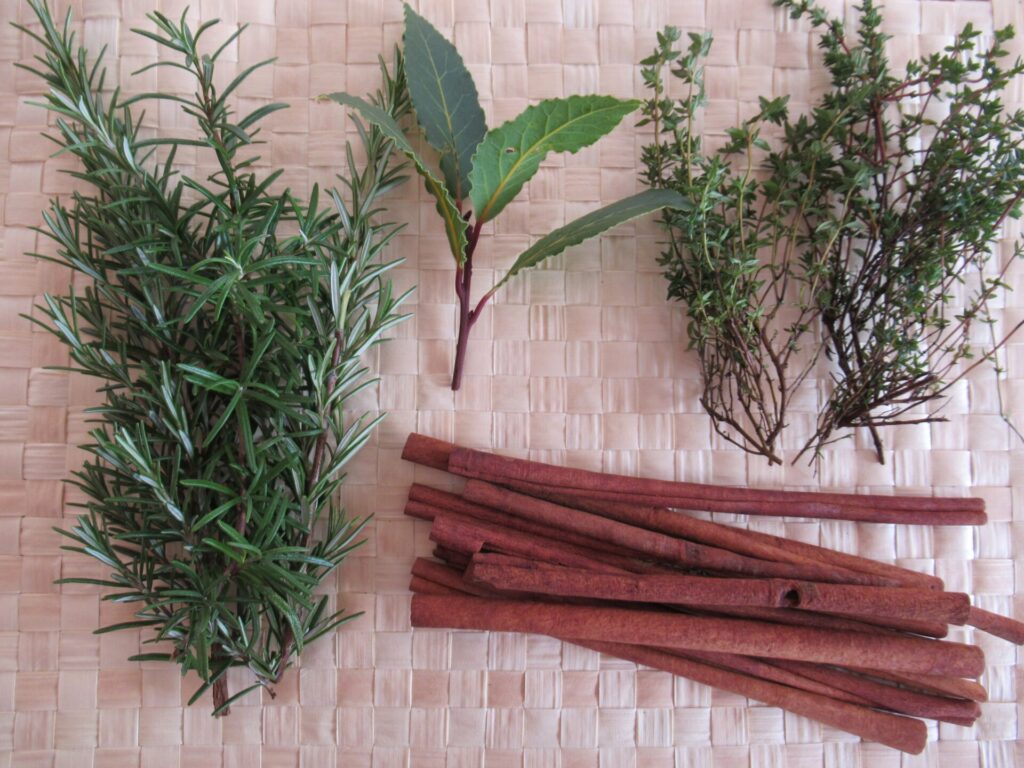
A large platter, and winter greenery and other ingredients to decorate it. I picked some rosemary, thyme and bay leaves from the garden, but conifer sprigs or other evergreen twigs or leaves would be fine, too.
I also had some jumbo cinnamon sticks I once bought at the garden centre. Not terribly fragrant, but still a nice addition to the spicy scent of the cloves. Star anise would be nice as well, if you have some.
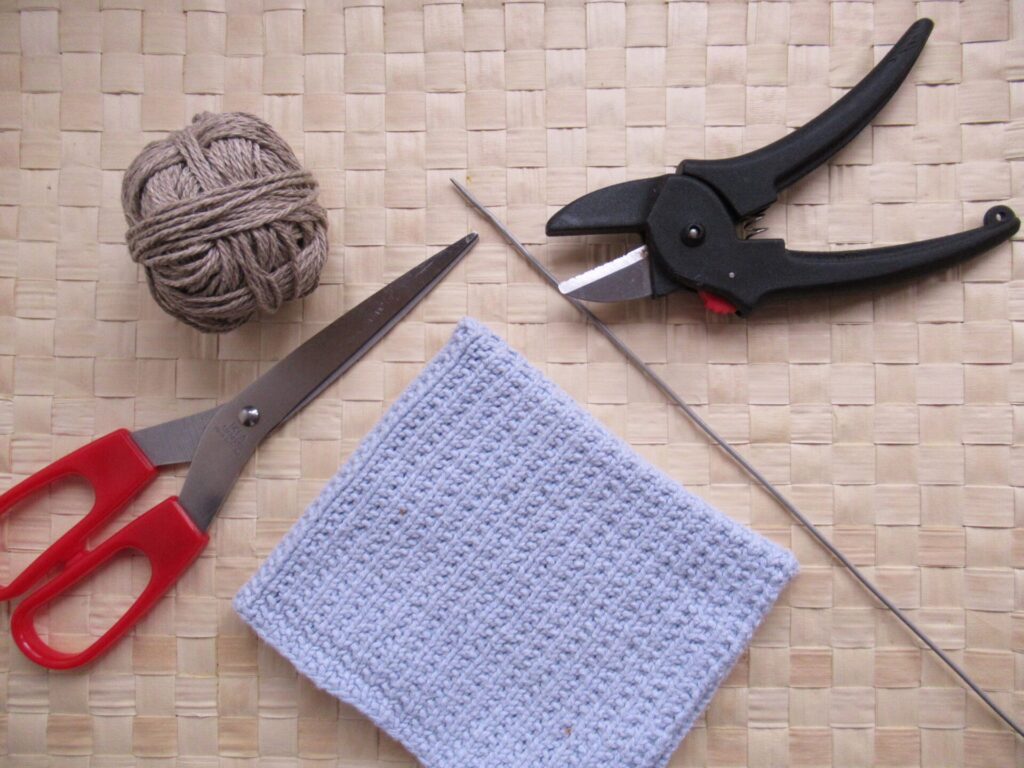
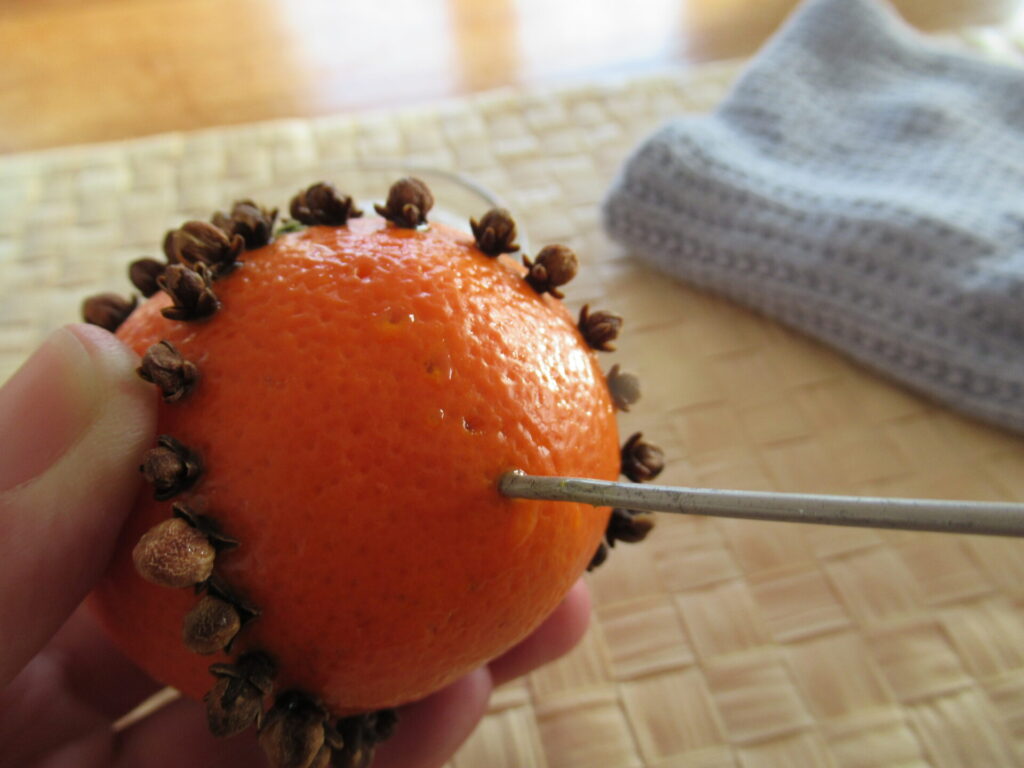
And finally a few tools and other bits and bobs. Scissors and secateurs, twine for tying the cinnamon sticks together and the twigs into bunches, a thin knitting needle (I used a size 2.0 mm/US 0) or a skewer, and a cloth to mop up the juice and dry your hands from time to time.
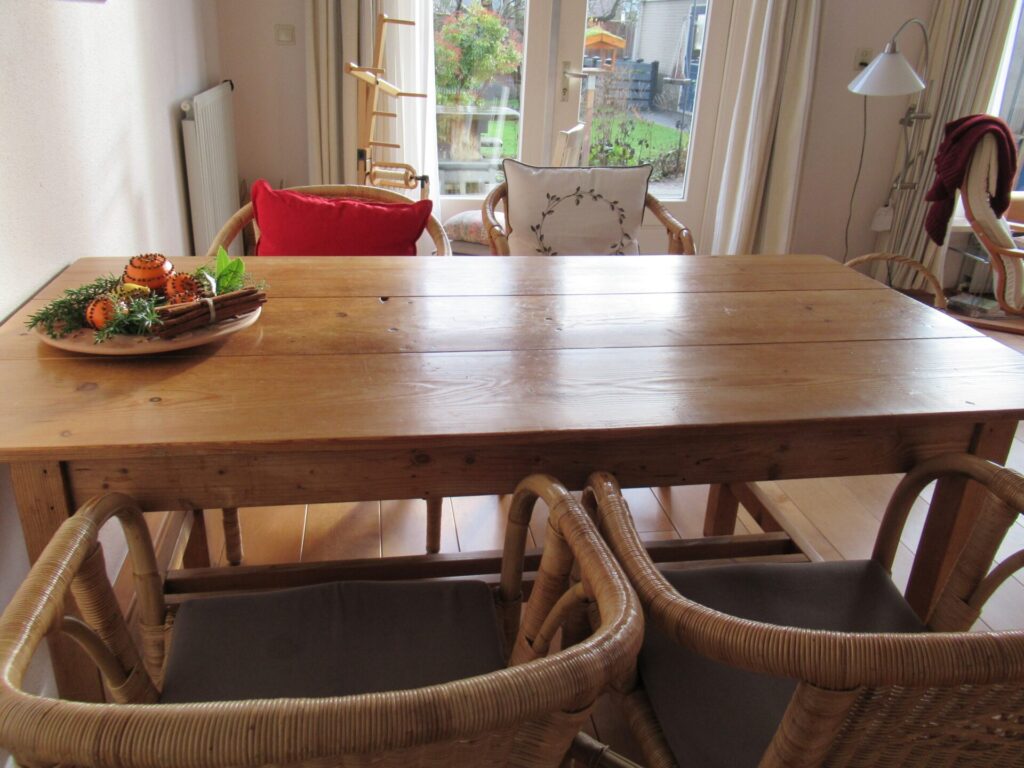
Oh, and if you’re working at a wooden table like ours, don’t forget to cover it with a whipeable table cloth or place mat, because juice will drip out of the fruit.
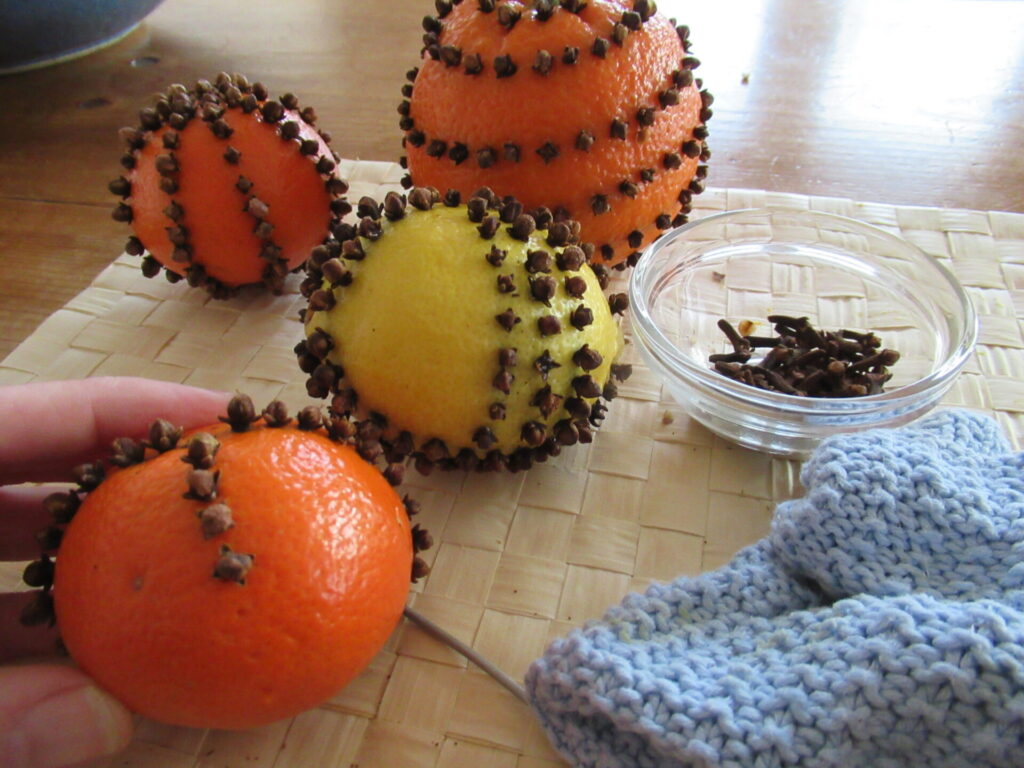
Now the fun starts. Prick holes in the fruit before inserting the cloves.
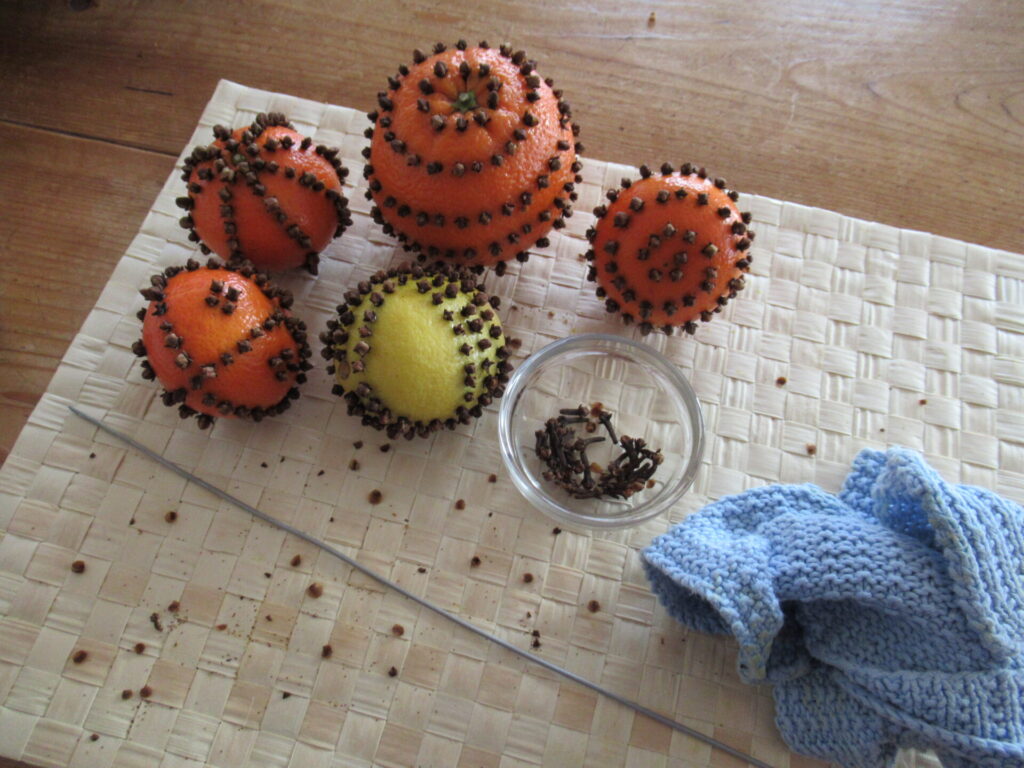
Make lines, circles, spirals, crosses, diamonds or other patterns.
There! It’ll give you sticky hands, but doesn’t make too much mess. And it’s an uplifting project that is also lovely to do with children.
Now it’s time to arrange everything nicely on a platter, together with the greenery and other spices. Tadaah!
I can’t guarantee that the fruit will keep for months. Sometimes it dries out nicely and will keep for a long time, and sometimes it gets mouldy. In the past, I’ve tried dusting it with a mixture of orris root and cinnamon powder. In theory, that should preserve it better, but it didn’t. I’ve also wrapped the fruit in tissue paper and stored it in a dark cupboard to dry, but that didn’t always work either.
My experience is that it is largely a matter of luck whether the fruit keeps well or not. But no matter how long the fruit lasts, the sunny colours are a feast for the eyes and the lovely wintry scents are a delight for the nose!
OK, complete focus on knitting today – no tangents or digressions. Maybe this is all old hat to you, but I thought I’d show you what happens to my knitwork after the actual knitting is finished and the ends have been darned in.
Last week I said the hat and scarf I made for my brother needed some TLC to relax. Well, they got more than just some TLC – they received a full 4-star spa treatment!
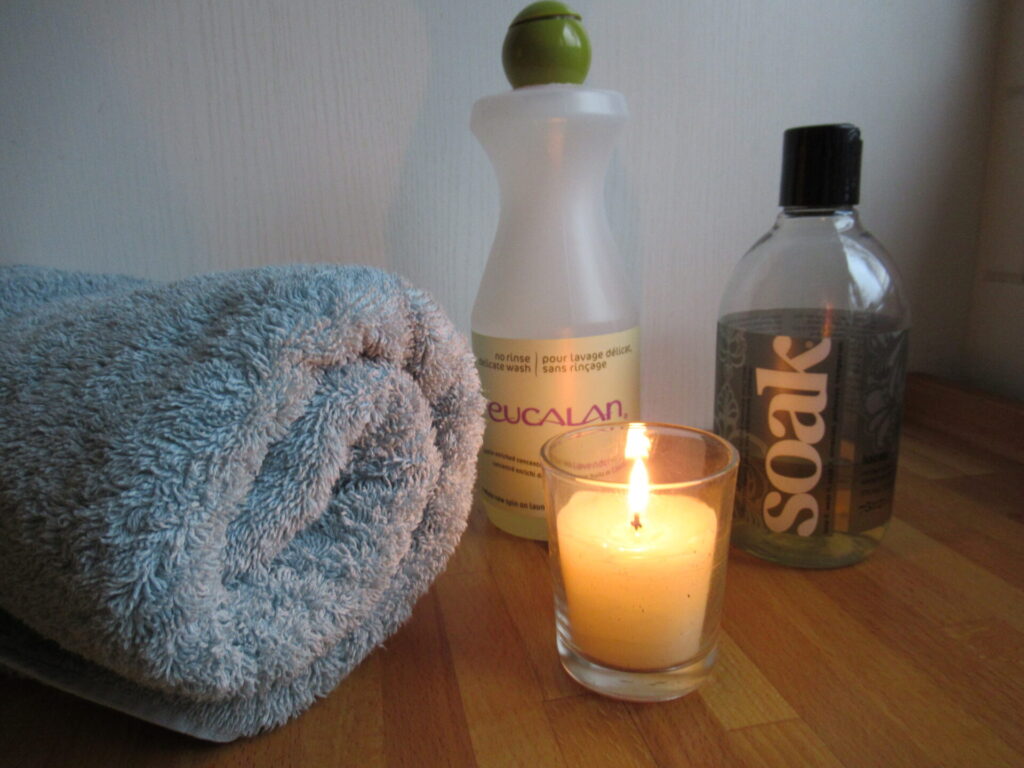
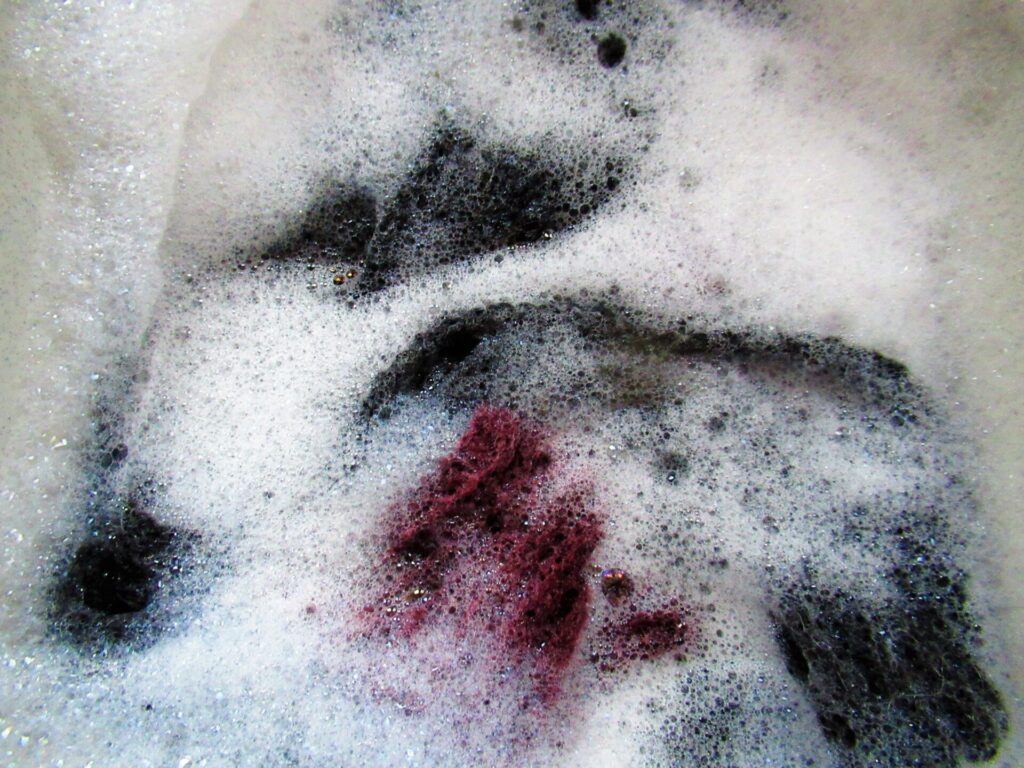
It all started with a bubble bath.
Aaaaah, so relaxing, especially when combined with aromatherapy. To make the bubbles, I use a no-rinse detergent for delicate fabrics – Eucalan or Soak. There may be other brands, but these are the only two I know.
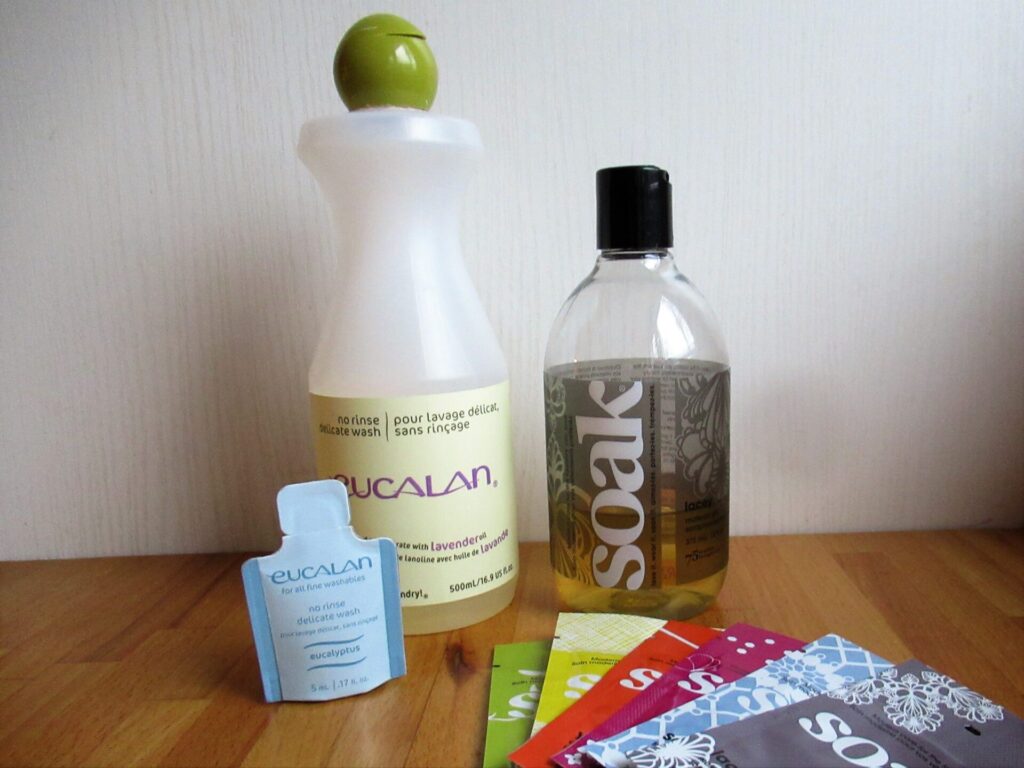
I can’t say that I prefer one to the other. Eucalan is sort of syrupy and yellowish, whereas Soak is thinner and clear. Both are available in various lovely scents. The Eucalan I have has a very mild lavender scent. My Soak favourite is Lacey, a subtle flowery scent that is harder to pinpoint.
Only a teaspoon of detergent is needed, so a bottle lasts forever. Both also come in small trial packages, that are ideal not only to try out the products, but also to tuck in with a knitted gift.
As their name says, no-rinse detergents do not need to be rinsed out. After a bubble bath of about 30 minutes, I first gently squeeze out most of the moisture. After that I’d roll a more fragile knit in a towel to squeeze out more water, but robust knits like these I put in the spin dryer.
Now, still slightly moist, the scarf and the hat get different wellness treatments, tailored to their specific needs. I thought the scarf would benefit from acupuncture, while some steam would be best for the hat.
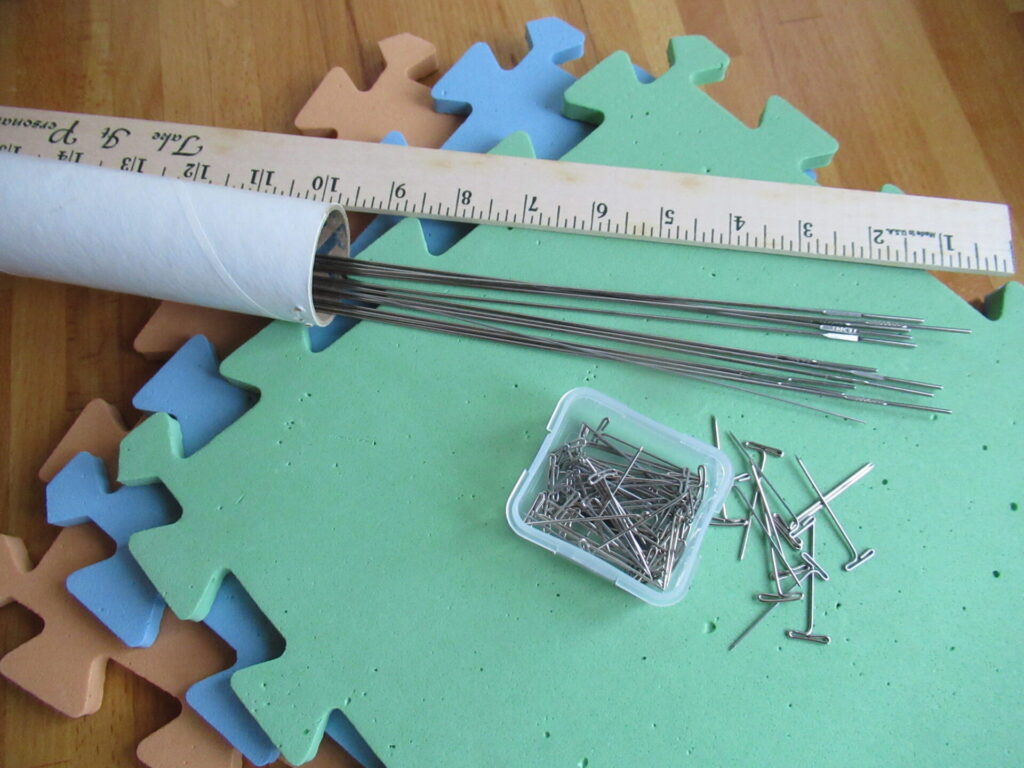
First the scarf. These are my acupuncture (in knitting terms also known as blocking) tools.
Foam blocking mats, blocking wires (that come with a wooden ruler), and T-pins (stainless steel pins in the shape of a capital T). At first I used this kit only for lace knits, but now I’m using it for many other projects, too.
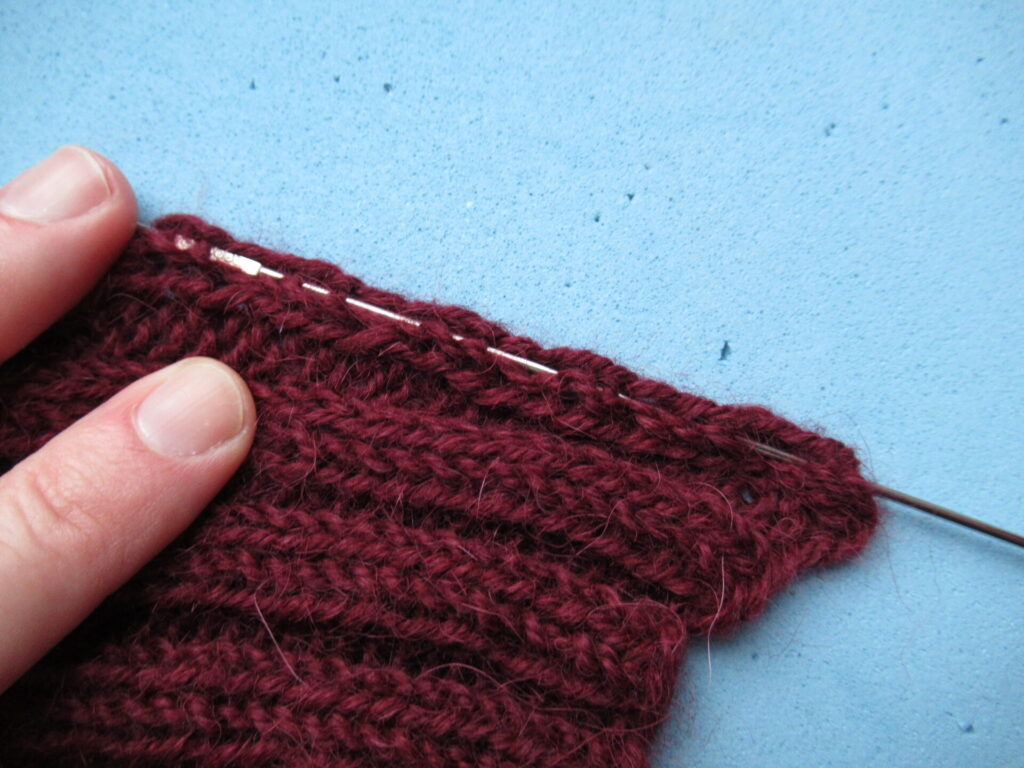
I threaded wires along the long sides of the scarf, between the edge stitch and the next, going up and down every other row.
Then I pinned it onto the blocking mats, smoothing the scarf out along its length and pulling firmly widthwise. (Never do this on a wooden table or floor – the T-pins may prick through the mats and damage the surface underneath.)
And here is a close-up. I hope you can see the wires and T-pins.
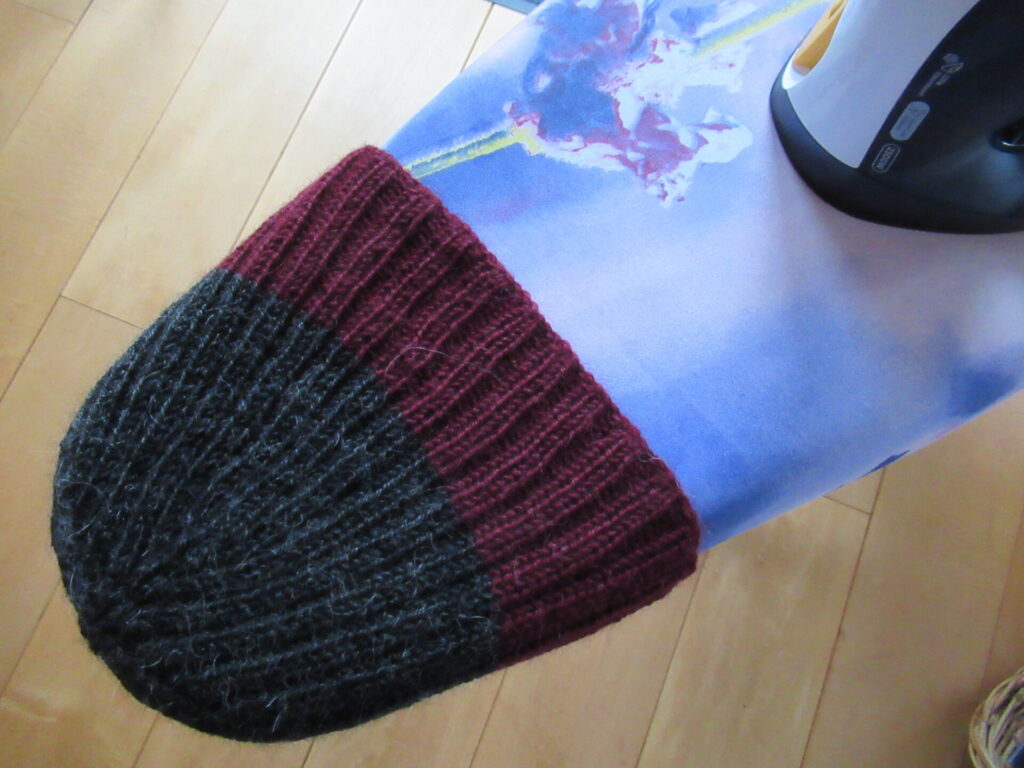
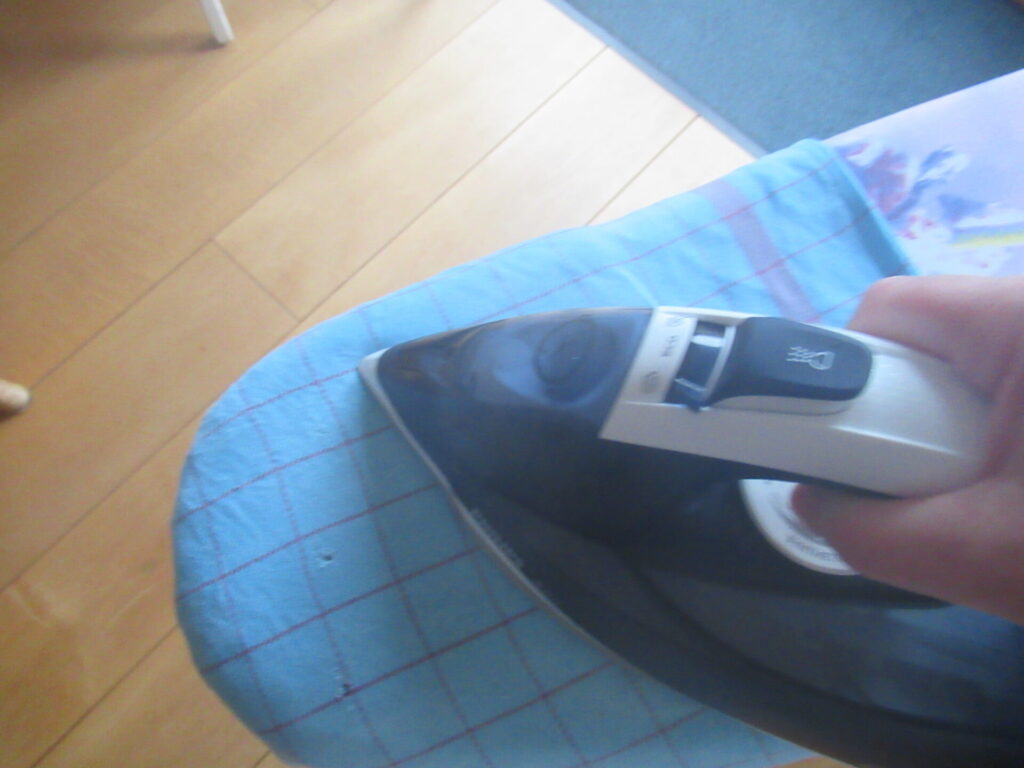
Now, let’s leave that to dry and continue with its mate. The still moist hat is pulled around the end of the ironing board.
Then it is covered with a moist press cloth (i.e. an old tea towel that doesn’t give off colour) and steam-pressed. I used the lowest setting that will give steam (silk/wool). If the picture looks slightly blurry, that’s the steam.
I tried all this out on a swatch first, to make sure nothing terrible (like felting) happened to my ‘clients’ and they would benefit from their treatments.
After pressing the hat was still slightly wet and I placed it on the blocking mats with the scarf. Twenty-four hours later everything was dry and I unpinned the scarf.
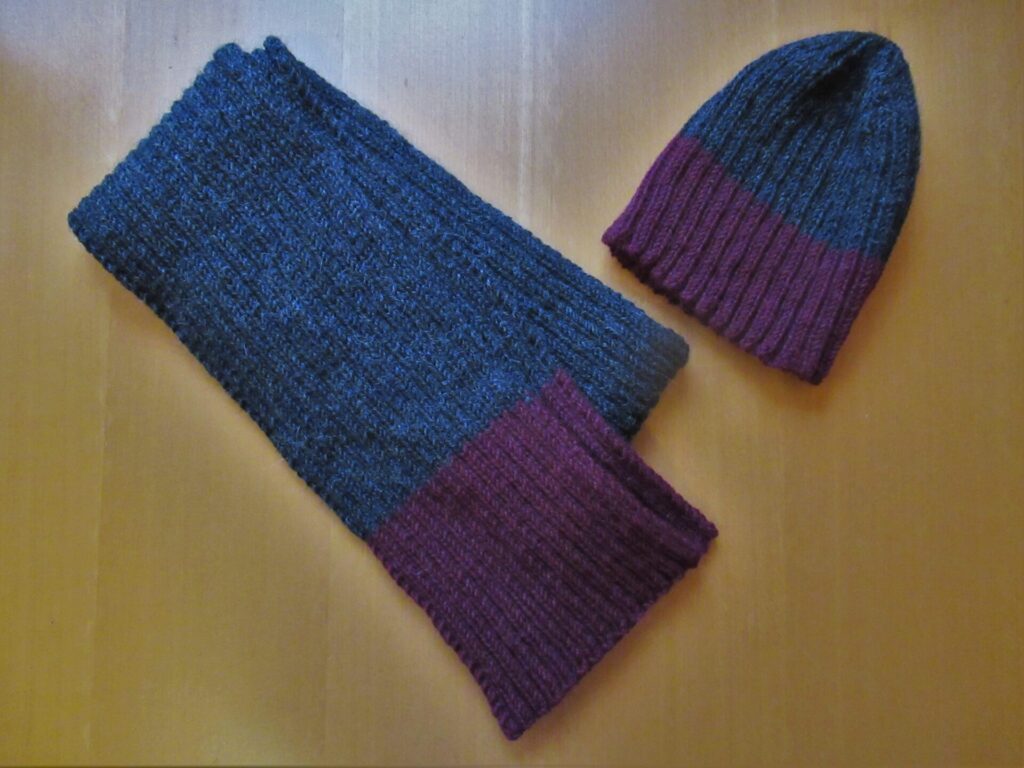
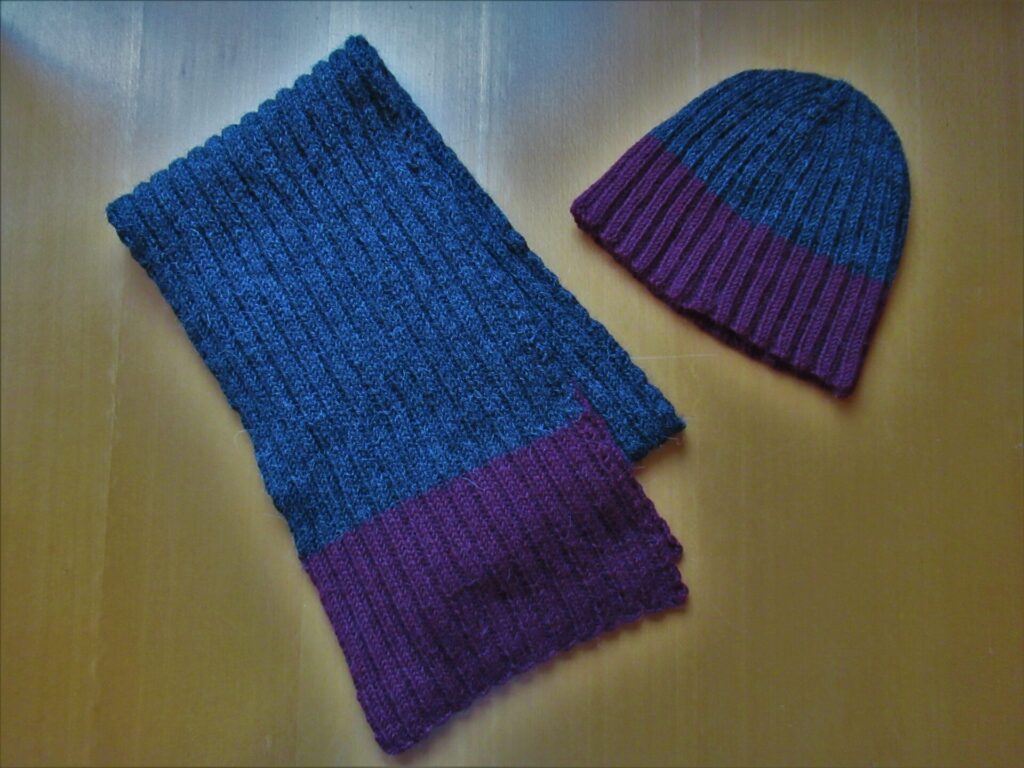
A lot of work for a simple hat and scarf. Is it really worth all the effort? I think it is – very much so. I took before and after pictures, but unfortunately they are not very clear because of the dark yarn colour and the dark weather.
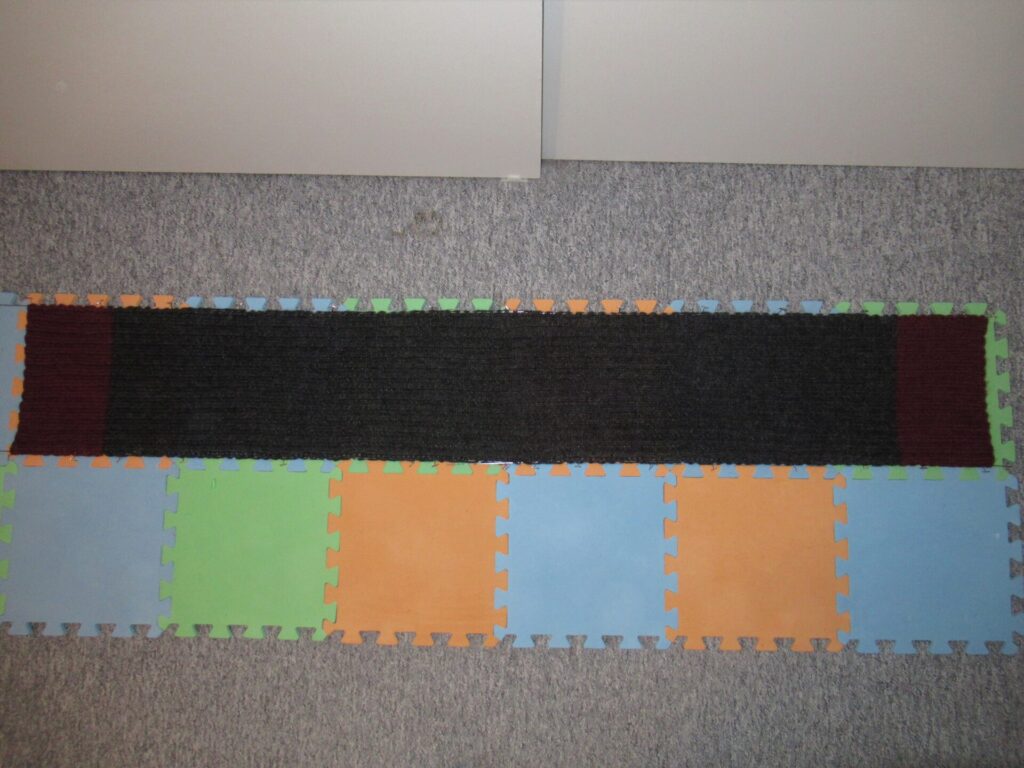
Here are the hat and scarf (before on the left and after on the right):
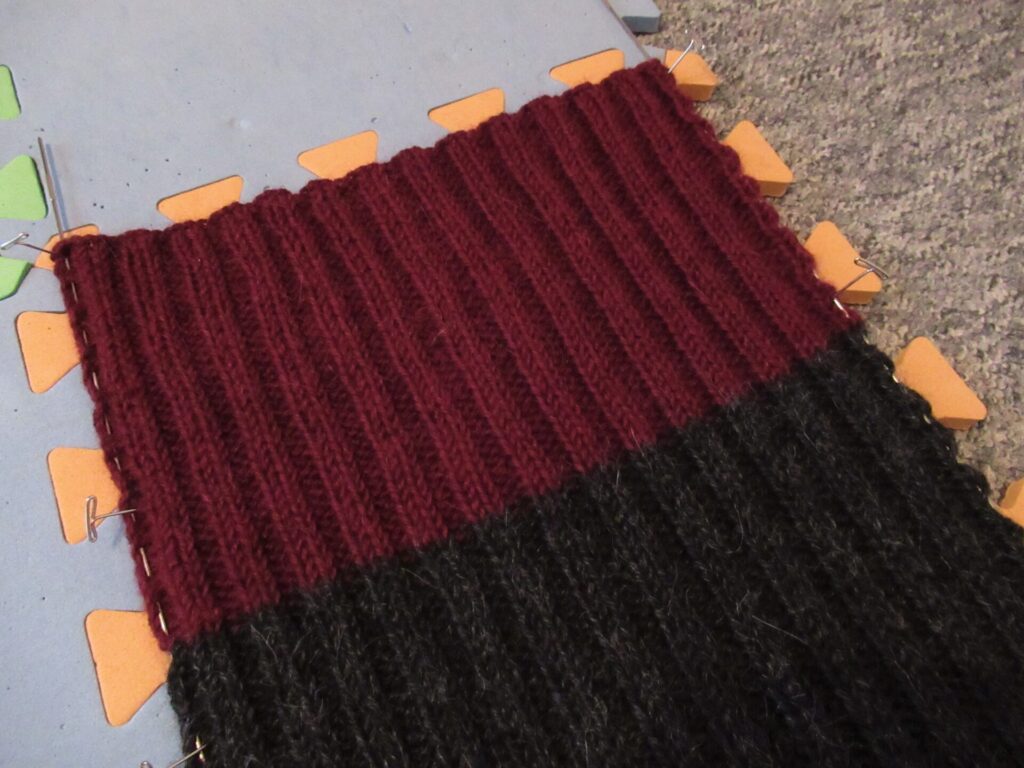
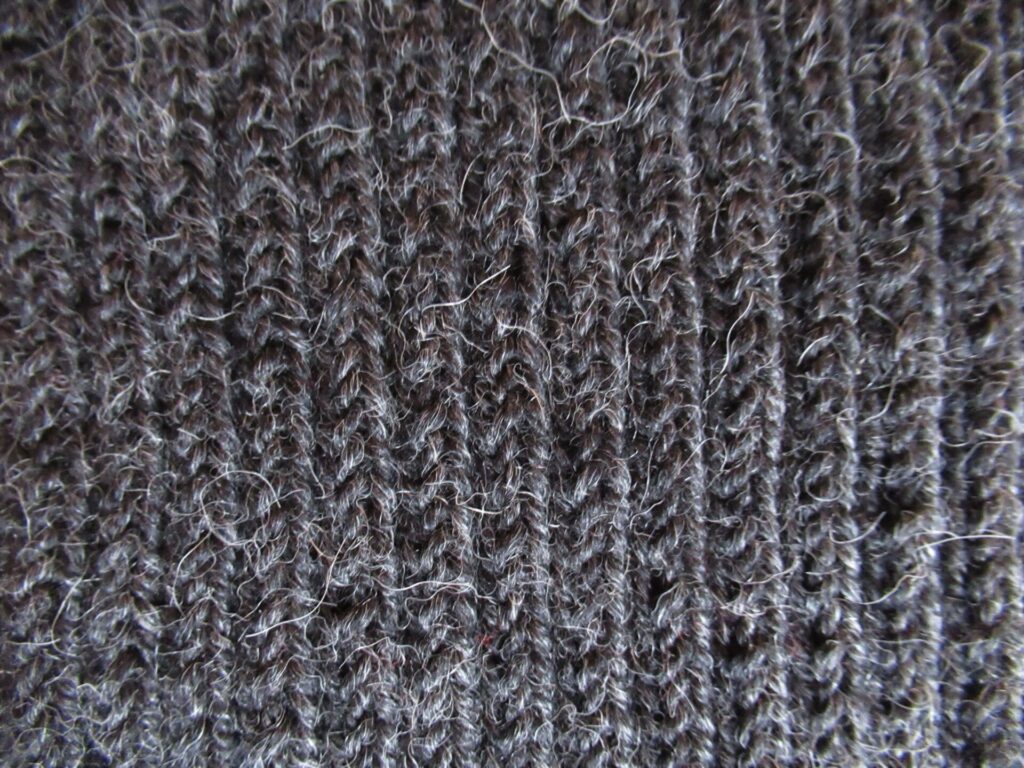
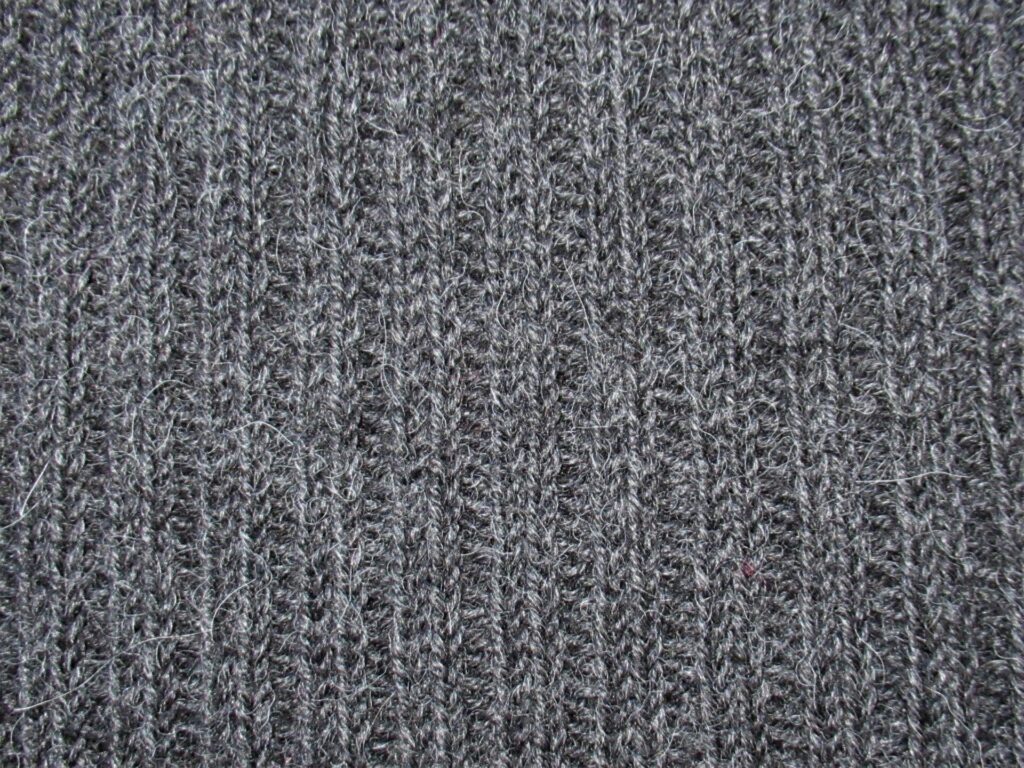
And here is a close-up of the k2, p2 rib pattern (again before left and after right):
Can you see the difference? Before blocking the knitting was irregular, and the purl stitches disappeared between the knit stitches. After blocking the knitting evened out and the purl stitches became visible. And before blocking the scarf was 1.5 m x 14 cm, so stiff that it could almost stand up on its own, and slightly scratchy. After blocking it was 1.6 m x 25 cm, with a lovely drape and nice and soft.
Now all that’s left to do is gift-wrap the set, put it in a box, add a few Dutch treats and send it off to Germany, in time for my ‘little’ brother’s Birthday.
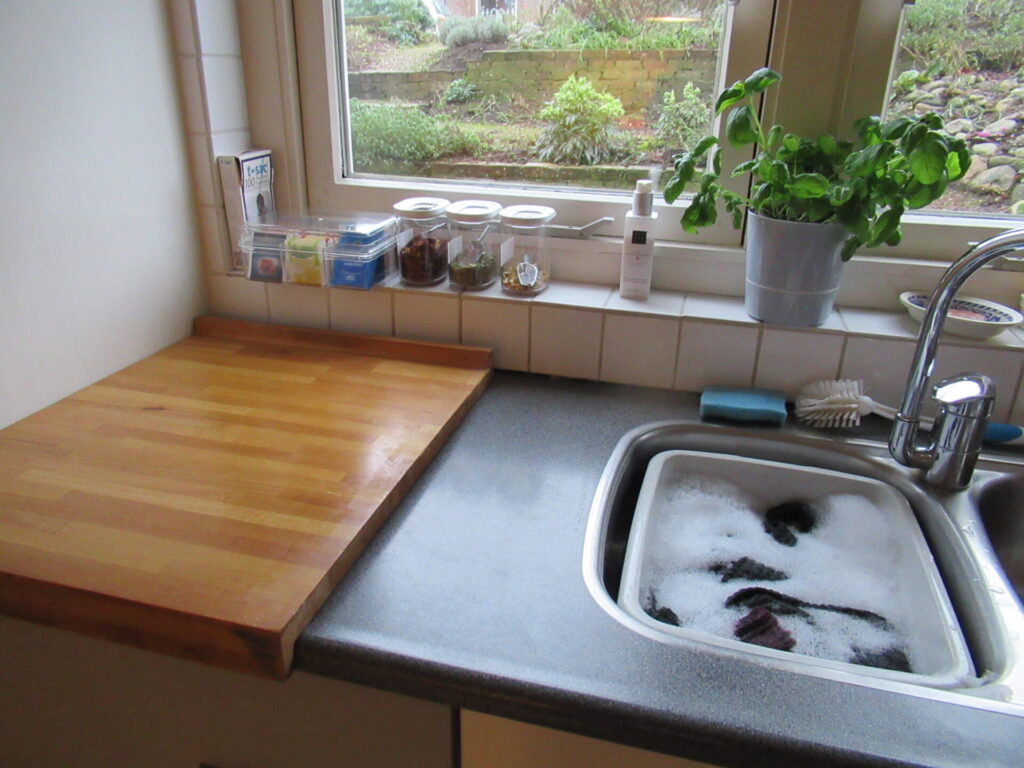
Here is a behind-the-scenes picture of the ‘Knitting Spa’ photo shoot.
The kitchen counter was the lightest place in the house on a dark day, and the bread kneading board made a nice natural surface for photographing the tools and detergents. A perfect Knitting Spa with everything to hand: hot & cold water, a bath tub, teas & tisanes, and a nice view of the front garden.
It’s good to be back here after a 2-week break. I hope that, in spite of everything, you’ve had an enjoyable festive season and a good start to the New Year.
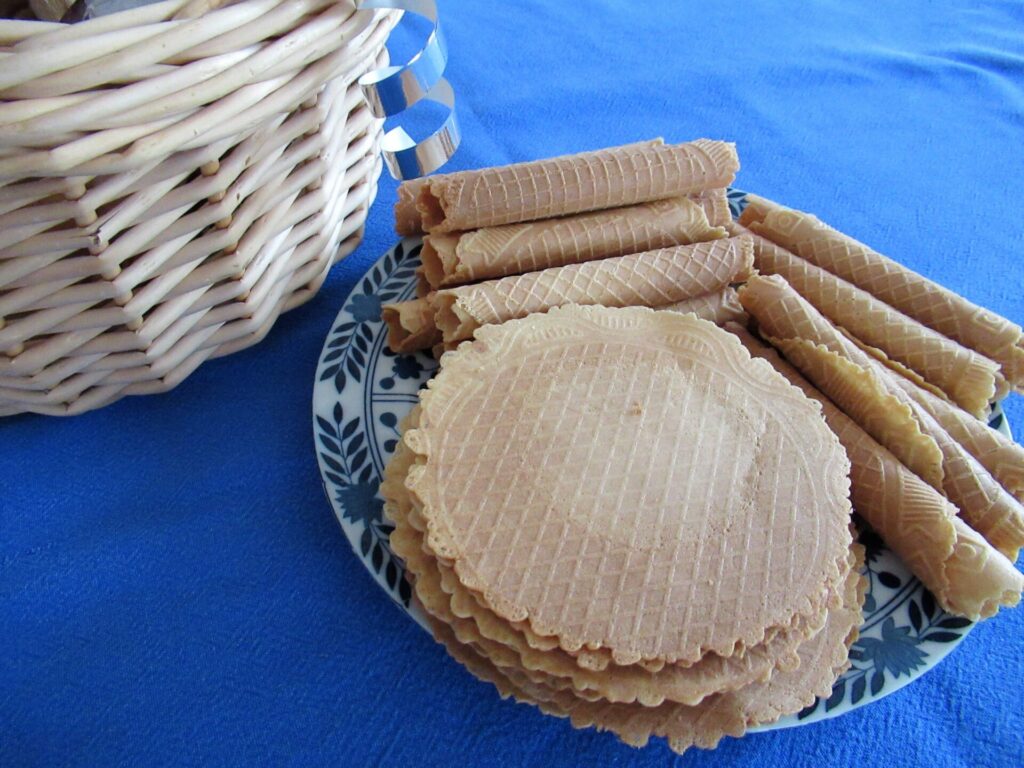
We had a quiet and pleasant time, and on New Year’s eve I baked a big batch of knieperties. These very thin wafers are a traditional end-of-the-year treat in this part of the country. I always make more than enough to share with several neighbouring families.
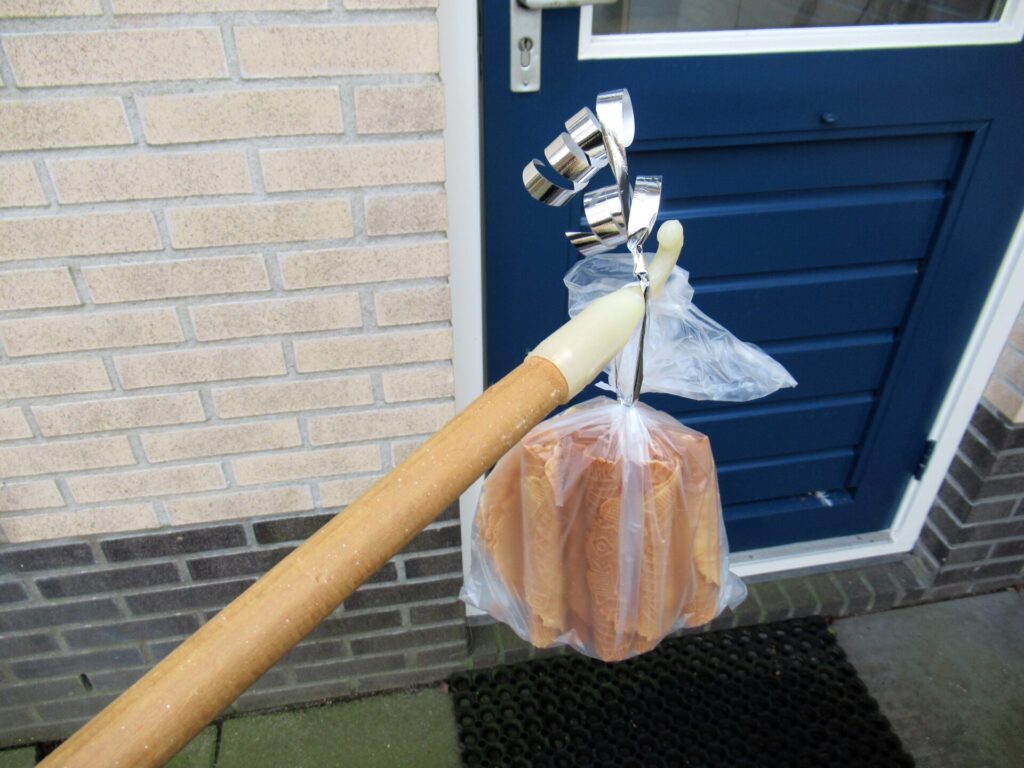
This year’s conundrum was how to hand them over at a safe distance? It didn’t feel right to place them on people’s doorsteps. I came up with this solution:
Loops of silver ribbons tied to the bags to hang them from the hooked stick we otherwise use to open our attic hatch. It was great fun, really, and brought smiles to everybody’s faces, including my own. The anderhalvemetersamenleving in action.
Anderhalvemetersamenleving (1.5-meter-society) was chosen as Word of the Year 2020 in the campaign organized by our leading Dutch dictionary Van Dale.
A word that sums up a lot about the past year, and also a word that we will not be leaving behind us soon, I fear. (As a former translator, I have a thing for words. Although I worked with digital dictionaries for years, I still treasure my paper ones.)
My knitting during the Christmas break was entirely in the spirit of the Word of the Year 2020. It’s an exactly 1.5 meter long scarf for my brother who lives in Germany.
Knit in 2-by-2 ribbing it is very tight and narrow now. It will need some TLC (a bubble bath, some steam, and an acupuncture treatment) to relax.
More about that and the matching hat soon.
I have very little knitting to show today, but there will be more over the coming months. Lots more, I hope. Looking back at 2020, I realized that I haven’t finished those UFOs that I planned to turn into FOs. Not nearly all of them. Am I beating myself up over that? No, I don’t think that will help. But their state of unfinishedness did set me thinking. It’s not just those UFOs. I currently also have 4 WIPs as well as loads and loads of plans for new knits. What might help, is a personal word for the year 2021 to give me some direction.
At first I thought of ‘limits’, but on second thoughts that sounded too bleak. There are so many outside limits already. (Our present lockdown lasts until January 19 and we don’t need a crystal ball to predict that it will be prolonged.)
A word with a similar meaning that sounds much friendlier is ‘focus’. Maybe more focus is what I need. Or maybe not. During the past year I’ve become a very focused grocery shopper.
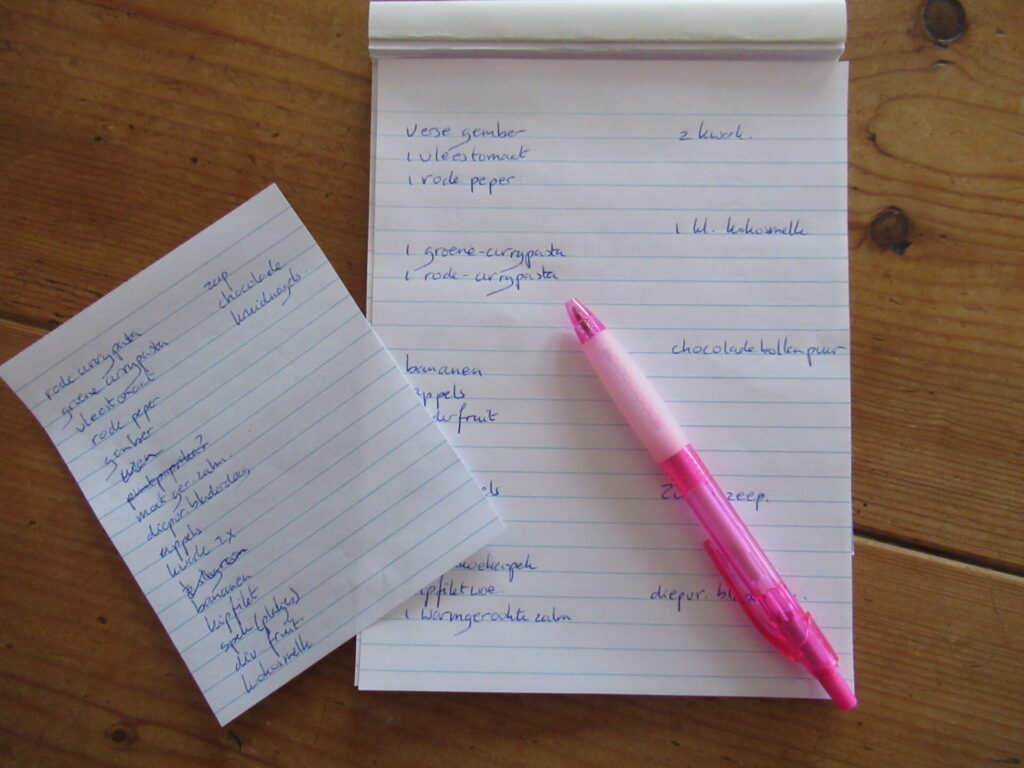
On the left an old-style shopping list with everything in no particular order and room for browsing around. On the right my new-style shopping list with everything neatly arranged along the supermarket aisles. Pro: More focus makes for very fast shopping and I’m not in anybody’s way for long. Con: It sucks all the joy out of shopping.
But still, I have a feeling that the word ‘focus’ may help me in my knitting as well as in other areas of life. At least it is something to explore. I don’t know if it’ll be worth writing about here, but we’ll see.
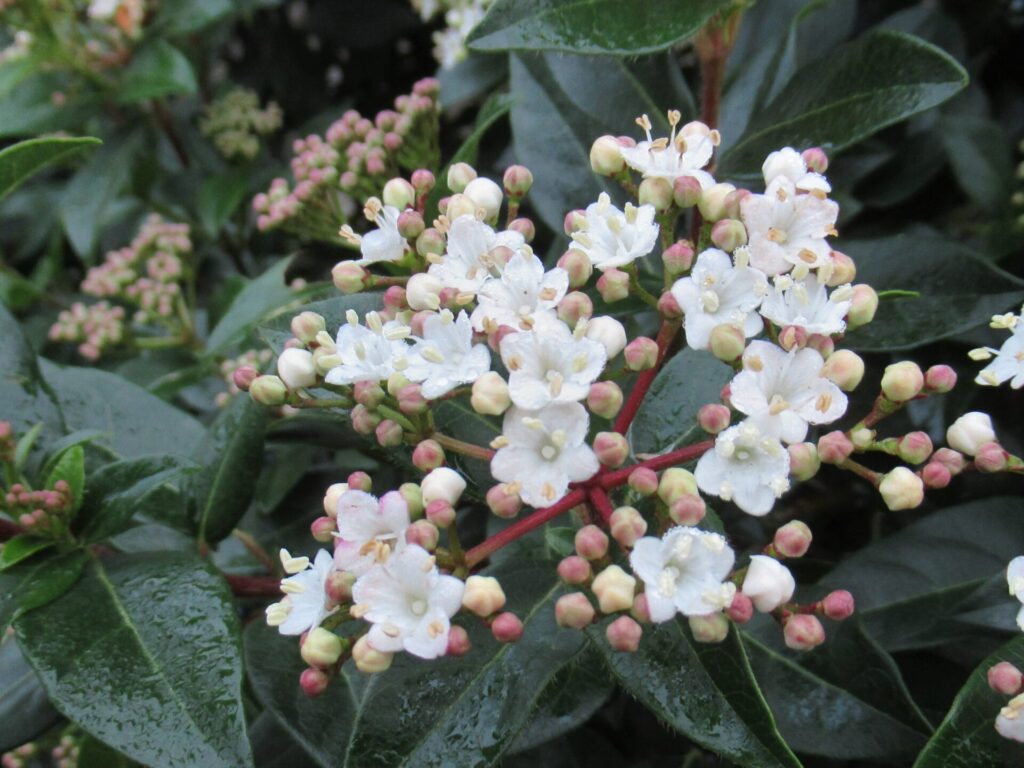
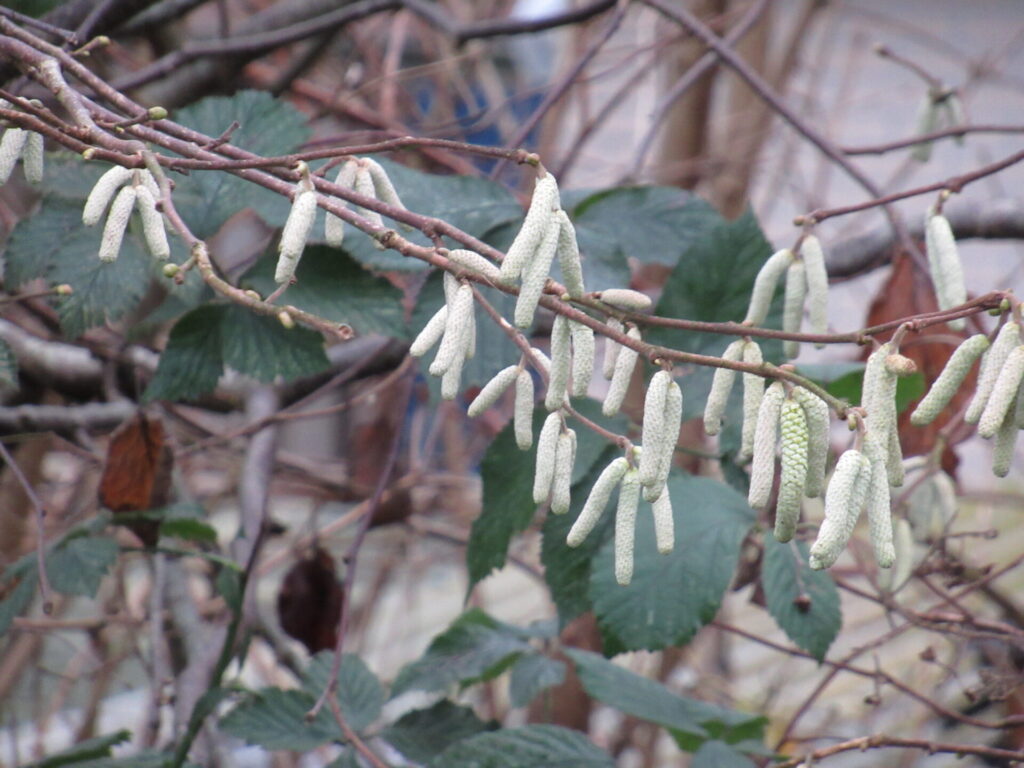
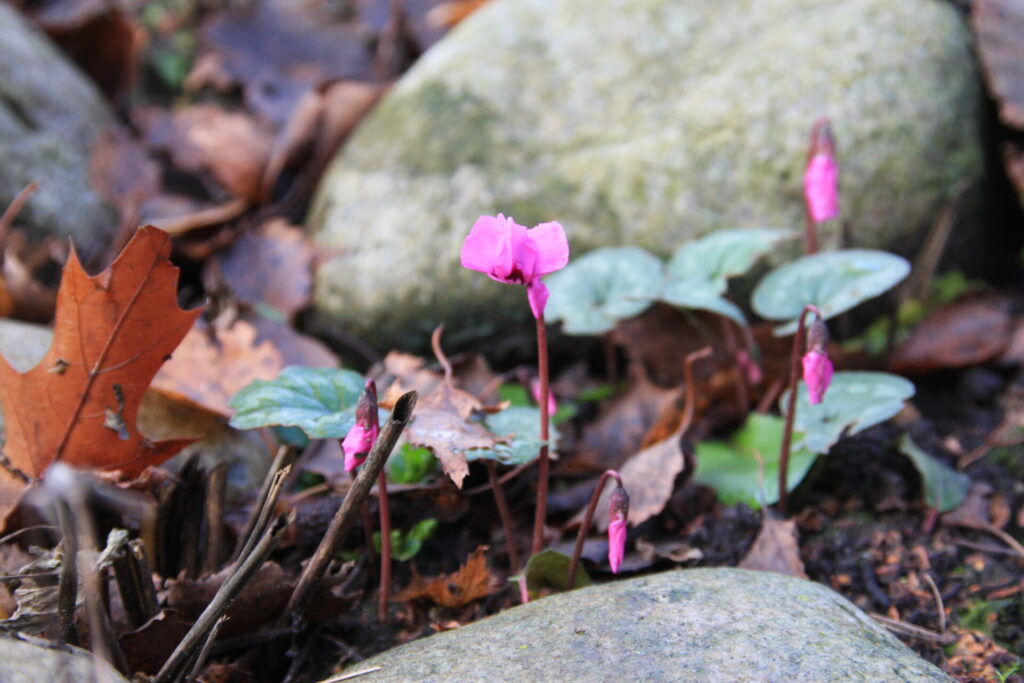
Now for something completely different. Spring is still a long way away, but even at this time of year there are a few bright and flowery spots in our garden. There’s the Viburnum tinus (top) that gives us flowers for a long, long time and provides a great hiding place for the sparrow family. The hazel shrubs already have catkins…
… and for the first time this year the Cyclamen coum is flowering. Its bright pink flowers are only about 7 cm (3”) high, but they cheer me up no end every time I look out the kitchen window.
Focusing on things like this really helps in a world in turmoil. Yes, Focus seems like a good word for 2021. Hope, too, by the way. And Peace.
It’s Christmas Eve, and we’re nearing the end of a challenging year. Thinking about writing this post beforehand, I felt that I should say something Profound and Meaningful, but what? I wouldn’t know where to begin. I’m not some kind of oracle or Wise Woman, after all. I’m just an ordinary person muddling along like everybody else.
In the end, I’ve gone back to what this blog is basically about and decided to share a few of the things that have given me comfort and joy over the past weeks, hoping they’ll do the same for you.
The front door with the lovely garland at the top of this post isn’t ours. It belongs to a house further down the street.
Every time I pass this house, looking at these neighbours’ stylish grey-and-white decorations brings me joy.
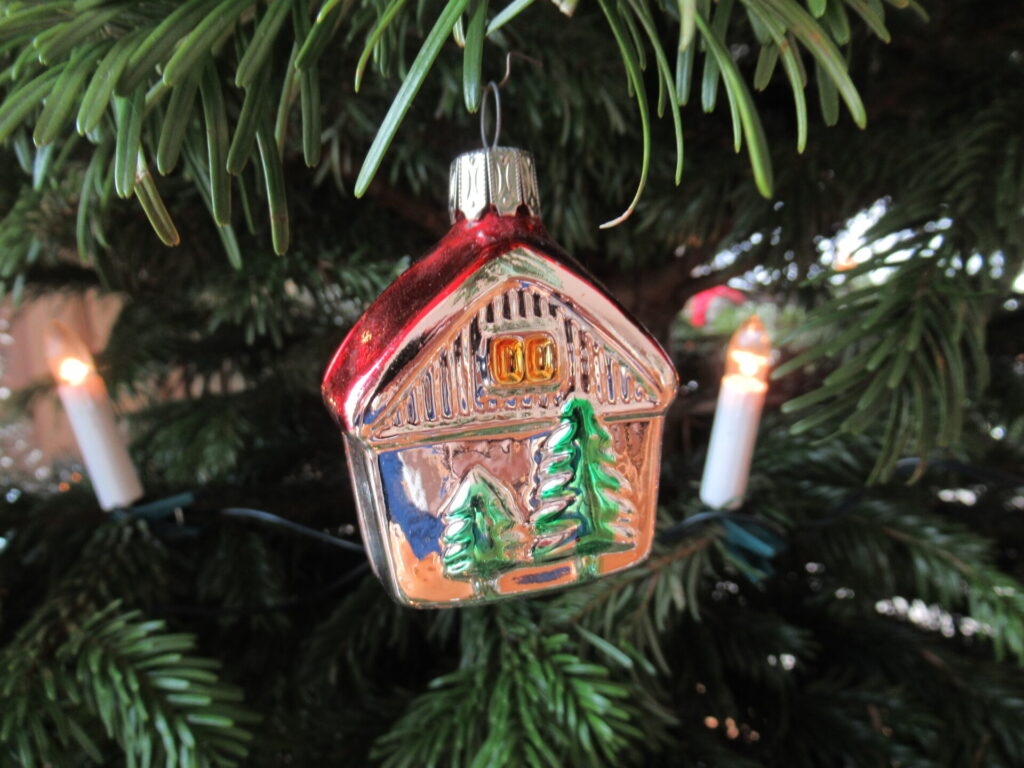
Our style is more traditional, mainly red, green and silver. It’s comforting to take the same old Christmas baubles from their box every year. This one symbolizes 2020 for me.
White hyacinths opening their flowers at exactly the right time scent our living room.
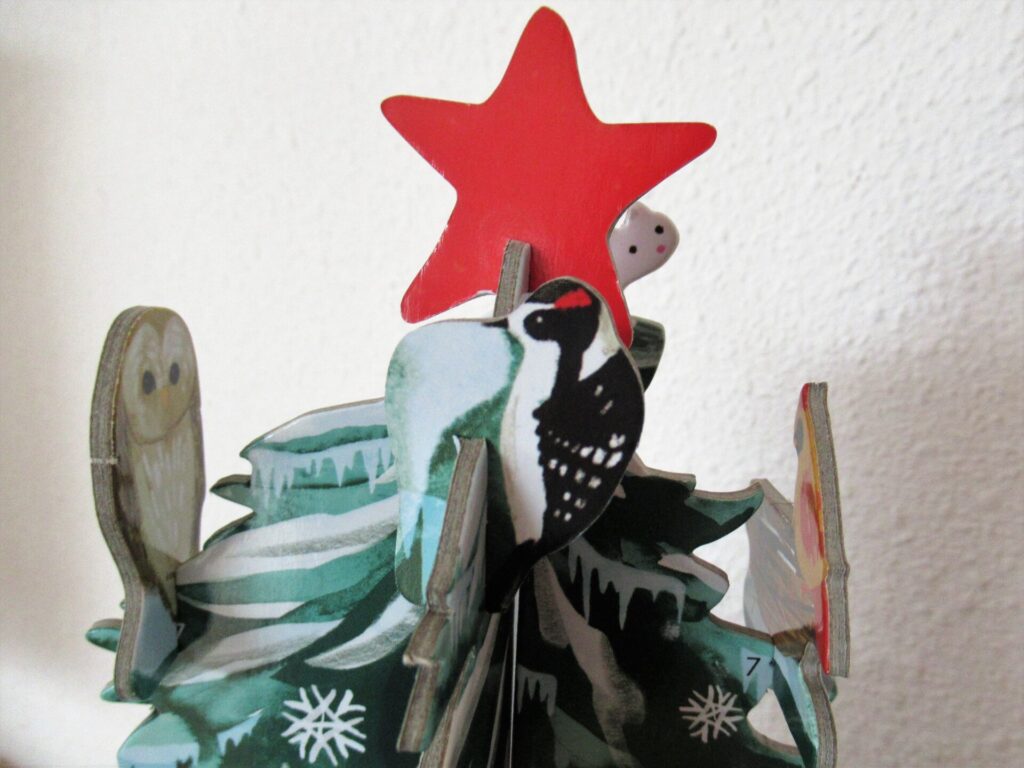
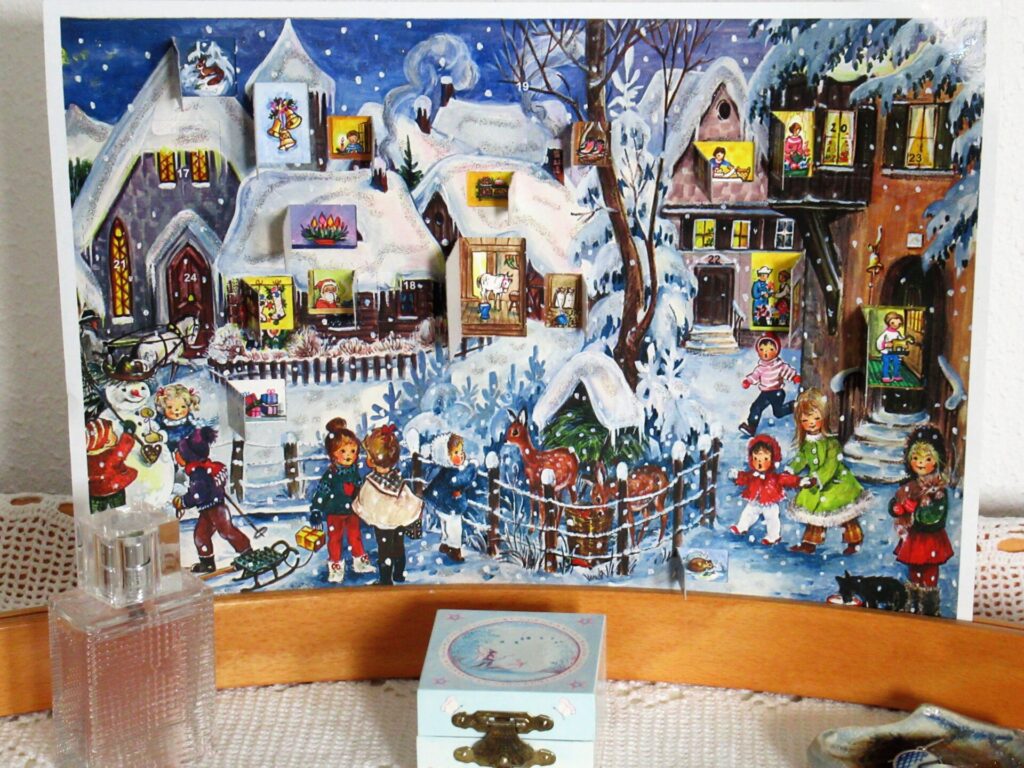
The upstairs Advent calendar has now opened its last door. And I put the star on the top of the downstairs one this morning. One of the first creatures I placed on this cardboard fir tree was a woodpecker.
It looks just like the great spotted woodpeckers that visit our garden. They’ve been away for a while, retreating to the wood during their moulting period, but are back in full force now. Sometimes there are four of them at the same time, looking for insects on the branches of our old pear tree and fighting for a place on the peanut feeder.
Watching these beautiful birds always brings me joy. They are fairly shy, but if I’m very quiet and patient, they allow me to take a picture now and then.
Something that always brings me a lot of comfort is knitting. It is the feeling of the yarn in my hands combined with the rhythmic movement that makes it so. And what’s more, knitting things for others makes me feel connected with them during a time we are unable to meet. That’s also a comfort.
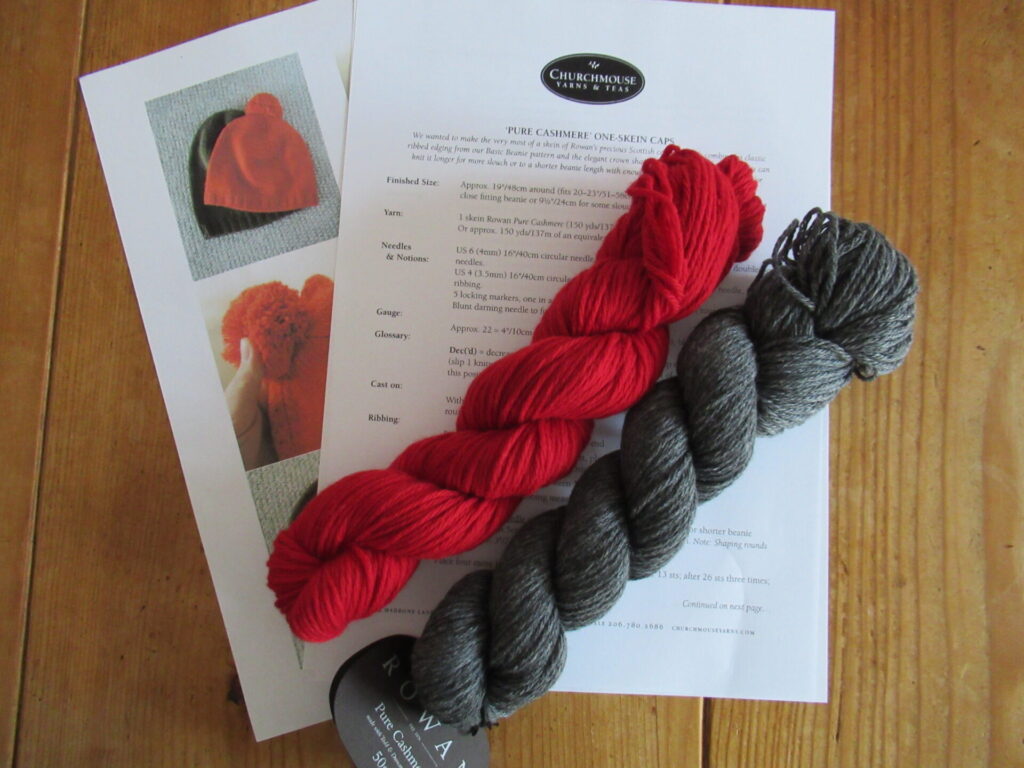
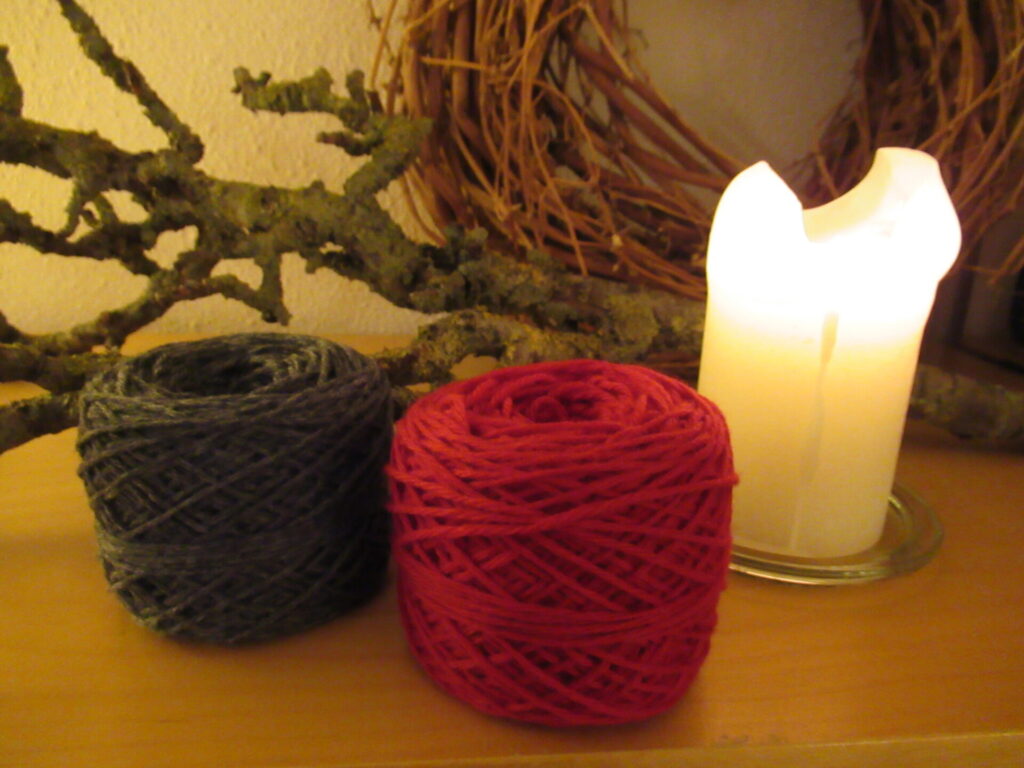
Apart from knitting several pairs of socks, a scarf and a hat to give away, I’ve treated myself to two skeins of exquisitely soft yarn for a hat and a cowl.
The hat pattern was a freebie from Churchmouse Yarns & Teas. They have a very active and friendly knitting group on Ravelry that I’ve enjoyed being a part of for years. The moment I saw this simple hat and read that the yarn they used for it was a sustainable cashmere, I knew that this was going to be my special December knit for me this year.
I was not just going to knit the hat, but also a matching cowl. Although I could have finished each of these projects in an evening, I decided to take it slow and enjoy every minute of the process, including winding the yarn and taking photos along the way.
I limited myself to knitting no more than a few rows a day. During these quiet, contemplative moments, I first saw my hat grow.
And then my cowl.
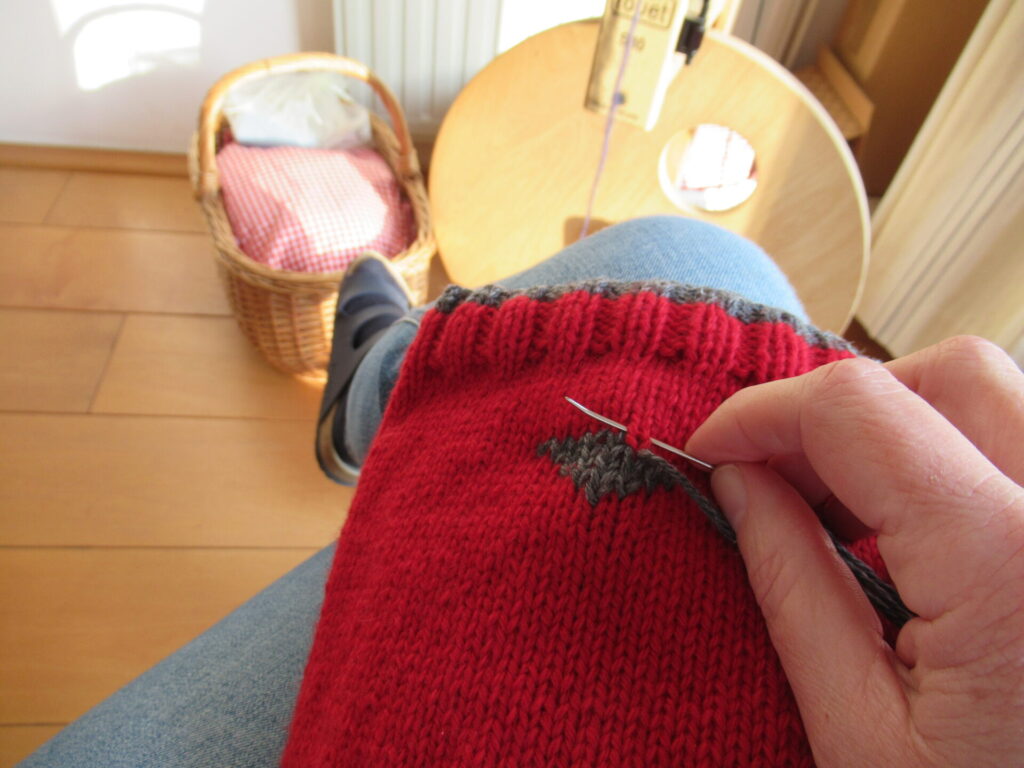
Knitting a pattern thought out by someone else is especially comforting – no stress about how many stitches to cast on, getting the right size, what decreases to use, and whether there will be enough yarn. I’ve given my own twist to it by adding a bit of contrasting colour to the rim of the hat, making a matching cowl, and finally duplicate stitching hearts onto both.
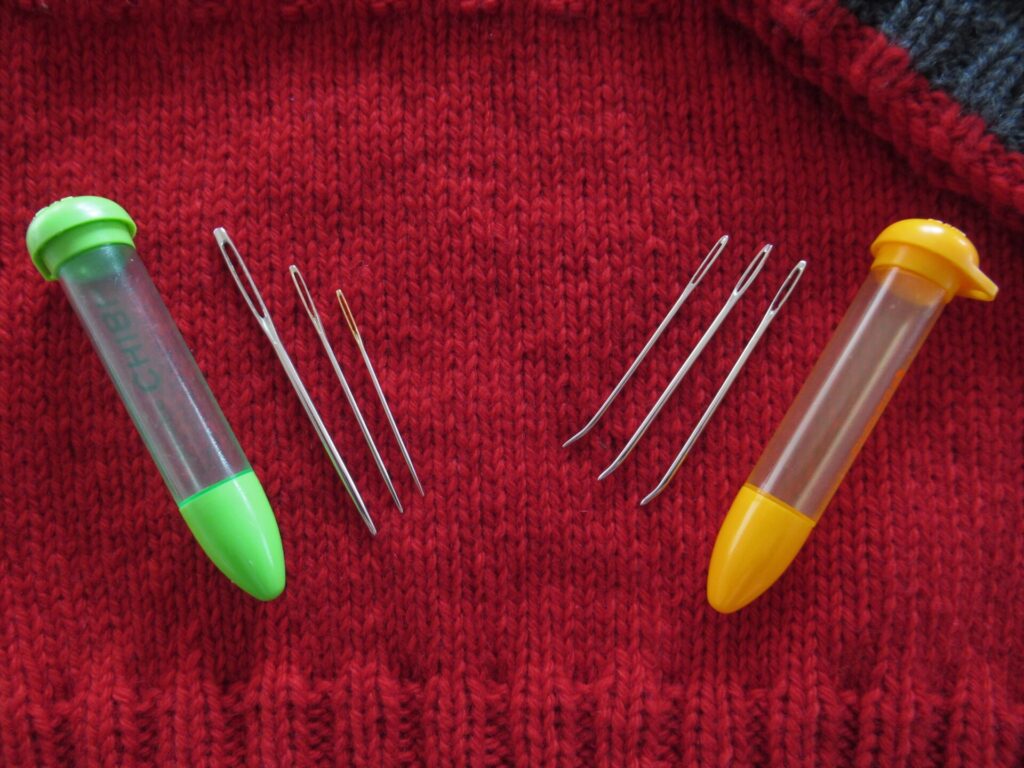
For the duplicate stitching I’ve tried out a new (to me) type of needle, with a bent tip. I’ve laid my ordinary darning needles and the new ones out on the finished cowl to show the difference.
The new ones are officially called tapestry needles, and they are a real improvement for duplicate stitching, I have to say. The bent tip slides easily between the knit stitches and is really nice to work with. (I’ll keep using the regular straight ones for darning in yarn ends, though.)
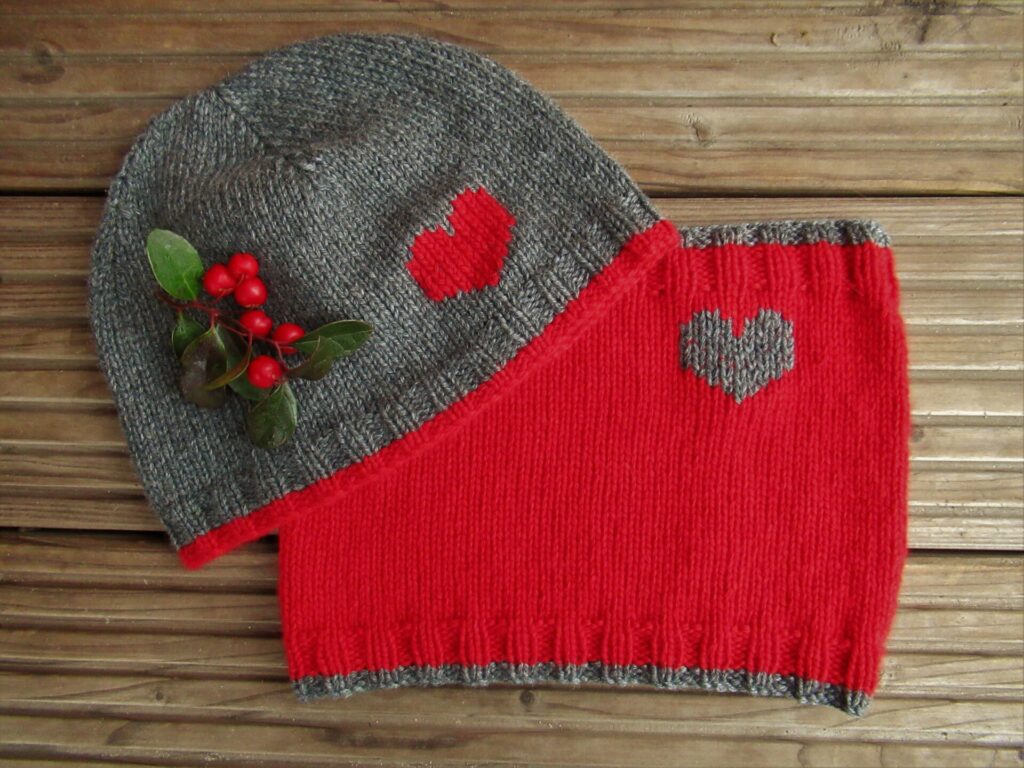
And here are my hat and cowl all finished.
They were a joy to knit, and I know they’ll be a joy to wear for a long time to come.
Now there is just one last thing I’d like to share with you – a gift we received on Tuesday. This year the organic farm that delivers groceries to our door, gave all their customers a bag of organic daffodil bulbs. It came with a message on a bit of sunny yellow paper. Translated it said:
When all of a sudden ordinary things Can no longer be taken for granted We realize how extraordinary Ordinary things really are
Such a lovely gift – a ray of sunshine and hope during these dark days.
Thank you so much for reading my blog over the past year, and leaving a comment now and then. These small virtual moments of contact mean a lot to me. I’m taking a break now and hope to be back here somewhere in the course of January. I’m looking forward to ‘seeing’ you again then.
I wish you a safe and peaceful Christmas and the very best for 2021!
Hello! Do you have an Advent calendar? A home made one? A new one, or one you use year after year? A paper one, or one with ‘real’ gifts?
Advent calendars are not a tradition I grew up with. My Dad did not believe in Christmas. My Mum’s belief in Christmas was very strong, but of a kind that did not approve of such things. This year, however, there are no less than three Advent calendars in our home. It seems like I have some catching up to do.
The first one is the one you see at the top – a fir tree that is gradually filled with birds, nest boxes and animals. It was a gift from our daughter last year and can be used again and again. It is a small treat to hunt for that day’s ornament in their box every morning and add it to the tree.
The second Advent calendar is a traditional paper one with a door to open every day. It is next to my bed and the first thing I see in the morning when I turn on the light.
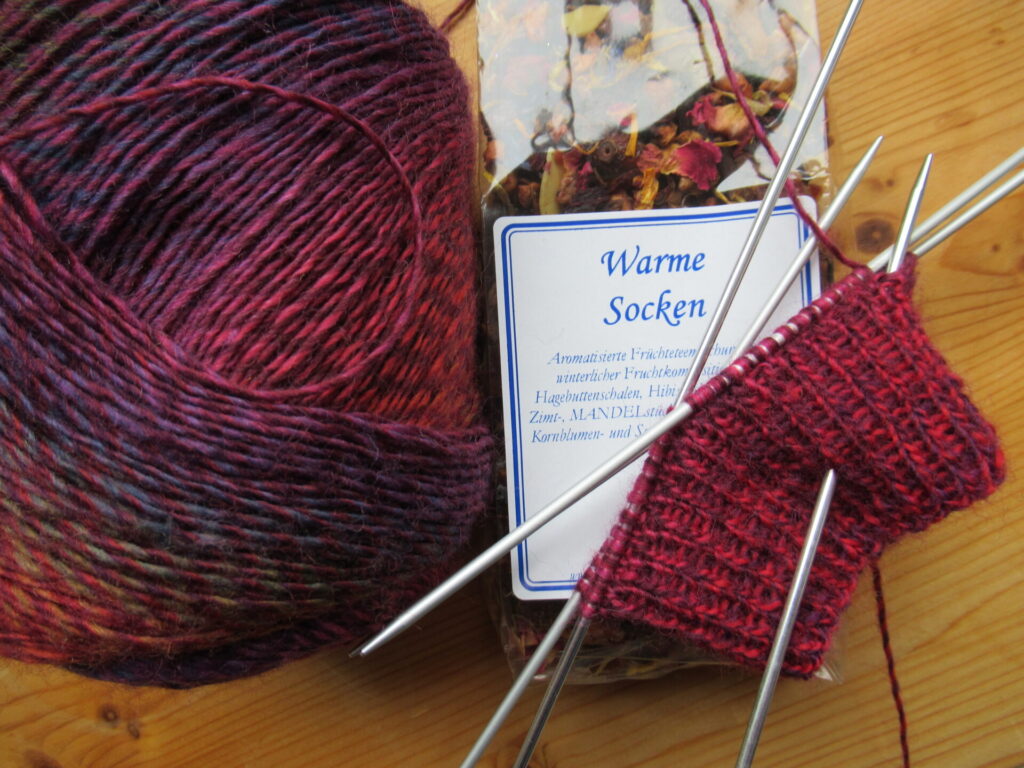
It was a gift from a dear friend. I found it in our letterbox on December 5th (our traditional gift-giving day), in a large envelope that also contained a pair of beautiful ‘pre-loved’ earrings and a bag of tea from Germany with the brilliant name Warme Socken (I don’t think I need to translate that).
It is a delicious seasonal blend of rose hips, apples, almonds, cinnamon, cloves and more.
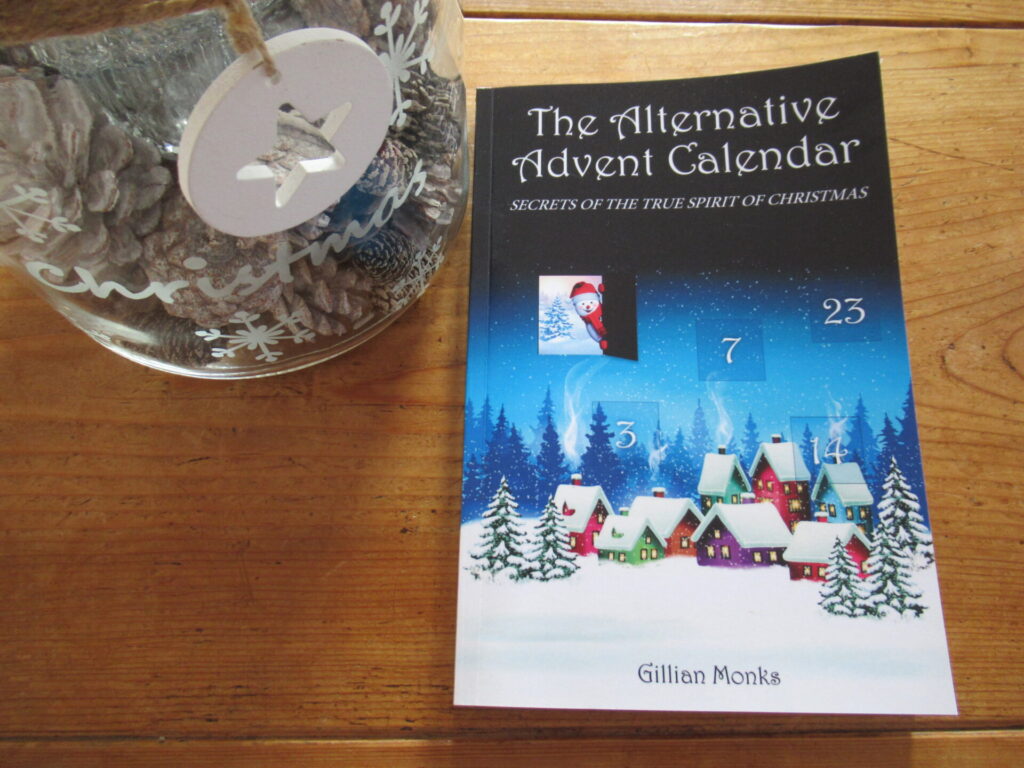
The third Advent calendar was, in a way, also a gift from the same friend, because she recommended it to me. This one is in the shape of a book, The Alternative Advent Calendar: Secrets of the True Spirit of Christmas by Gillian Monks.
The book gives ideas for things to do for every day of the Advent period that are, in the words of the author, ‘universally relevant, regardless of geographical and genetic origins, social, academic or professional status, cultural background, religion or belief.’
All of the ideas in it are small and enjoyable ways to offer of yourself to the world. Most of them can easily be done even during the strict lockdown we are now finding ourselves in, in the Netherlands. Some require a little creativity under these special circumstances, but so far I have only found one that seems well-nigh impossible: ‘Open your door to all. Invite all your neighbours to supper – and I mean ALL your neighbours… as many as you can sensibly fit inside your house.’
Although the book was only published in 2019, this now sounds like a bizarre idea from a very distant past or for a far-off future, almost like an indecent proposal. But with a bit of creativity… a Zoom supper, perhaps?
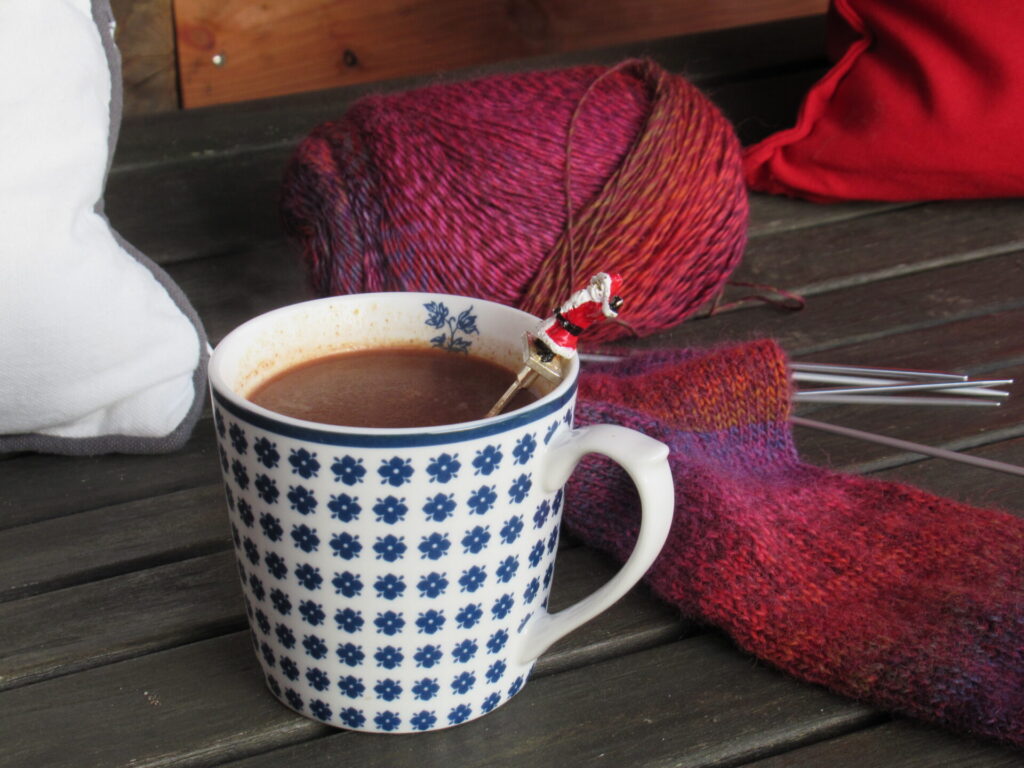
Behind another ‘door’ there is a more doable suggestion: ‘Make someone a hot or cold drink’. My friend did that from a distance by sending me Warme-Socken-tea. In my turn, I am offering you a virtual hot drink.
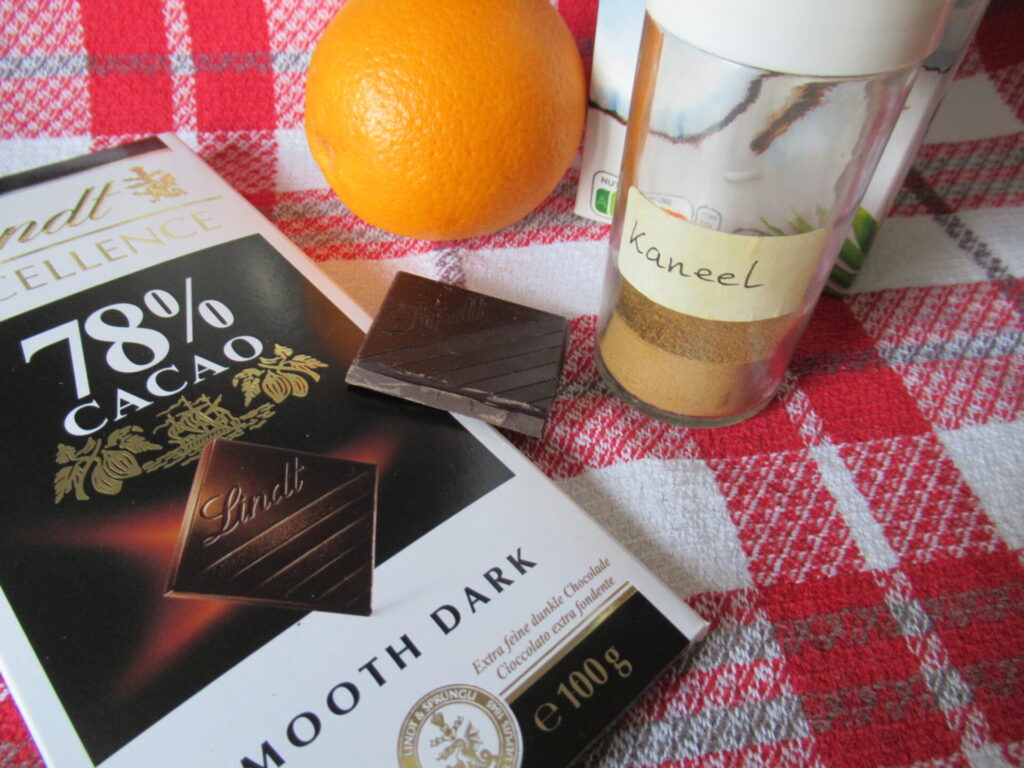
Cinnamon-and-Orange Cocoa
For one small mug, you’ll need:
10 grams of chocolate (I use a very dark chocolate, but think any kind will work)
Finely grated zest of half an orange
A pinch of cinnamon
200 ml milk (I’m allergic to cow’s milk and use plant-based ‘milk’ – the rice-and-coconut variety is my favourite for this recipe)
Sugar or honey to taste
To make the cocoa:
Break the chocolate into chunks and put them in a small saucepan, together with the orange zest, the cinnamon and a little of the milk
Heat, stirring until the chocolate has melted
Add the rest of the milk and bring to the boil
Pour into a mug, add some sugar or honey if you like, and enjoy!
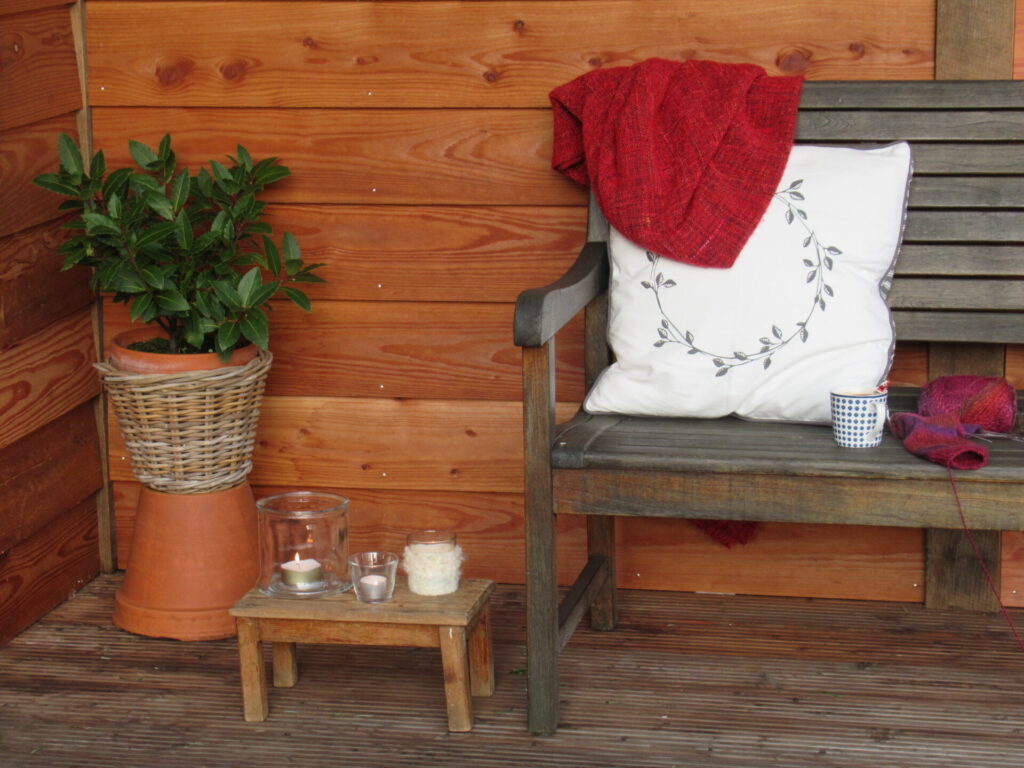
You’re welcome to virtually join me on the veranda in front of our garden shed. I don’t usually go to the trouble of outdoor decorating in winter, but in this special year I’ve made it into a cozy corner.
Our garden bench is overwintering there. It should of course have a beautiful hand knit blanket hanging over the back instead of this Ikea one, but nobody’s perfect. Maybe next year.
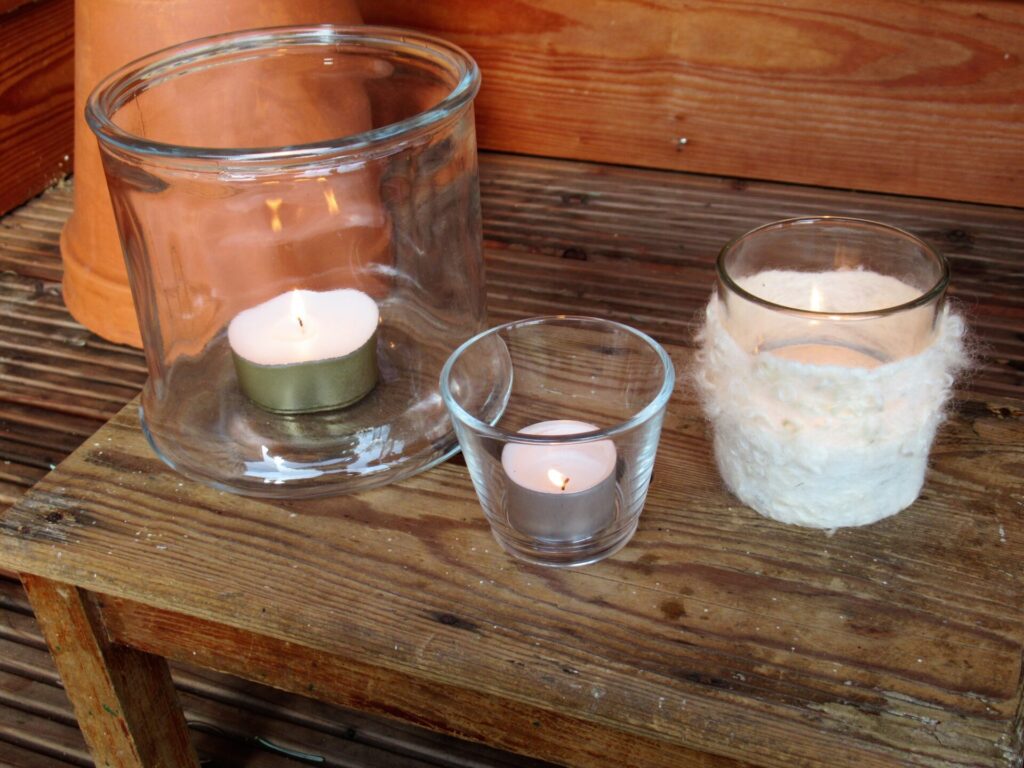
I’ve placed a few candles next to it on a rickety old footstool. One of the glasses has a felted sheep’s wool jacket, bought at a fair a few years back.
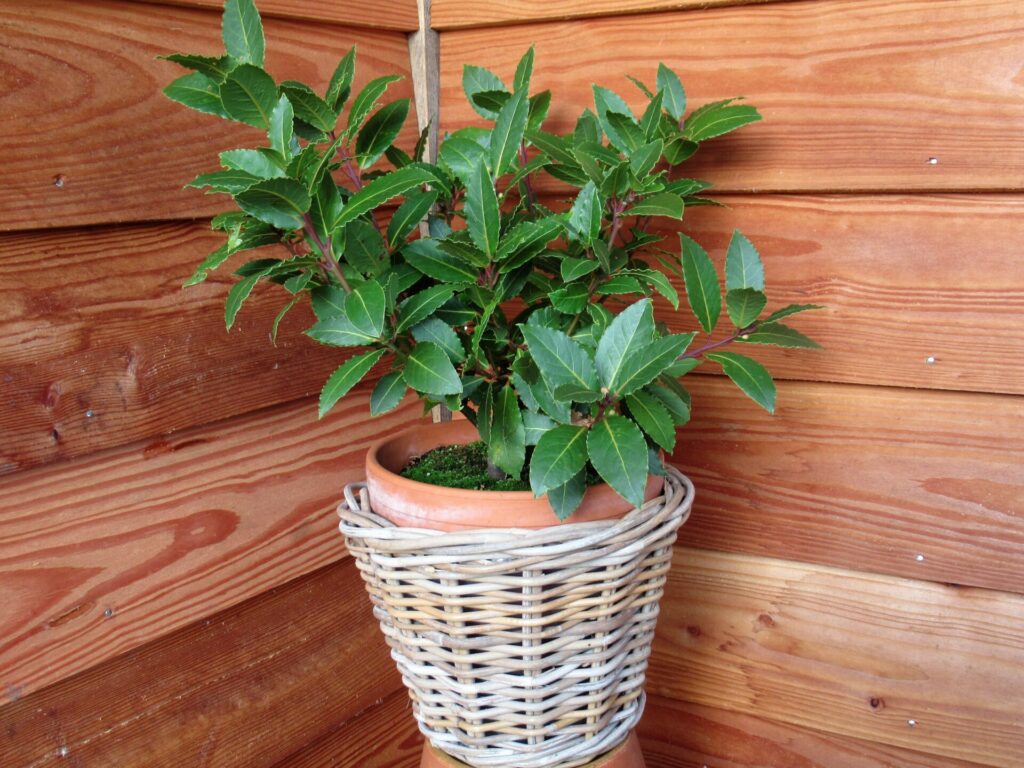
And in the back our little laurel tree is protected from the elements.
It looks happy there, and for the first time ever has flower buds.
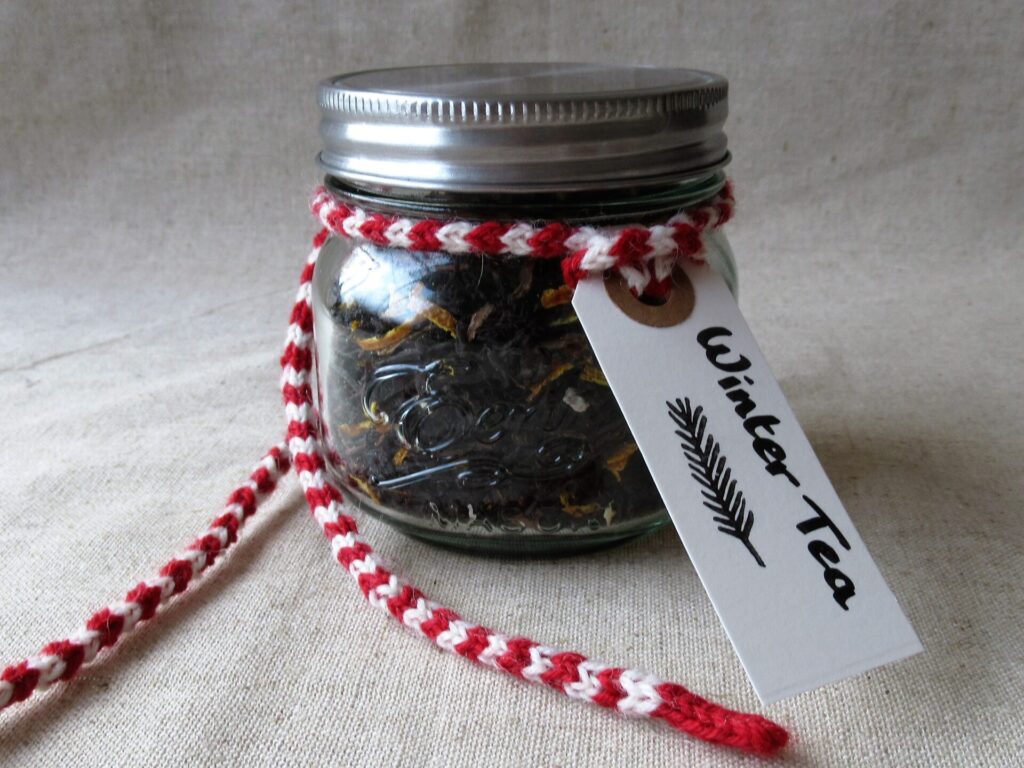
According to the Alternative Advent Calendar, I should have asked you what you’d like to drink first. I didn’t know how to do that here, so I’ve chosen cocoa. For our friends in the southern hemisphere – please pour yourselves a cold drink from us! And for anyone who doesn’t like hot cocoa – maybe you’d prefer some Winter Tea instead? You can find my recipe for that here.
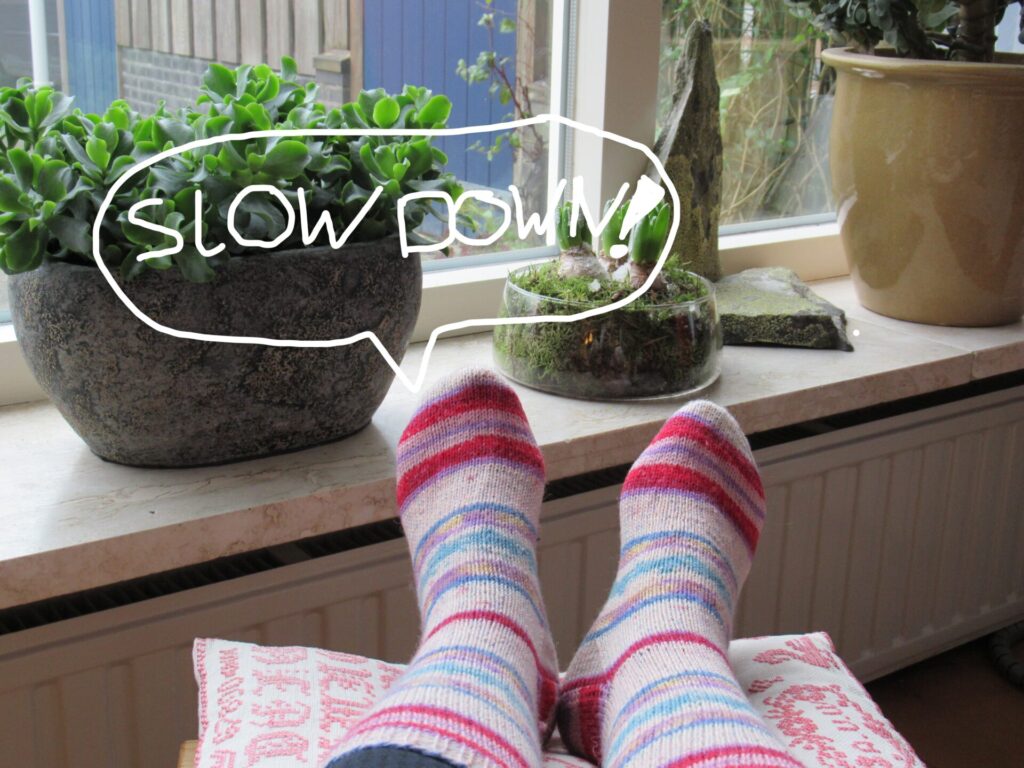
The title of today’s blog post – ‘Slowing Down and Tidying Up’ – may sound terribly Zen and Organised, but that’s not how I’m feeling at all.
The slowing-down part is my left foot speaking. I’ve injured it during a recent walk. Nothing serious, and I hope it will heal soon, but for the time being I need to listen to my foot and walk slowly and mindfully. Because whenever I ignore it, it sends a stab of pain to my brain.
I think my left foot is a rather sadistic Zen master, and I can’t say that I’m grateful to it. But I am grateful that it isn’t my left hand that’s injured. At least I can still knit, and that’s what I’m doing a lot.
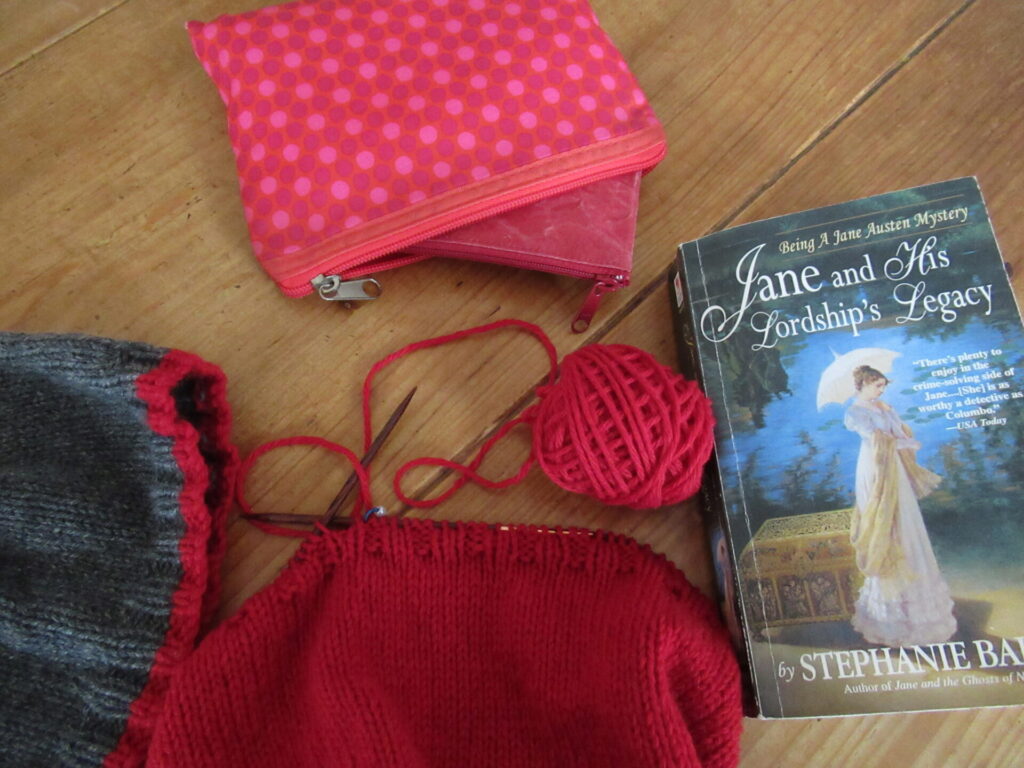
There is some gift knitting going on that I can’t show you, but I’m also knitting something for myself that I can show – a cashmere cap and matching cowl in charcoal and red. Pure comfort knitting.
More about that when I’ve finished it. The novel next to my knitting is from the series of Jane Austen mysteries by Stephanie Barron that I’m re-reading. Highly recommended!
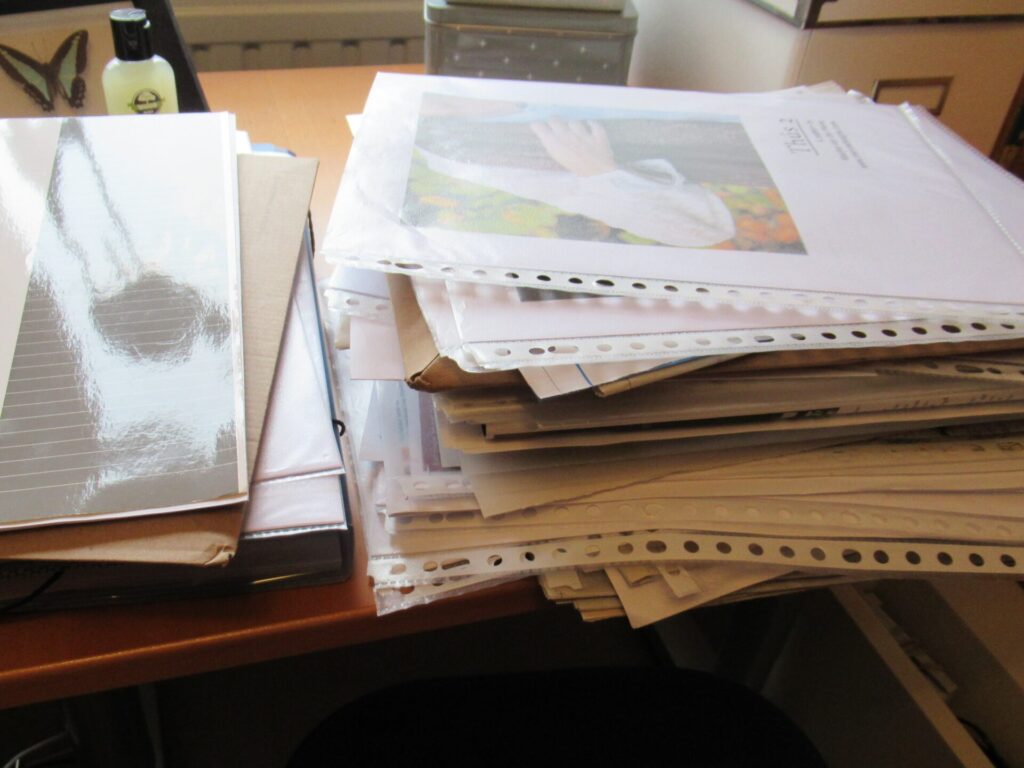
While the slowing-down bit from this blogpost’s title is dictated by my left foot, the tidying-up bit is dictated by the state of some parts of our house. You probably know what it’s like if you have many interests: notes, patterns, newspaper clippings, recipes and other papers pile up until there comes a moment when they take up so much space that tidying-up becomes unavoidable.
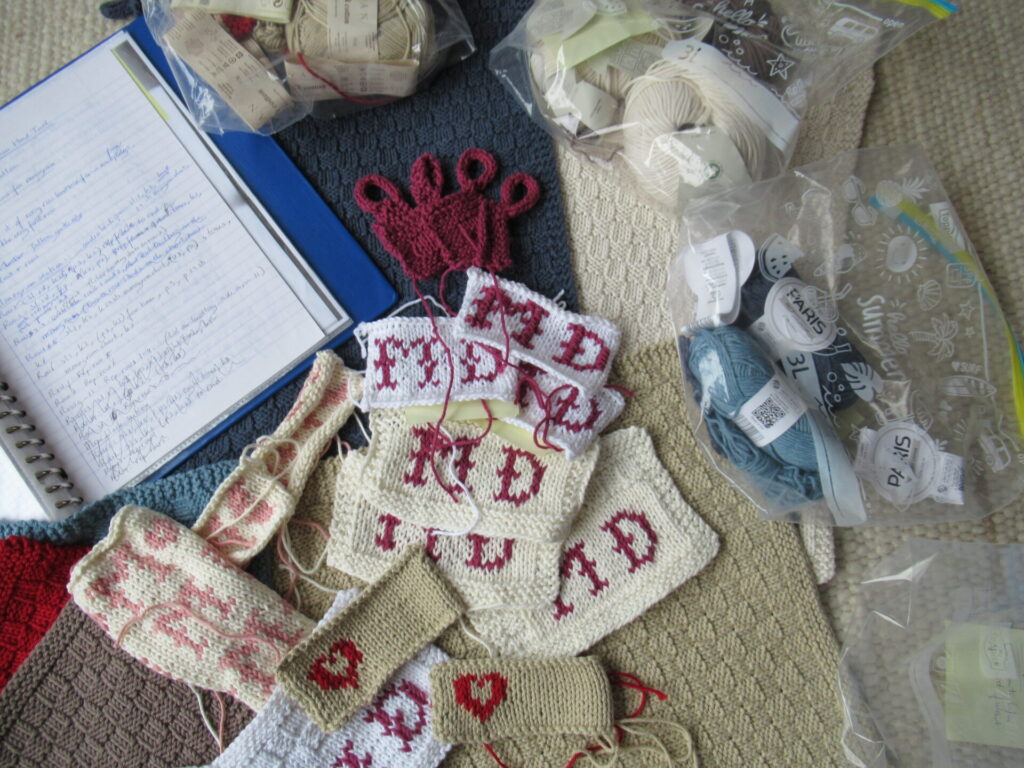
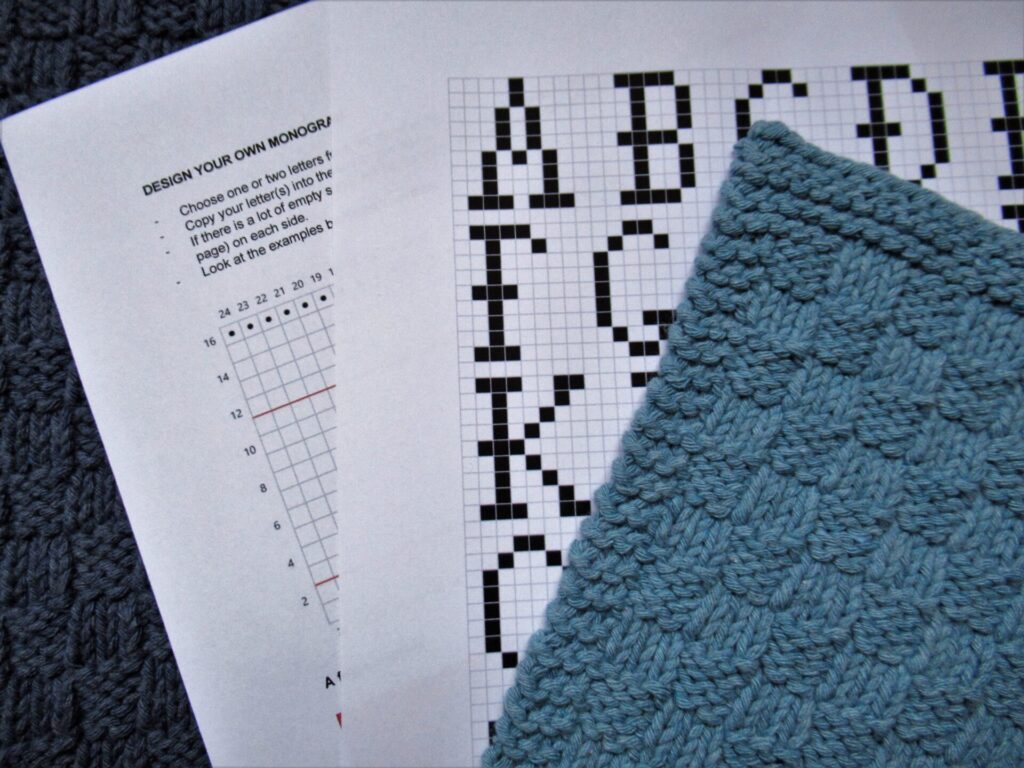
And for a knitter, there are all the things left after a knitting project is finished: pattern print-outs, notes, swatches, scraps of yarn. After finishing my Monogrammed Guest Towels I am left with all this:
A folder full of notes and charts, left-over yarn, yarn labels, the towels and face cloths themselves, and swatches. Lots of swatches of the monograms – many knit-in versions, one in duplicate stitch, and even one in cross stitch on a knit swatch (not a success).
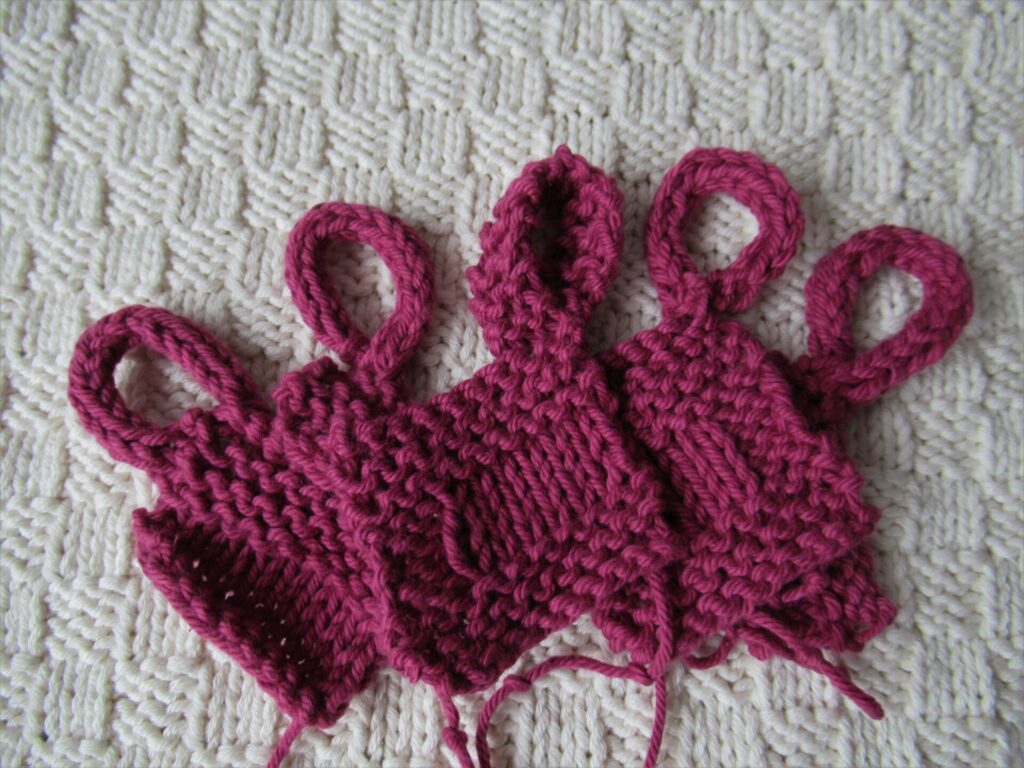
And there’s also a small bouquet of loops:
Shall I keep them for future reference? I have difficulty tidying up, because I keep thinking that things may come in handy later. But no, they’ll have to go or we’ll get snowed under in stuff. If I’m ever going to make something with loops or monograms again, I’ll knit new swatches. That’s part of the fun anyway.
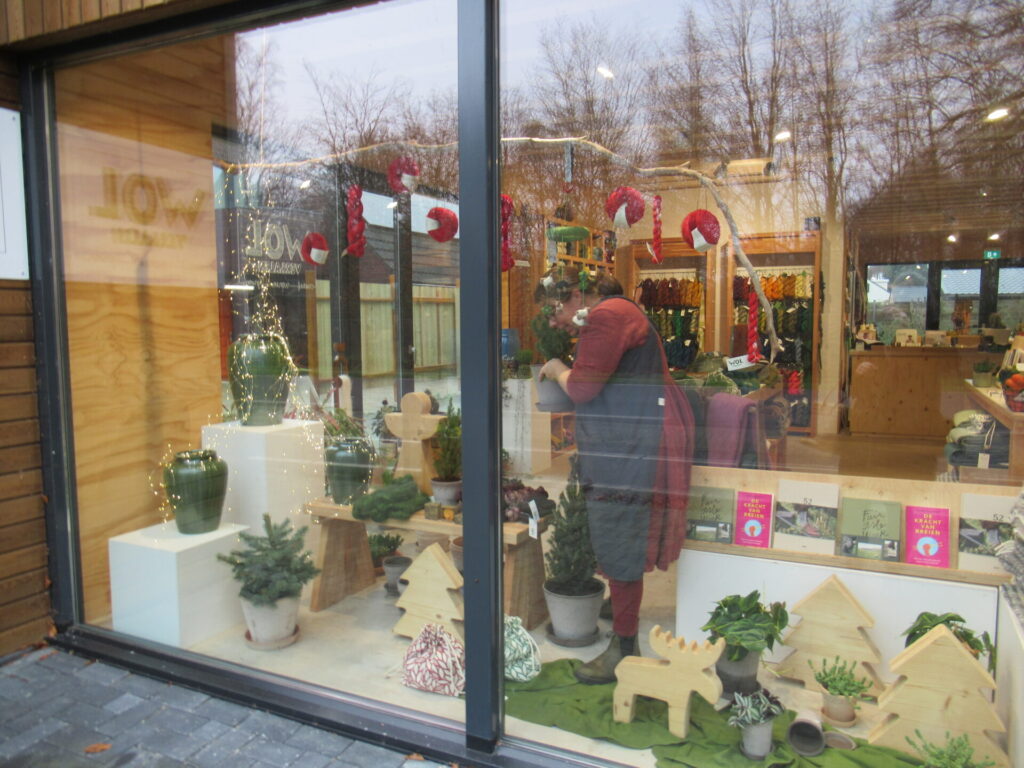
Speaking of new swatches, I paid a visit to Wolverhalen to get some materials and needles for them. Maybe you remember the shop? I wrote about it before here.
My tactic at a time we need to avoid crowds is to shop as little as possible, and when I really need something, to go at a quiet moment. So last Wednesday I arrived at Wolverhalen when Catharina was just about to open up. While she was placing a last little Christmas tree in the shop window, I looked at the things on display and put on my face mask.
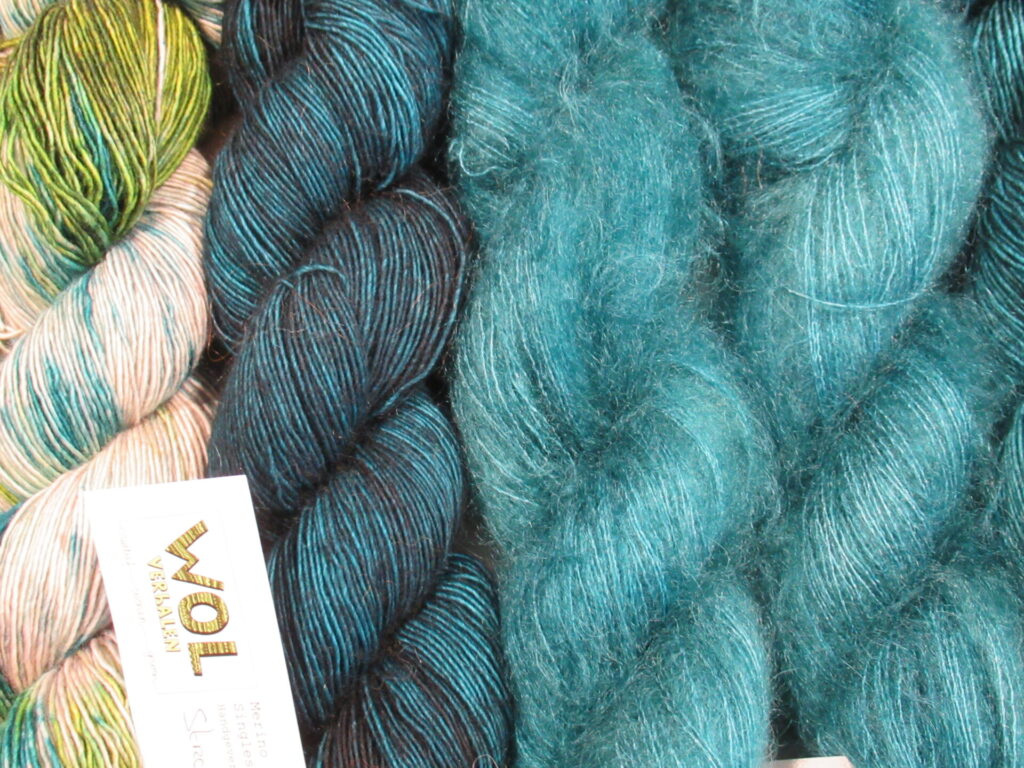
I had taken a good look at her website beforehand and made a shopping list. One of the things on my list was two balls of this squishy yarn.
Something to play/knit swatches/cuddle with during the Christmas holiday.
Also on my list was some of Catharina’s own handpainted yarn for another Thús 2. On my way to Wolverhalen, I dropped the original version off at a friend’s house, and now I’d like to make another one. I chose a deep teal merino singles yarn (2nd from left in photo below).
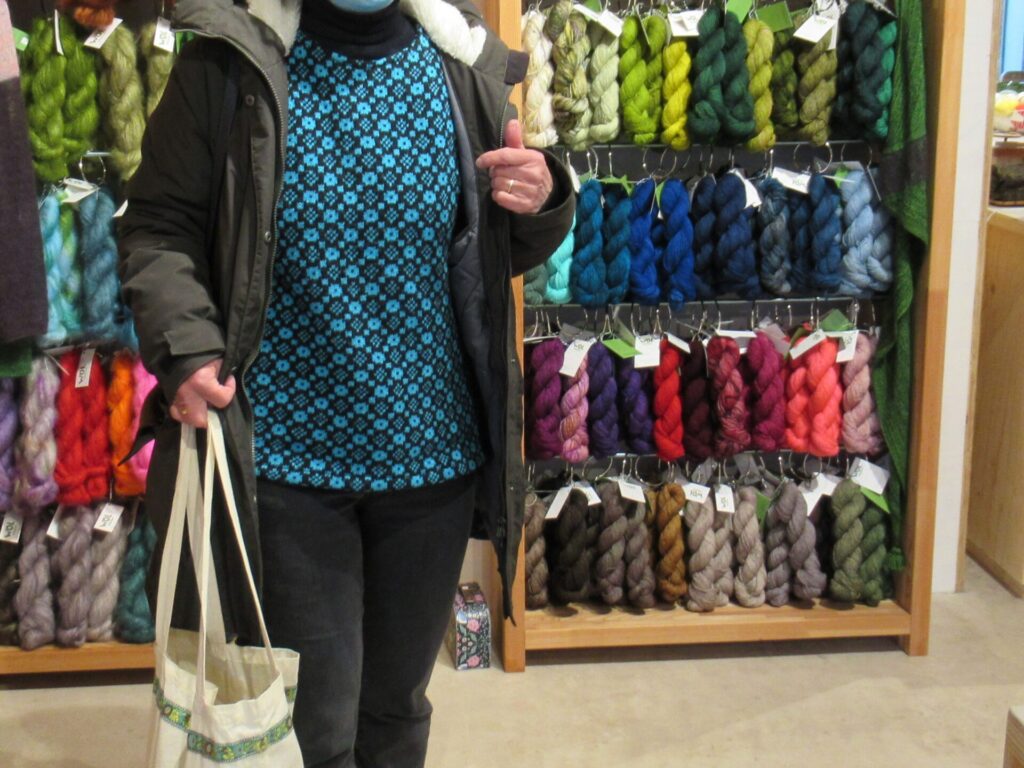
While I was choosing my yarns, another customer came into the shop. She was wearing a very special sweater, and when I asked her about it, she told me she’d bought it during a month-long stay in the Faroe Islands. Oh my, an entire month in that beautiful place!
I asked her if I might take a picture of her lovely sweater for my blog and she said that was fine, so here it is – Thank you, unknown knitter!
Chance meetings like these are what make visits to a brick-and-mortar yarn shop extra special. I don’t know if I’d recognize her in the street or she me, large parts of our faces being covered in masks, but from her story about the Faroe Islands, the pattern she was choosing yarn for and her remark that’s she’s a bird watcher, I did recognize a kindred spirit.
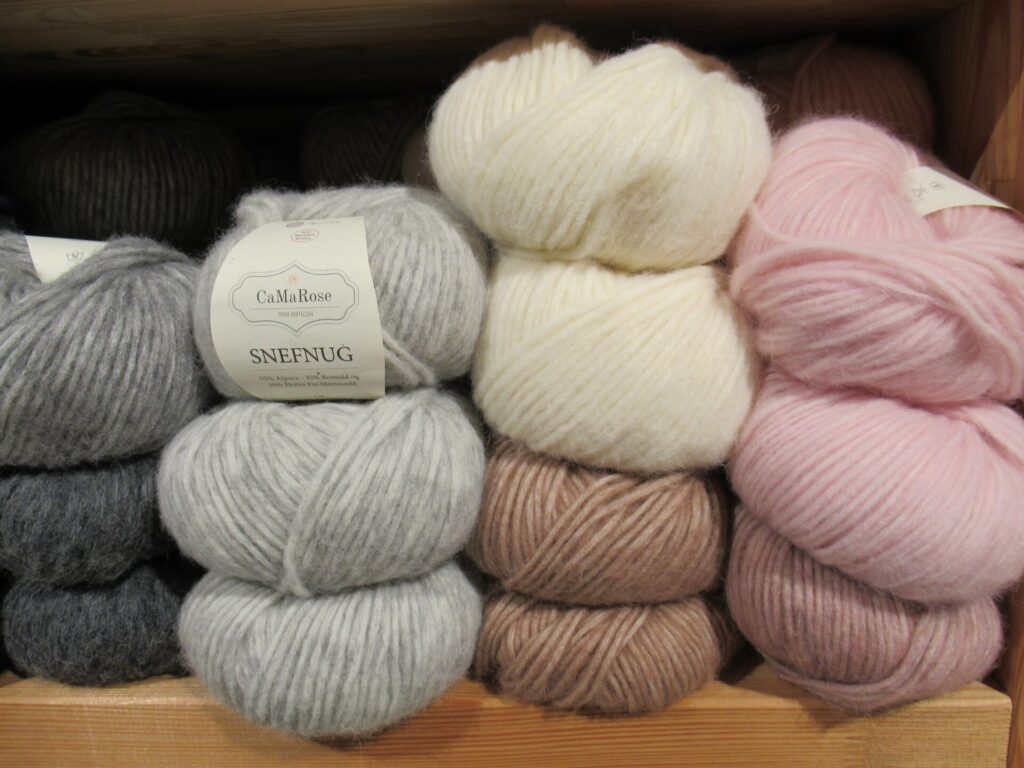
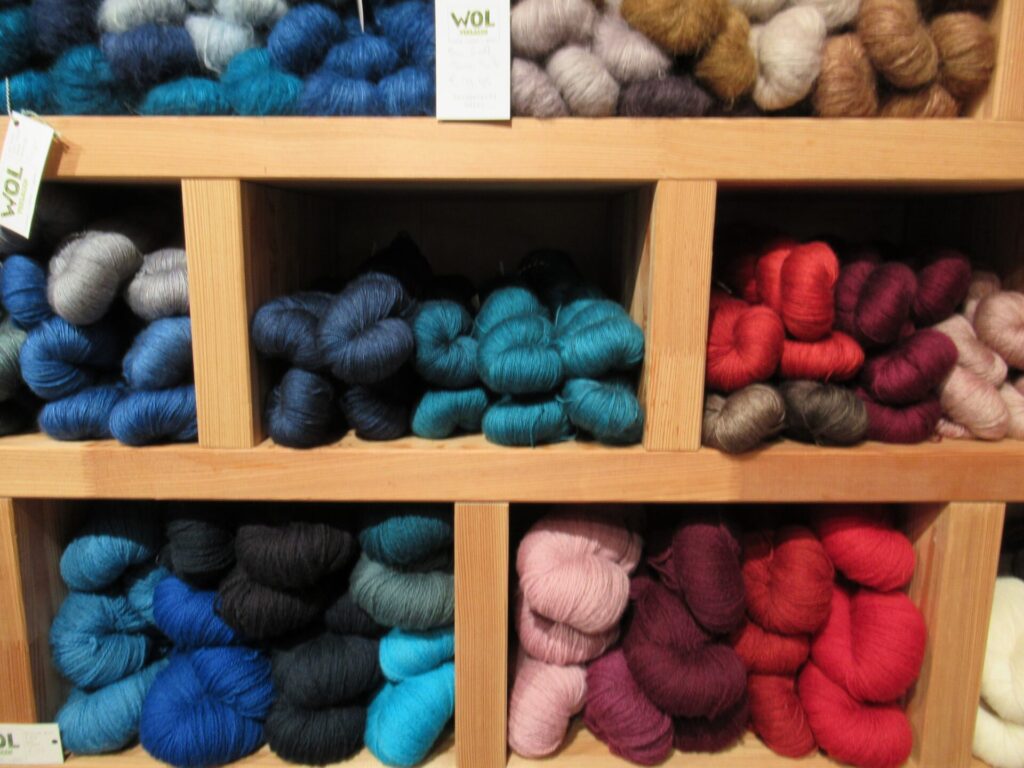
Well, let’s browse around a little more before leaving for home. Apart from her own gorgeous hand dyed yarns…
… Catharina also stocks a selection of yarns from other companies, like Danish CaMaRose.
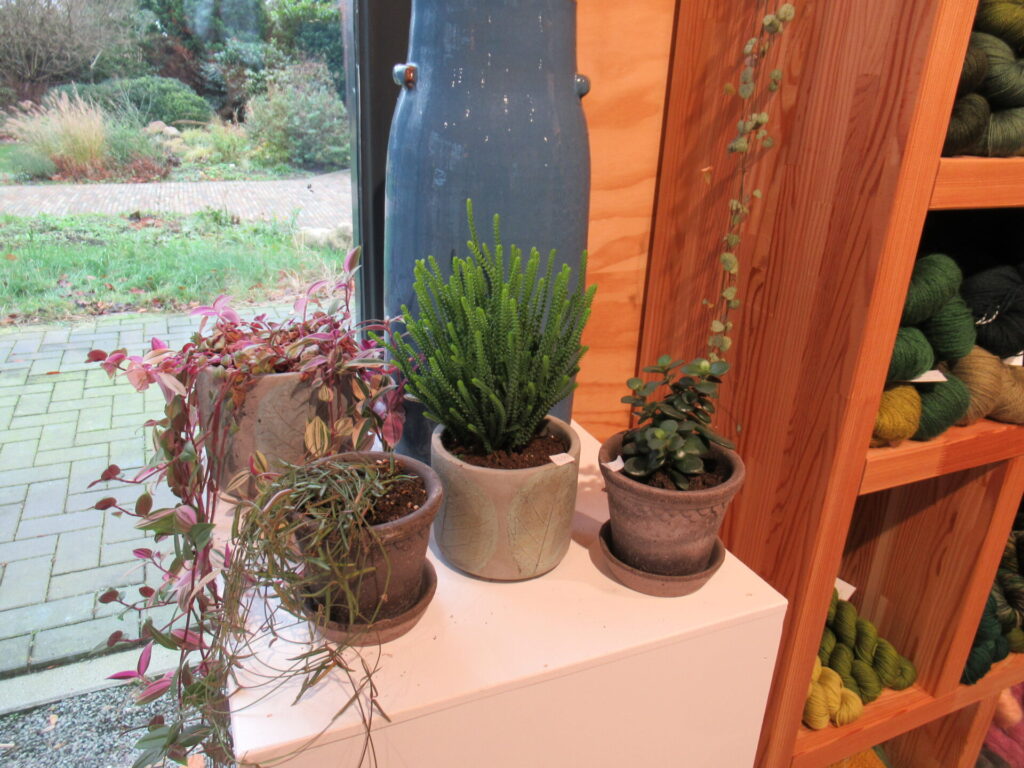
And then there are plants in lovely pots everywhere…
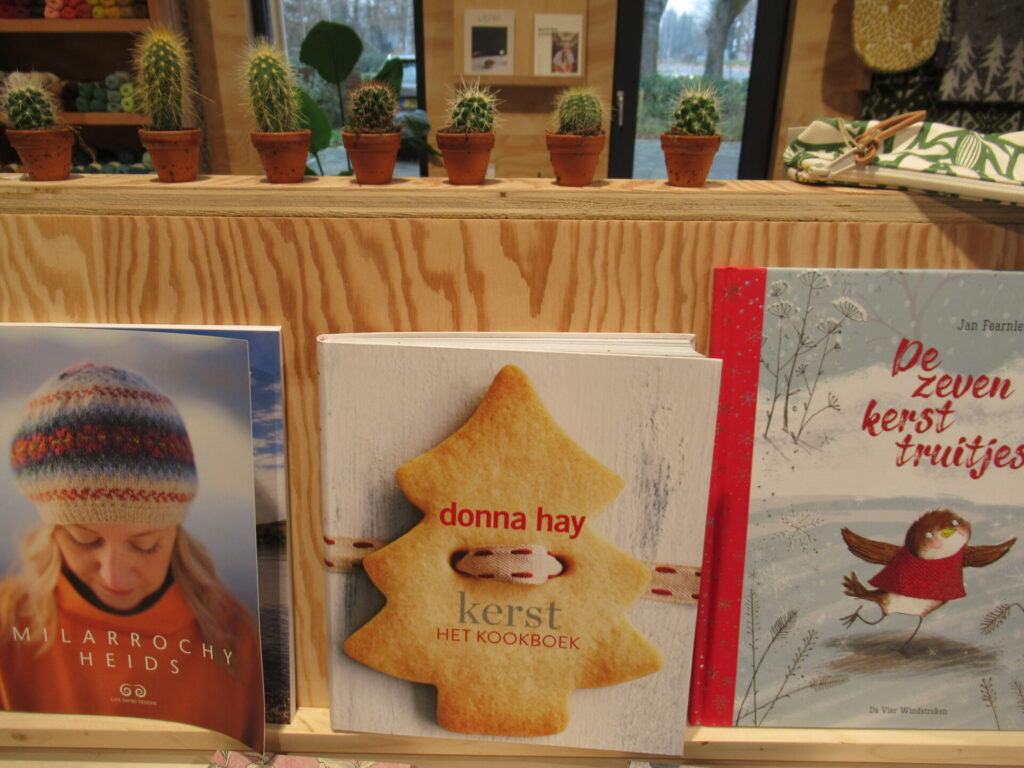
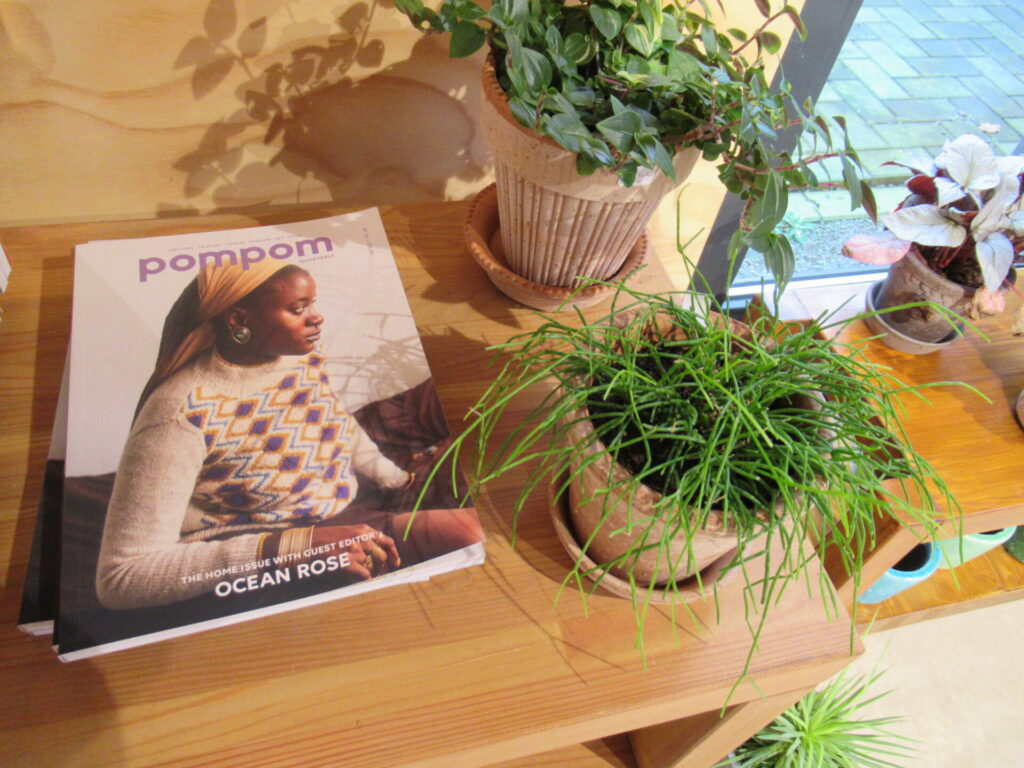
… books…
… and magazines.
Ah, it’s been so good to not be at home for a while. And to meet other knitters and yarn lovers, even if it was only briefly, in small numbers, at a safe distance, and partly hidden by masks.
Well, that’s all for today. I’m hurrying back (slowly) to my tidying up. Wherever you are in the world, and whether you are slowing down (of your own free will or not) or are extra busy at work or at home, I hope that you are okay. Thank you for reading and see you again soon!
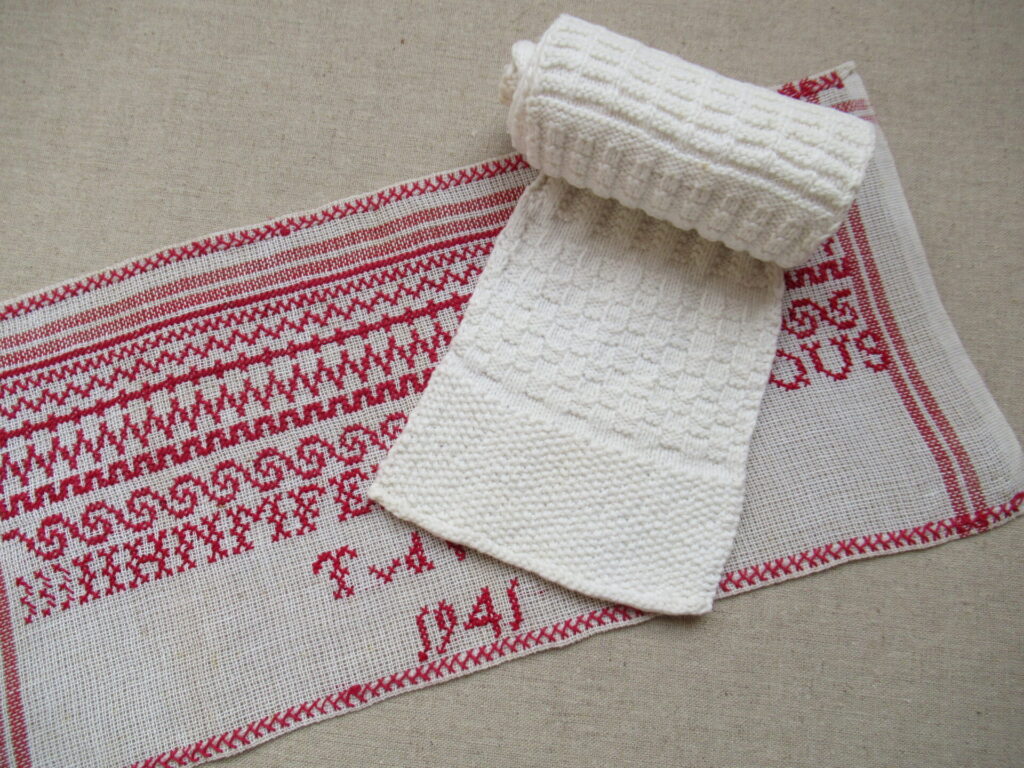
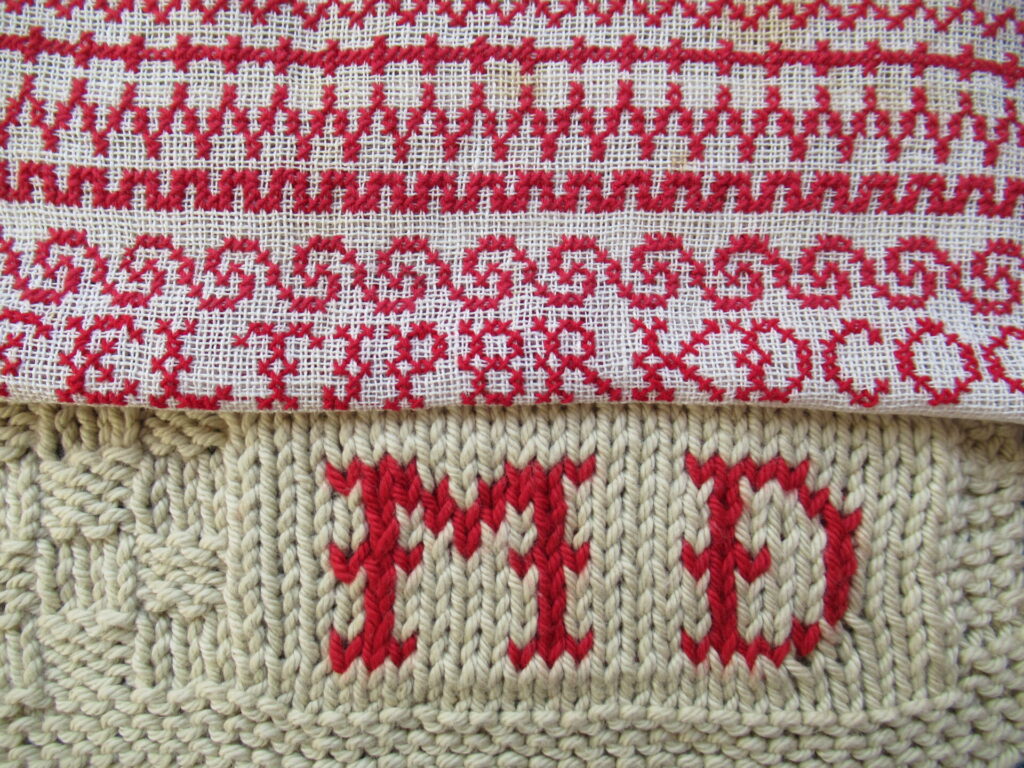
If you’ve been reading my blog for a while, you may remember that I’ve inherited two samplers – an embroidery sampler and a knitting sampler. The embroidery sampler was made by my Mum, aged 8, in 1941. I don’t know anything about the date or the maker of the knitting sampler.
The samplers spent decades in my parents’ attic, and after that, over twenty years in a deep dark cupboard in my home. High time to give them the attention they deserve. I’ve been studying them closely and thinking about the people who made them, and I’d love to find out more about the knitting sampler. But first and foremost, my hands were itching to DO something with them.
The word ‘sampler’ is related to ‘example’, and that is exactly what samplers like these were meant for. To provide the girls who made them with examples to be used later in life, for useful and beautiful textiles for their families and homes.
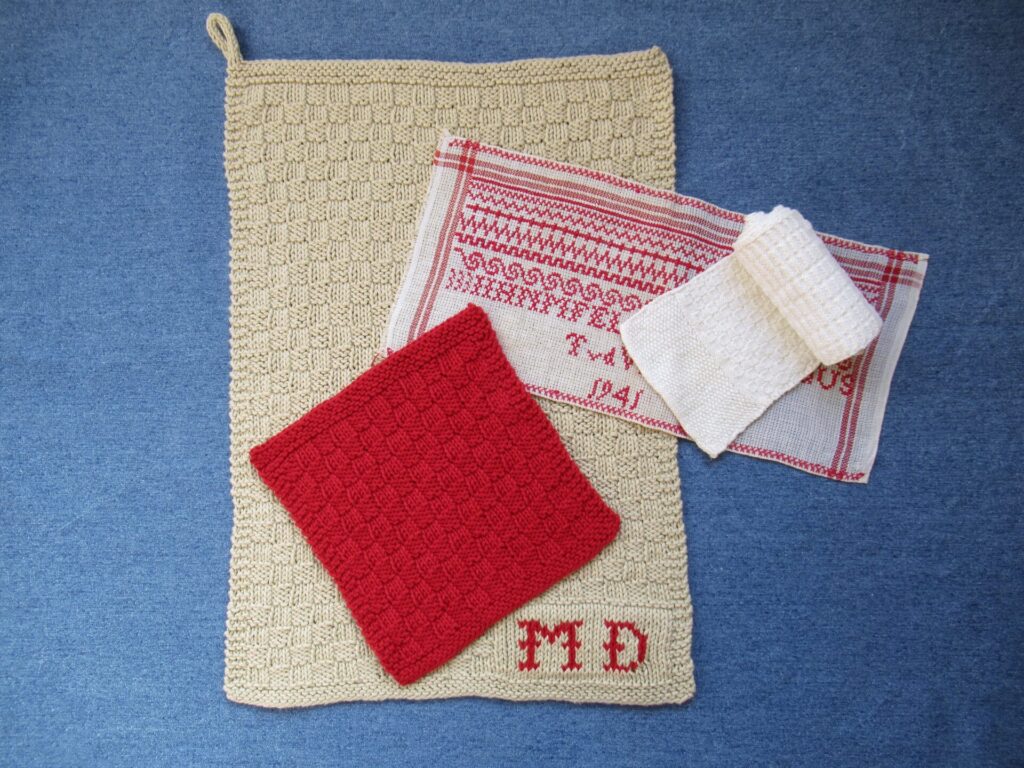
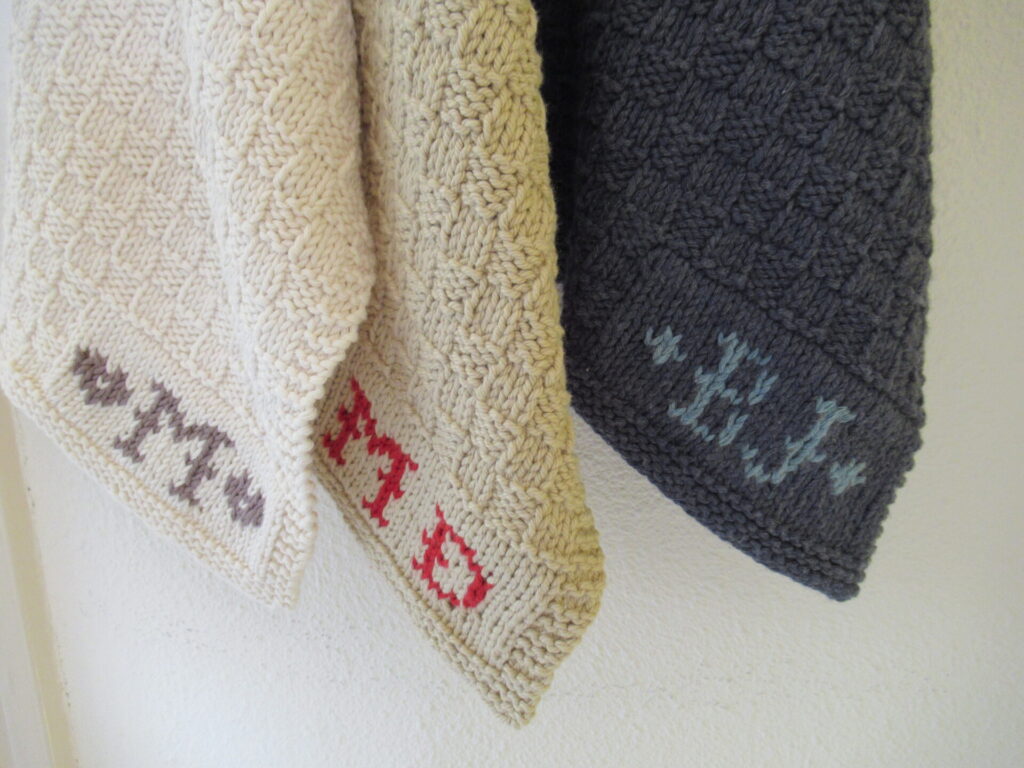
For my first sampler-based project, I’ve stayed close to that idea. Combining and adapting elements from both samplers, I’ve designed and knit a monogrammed guest towel, using the yarn left over from the monogram for a small face cloth.
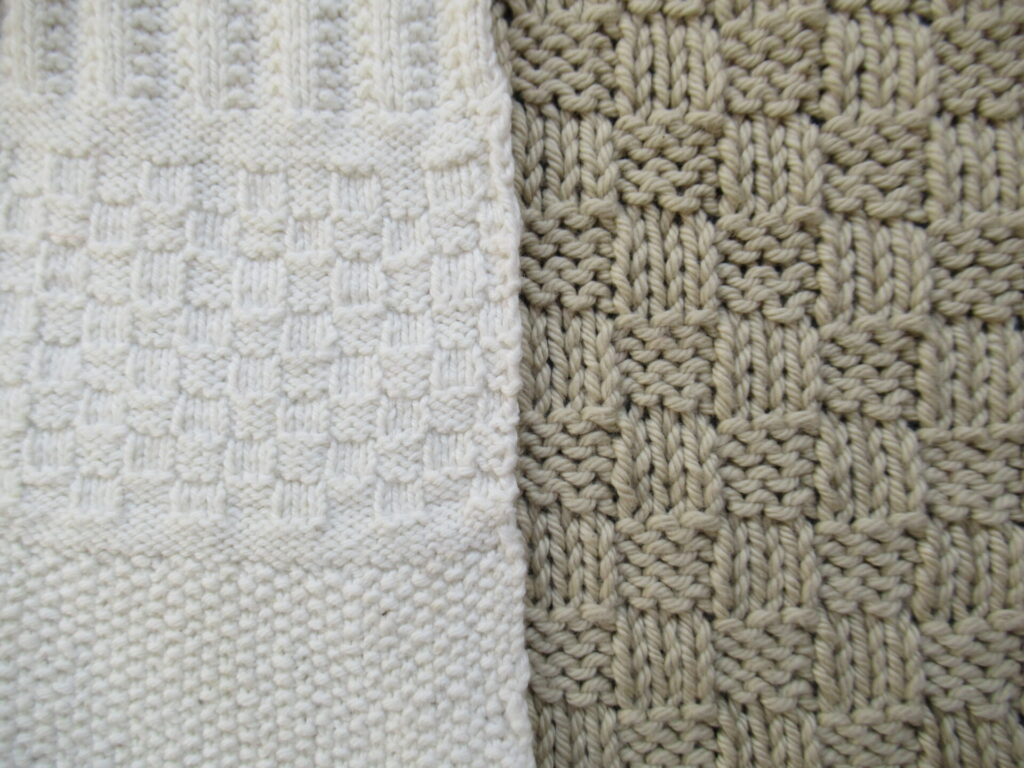
For the first version that I made, I also stayed close to the original colours.
From the knitting sampler, I borrowed the second stitch pattern from the bottom – mini-blocks. That was simple.
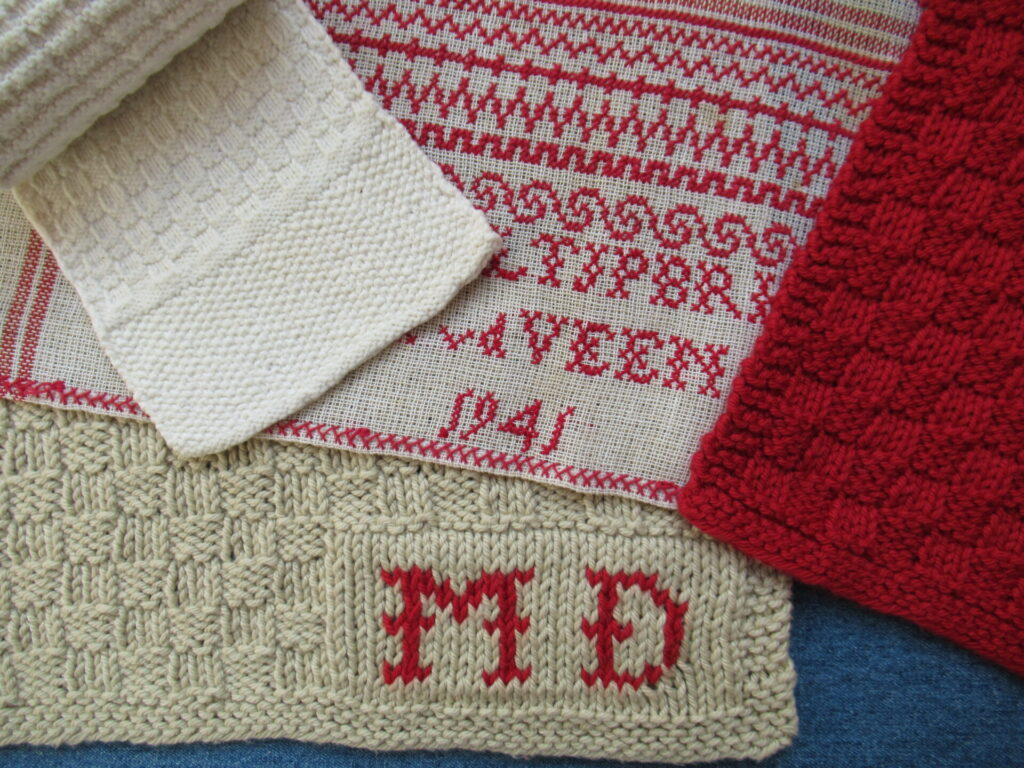
Translating the embroidered letters into knitted ones was less straightforward, because a cross stitch is square while a knit stitch is a flat rectangle. You know what it’s like when your tv screen has the wrong picture format and people’s faces get squashed? That’s what would happen if the letters were simply copied from the embroidered examples in knitting.
So, to begin with, I stretched the letters out. As a result some of the ‘legs’ looked wrong, and I had to alter those. When I tried knitting them, I found out that the letters still didn’t look quite right, and I tweaked a few other details until I was happy with them.
The second problem I ran up against, was that my Mum’s sampler didn’t have a complete alphabet – it had only 19 letters. It did have an M and a D (for Merula Designs), but it lacked several other essential letters. Looking at similar samplers, I finally pieced together a complete knittable alphabet. Phew, problems solved.
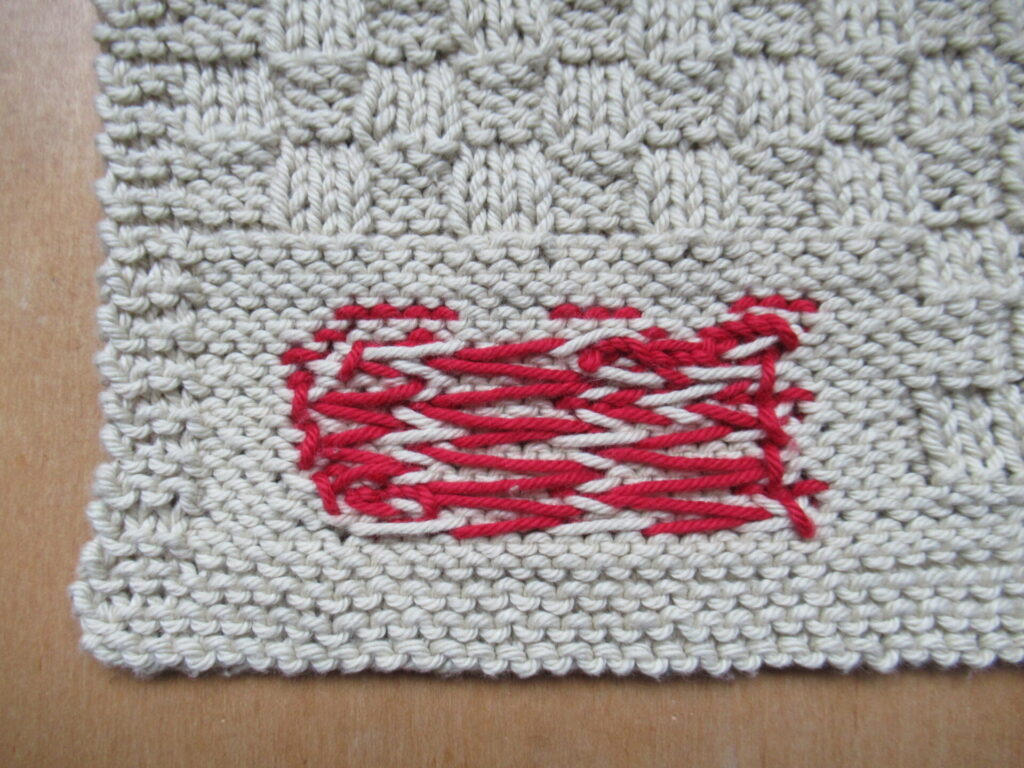
Or so I thought. Because when I started knitting more swatches, I soon realized that the back of the monogram wasn’t going to look very attractive. Uh-oh.
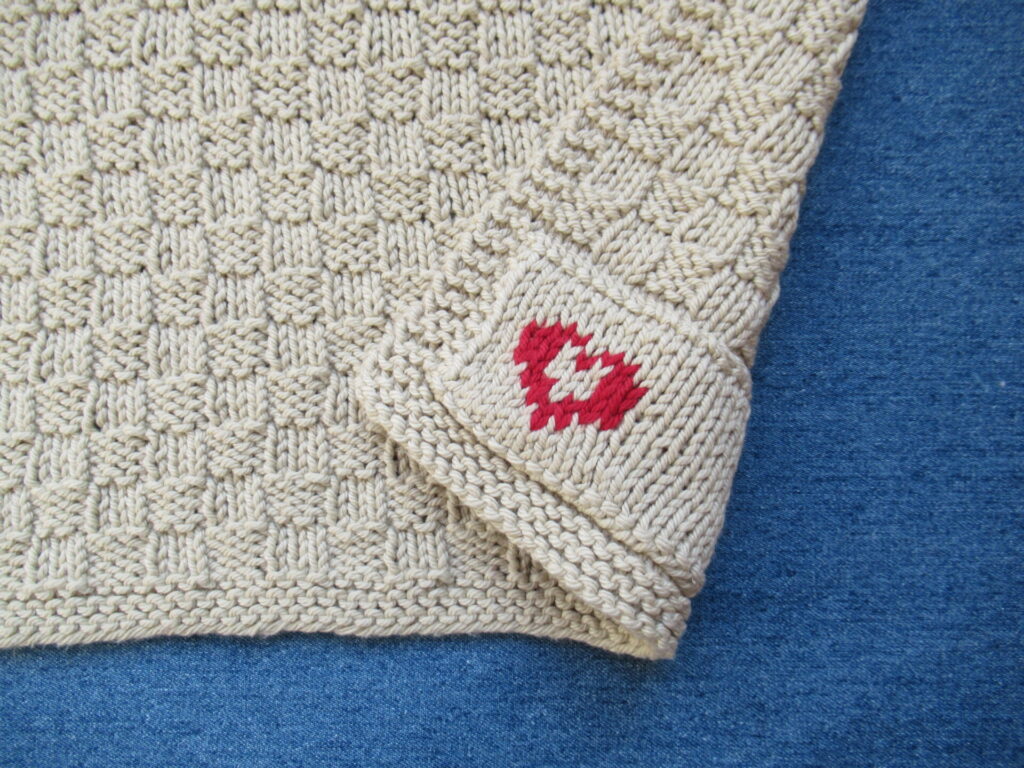
In the end, I solved that by adding a nice little surprise to the back.
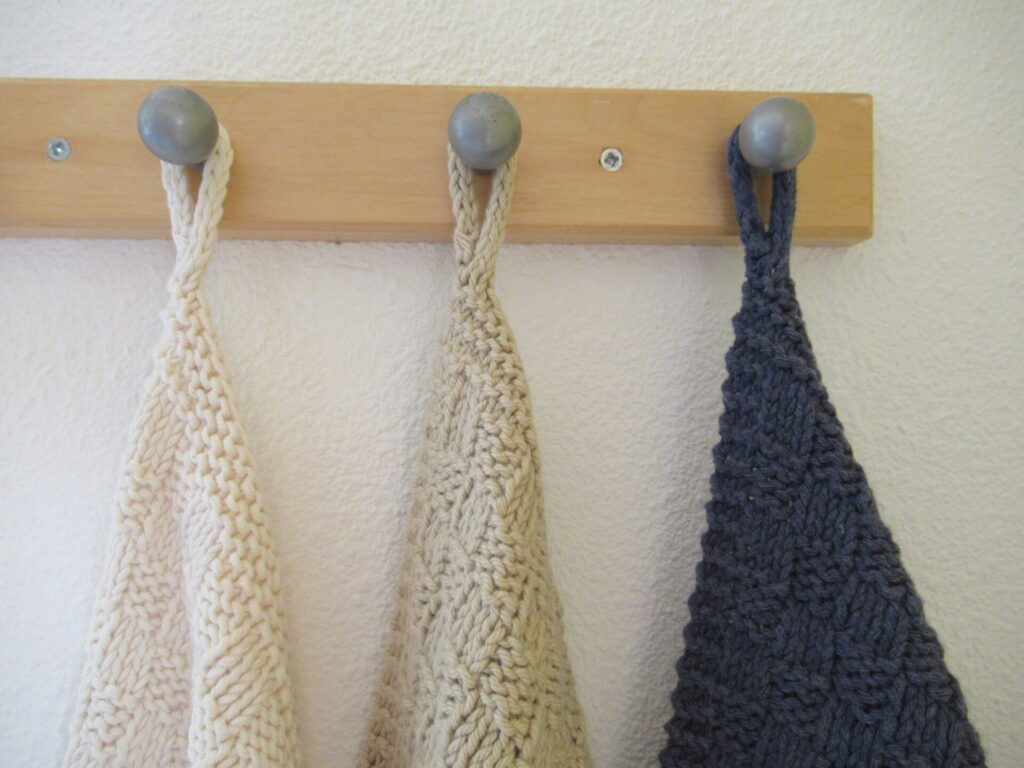
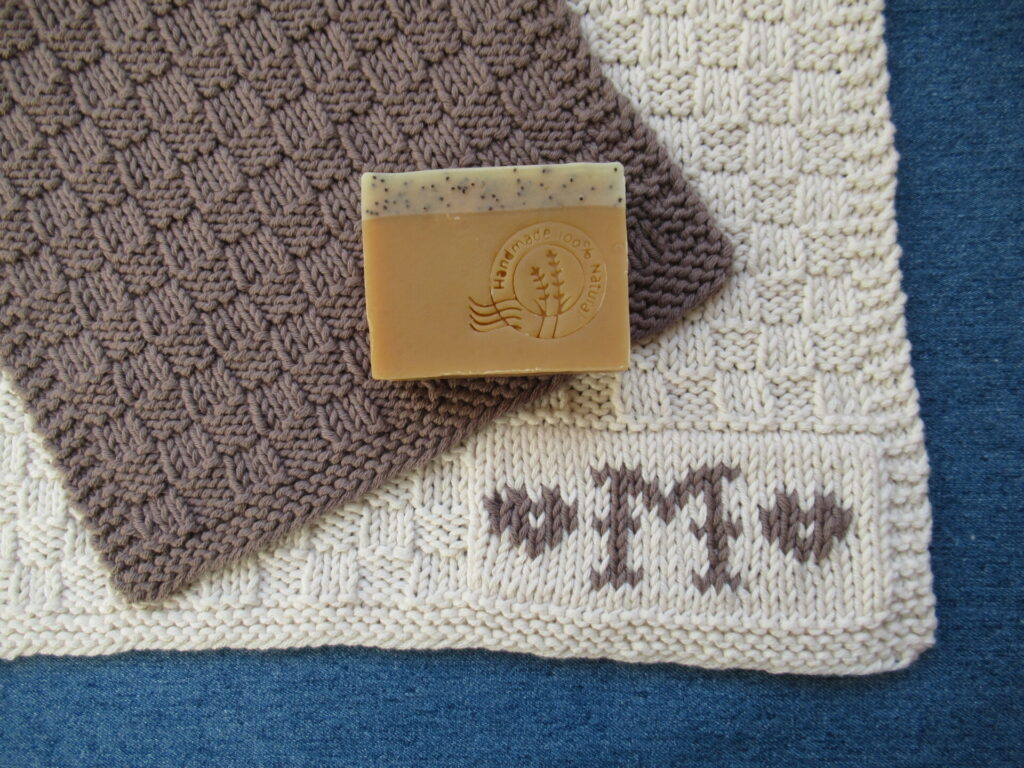
I tried out several loops and decided on a bit of I-cord. Then I knit another towel, and another one – each with a matching face cloth. Here is a close-up of the loops…
… and one of the monograms.
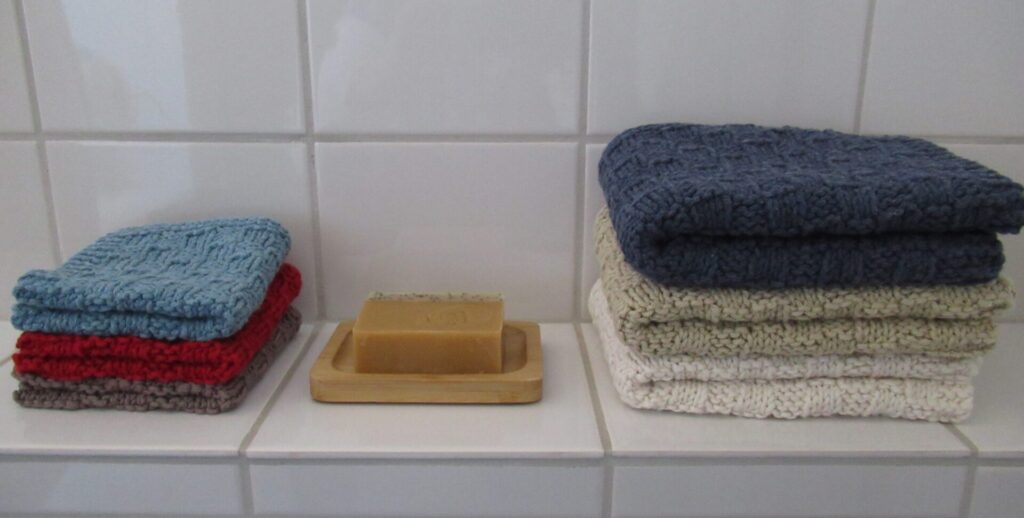
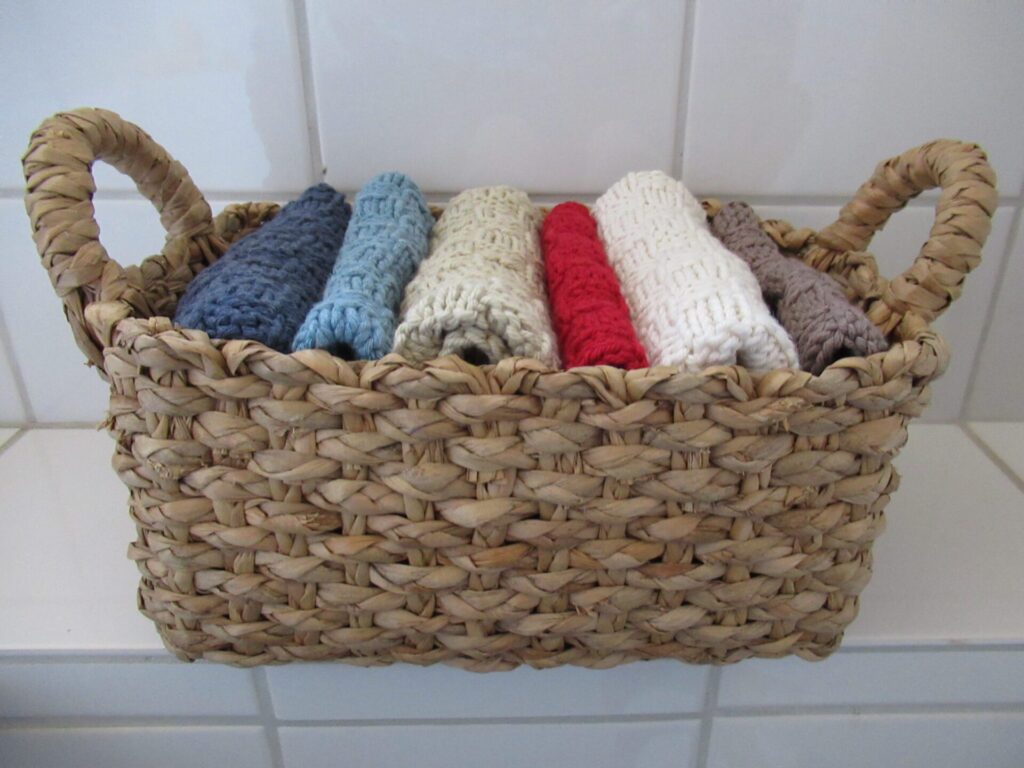
Each towel & face cloth set was knit in a different yarn.
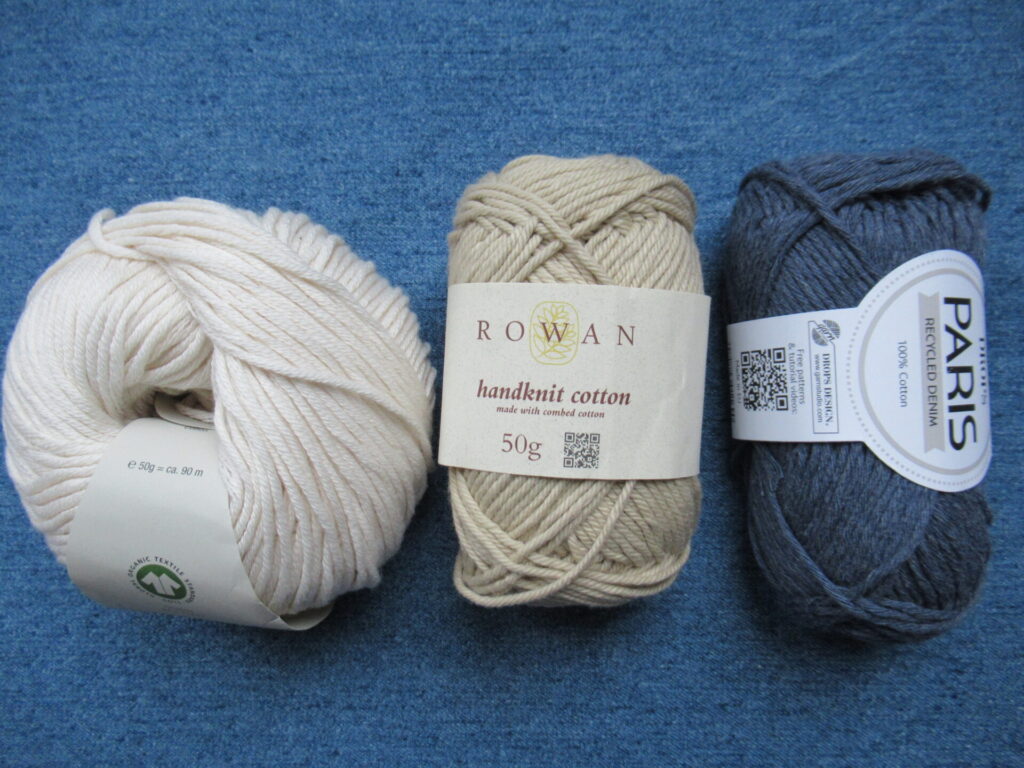
I’d like to go greener in my knitting, but that isn’t always easy. First, because there are some old yarn friends that I’m strongly attached to. Second, because the choice in organic yarns is still very limited. And third, because organic yarns can be rather expensive. In the end I came up with 3 options:
An old friend: Rowan ‘Handknit cotton’ (linen/red version)
An affordable organic yarn: Lana Grossa ‘Linea Pura Organico’ (cream/taupe version)
An inexpensive sustainable yarn: Drops ‘Paris Recycled Denim’ (blue version)
If I’m honest, the organic version is my favourite. It is very soft and supple.
But the other ones are really nice, too.
I’ve written out the pattern for anyone who would like to make a monogrammed guest towel of their own. Personalized with the recipient’s monogram, I think a guest towel & face cloth set would make a lovely Christmas, Birthday or Wedding Anniversary gift.
The pattern includes:
Clear knitting instructions and charts for towel & face cloth
A complete knittable alphabet
Instructions and an empty grid for designing your own monogram
Tips for knitting the monogram and the I-cord loop
The Monogrammed Guest Towel pattern can be found here on Ravelry (available in English & Dutch, also to non-Ravelry members)
Now, what else could I make based on my inherited samplers? Hmmmm……
As always, thank you for reading and take care! Xxx
First of all, thank you so much for all of your kind comments about my Thús 2 scarf, here and on Ravelry. If you’re going to knit it, I hope knitting it will bring you as much pleasure as it did me.
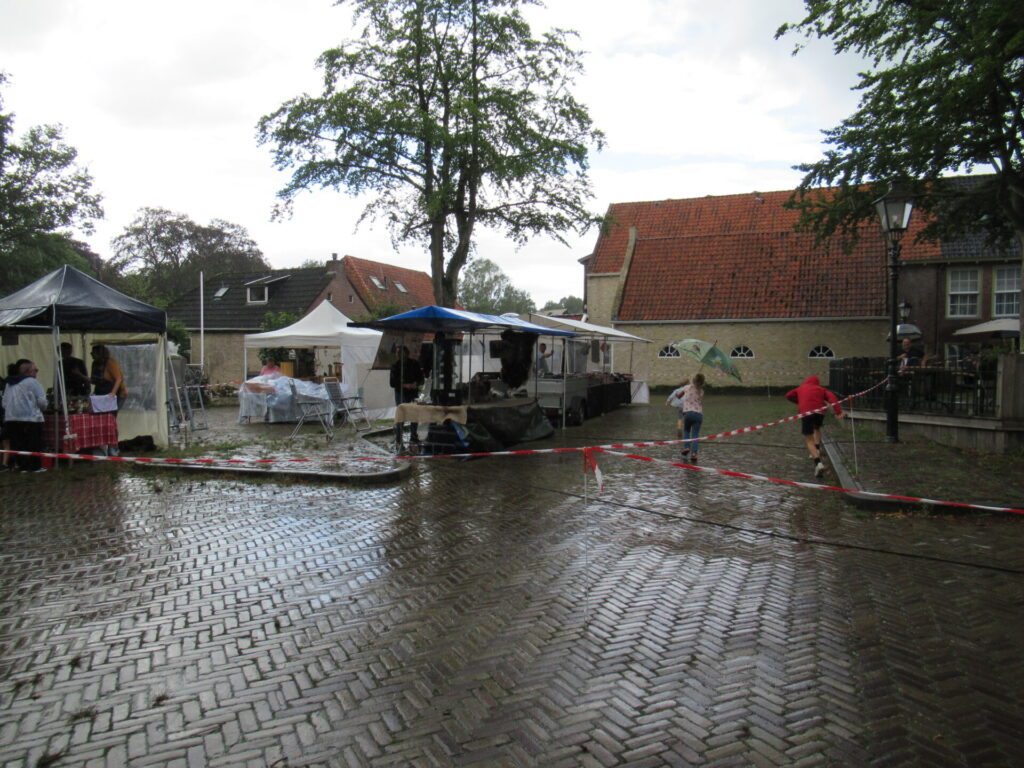
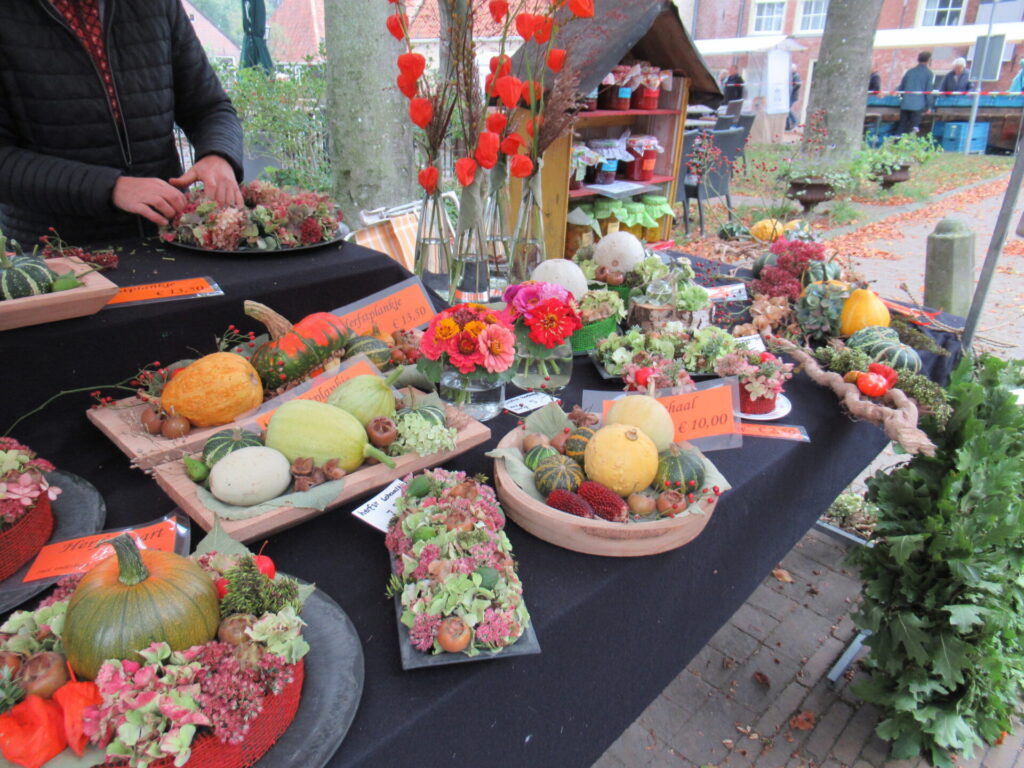
Today, I’m taking you along for some outdoor shopping. A visit to our nearest Farmers’ Market is one of the highlights of the month for me. Normally, it is held once a month from spring through autumn, with an extra Christmas edition in December. This year, it didn’t start until the summer, and there isn’t going to be a Christmas Market, but I’m glad that we’ve been able to go a few times.
Apart from the late start, several other things were different, too. The singer with her guitar was absent, the stalls were spaced out a little more, and there were red-and-white tape and arrows for managing the ‘crowds’.
It was raining when I took this picture, and there are usually a few more people strolling around, but this market never attracts anything remotely like a crowd. Still, it’s good to be on the safe side.
Other than that, it was the same enjoyable place, with the same friendly people and the same attractive wares.
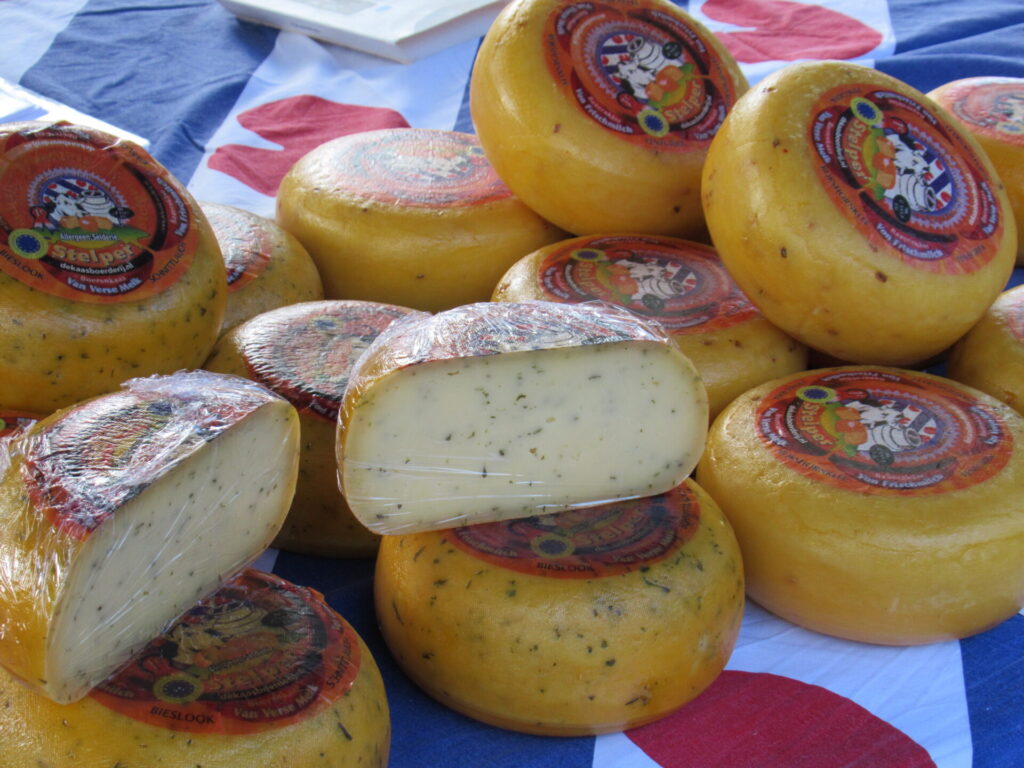
One of the things we always buy here is cheese. The ones below are made from cow’s milk with chives (left) and fenugreek (right).
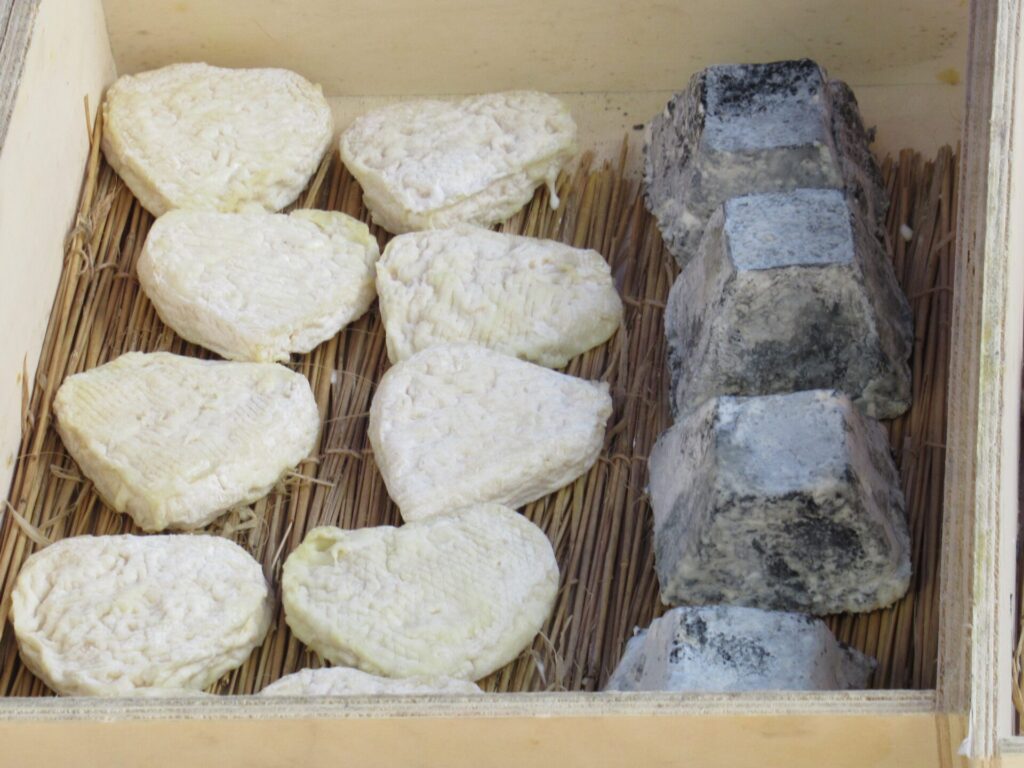
Our favourites are Doetie’s goat’s cheeses. She makes different varieties – harder ones that have been left to mature for a while…
… and soft, fresh ones that cannot be kept long (they never are in our house anyway). The heart-shaped ones below on the left are like a mild brie and the grey ones on the right have a layer of ashes on the outside and are sharper.
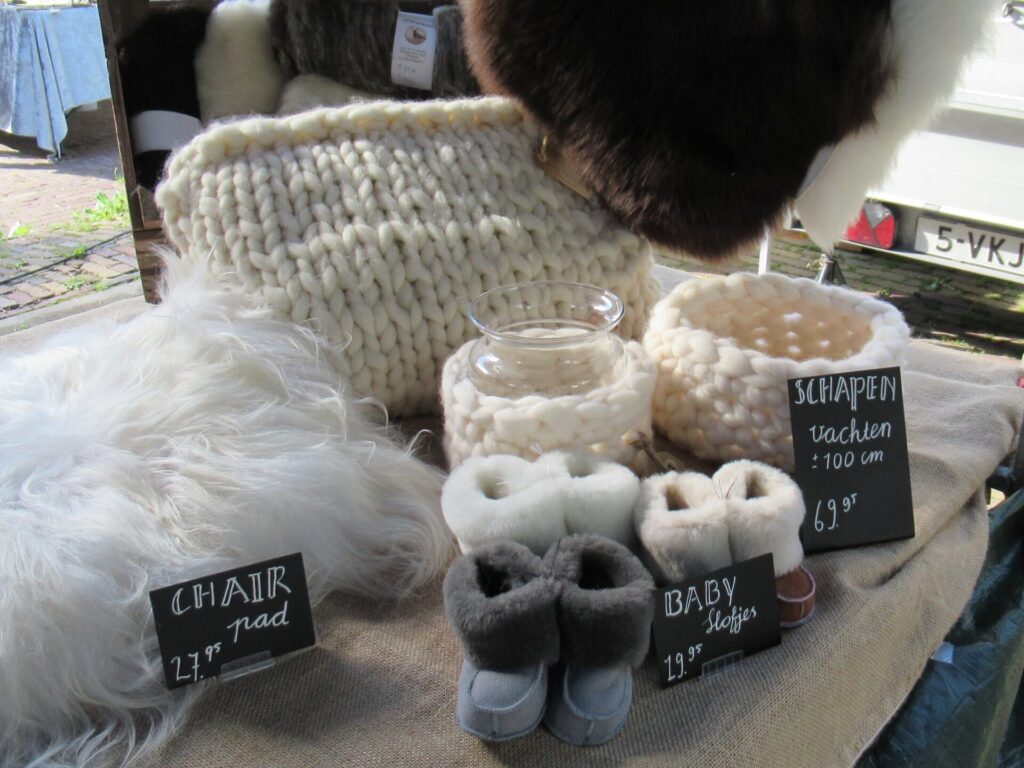
There was also a new stall this year, selling sheep’s cheese, skins and other sheep products.
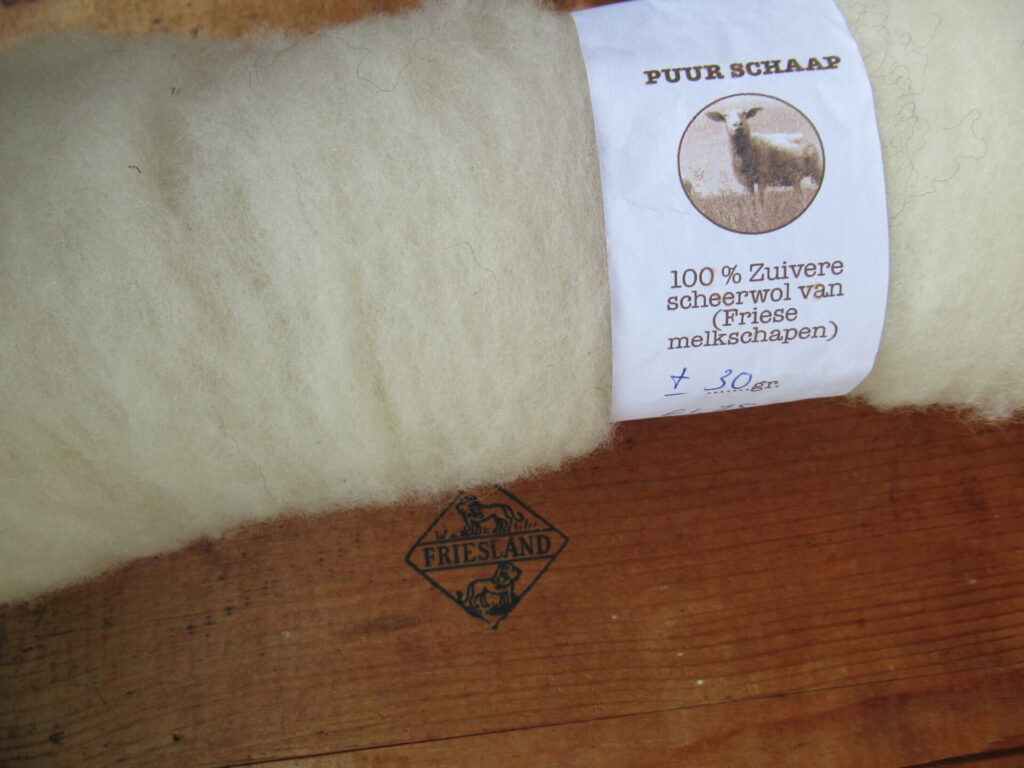
From them, I bought 30 grams of unspun Frisian dairy sheep’s wool. I’ll let you know more about that when I’ve spun it.
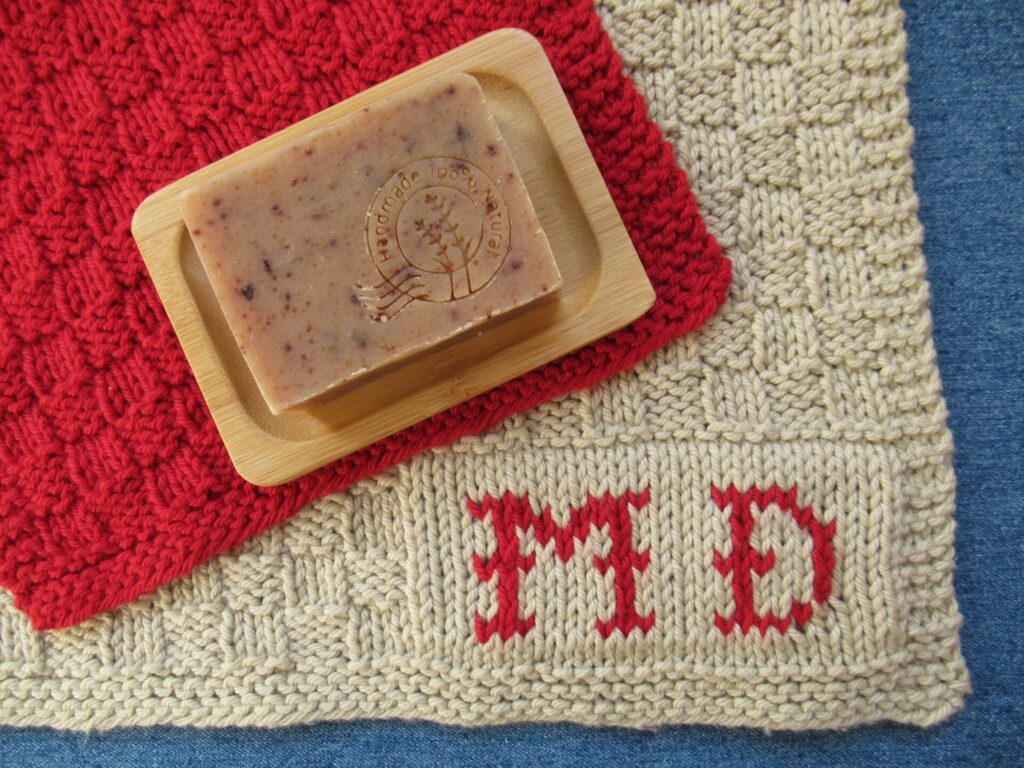
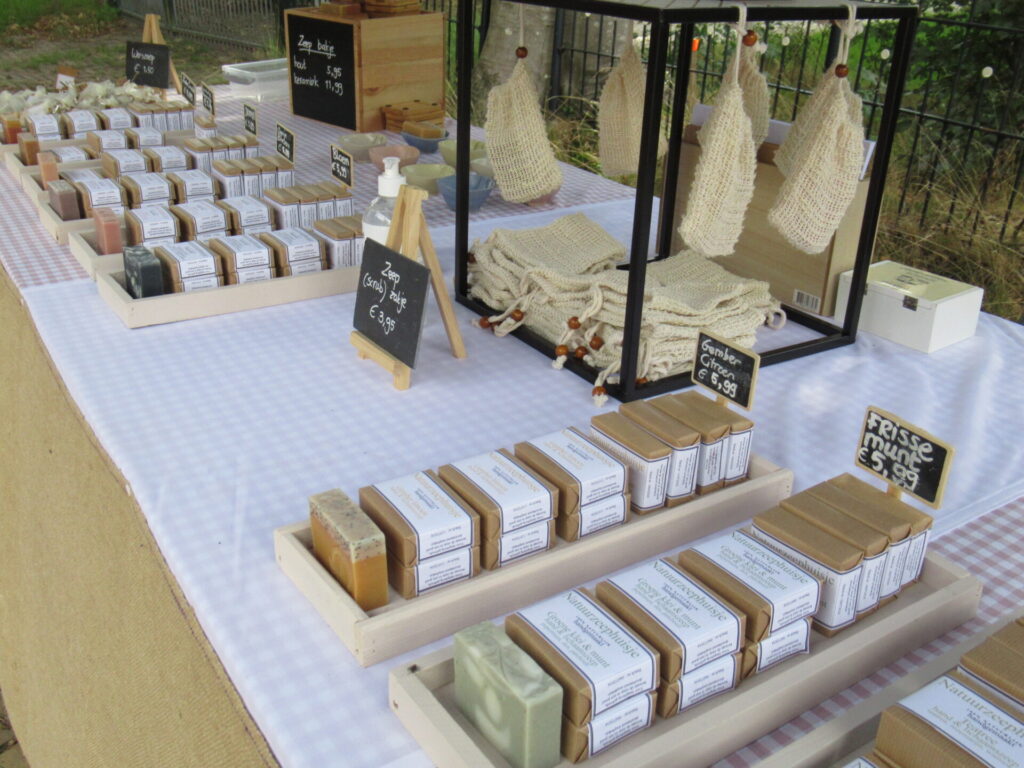
Another fairly new face here, is soap maker Melanie’s. She didn’t actually want to show her face here (I understand – I’d feel just the same), but I’m happy with a few pictures of her soaps.
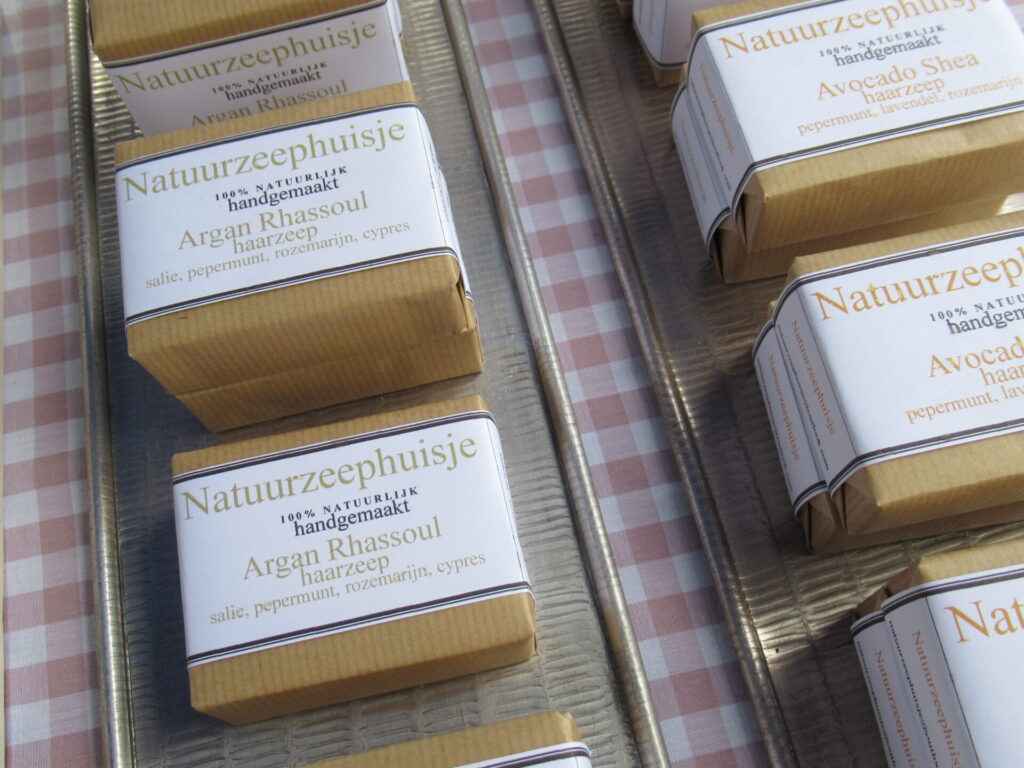
Melanie uses only natural ingredients, including flowers, plant extracts and essential oils. In addition to hand and body soaps, she also makes hair soap bars (to be used instead of shampoo).
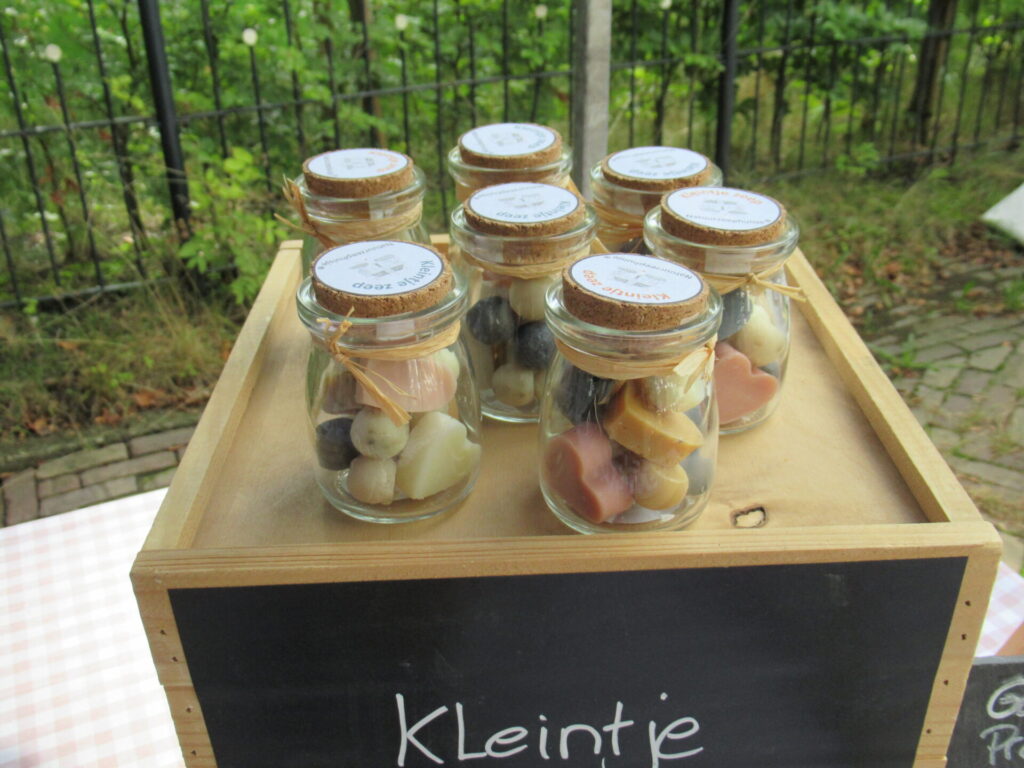
She also sells a mixture of different ‘tastes’ and shapes in jars.
I first bought one of her handmade natural soap bars last year – cinnamon soap with poppy seeds as a scrub element. I loved it! This year I went back for more, not just to wash with, but also as accessories for photographs of my next knitting design. I’ll tell you more about that next week or the week after.
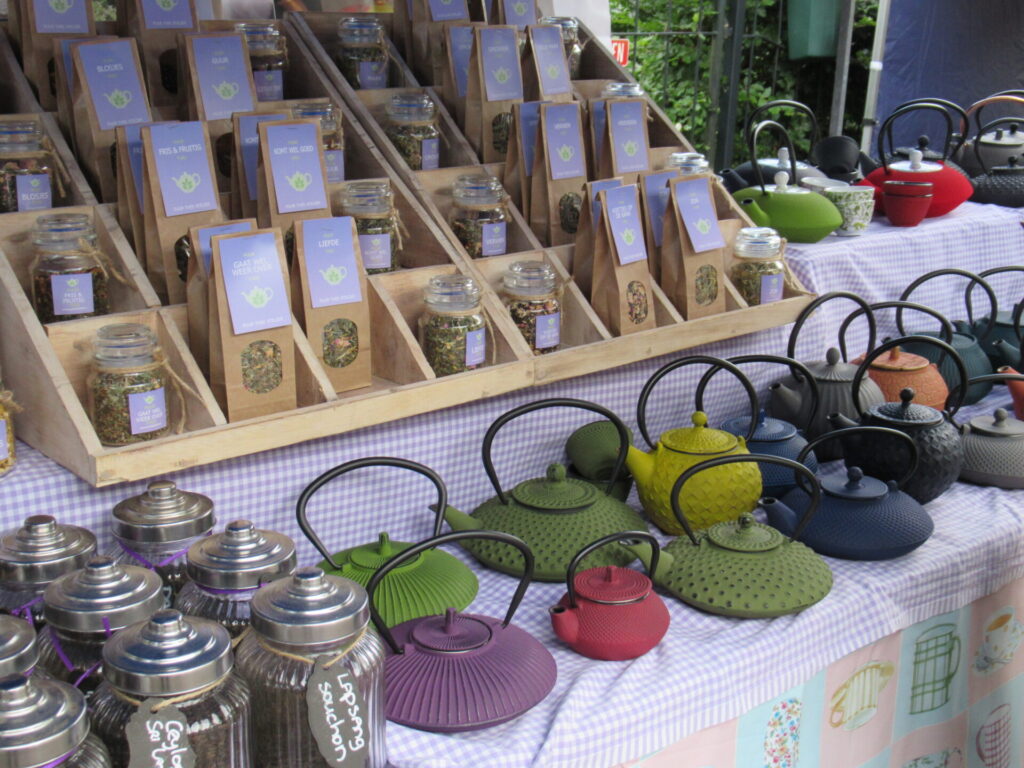
Our next stop is the tea stall. Liesbet blends all her teas and tisanes herself, using organic ingredients. Her blends have fun names like ‘feet-up-on-the-sofa-tea’, ‘shivery-weather-tea’ and ‘everything’s-gonna-be-fine-tea’.
What makes this market so special to me is its small scale, the relaxed atmosphere, and especially the people, like goat farmer Doetie, tea blender Liesbet, and soap maker Melanie. Their products are totally different, but all made with much love, expertise and their own two hands. (None of them have webshops, or I would link to them here.)
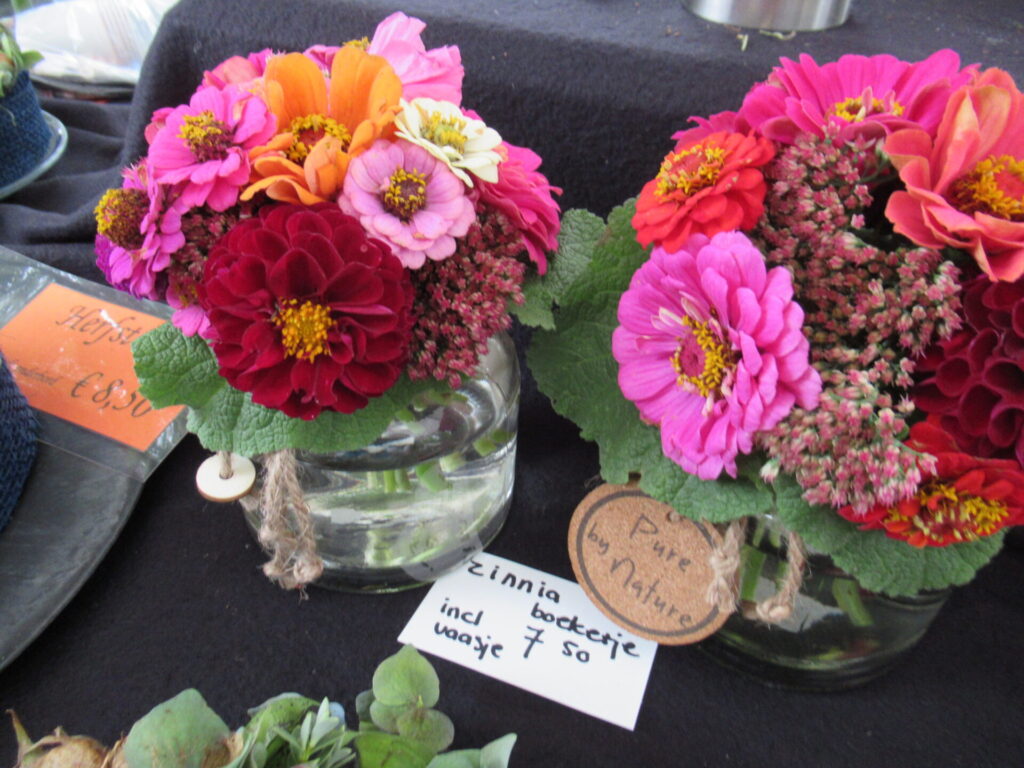
And here is another pair of hands – that of the flower lady (I don’t know her name).
A wreath similar to the one she is working on still graces our dining table.
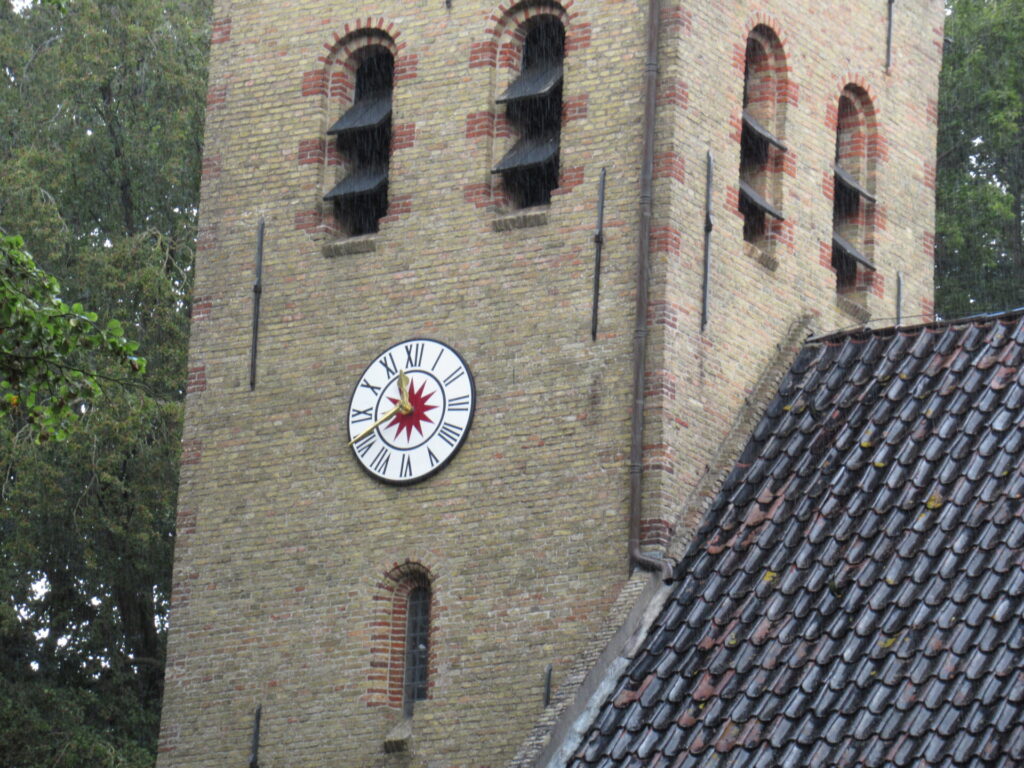
Well, the clock on the church tower tells us it’s time to head home for some lunch. Have a lovely weekend and I hope to see you here again next week!
How are things going in your part of the world? I really hope that you are safe and well, and have enough to do to keep your hands occupied and your mind free from too many worries.
Here, in the Netherlands, we are still spending an inordinate amount of time at home, or thús, as the Frisians say. And what better thing to do at home than knit? It’s utterly comforting and relaxing. Plus you end up with something nice for yourself or someone else.
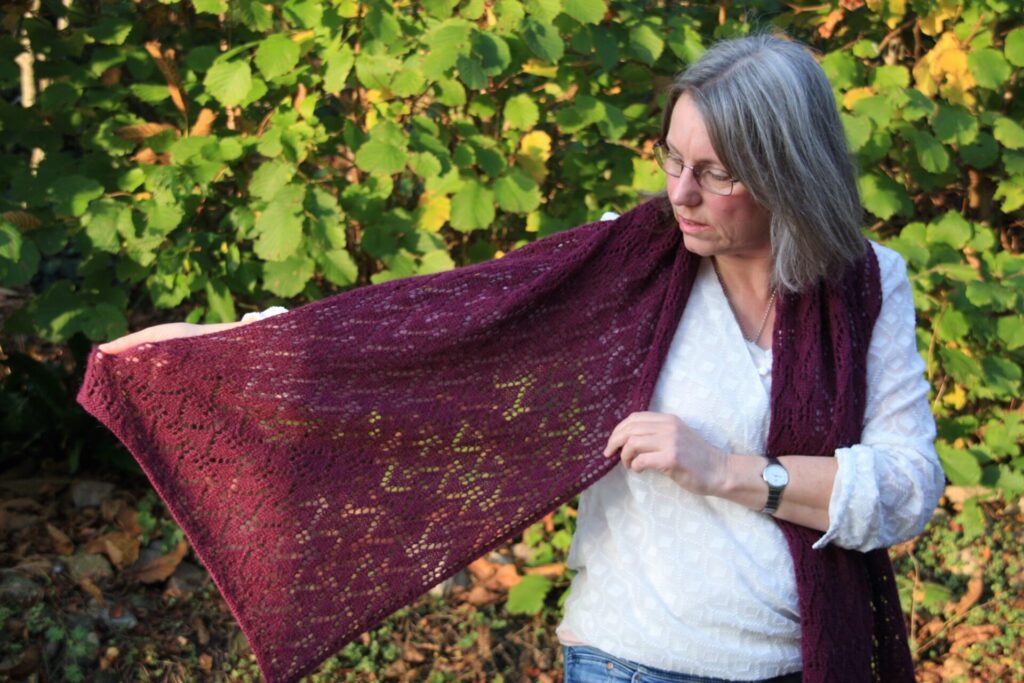
So, high time for a new version of Thús, a pattern I published earlier this year. Here it is – Thús 2!
The original version of Thús was a one-skein project, with an all-over stitch pattern of rows of interconnected houses.
Thús 2 is covered in the same tiny houses, but is wider and longer. And it is a scarf instead of a loop – a bigger symbolic hug for yourself, a friend or a relative.
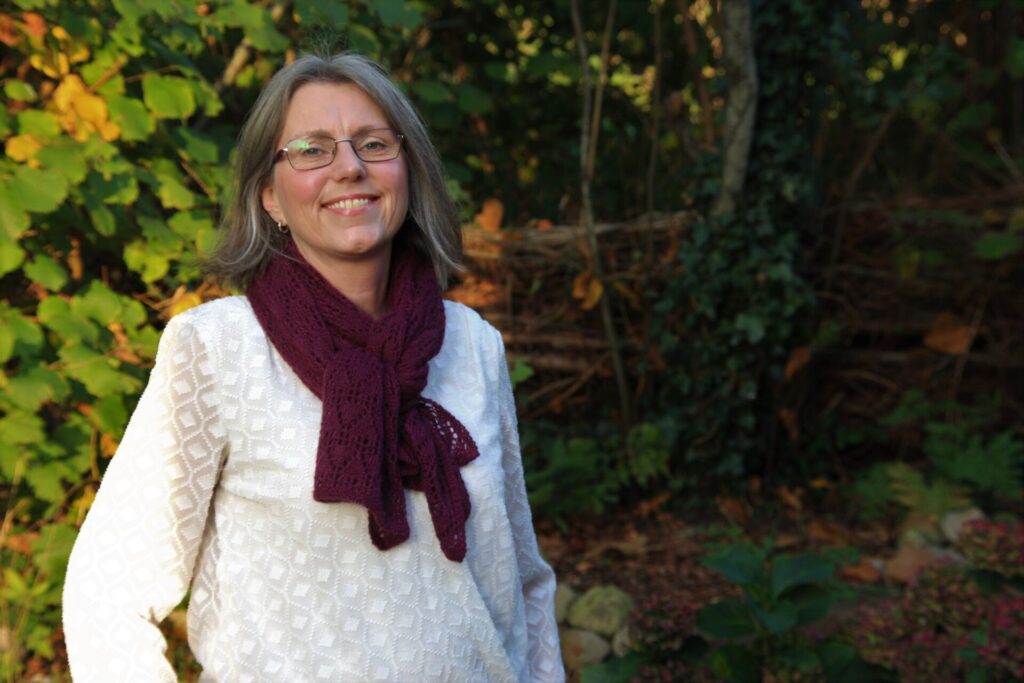
I hate having my pictures taken, but my beloved photographer was patient, I called upon my inner Doutzen Kroes (who also grew up in Friesland, by the way), and we actually ended up with a few in which my eyes aren’t closed.
Thús 2 is long enough to be worn wrapped around the neck.
Or folded in half with the ends pulled through the loop.
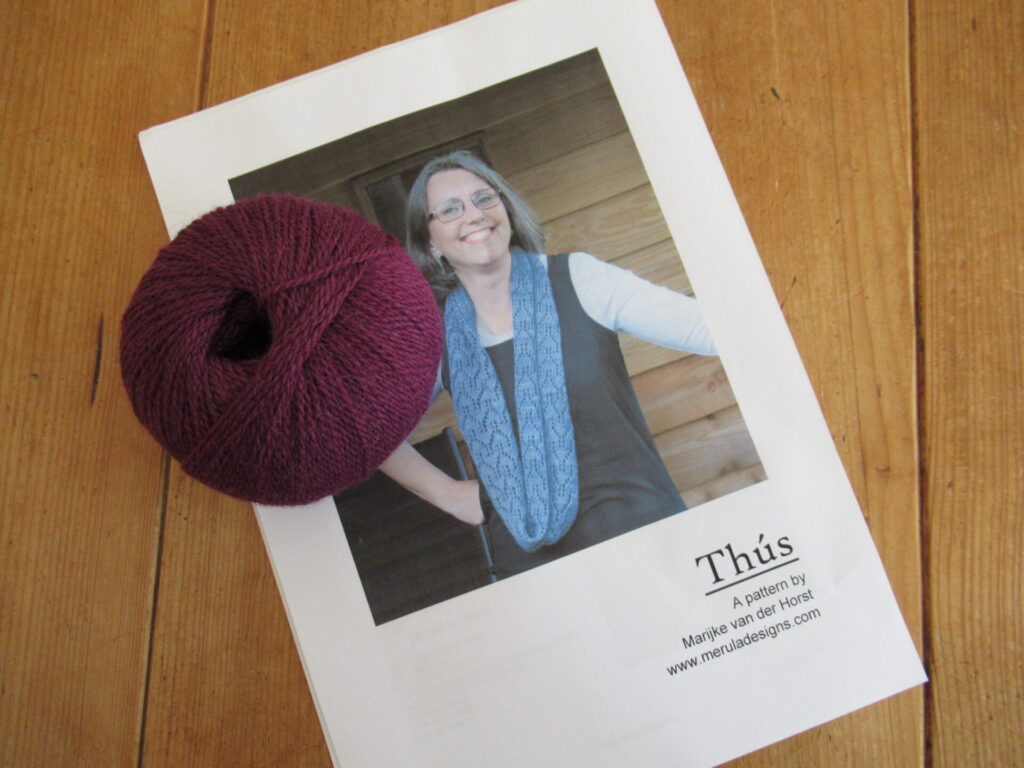
Thús 2 may look like a lot of knitting, but it isn’t really. It takes four 50-gram balls of fingering-weight yarn. That is the same quantity as two pairs of socks. I won’t say it is done in a jiffy, but on 3.5 mm (US 4) needles it is a fairly quick knit. And an enjoyable one, too, I think/hope.
The yarn I used is Pascuali ‘Balayage’, a blend of 20% organic merino wool and 80% baby alpaca. The wool is certified organic. The alpaca isn’t certified, but is produced sustainably. Both fibres are produced in Peru, where the yarn is also spun and dyed.
This was a delicious yarn to knit with! (I’m not sponsored to say this – it is my own honest opinion.) It is very, very soft and smooth. To my mind, the yarn has the best of both worlds. It has the drape and smoothness of alpaca, but thanks to the wool content it isn’t as ‘limp’ as 100% alpaca can be. I think it is ideal for lace and will also show up other stitch patterns very well. I don’t agree with the yarn producer that it is suitable for Fair Isle knitting, though. Imho it is too slippery and not stretchy enough for that.
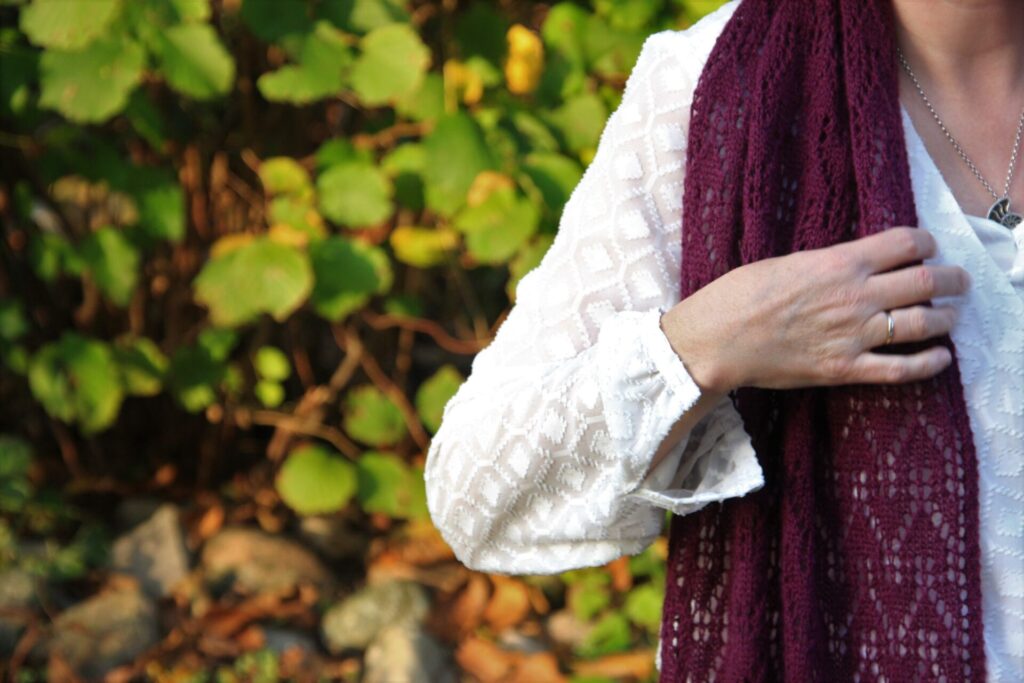
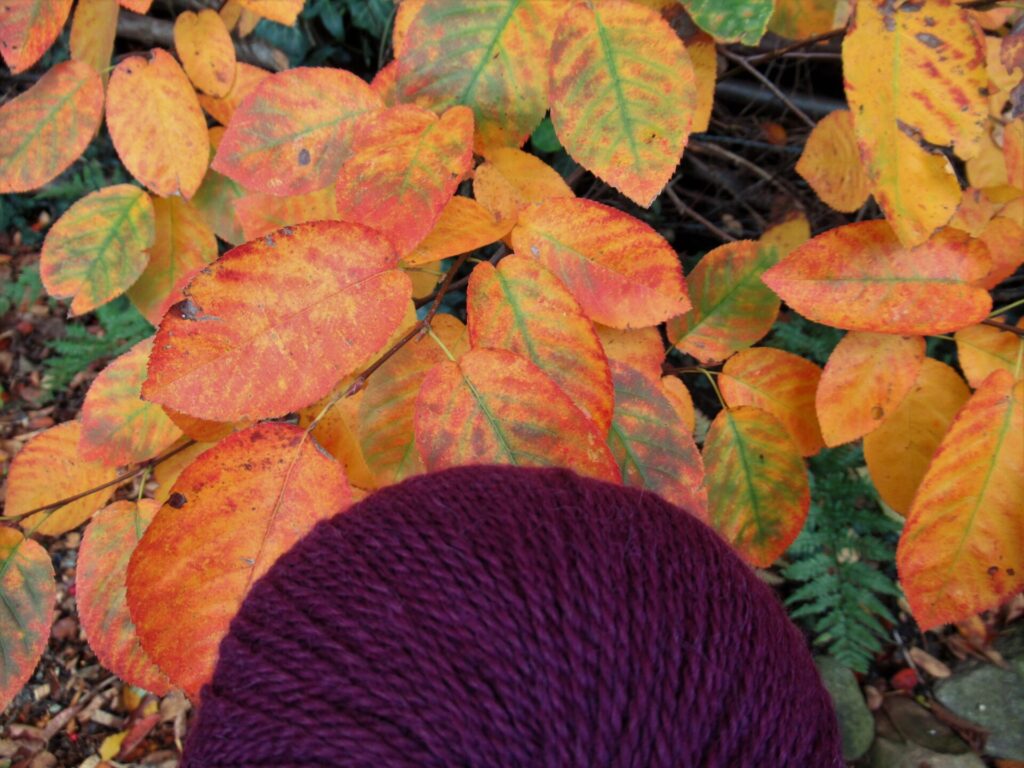
Something that doesn’t show in my dark plummy shade, is that part of the alpaca is grey, which gives the lighter shades a lovely heathered look.
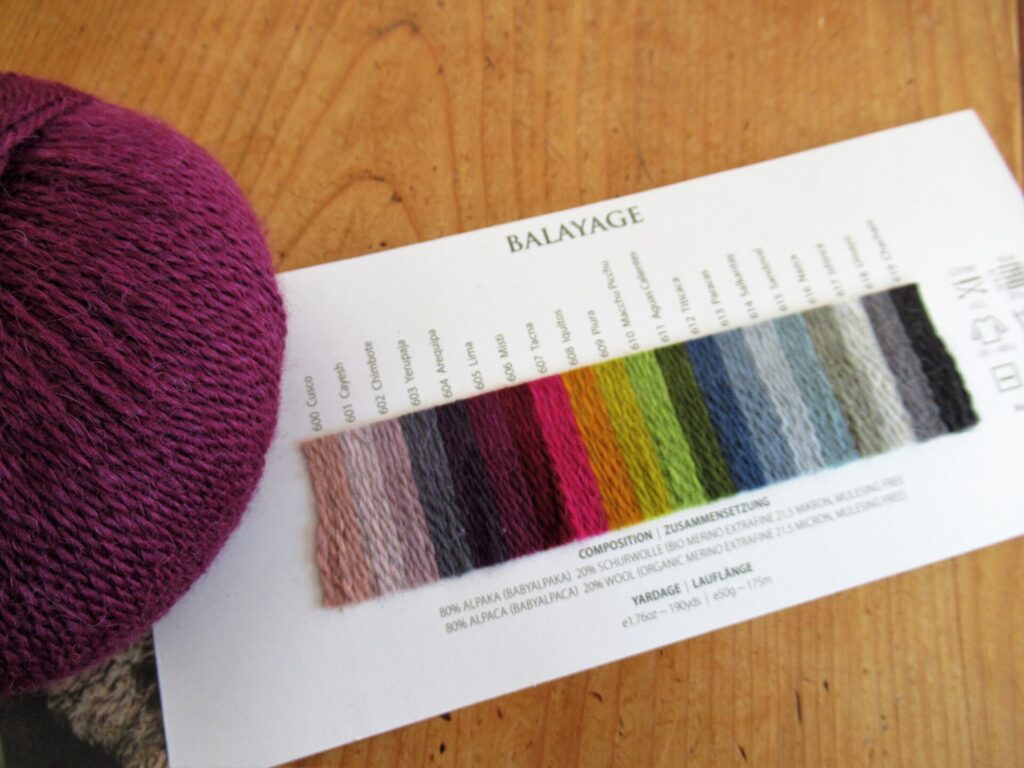
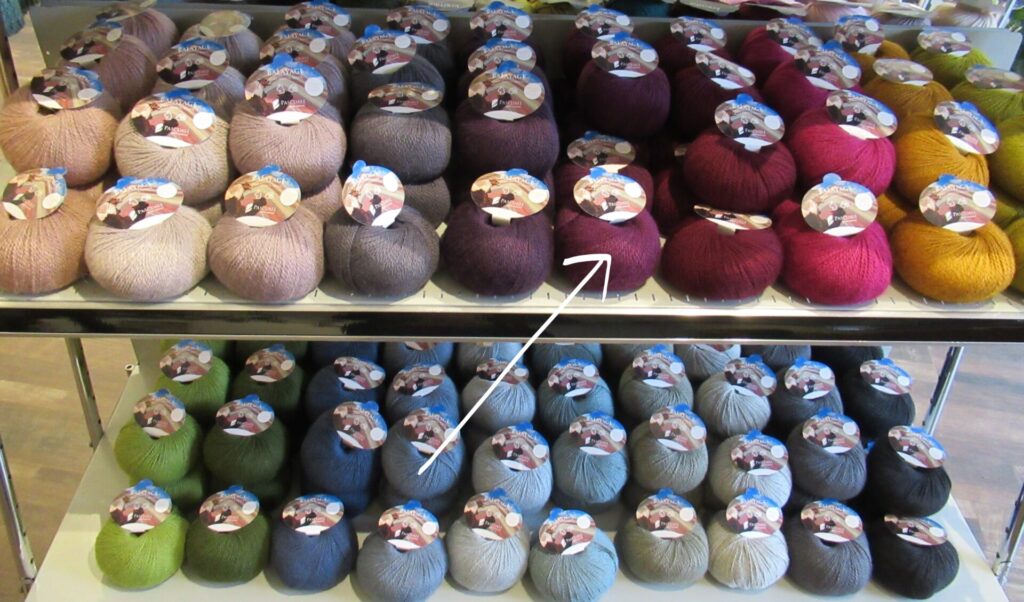
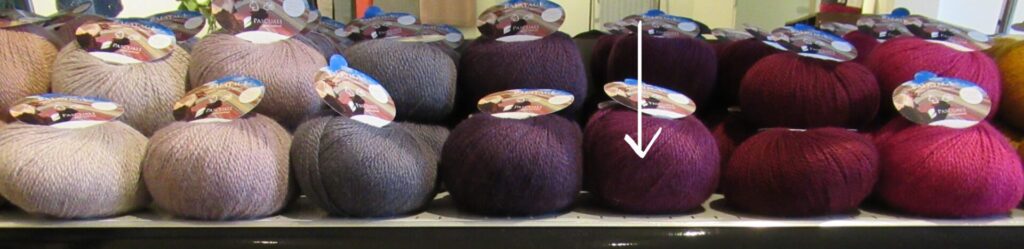
Although I have a shade card (I love shade cards!) it works best for me to choose colours in real life, in the skein or ball. From the rainbow of gorgeous colours at the not-so-tiny-anymore yarn shop I recently wrote about, I chose a shade called ‘Lima’ after the capital of Peru.
What always helps me choose, is seeing colours in relation to each other. Take the gradient of pinks and purples below. Lima is on the darker end of the spectrum. Compared to the burgundy to the right of it and the eggplant to the left, it isn’t really purple or red, but something in between.
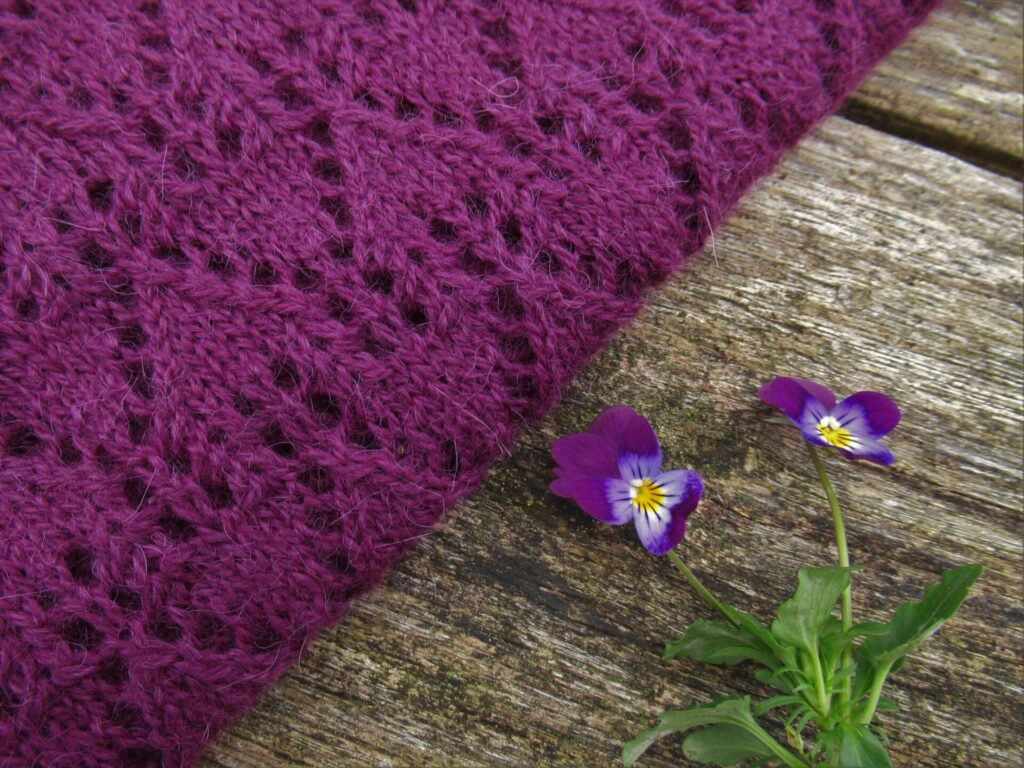
I made this Thús 2 for a friend, in lieu of a real hug. She has a cardi in the same kind of red-purple that looks very good on her, and I am fairly confident that she’ll like it.
(That I wrote about the yarn I used in so much detail, is just because I’m a little obsessed with yarn. Please don’t feel that you have to use the exact same yarn if you’d like to make a scarf like mine – 200 grams of another, similar fingering-weight yarn will be fine, too.)
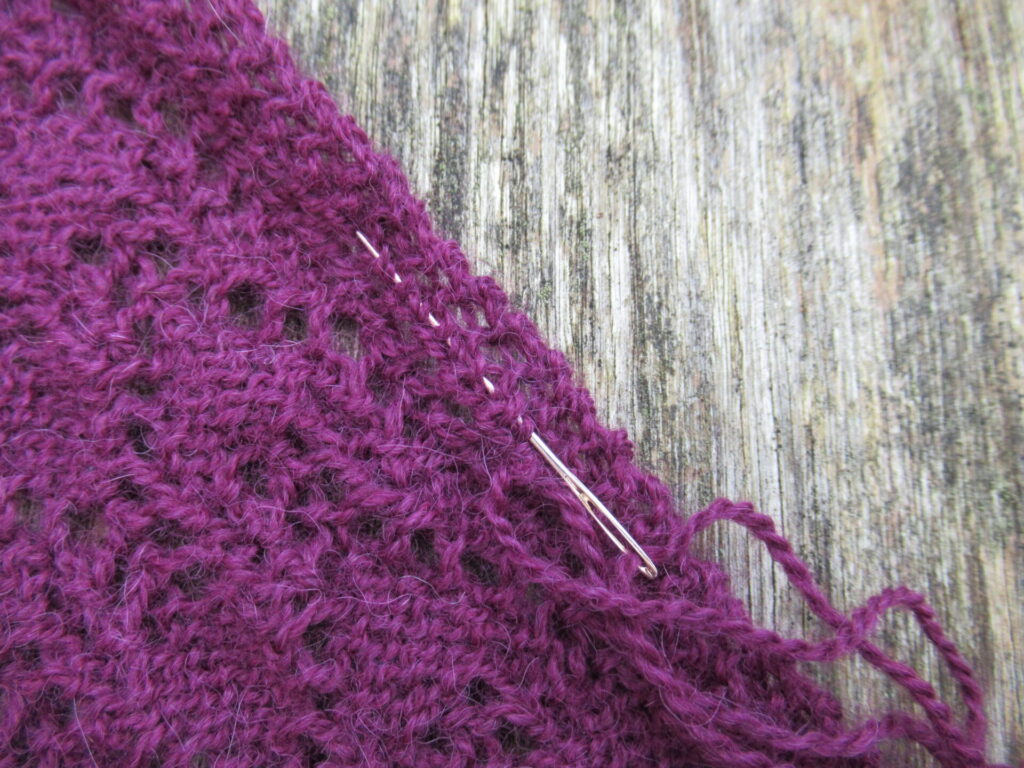
Here is a tip for starting a new ball and weaving in the ends invisibly. (This also applies to the original version, and any other shawl or scarf with garter stitch edgings.) In my experience the best place to do this is on the inside of the narrow bands of garter stitch along the long sides. This is what I mean on the wrong side:
And if that picture isn’t clear enough, this is the place indicated on the right side (the actual weaving-in is done on the wrong side).
Well, I think that is all I can tell you about it for now. After the original Thús, I hope you like Thús 2, too.
Oh, and like the original version, Thús 2 is a free pattern – a small positive gesture in this challenging time. If you’d like to take some positive action in return, please consider making a donation to an organisation supporting refugees, other homeless people, or children/adults in unsafe home situations.
Thús 2 can be downloaded here from Ravelry (available in English AND Dutch, also to non-Ravelry members)
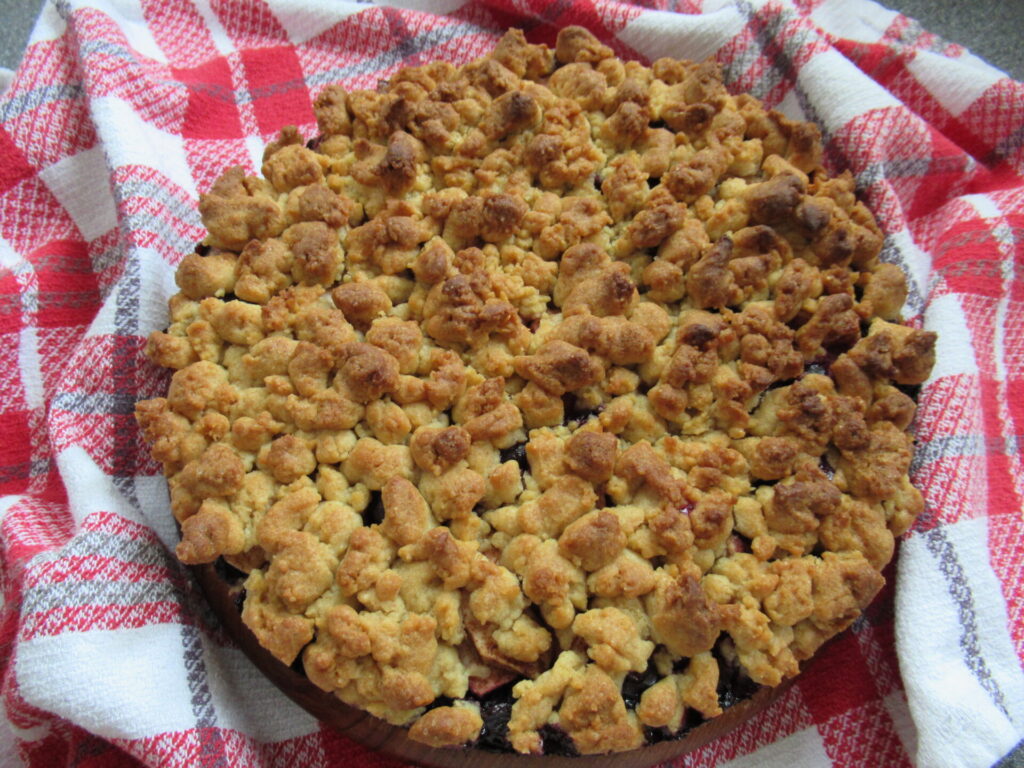
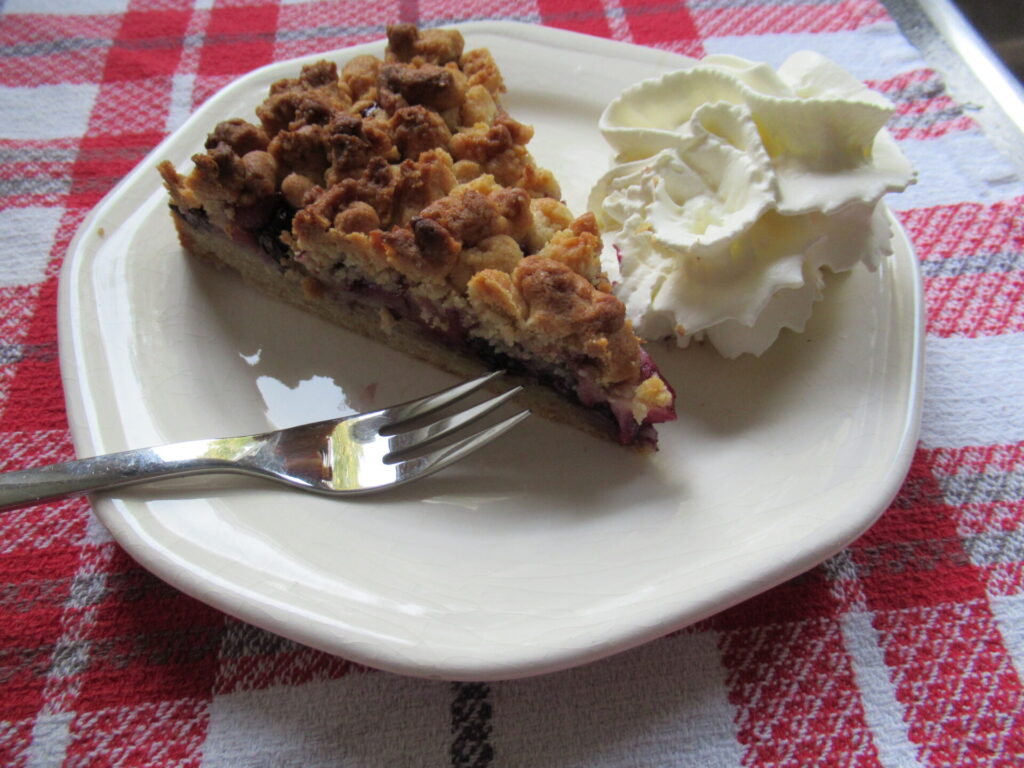
Several of you have asked me for the recipe of the apple-and-blueberry pie I baked at the start of our autumn break. Your wish is my command (sometimes), so here it is. (For those of you not interested in recipes, just scroll on for a ramble and a tiny bit of knitting.)
Apple-and-Blueberry Pie
For a 24 cm/9½” ø spring form cake tin Makes 8-12 slices
Ingredients
200 g unsalted butter
200 g sugar
1 medium egg
½ tsp vanilla extract
200 g plain flour
200 g wholewheat pastry flour
12 g baking powder*
A pinch of salt
2-3 apples (depending on size)
150 g blueberries**
1 level tsp cinnamon
* I like making my own half-and-half mixture. Instead of the two types of flour and baking powder you can use 400 g of ordinary or wholewheat self-raising flour. (Voor mijn Nederlandse lezers: ik gebruik een mengsel van gewone bloem, gebuild tarwemeel en wijnsteenbakpoeder i.p.v. zelfrijzend bakmeel) ** When using frozen blueberries, the pie may take a little longer to bake
Method
Preheat the oven to 200 ˚C/400 ˚F (180 ˚C/350 ˚F fan oven) and grease the cake tin
Cream the butter with 175 g of sugar
Mix in the egg and the vanilla extract
In a separate bowl mix the flours, salt and baking powder. Sieve these dry ingredients and gradually mix them into the butter, sugar and egg mixture to a slightly crumbly dough
Peel, core and slice the apples. Mix the apple slices with the blueberries, cinnamon and remaining sugar
Cover the base of the tin with two-thirds of the dough, pressing it in evenly
Pour in the apples and blueberries
Cover with the rest of the dough, crumbled coarsely
Bake the pie for about 40 minutes
Leave to cool completely before removing from the tin
Enjoy!
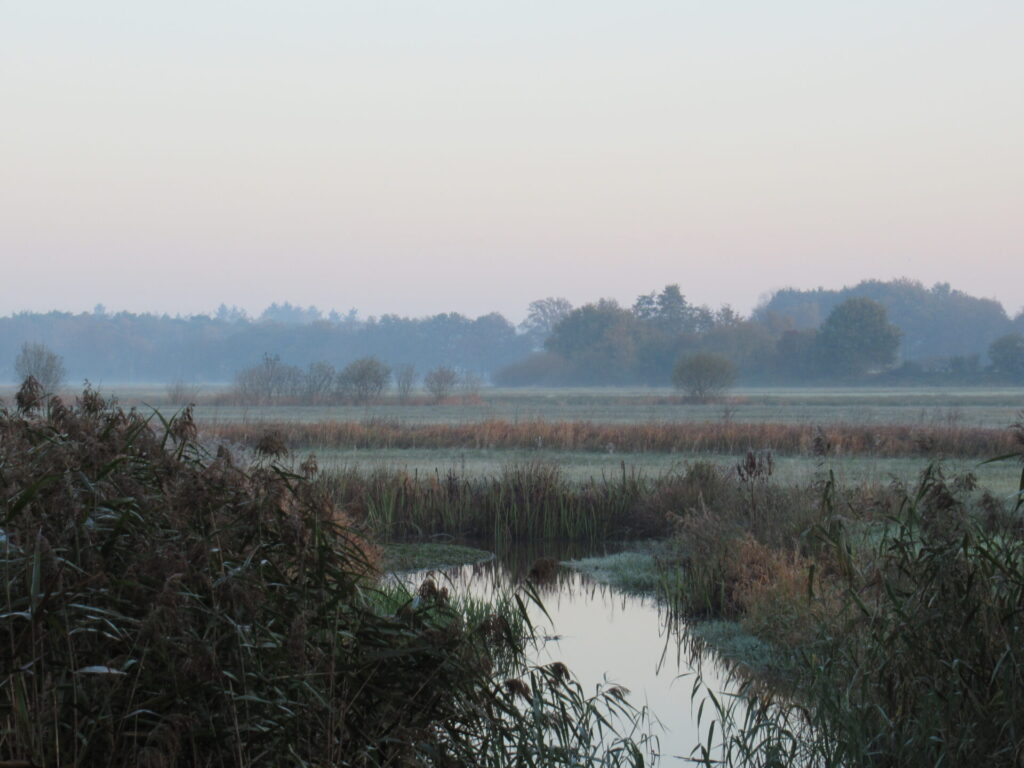
Now, let’s go for a ramble. It’s early Sunday morning in one of our favourite places. There has been a slight ground frost and the light is hazy.
This is a small-scale landscape with a meandering brook, some open marsh and farmland, and some woodland.
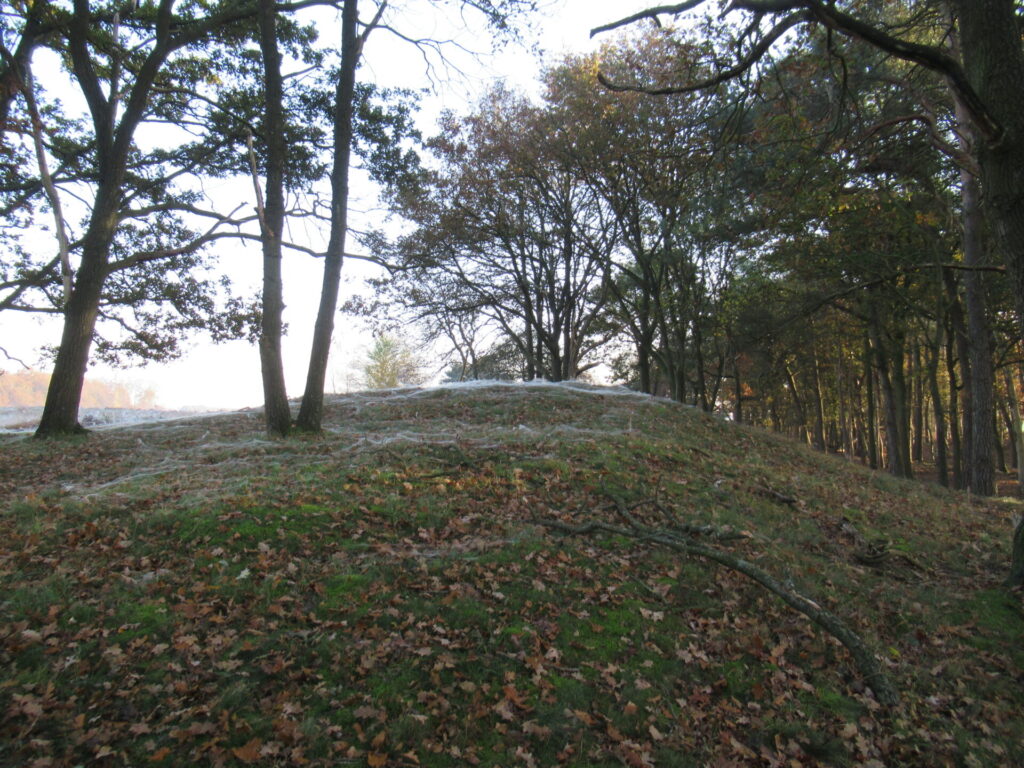
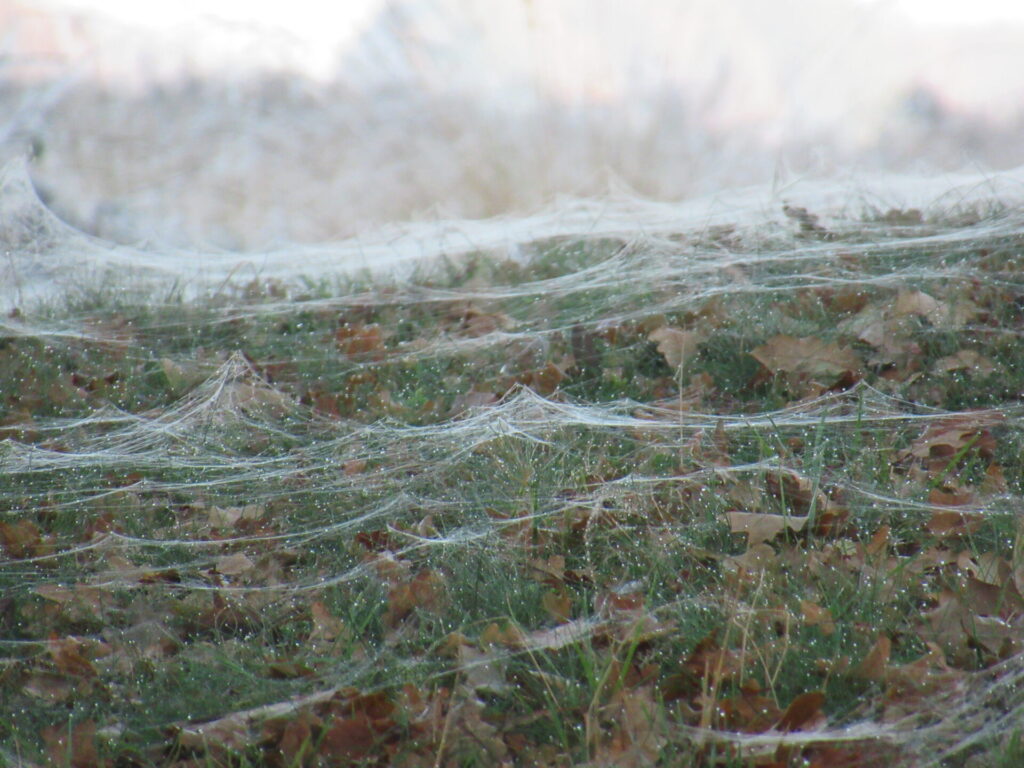
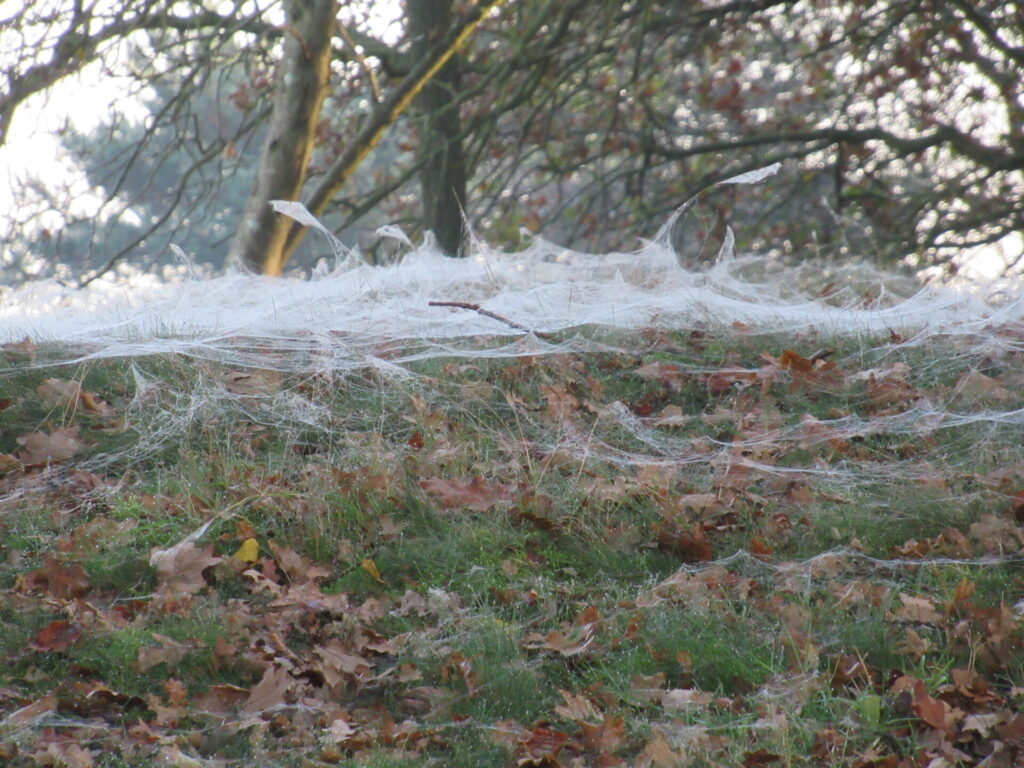
When it is getting a little lighter, the sun slants across a hillock, showing a strange sort of white veil on the top. What is it?
Zooming in it becomes clear that the grass and fallen oak leaves are covered in spiders’ webs.
A slightly eerie but beautiful blanket of spiders’ webs.
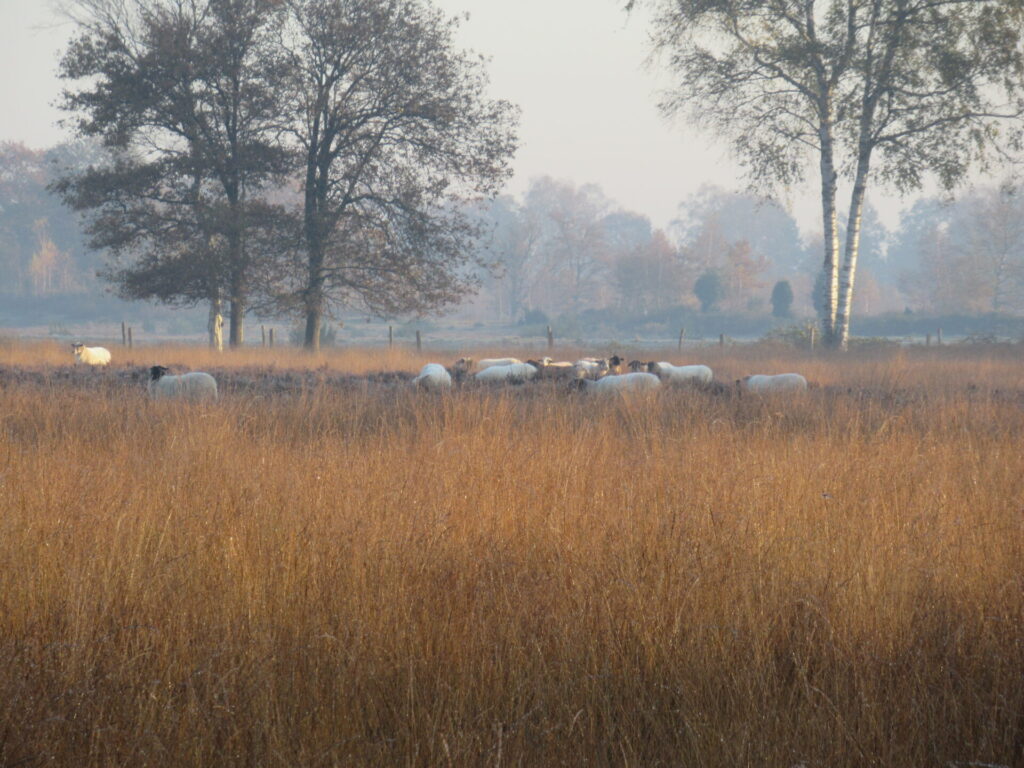
There is some heather as well, although it is partly overgrown with purple moor grass. A small group of sheep is grazing quietly. Not a sound to be heard. The highland cattle that also help keep the heathland open are nowhere to be seen today.
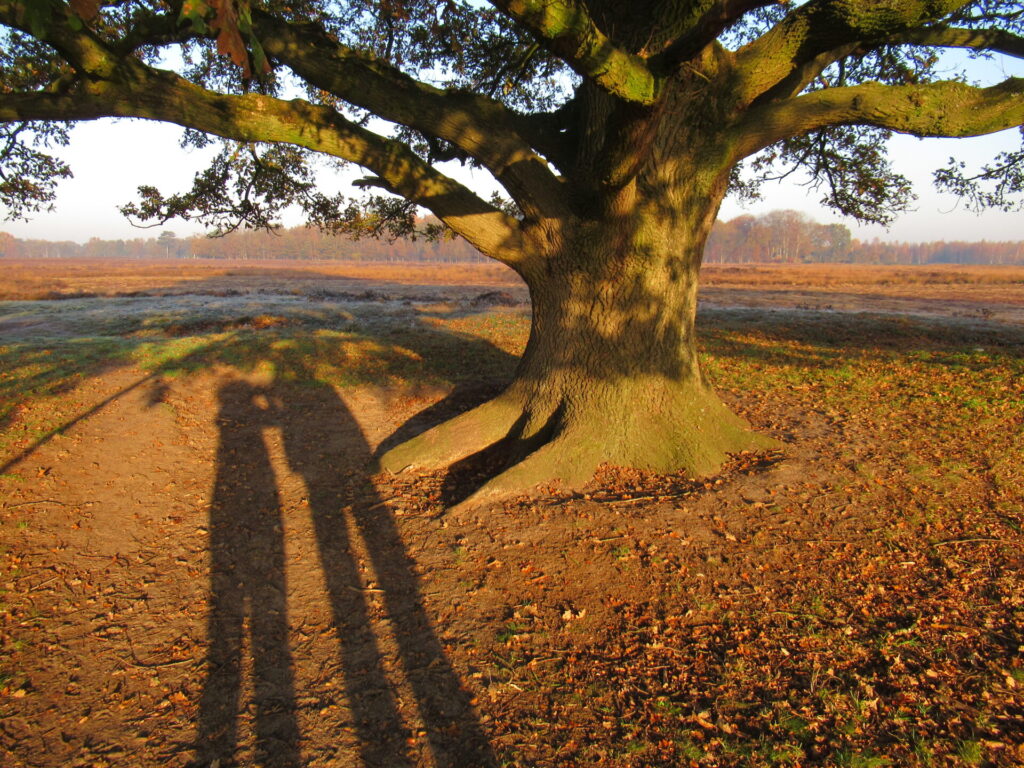
It is getting lighter, but the sun is still low, casting elongated shadows.
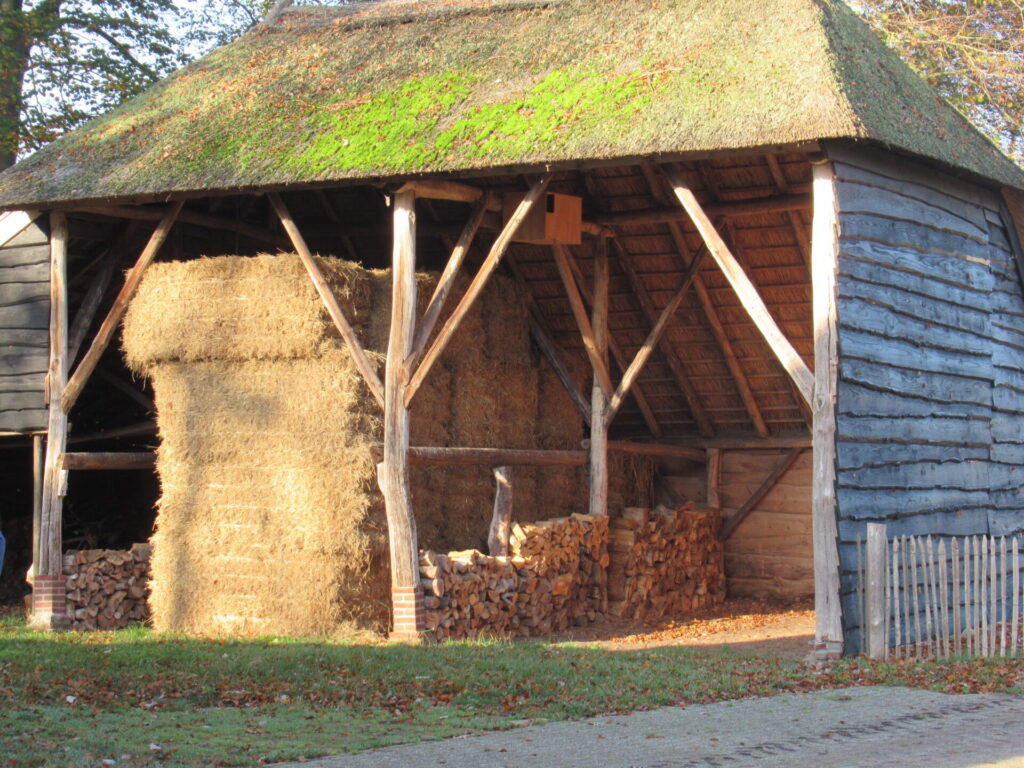
Towards the end of our ramble, the sun is fully out, giving the hay and wood in a barn a golden glow.
Time seems to stand still here.
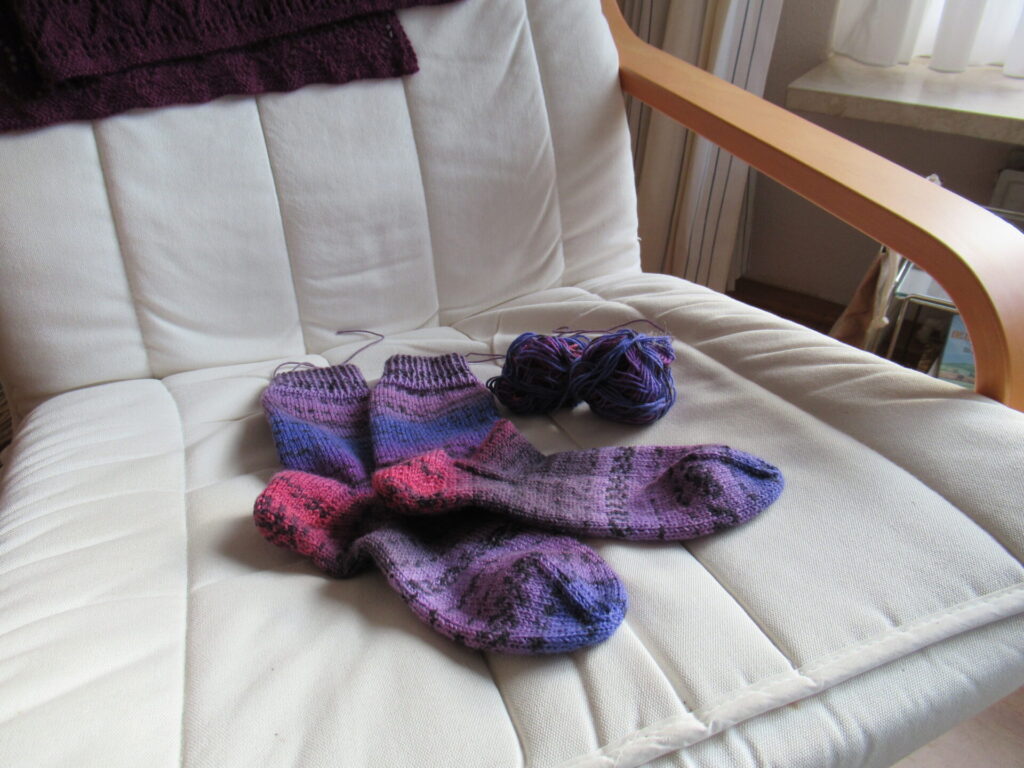
Not so at home. On the knitting front, I’m in the finishing stage of all kinds of things. I’ve just finished another pair of socks. Now there’s only the ends to weave in and then I can try out my new sock blockers.
And what’s that hanging over the back of my knitting chair…………?