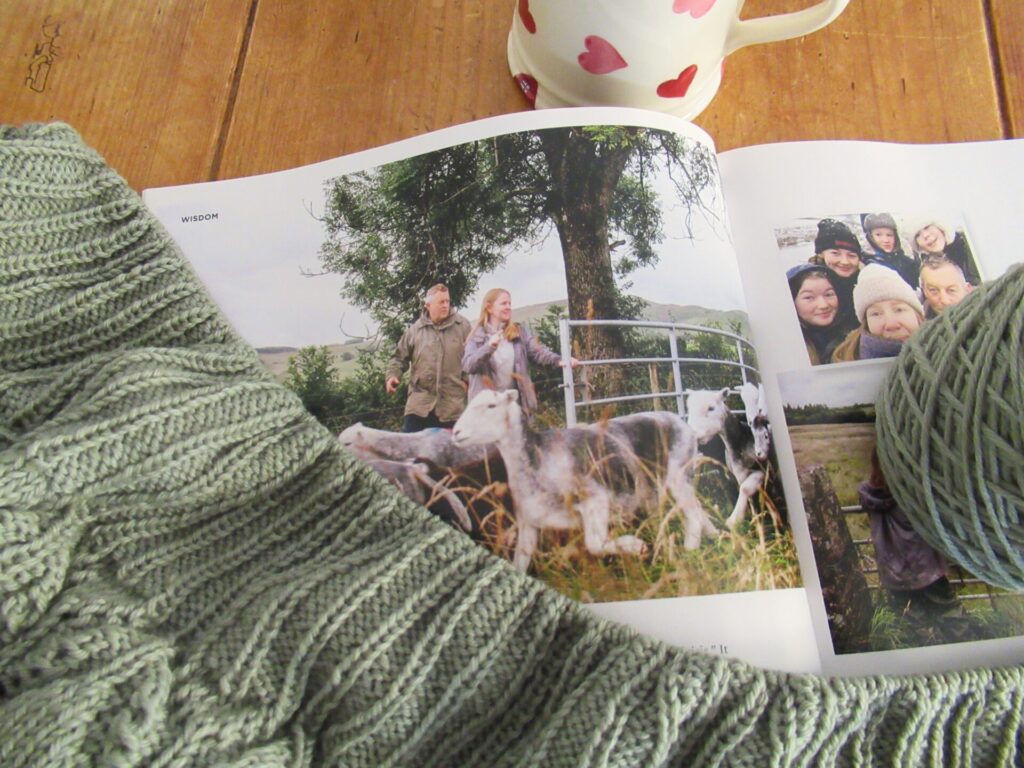
Together, my daughter and I have taken out a subscription to The Simple Things for a year. She gets the magazine in her letterbox first, and I get it when she’s read it. That means I’m always behind, but I don’t mind. I’m now reading the April issue, which contains an interview with James and Helen Rebanks. They have a farm in the English Lake District, are both authors and have four children aged 7 to 19.
One of the things that come up in the article is how they find balance in their busy lives, and Helen says something that really strikes a chord with me: “Rest is a huge part of regenerative agriculture. Plants need time to grow, time to flower,
time to set seed
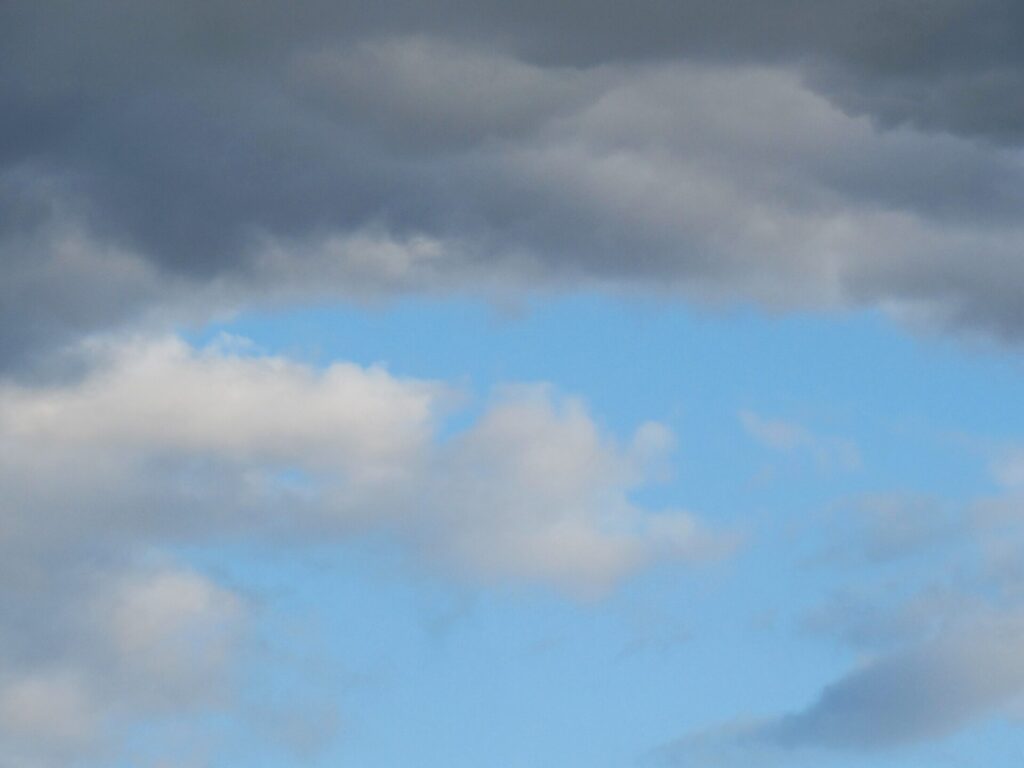
and time to recuperate. […] People are the same. We can’t push our bodies and minds to the max all the time. We need periods where things are slower and quieter, particularly as creative people. Sometimes we just need to stare out of the window
or take a walk and let things mull.” (Quote The Simple Things, April 2025, p. 49; photos mine.)
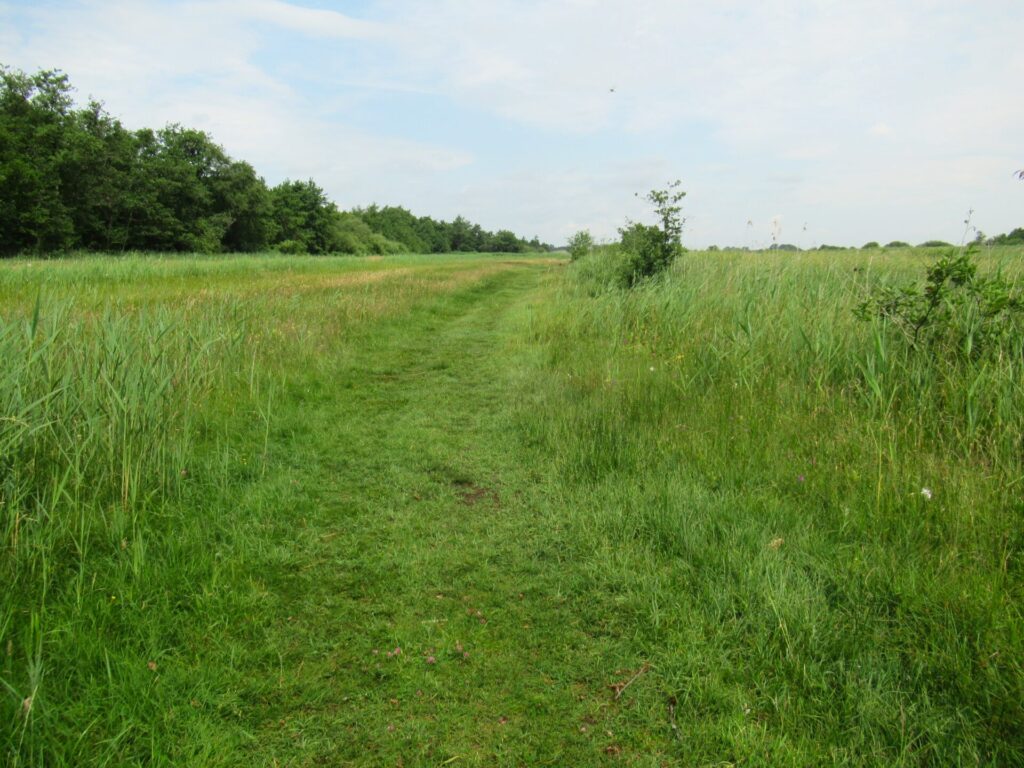
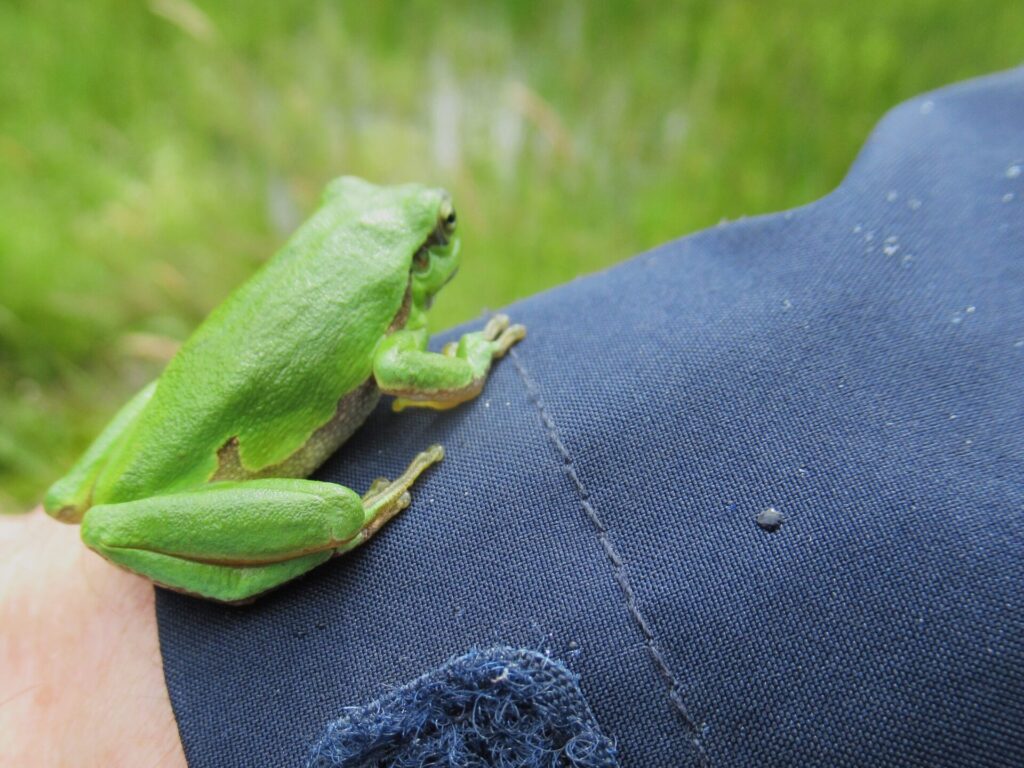
Yes, absolutely, hmm (can you see me nodding in agreement?). But what if you are too restless to rest? Hot summer weather does that to me. I really struggle with that, but have found some ways of dealing with it:
Take a walk every day no matter what.
Wear sunglasses. On the one hand, I hate having a barrier between myself and others and not being able to see the world in its true colours. On the other hand, aside from protecting my eyes, sunglasses also seem to give my brain some rest.
Snatch brief moments of rest and have a list at hand of small things to do during those moments. That may sound like a contradiction (resting – doing), but doing certain things (see below) can be more restful to me than just sitting around doing nothing.
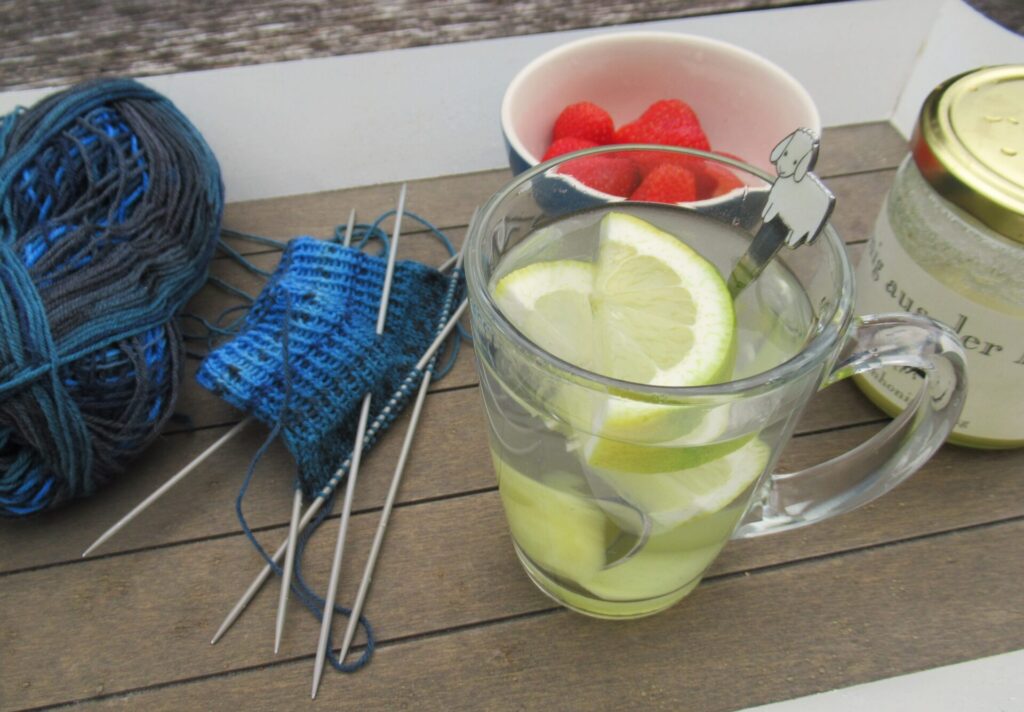
Read one article in a magazine. Or, if even too restless for that, just look at the pictures and/or cut some out and stick them in a scrapbook.
Listen to one song. Three of my favourites (in random order):
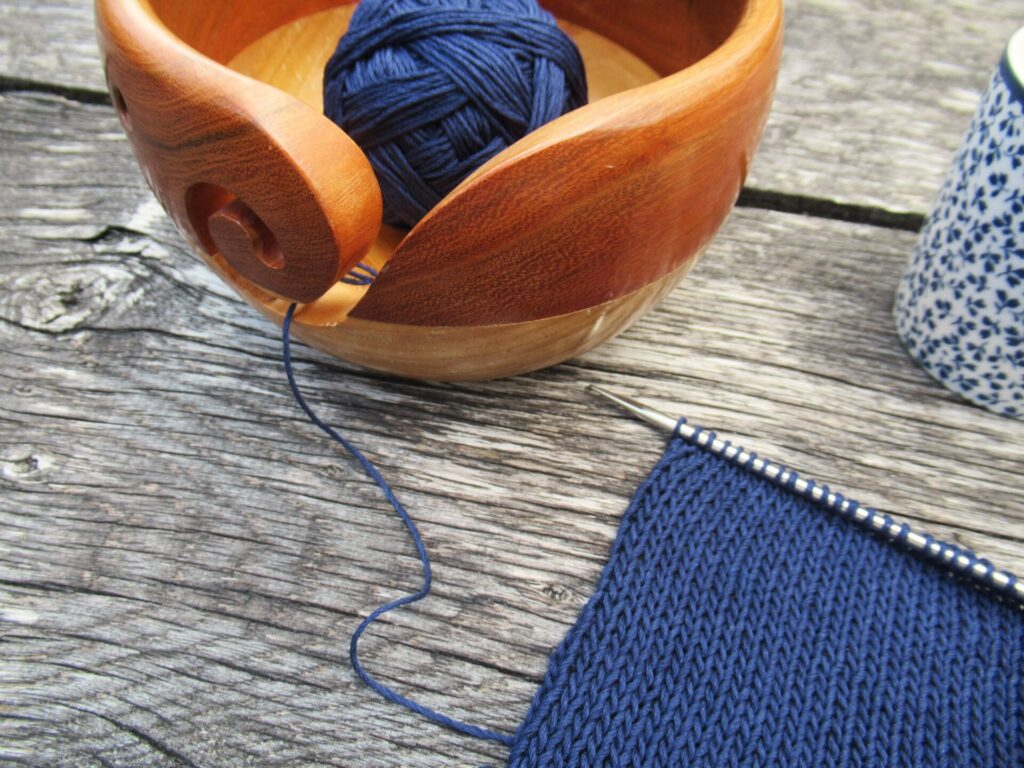
Play with colour – with pencils, water colours or yarn.
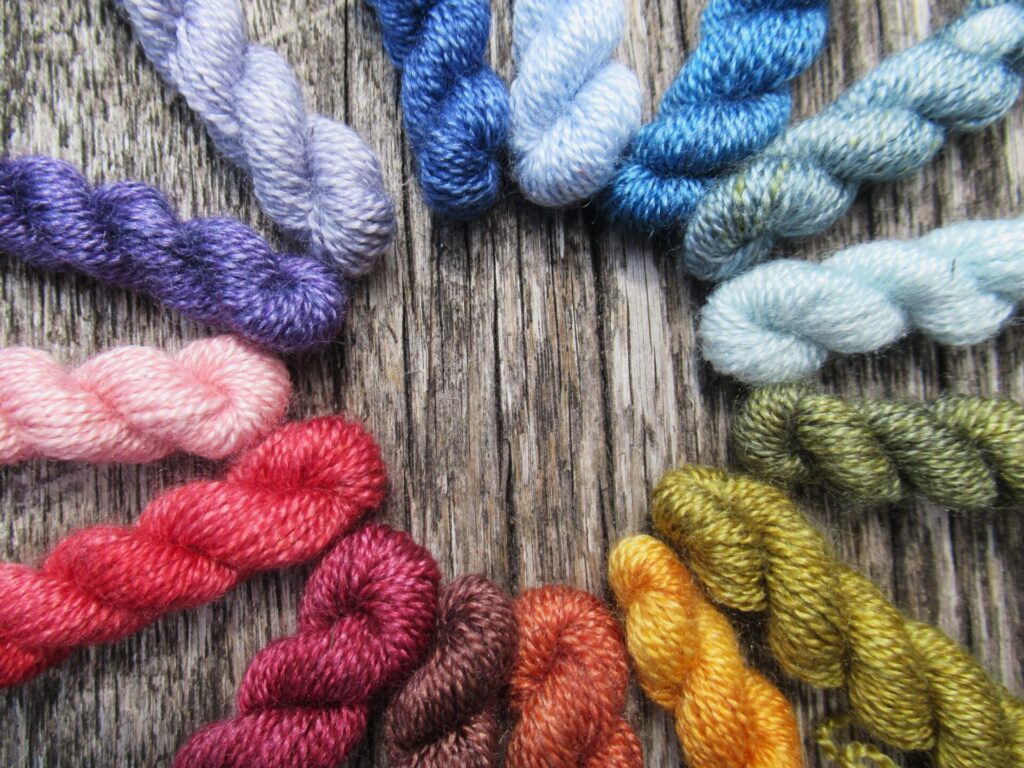
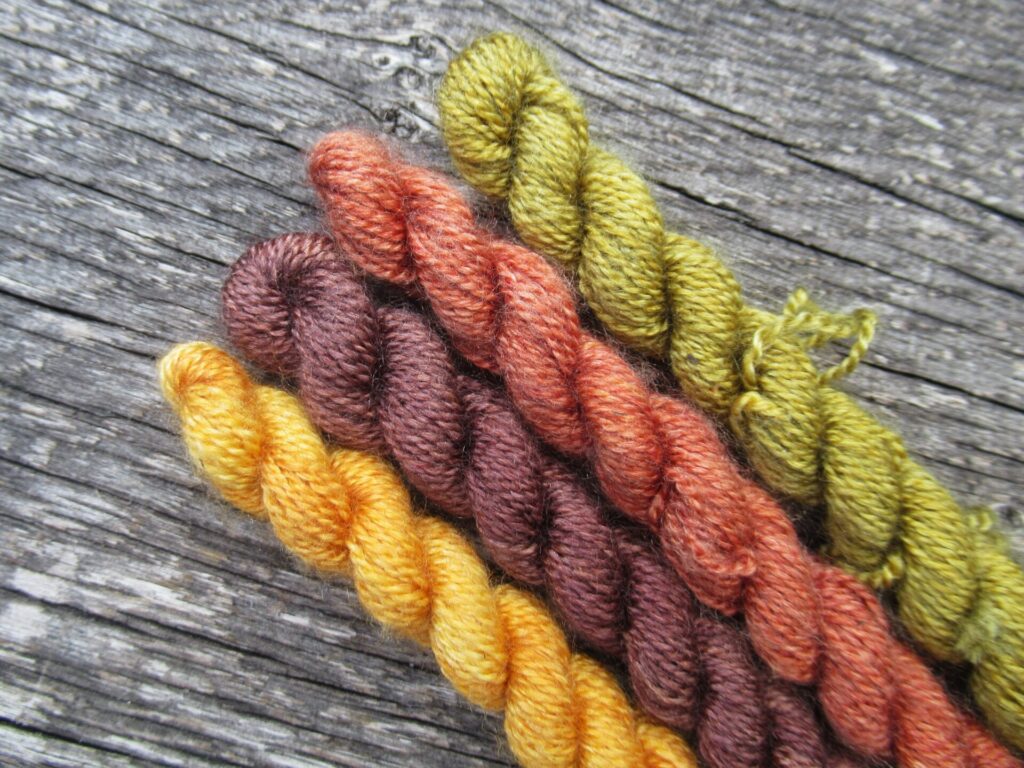
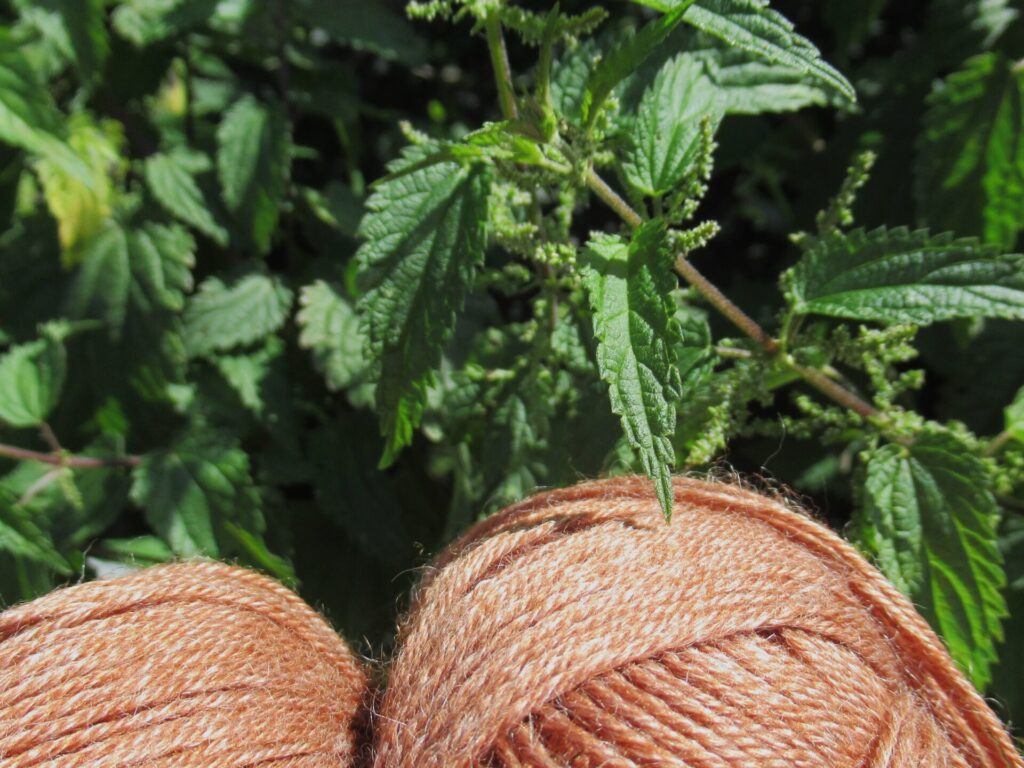
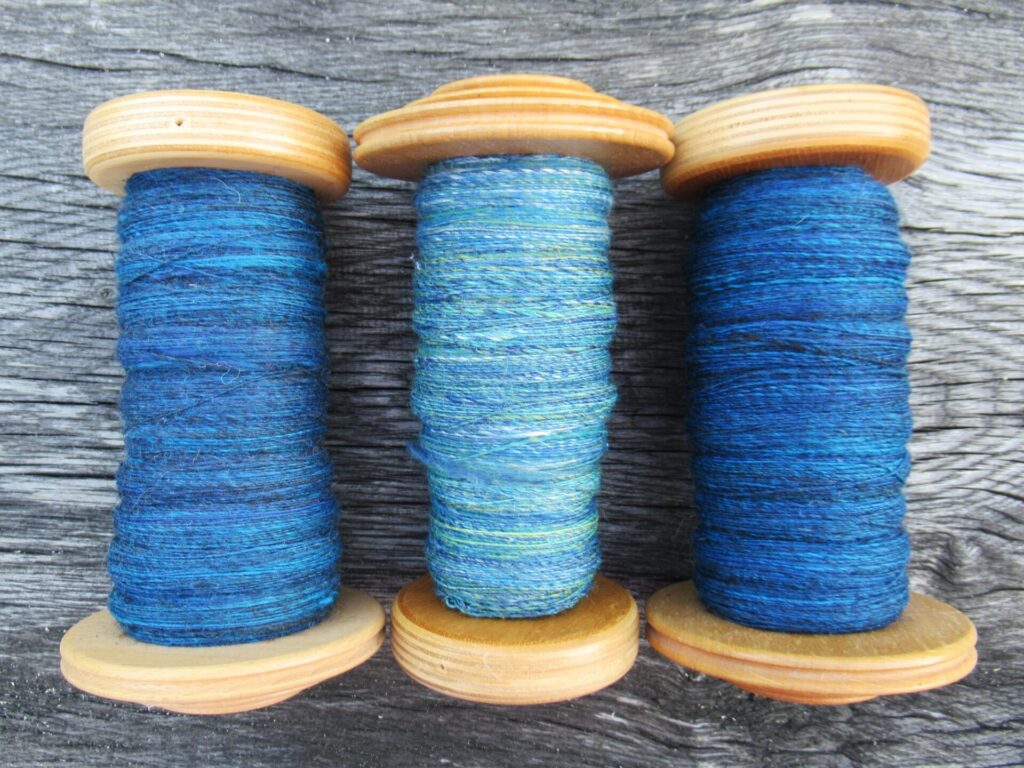
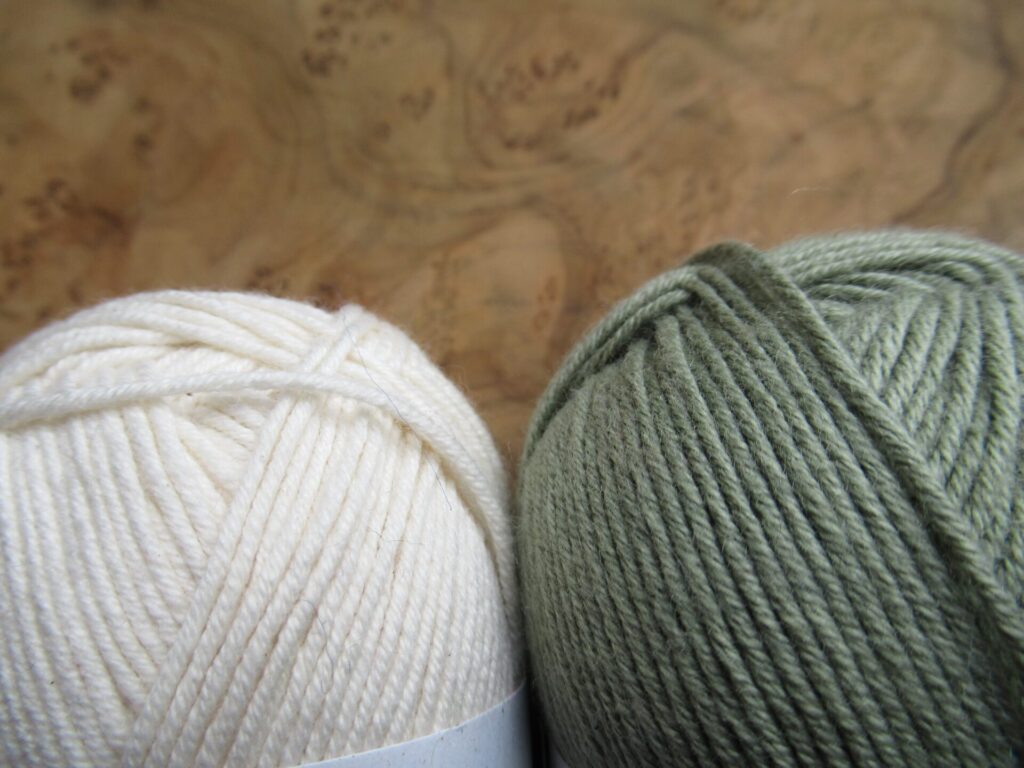
These beautiful little hanks were hand-dyed by Marianne of Lindelicht (who is taking the entire month of June off to rest). It is a blend of blue-faced Leicester wool and silk, and each hank is 3 g/24 m/26 yds.
Some yarns are so beautiful that I don’t use them because I’m afraid of ‘wasting’ them, but what’s the use of that when they are then languishing away in a dark corner? So I’m determined to do something with this yarn this summer, but what? It is sold as embroidery yarn, so that’s an option. Or could I use it for knitting or crochet? Or a combination of several techniques?
Something outside my comfort zone?
Or something inside my comfort zone?
Well, I hope this summer will bring you some time to rest, whether at home or away. We’re not going anywhere this summer, but I may take a short rest from blogging now and then. Or I may not – I just don’t know yet and don’t have a plan at all (eek! – that’s very unusual for me). Anyway, I hope to see you here from time to time. xxx
Hello! There is a green knitting project on my needles that I don’t think I’ve mentioned before. It’s a cardigan for our daughter – Be Mine, from Swedish designer Matilda Kruse. It’s a fairly long cardigan knit on smallish needles (3.5 mm/US 4), with an intricate stitch pattern on the back. The pattern is well-written but complicated, and I’m using all kinds of aids so as not to lose the way.
A row counter to remind me when to knit in button holes.
A sticky note for keeping track of where I am in the stitch-pattern diagram.
Another sticky note with the number of pattern repeats I need to knit written out, so that I can cross them off once I’ve knit them.
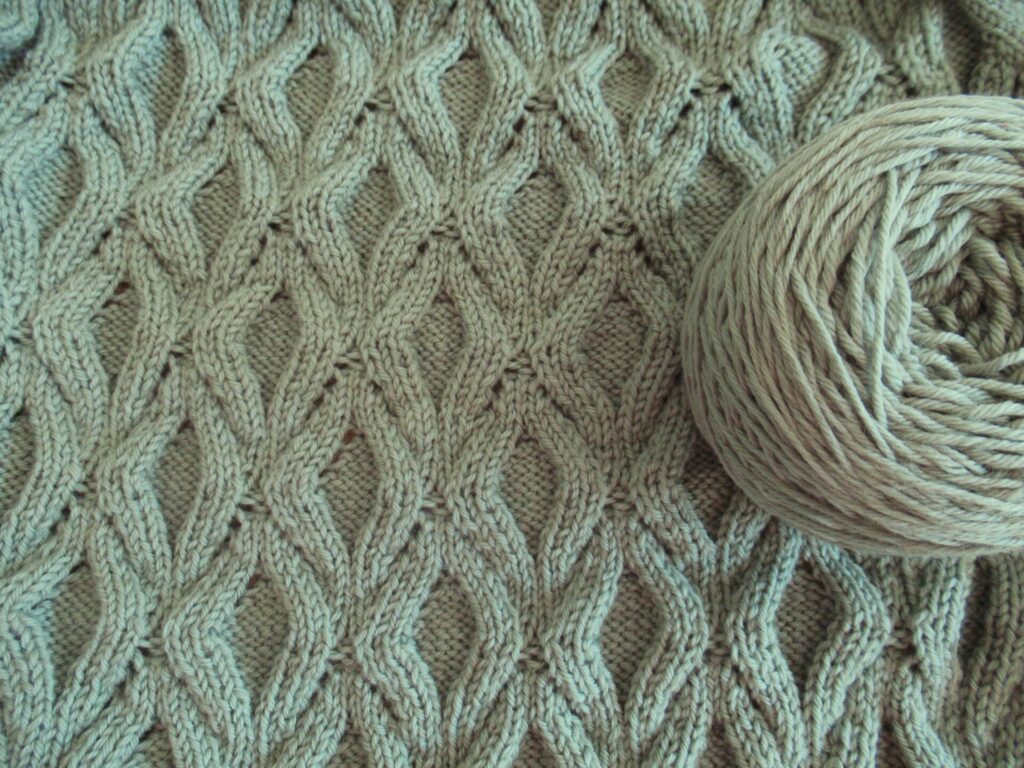
The yarn I’m using is ‘Cheeky Merino Joy’ from Rosy Green Wool in a greyish green shade called Reed.
It’s a sport-weight 100% merino yarn – a finer version of the yarn I’ve used for my OXOX XL shawl. Cheeky Merino Joy is very soft and gives great stitch definition. Plus it’s organic. And that brings me to my second subject for today.
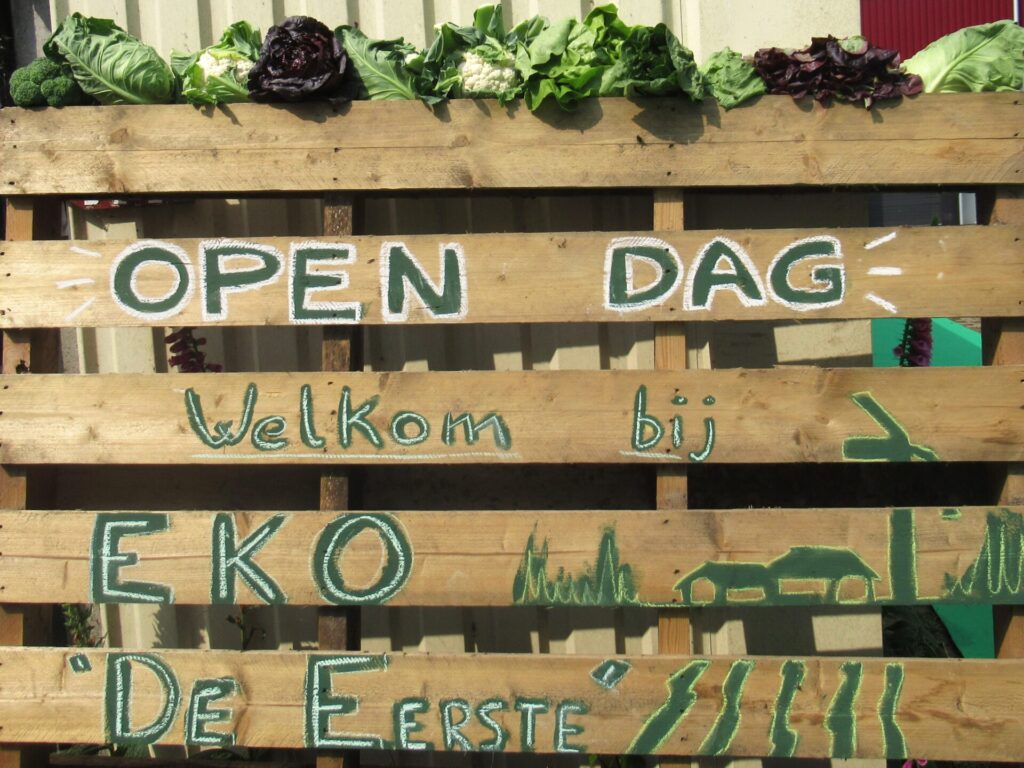
The organic farm that delivers groceries to our door every other week held an Open Day, together with 3 other organic farms within walking distance.
We buy organic because we think it’s better for our own health and that of the planet, but I’m not rigid in that. Often organic options just aren’t available or affordable. Not everything we eat is organic, I don’t wear organic lingerie and most of the yarns I knit with are not organic. Speaking with Kermit, ‘It’s not easy being green’.
I do think it’s a good direction to go in, though, and aside from the saving-the-earth aspects, it can also be very enjoyable. The green yarn I’m using is utterly lovely to knit with. It’s very nice to know the people who grow our vegetables…
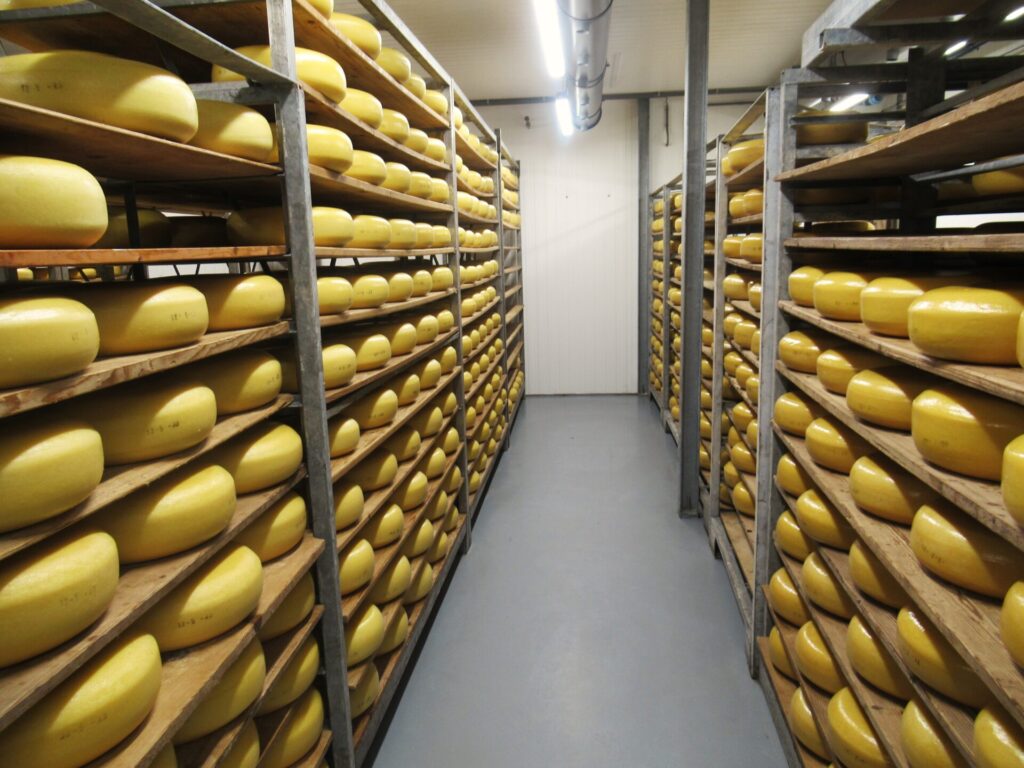
…and make our cheese.
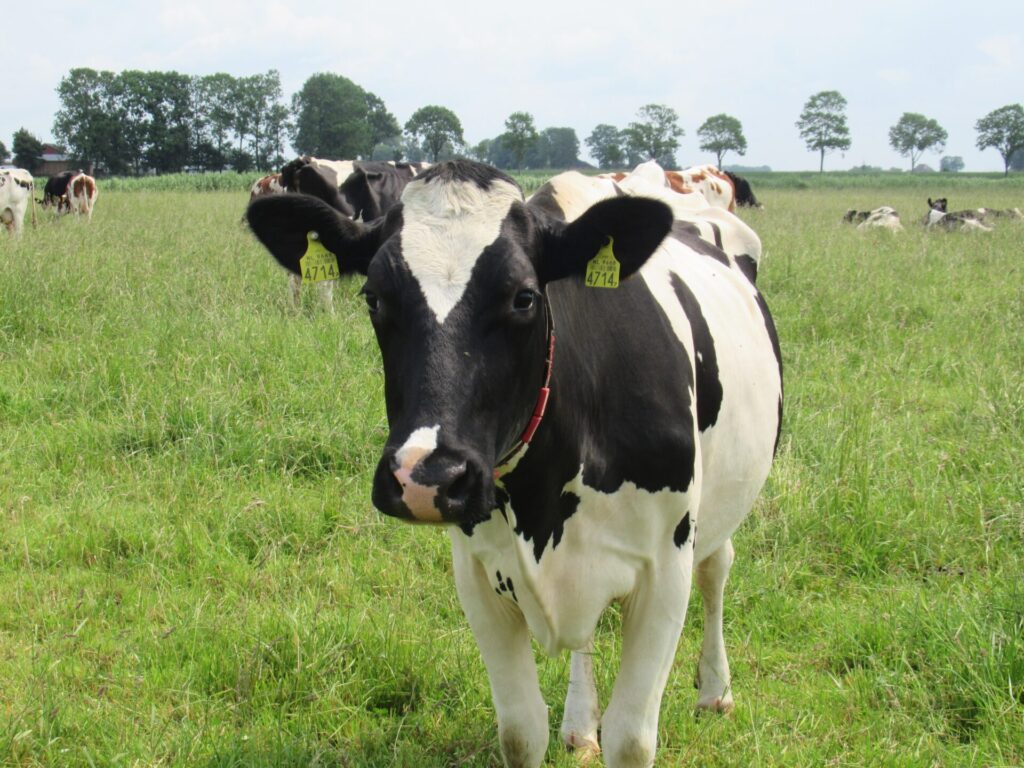
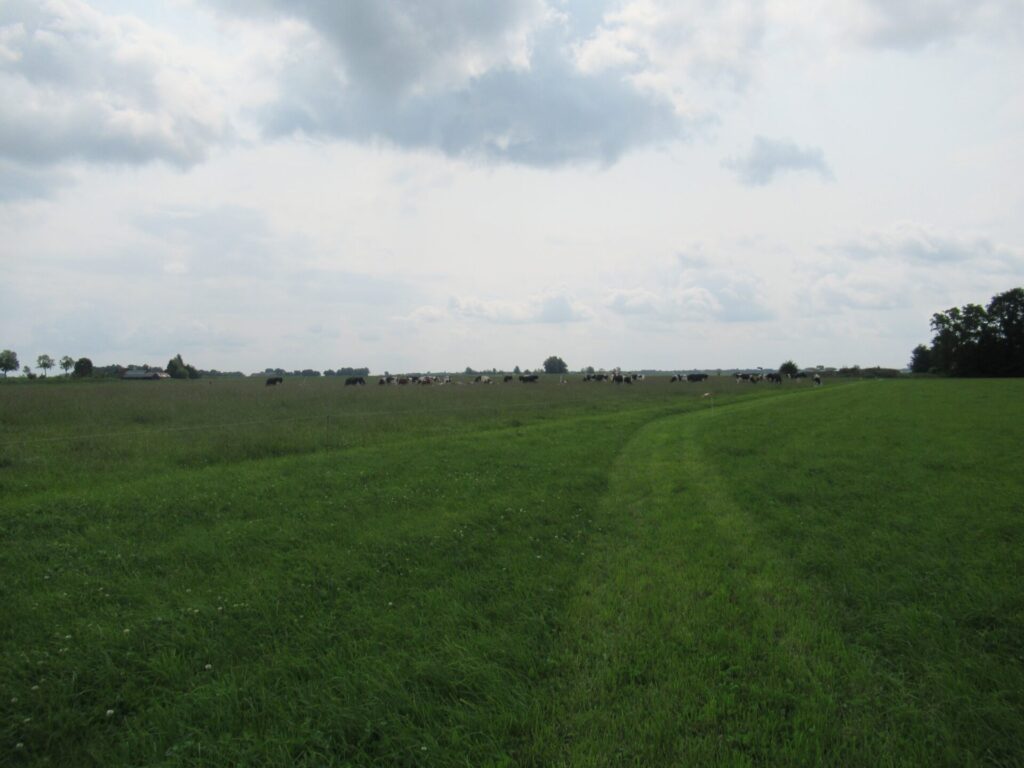
And it’s great to see the cows producing the milk for the cheese grazing on pasture land with all kinds of herbs among the grass.
Many of them are the well-known black-and-white Friesian Holsteins, but not all of them.
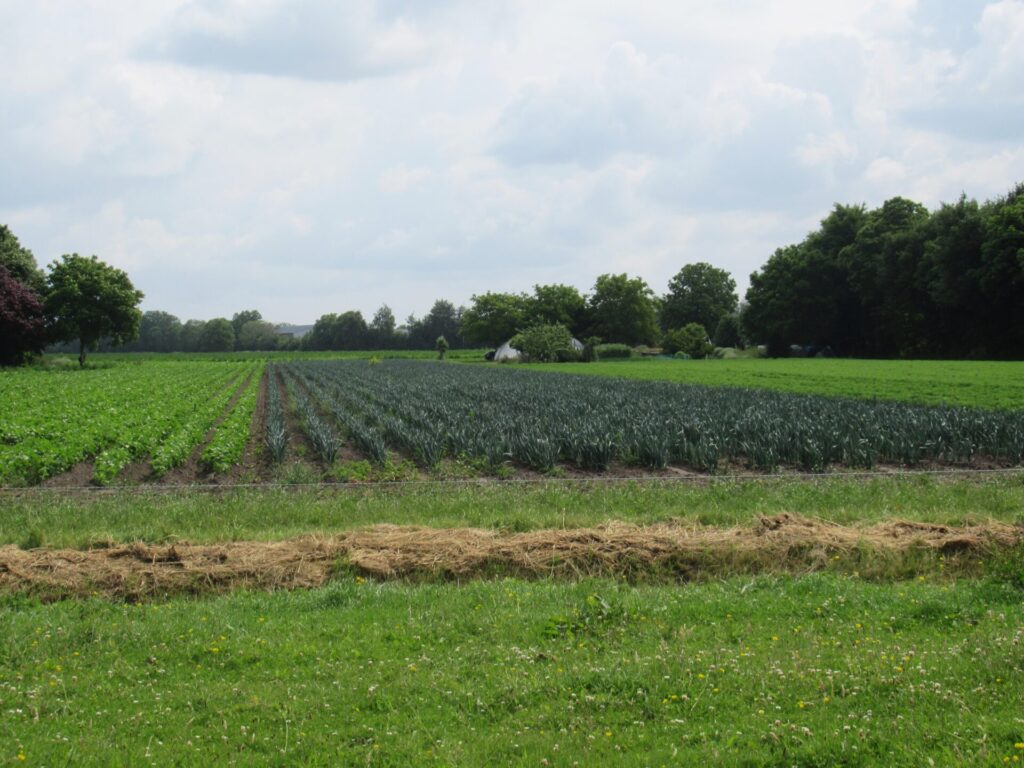
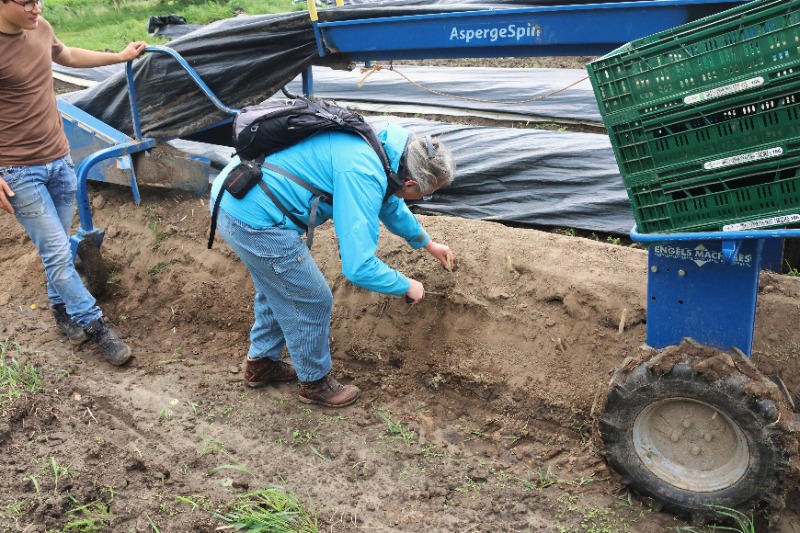
Two of the farms along our route are dairy farms. “Our” farm is mixed, with cattle, chickens, a few pigs, vegetables, herbs and a shop. And the fourth is a vegetable grower. At this one, I got to try my hand at harvesting white asparagus, cutting it below the soil with a special pronged cutting tool – not as easy as it looks!
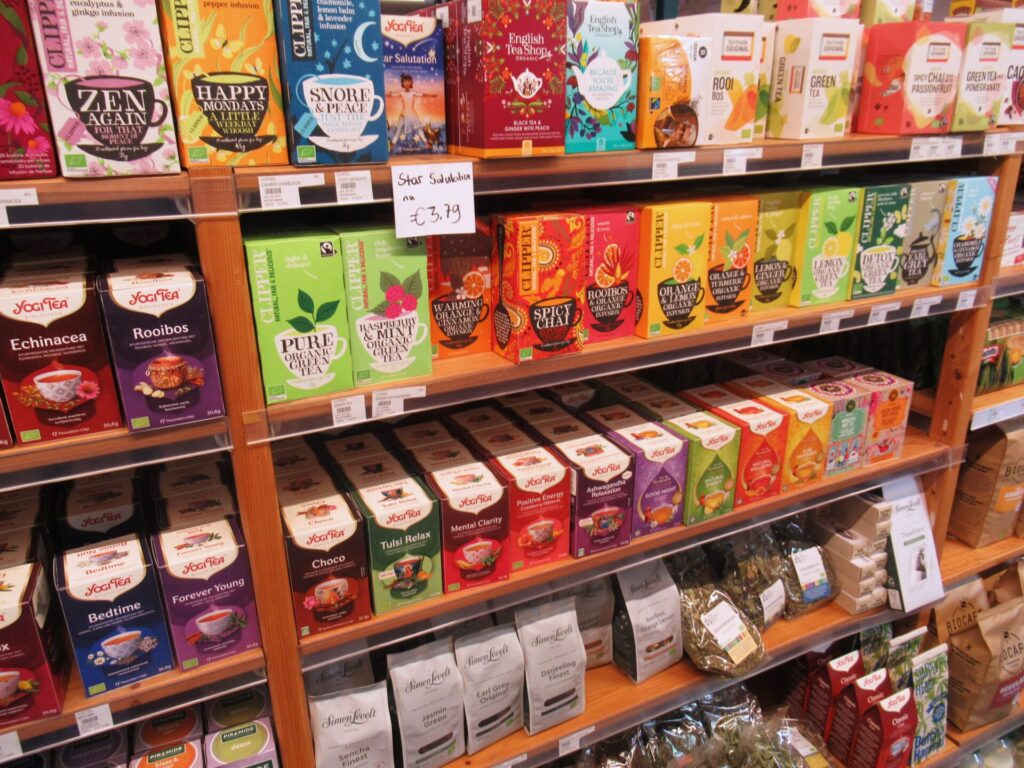
At the end of our walk along all four of the farms, we stopped at the farm shop to buy some tea, biscuits and chocolates for friends we were going to visit.
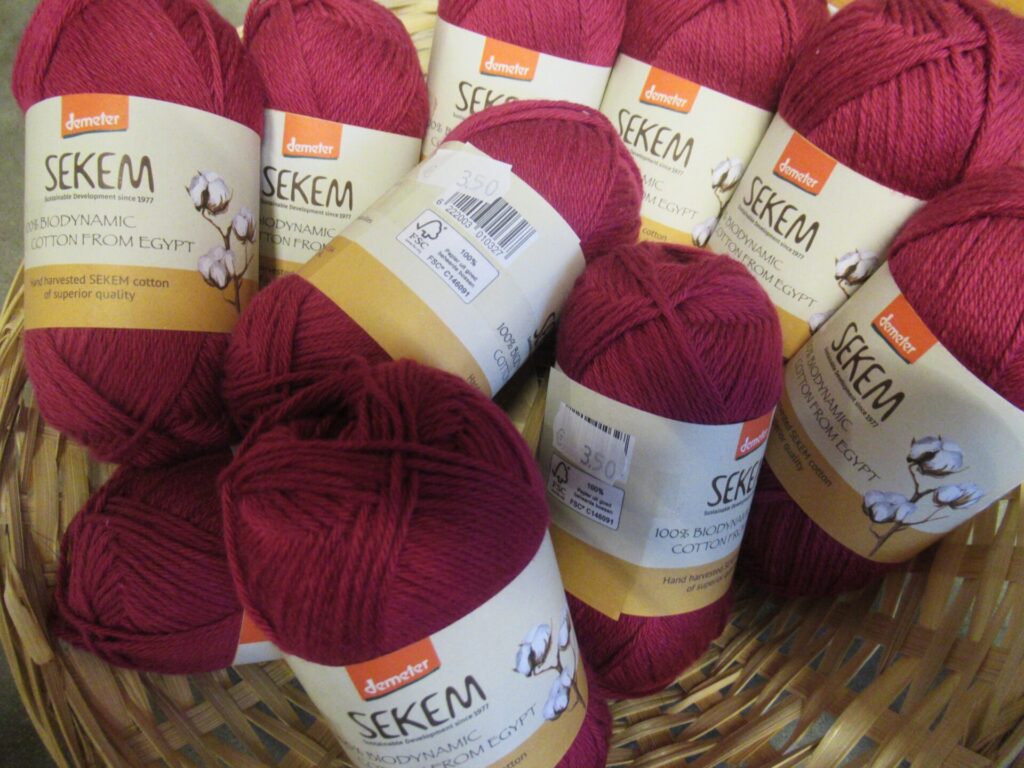
It’s more convenient to have groceries delivered and I don’t visit the shop often, but it’s nice to see everything they have in person from time to time. And sometimes you find something unexpected – like organic cotton yarn.
I didn’t buy any because I rarely knit with cotton, but it felt very nice. I’m keeping it in mind for a summery knit sometime.
Today’s organic-farm-walk was in the polder, land reclaimed from a former sea. A landscape as flat as a pancake with big open skies.
I always feel it’s rather special to be walking on the seabed, 3 metres below sea level. I hope you’ve enjoyed this short walk, too, and hope to see you again next week. Till then, keep well.
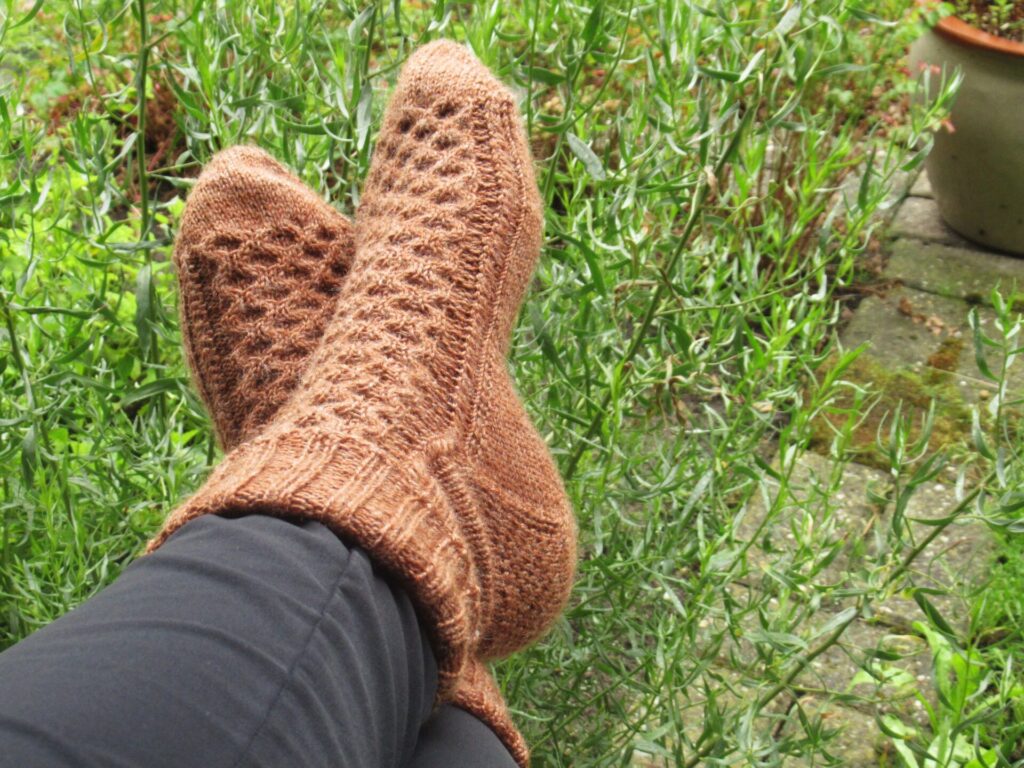
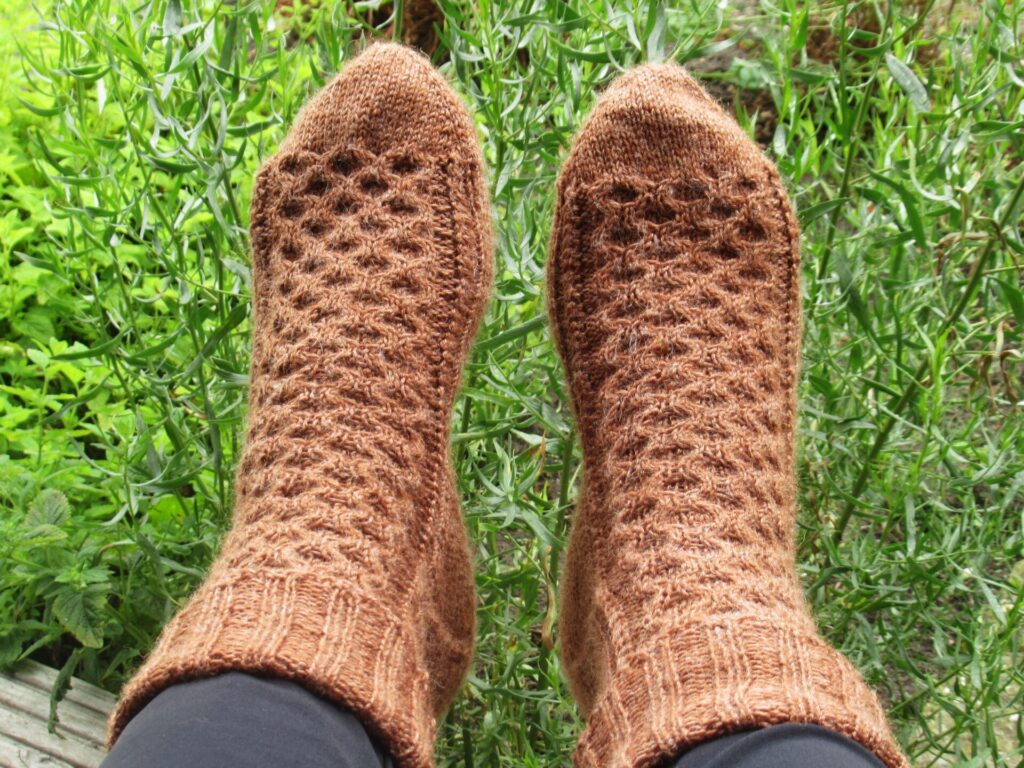
Hello, I hope you’ve had a good week so far. I’ve been busy as a bee this week, and have finished another pair of socks from the wonderful 52 Weeks of Socks book – the Imker socks. As you can see, they are slightly too long for me, but they are for someone with feet two shoe sizes up so that’s fine.
Imker is the Dutch word for beekeeper and I think the design idea is brilliant, with honeycomb cables on feet and legs…
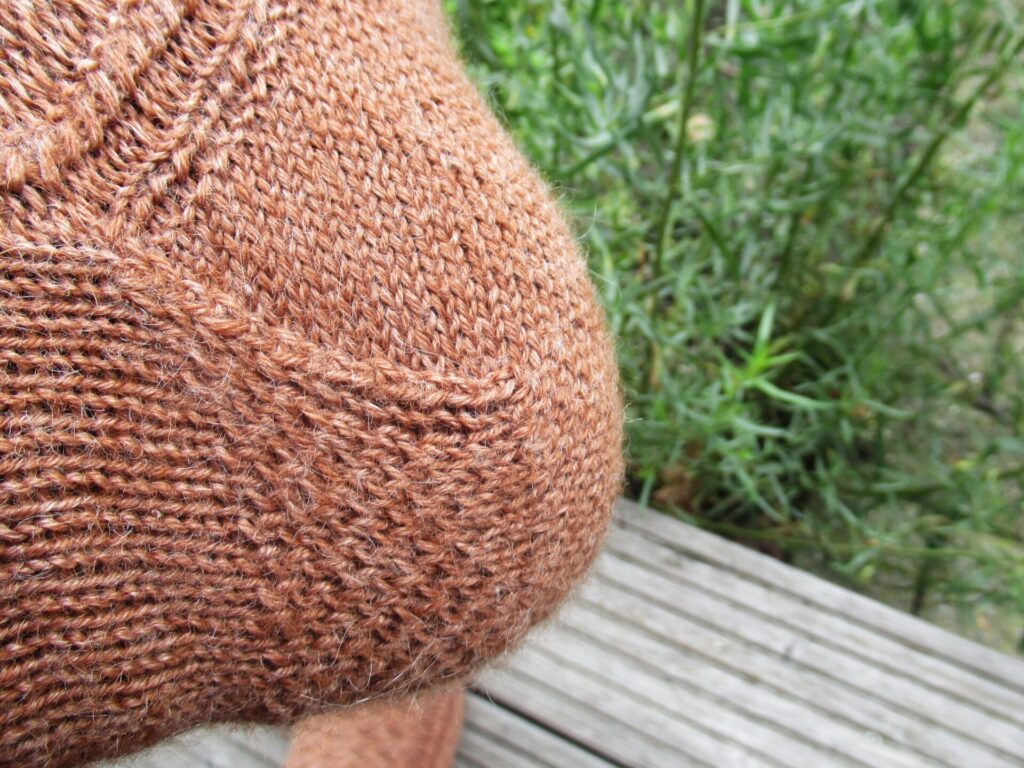
…and even a kind of tiny honeycomb stitch on the heel flaps.
I knit the backs of the legs in plain stocking stitch, because I’d read in other people’s Ravelry notes that with cables all round, the legs get too narrow to get your feet into the socks. The other modification I’ve made is using German short rows on the heels instead of the Wrap-&-Turn method (a great post about the how and why of that can be found here.)
The only thing I’m not very enthusiastic about is the very short heel flap. Having said that, the socks do fit very well around the heel and foot.
The yarn I used is Onion Nettle Sock, a blend of 70% wool and 30% nettle fibres, in shade 1032, a warm honey brown.
The stinging nettle fibre is added for durability as a sustainable alternative to nylon. The wool-and-nettle blend looks and feels like wool blends with other plant fibres in them, like cotton or linen. The nettle fibre takes the dye differently than the wool, which gives an ever so slightly marled effect.
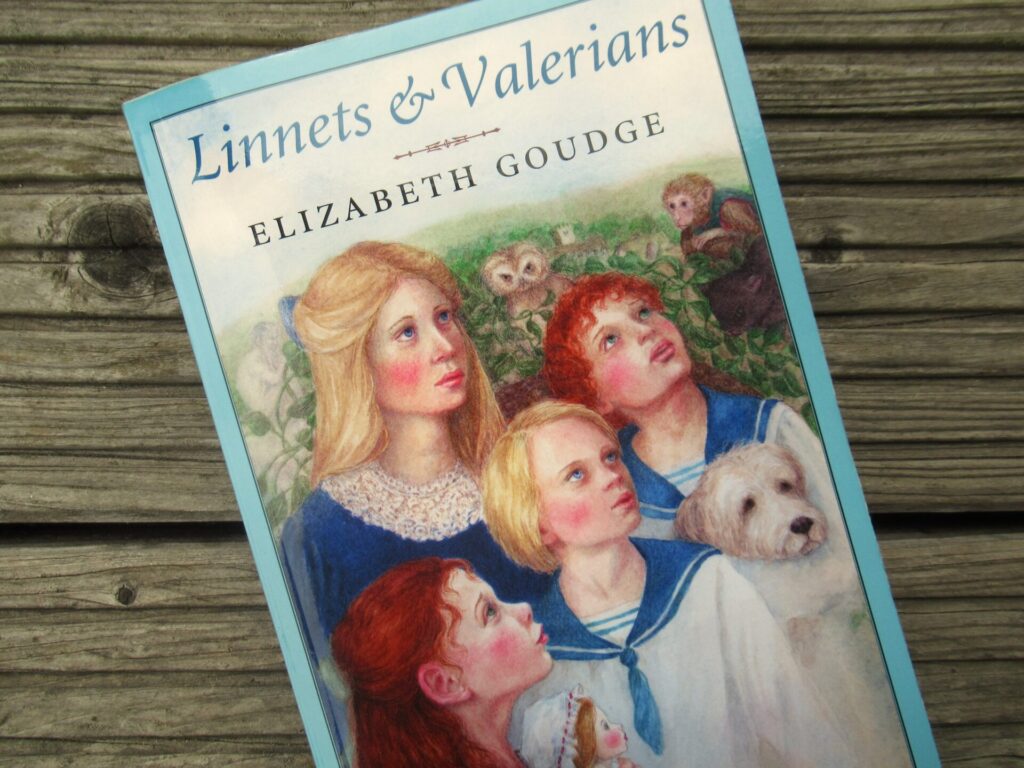
While I was knitting these socks, I was thinking about bees and remembered a book I’ve loved reading – Linnets and Valerians by Elizabeth Goudge.
It’s a children’s classic from 1964, about Nan, Robert, Timothy and Betsy, who come to live with their eccentric uncle somewhere in the English countryside. Uncle’s cook/housekeeper/gardener Ezra is also an imker, and bees play an important role in the story.
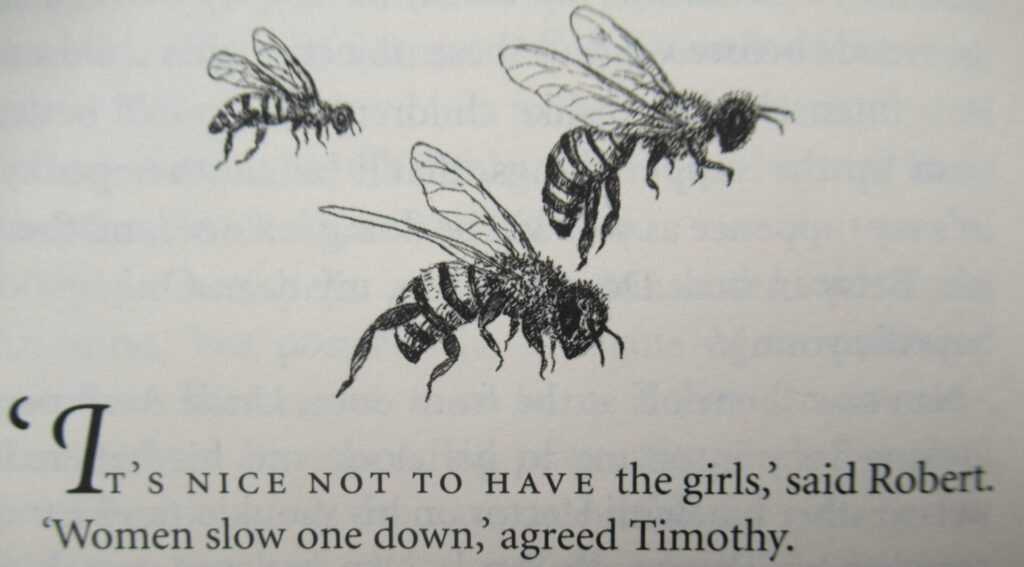
Ezra teaches the children “Bees understand every word you say. They be the most wonderful creatures God ever made. If men were to ‘ave one-quarter o’ the wisdom o’ the bees this wicked world would be a better place…”
Ezra’s philosophy is, “If you’re good to the bees the bees they’ll be good to you.” He also warns the children, “you must mind your manners with ‘em. They like a bit o’ courtesy.”
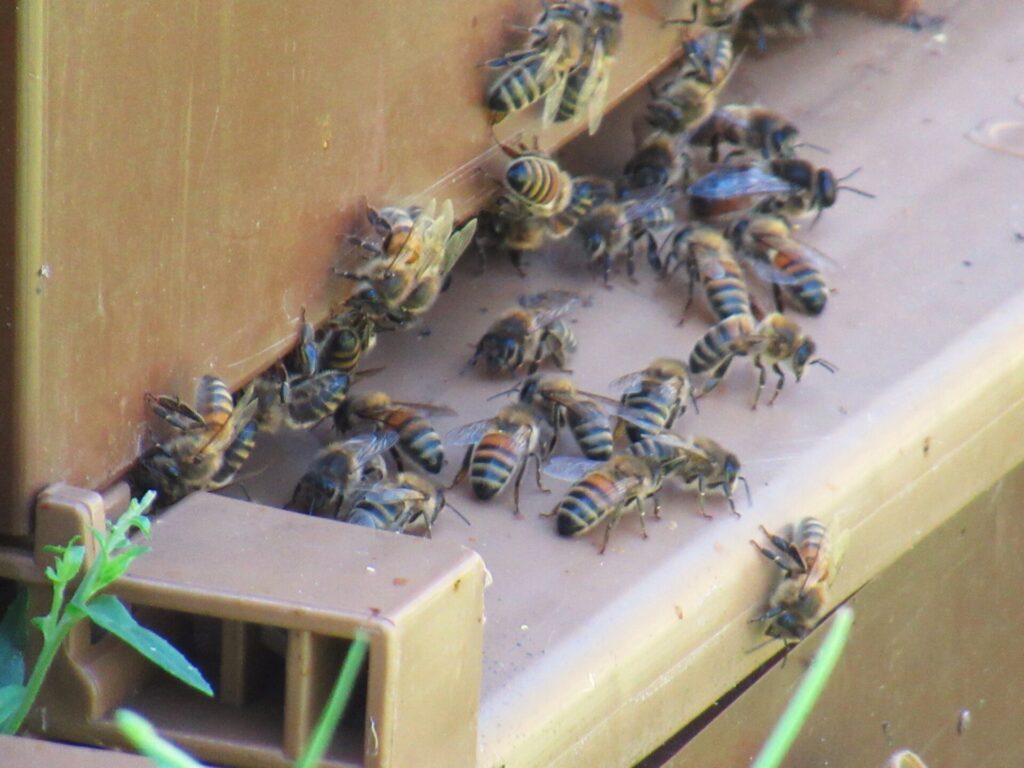
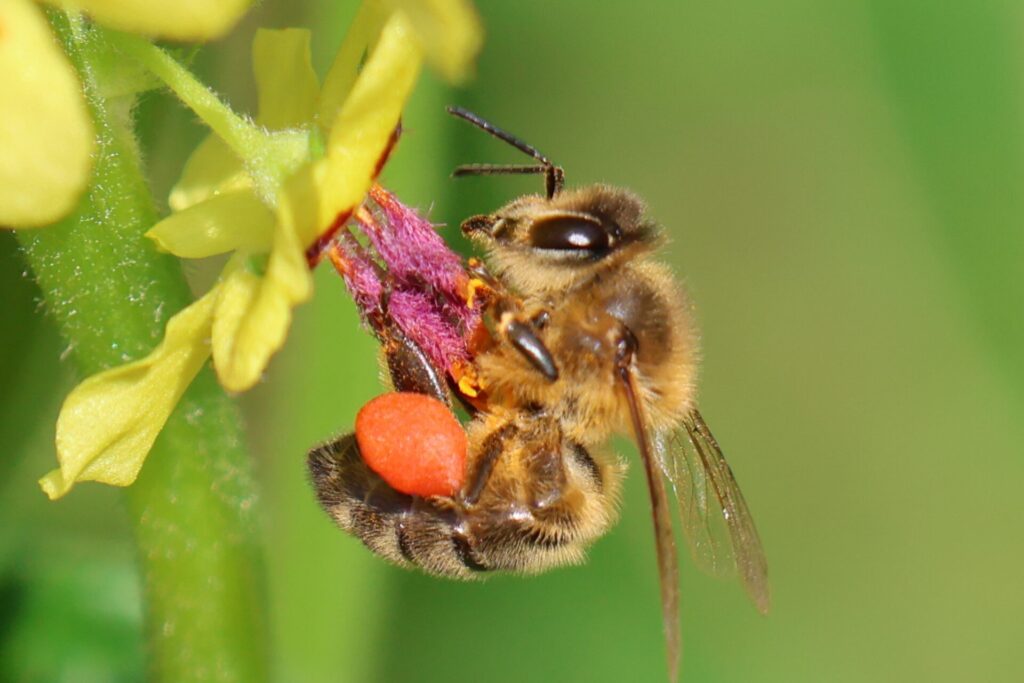
Heeding Ezra’s warning, I asked some of the bees in our garden very politely if they’d please sit still for a moment, so that I could take a picture of them. But either they speak a different language here or they just weren’t listening, because I haven’t been able to capture them. My husband was more succesful as a honey bee whisperer and took this photo:
Isn’t it gorgeous? The orange clumps on the bee’s legs are pollen. To be honest, I had to look that up and found out that some species of bees actually have baskets on their legs for collecting pollen. Amazing! There is so much about bees that I don’t know yet. What I do know is that I love some of their honey in my ginger-and-lemon tea.
I don’t know exactly how consuming honey relates to Ezra’s philosophy about being good to the bees, though. Sigh, life can get very complicated once you start thinking about things. Wishing you a great weekend, with hopefully time to enjoy some knitting and a nice cup of tea (with or without honey).
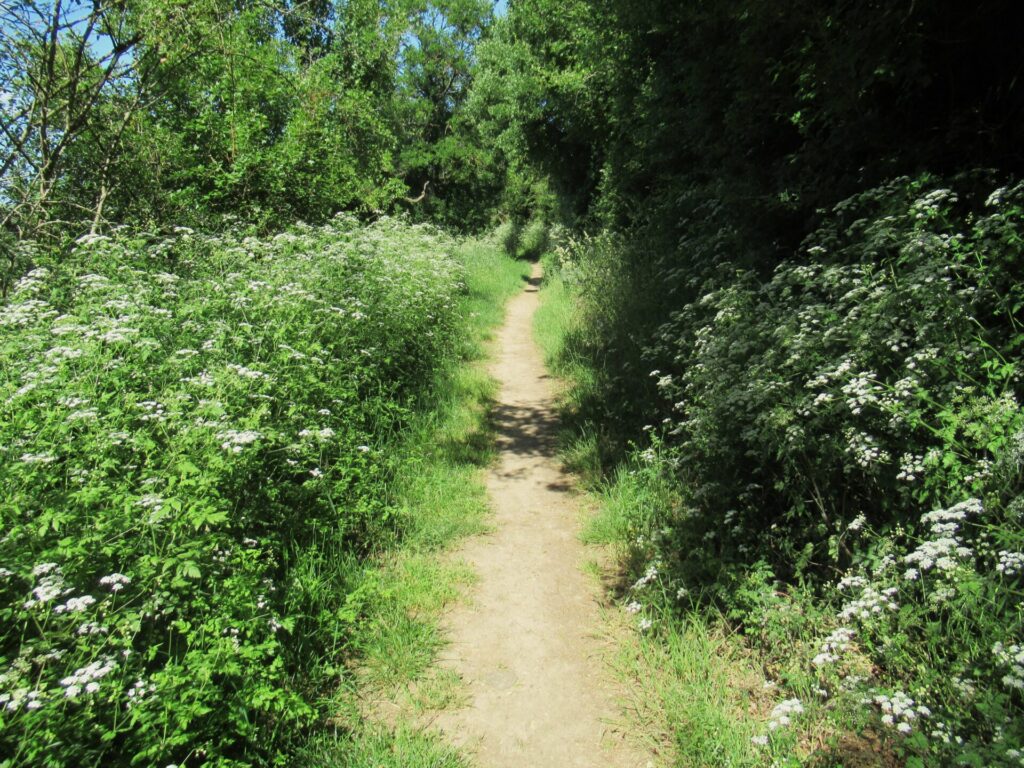
Hello! We’re in the Moselle region again, where people have lived for thousands and thousands of years, leaving some of the things they made behind as evidence. We’re going for a walk that’ll be like time travelling. Don’t worry, it’s all downhill and not too strenuous. Our starting point is a place of contemplation that has drawn pilgrims for almost 800 years.
From here, a narrow track is taking us back in time…
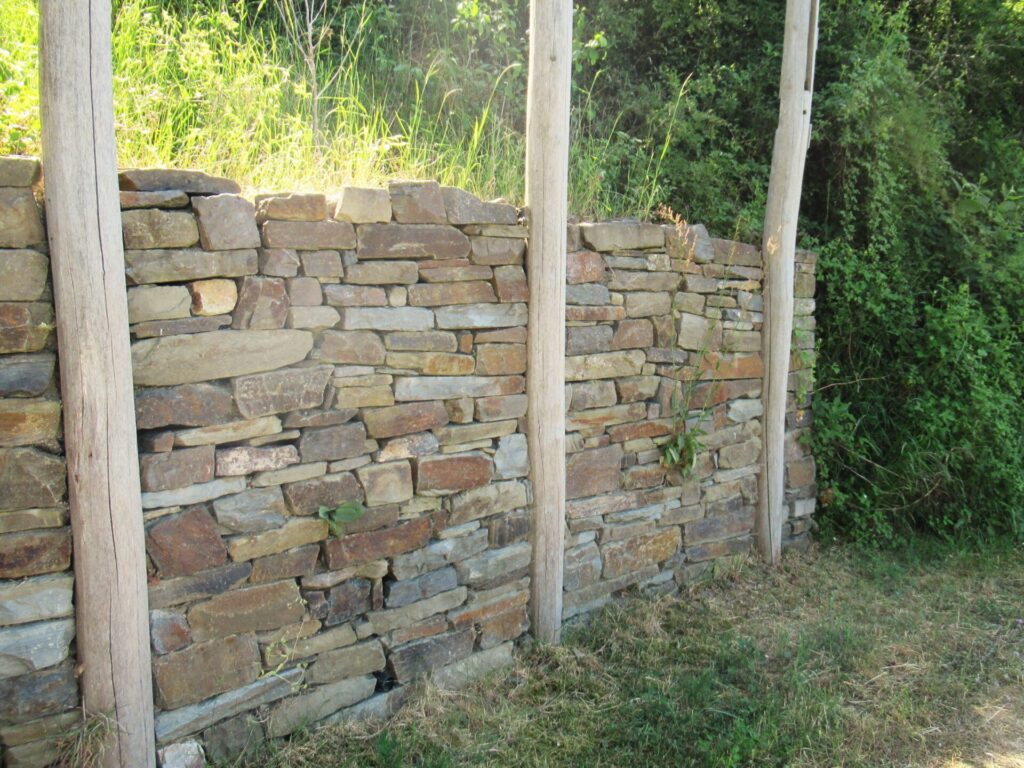
…until we arrive in the 4th century BC. This is when the Treveri tribe lived here – farmers , traders and craftsmen known for their metalwork. They built a drystone wall with wooden posts to protect their settlement. I wonder what my life would have looked like had I lived here then. As a woman, I would probably not have been a metalworker, and nobody was knitting yet. So what would I have done with my hands instead? I can’t imagine not making something – maybe I’d have been a basket weaver?
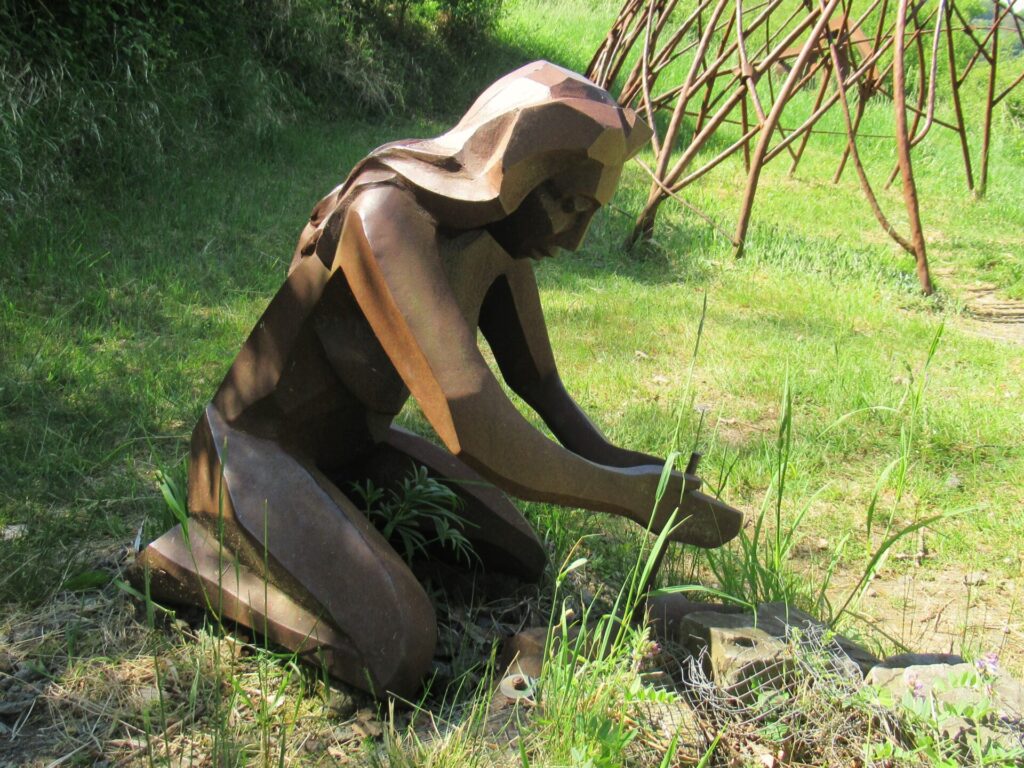
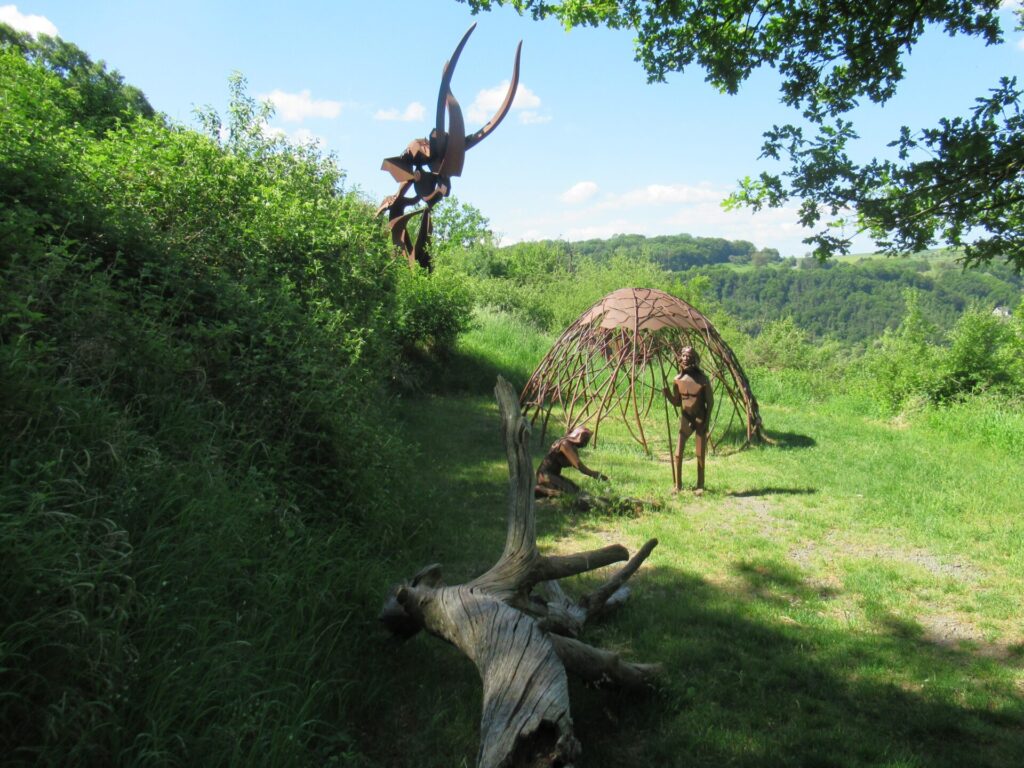
A little further down the track, we are suddenly going 800.000 years back in time for a visit to a very early ancestor, the homo erectus. Pebble tools they made and left behind show that they had a camp here – all kinds of different tools used for hacking, cutting, scraping and chopping. In a reconstruction of the camp a corten steel woman is starting a fire. What is she going to make for dinner?
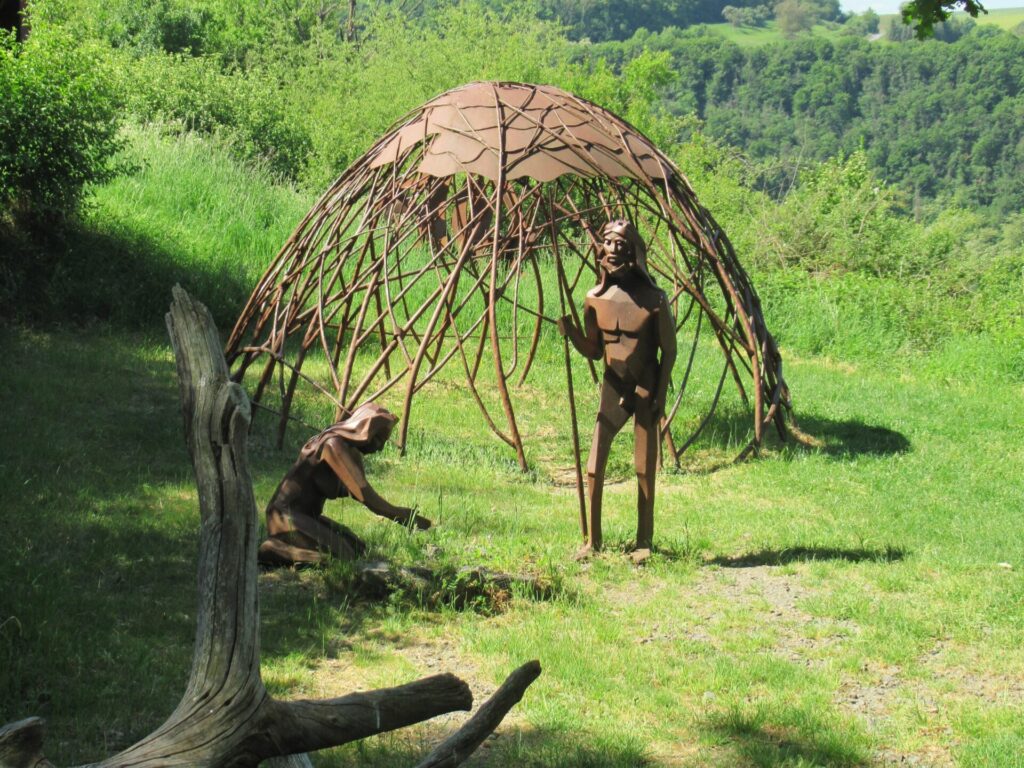
A man holding a spear is looking on, in front of their shelter. It looks quite cosy, really – a bit like the dome tent we camped in for years.
That is, until you zoom out and see the giant elephant looming behind their shelter.
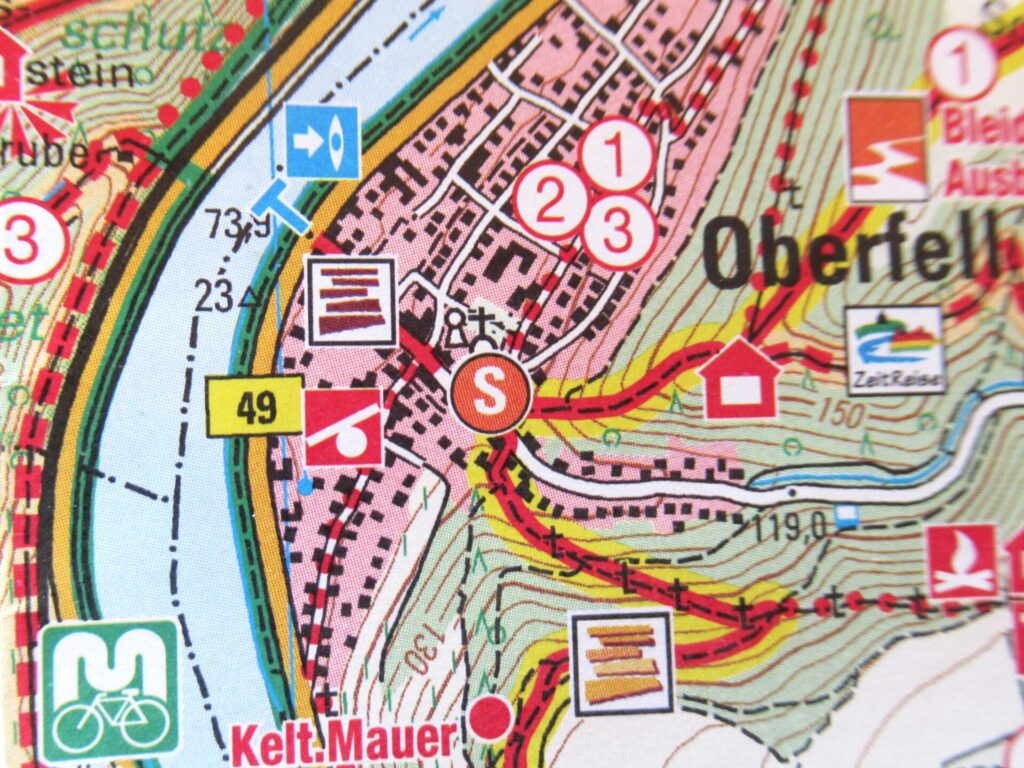
Life must have been unimaginably hard all those millennia ago. Let’s quickly descend a little further to get back to the present day. Uhm, where exactly are we going next? I think we need to take a look at the map.
Ah, the trail is leading us to a big red dot with an S in Oberfell. I recognize most of the symbols on the map, but where does the S stand for? Oh, I see, the key tells us that the S stands for Stricken – German for knitting!
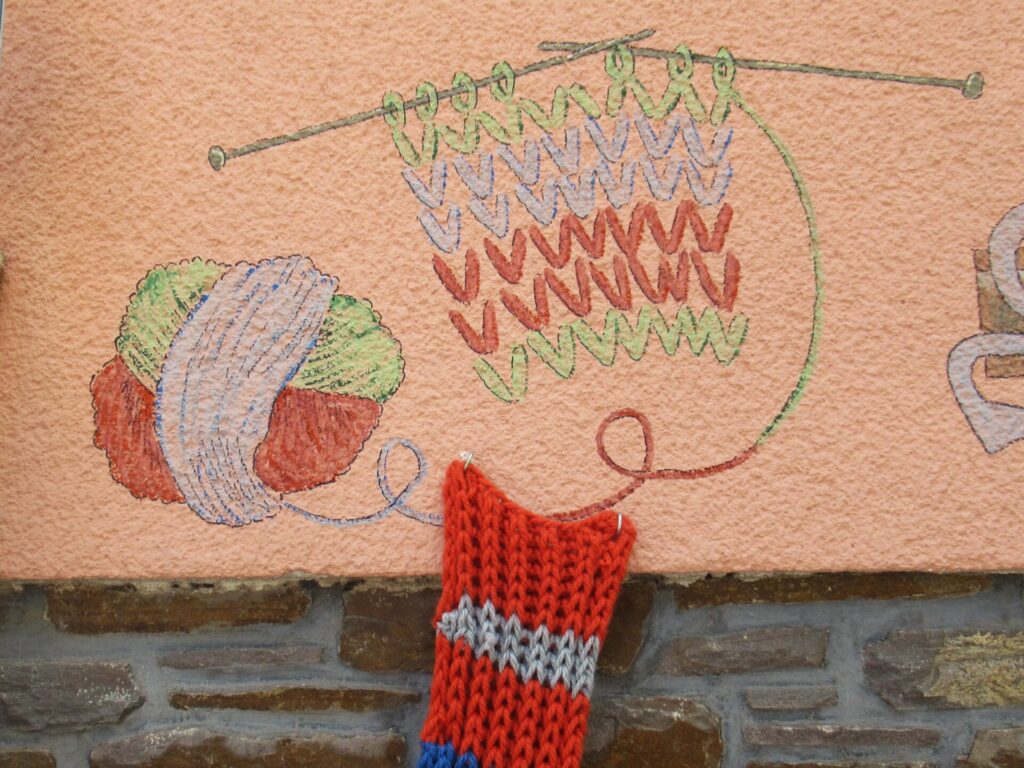
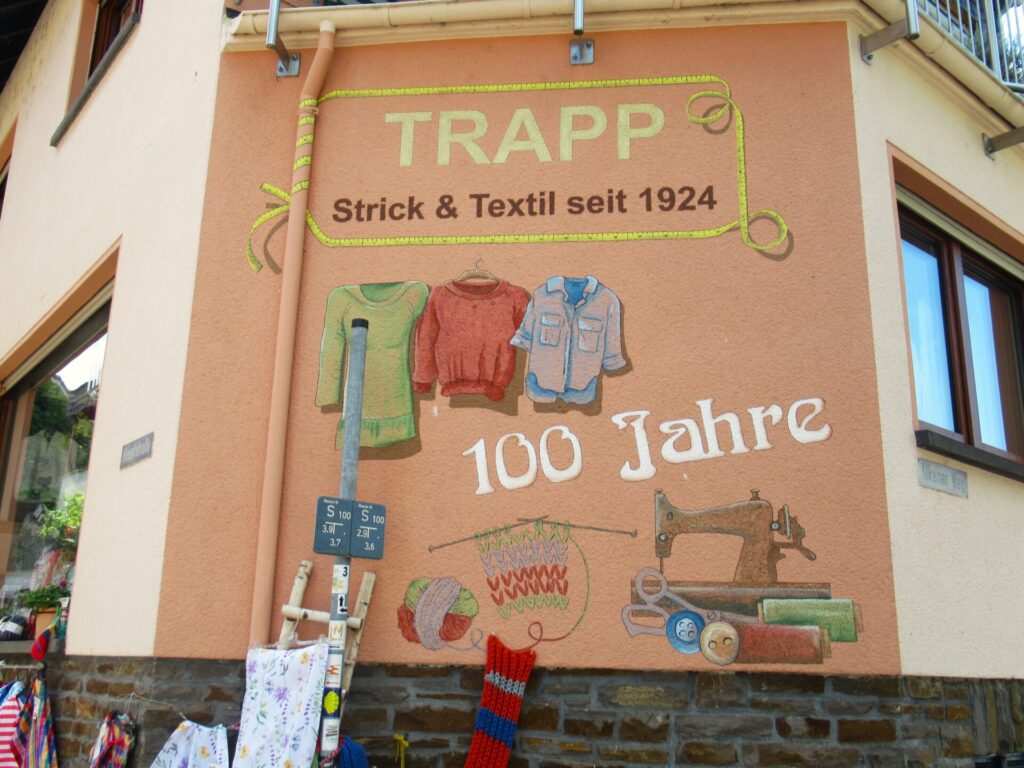
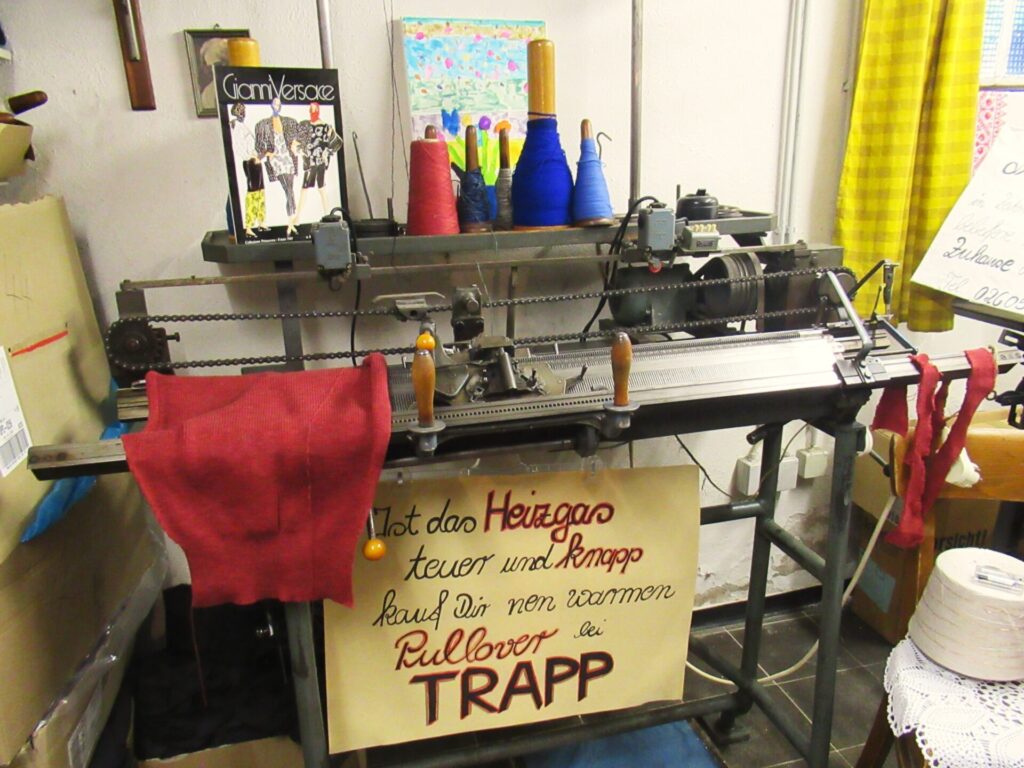
We’ve arrived at the home and business premises of the Trapp family (not Von Trapp as in The Sound of Music, just Trapp).
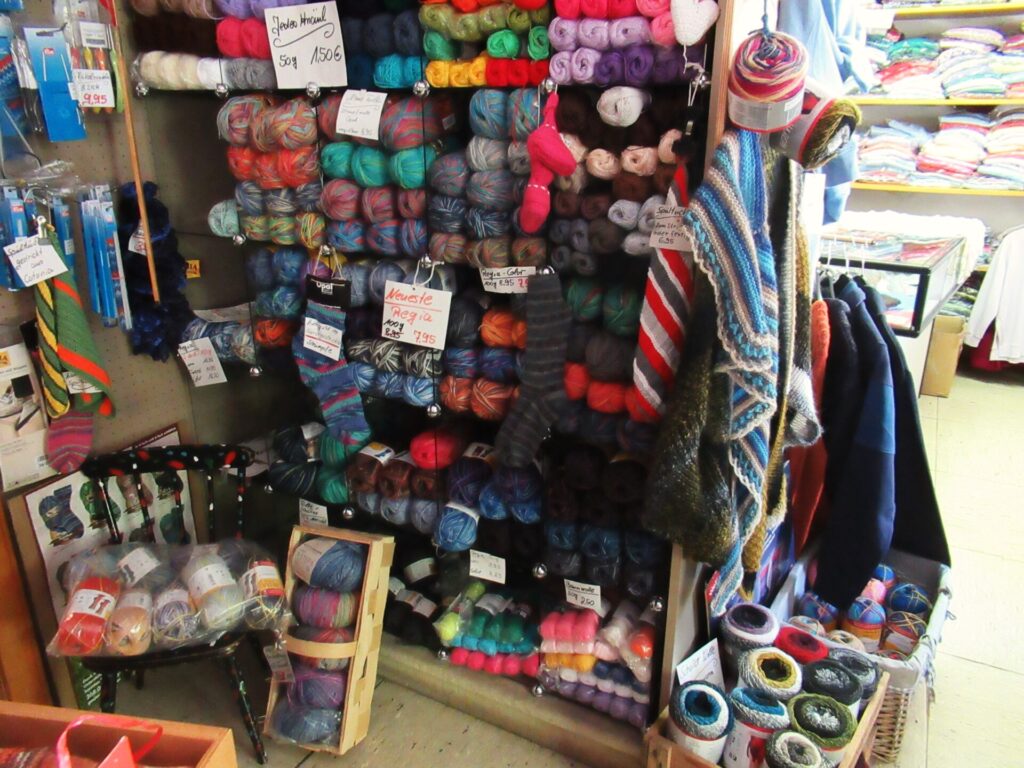
Their lovely, old-fashioned shop stocks clothes, table cloths and other textiles, and yarn. The yarn section is small, but if you’ve forgotten to bring your knitting, you’ll certainly find needles and yarn for a nice pair of socks, a scarf or a shawl here.
As happens so often among knitters, I got chatting with owner Bernadette and she told me about the knitwear manufacturing business her family used to run. Would I like to see the old knitting machines in the basement, perhaps? Yes please!
A sleeve is hanging over a knitting machine driven by what looks like a bicycle chain. Bernadette tells me how they knit their items from extremely fine yarn, with two or three threads combined.
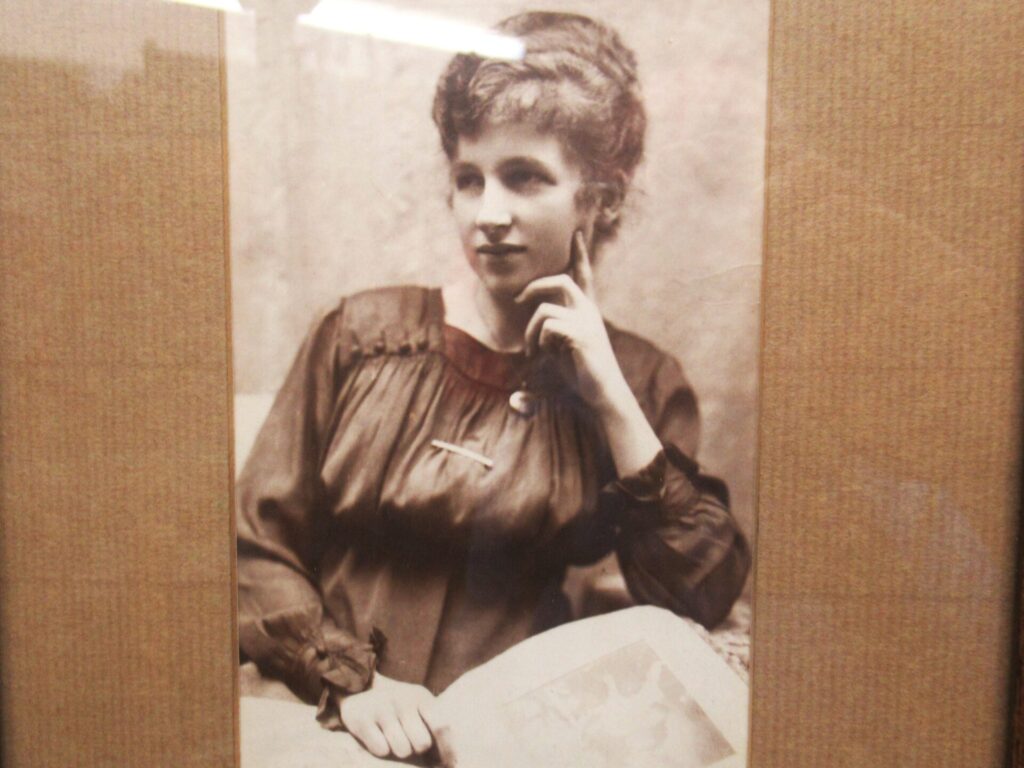
She also tells me that the knitting business was founded by her grandmother in 1924. Another family member in the nearby city of Koblenz (I believe it was grandmother’s uncle) already had a knitting business farming out the knitting among many women in the region. This made him a wealthy man but didn’t bring in all that much for the knitters. Grandmother Veronika decided that it would be more profitable to start her own knitting business and so she did.
She had a large family (13 children if I remember correctly) and all of the children had their little jobs in the business, like winding the yarn from hanks onto cones.
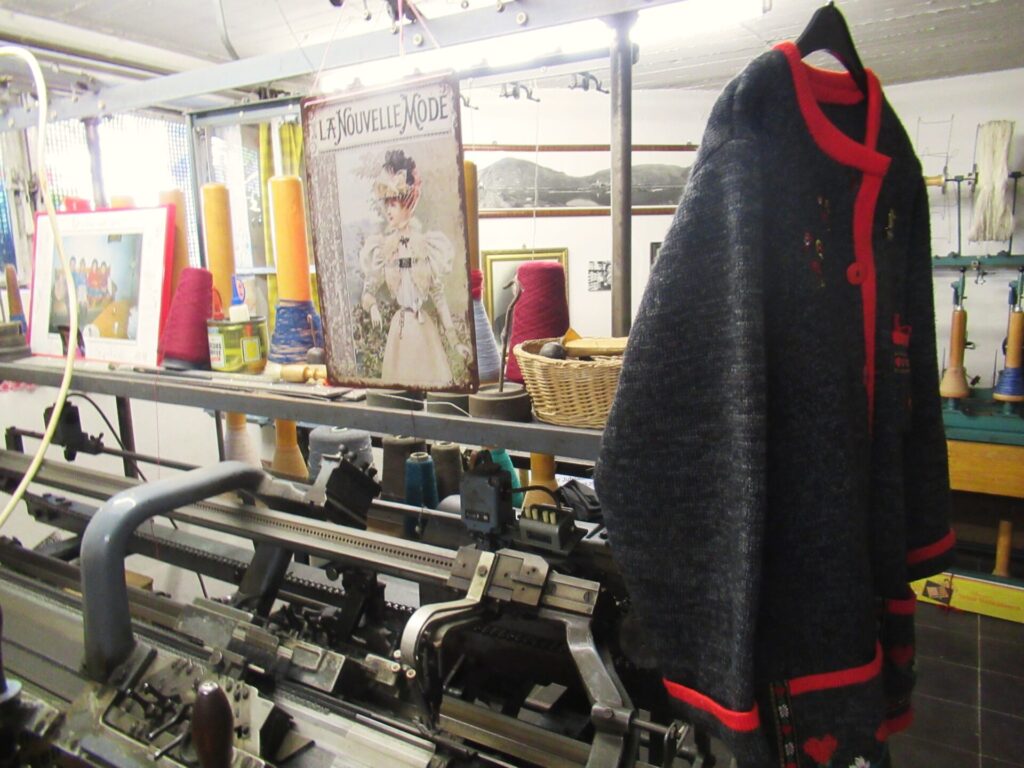
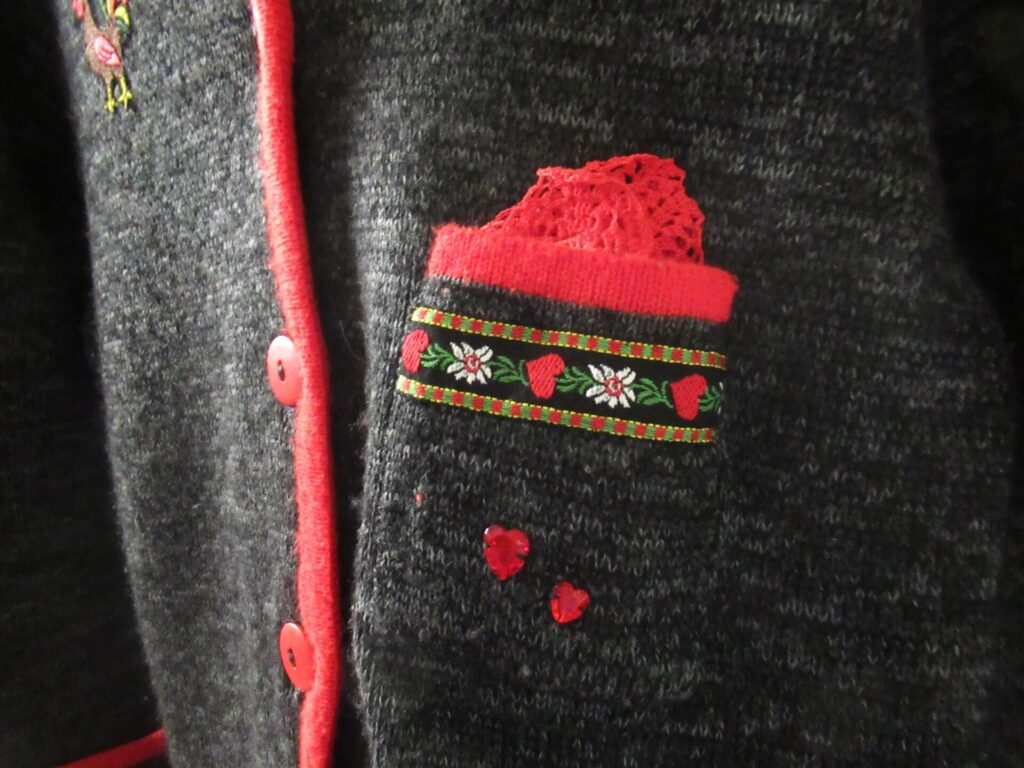
One of these children later continued the business. An example of the style of jackets they knit hangs on another, slightly more modern-looking knitting machine.
Sewing on buttons and ribbons, and adding embroidery was all done by hand by members of the family, in this case by Bernadette herself. She also crocheted the lace on the pocket square in the breast pocket.
For the bakers in the region they knit jackets with beautiful stitch patterns on the front. White jackets, so that the bakers would still look presentable even though they were all covered in flour. People also came to Trapp when the cuffs on their sweaters were frayed or the elbows worn through, and new sleeves would be knit on. In the 1960s the family stopped producing knitwear as they were unable to compete with the mass produced items flooding the market, but the shop is still going strong.
I’ve loved getting a glimpse into this knitting business and didn’t leave empty-handed either – sock yarn always comes in handy.
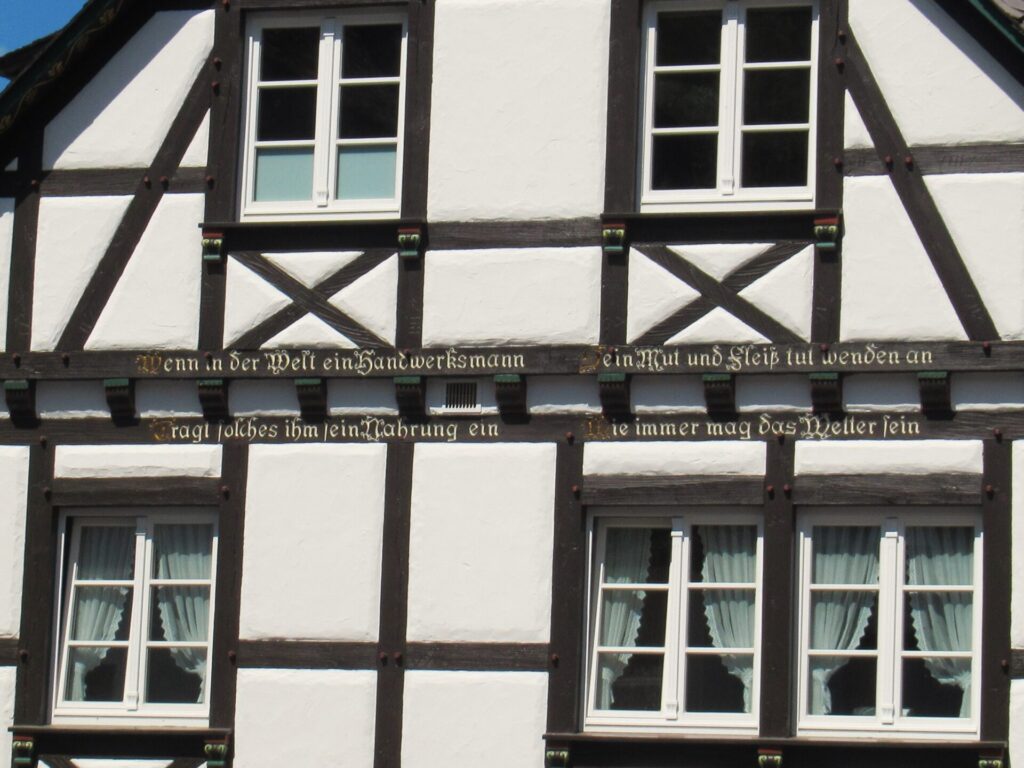
Many old houses in the Moselle region have sayings on their gables. The saying on a gable a few houses down from the Trapp family business seems apt for closing off today’s post: “Wenn in der Welt ein Handwerksmann sein Mut und Fleiß tut wenden an, tragt solches ihm sein Nahrung ein, wie immer mag das Wetter sein.”
Roughly translated it means: “When a craftsman shows up in the world diligent and able, he will always have food on the table, no matter what the weather.” I’d love to have a saying like that on my gable, only I’d phrase it slightly differently:
Going through the world as a maker Whether as a knitter, gardener or baker Will keep you from feeling lost and blue No matter what life throws at you
Well, it doesn’t always work, but I’m sure you’ll agree that making things often helps make things better. Now, back to my own knitting and I hope to tell you a bit about some of that next week. See you then!
Hello, I’m back! You may not even have noticed that I’ve been away, but we’ve just spent a couple of weeks in the Moselle region in Germany again. It’s one of our favourite holiday destinations, not too far from home, and also conveniently close to where my brother lives.
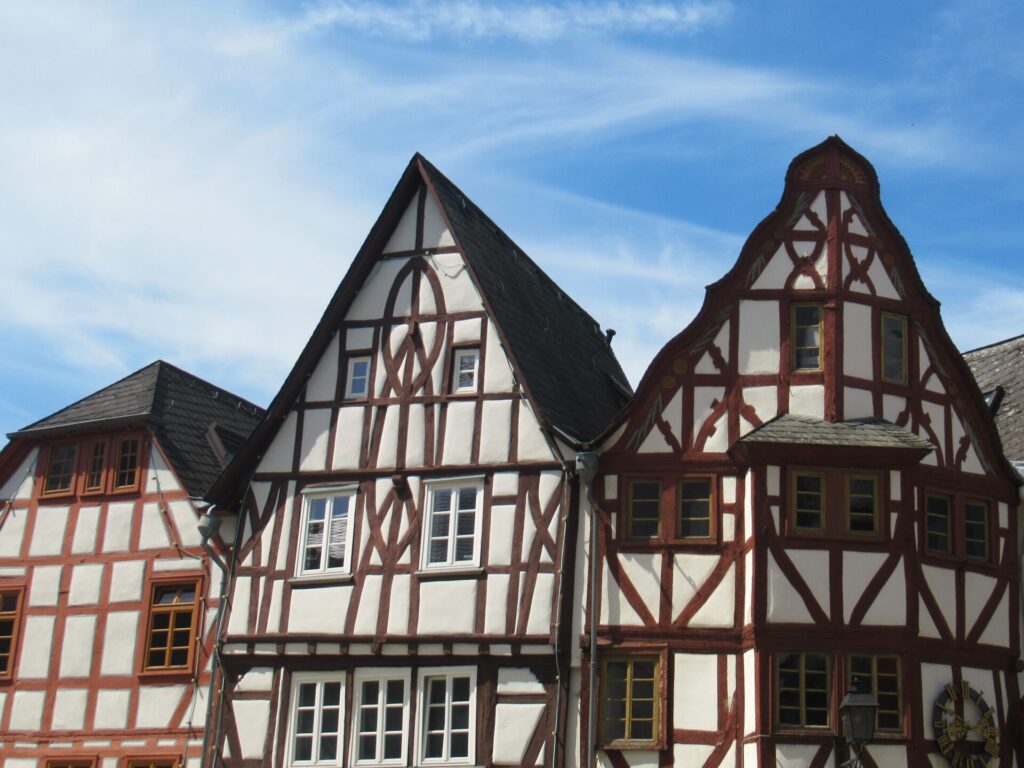
The region has fairy-tale like qualities, with its half-timbered houses…
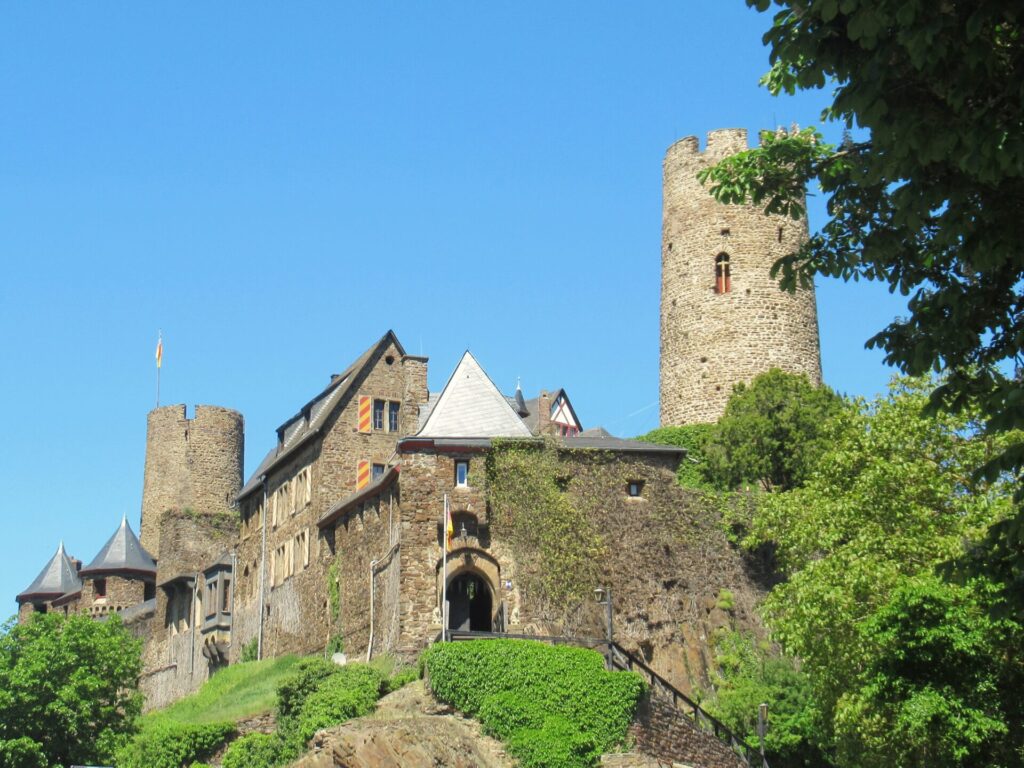
…and castles around every corner,
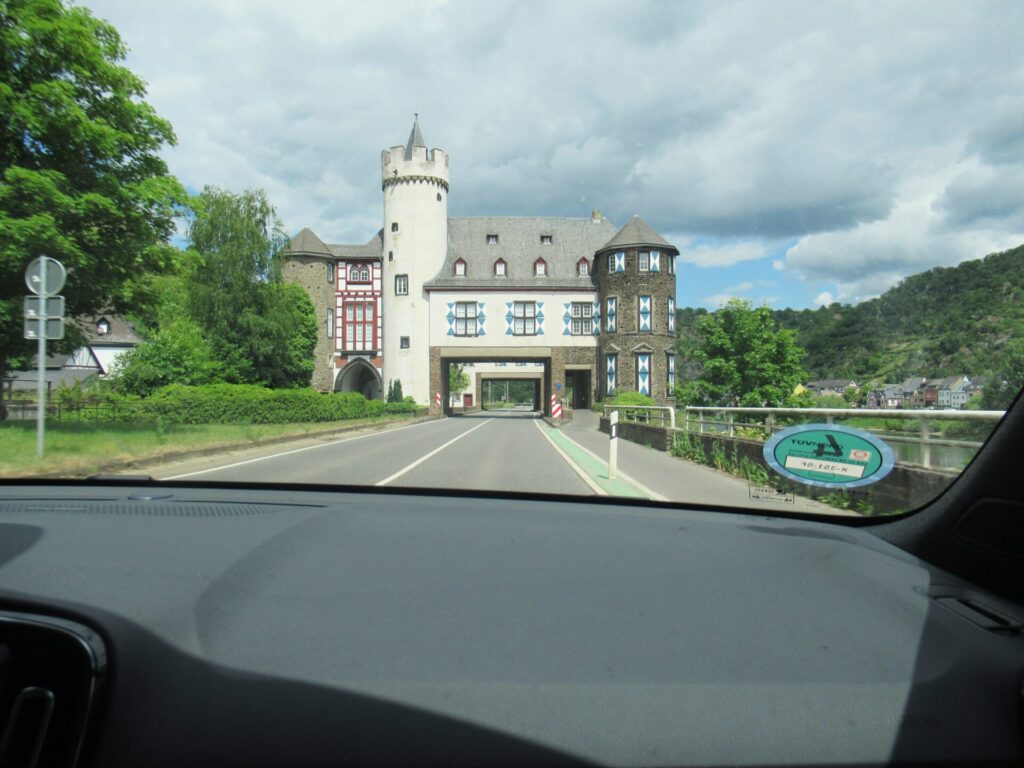
but it has kept up with the times – I mean… a drive-thru castle!?!
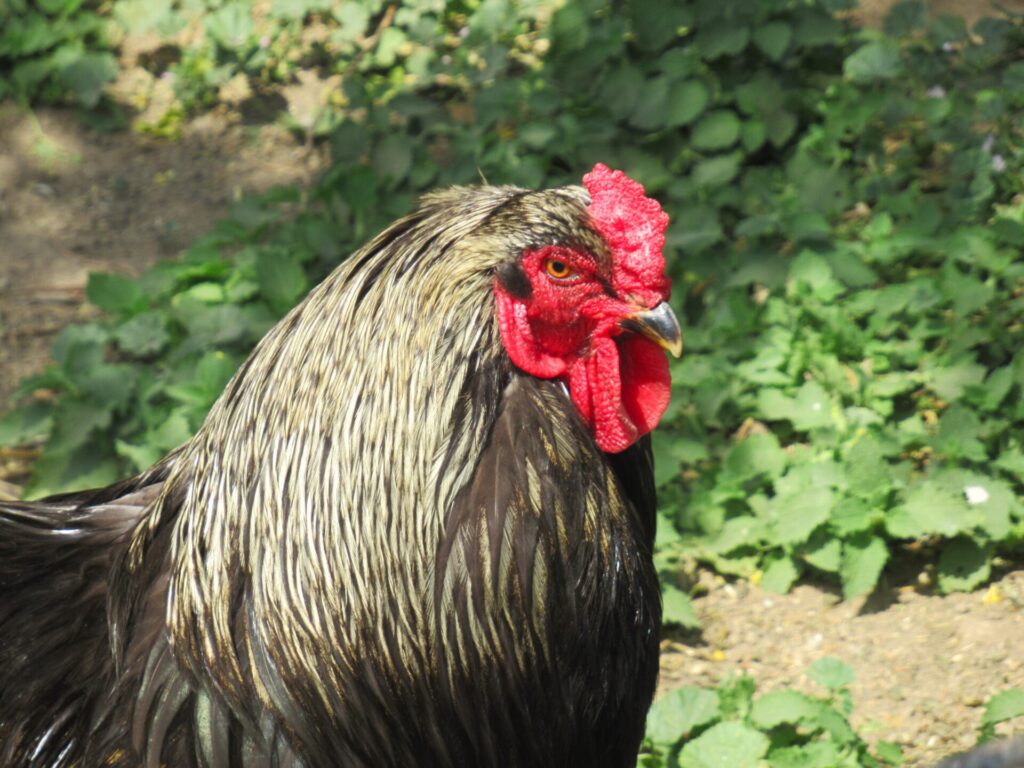
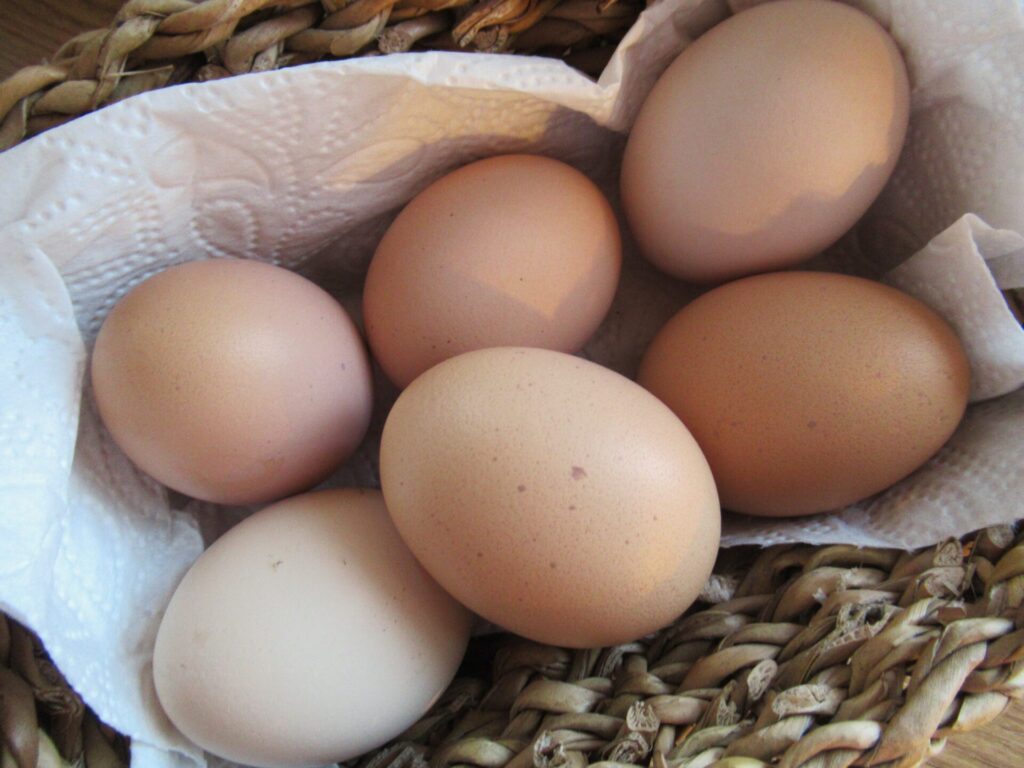
We received a very warm welcome from our hosts and felt safe and secure in our little cottage guarded by a fierce-looking cock.
He was actually friendly enough and allowed his hens to give us some of their eggs now and then.
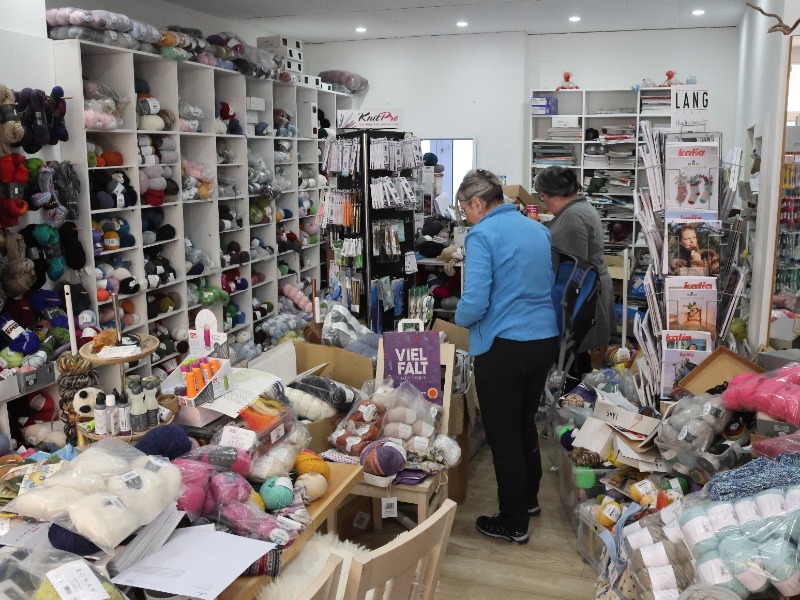
I had planned to tell you about a yarn shop I was going to visit, but, well, I think you’ll understand why I’ve decided not to when you’ve looked at a picture of its interior.
I felt shocked at the time,
but now it only makes me giggle – I’ve never seen anything like it. There were some gems buried in those mountains of yarn, though. I only wish I could have waved a magic wand and created an inspiring space out of the chaos.
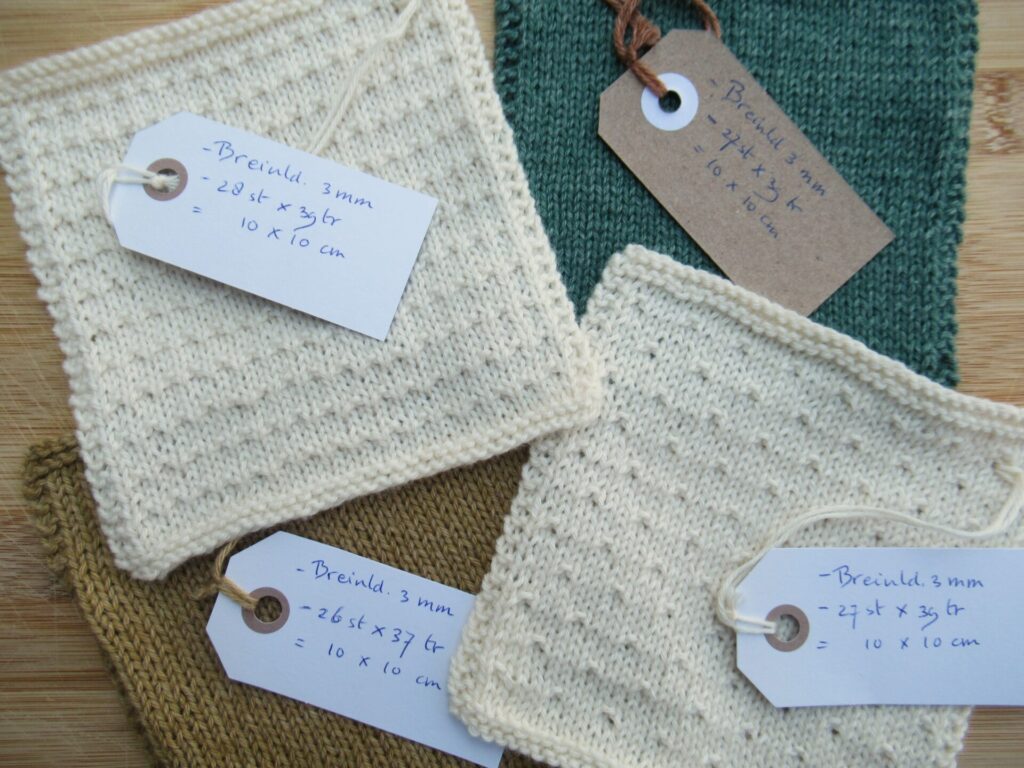
I brought some knitting with me on our trip, of course. I’d knit some swatches beforehand.
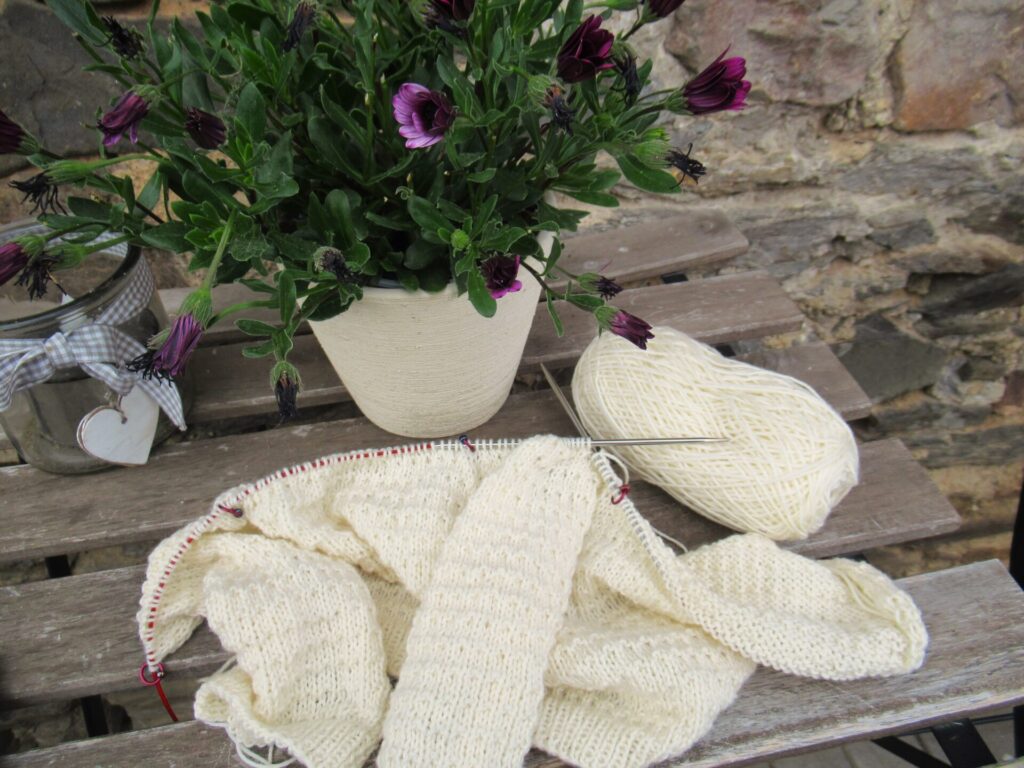
And while we were there I sketched, measured, calculated, improvised, frogged and knit again until I was happy with the result.
I can’t tell you anything about it yet, as it is for the gift basket for our second grandchild (expected this summer) and I want it to stay a surprise. There is something knitting-related I’ve seen that I think will be interesting, but I need a little more time to sift through my photos and organize my thoughts. I hope to get round to it next week.
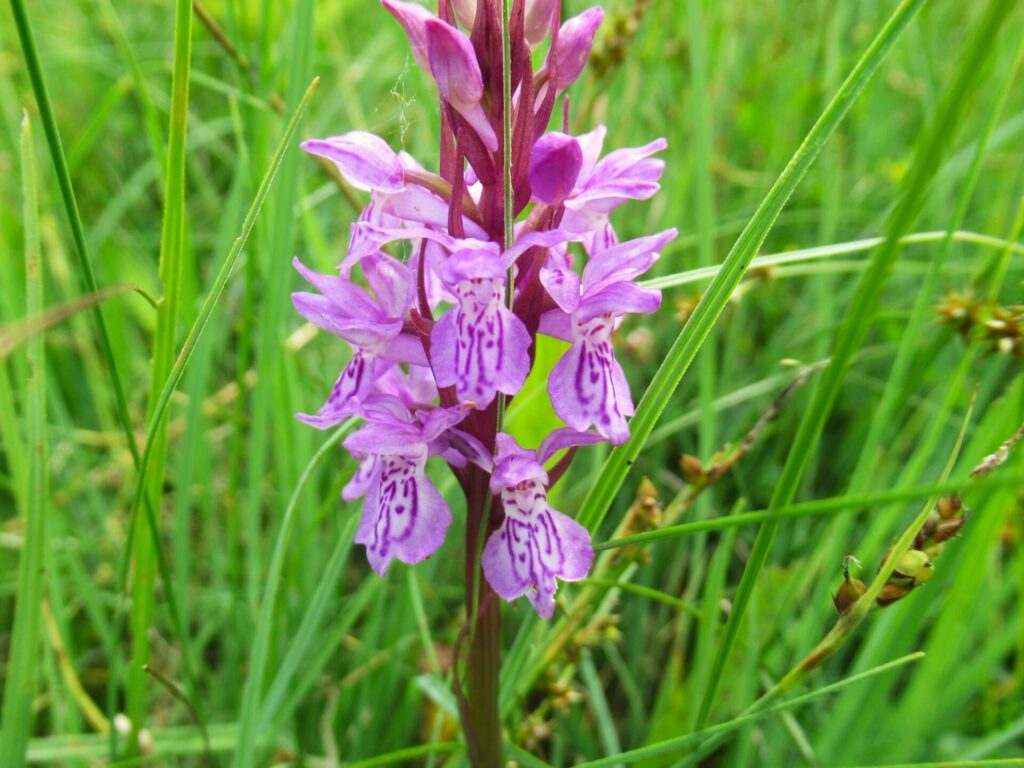
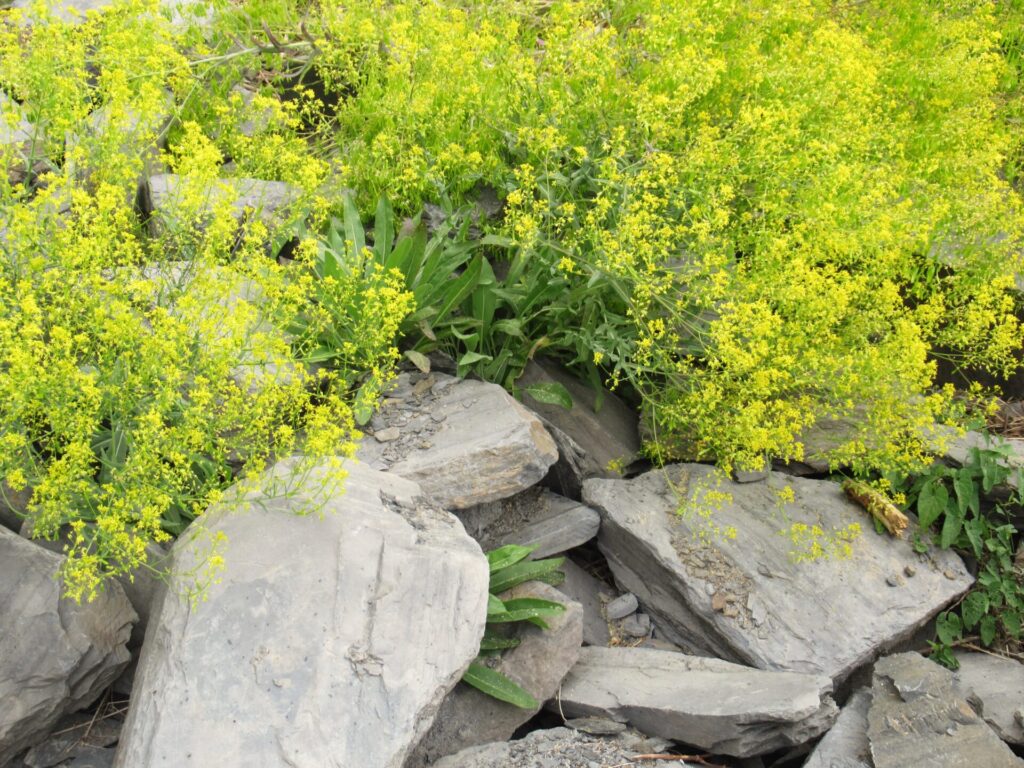
Now, on to something that gave me incredible joy – wildflowers. The sweetbriar roses and fragrant herbs along the hiking trails were delightful, and there was also flowering woad here and there.
Since I tried growing woad in our garden as part of a community project (see this, this, this and this post), it’s like meeting an old friend. A friend that gives beautiful shades of blue when used as a dye plant.
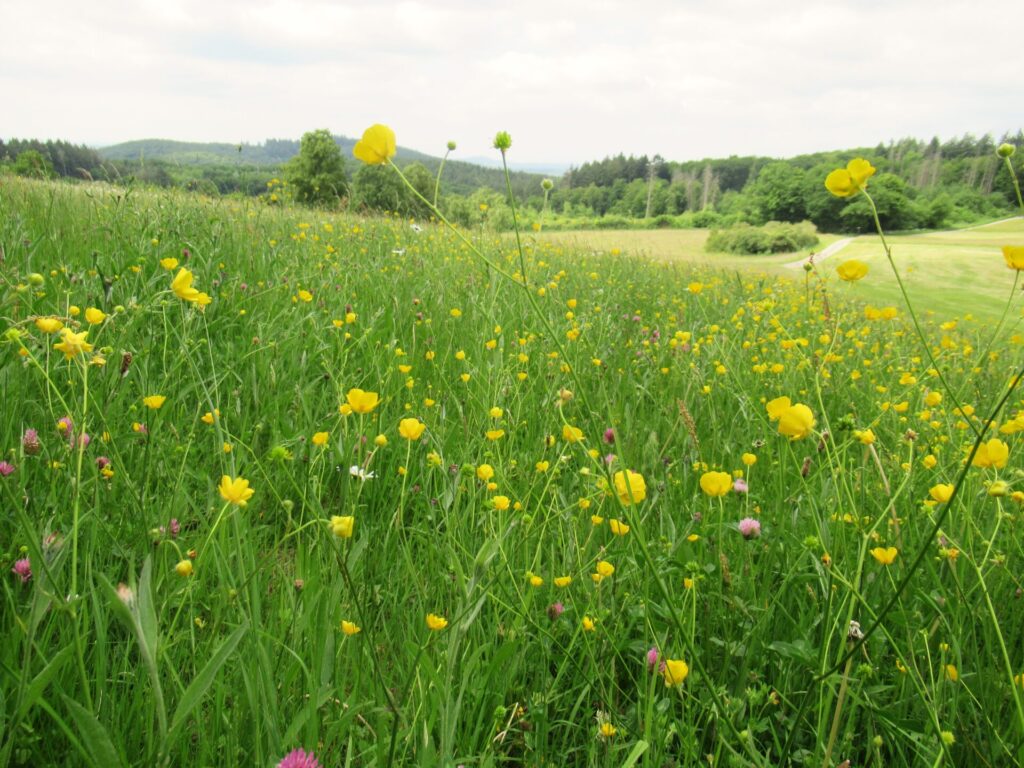
And then there were the wildflower meadows, in full bloom in May. They take my breath away every time.
I’ve taken tons of flower photographs and am tempted to inundate you with them. But often less is more, so I’ll just share one here, hoping it’ll give you the same jolt of happiness it gave me.
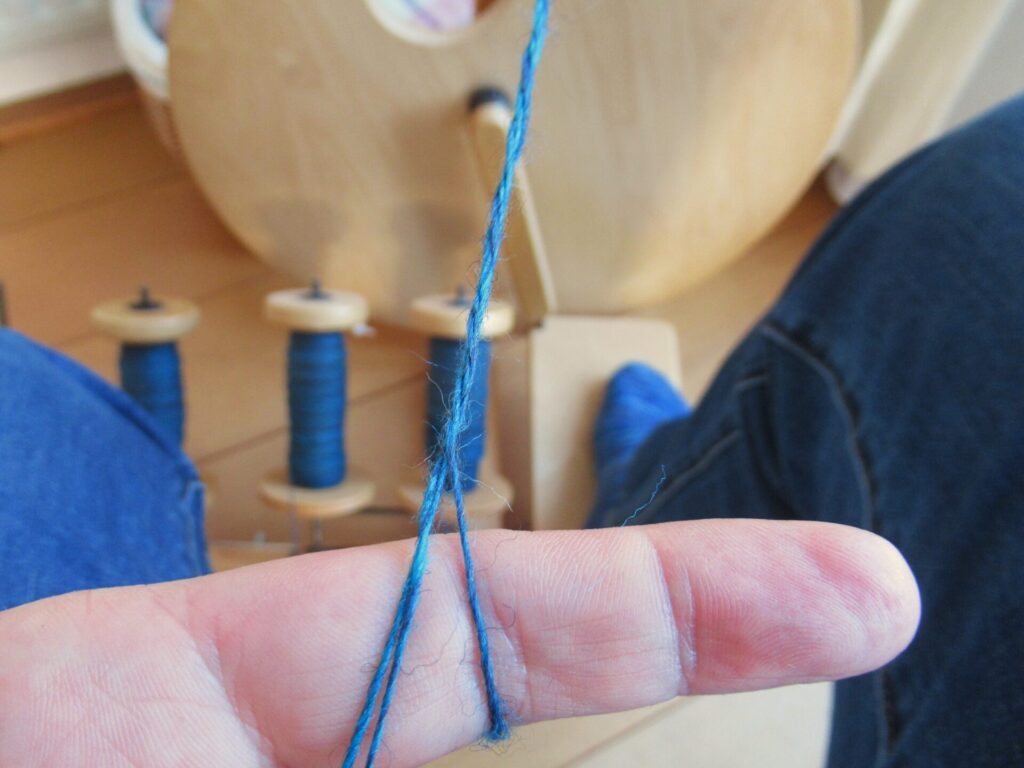
‘How long does it take to spin enough yarn for a sweater?’ people sometimes ask me. So far, I’ve always given rather vague answers, along the lines of ‘It all depends…’ Now, for once I’ve kept a log for a more concrete answer.
It all started with a gift of 200 grams of spinning fibres from my knitter, spinner and dyer friend L.
A very soft, fine and slippery silk-merino blend from Ashford, in a shade called Salvia.
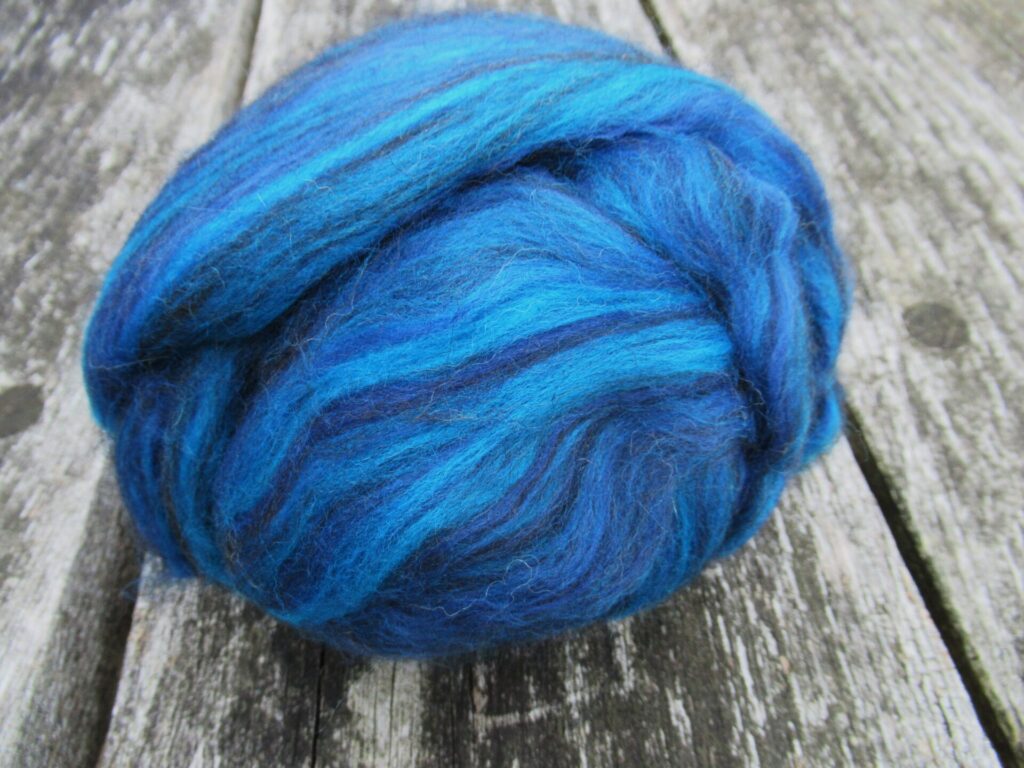
It would have been enough for a shawl, but I wanted to turn it into a sweater quantity and added some Harvest Hues top from John Arbon – a blend of zwartbles, bluefaced Leicester and merino, in a shade called Woad.
I spun and spun – sky blue and lime green…
…frog green and navy blue…
…more blues, and also a hint of white and a touch of black.
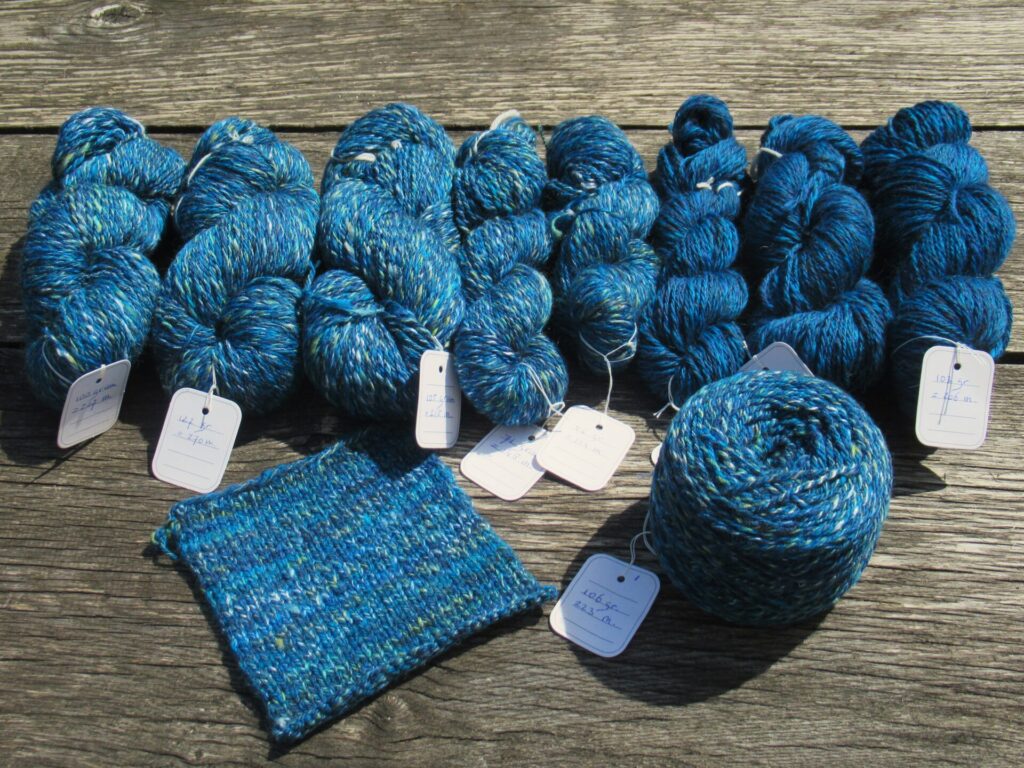
Spinning 200 grams of Salvia and 365 grams of Woad took 19 hours.
Then I plied those blues and greens together – 2 plies of Woad, 1 ply of Salvia.
565 grams, 4 hours and 25 minutes of plying.
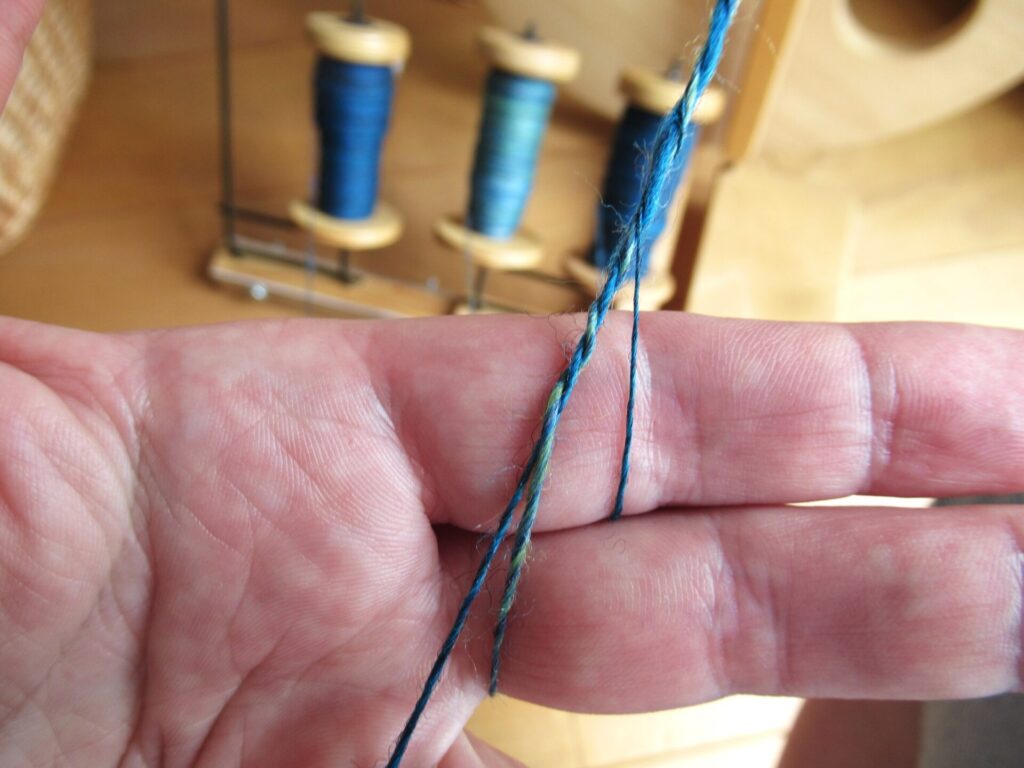
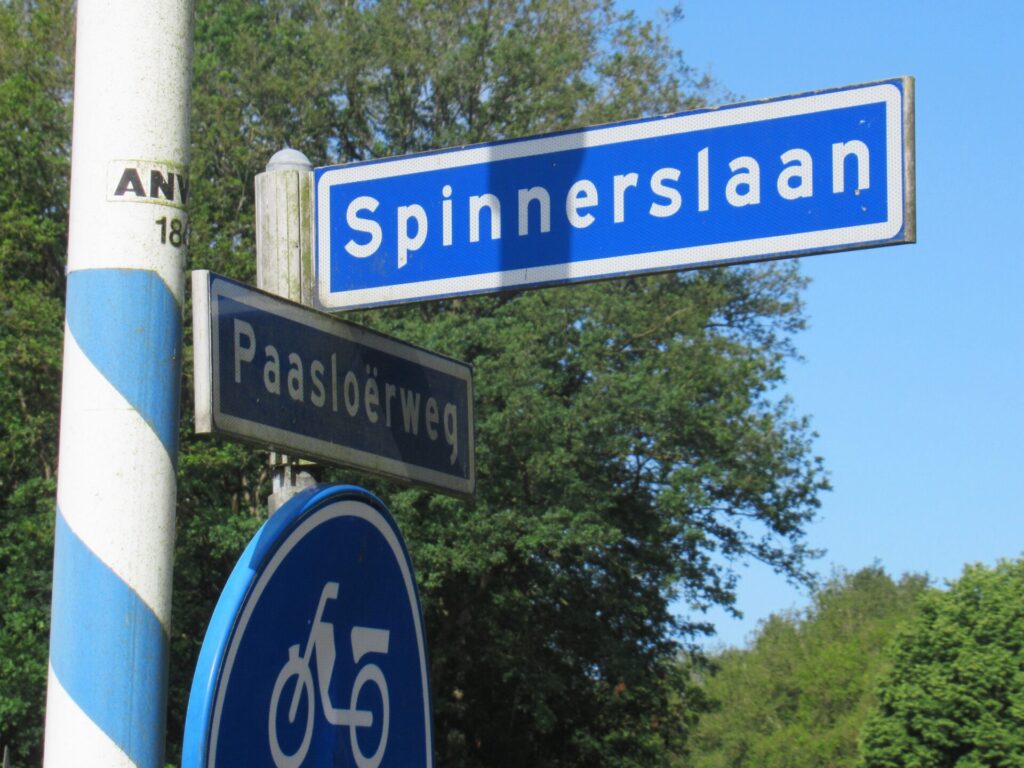
After that, I had 235 grams of Woad left. With those, I spent almost 8 hours in Spinners’ Lane.
Finally, I plied three plies of Woad together, 1 hour and 45 minutes of plying.
Adding everything together, I spun for 27 hours, plied for 6 hours and 10 minutes, and ended up with 800 grams of a worsted-weight yarn in total.
The yarn is approximately 200 m/219 yds to 100 grams, and knits up at 17.5 sts to 10 cm/4” on 4.5 mm/US 7 needles.
So, how long does it take to spin enough yarn for a sweater? About 33 hours and 10 minutes. At least, if you spin a 3-ply worsted-weight yarn from a blend of different wools and silk, and spin at my not-so-fast speed.
And if you want a bulky singles and are a beginner spinner? Or a DK-weight made up of 2 plies? Or an alpaca, hemp or yak yarn? Sorry, I have no idea. All I can say is, there are quicker ways to get yarn than hand-spinning it. Only none of them have the same meditative quality, and none of them will give you a yarn quite like hand-spun.
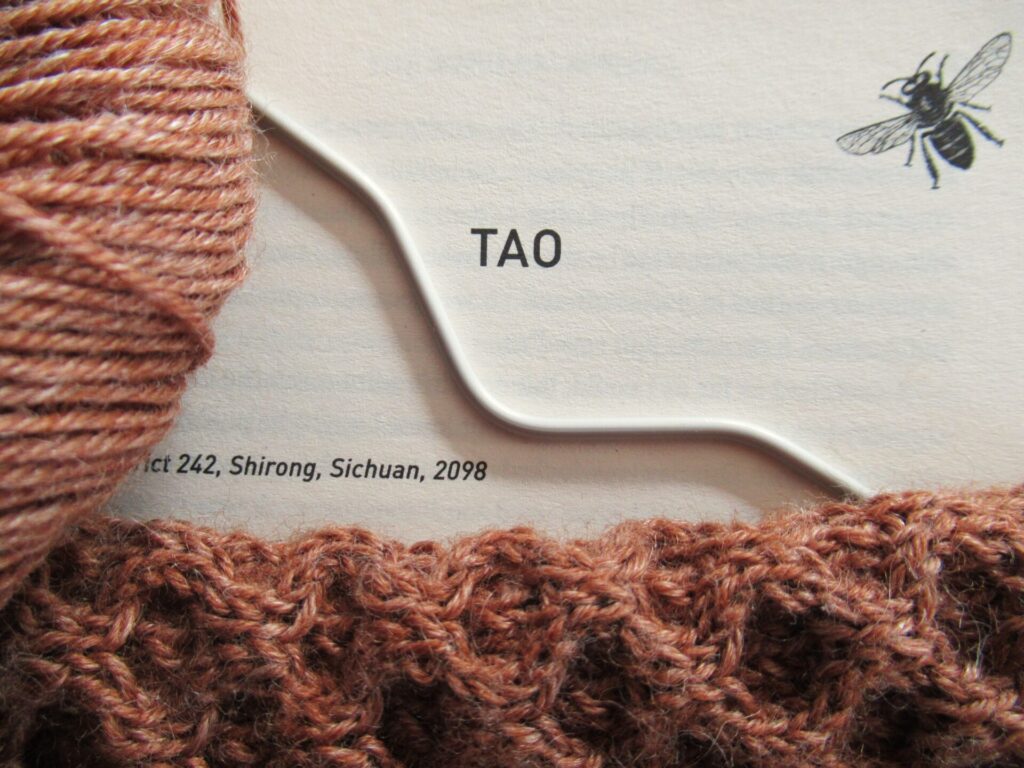
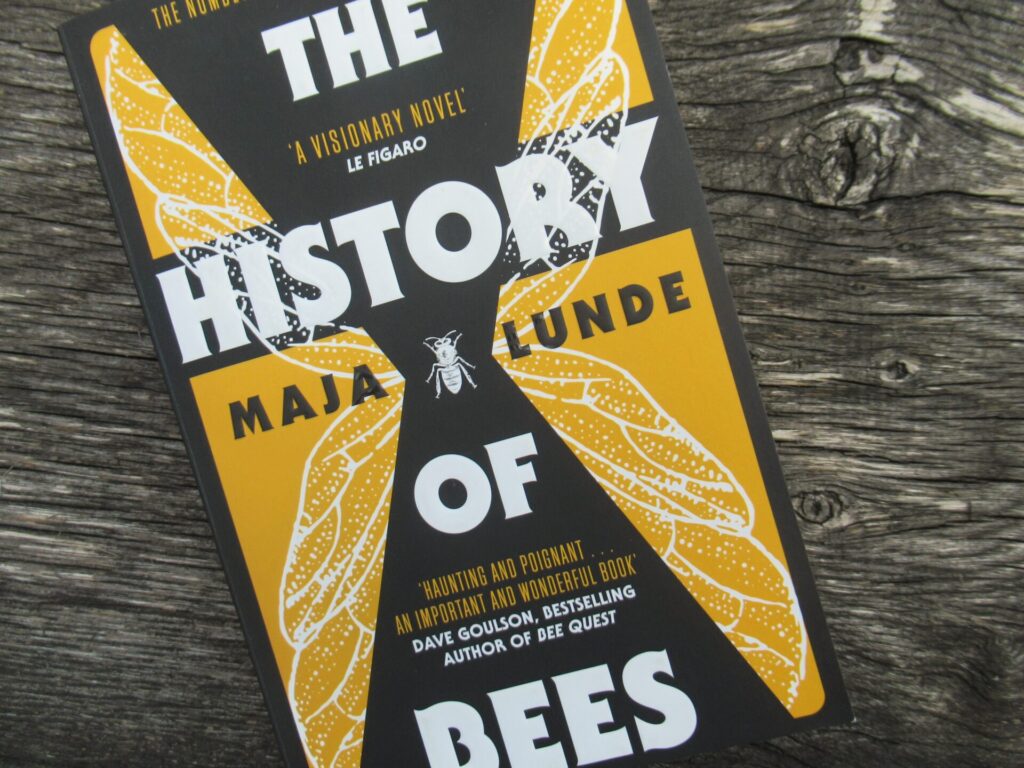
Hello! Both my knitting (at least some of it) and my reading have been bee-themed lately. To start with the reading, I’ve just finished The History of Bees by Norwegian author Maja Lunde. (Thank you for the tip A.!)
It is set in three different countries and three different periods: 19th century England, more or less present-day USA, and China in the not-too-distant future. It also has three different protagonists. The common denominator is that in all three of the settings bees play an important part. In the dystopic future China story line, bees have become extinct and orchards have to be pollinated by hand.
It is not just a book about bees, but also about parenting. From time to time, I found it painful to read how self-absorbed the parents were and how they failed to really see and hear their children. It’s a cleverly constructed book and an absorbing read with interesting characters. And although it is unsettling, it also offers glimmers of hope.
The old pear tree in our garden flowered profusely this spring.
I remember years when it was positively buzzing with bees. In recent years there were fewer bees, and this year it’s been eerily quiet.
It is worrying, to say the least. Will we need to pollinate the blossoms by hand from now on, like they do in China in The History of Bees?
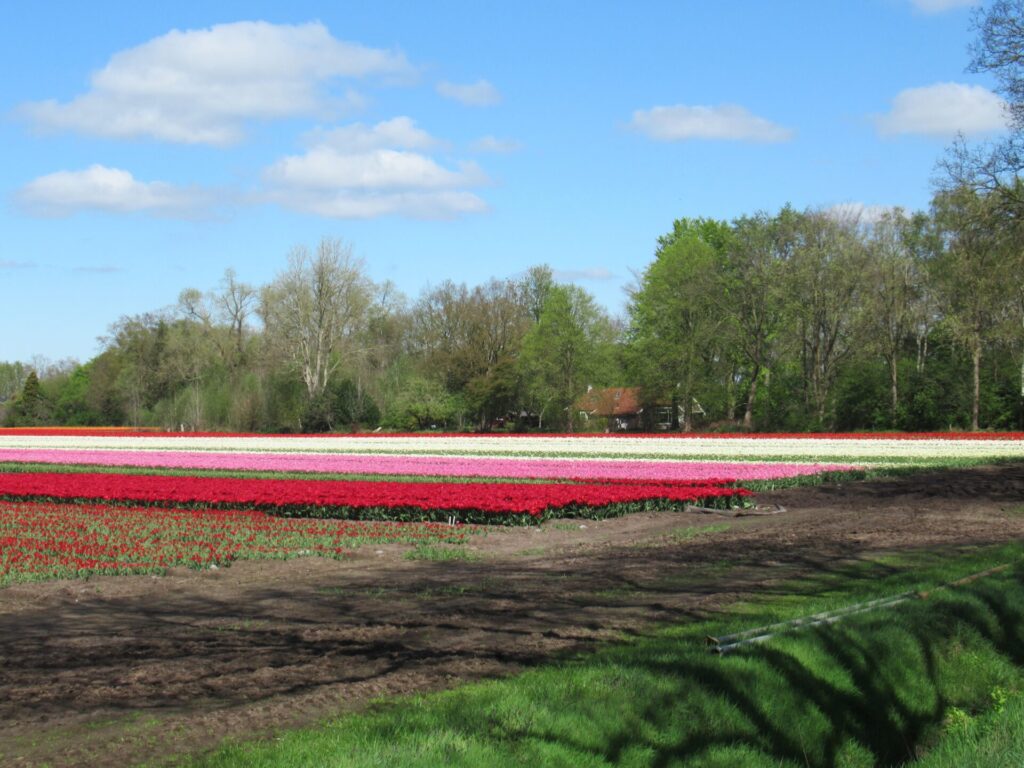
There are various reasons for the worldwide decline in bees and other insects, and the use of pesticides is one of them. We live in a part of the country that wasn’t traditionally a flower-growing region. But now we suddenly see tulip fields popping up here and there.
A beautiful sight, absolutely, but also an upsetting sight to me.
Growing tulips involves large amounts of pesticides. And it’s even worse with peonies and lilies, which are also grown in more and more fields around here, too. Really, really worrying (also because of the link of pesticides with Parkinson’s, Alzheimer’s and ALS), but what can we do?
Now, onto a more light-hearted subject: knitting. The Imker sock on my needles is growing slowly. It is knit from the toe up and I’ve just finished the heel.
Imker is the Dutch word for beekeeper. A well-chosen name, as the foot and leg are covered in a honeycomb cable pattern. It is a time-consuming but interesting sock to knit.
Well, that’s all for today. I hope I haven’t put you off with my worries and being a wet blanket about tulip fields. Hope to see you here again next week. Bye for now!
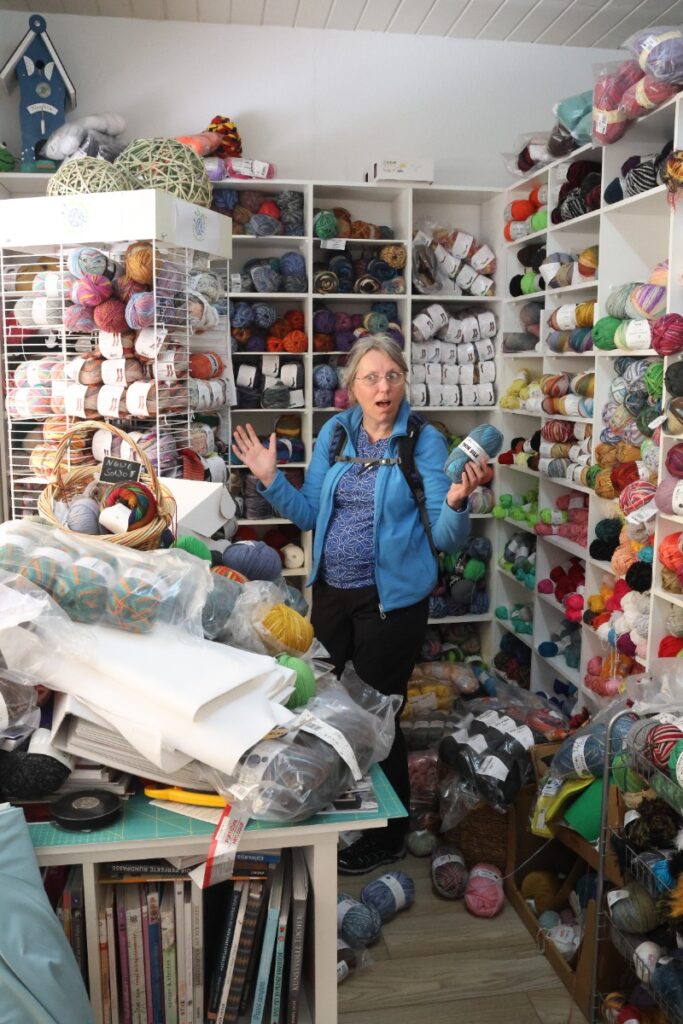
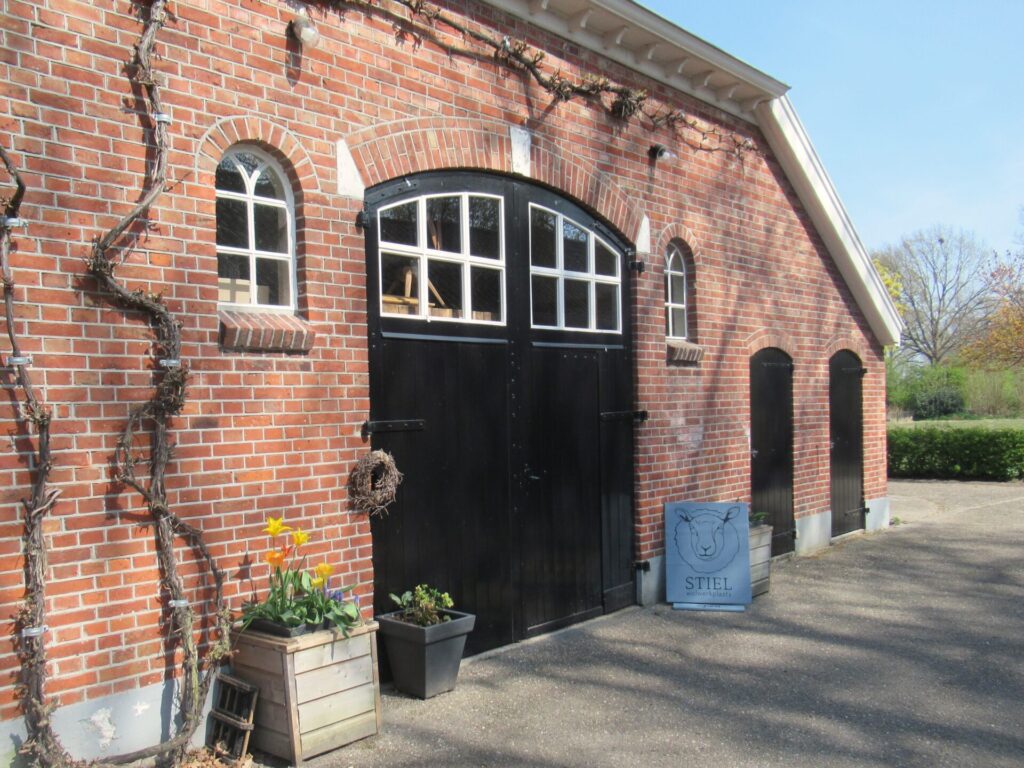
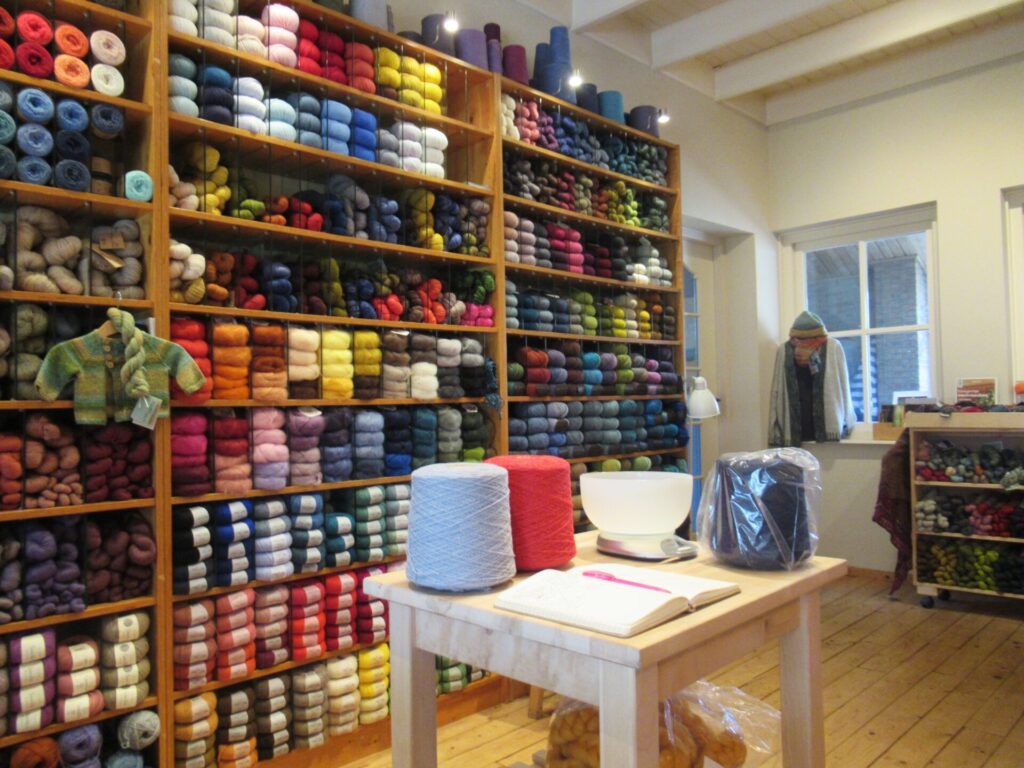
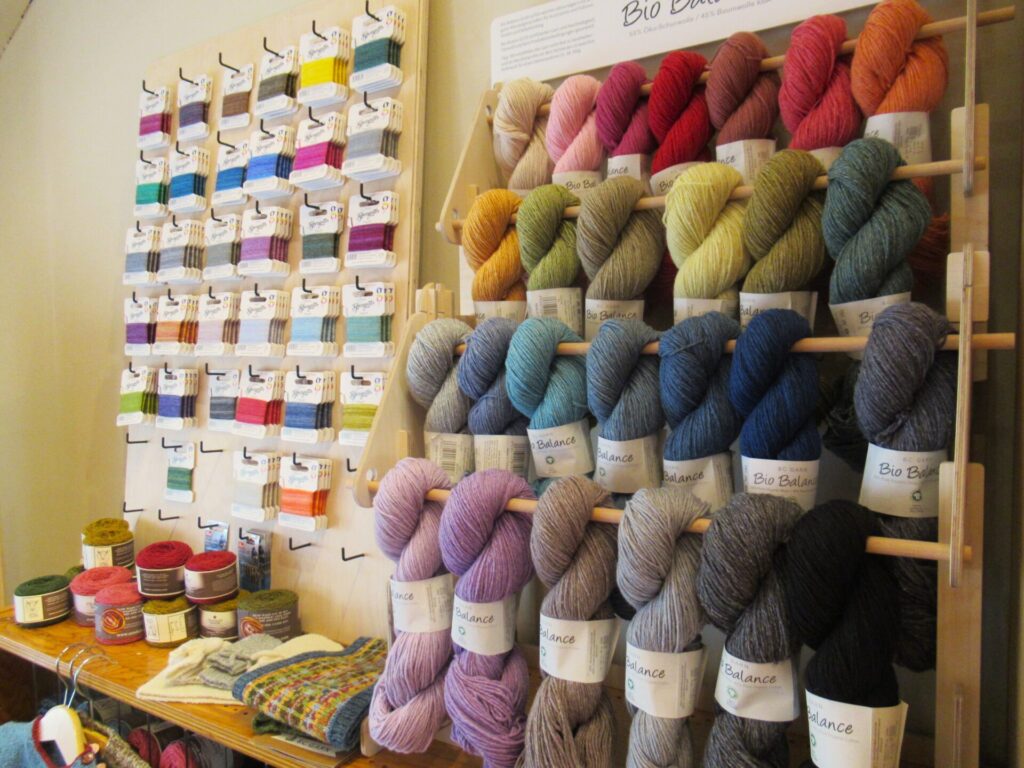
Hello! One of my best friends and I have been on a fun day out. We drove to Bornerbroek in the east of the country, about 30 miles from the German border, to visit a yarn shop called Stiel Wolwerkplaats. (Stiel Wool Studio – the word stiel meaning craft or metier). I thought you might like soaking up the colours at Stiel, too. Just gazing at a wall of yarn in all the colours of the rainbow makes me so happy. Does it do that for you, too?
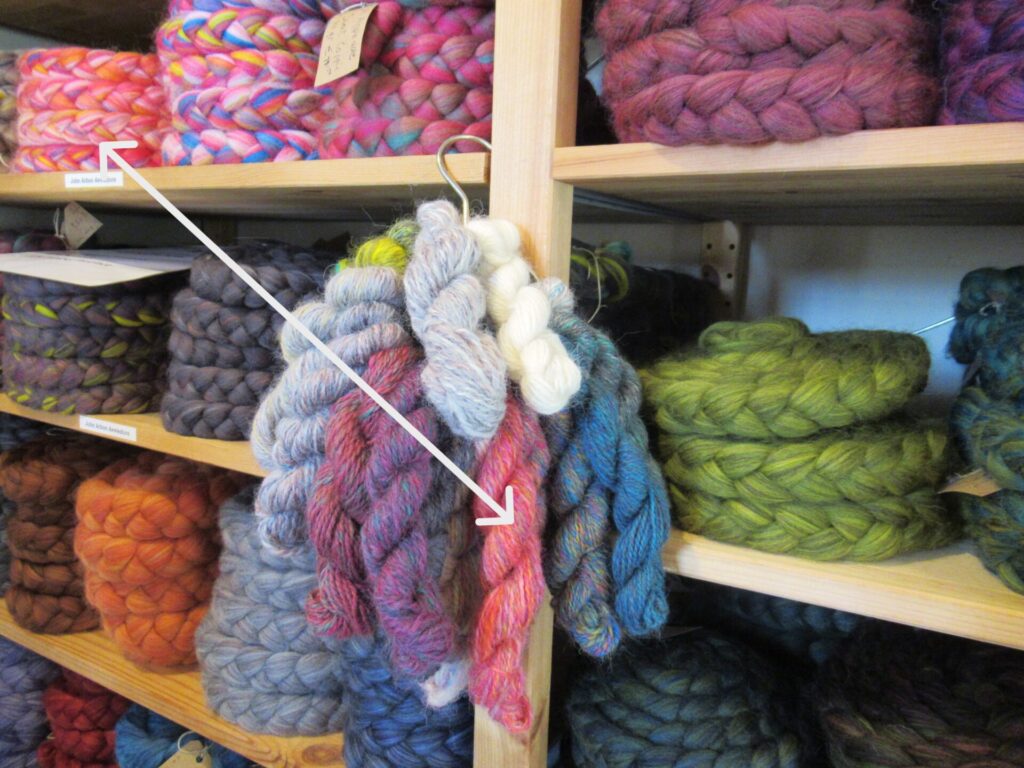
One of the things that distinguish Stiel from other yarn shops is that they also stock spinning fibres. It is the only shop I know of that does so. Their wall of spinning fibres is a joy to gaze at, too. And what I really appreciate is that next to the fibres, they have a bunch of mini-skeins to show what they look like when spun up. For instance in the photo below, the orange-pink mini-skein in the centre is the fibre top left. It’s very nice to be able to see how the colours blend together.
To the left of the big wall of yarn is a corner with BC Garn’s Bio Balance, a GOTS certified wool-and-cotton blend that I’d love to make something from. And next to that, beautiful embroidery wool-silk from Fyberspates.
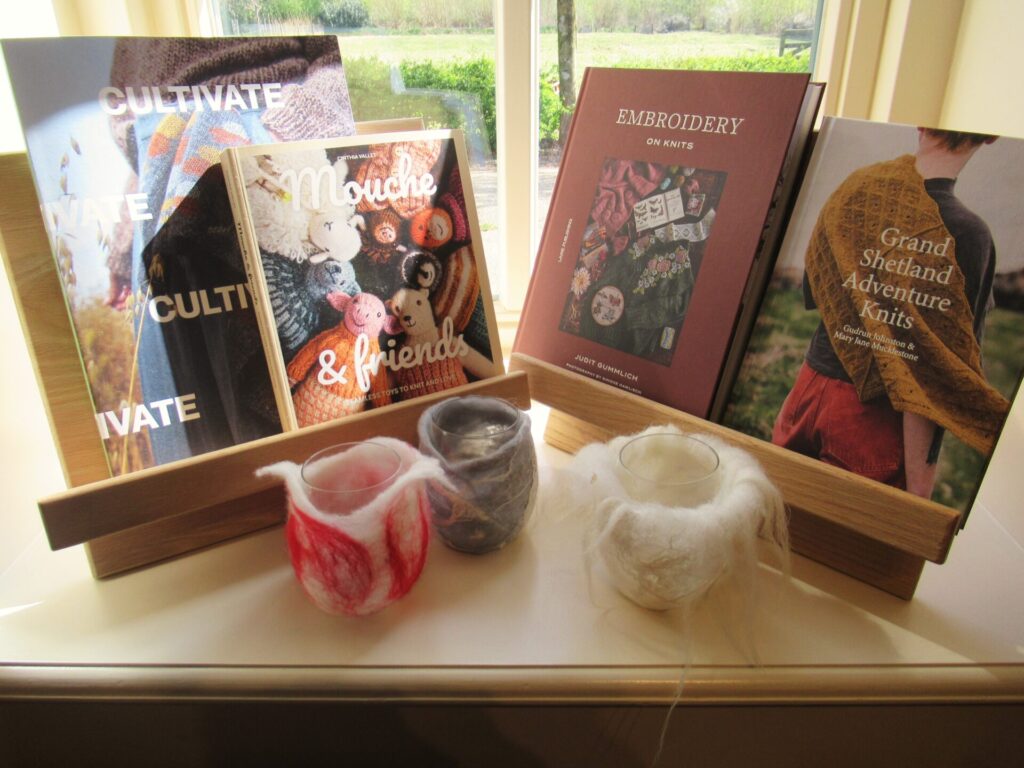
In the windowsill several recently published knitting books.
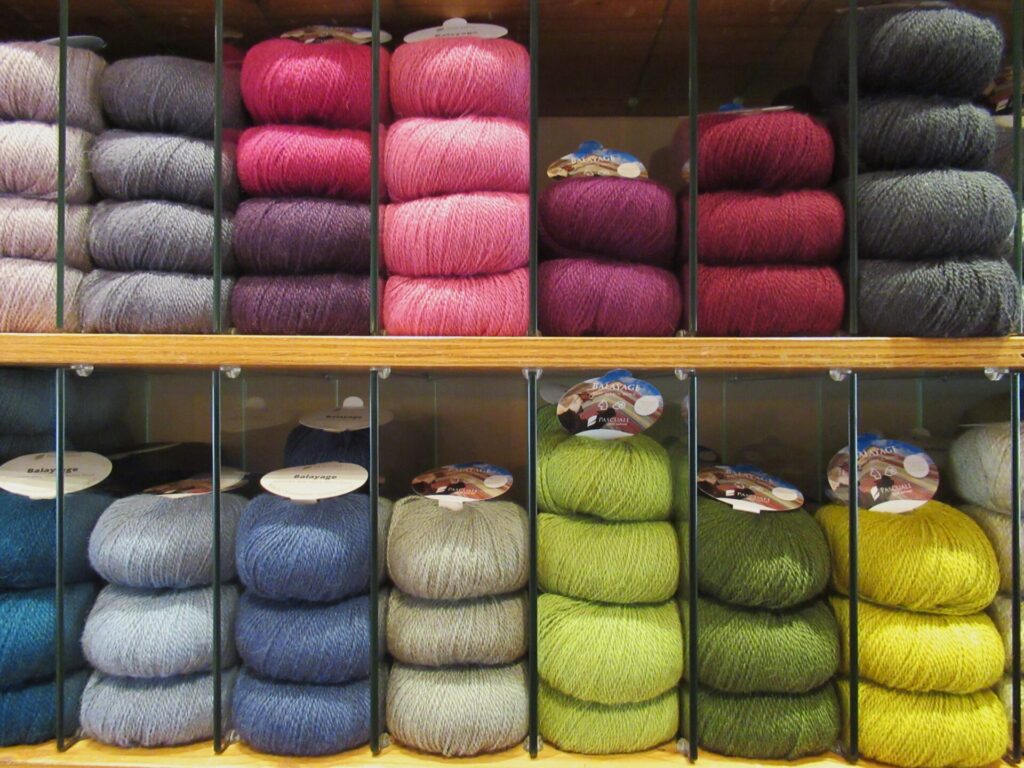
I can’t possibly describe all of the yarns at Stiel – I’ll just pick out two more. First up: Balayage from German firm Pascuali, a blend of 80% baby alpaca and 20% extra fine organic merino wool.
It’s like meeting a friend I haven’t seen for a while. In 2020, at a time when we were all forced to stay at home a lot, I used 4 skeins of Balayage for my Thús 2 scarf with its rows of lacy houses.
I have given the original scarf away, and the shop where I originally bought the yarn has closed its doors, so I was tempted to buy some Balayage for another scarf like it. But I didn’t, as there were other things on my shopping list.
The second yarn that caught my eye was Kashmir Lux (95% geelong lambswool; 5% cashmere). Its colours are so very beautiful and subtle.
With 1000 metres on a 50 gram cone, it is an extremely fine yarn. I think it’s stunning, but what would I knit with such a fine yarn? For now, I left that on the shelves too.
Ah, so many impressions. Time for a cup of tea with a little something – apple pie for my friend, carrot cake for me.
We had tea at 100-year-old Theehuis Dennenoord. They have dozens of teas to choose from and serve huge slices of cake. It is a 30-minute drive from Stiel, but we had all day and wanted to make the most of it.
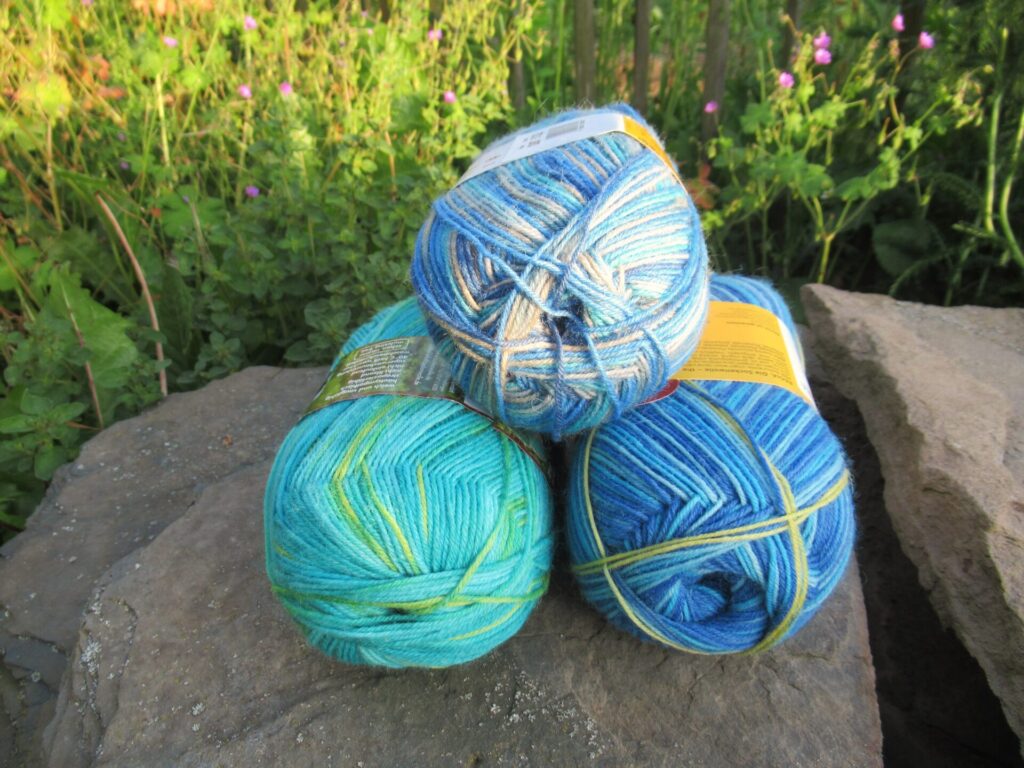
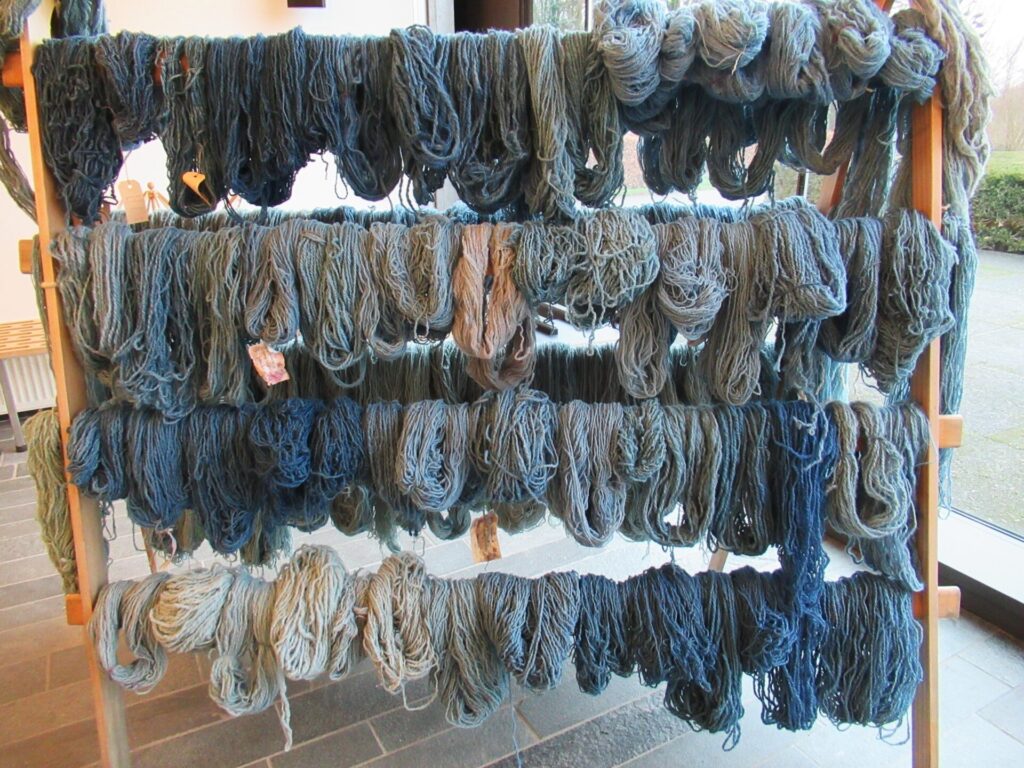
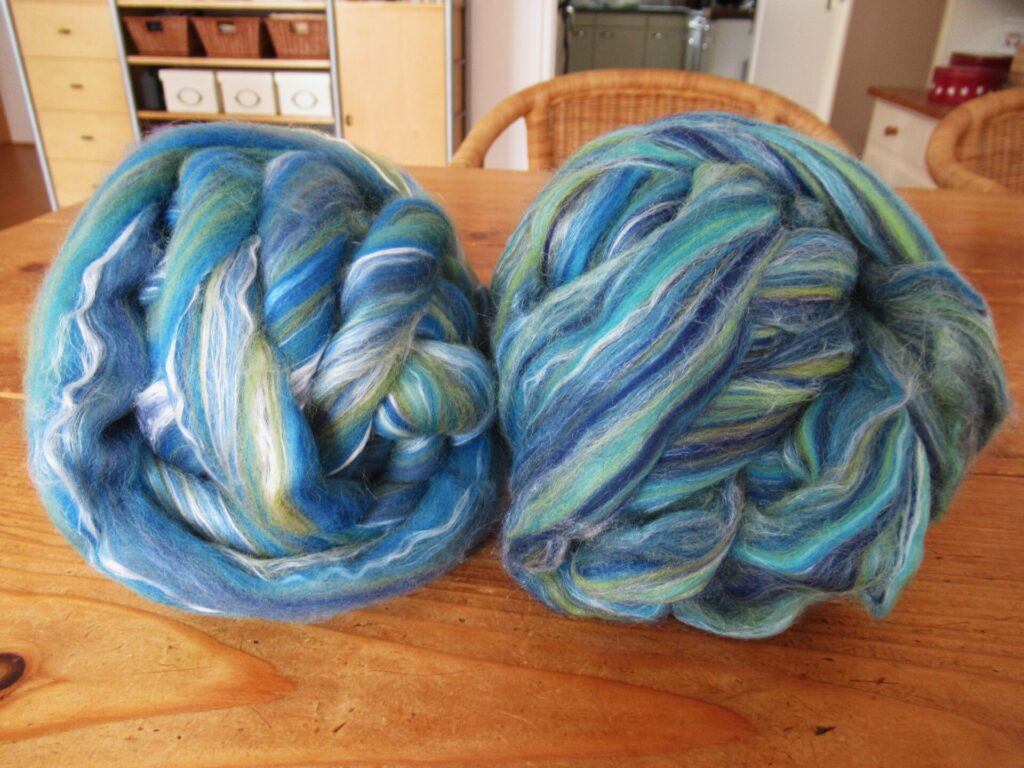
I’ve mentioned several things that didn’t come home with me, but what did? First of all, some spinning fibre in blues and greens. It is John Arbon’s Harvest Hues top in shade Juniper (zwartbles, bluefaced Leicester and merino). I’ve stored it away for autumn, because I have other spinning projects I want to finish first.
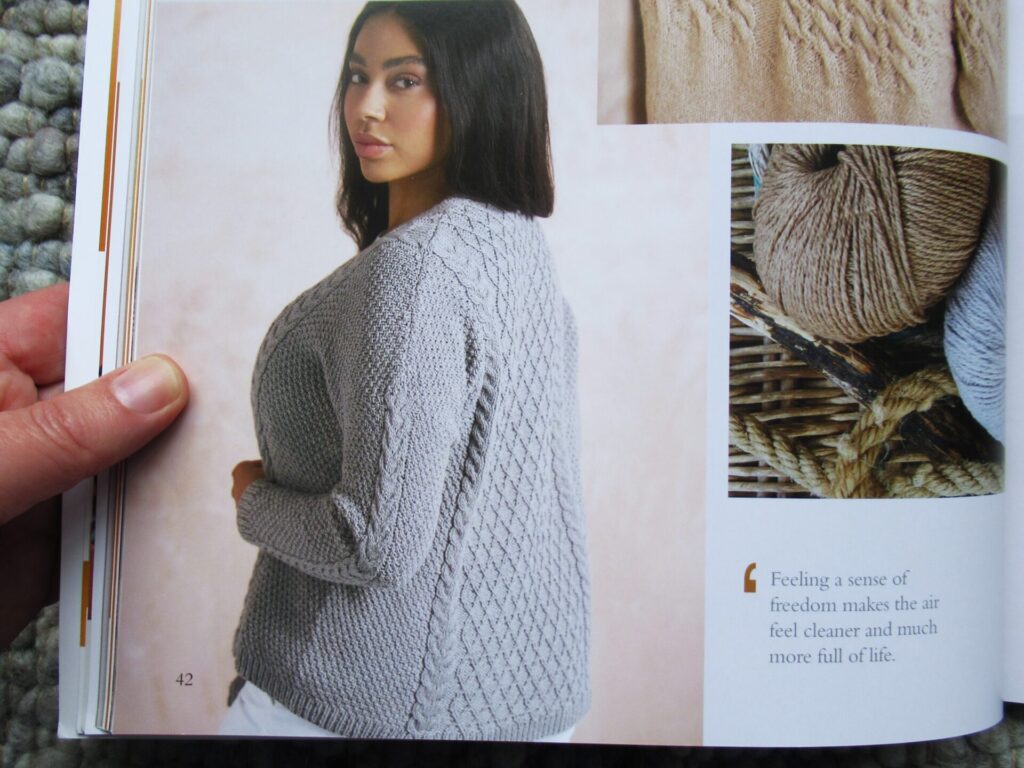
Next, Rowan Magazine 71. It is an older issue, from spring 2022, and just like the Balayage yarn it is a reminder of the difficult pandemic years. Most of the photographs were taken indoors, instead of in the usual beautiful scenery, probably because of restrictions. There is also more variation in the photo models in this magazine, compared to the usual skinny ones. This is one of my favourite designs in the Magazine – the Free cardigan designed by Vibe Ulrik Sondergaard (the cardigan is called Free, the pattern isn’t free).
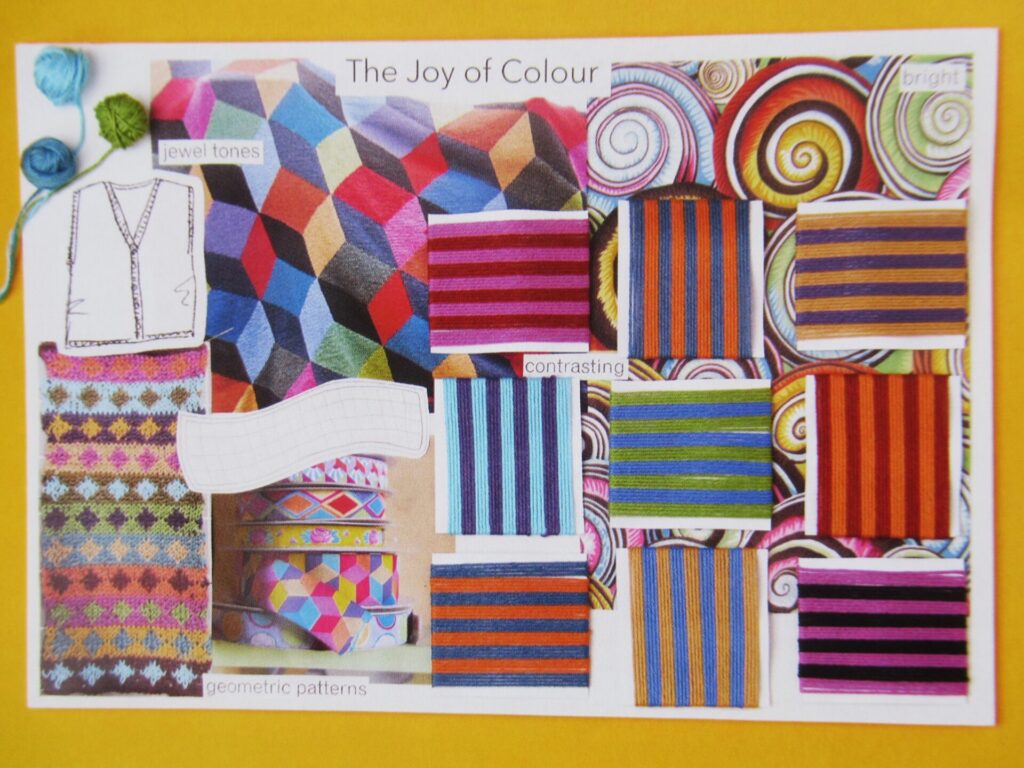
It seems to me that the pandemic had a positive effect on the Rowan team, not just in their choice of models, but also in their more creative approach to presenting the designs. The theme of the magazine is Joy, and the designers were asked where they found joy. Here is how two of my favourite designers depicted that on a kind of scrapbook page. Kaffe Fasset finds joy in colour (where else?).
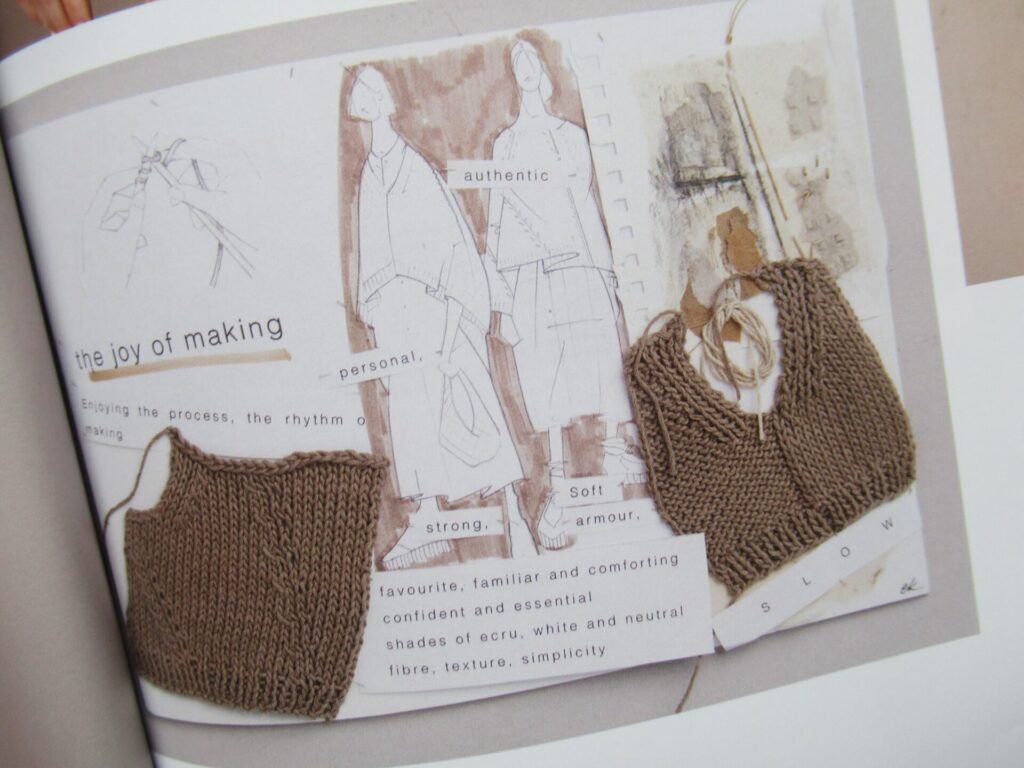
And Erika Knight shows how making gives her joy.
Finally, several skeins of a soft cotton-and-cashmere yarn came home with me. They are meant for a wee garment for our second grandchild, expected later this summer. So exciting! Our daughter is doing well, the baby is growing healthily, and my knitting needles are working overtime. I can’t tell you about those projects yet, but I’m sure I’ll be able to find something else to write about next time. See you then!
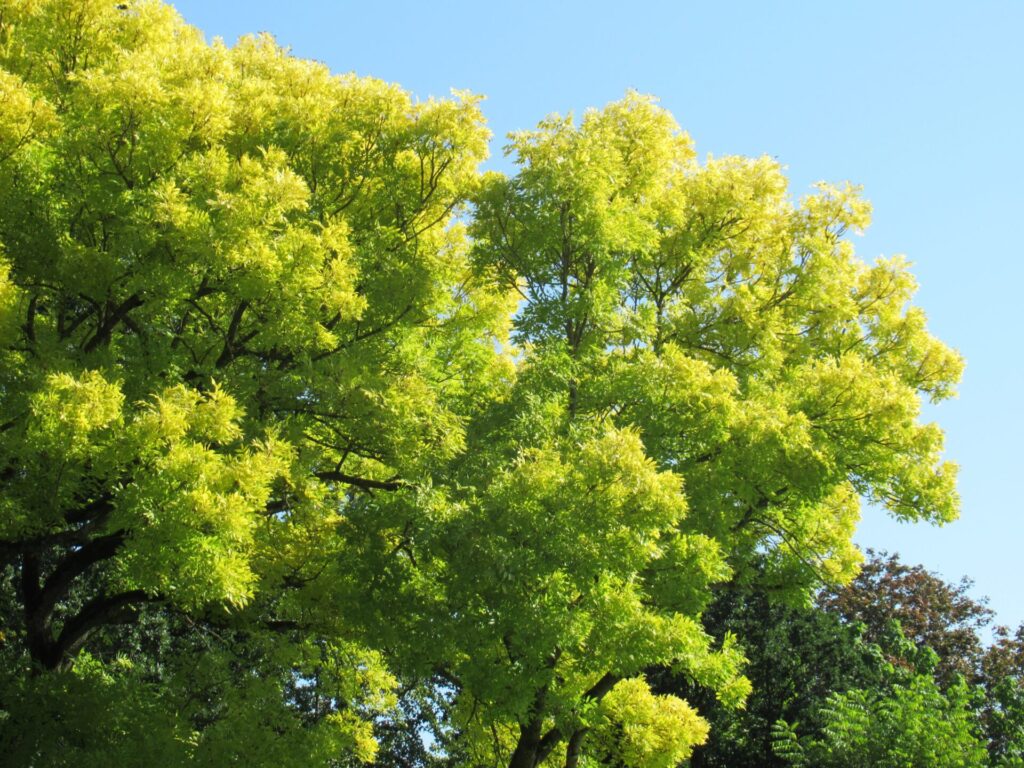
Hello! I hope you’ve had an enjoyable Easter weekend. Or perhaps you’re even having a longer Easter break? For us it was a long weekend, with several little outings. On the Saturday we first worked in the garden, and in the afternoon I went cycling. It was a lovely, sunshiny day for a ride, with lots of blossoming trees along the way.
After a little under an hour, I arrived at my destination – Atelier Lindelicht. I’d come to collect my scarf that had travelled to several crafts fairs with Marianne. Her studio is always such a nice place to have a browse.
(The shawl with the crocheted border is from her hand-dyed Oda kit.)
After a cup of tea and a chat, I took the long route home, partly through an agricultural area…
… and partly through a nature reserve along a river.
On Easter Sunday, we always have a special breakfast that wouldn’t be complete without my husband’s home-baked paasbrood, the traditional bread with a marzipan core that is basically the same as our Christmas stollen.
Our grandson got to try on his new Norwegian pullover and wanted to keep it on straightaway. Knit in a fine yarn, it took me longer than I’d thought. It’s the same number of stitches and the same number of rows as my own Sundborn cardigan.
It is a Nordsjøgenser, knit from Sandnes Babyull Lanett. (Pattern not on Ravelry; I wrote about the pattern booklet here.) It is knit from the bottom up, with the body and sleeves knit separately first. Then everything is placed on one needle for the raglan yoke.
In the pattern, several stitches are bound off under the arms to be seamed later. I placed the stitches on pieces of waste yarn instead of binding them off.
This creates a big gap.
Here is how to close it:
1) On the wrong side, pIace the stitches from the waste yarn on two needles and bind them off with a third needle. Make sure to leave yarn tails of at least 4” (10 cm) at both the start and the end of the bind-off.
After binding off there are still fairly large gaps left on either side.
2) Using a darning needle, thread a yarn tail around one of the gaps and pull the gap closed.
3) Weave in the end and repeat on the other side of the bind-off.
Repeat steps 1 – 3 for the other underarm gap. I’ve closed underarm gaps in this way several times now and find it easier and neater than casting off under the arms and seaming the gaps.
Well, that was pretty technical. To close off and bring a smile to your face (or maybe even make you laugh out loud), here is a photo I took at a fair we also visited during the Easter weekend. Somebody had been knitting for many, many hours…
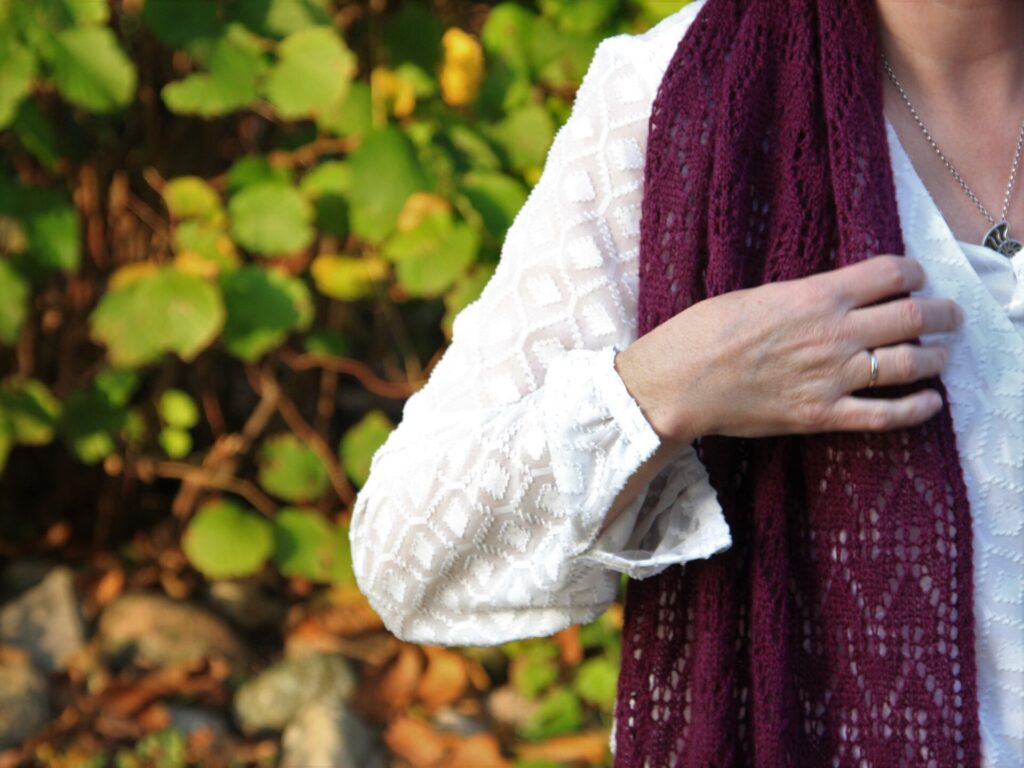
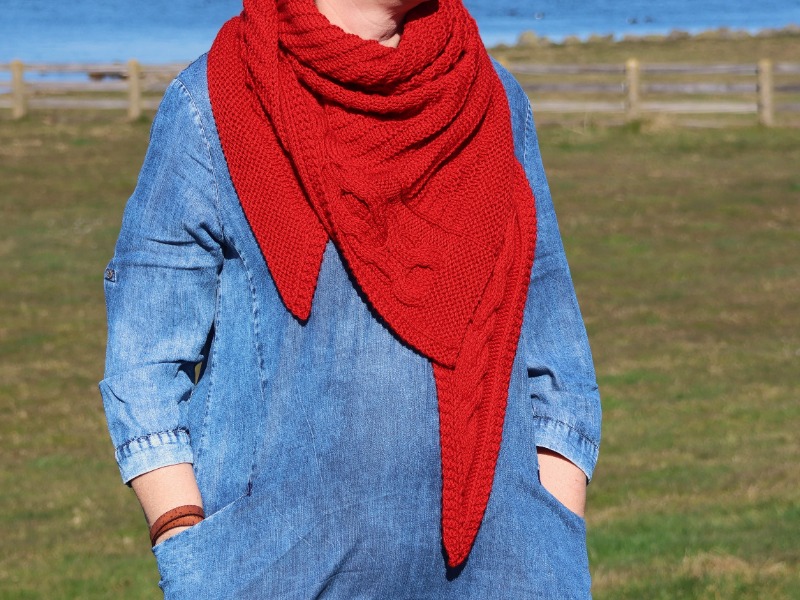
Hello! A day earlier than my usual Friday posts because I’m away tomorrow, I hope this reaches you well. I was going to publish this, my hand-knit ode to love, even earlier. Two months earlier to be precise, on Valentine’s Day. But when it comes to knitting, I’m not rushing anything.
For me, knitting is all about love. Love for the people I knit for. Love of the materials and the techniques. Love of working with colour. And love of the rhythmic and relaxing nature of knitting. With all of that in mind, I designed a shawl I named OXOX XL.
One side of the shawl is adorned by the traditional OXOX cable, also known as the hugs-and-kisses cable.
That explains the OXOX part of its name. The XL part refers to the size of the cable. Traditionally it is worked over 8 stitches and 16 rows, but for extra large hugs and kisses I’ve enlarged the cable both widthwise and lengthwise.
With a wingspan of approximately 1.80 metres (71 inches), OXOX XL is a generous but not overwhelmingly large shawl.
It is big enough to be worn with the point at the back and one end draped over the shoulder…
… or tied in a nonchalant single knot.
(Can you see the windturbines in the distance behind my left shoulder? I was not the only one posing against that background. What’ll the cormorant have thought of those two humans there on the dyke, with one of them holding up a strange sort of wing and wrapping it around herself in different ways?)
OXOX XL is also the perfect size to simply be wrapped around the neck, the way I’d usually wear a shawl like this.
I’ve loved working on this shawl, especially knitting the final version. Not just because of the interesting cable and the soothing stocking-stitch-with-garter-ridges alongside it, but also because of the yarn. It is Big Merino Hug from Rosy Green wool, an aran-weight 100% organic merino. Big Merino Hug is super soft, and knit on 5.5 mm (US 9) needles, it gives a lovely and drapey fabric. The colour I’ve chosen is red hot ‘Chili’ – the colour of love.
A colour that feels at home on the IJsselmeer coast, where the photos were taken.
If red isn’t your thing, there are 35 other colours to choose from.
Or perhaps you’d prefer to stash dive? In case you don’t have exactly the kind or amount of yarn specified, or would rather make the shawl larger or smaller, the pattern includes tips for adapting it.
It is available in English and Dutch and contains written instructions as well as charts.
Well, I’m going to love you and leave you now. Thank you as always for reading, and if you’re going to knit an OXOX XL shawl, I hope you’ll love knitting it – for yourself or for someone else you’d like to wrap in a soft, hand-knit embrace.