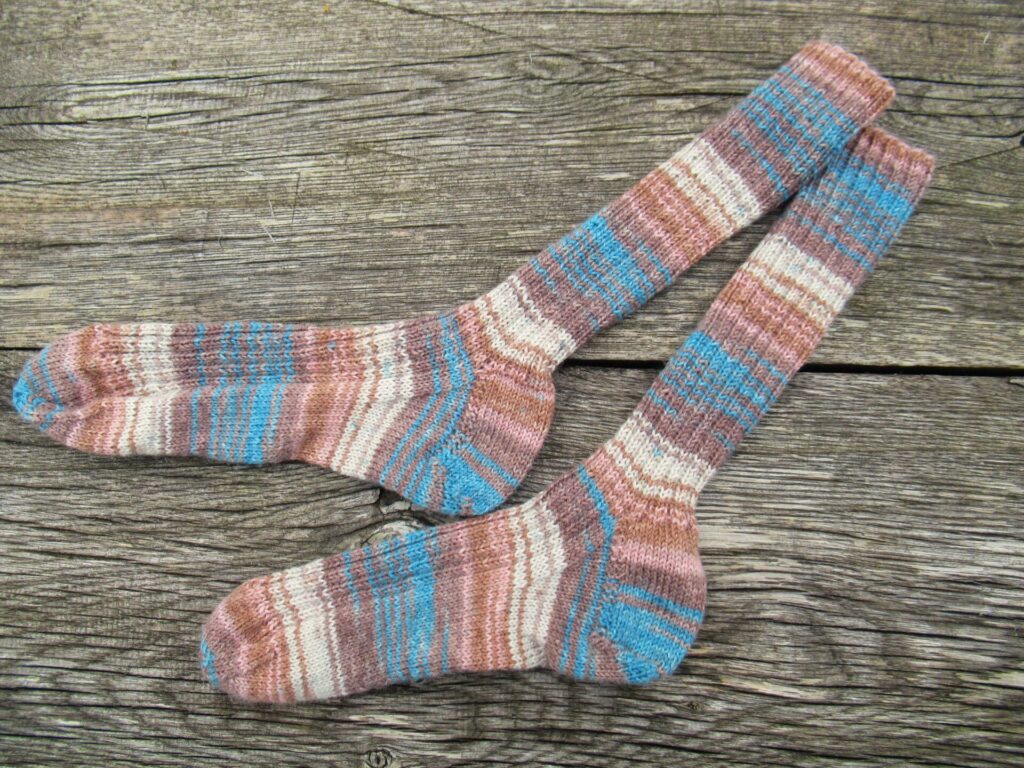
Hello! While I was puzzling over the shoulder problem I wrote about last week, I knit a simple pair of socks for my sister-in-law. The stretchy k2/p2 ribbing will fit snug around her narrow feet. Here they are on my wider feet:
Not the most exciting pair of socks ever, but I thought you might be interested in the yarn – Austermann Step 4 (Irish Rainbow, shade 228). It looks and knits up like a fairly run-of-the-mill 4-ply superwash sock yarn. Only, for its superwash treatment the more sustainable EXP-process was used. Avoiding the use of chlorine and other harmful chemicals, and using far less water, the EXP-process has the GOTS-certificate and several other certificates for sustainable textiles. Though I do have my slip-ups, I try to be a responsible consumer.
Starting the second sock at exactly the right spot in the stripe sequence to get a matching pair is a game I like to play with self-striping yarns. Yay, I won!
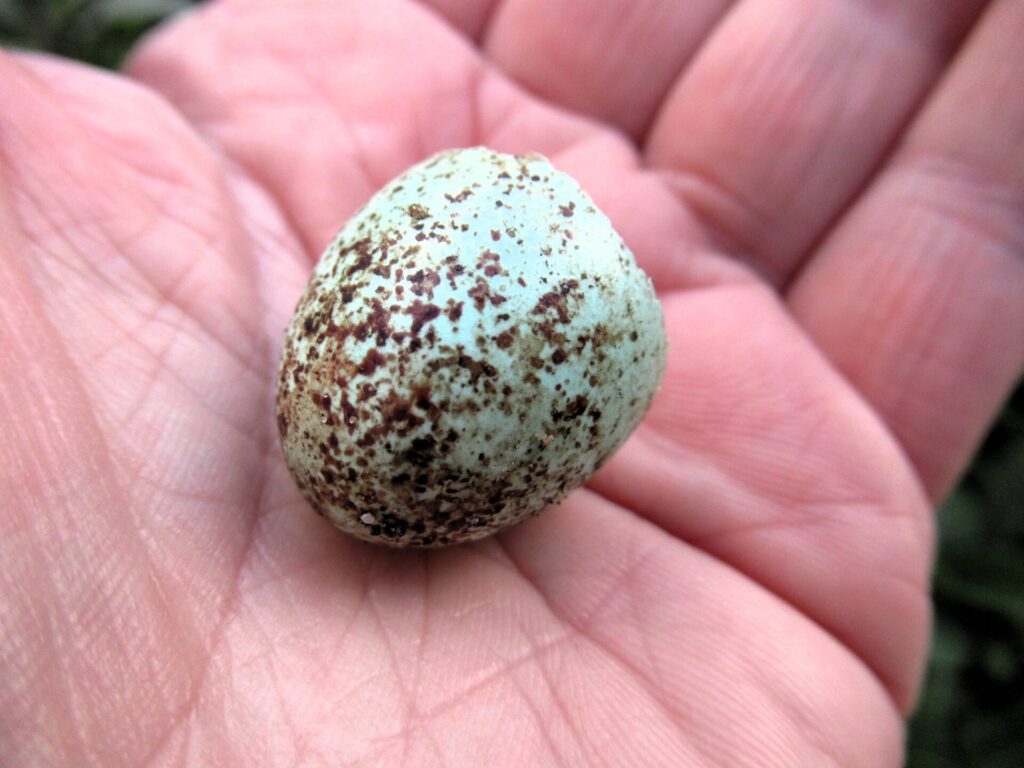
After taking pictures of the socks, I spent some time playing in the garden. Being a responsible adult is all well and good, but the inner child also needs time to play and explore. My hands may be getting spotty and wrinkly, I still get excited about the empty shell of a blackbird’s egg.
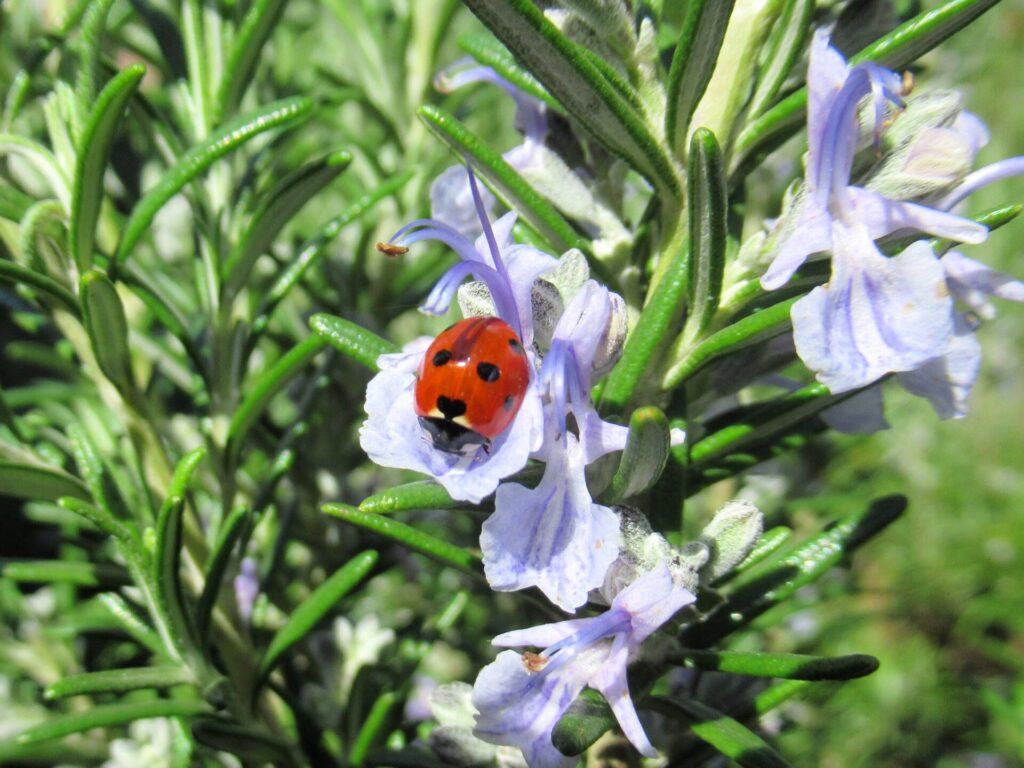
And I still collect bugs, only not in a jam jar but with my camera.
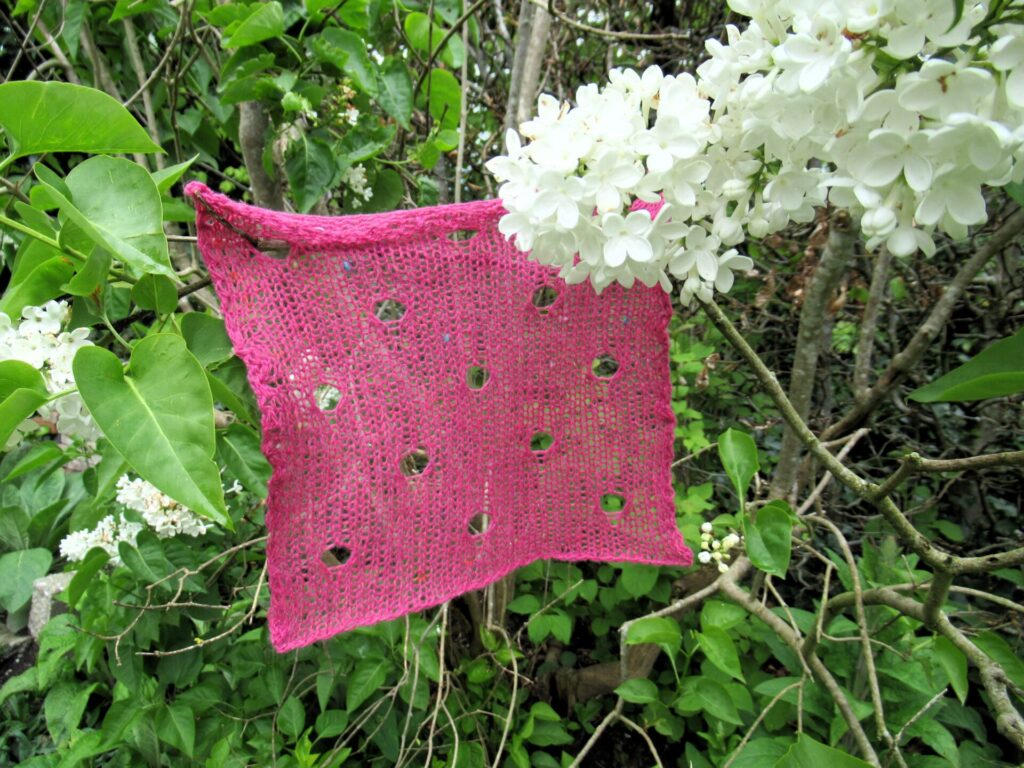
In our white lilac bush, my gossamer swatch for a pink Polka Dot Scarf looks like a fairy’s laundry.
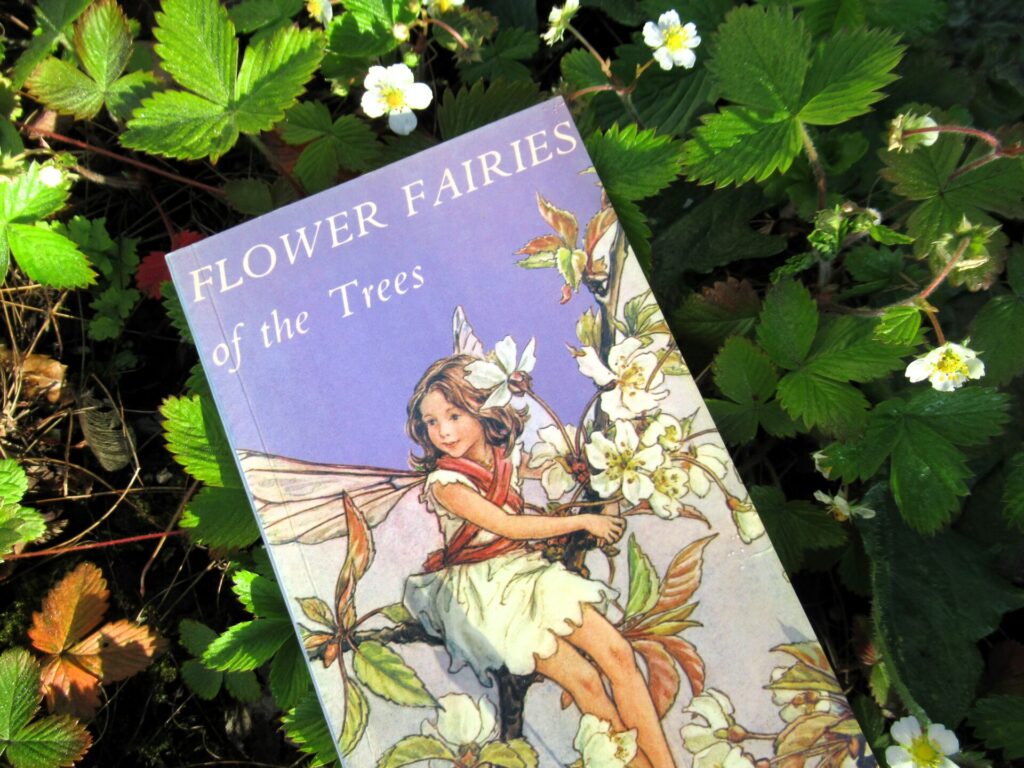
As a young teenager just starting to learn English, I collected the flower fairy booklets by Cicely Mary Barker. I still have them and early on Sunday morning I spent a delightful quiet hour looking at their lovely pictures and reading some of the poems.
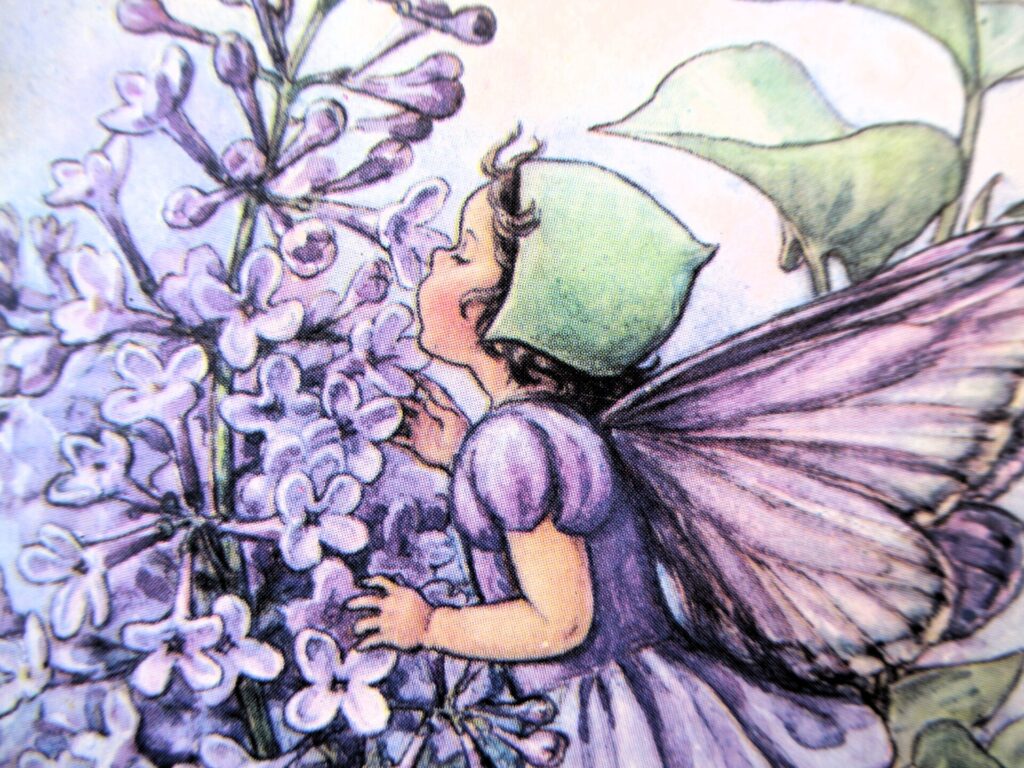
In Flower Fairies of the Trees there is a poem about the lilac that ends like this:
“I love her so much That I never can tell If she’s sweeter to look at, Or sweeter to smell.”
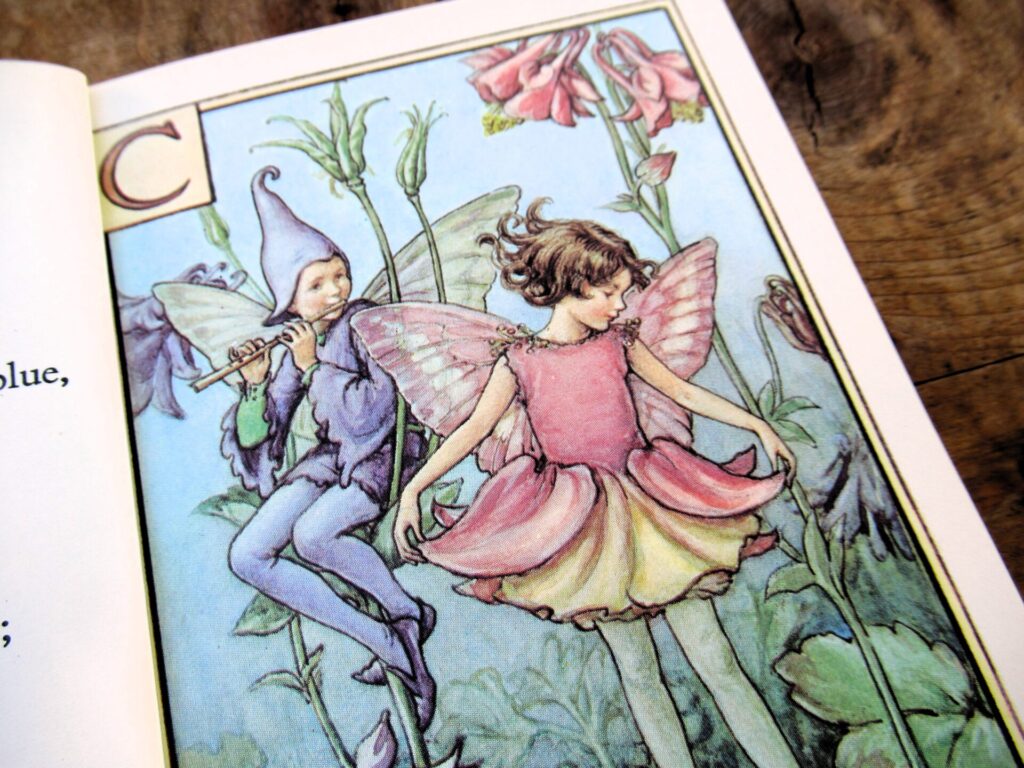
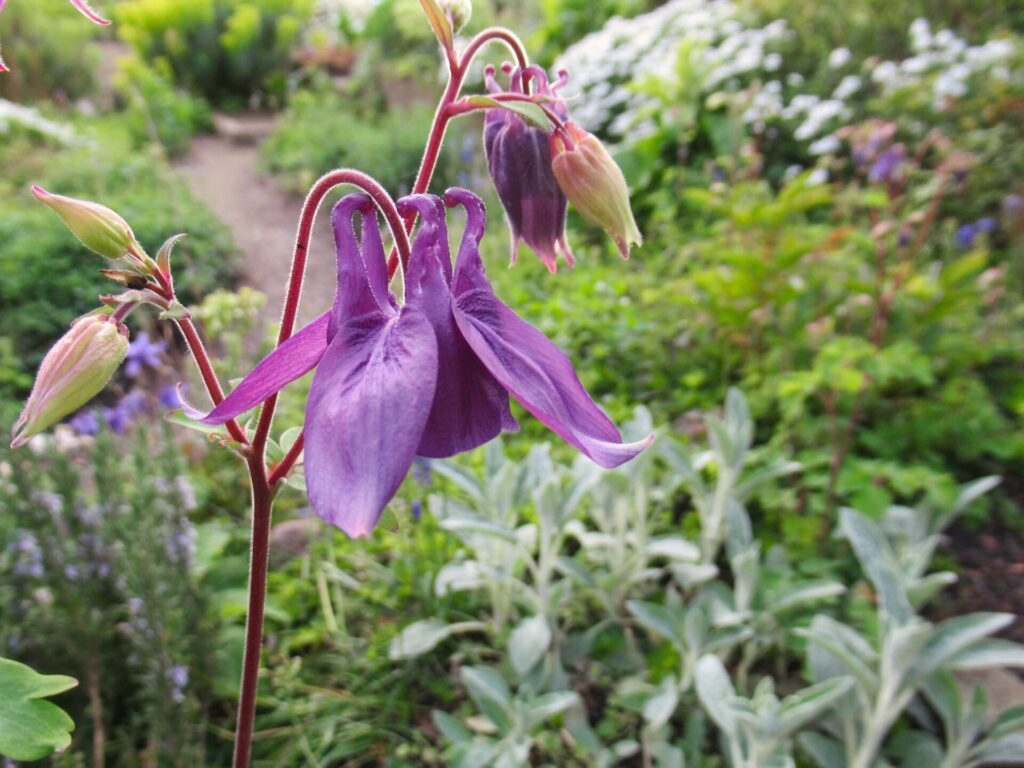
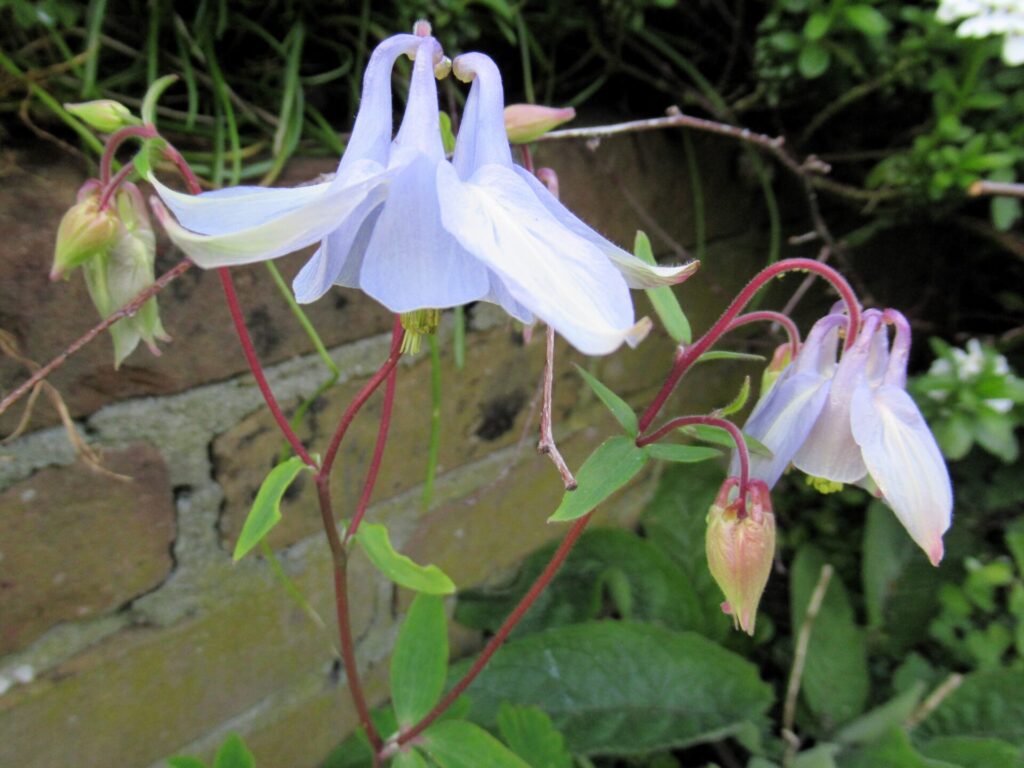
And under the C in A Flower Fairy Alphabet, I came across the columbine (known to me as aquilegia).
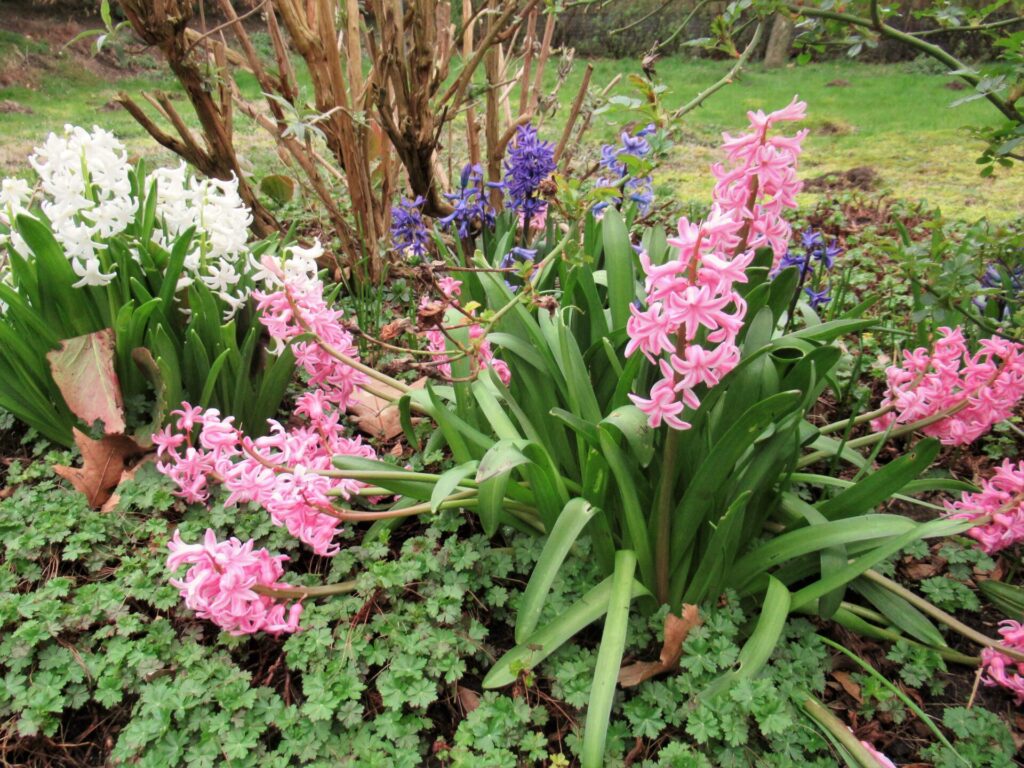
These flowers like fairy skirts are dancing in our front garden in many shades of pink and purple.
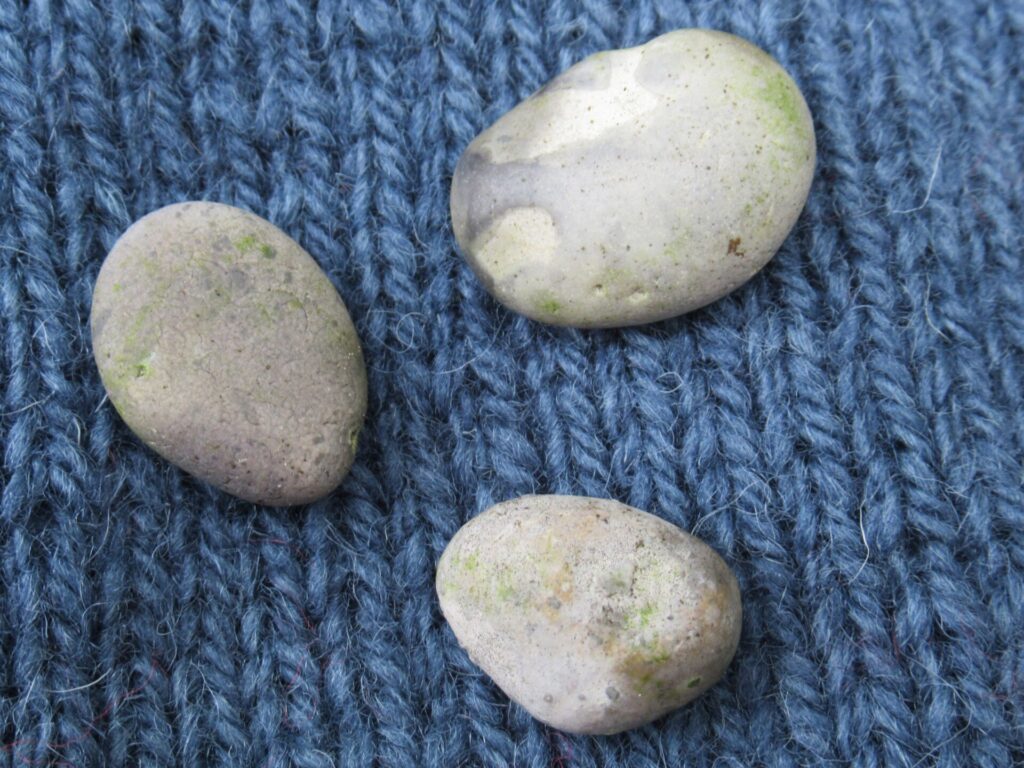
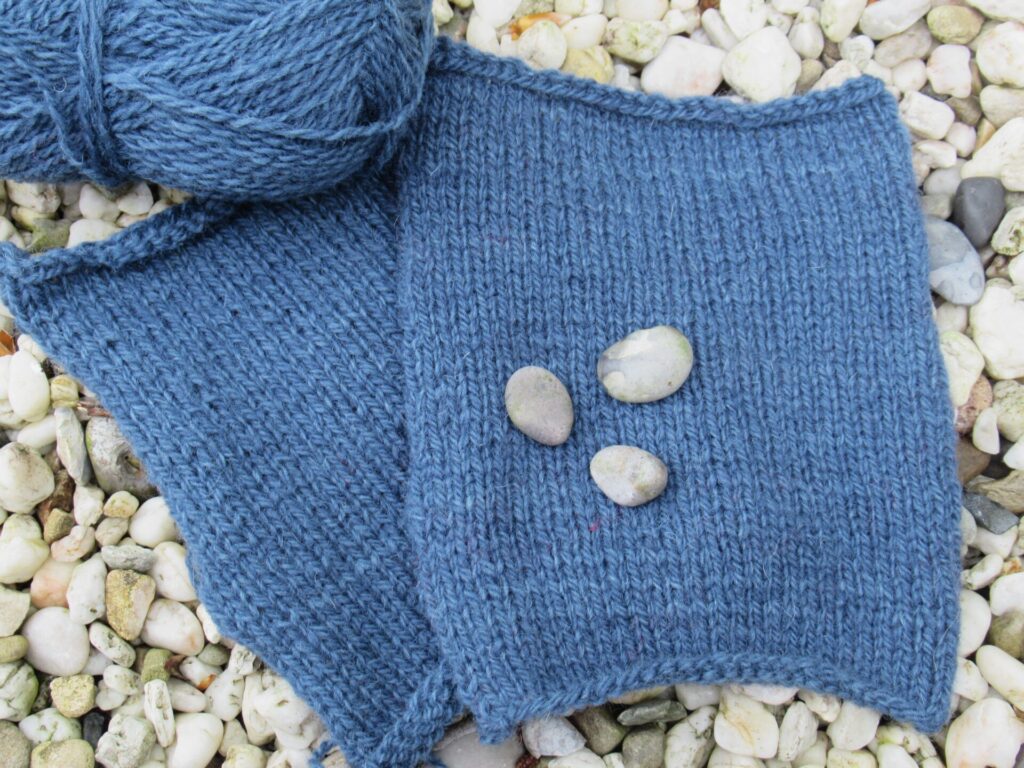
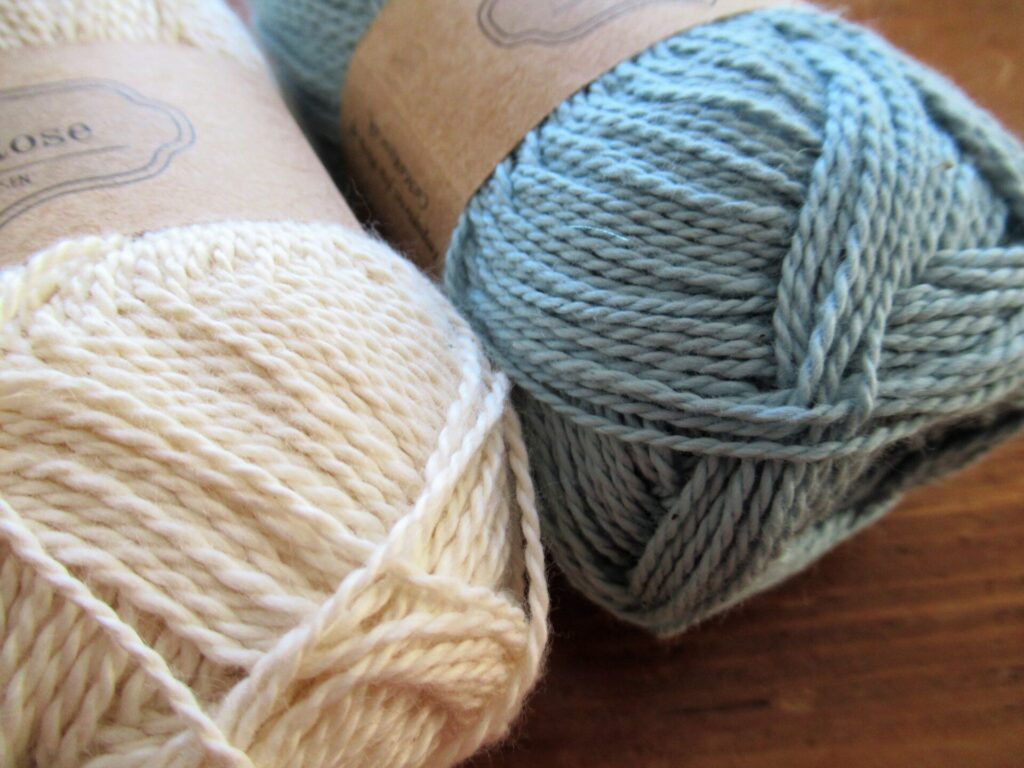
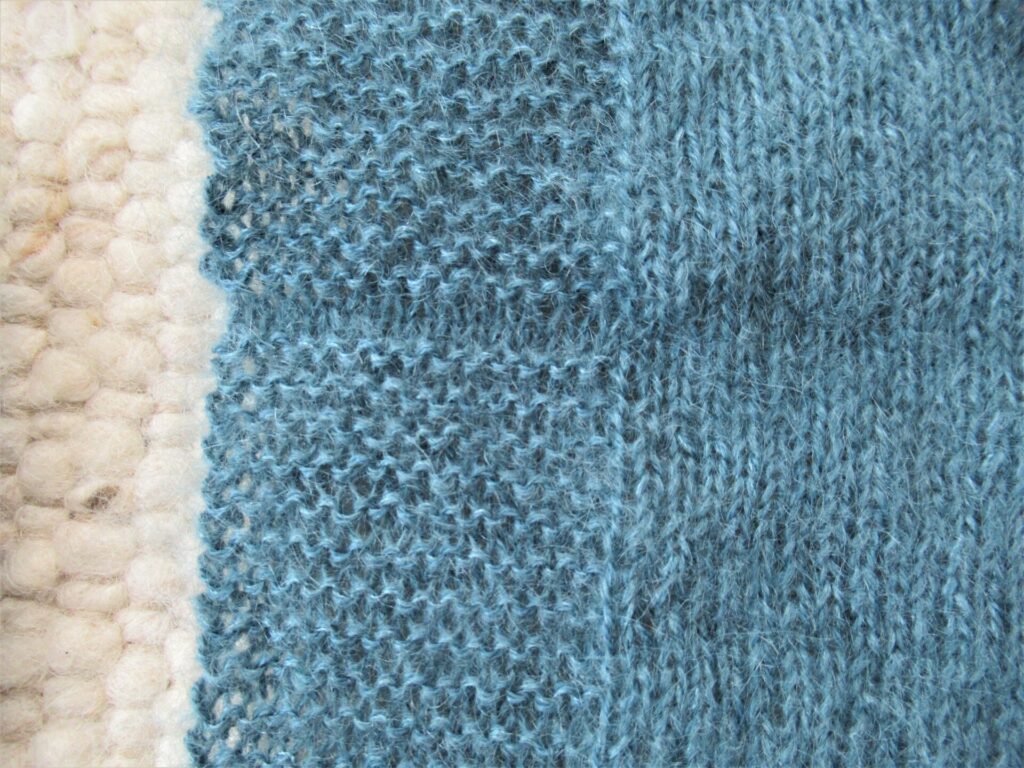
The sweater-with-the-now-solved-shoulder-problem is almost finished, and thinking about new projects I knit a couple of swatches with a yarn I’m considering for a Norwegian sweater – CaMaRose’s Økologisk Hverdagsuld (Organic Everyday Wool). While I was photographing them, my inner child played with pebbles.
I hope that you, too, can find some time in your days for your inner child to play (and/or take a nap). xxx
Hello! I know that some of you are on holiday, while others are off enjoying a fabulous weekend at a Fiber Fest. So maybe you’re reading this in front of your tent, on the veranda of your summer cottage, or in your hotel room. Or during your coffee break at home or at work. I like imagining all these different surroundings and look forward to reading about them on your blogs, Ravelry or elsewhere.
Nothing much is happening here at the moment. We’re at home, doing some work and just living our lives, and I thought this week I’d write about several of my small summer pleasures. First of all: rain.
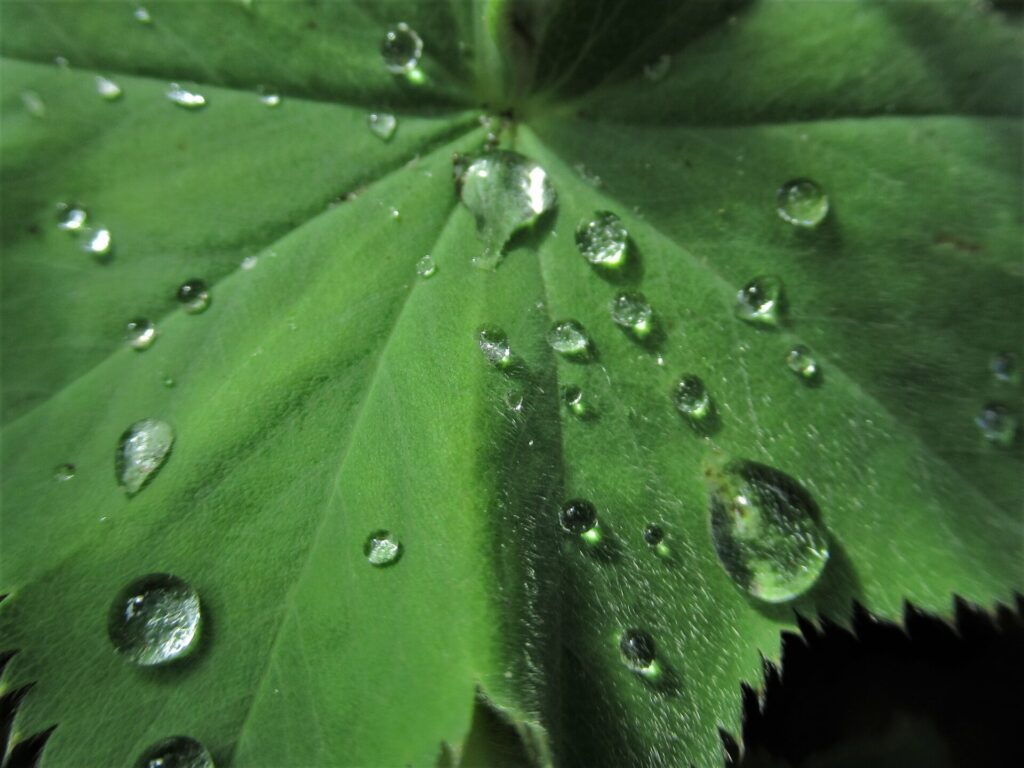
We’ve had so much rain this week! Is that a pleasure? Yes, for me it is. After the hot and dry start to the summer, I love the muted light, the freshness and the wetness of it all. And our soil, plants and trees really need it.
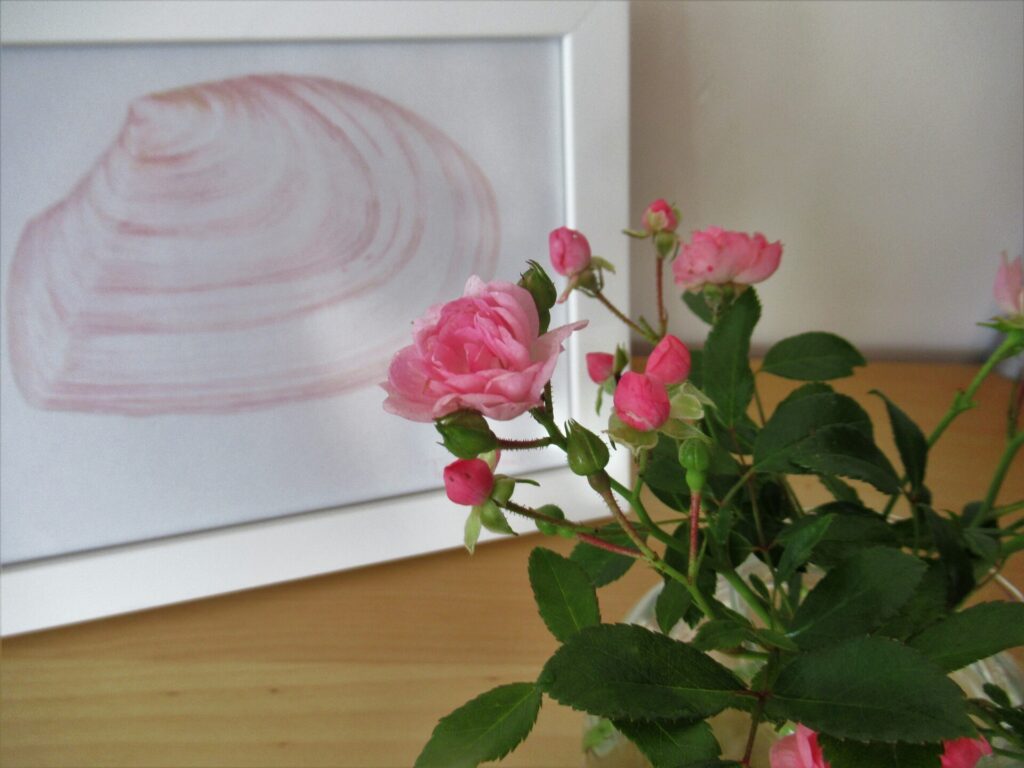
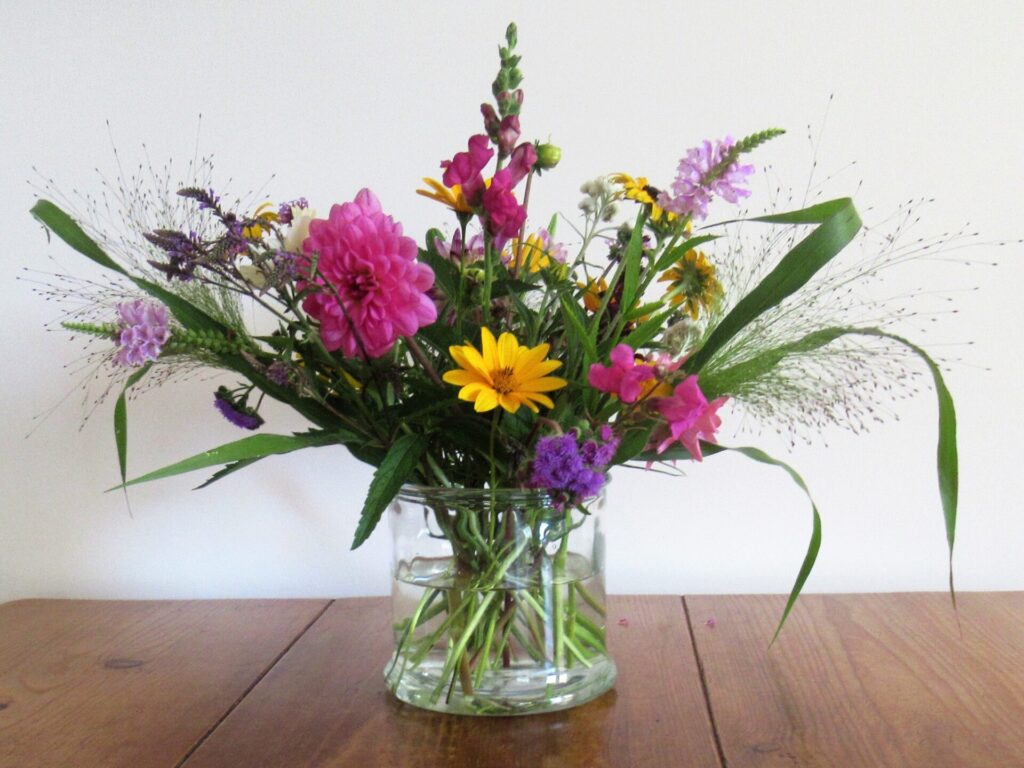
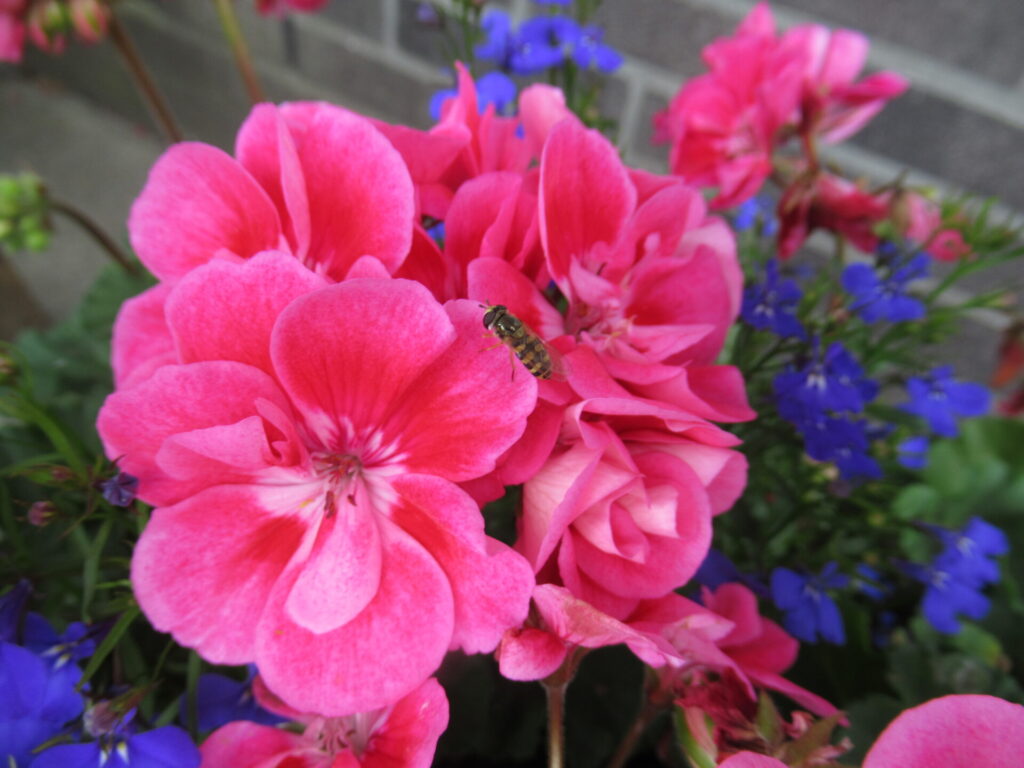
The garden is perking up and another of my small summer pleasures is strolling through it, looking at the flowers, butterflies and insects. I’ve picked a few sprays of miniature roses for a small glass vase (top). We also have a tiny fuchsia bush, with flowers like elfin ballerinas.
In a recent episode of BBC’s Gardener’s World, there was an elderly couple who had dedicated their lives to growing miniature fuchsias. On the one hand, incredibly twee. What a thing to dedicate your life to! But on the other, so peaceful – there are far worse things to do with one’s life.
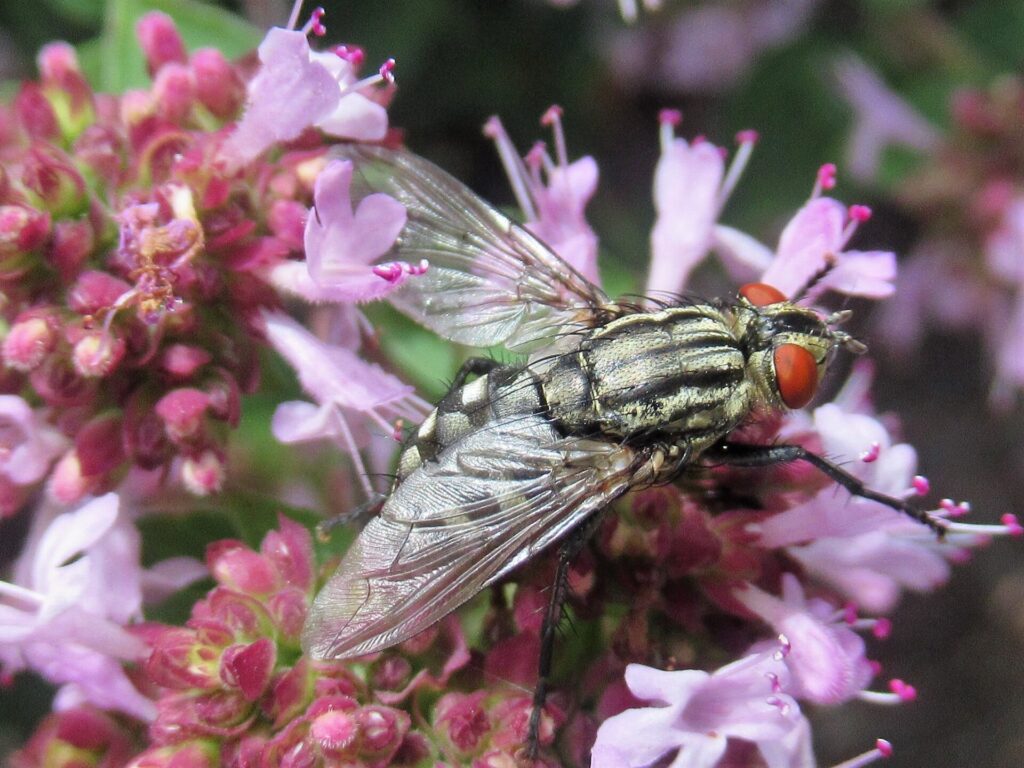
Speaking of peaceful, how can I ever swat a fly again, now that I’ve looked at this one from up close? With its veined glassy wings, its huge red eyes and its checkerboard-pattered backside it’s a beautiful creature.
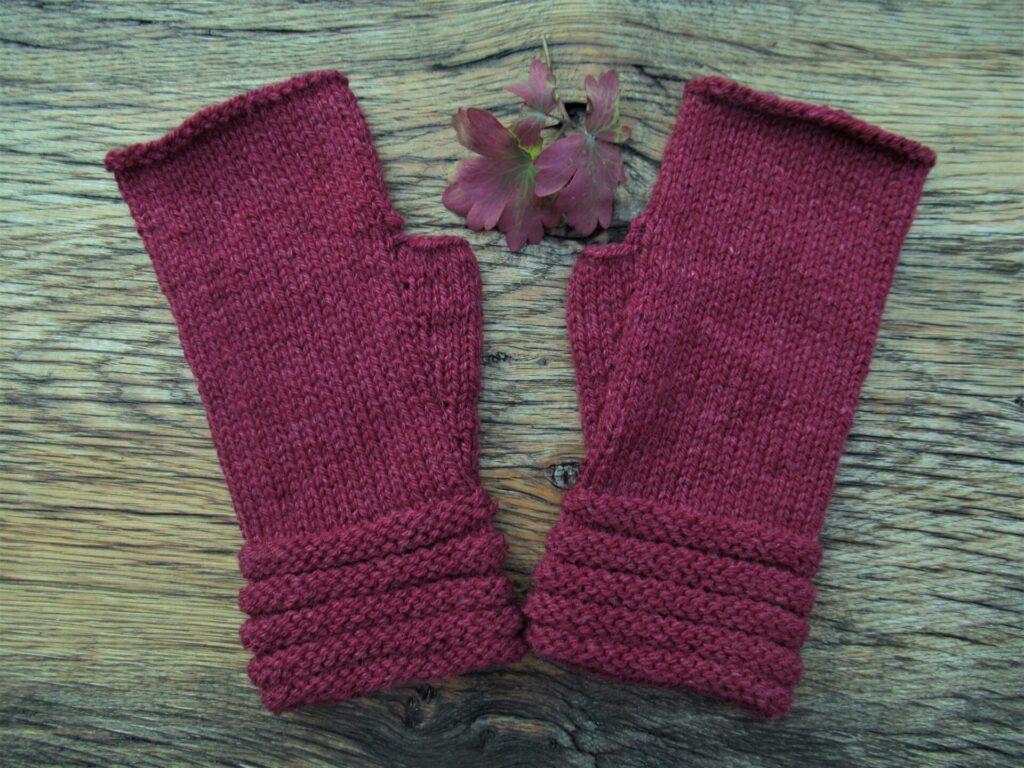
My small summer knitting projects are also giving me a lot of pleasure. I just finished a pair of Welted Fingerless Gloves for our daughter, to replace a pair that was worn to shreds. They took 34 grams of Fonty’s ‘Tartan 3’, a yarn dyed using a more sustainable method than usual.
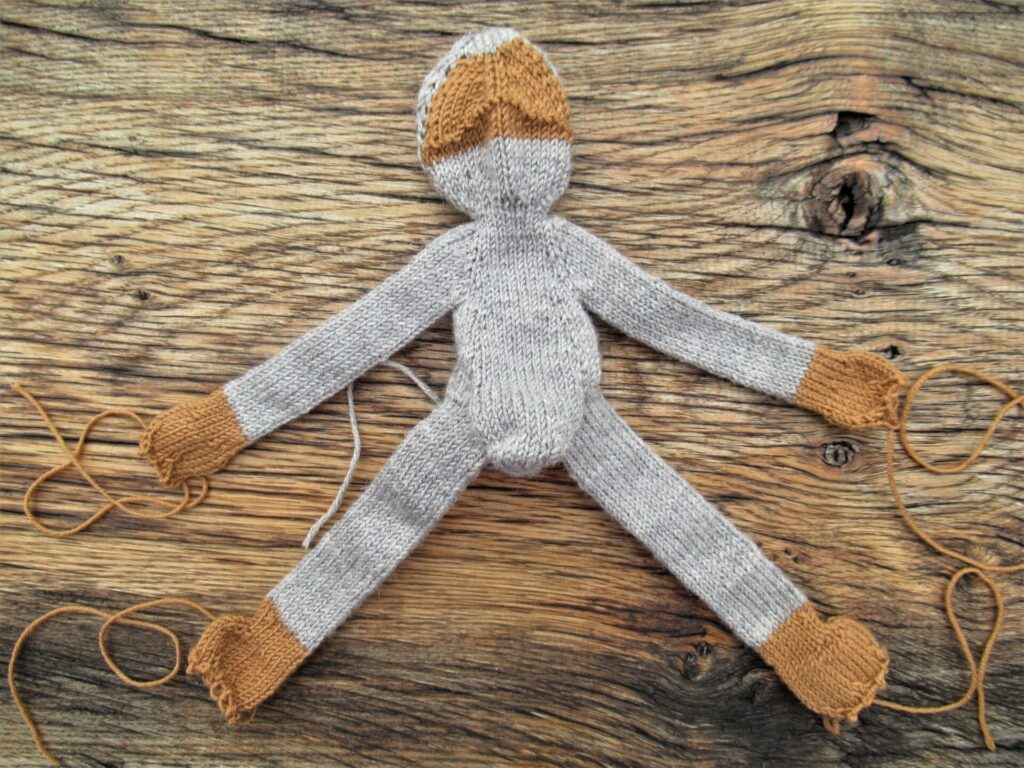
On my needles now is a small monkey for our grandson. More about that soon, when it’s finished.
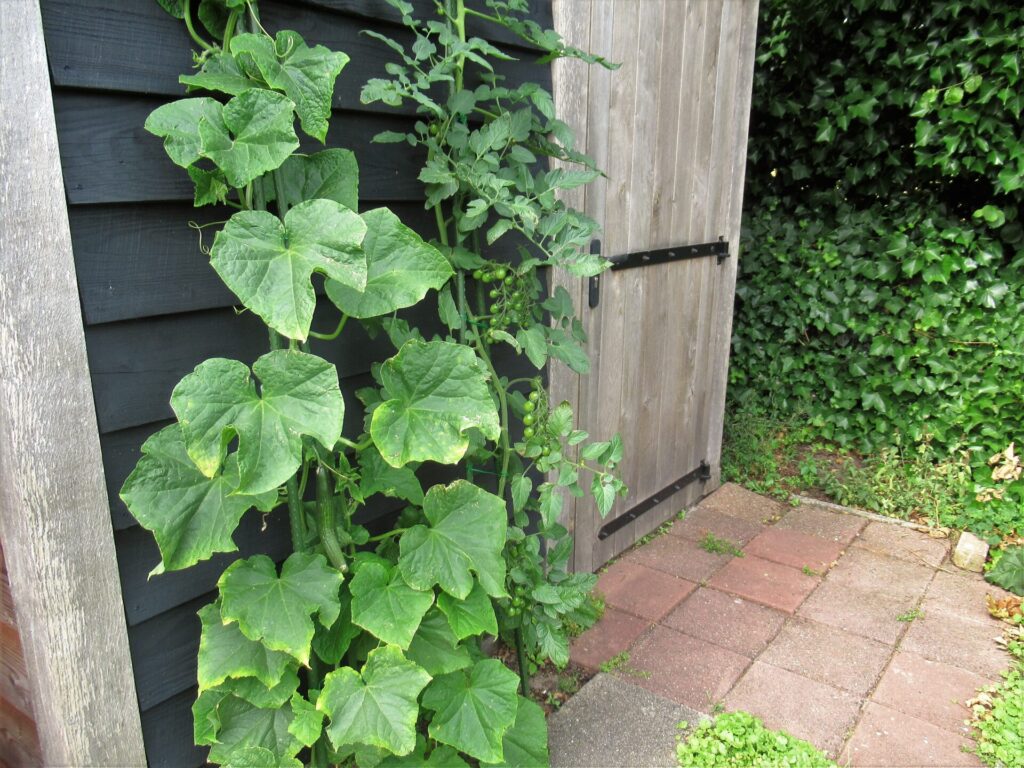
We do not have a vegetable garden anymore, but we do have some vegetables in our garden. Rocket and spinach on last year’s compost heap. Rhubarb plants here and there. And one tomato and one cucumber plant against our tool shed.
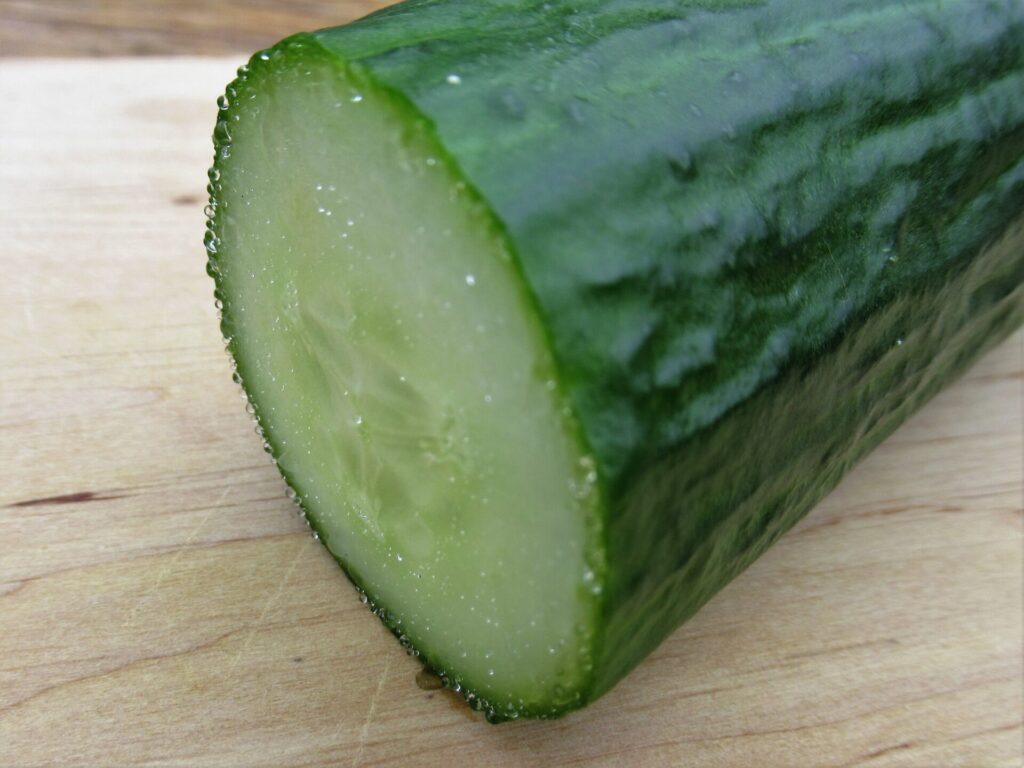
The tomatoes are not ripe yet, but we’ve already harvested three wonderfully fresh and crunchy cucumbers – another small summer pleasure.
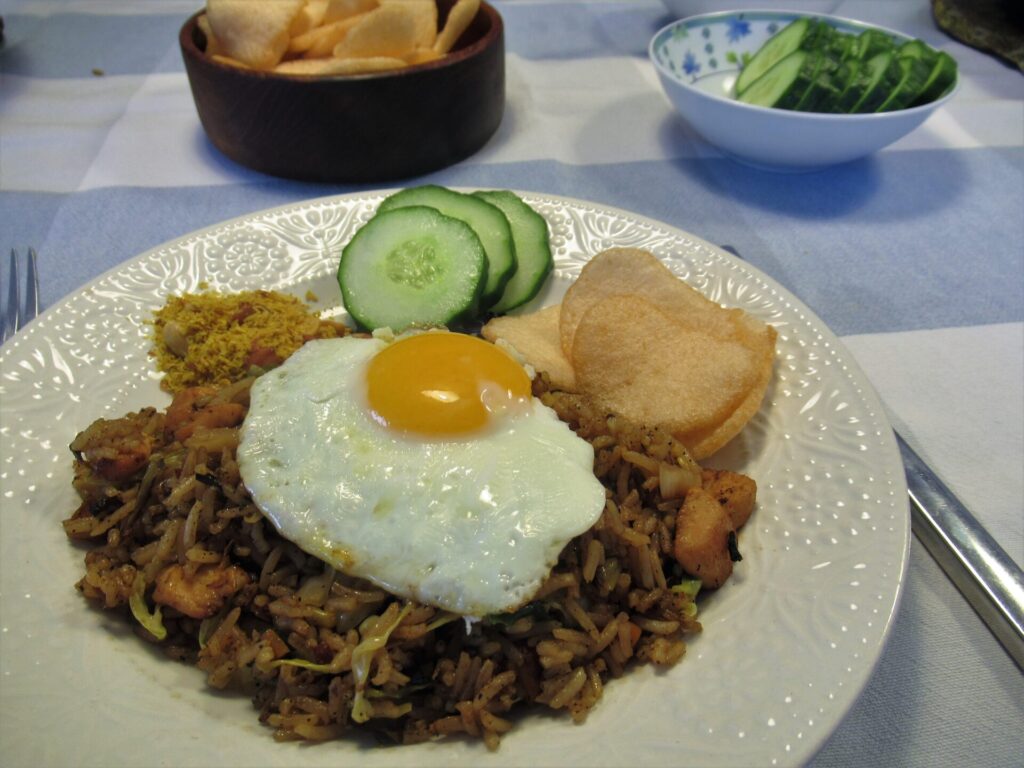
The other day we ate slices of cucumber with an Indonesian-style meal. (We have a large Indonesian community and their food culture has been an important influence on Dutch cuisine.) While I was cooking and laying the table, I thought you might like my recipe for Nasi Goreng and took some pictures. It’s an easy weekday meal and I’ve made it countless times over the years.
I don’t usually measure the quantities and sometimes vary with the ingredients, but I’ve done my best to write up a cookable recipe. My version is only slightly spicy. My husband likes it hot and adds lots of sambal.
Nasi Goreng
Serves 2
Ingredients
125 g white rice
1 tbsp sunflower oil
150 g chicken breast, cut into cubes, or a vegetarian alternative
1 onion, chopped
2 tsp ground coriander seeds
½ tsp ground cumin
1 tsp sambal brandal (a mild, fried sambal)
1 medium carrot, finely diced
150 g finely shredded pointy cabbage
½ tbsp ketjap asin (salty soy sauce)
½ tbsp ketjap manis (sweet soy sauce)
Salt
Method
The day before:
Cook the rice, leave to cool and store in the fridge (It is essential to do this ahead of time or you’ll get a very sticky Nasi Goreng)
On the day:
Heat the oil in a wok and fry the chicken cubes on high heat until lightly browned
Reduce the heat to medium, add the onion and fry until slightly transparent
Add the sambal brandal, ground coriander and cumin and stir for 2 mins
Turn up the heat, add in the carrot and cabbage and stir fry for about 3 mins
Reduce the heat to low, mix in the cooked rice and the two kinds of ketjap, and heat through
Add salt to taste
To serve:
This time we ate the Nasi Goreng with sliced cucumber, prawn crackers, serundeng (seasoned roasted coconut with peanuts) and fried egg.
Sometimes I also serve it with stir-fried bean sprouts, atjar tjampoer (sweet-and-sour pickles) and/or satay (peanut) sauce
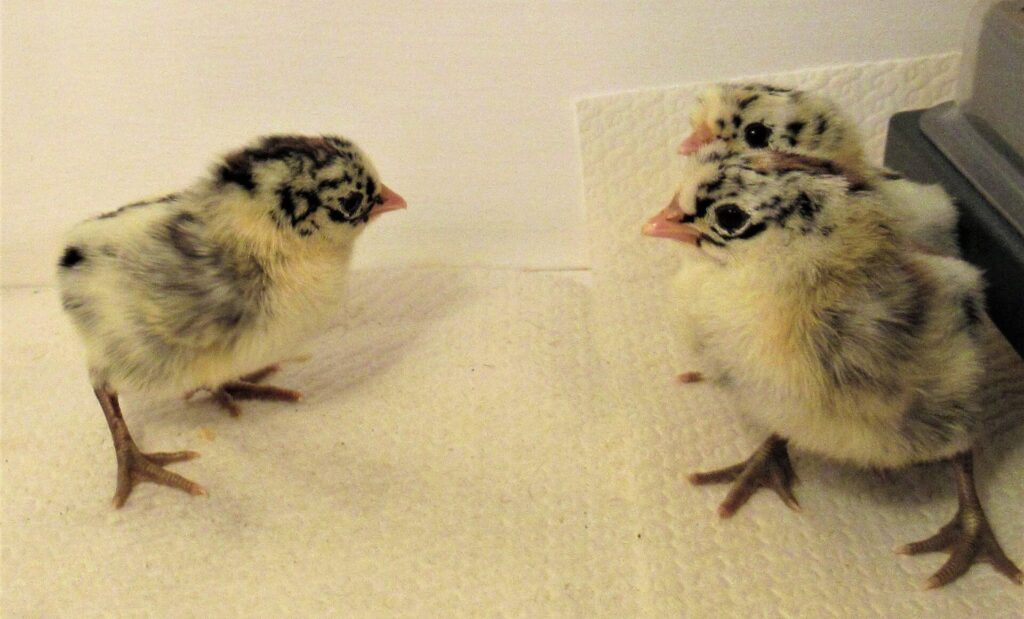
Hello! Please meet the latest additions to our household: three tiny chicks. With just two ancient hens left, it was time for some new life in our chicken coop. Not all of the eggs we put in the incubator hatched, and sadly one of the four chicks that did hatch died soon afterwards, but we’re very happy to have three healthy, lively, fluffy, adorable speckled chicks.
Ideally they’ll turn out to be one cock and two hens, but they may just as well be three hens (fine too) or three cocks (not really what we’re hoping for). We’ll wait and see.
With the new chicks, fresh green leaves unfurling on the currant bushes, fat blossom buds on the pear tree and many bulbs in flower, spring has truly sprung in the garden.
On the knitting front, it’s as if it’s a little earlier in the year. Do you know that feeling? You can feel that all kinds of things are happening below the surface, but above ground there is very little to be seen as yet.
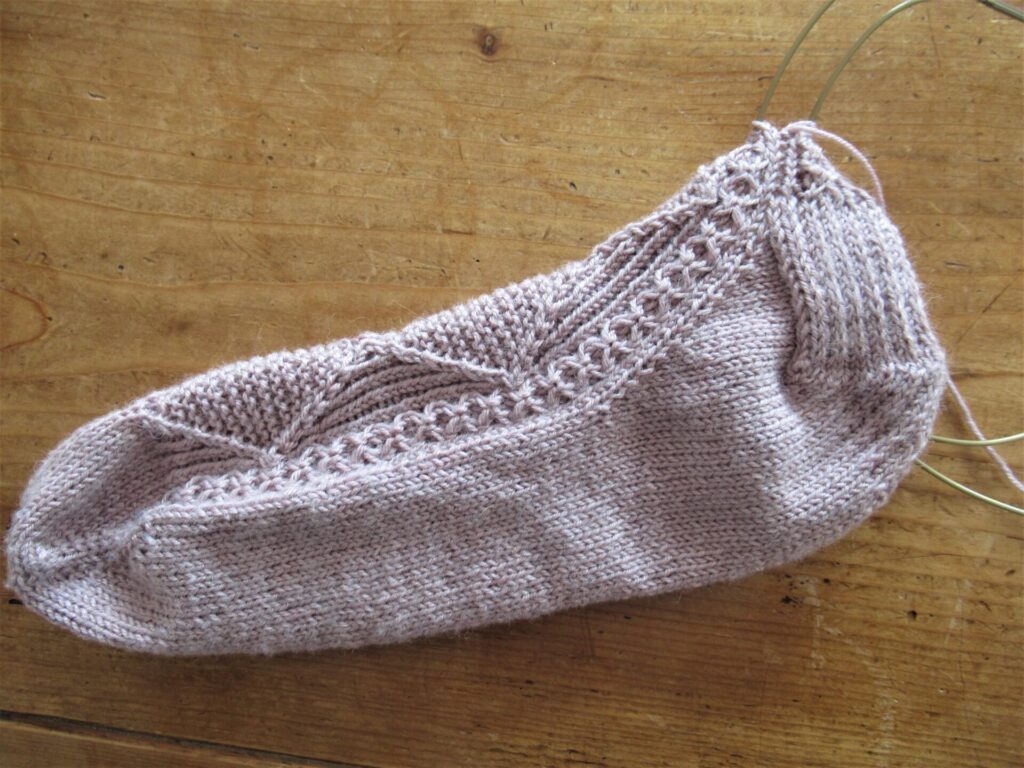
I have made some progress on my Linea socks, though, and the foot of the first sock is finished.
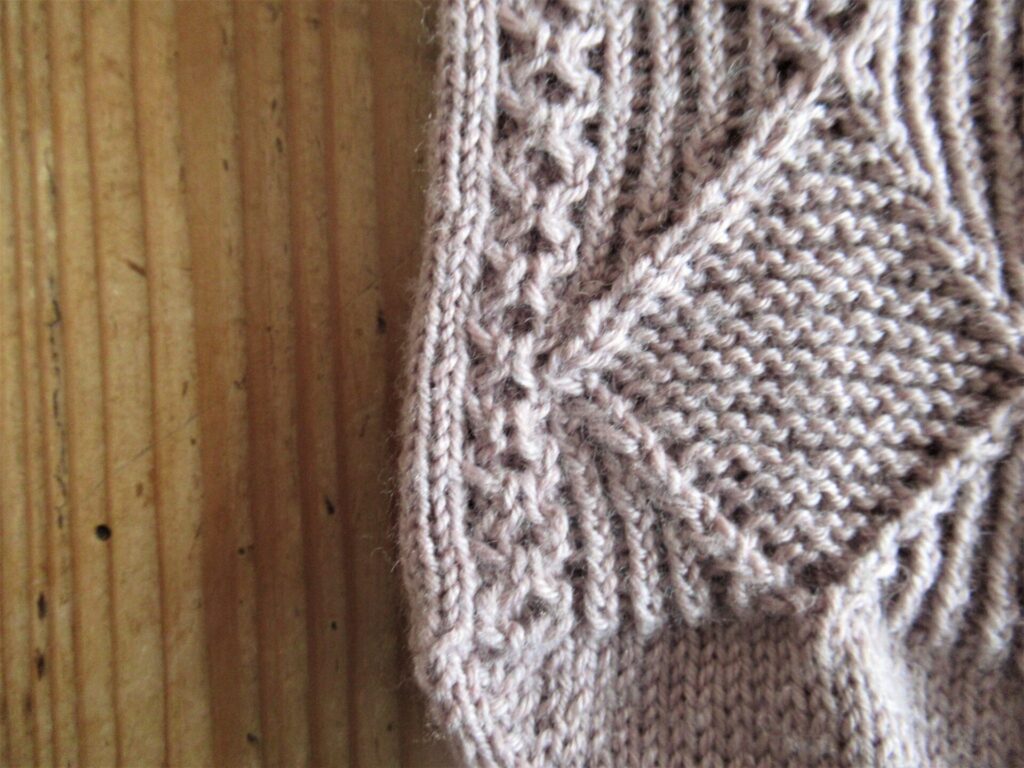
I started out doing the cables without a cable needle, as a fast and easy method. (All the cables are basically just pairs of two stitches crossed in front or behind each other.) But after an inch or so, I noticed that they didn’t look great. Especially looking at the tiny cable to the left of the diamond, I think you can see what I mean.
Along the bottom half of the diamond (without cable needle), the tiny cables look irregular and sort of angular. Along the top half of the diamond (with cable needle), they are more regular and rounded, as well as more open in the centre. So from here on I’m using a cable needle, even if that means slower progress.
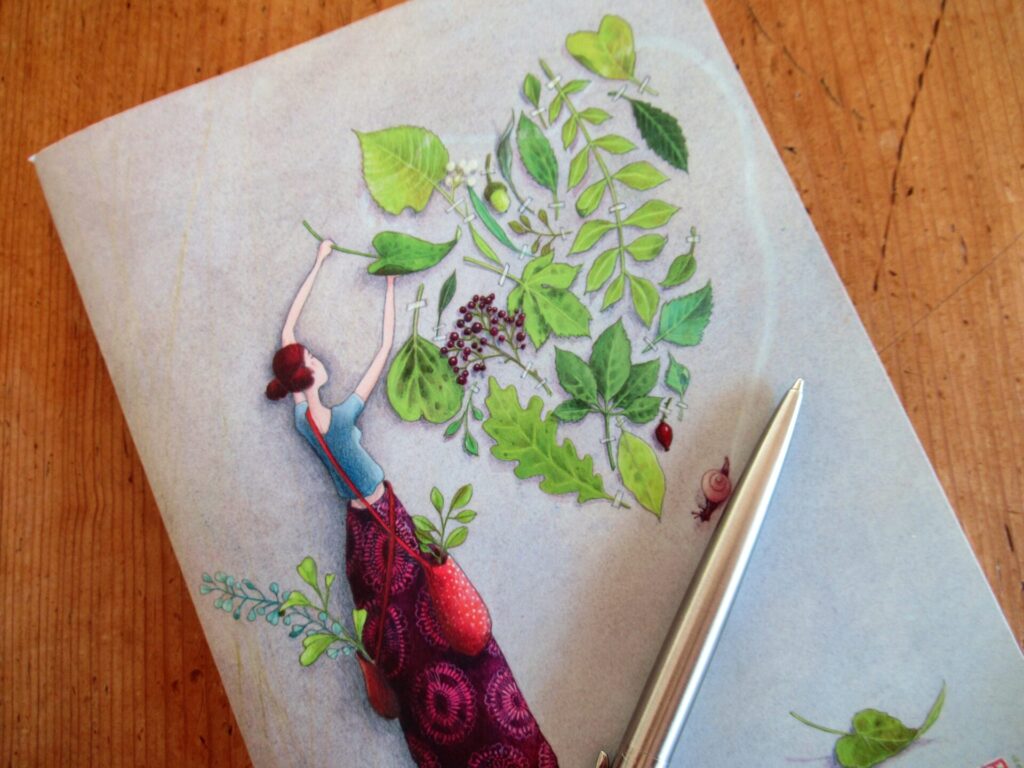
The rest of my knitting is still in the incubation stage. I keep lists of the projects I want to focus on now and would like to knit someday in this notebook.
For me, old-fashioned hand-written notes on paper still work best. With ideas and notes in computer files it is often a matter of ‘out of sight is out of mind’. And the actual act of writing things down by hand seems to connect to a different, more creative part of my brain than typing does.
The notebook was a souvenir from France, and the cover is a design by Gaëlle Boissonnard. I adore her work. Her blog can be read here – it gives a lovely insight into her creative process. Google doesn’t do a great job translating her poetic texts, but just looking at her images is inspiring, too.
Feeling frustrated by the slowness of my creative process, I was thinking of the garden. Why can’t my projects flower now, like the hyacinths and all the other spring bulbs? And then I discovered that I just need to be a little more patient, because I’m a sunflower!
You can find out what flower you are by taking this quiz. Have fun!
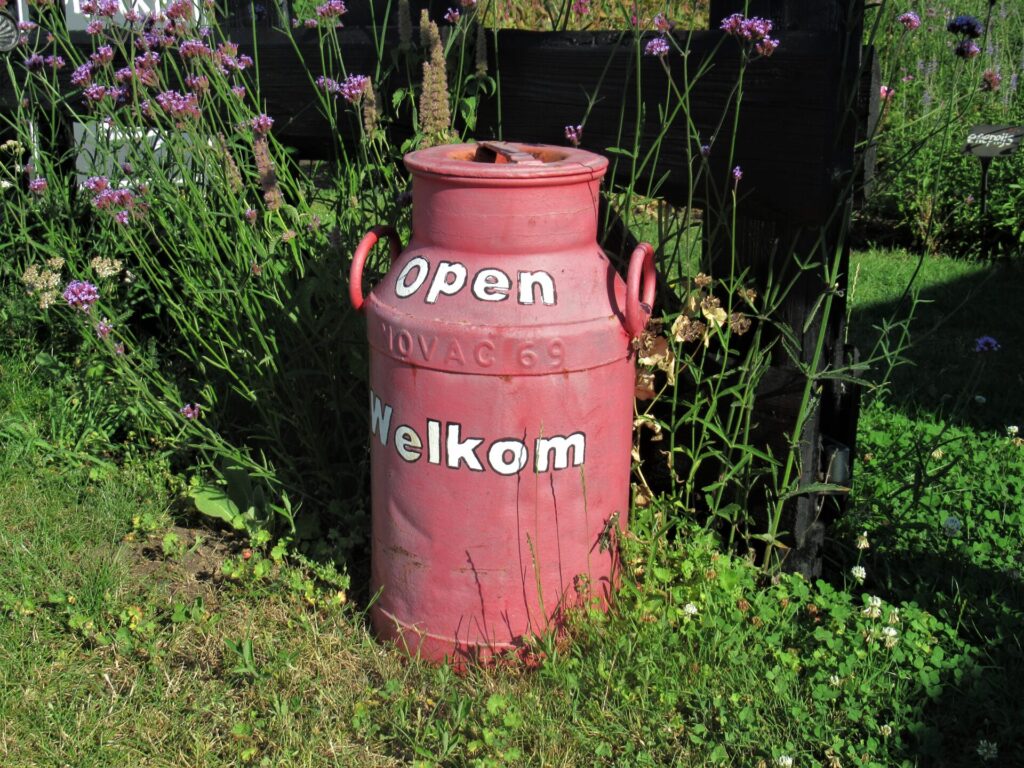
Later on, I’ll take you to the place that has this milk pail saying ‘Open, Welkom’ at its entrance, but first of all some sock talk.
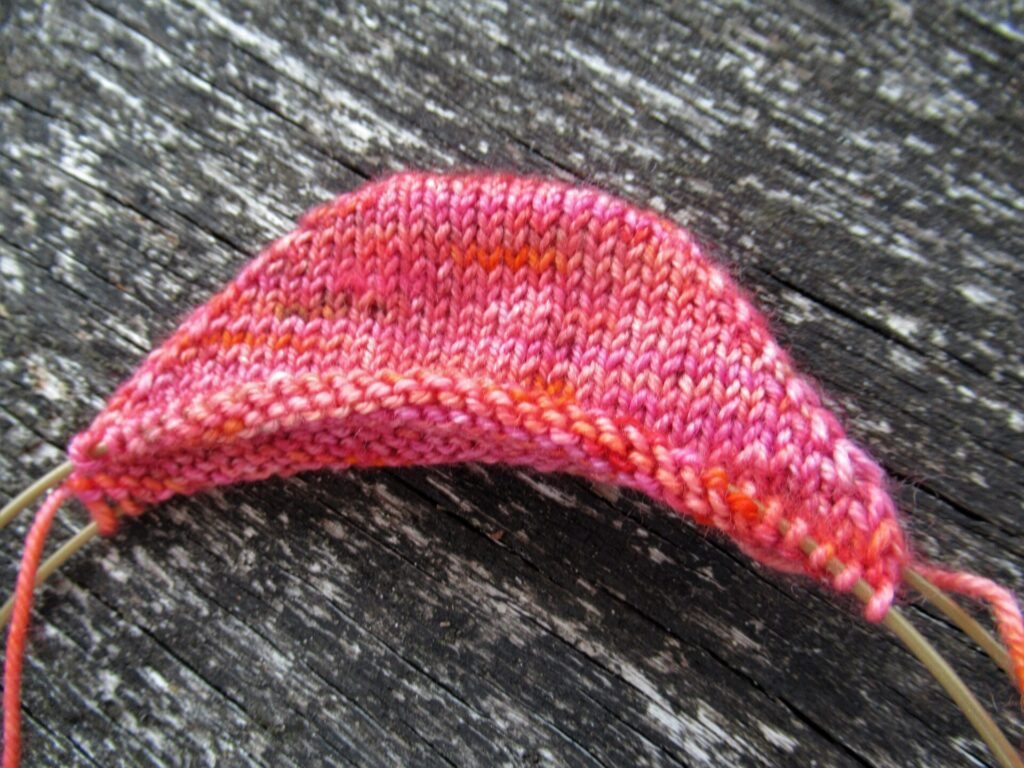
Unlike most of the socks I knit, the Garia Socks I started last weekend are knit from the toe up. I cast on for the toe using Judy’s Magic Cast-On, a technique someone in my knitting group taught me years ago. Most of the sock knitters among you will be familiar with it, but in case you aren’t here is a video with Judy herself explaining it clearly. It’s very simple, really, once you get the hang of it.
After the toe, the sock is turned inside out and is worked that way to just below the cuff. Why? Well, this way most of the stitches in the knit-and-purl stitch pattern are knit instead of purled, which makes for easier and more enjoyable knitting. Such a clever idea!
This is what the sock looks like while I am knitting it:
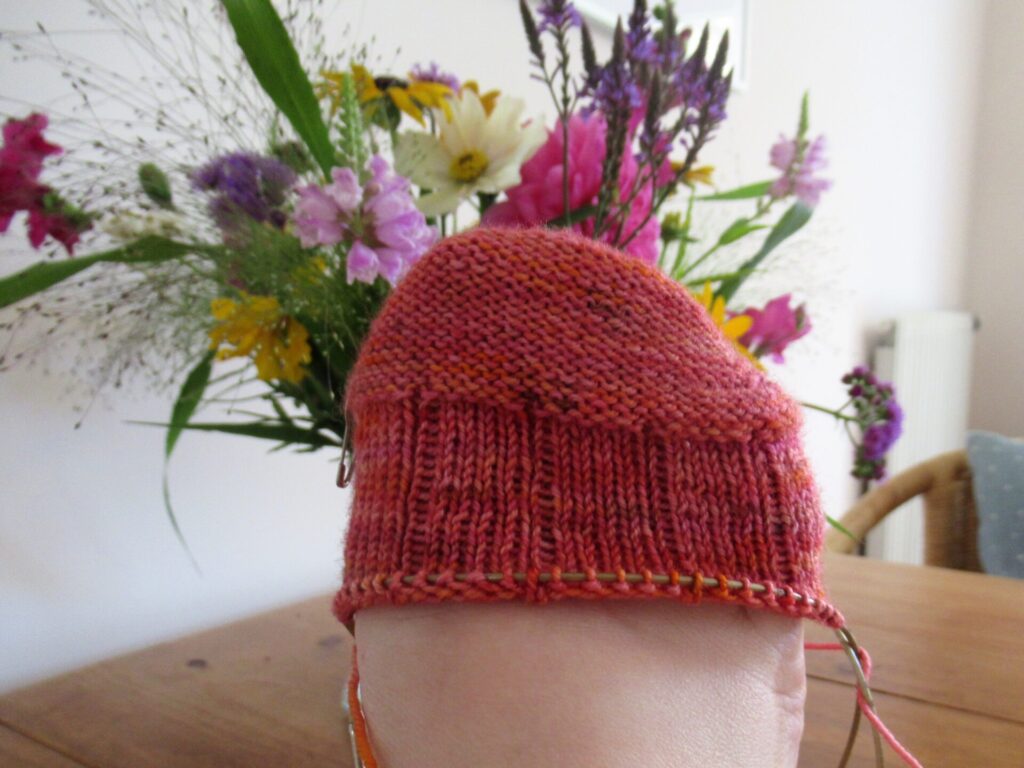
And this is what it will look like turned right-side-out later:
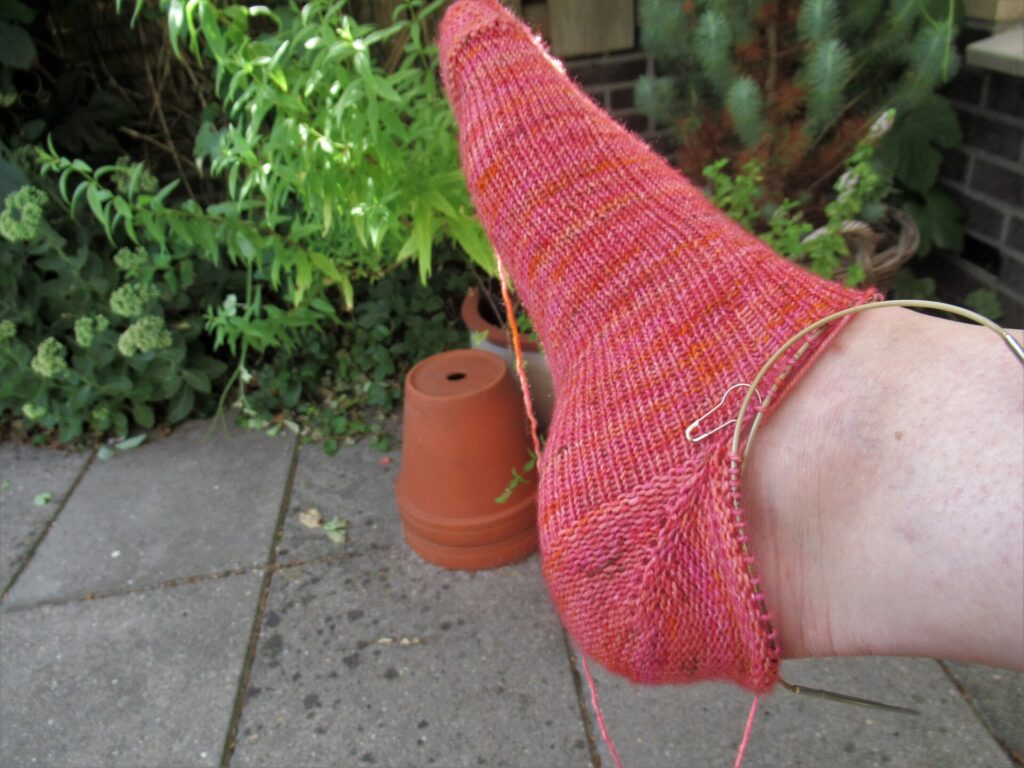
The magic is not just in the toes and in knitting the socks inside out. It’s also in the magic loop method I’m using, worked on a long circular needle.
The heel uses German short rows, also knit inside out.
A very enjoyable and cheerful summer knitting project, these socks. I’ve taken some of the pictures with a summery bunch of flowers as a backdrop…
… picked from the pick-your-own flower garden I’ve taken you along to before. It’s just a short bicycle ride from our home.
And it’s always such a joy to visit, especially towards the end of summer, when our own garden is looking rather tired. Everything is still growing and flowering so abundantly that the paths are hardly visible anymore.
I’ve composed a small gallery of flowers in the colours of my sock yarn (click on images to enlarge).
Like a butterfly, I fluttered from flower to flower, collecting pictures instead of nectar (but that’s where my likeness to a butterfly ends 😉).
Thank you for reading and have a lovely weekend! xxx
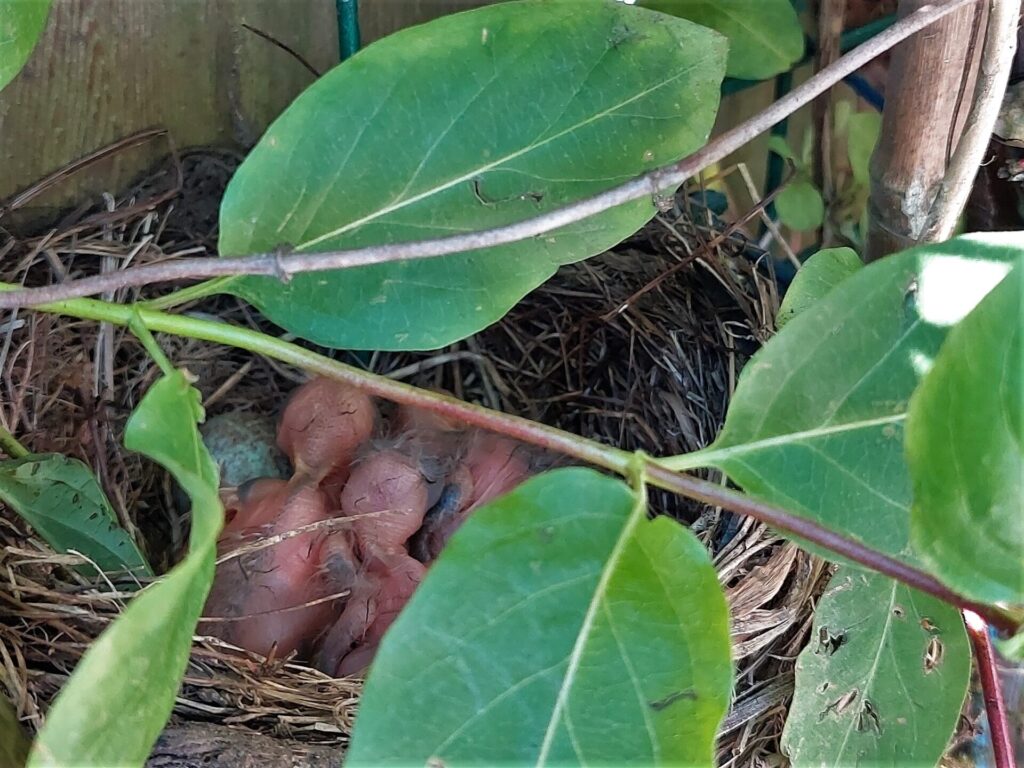
My knitting is out of sync with the seasons – again. The garden is bursting into flower and the blackbirds’ eggs have hatched.
Don’t those naked little chicks look vulnerable? I hope they’re going to make it. Their nest isn’t very well hidden and there are magpies about.
With spring well on its way and warmer weather around the corner, I’m finishing some warm and woolly knits. It has happened before, my knitting being out of sync with the seasons, but this time I have a very good excuse: Several months ago I dropped everything else to knit baby things. Now our grandson has more than enough to keep him warm for the time being, and there’s finally time to finish other projects.
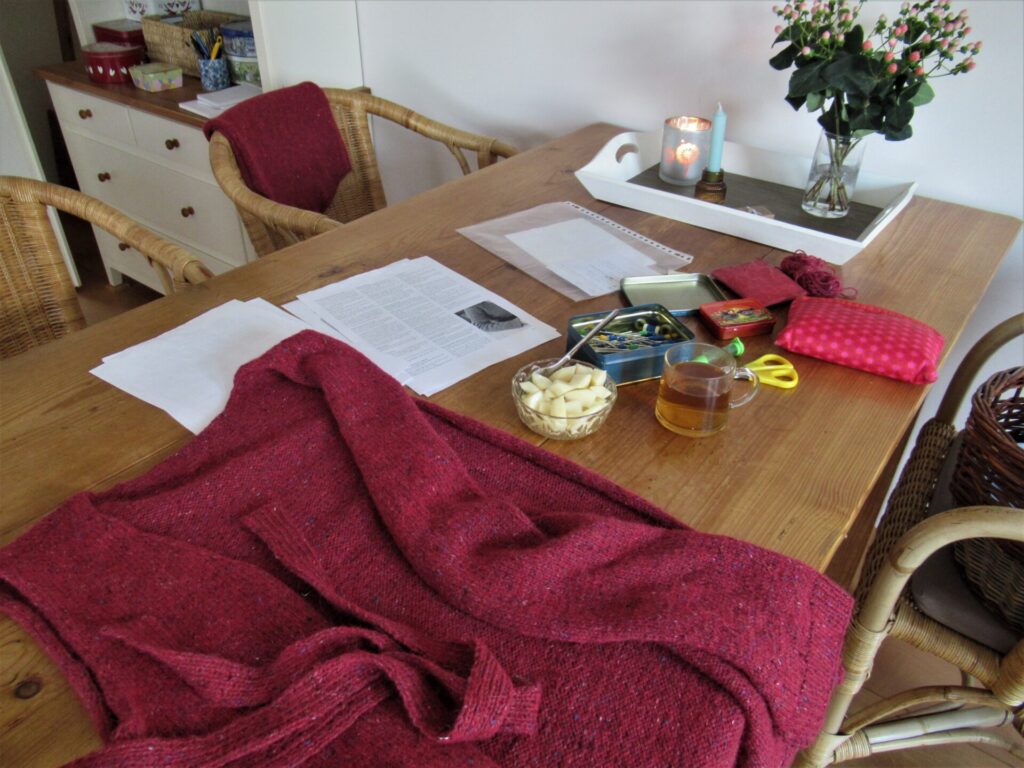
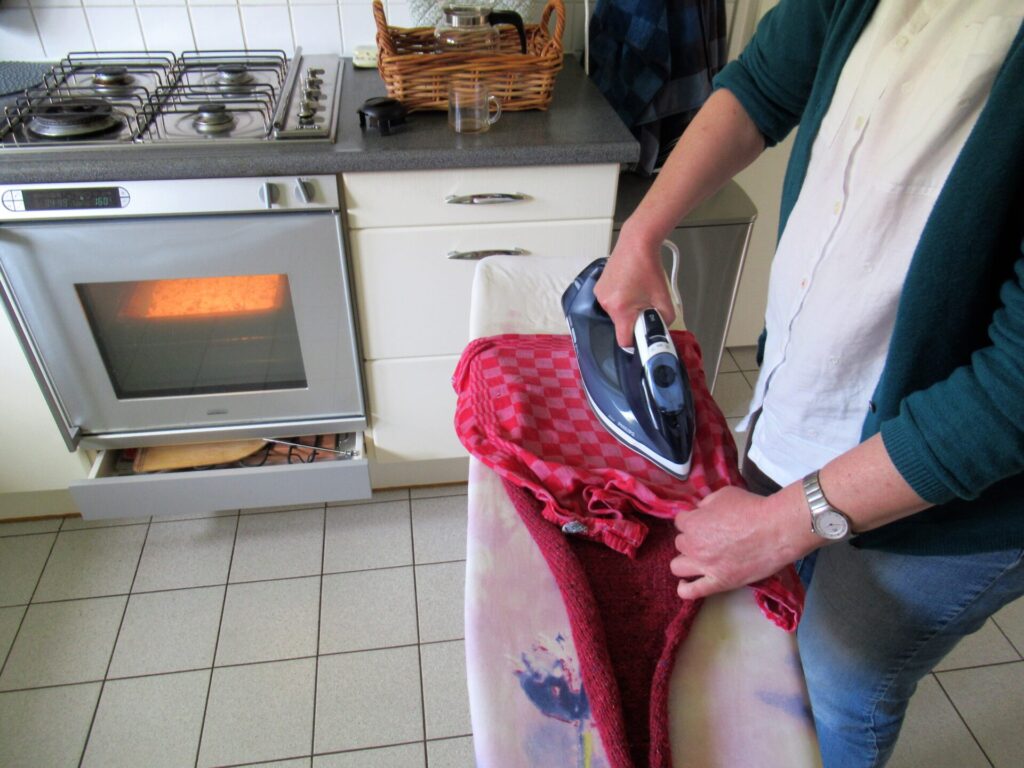
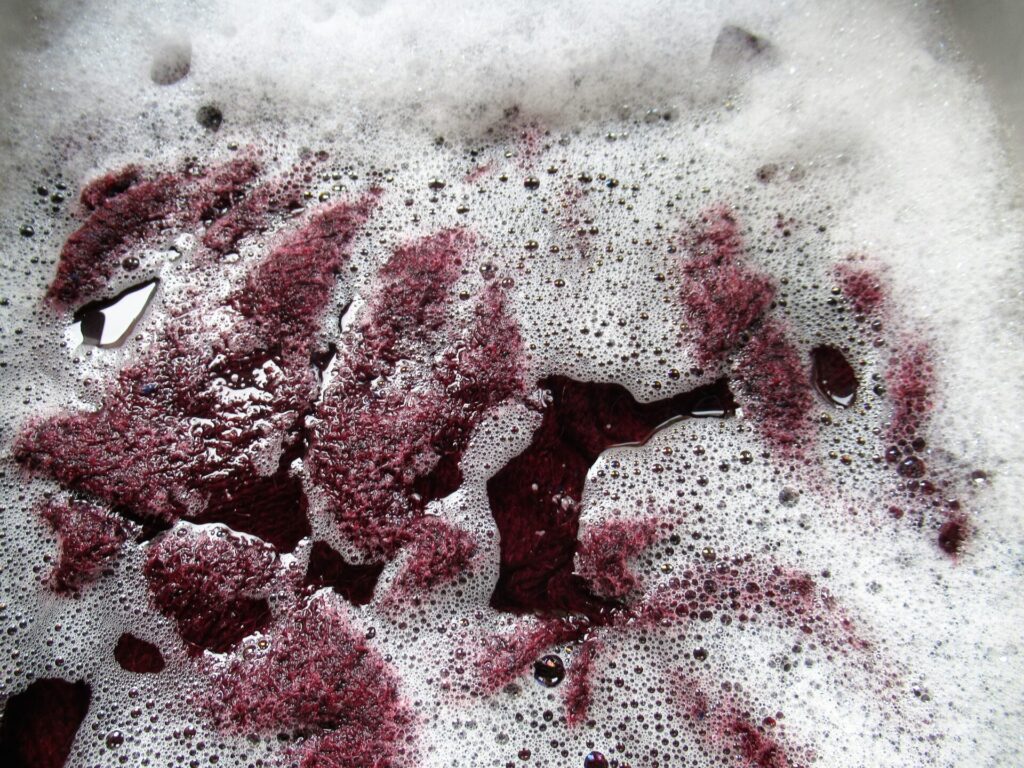
The first one I’m tackling is a red tweedy cardigan. All parts are knit separately, including the button bands. That means a LOT of seaming, and I’ve done it in stages. Before I started the actual seaming, I pressed the individual parts, covered by a damp tea towel.
As I hope you can see in this picture the edges of the stocking stitch fabric roll inwards terribly. Pressing them flattens them out and makes seaming easier and neater.
As you can probably also see in this picture, there is something in the oven. It’s a batch of my Very Healthy Oat Squares (recipe in this older post; please scroll down).
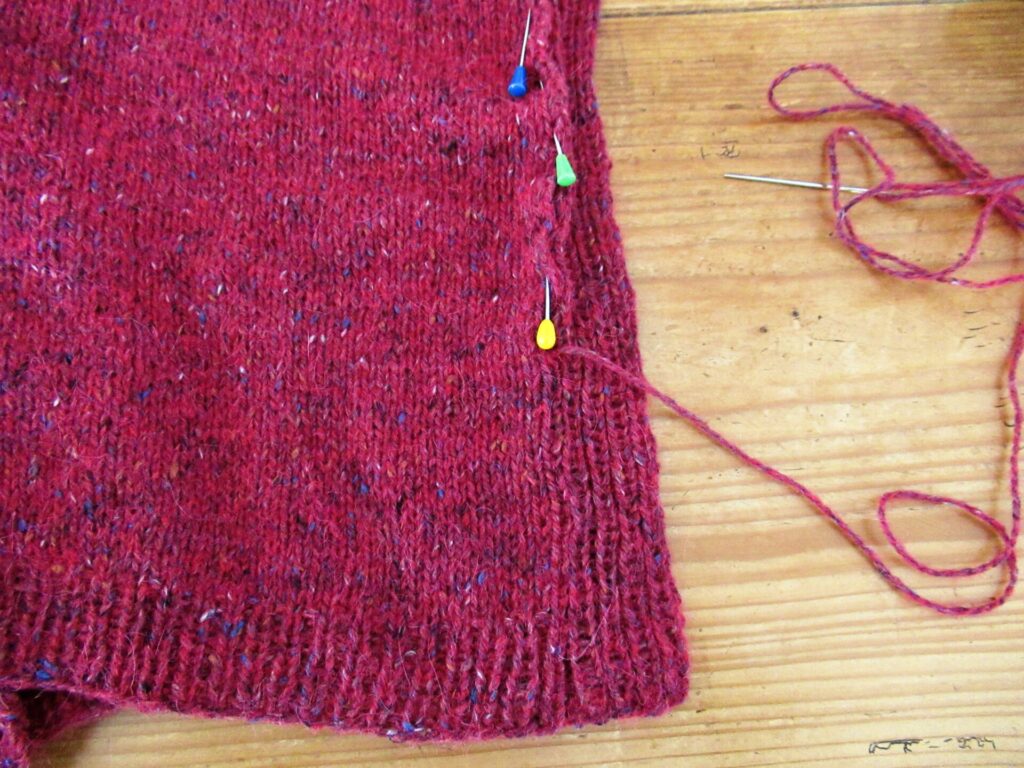
Over the course of several days, I meticulously sewed on the button bands using mattress stitch. It’s a time-consuming job and I did a little every day.
Then I realized that it was going to take ages this way. So on a day when I had a to-do-list from here to Tokyo, I decided to take a different approach and alternate my chores with bursts of seaming. It looked something like this:
Clean bathroom and sink, sew right sleeve cap. Replace light bulb, empty wastepaper baskets, water plants, fold laundry, sew left sleeve cap.
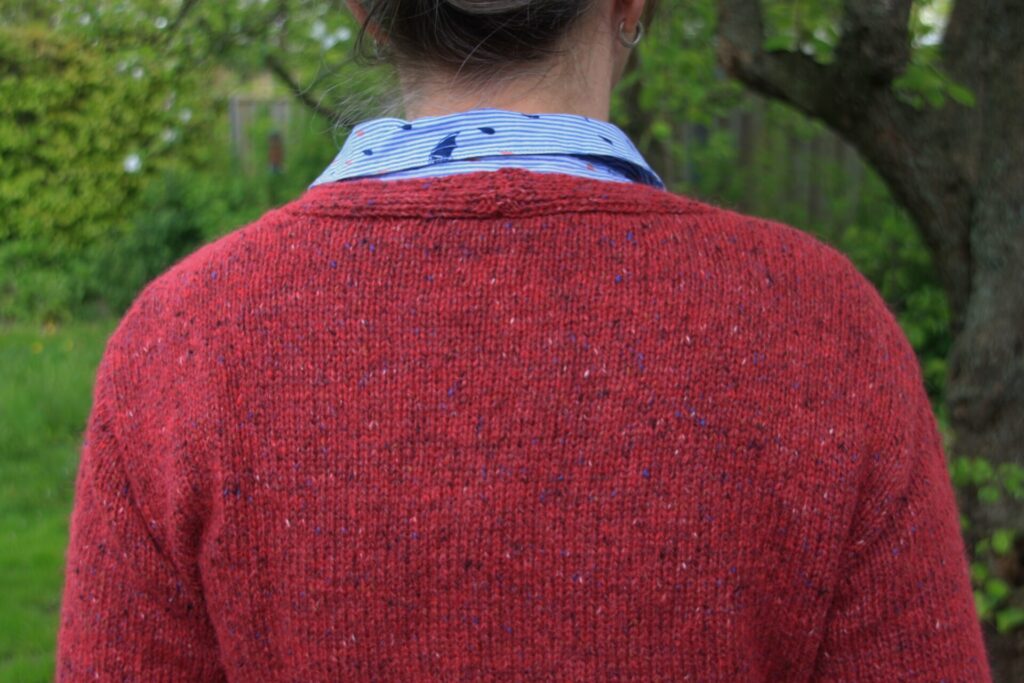
For a knitting connoisseur, the sleeve caps are lovely, by the way. Due to a special way of binding off using slipped stitches, the slope isn’t stepped as usual, but nice and smooth.
Dust and hoover downstairs, sew right underarm seam. Catch up with e-mails and admin, sew right side seam, etc.
Granted, it wasn’t the most exciting day of my life, but at the end of it I had tackled many items on my list and finished the seaming of the entire cardigan. Time for a bubble bath…
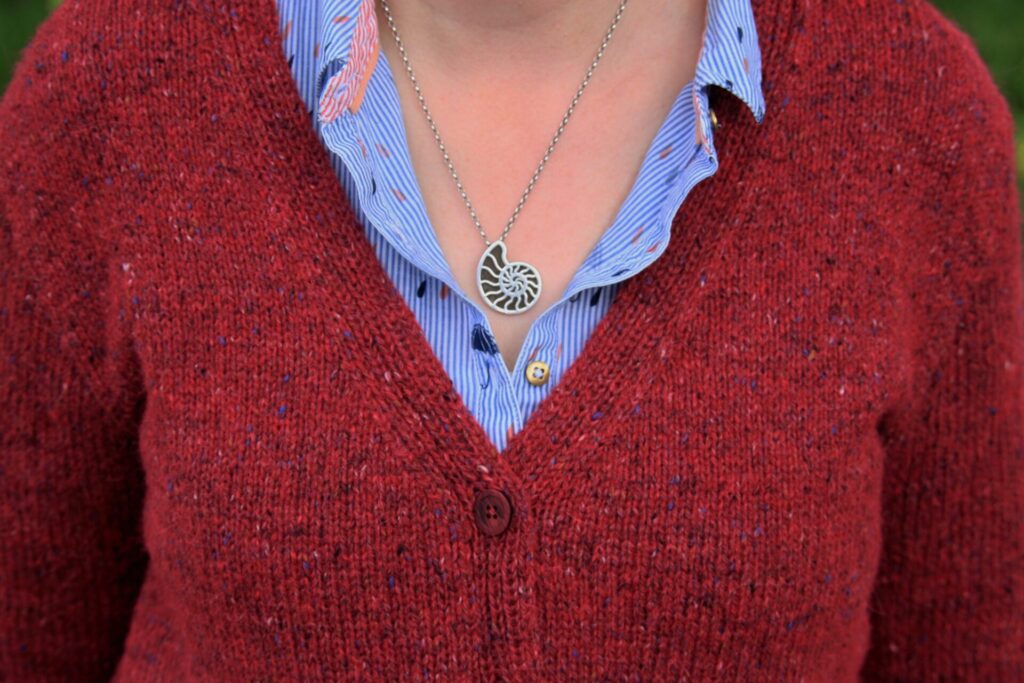
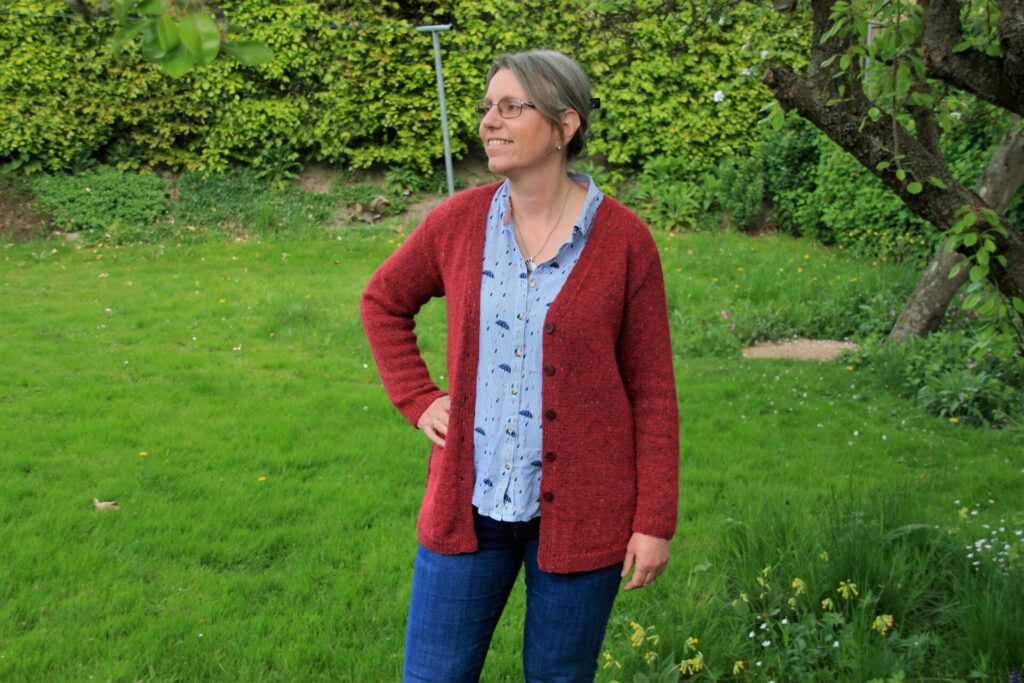
… for the cardigan. (Should have taken one myself, too, instead of a quick shower.) And then, after drying flat, the final touch: buttons. And here it is, my simple but sophisticated tweedy cardi:
Entirely in stocking stitch, it looks very simple. What makes it sophisticated is the attention to detail: A-line shaping, sloping shoulder seams moved a little forward, smooth sleeve cap, customized sleeve length, side vents, a few short rows above the hem so that the cardigan ‘hangs’ better, and the careful finishing, of course. The cardigan is also knit at a looser gauge than normal for the yarn, which gives it a nice drape.
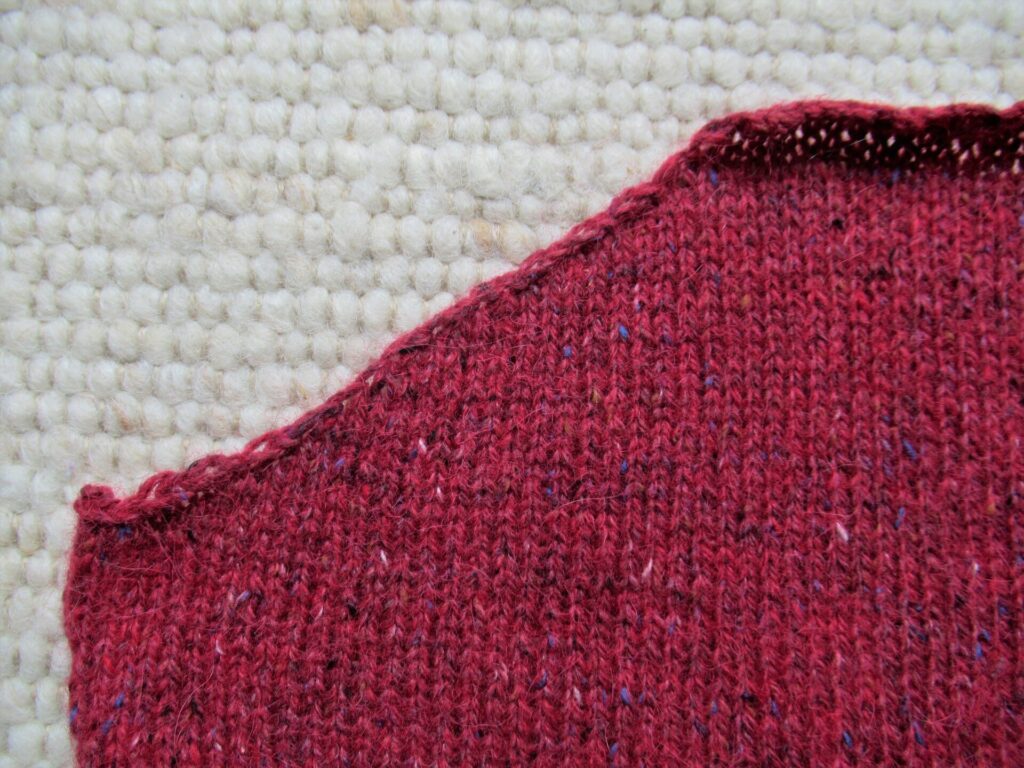
I’m particularly happy with the neatly sewn on button bands.
And also with the perfect sleeve length and the way the cardi fits around the shoulders.
The pattern’s name Go-To Cardigan is well chosen – it really is a cardigan to wear every day. Because of the A-line shaping, it is particularly flattering for pear-shaped people like me. The pattern can be found here on Ravelry and here on the designer’s website. The yarn I’ve used is Rowan Felted Tweed, shade 150 Rage. The pattern range goes from XS to XL. I’ve made size S, while my usual clothes size is M/L, EU 40/42 (UK 12/14).
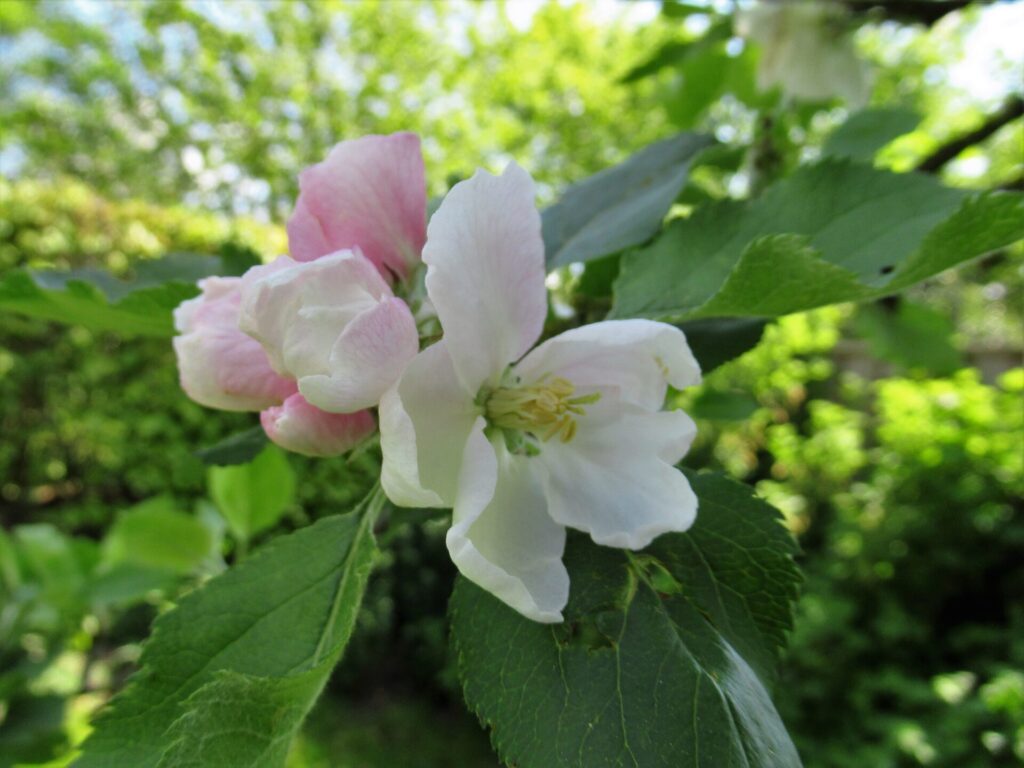
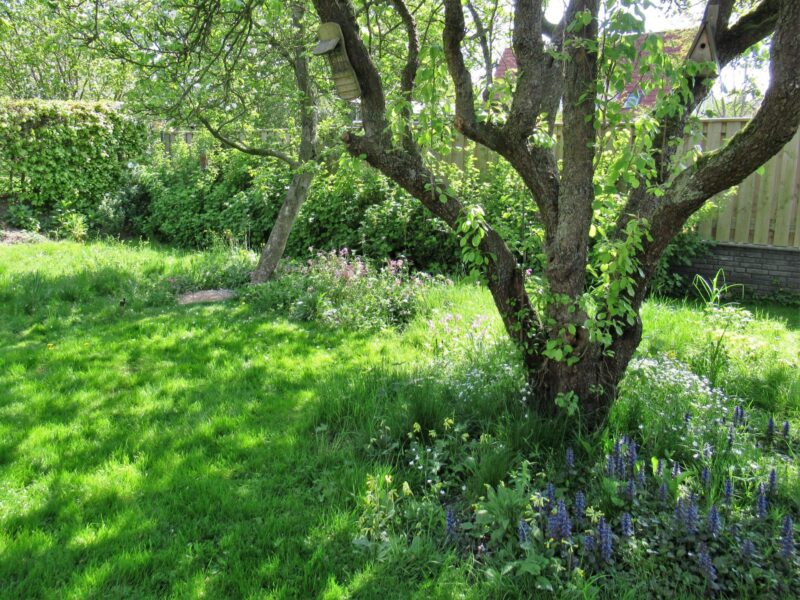
To close off, I’d like to show you our ‘orchard’, where these pictures were taken. It hardly deserves to be called an orchard, with just one apple and one pear tree, but it sounds nice. The pear blossomed early in spring and we’re now enjoying the apple blossoms.
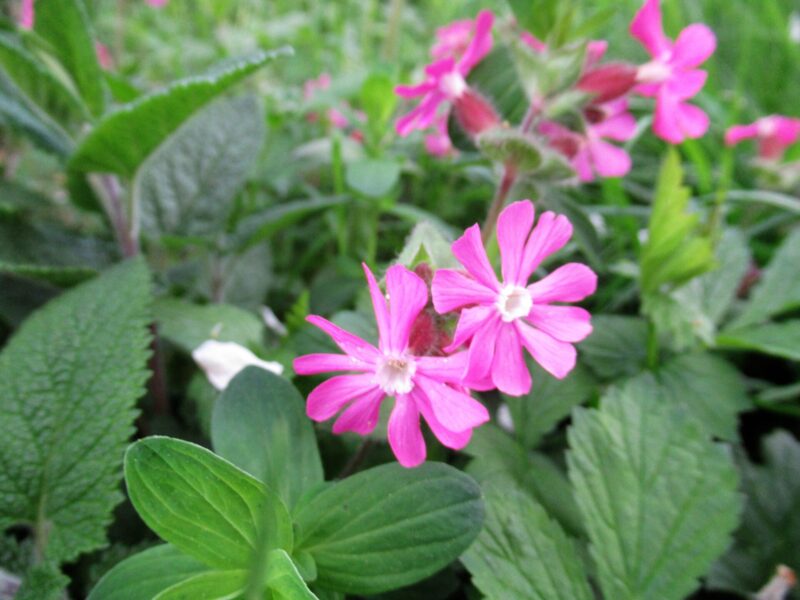
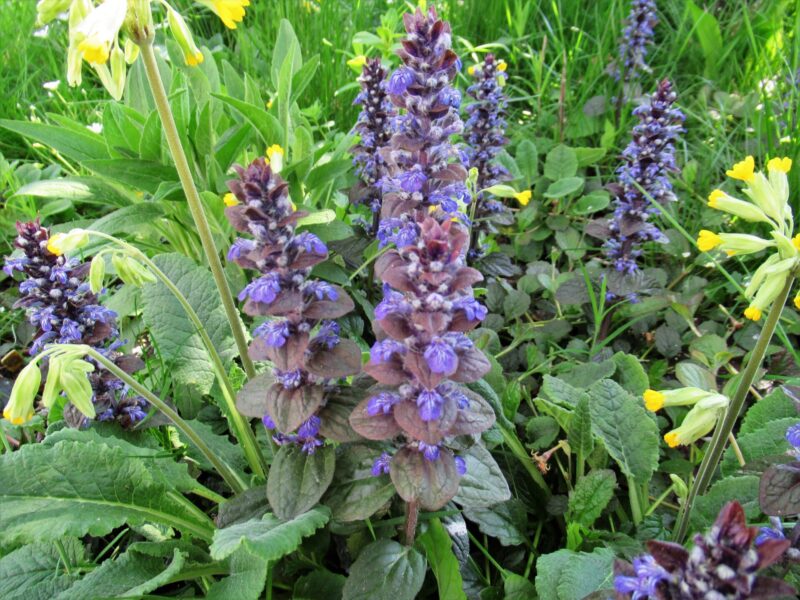
Under the fruit trees in our tiny orchard, we’ve created a wildflower meadow with native plant species. Our meadow is also tiny (just a few square metres), but from spring into autumn there is always something flowering. This is what it looks like at the moment (click on images to enlarge):
Enjoy your weekend and hope to see you again next week! I don’t know if I’ll have another project finished by then, but we’ll see.
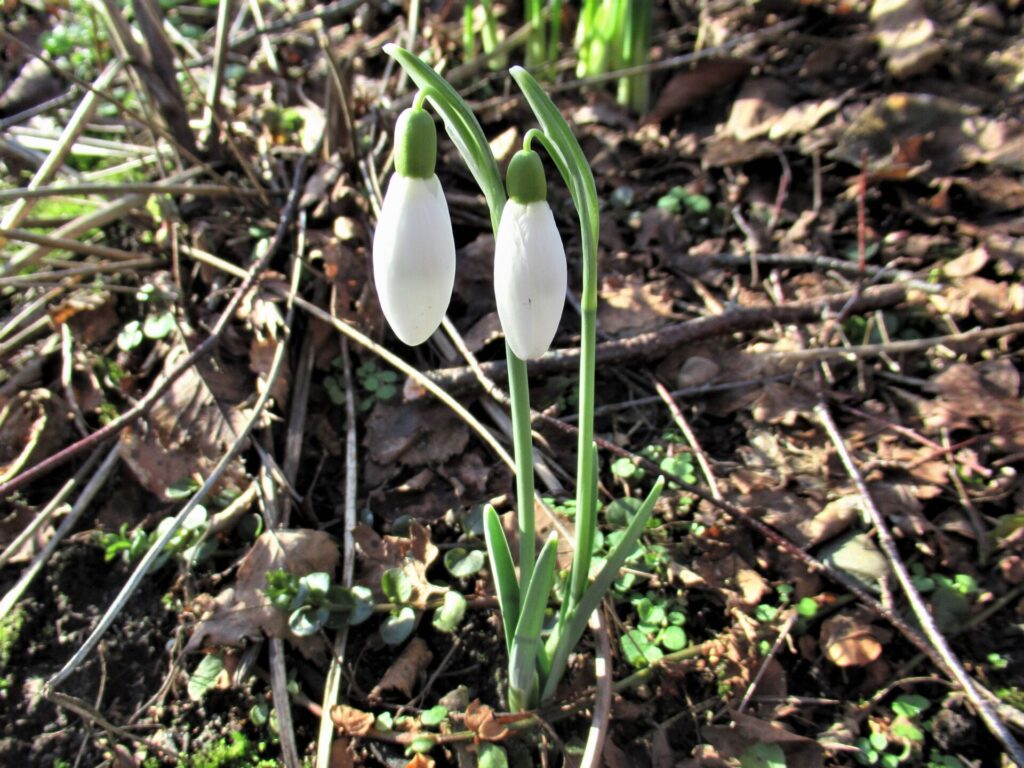
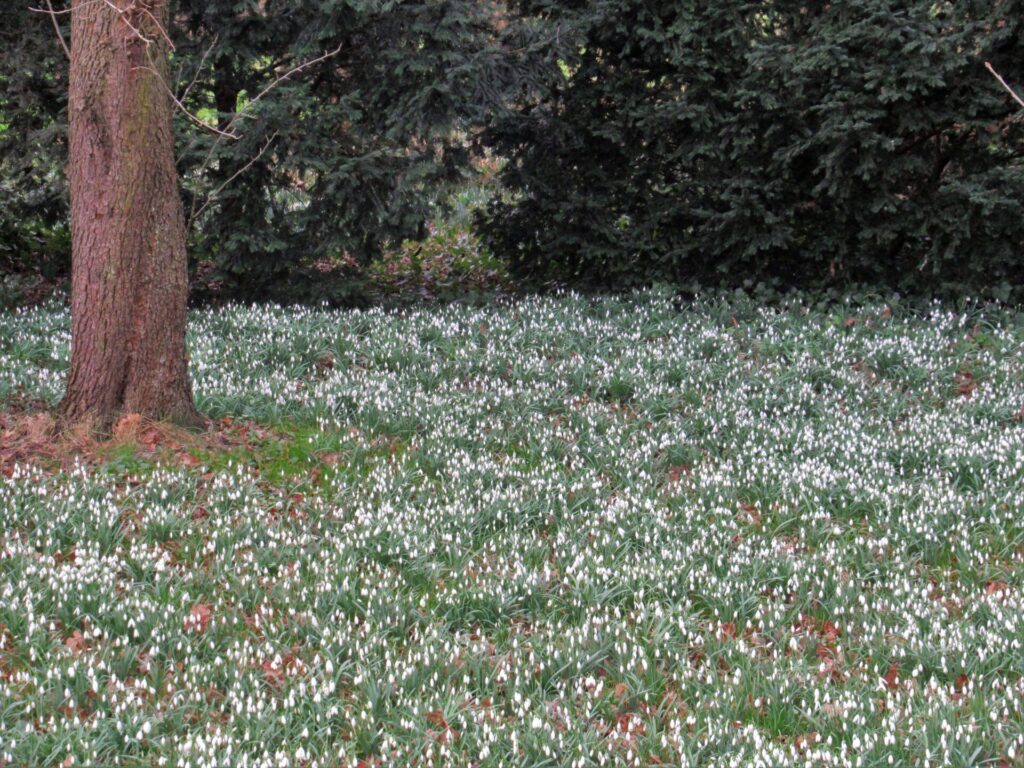
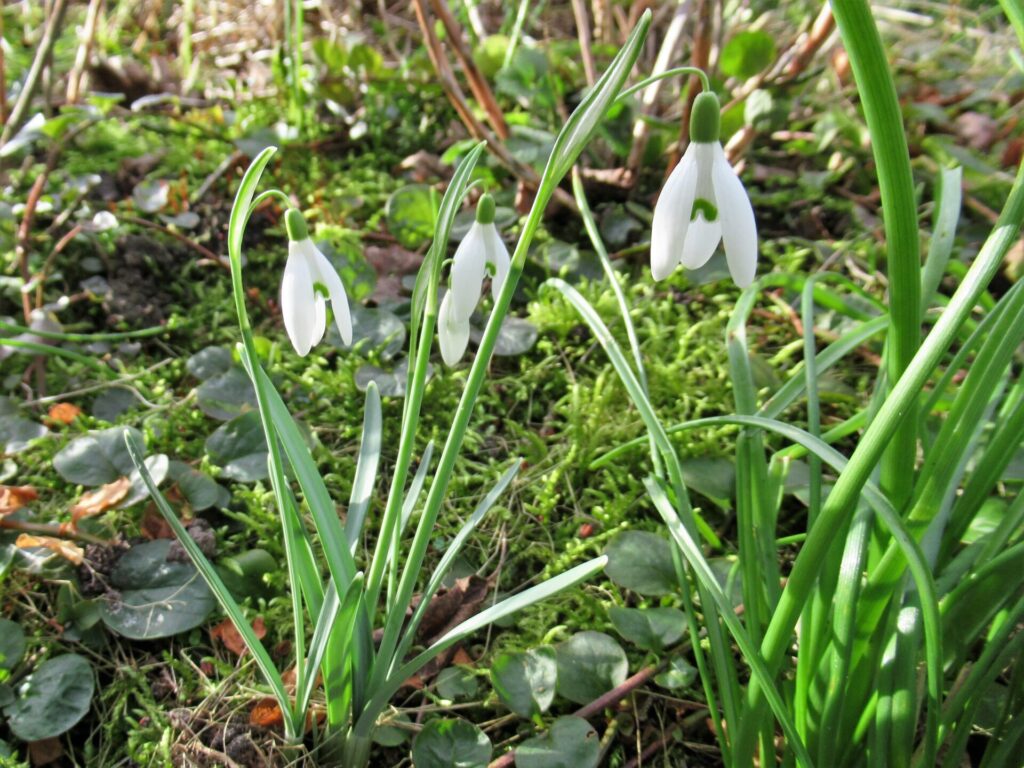
It’s snowdrop season! A garden I sometimes pass, is carpeted with them.
We have only small clumps here and there.
Maybe they’ll grow out to a carpet, too, over the years. Wouldn’t that be wonderful? For now, I’m very happy with the ones we have dotted through the garden. I just love their beautiful little bells.
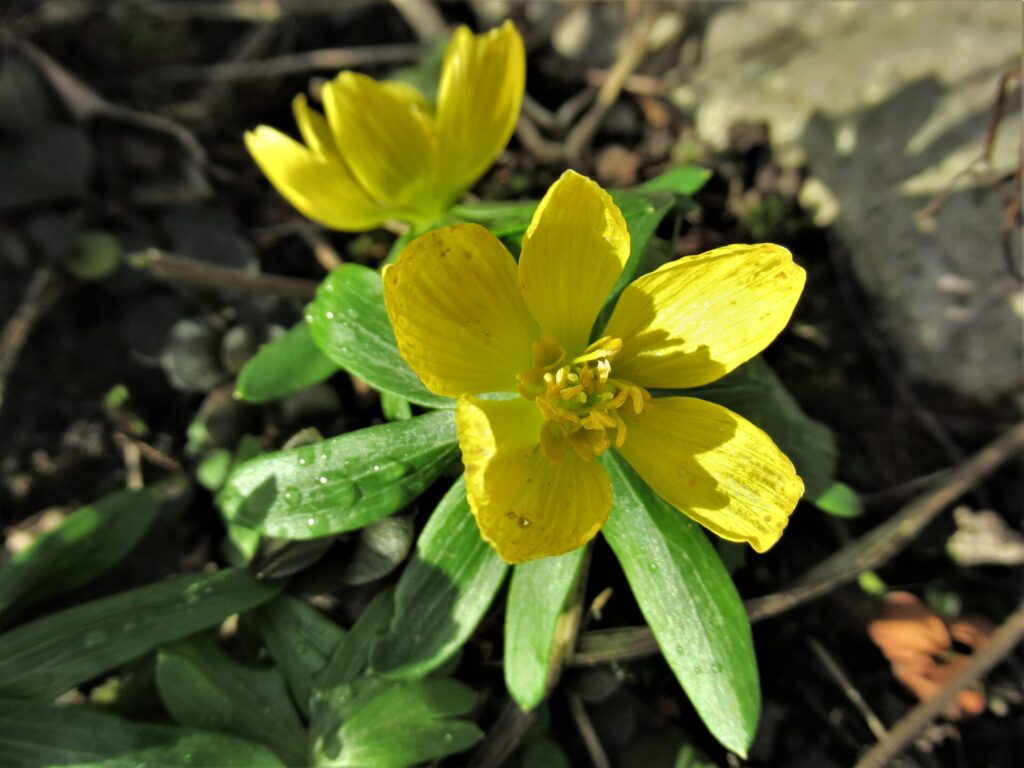
But it’s not just snowdrop season. It is also aconite season.
And iris season. We have yellow and blue miniature irises. The yellow ones are a little later, but the blue ones are in full bloom already. They are especially beautiful looked at from above.
Apart from the snowdrops, everything is earlier than normal this year. We haven’t had any real winter at all, and it feels strange to see so many flowers in the garden already. Compared to the 1950s spring arrives three weeks earlier now, according to Nature Today.
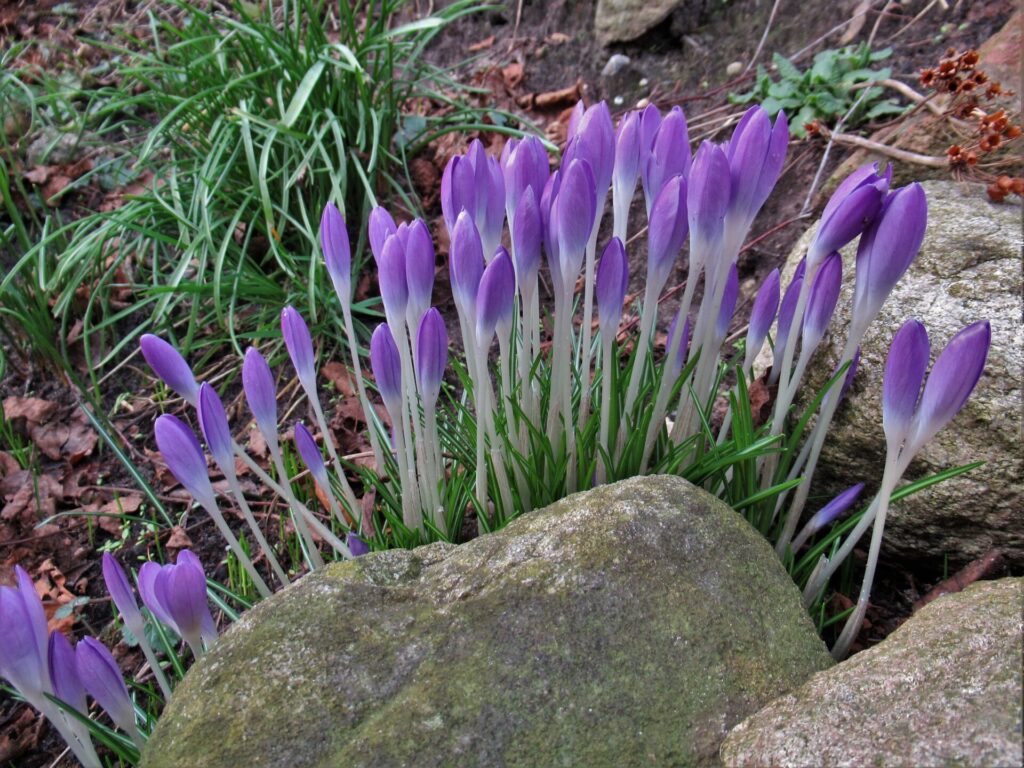
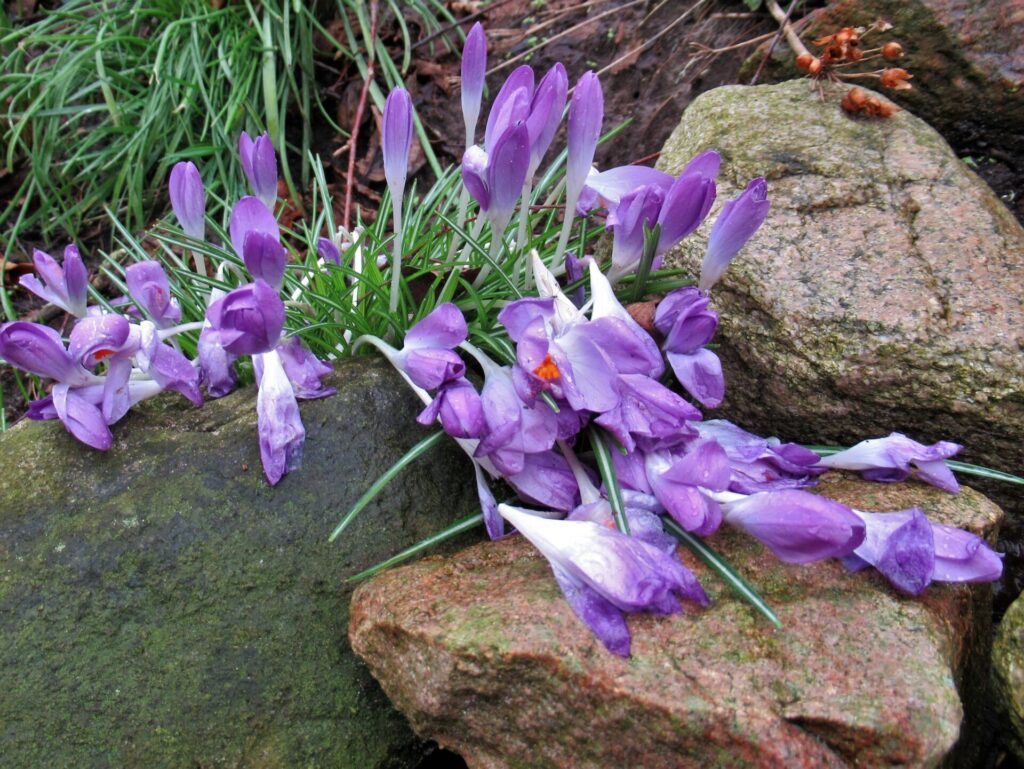
It’s crocus season, too. This is a photo I took last week:
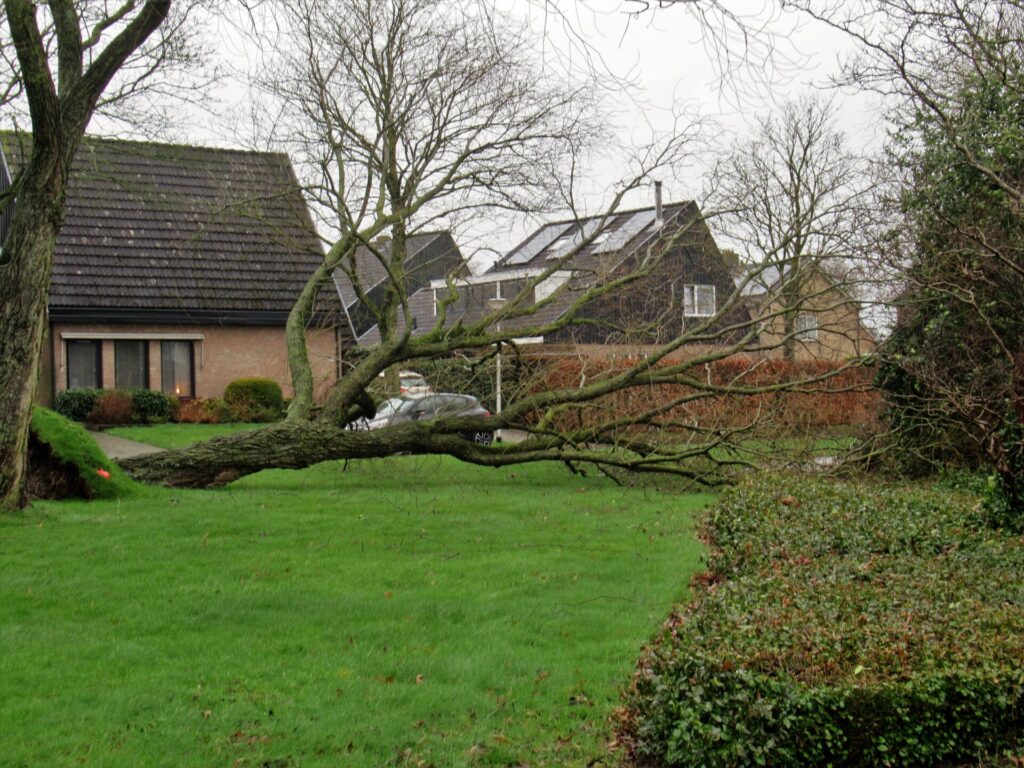
And this is what they look like after triplet storms Dudley, Eunice and Franklin raged across the country.
Especially Eunice was fierce, but we do not live close to the coast and it wasn’t as bad here as in the north and west, where it killed four people. Although the solar panels on our roof rattled dangerously, they stayed put. The strong gusts tore tiles from other people’s roofs, though, and toppled quite a few trees.
Some weeks the words flow easily from my keyboard, other weeks they do not. This is a week in the latter category. The seasickness-without-having-been-on-a-boat has gone, but my head is still tired and achy, like having a hangover-without-having-had-any-alcohol. It is also filled with worries about the storm hitting Eastern Europe.
How can I write about snowdrops and knitting at a time like this? But then again, maybe these humble little, peaceful things are more important than ever. So here is a report on my progress on the knitting front.
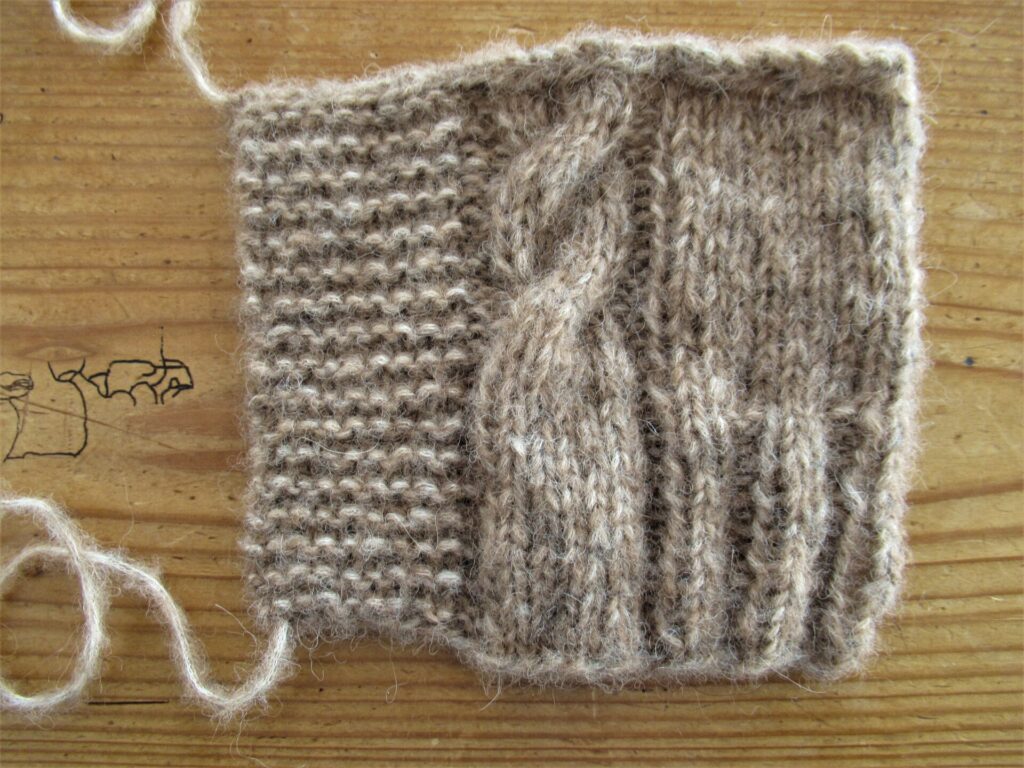
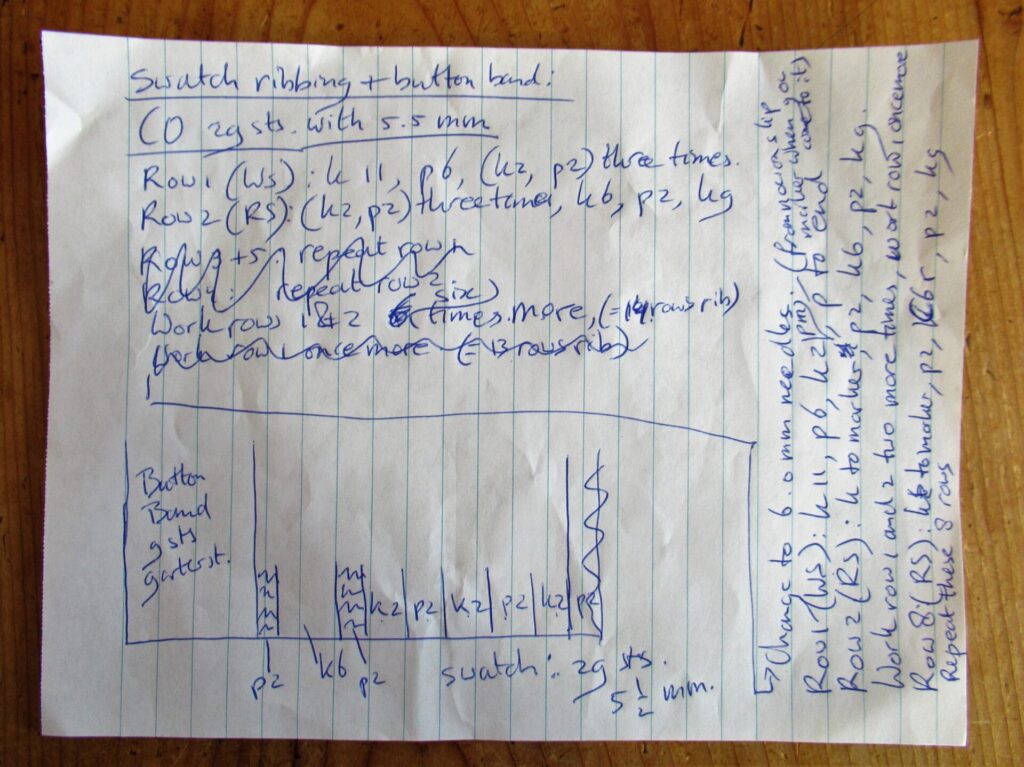
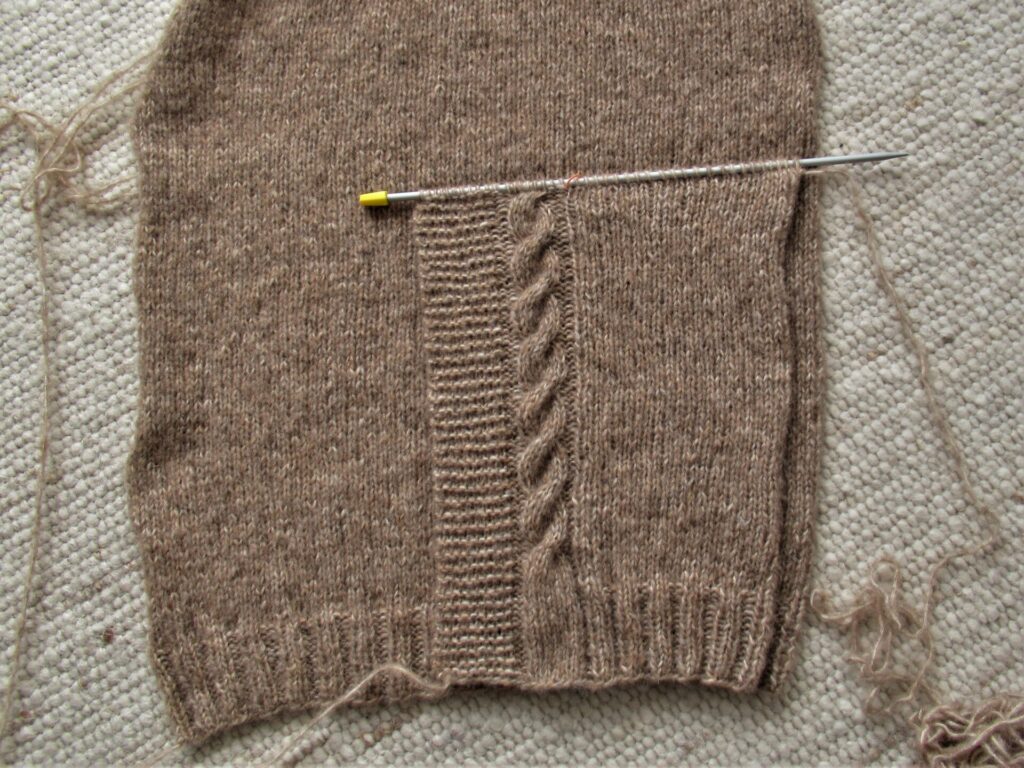
Remember the cardigan I’m designing and knitting for our daughter? (I wrote about it here.) After some initial swatching and brainstorming, I swatched some more and this is the winning swatch:
I scribbled down notes during the process.
The back was simply knit in stocking stitch. I added a cable to the front, next to the button band, but underestimated how much narrower the cable would be compared to the same number of stitches in stocking stitch. I should have made a larger swatch. Almost at the armhole, I realized that the front would be too narrow and the button bands wouldn’t overlap.
So I ripped the whole thing out, cast on a few more stitches and started again.
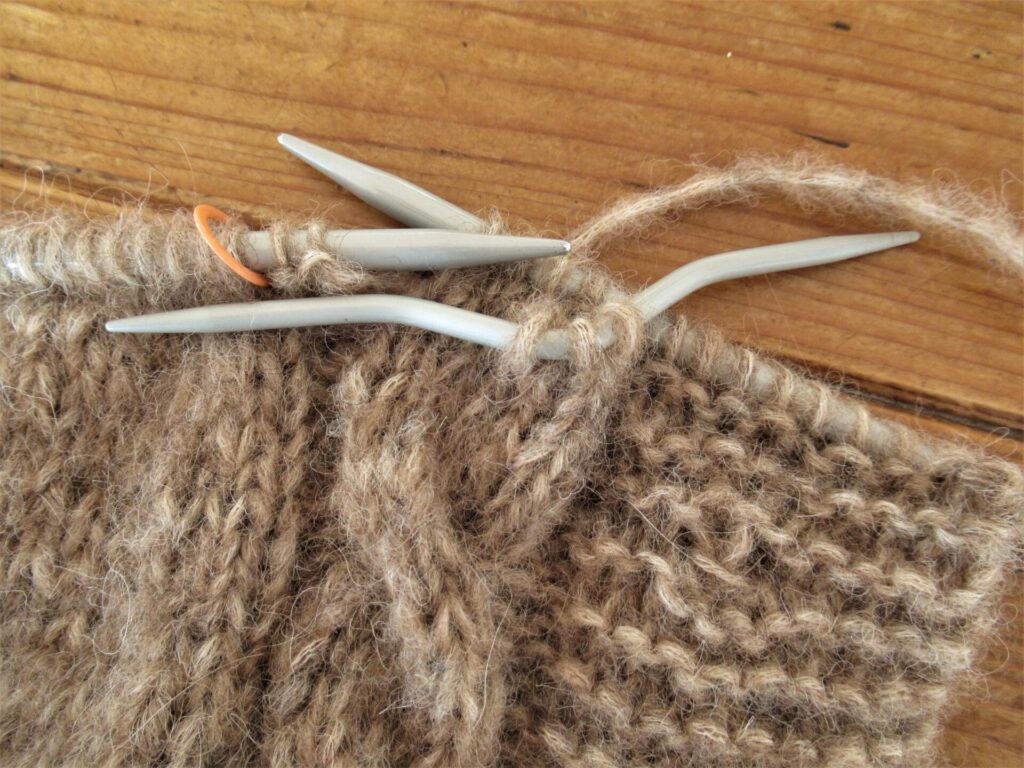
This is my favourite type of cable needle. Its V-shape holds the stitches really well, and it is easy to manipulate.
I’m halfway through the second front now, and have good hopes to have the entire cardigan finished by next week. Or am I being too optimistic? Anyhow, I hope to see you again next week. Bye!
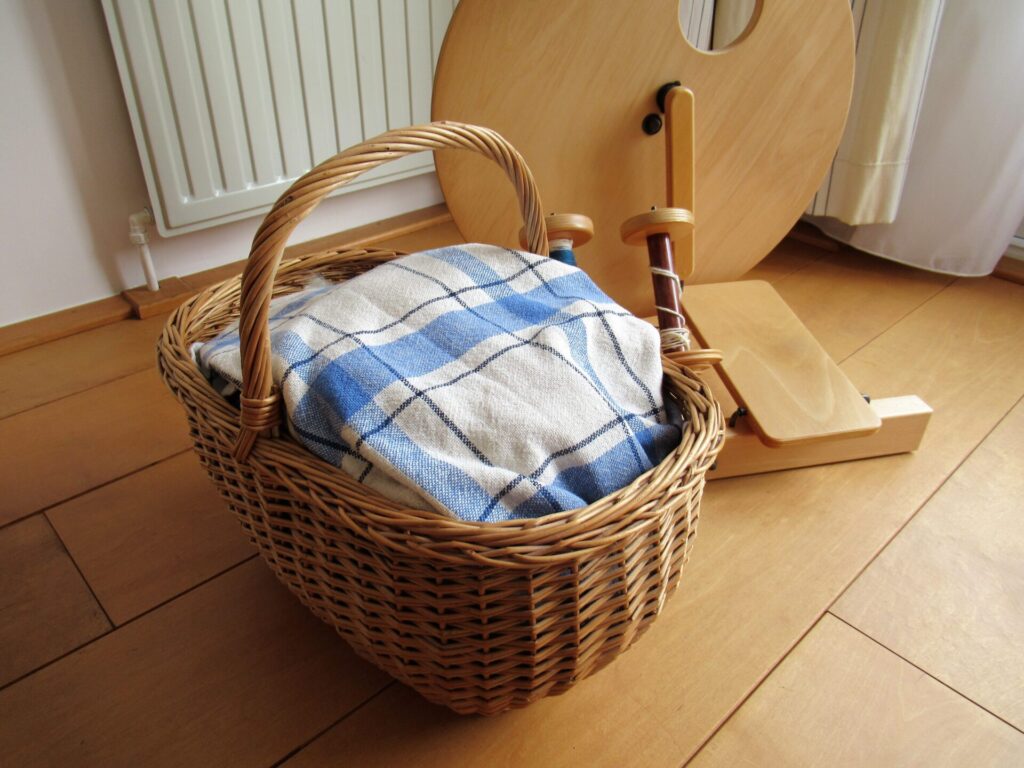
‘Oh, no!’ I thought while I was whizzing around the living room with the vacuum cleaner sometime this spring. (Or I may have thought something a little less polite.) I had just lifted the basket with spinning fibres beside my wheel…
… and discovered a kind of grit under it. I knew what that meant – moths!
I had stuffed the fibres into a plastic bag, put them in the freezer, removed the grit, and shaken out the basket before I thought, ‘this could be interesting for my blog.’ The only things left to photograph were 3 cocoons.
Moth problems are unavoidable in a house containing so much that is high on the moth’s Munchability Index. (Isn’t that a brilliant term? It was coined by Adrian Doyle, conservator at the Museum of London. There is a link to the article in which I found it at the bottom of this post.) Fortunately, I haven’t had moth problems very often, but often enough to recognize the signs.
I’ve taken a few photos of moths lately. It isn’t that I’m a moth geek or anything. It is just that with my camera in hand I’m becoming more and more aware of my surroundings. And when I see creatures I don’t know, I try to find out what they are.
This is the large yellow underwing on our kitchen floor. It is called grote huismoeder (literally: large stay-at-home-mum) in Dutch. Whoever thought of that name?
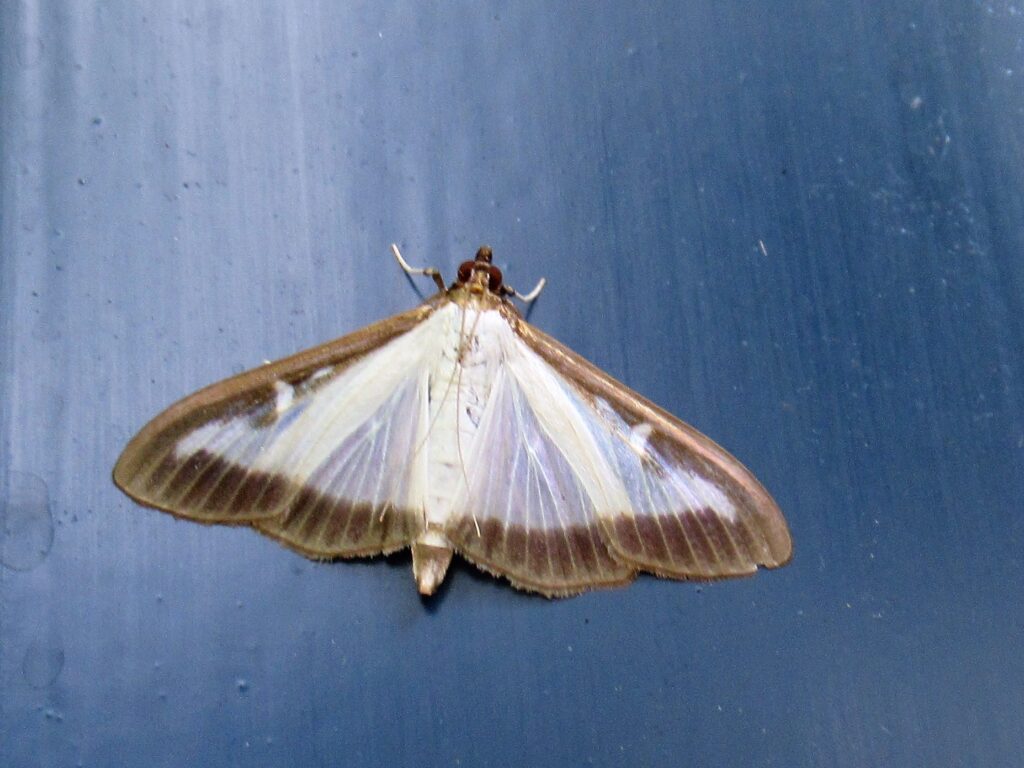
And this is a box tree moth.
Isn’t it beautiful, with its almost transparent veined wings in a dark frame? We don’t have any box in our garden, and its family has already destroyed our neighbours’ box hedge, so I can admire it without getting nervous.
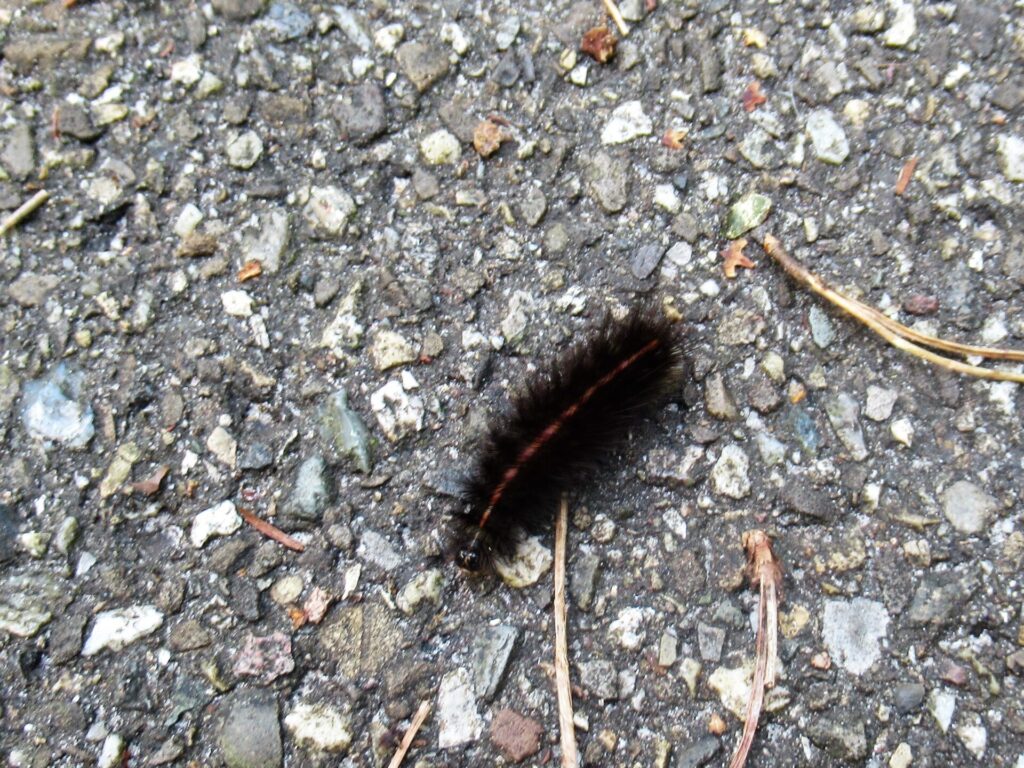
Several moth caterpillars crossed my path while I was out cycling this summer. This hairy little monster is the caterpillar of the majestic white ermine (NL: witte tijger).
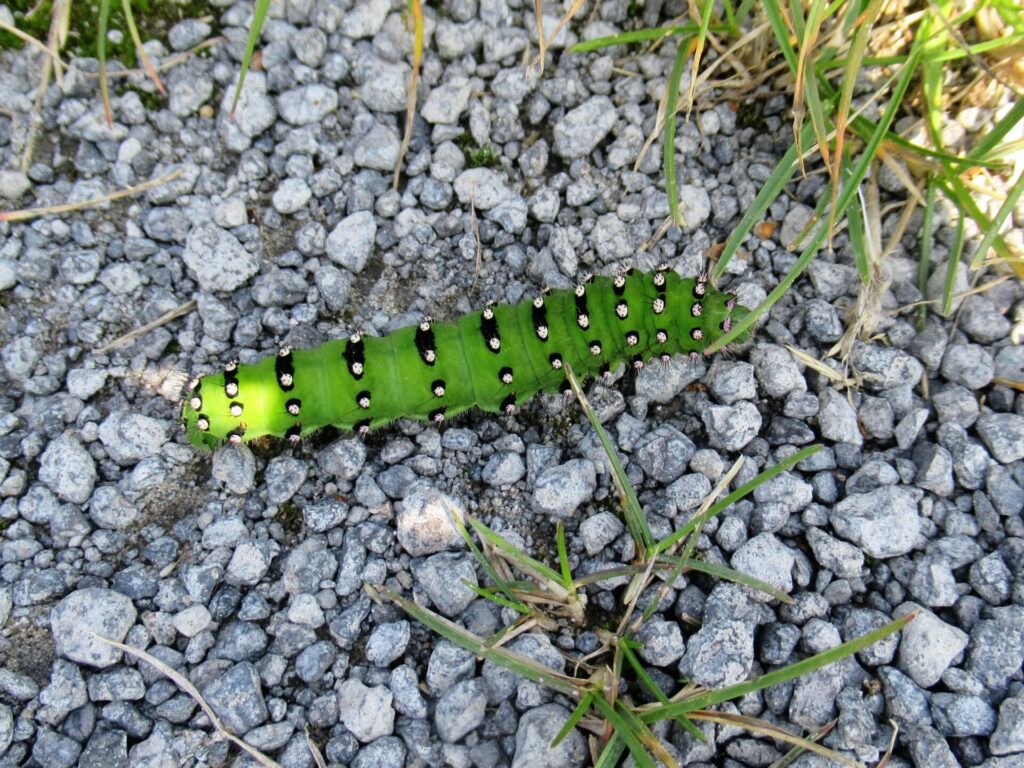
And this big fat beauty will later transform into a small emperor moth (NL: nachtpauwoog).
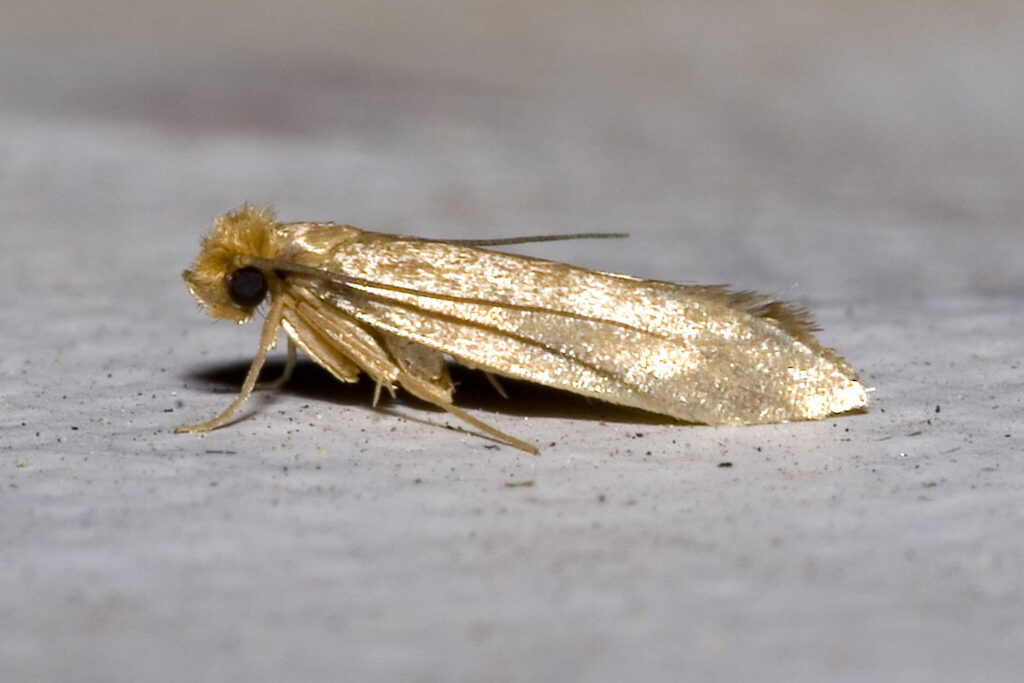
It isn’t any of these that munch on spinning fibres, knitting yarn and sweaters, though. It’s the clothes moth that does that. I have, (un)fortunately, not been able to photograph it and am borrowing someone else’s picture. Here it is – every knitter’s and spinner’s nightmare:
Doesn’t it look glorious in this picture, all shimmering gold? In real life it is only about 7 mm (0.25”) long – an unsightly beige-ish little fluttery thing.
So, what to do about them?
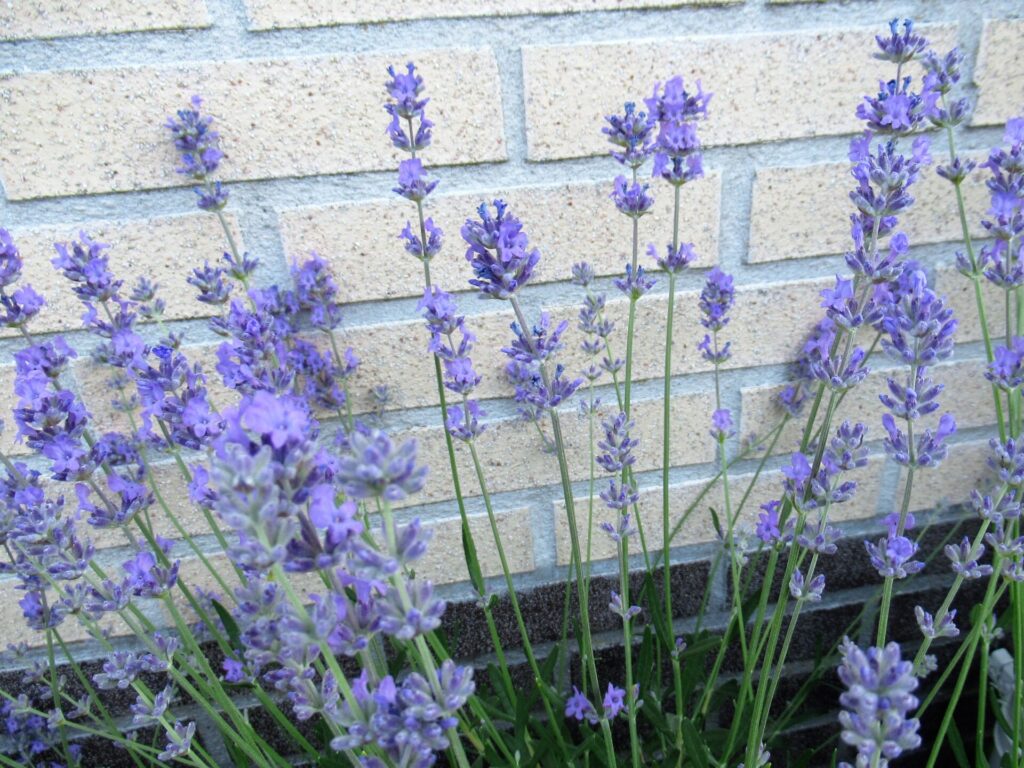
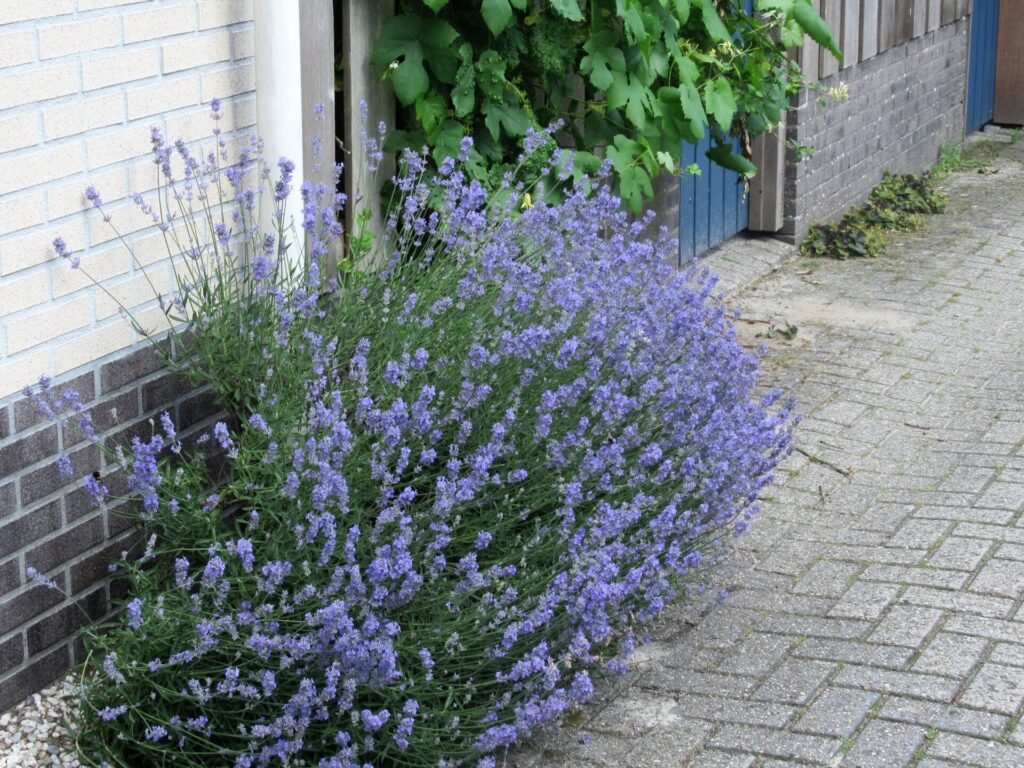
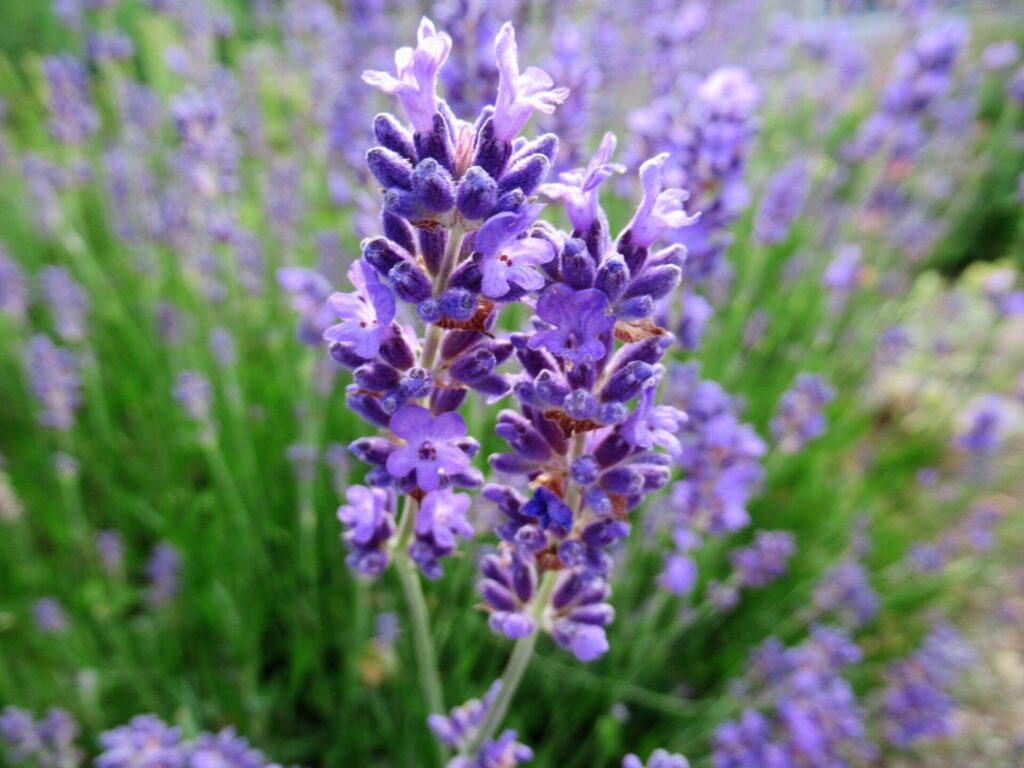
Moth balls and moth paper are one option, but they smell horrible and are carcinogenic. Another is cedar wood. There was a block of that in my spinning basket. Maybe it loses its moth-repellent quality over time? Something else moths hate is lavender.
This bush along our driveway established itself there years ago. It is a pale shade of, well, lavender.
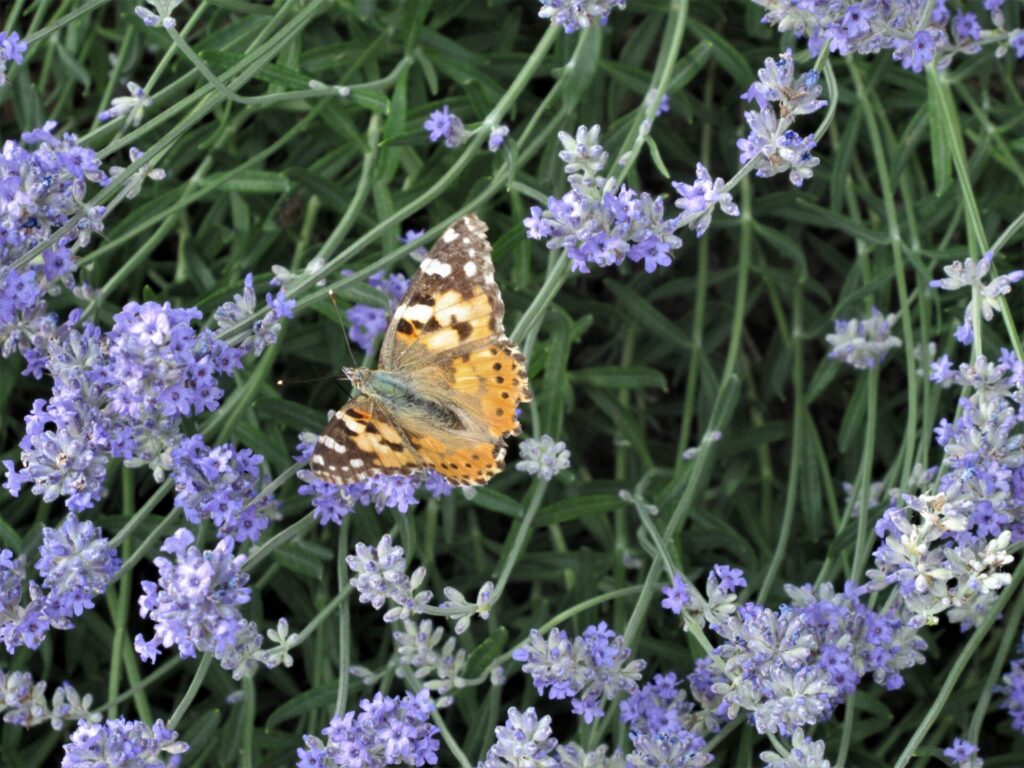
This isn’t a moth, by the way, but a butterfly called painted lady (NL: distelvlinder).
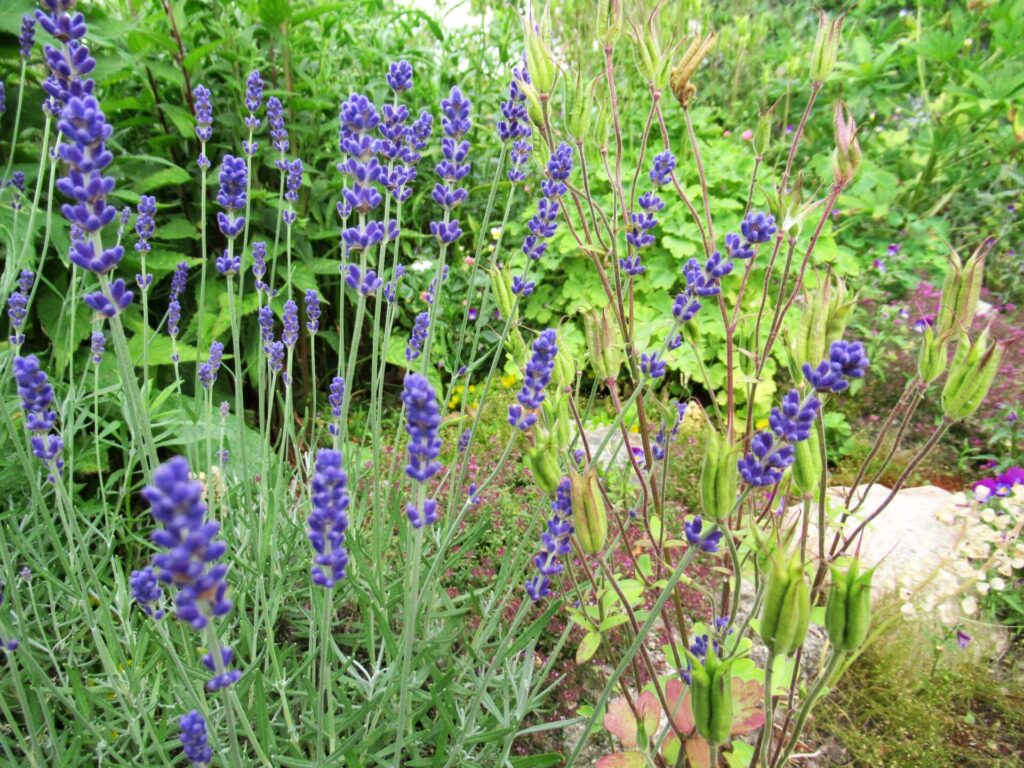
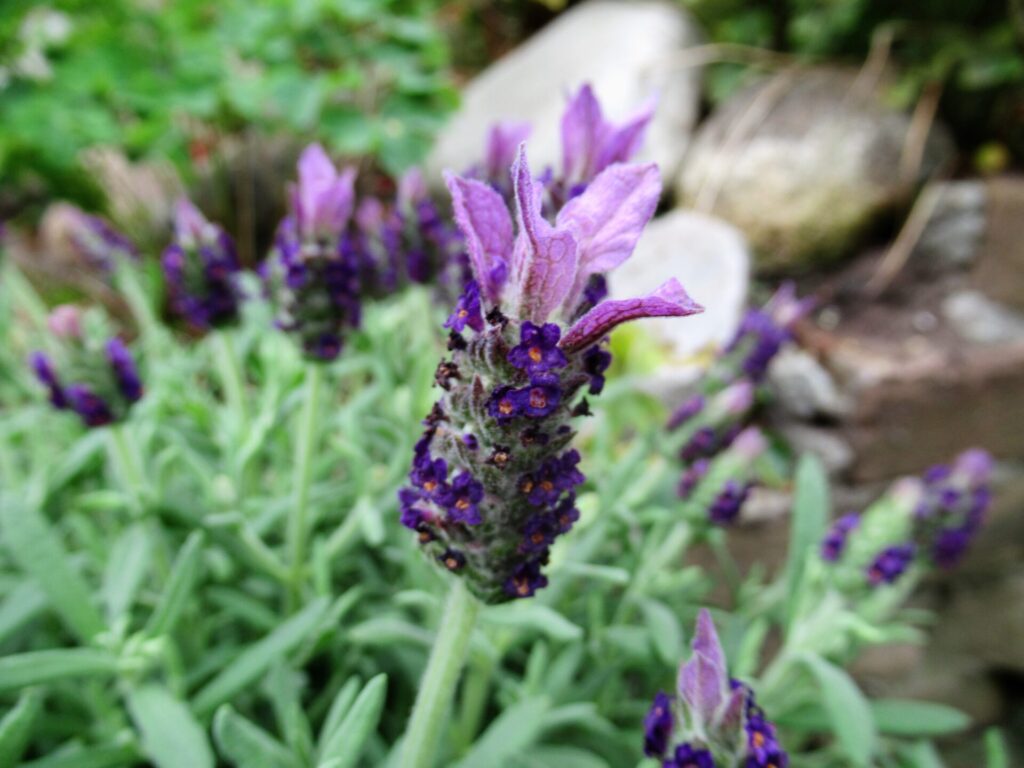
Last year we planted some more lavender in our front garden.
It is smaller and a darker shade of purple.
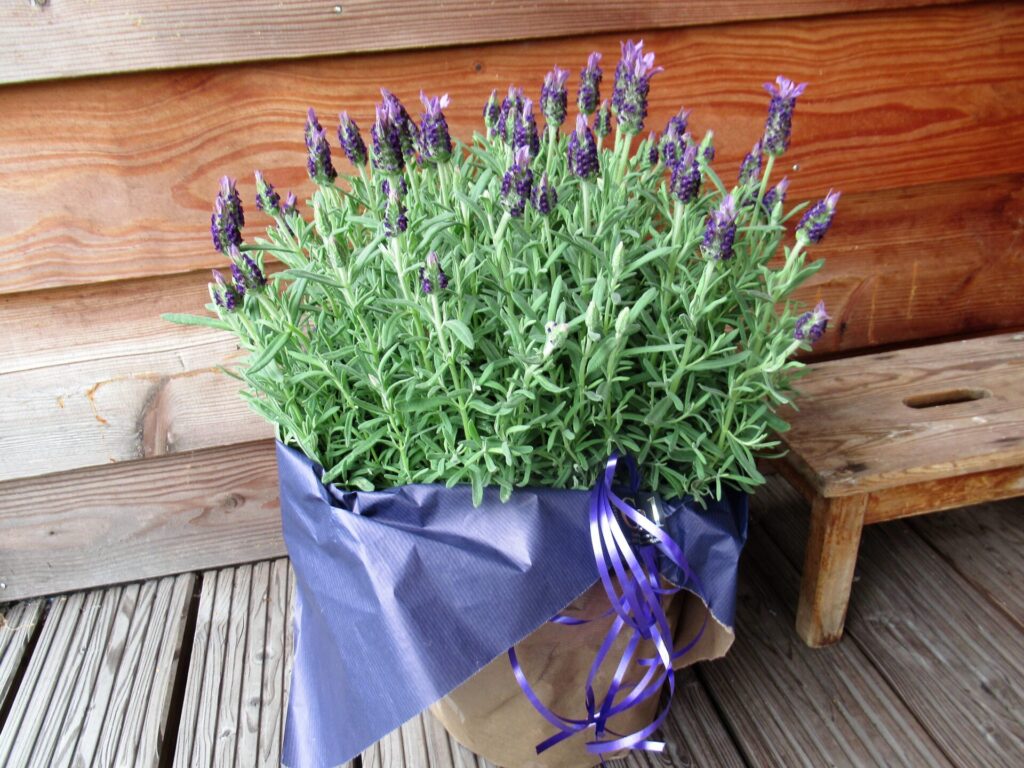
Moths may hate lavender, but I love it. Its scent, the purple of its flowers, and the silvery grey of its leaves. When all the lavender in our garden had finished flowering, friends coming to spend a sunny afternoon chatting in our garden brought us a big pot of a different variety.
It has beautiful tufted flowers. I have placed it just so that we can see it every time we look out the kitchen window.
I don’t know what it is that makes moths hate lavender so much, but it is a well-known fact that lavender is an excellent repellent.
Over the summer, I’ve been knitting some lavender sachets from small remnants of sock and other fingering-weight yarn. Not the old-fashioned frilly kind, but more modern? simple? plain? ones. I don’t know exactly how to describe them, but if all goes according to plan, you’ll see what I mean next week.
Meanwhile, here are a few links to some interesting reading about moths, the problems they pose for textile-lovers and what to do about them.
Remember the woad seeds I sowed in June? I received them as part of a project aimed at using more local wool and dyeing it with local dye stuffs too. That seemed like an interesting idea and woad can give a beautiful blue colour, so I thought I’d give it a try on a small scale.
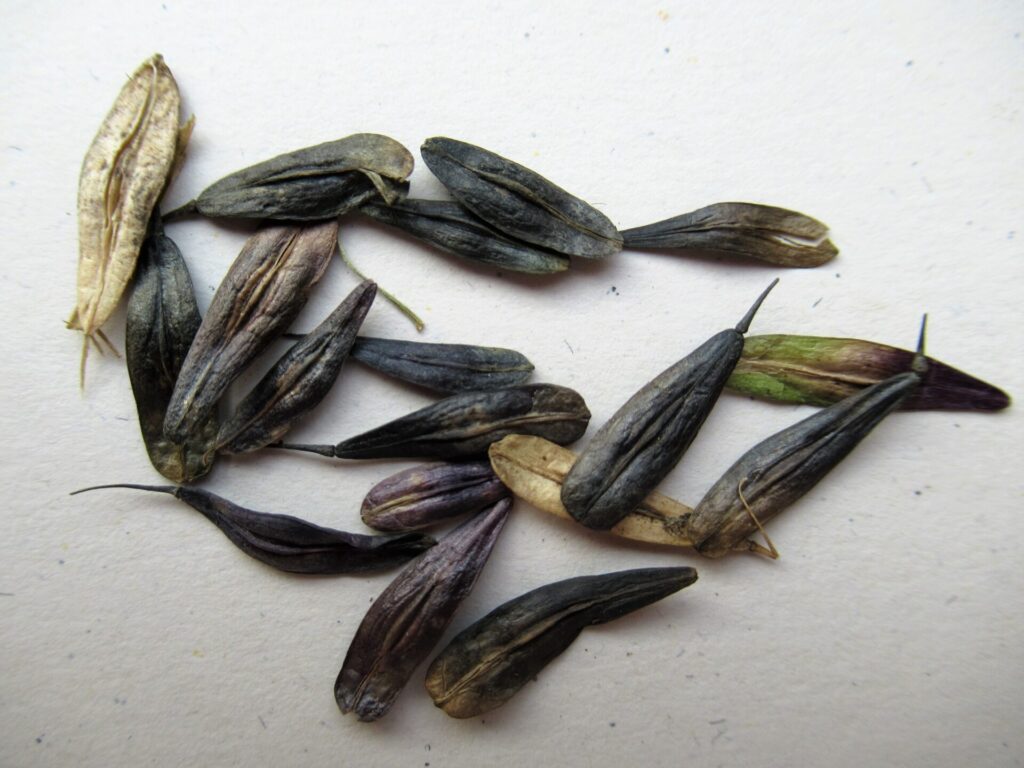
Now, 3 months after the start of my woad adventure, it’s high time for an update. It’s not all good news I’m afraid. At first everything went well. Most of the seeds germinated and I had a number of really healthy looking plants (photo above). I planted them out around mid-July. Half of them in a sunny spot next to our garden shed, and the other half behind a big rose bush.
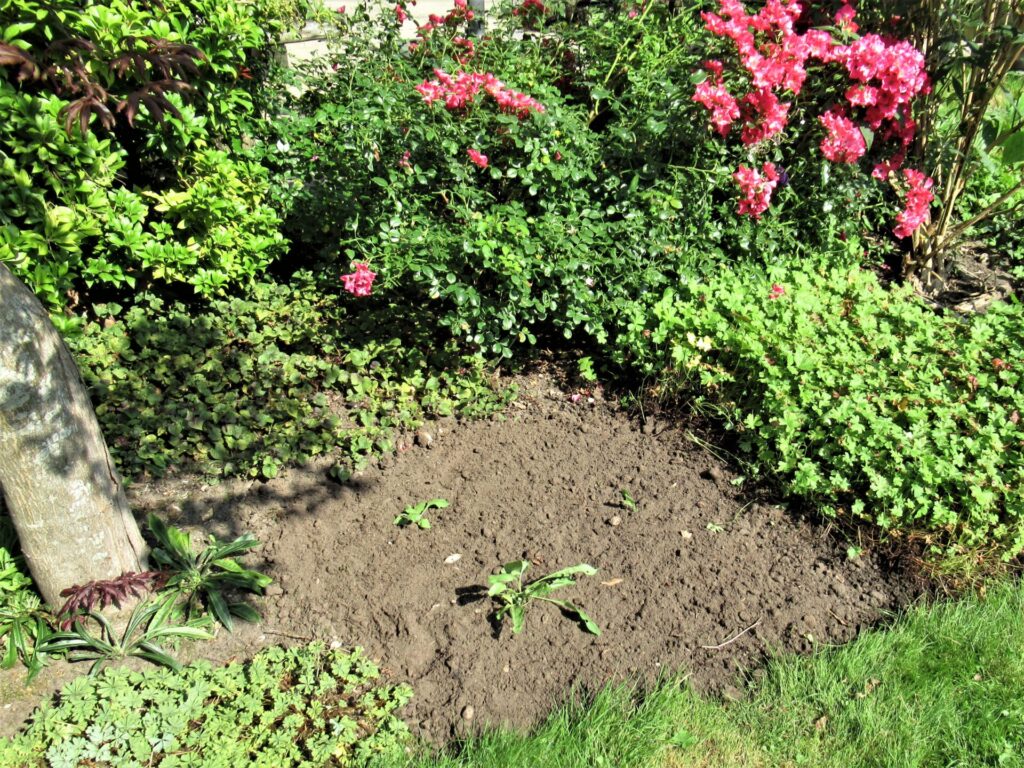
Below you can see the plants several days after planting them out. Already, things were not looking good at all.
Some of the plants were still sort of okay, some had almost disappeared. Uh-oh! Rainy weather = slug weather!
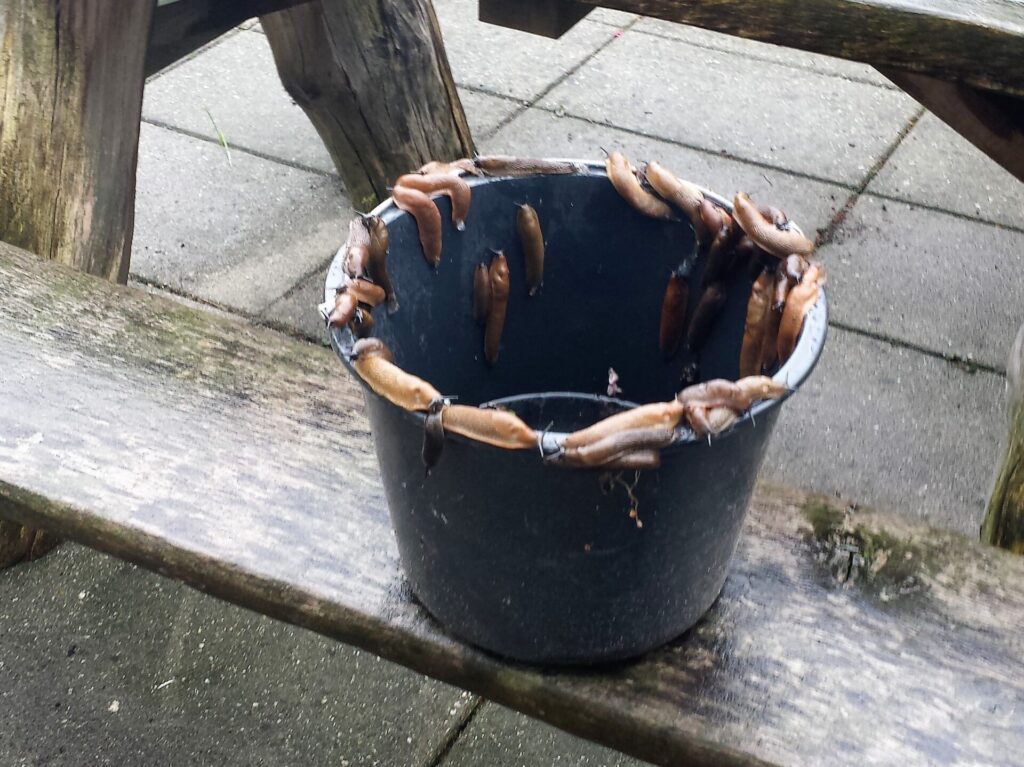
Several years back, we emigrated large numbers of slugs from our garden. We (read: my husband) collected them with BBQ tongs, put them in a bucket with a layer of water and emptied the bucket on a piece of land where the slugs wouldn’t bother anyone and would be much happier (or so we told ourselves.)
We soon learnt that the bucket shouldn’t be left standing for too long or the slugs would crawl out. Ieuw!
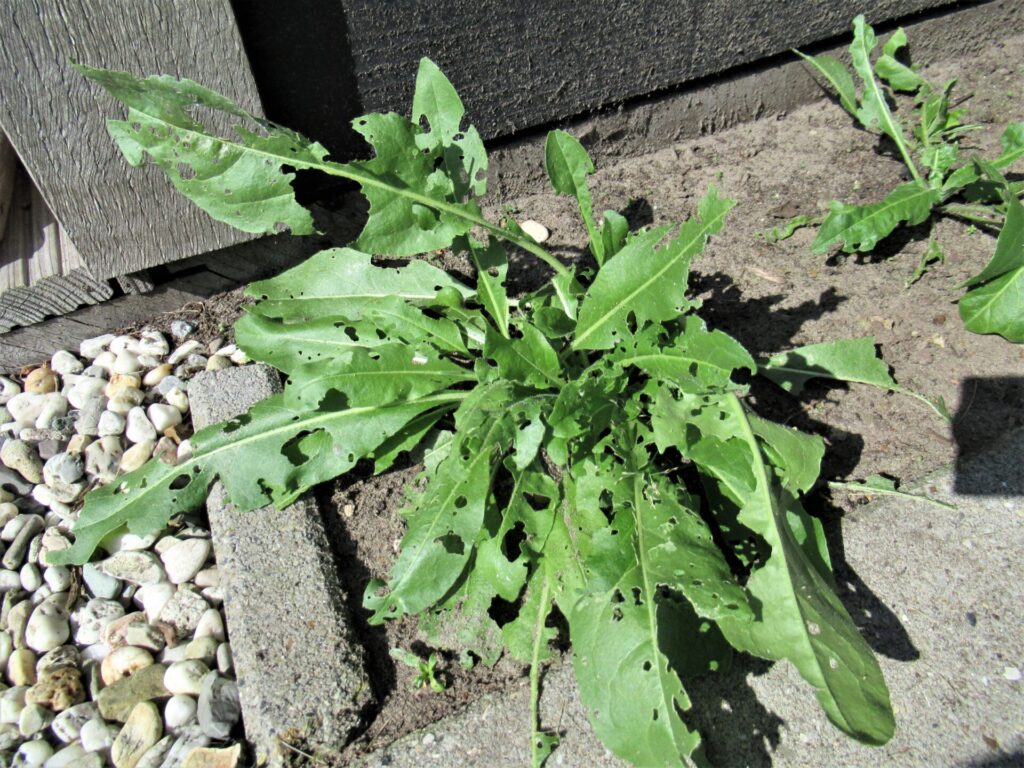
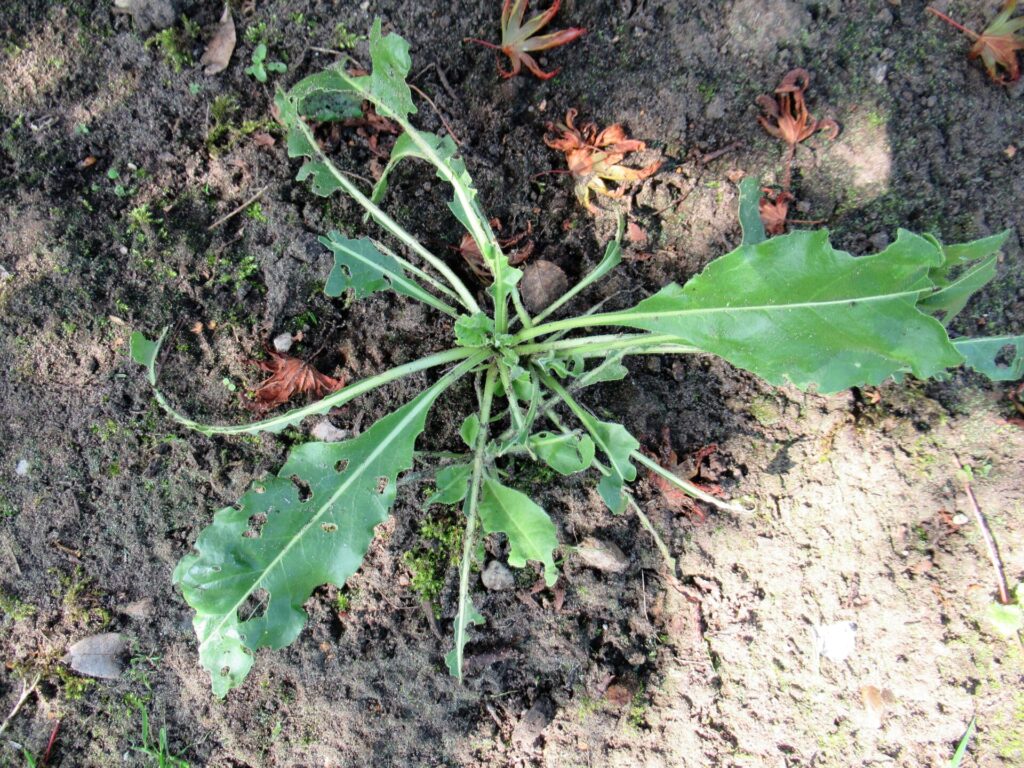
Maybe we should have mounted another slug removal campaign this year, but we didn’t. And the result is that now, 2 months after I planted them out, one woad plant looks reasonably okay.
One has disappeared completely. And the rest looks… well, see for yourself:
I recently learnt that only fresh woad leaves from the first year’s growth can be used. Dried and older leaves do not give off any colour. I also found out that at least 250 g/½ lb of fresh leaves are needed for a 9 litre/2 gallon dye vat. Even if my plants had thrived, I wouldn’t have come close to that, but that was never the plan.
The plan was that small woad growers like me would bring their 10 or 20 grams of fresh leaves to a stall at a wool event, where together they would make a great dye vat. Unfortunately the wool event was cancelled because of Covid-restrictions. Oh well, that’s life at the moment. At least it’s been an interesting experiment. The dyers have found enough leaves for their vat elsewhere and I now know a lot more about woad.
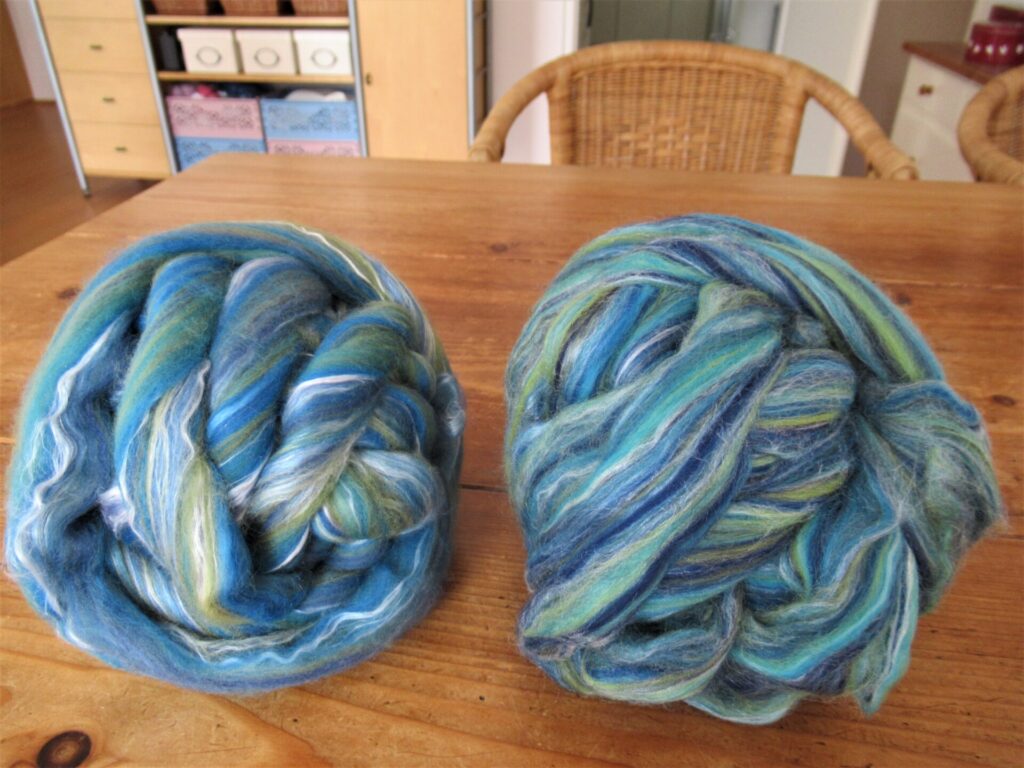
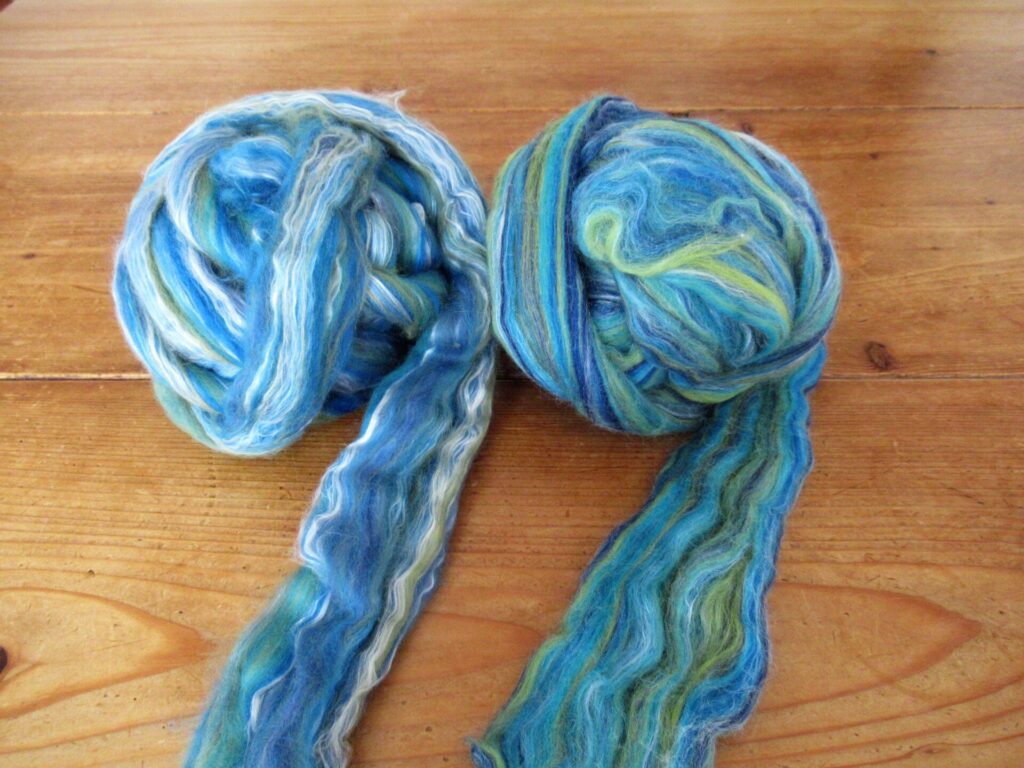
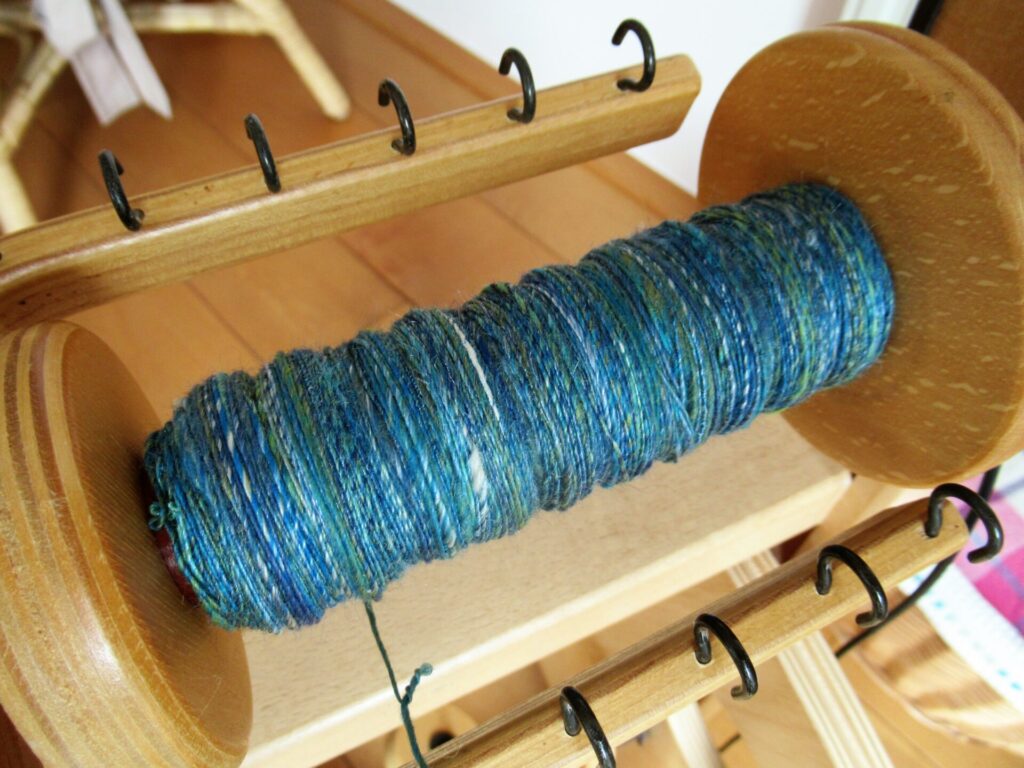
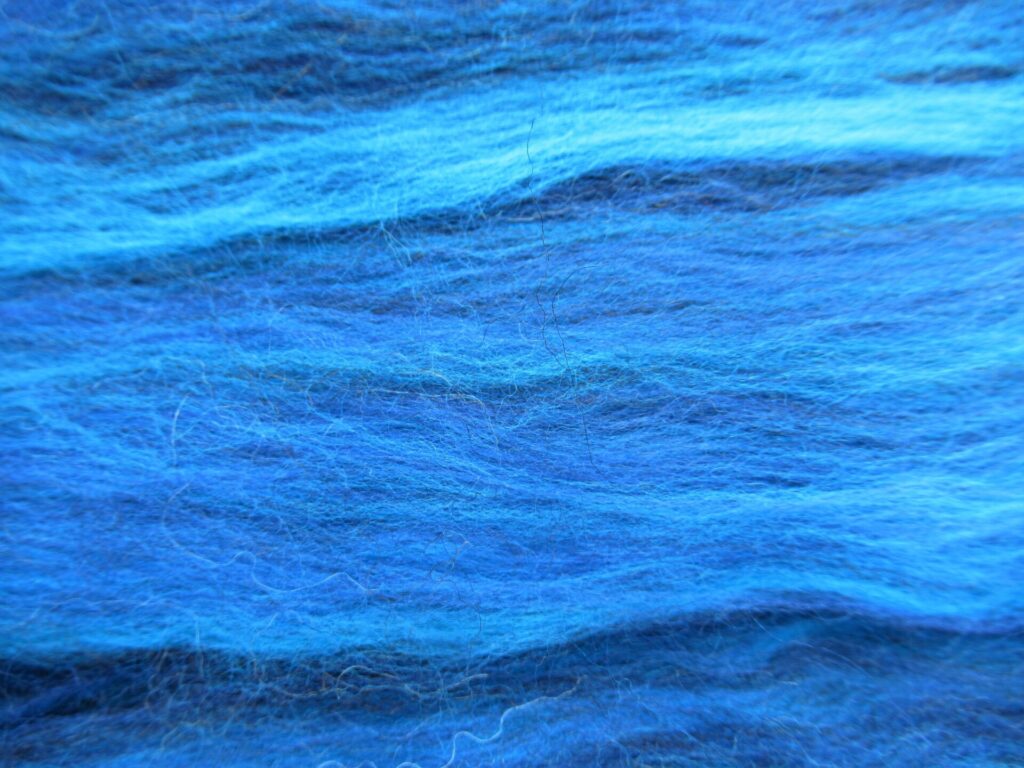
Meanwhile I have started spinning the lovely blue-and-green merinowool-and-silk gifted to me by a friend. She gave me two batches of spinning fibre of 100 grams each.
When I took them out of their bags, I noticed that although they were the same colourway, they were very different, like two balls of yarn from different dye lots. Can you see it?
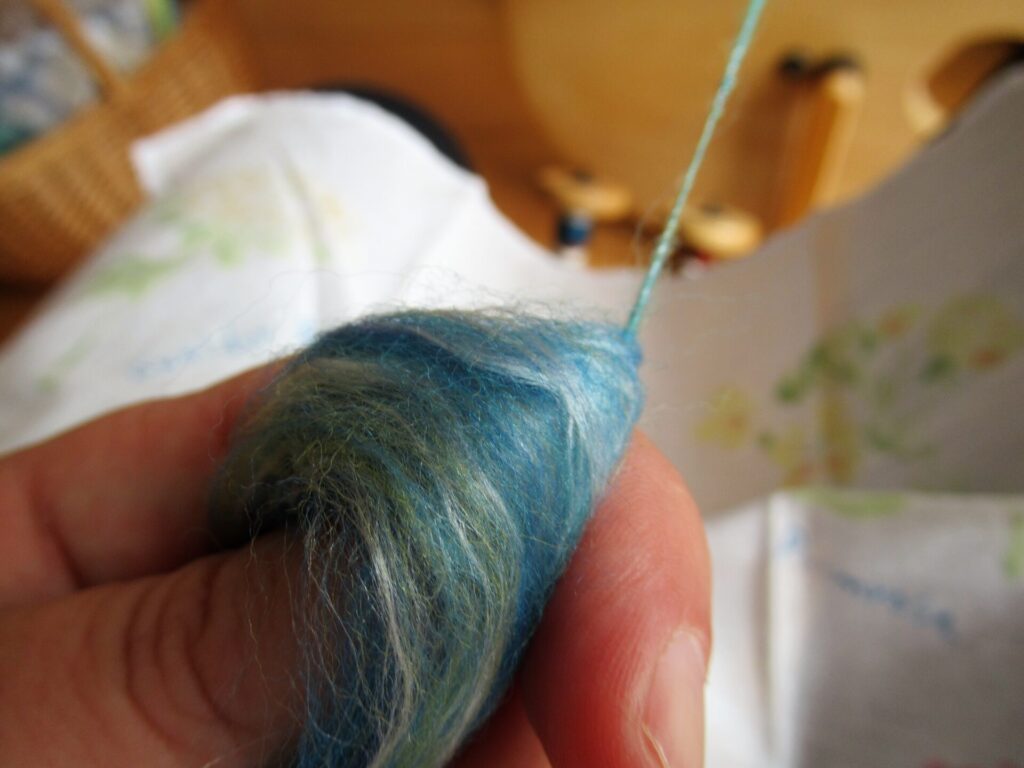
To solve the problem, I spin small portions from the two batches alternately. The result is a beautiful blend of blue, green, white and turquoise with the various colours still distinguishable.
Spinning it is like having a piece of mermaid’s tail in my hands. Not just because of the shimmery blues and greens, but also because it’s slippery. That is why I am spinning the fibre ‘from the fold’ as it is called. Some people hold a ‘fold’ of slippery fibres like these folded between their fingers, but I prefer wrapping it around my thumb.
Spinning it like this, gives me more control over the fibre.
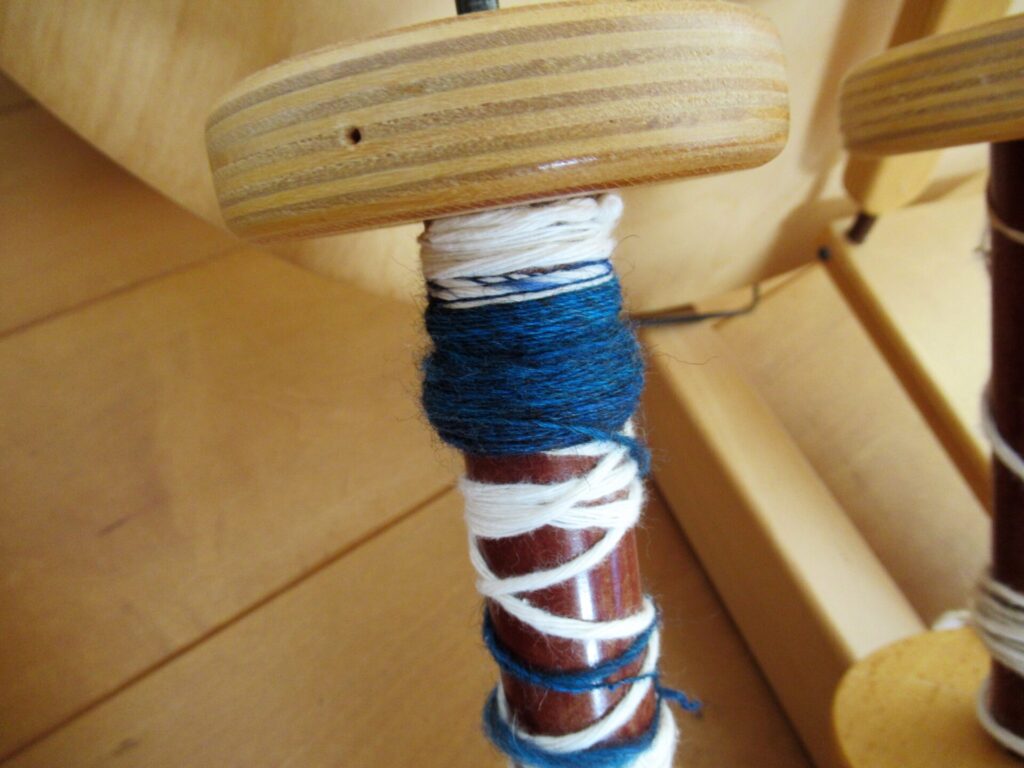
Spun up and plied, the 200 grams would be enough for a good size shawl, but I’ve decided to spin it out to enough for a sweater by combining it with something else – 600 grams of wool in a colourway called… (drum roll)… WOAD!
This, too, consists of various shades: black, cobalt and turquoise. A sea of blues to go with the mermaid’s tail.
But unlike the mermaid’s tail fibres, the different shades can no longer be distinguished when this wool is spun. Everything blends together into a beautiful deep but not very dark blue. I’ve tried a little bit out.
This woad adventure (the whole process of spinning, plying and knitting up this mountain of fibre) is going to take a long time, I expect. Especially because I also have many other projects on the go. I’ll show you my progress when there is something worth showing. But first more about some of my other projects over the coming weeks. Bye for now! xxx
PS More info about the local wool & woad project can be found in this blog post.
In Dutch, we have the expression achter de geraniums zitten (sitting behind the pelargoniums). It’s hard to explain exactly what it means, but on the whole it’s considered a Bad Thing. Not quite as bad as pushing up the daisies…
… but it comes very close. Sitting behind the pelargoniums, you’re a dull old stick-in-the-mud.
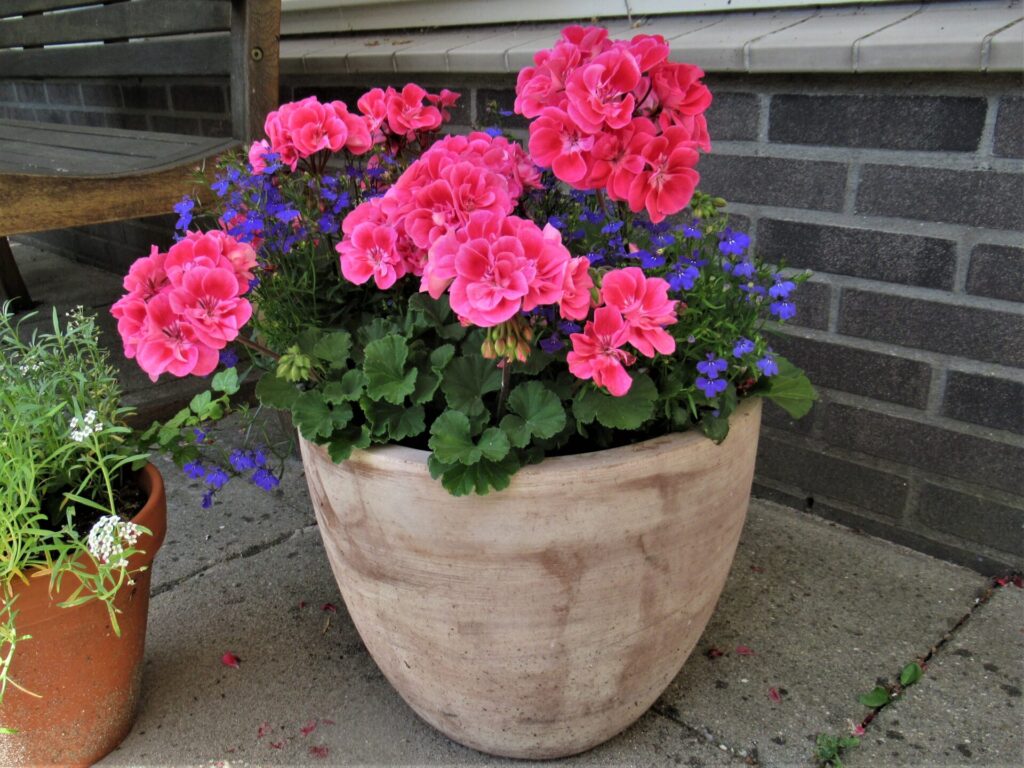
I never particularly liked pelargoniums. But since we came to live here, almost 20 years ago, we’ve bought them from our local brass band every year to sponsor their uniforms and instruments.
Ironically, last year – when we spent more time behind the pelargoniums than ever before, figuratively speaking – we had to go without them. Fortunately this year, the brass band players were able to go round the doors selling them again.
I don’t know if I’ll ever love pelargoniums, but I’ve come to like them over the years. They provide some nice splashes of colour around the house.
And how about sitting behind those pelargoniums?
According to our government, it is no longer necessary to do so. I don’t know what it’s like in your part of the world, but here almost all of the covid-measures have suddenly been dropped. As of last Saturday, we don’t have to wear face masks anymore, and almost everything is allowed (with 1.5 metres distance). It’s a BIG step, and I wonder where it is going to take us.
It is not going to take us (my husband and me) anywhere much in the foreseeable future. We don’t have big plans. I mean, it would be a shame if we weren’t here to enjoy our wonderfully fragrant miniature strawberries, wouldn’t it?
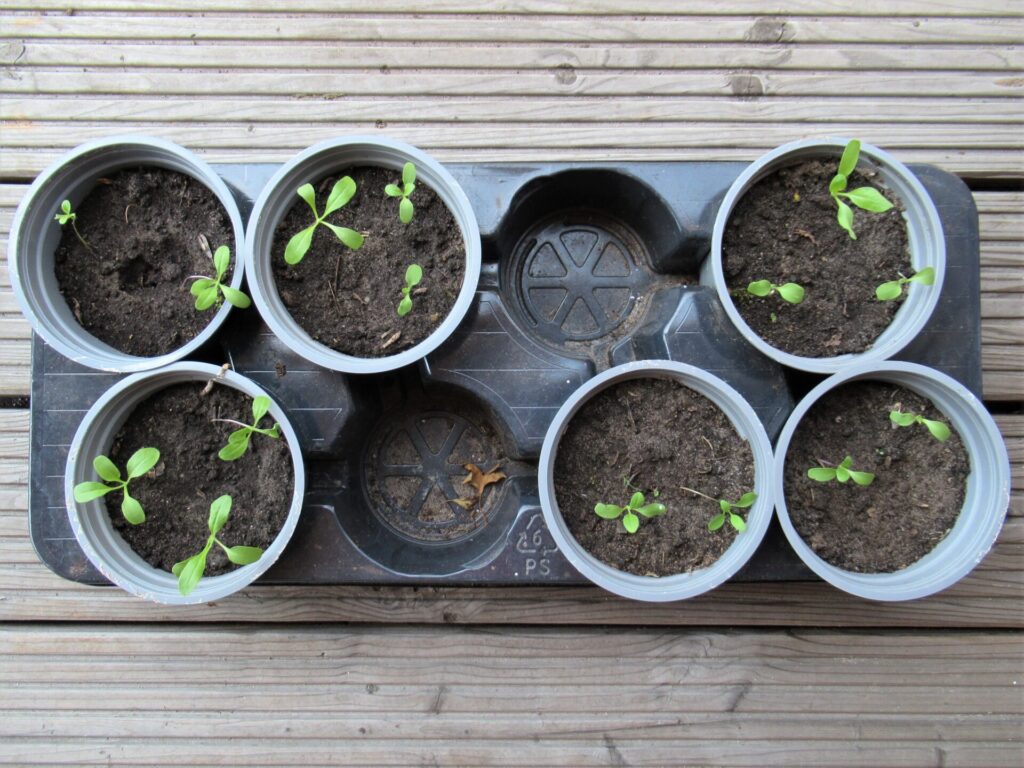
And who among our neighbours would be crazy enough to pamper my little woad seedlings the way I do? Yes, the seeds have germinated! Well, most of them anyway.
We will just continue living our lives, and doing the things we normally do this summer. But we are planning to take a day off now and then to venture away from behind our pelargoniums. I hope you’ll virtually join us on some of our outings.
One thing we have planned, is a visit to our niece. She left home last September to go to uni and I am really looking forward to finally see where she has been studying so diligently on her own this past year. Before that trip, I am crocheting her a pair of old-fashioned pot holders from blue and cream cotton.
On the knitting front, I don’t have any big plans either. I’ll focus on small projects from those yarn remnants I talked about last week. There is one big project I want to finish, though – the soft, light and relaxed cardi I started earlier this year. Only, I found out that I’ve made a mistake in one of the front bands. Oops.
I think I know how to fix it, but I need to pluck up the courage for that.
Some crochet is also on my list of things to do this summer. Not a big blanket or anything – I’ll keep it small, too.
For the rest, I’ll keep enjoying the small miracles surrounding us and sharing them with you.
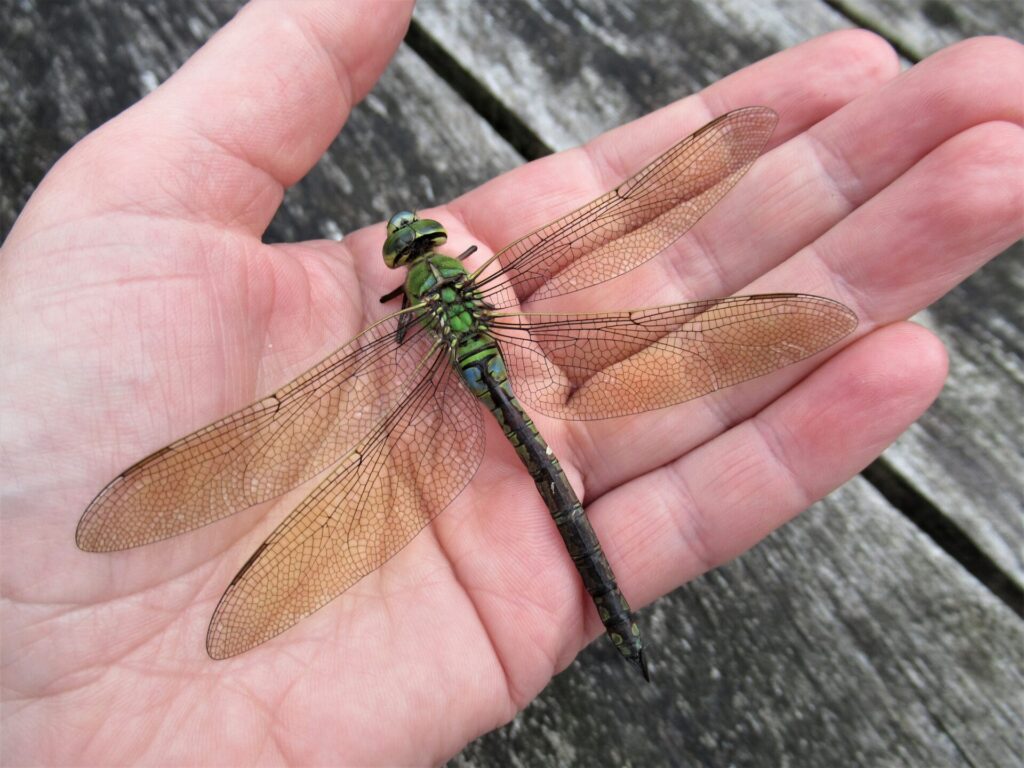
The other day, when I was starting to lower our awning, I heard a dry, crackling sound. Like something dropping down from it. And this is what I found:
An emperor dragonfly. I couldn’t see it breathing, and after observing it for a while concluded that it was dead. A rare opportunity to study it more closely. Such a beautiful creature.
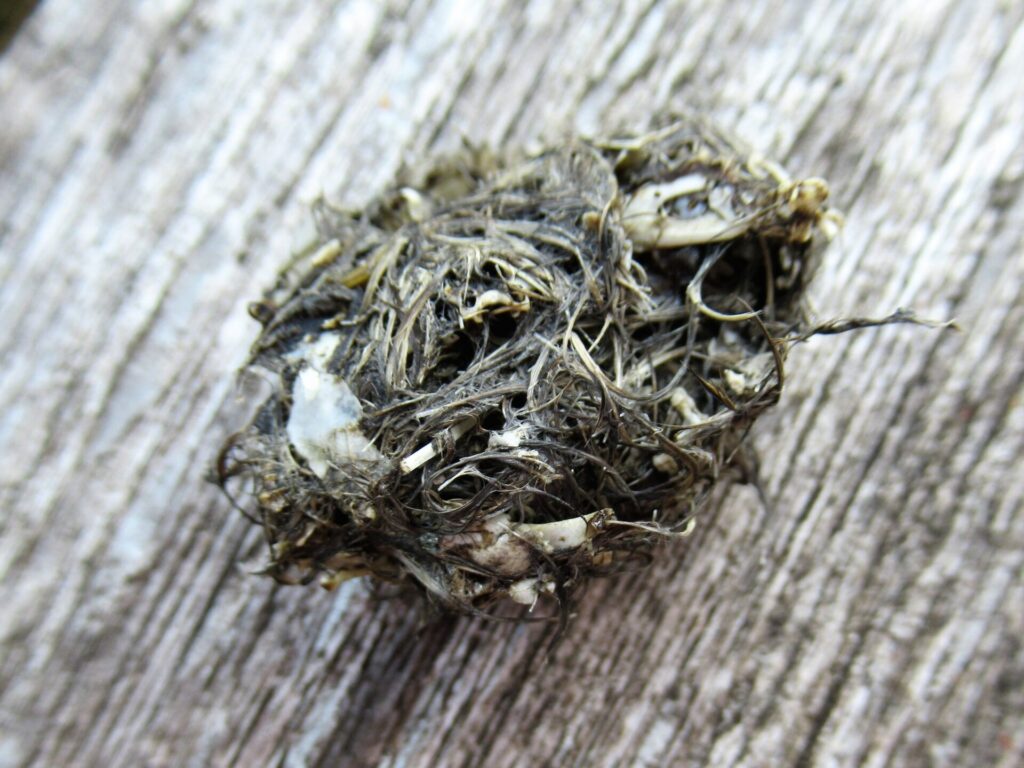
Another thing I found just outside our backdoor this past week is this:
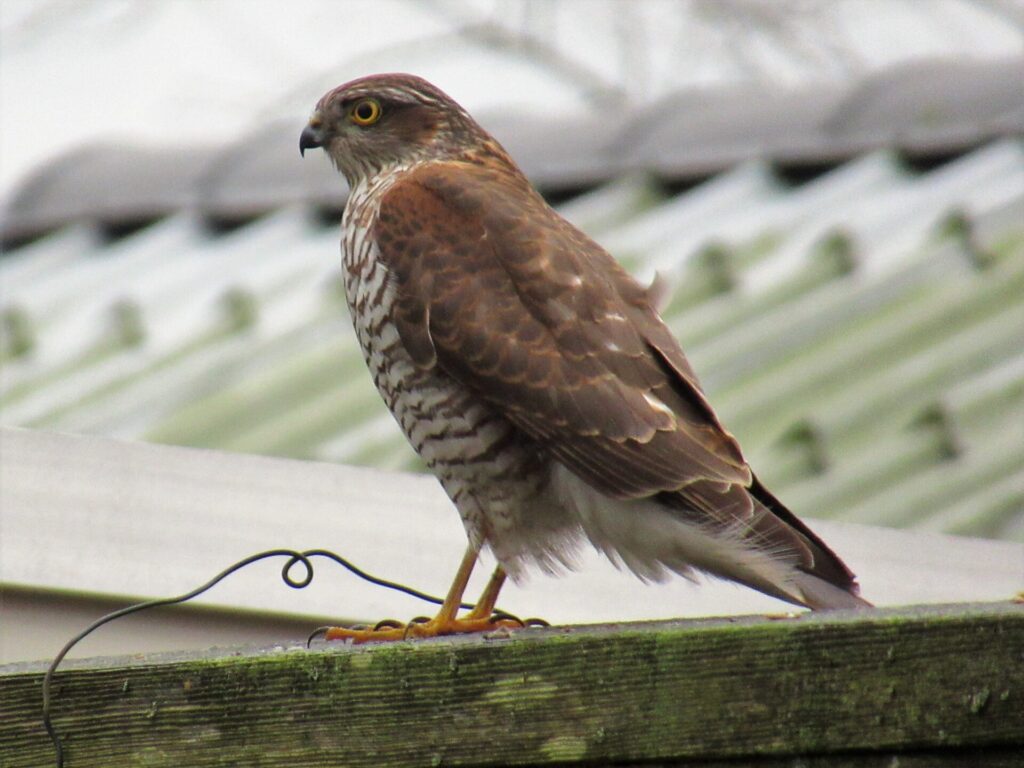
I’ve zoomed in on it; in reality it is only about 3 cm long. At first I thought it was a bit of moss fallen from off the roof, but when I looked more closely, I saw ‘things’ in it and realized it was a pellet. Probably regurgitated by this sparrowhawk.
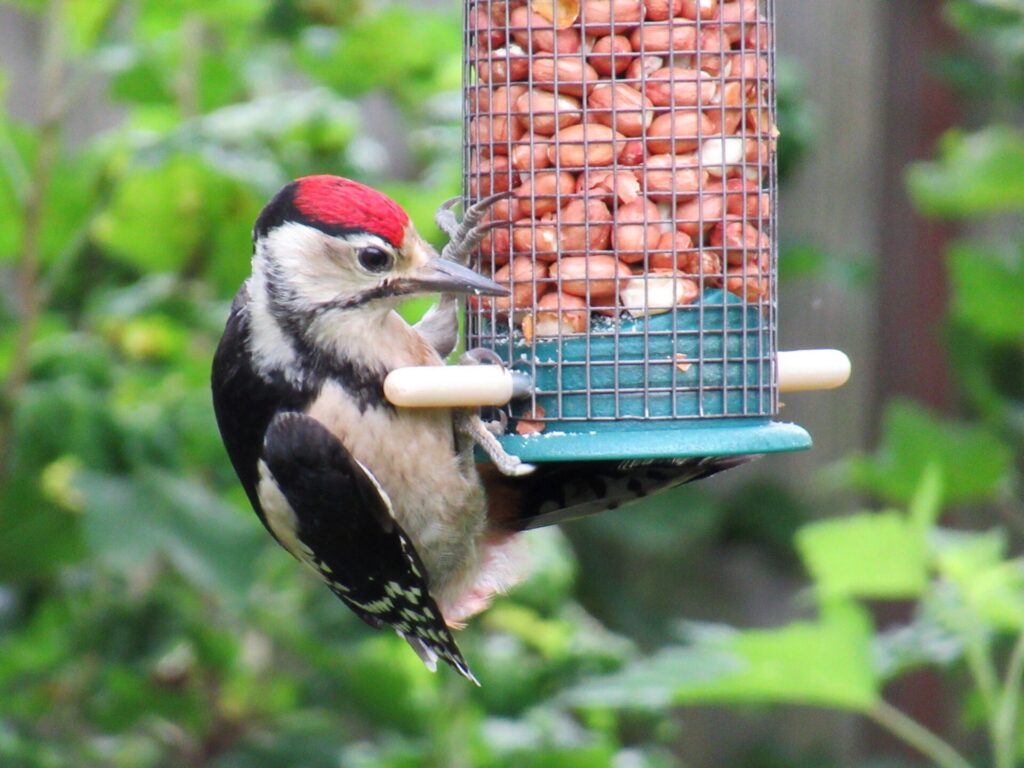
I may seem like a dull old stick-in-the-mud to others, spending so much time behind the pelargoniums. But life never feels dull to me. To close off, here is one of the young woodpeckers who visit our garden every day.
Wherever you are in the world, and whether you are staying behind the pelargoniums or not, I wish you a safe and enjoyable summer and hope you’ll pay me a visit here from time to time.
PS If you’d like to see a dragonfly breathing (they breathe through the lower part of their body), here is a lovely video I found on YouTube.
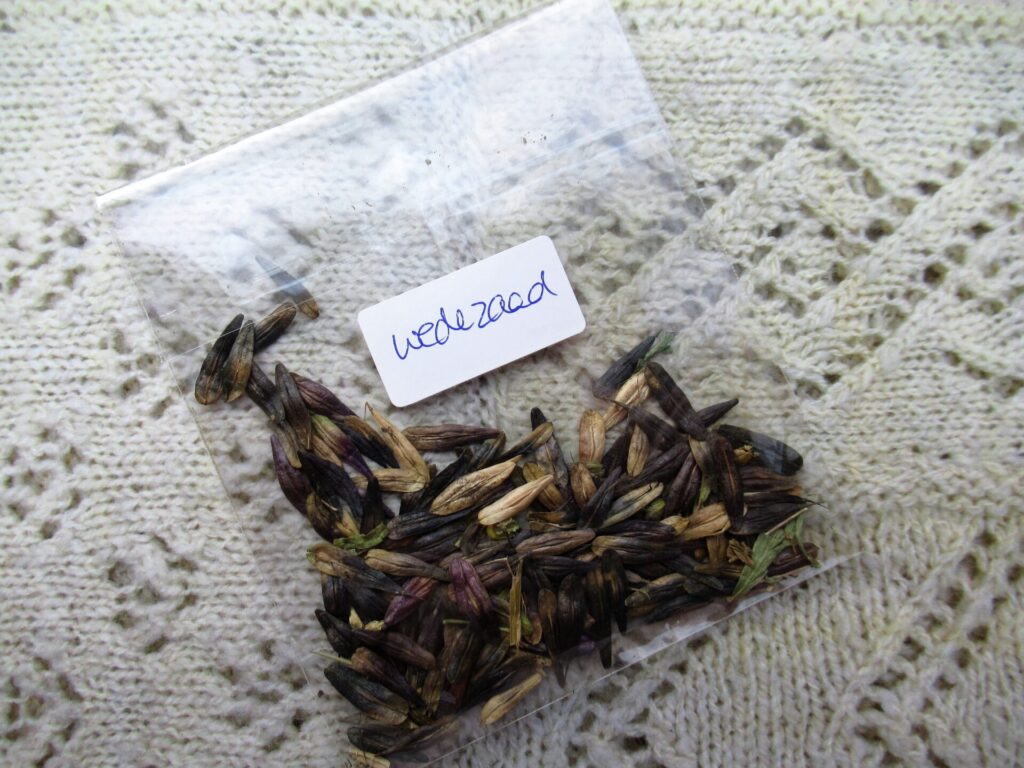
‘Urgent: Woad Growers Wanted’, a newsletter that landed in my inbox said. At first I thought, ‘Go away, I’m too busy.’ But after a while I thought, ‘Oh, why not? It sounds really interesting, and it won’t take any time at all!’ So I answered that I’d like to be involved and received a packet of woad seed.
It came with a lovely postcard of a blanket knit from local and hand spun wool. It is one of the blankets that was made last year, as part of a community project aimed at rescuing local wool from being labelled as waste and shipped off to China.
The call for woad growers came from the same people who organized the blanket project. They are now working on more ideas for things to do with local wool, and one of them is dyeing it with locally grown woad.
I won’t pretend to know everything there is to know about woad. In fact, I knew very little about it before I became involved in this project.
From the newsletter, I learnt that for centuries, wool was dyed blue with woad in the Netherlands and other parts of Europe. In the 18th century, Frisian wool comber Eise Eisinga won international awards for his beautiful blue wool. In his spare time, Eise built a planetarium that is now a museum (I knew that, I’ve been to it and it’s great!). The museum still owns his original dye recipes, including one for dyeing with woad.
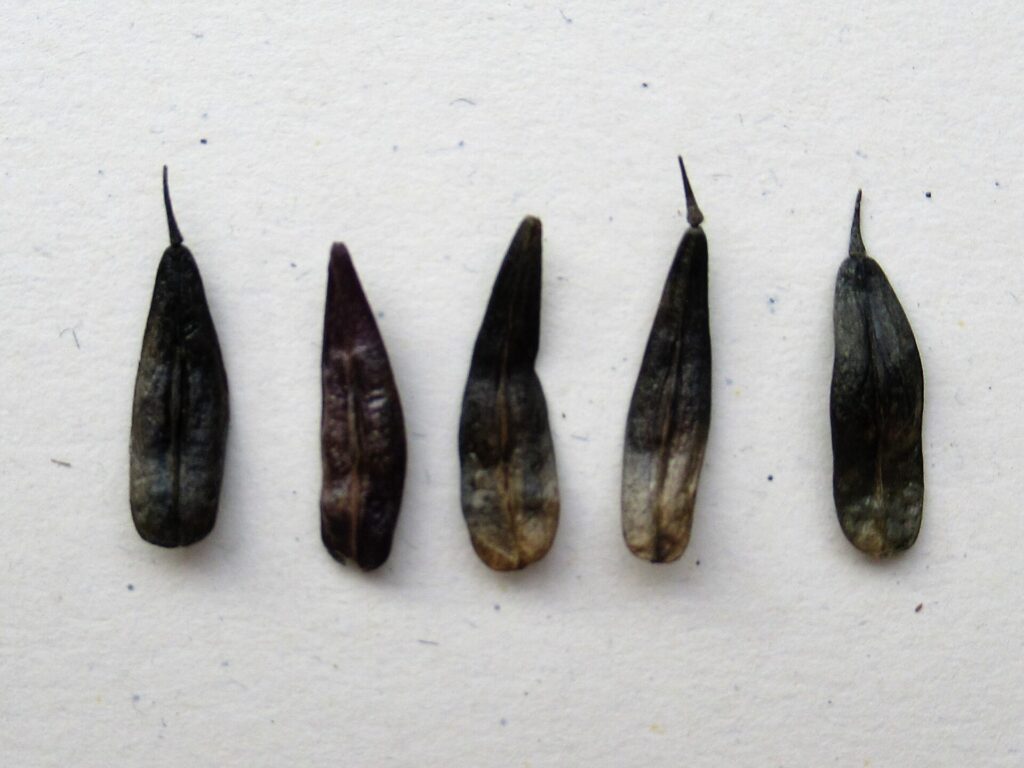
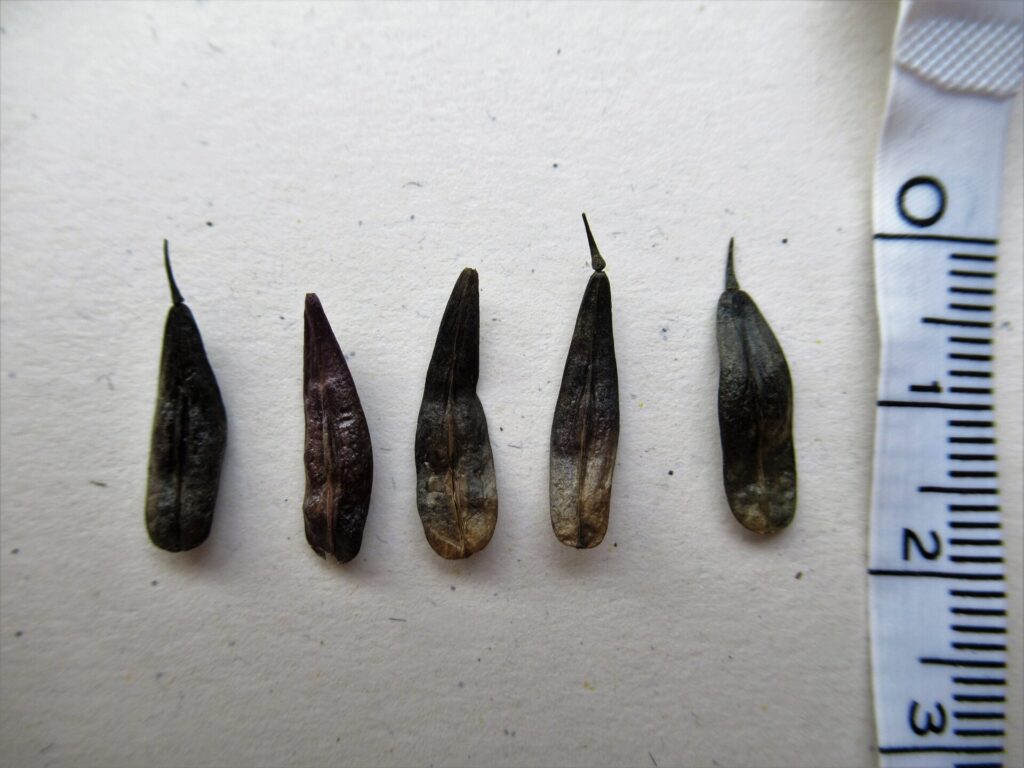
The seeds themselves vary in colour from pale yellow and green to a deep purplish blue.
They measure about 2 cm/¾”.
When I thought ‘it won’t take any time at all’ I was kidding myself. When I get involved in a project like this, I can’t just plant a few seeds. I take it seriously, want to do it well, and want to know more than the newsletter tells me. Here are a few things I found out:
In Latin woad is called Isatis tinctoria. In het Nederlands heet de plant wede, auf Deutsch Färberweid, en Français pastel des teinturier, och på Svenska vejde.
Tinctoria in a plant name means that the plant can be used for dyeing, as in: Indigofera tinctoria (indigo), Genista tinctoria (dyer’s broom), Cota tinctoria (yellow camomile) etcetera.
Woad belongs to the brassica family, which also includes broccoli, mustard, cabbages and oilseed rape.
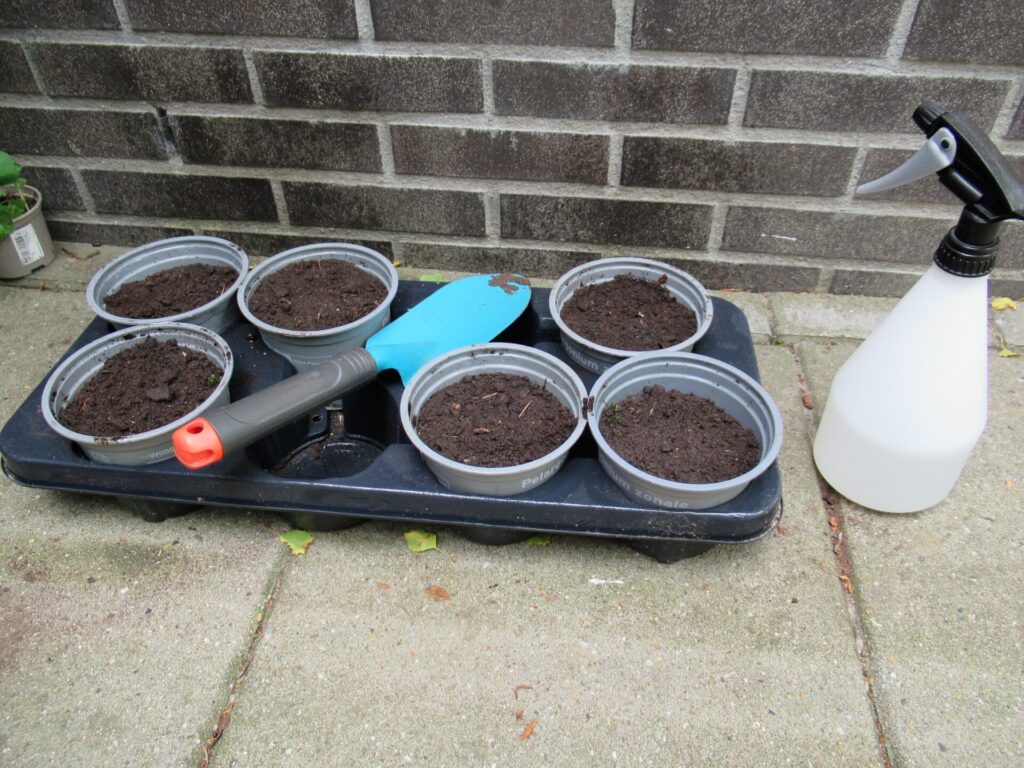
I was going to sow the seeds directly in the garden. But the instructions say that they should be kept moist at all times, so because of the hot and dry weather, I decided to sow them in pots first.
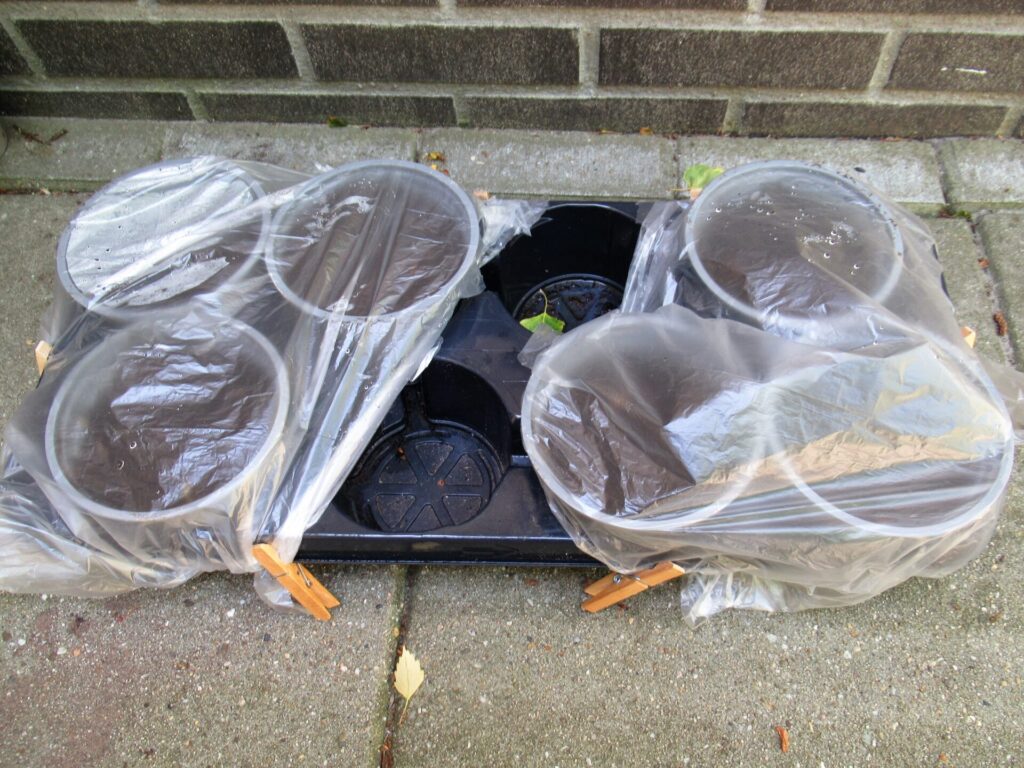
I didn’t use special potting soil, but just dug some soil from the garden, sowed the seeds, covered them with a thin layer of soil, and carefully moistened the soil with a plant sprayer afterwards. Although I placed the pots in the shade, the hot wind had already dried out the soil several hours later. So I spray-misted them again and covered them with plastic.
Now, several days later, I’m really glad I planted the seeds in pots. If I hadn’t, they wouldn’t have stood a chance. Some other plants in the garden are already wilting in the heat.
I was sent 1.25 grams of seed and selected some of the plumpest, most promising looking ones.
Using only 3 seeds per pot, I have quite a few left. I thought of giving them to a friend, but I’m keeping them for the time being, in case the seeds don’t germinate and I need to try again. I’m hovering over them like an anxious mother hen. Am I using the right kind of soil? Are the seeds still moist? Aren’t they too wet? Are they getting enough sunlight?
I’ll keep you updated about their progress. In the meantime, here are a few links for those of you who’d like to know more.
Links:
A picture of Eise Eisinga’s woad-dyed wool samples with his handwritten notes can be found here.
An interesting short video about the wool comber/dyer and astronomer (with English subtitles) can be viewed here. It was filmed in Eise’s beautiful blue living room with his working model of the solar system on the ceiling. (Scroll down to second video. Be patient – it continues after the quote.)
If you’ve missed the blog post about my humble attempts at rescuing some local wool and about the Wool Rescue Handbook, you can read it here.