Hello! Usually my writings are about woolly things, but today it’s all about flax and linen. My husband and I followed flax trail Follow the Blue Line last Saturday, and I thought you might like to follow it with us.
The 30-kilometre-long trail covers everything from growing flax to processing it, and spinning and weaving it into linen. Let’s follow it in the order we did, and we’ll see everything along the way. So, where are we? Well, we’re in the northernmost part of Friesland, with its open agricultural landscape.
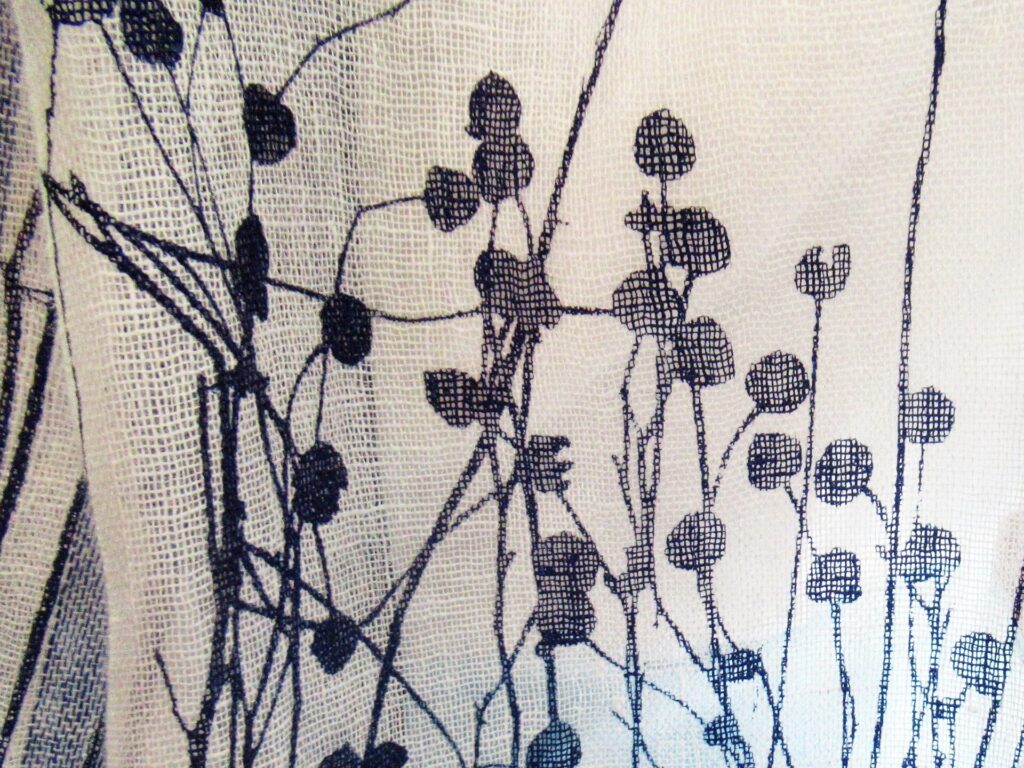
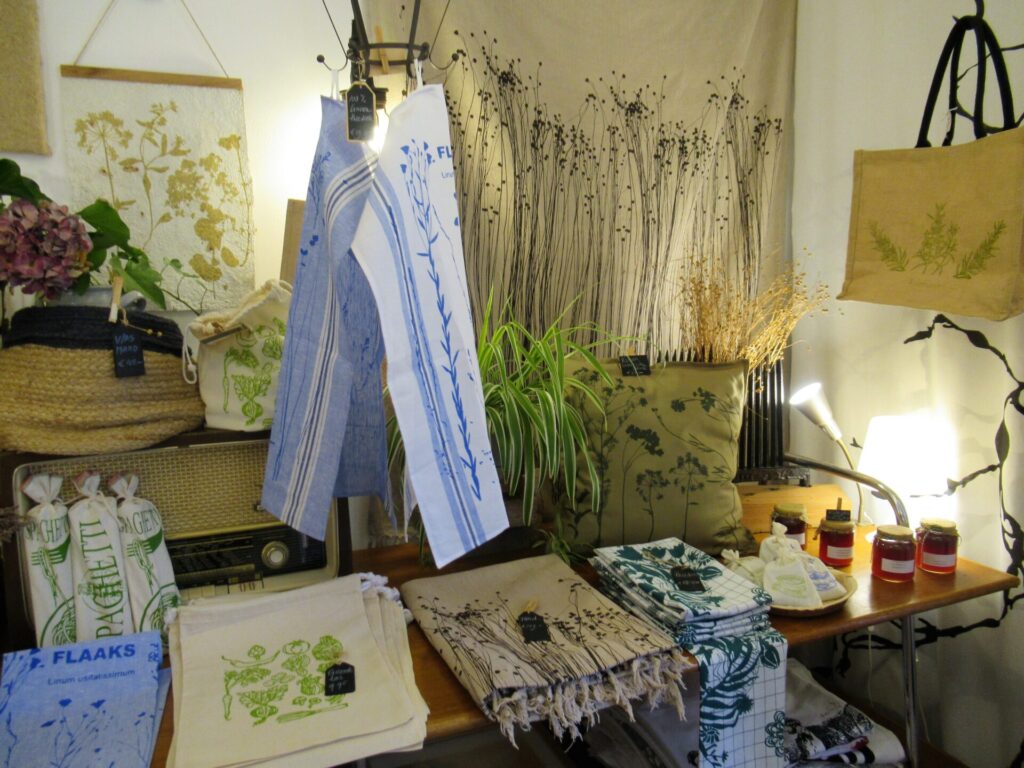
Before we moved to where we are now, we lived in this area for 15 years and it still feels very much like home. We’re starting in the village of Blije, at textile hand-printing studio Kleine Lijn. Nynke prints all kinds of designs on cotton, silk and linen. My eye is immediately drawn to her plant prints. The top of this post shows a print of flax stalks with seedheads on linen. Here is some more of her work:
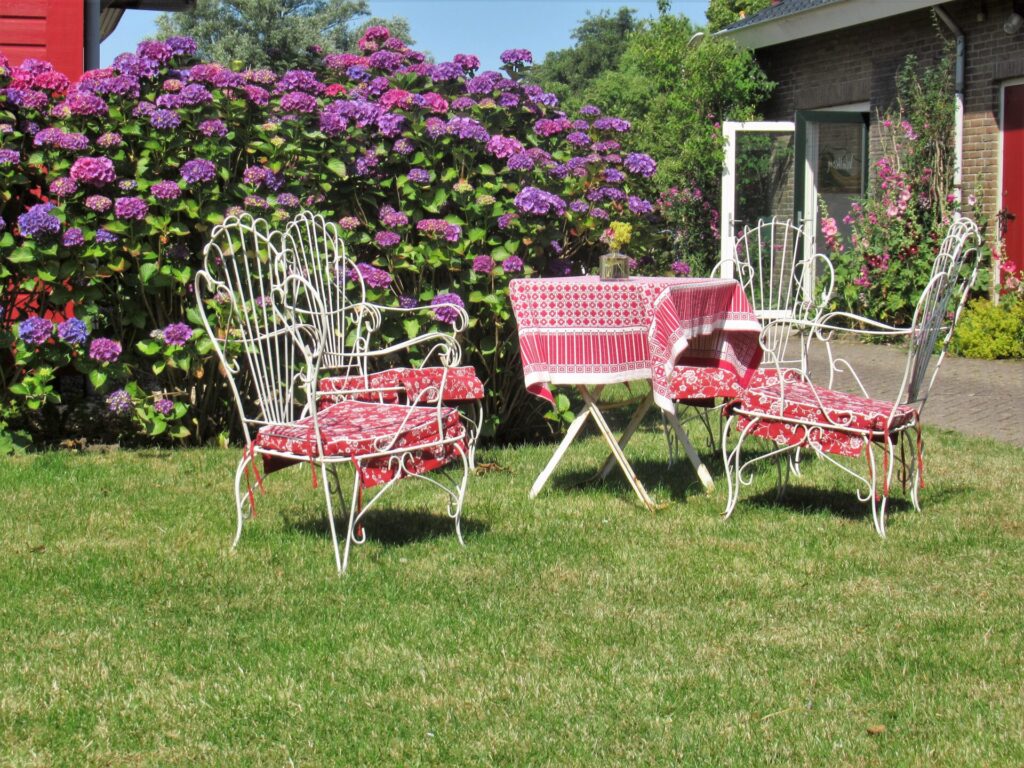
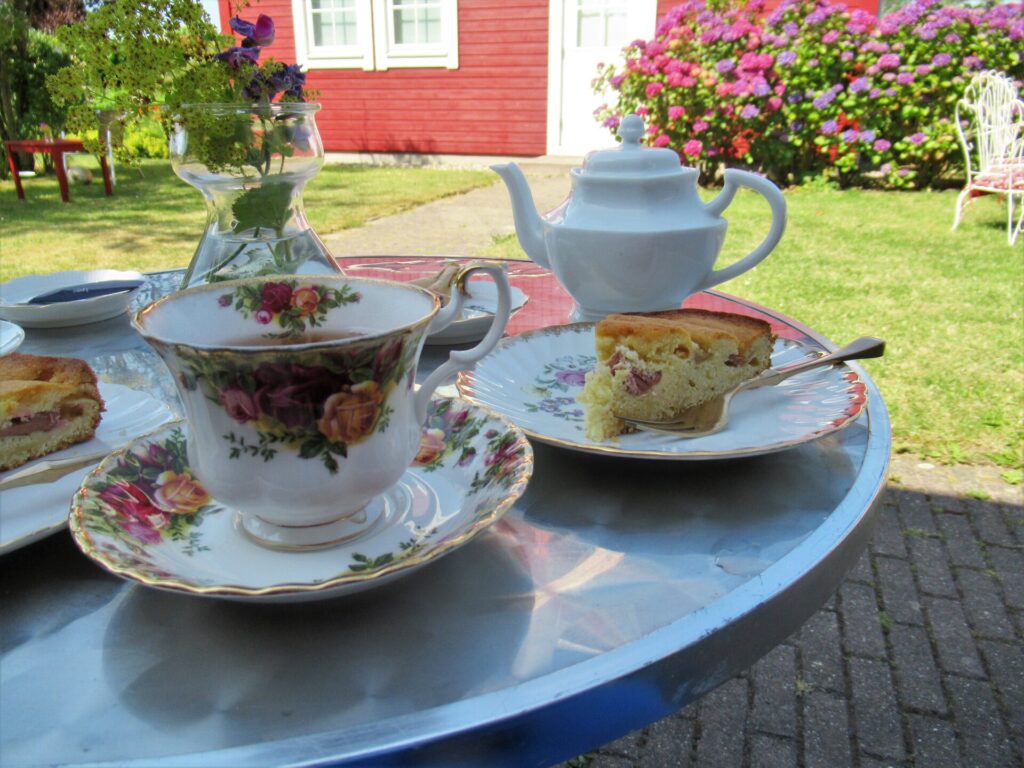
We’ve been following the trail for at least 30 minutes now, so high time for some refreshments in the adjacent tea garden, with its lovely mix of vintage furniture…
…and mismatched china.
Ready to continue the trail?
Before Nynke can print onto it, the linen she uses has a long way to go. It starts out as flax, a traditional crop in this region that is now making a come-back.
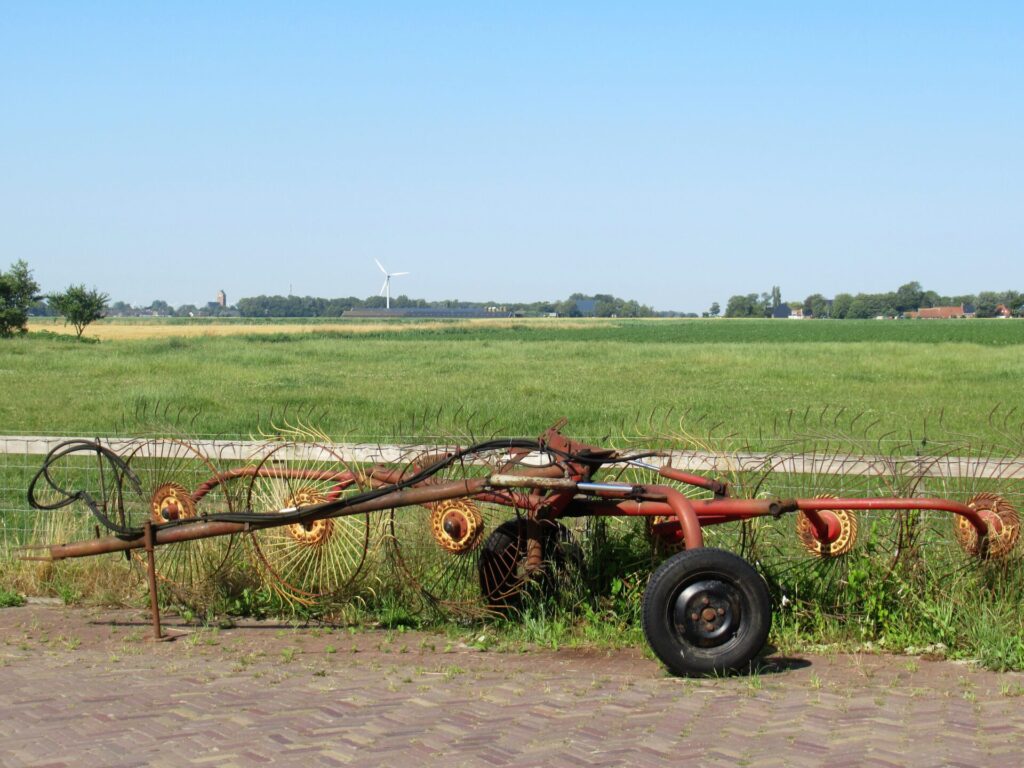
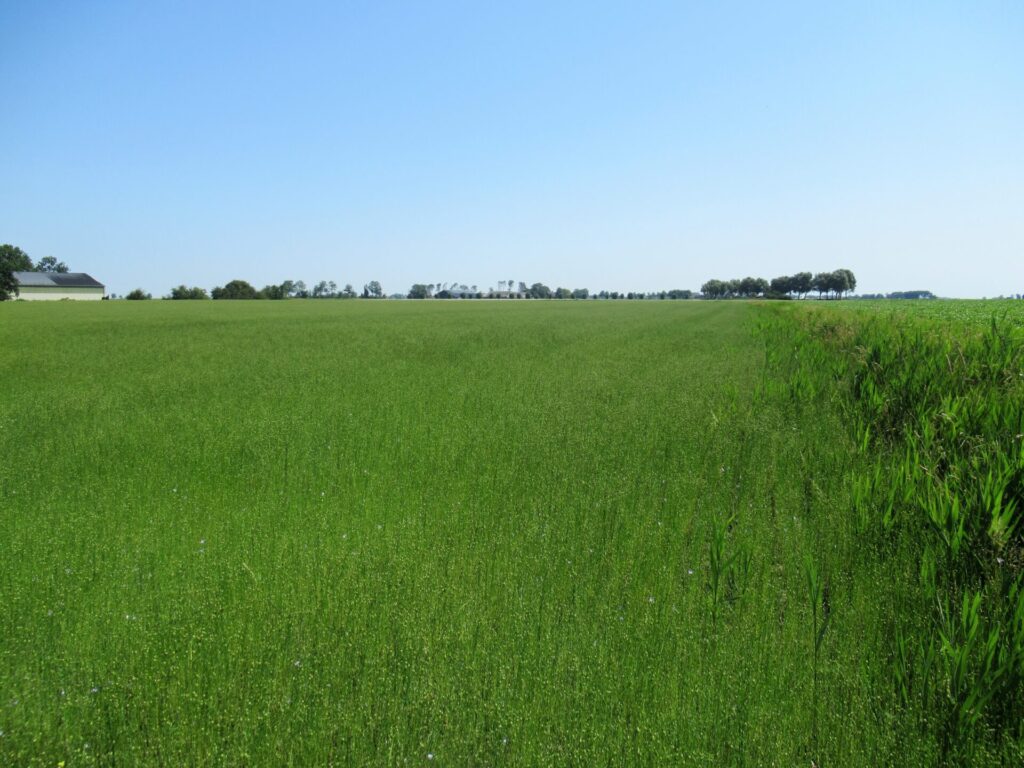
What I learnt on Saturday is that there are two kinds of flax: linen flax and oil flax. Linen flax has longer stalks to make longer fibres for spinning and weaving. And oil flax has shorter stems with more seed heads that produce more seeds for making linseed oil. There are several flax fields along the way and this is one of them:
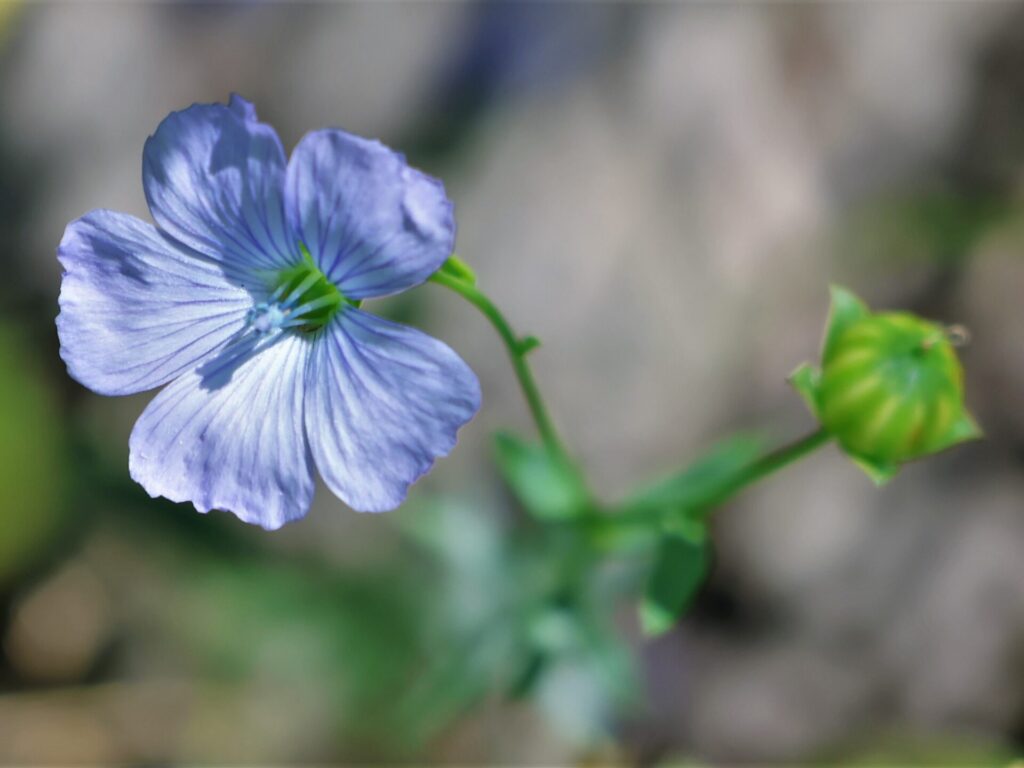
In this field, most of the flax has finished flowering. But there are still a few of its lovely blue flowers to be seen.
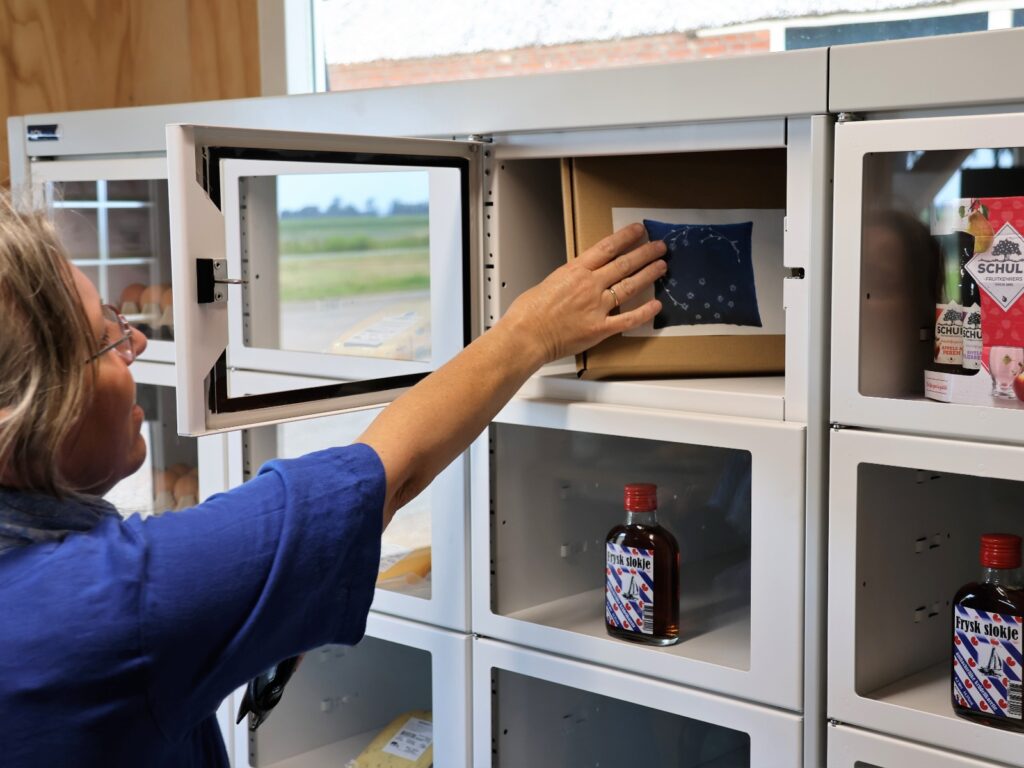
Next stop: a potato farm with a high-tech farm shop. In addition to potatoes, fruit, veg and local tipples, it also has an unexpected product in its vending machine. More about that later in a separate post.
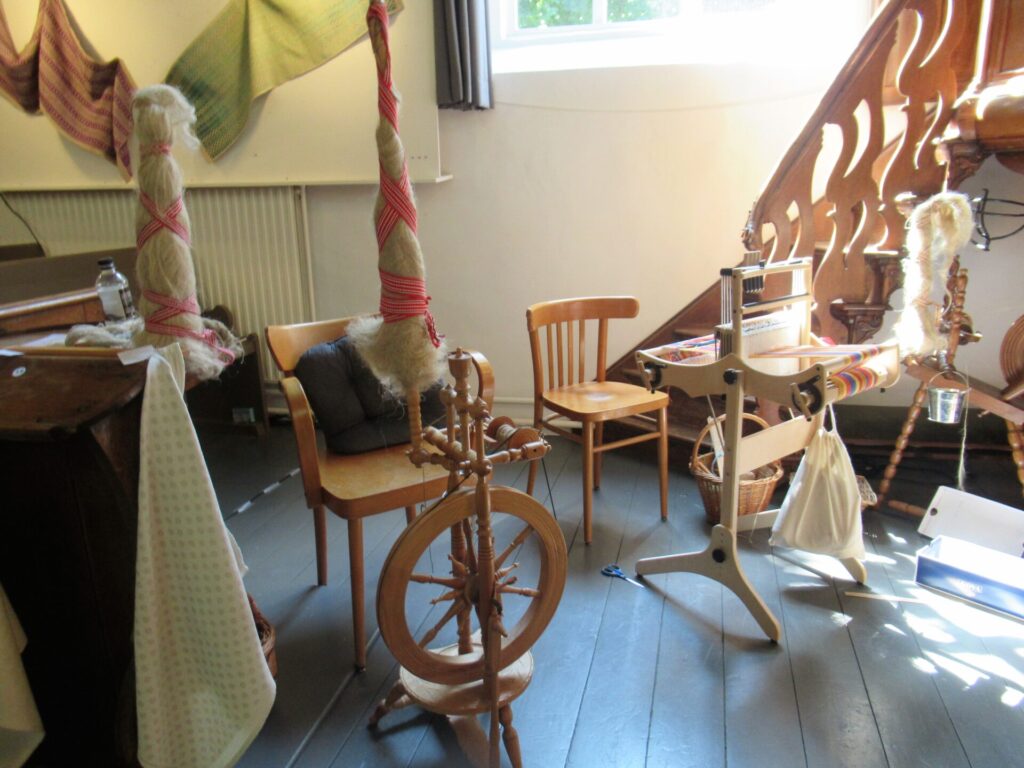
Now, let’s continue on to Mitselwier. Ah, the cool interior of the church makes a very nice change from the heat outside. There is a weaving exhibition inside, with demonstrations of weaving and flax spinning. Unlike wool, flax isn’t held on the spinner’s lap, but on a distaff. In the picture below, it is held in place with red ribbon.
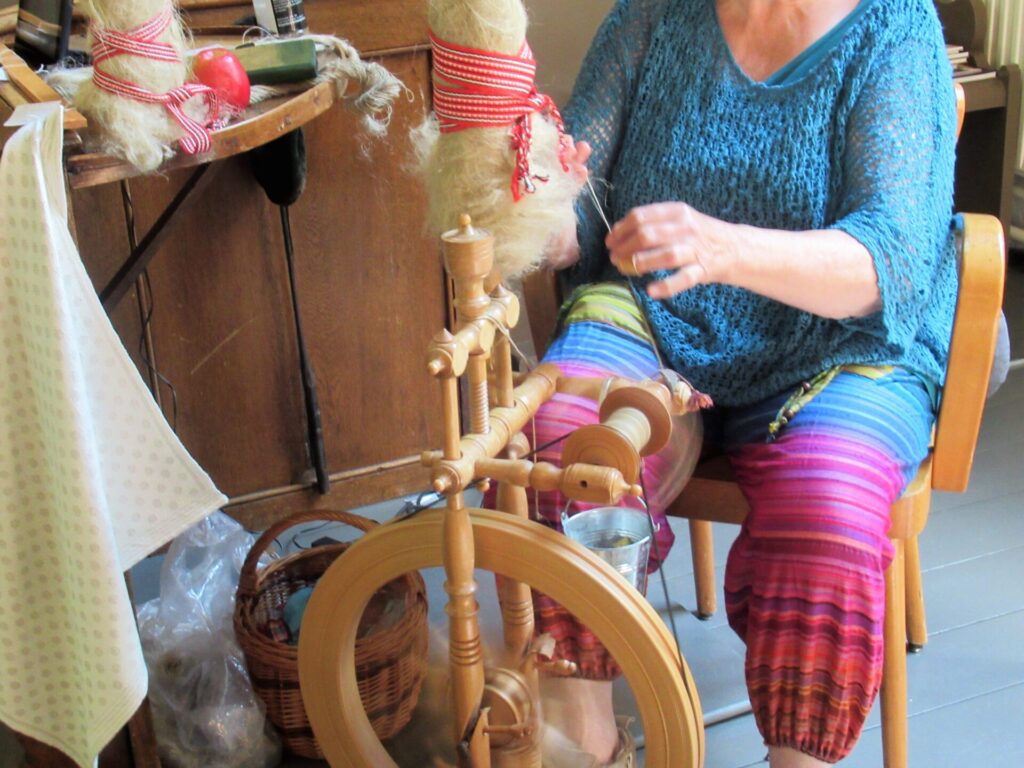
The flax is pulled down from the distaff and spun into a thin linen thread.
The spinner frequently moistens her fingers with water while she is spinning. She tells me that after spinning, the thread is too sticky to be used for weaving straightaway. It needs to be bleached first – a process that involves covering the hanks of thread with hay, sprinkling that with wood ashes and then pouring boiling water over everything. Repeat that six times and the yarn is bleached. Phew, so much work!
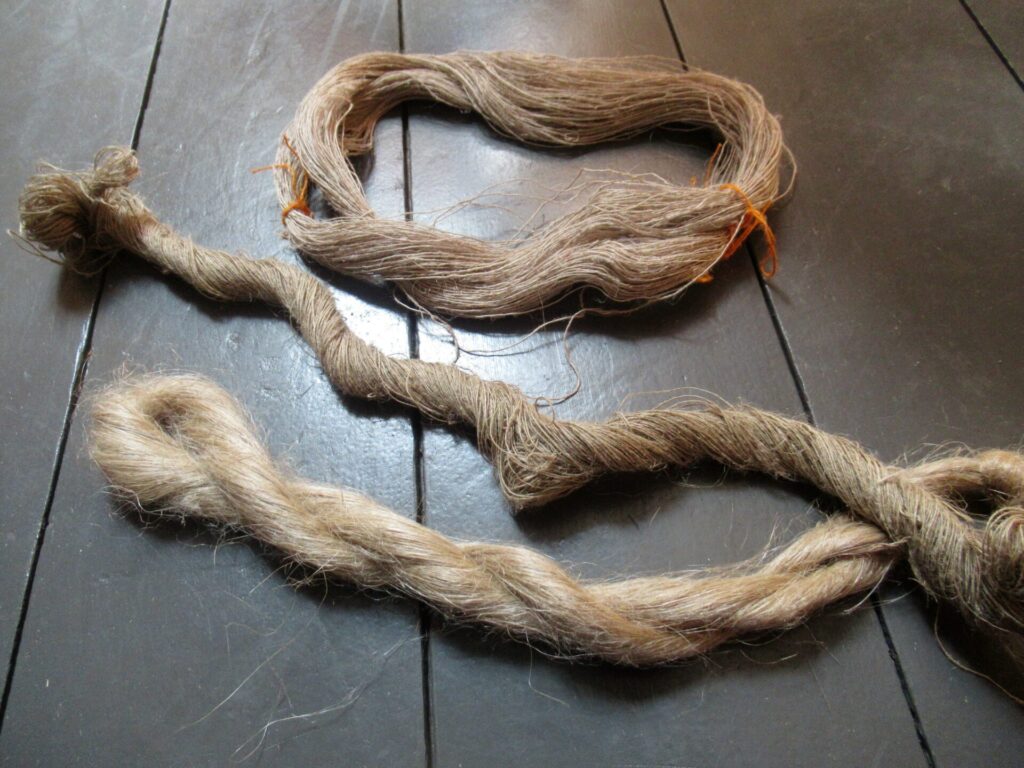
Below from bottom to top: unspun flax fiber, spun linen thread and bleached linen thread.
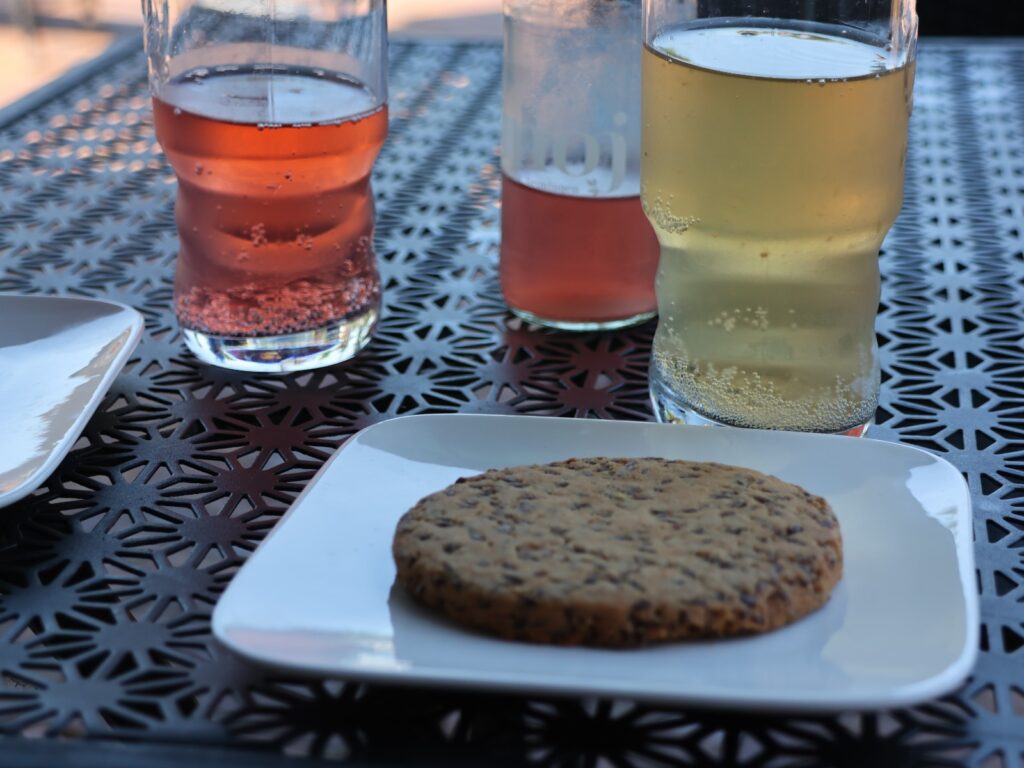
Before we continue on to our final destination, it’s time for some cool, cool drinks and flax biscuits (with linseed).
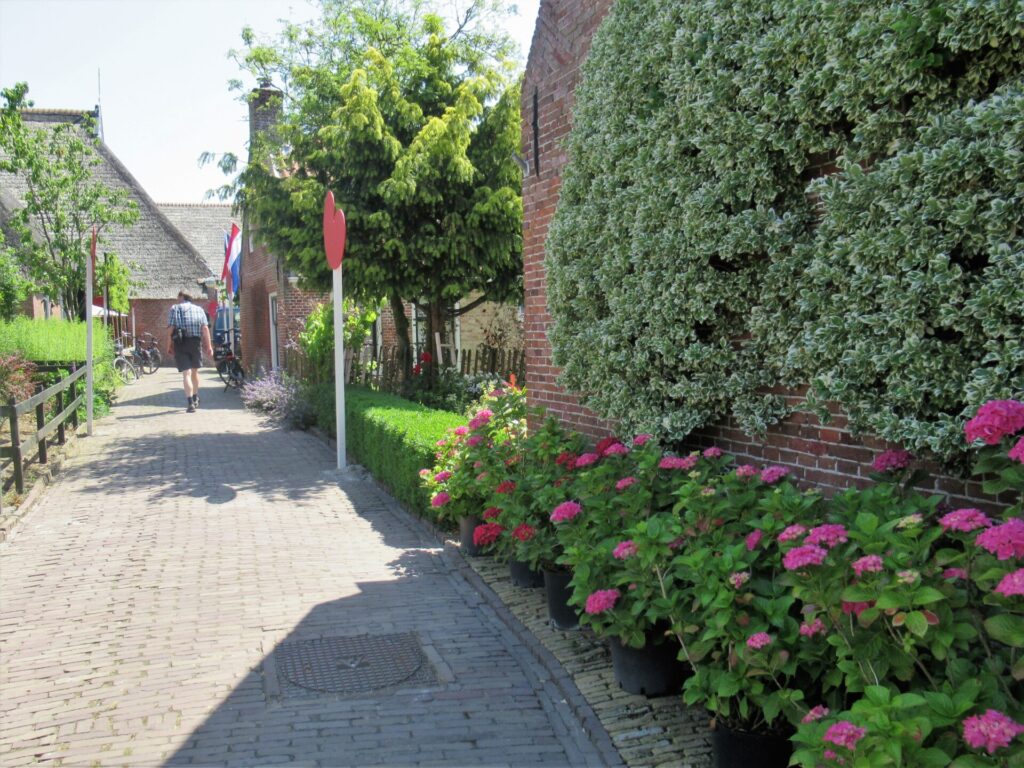
A narrow lane brings us to flax museum It Braakhok in the village of Ie – on the right, where the Dutch flag is waving.
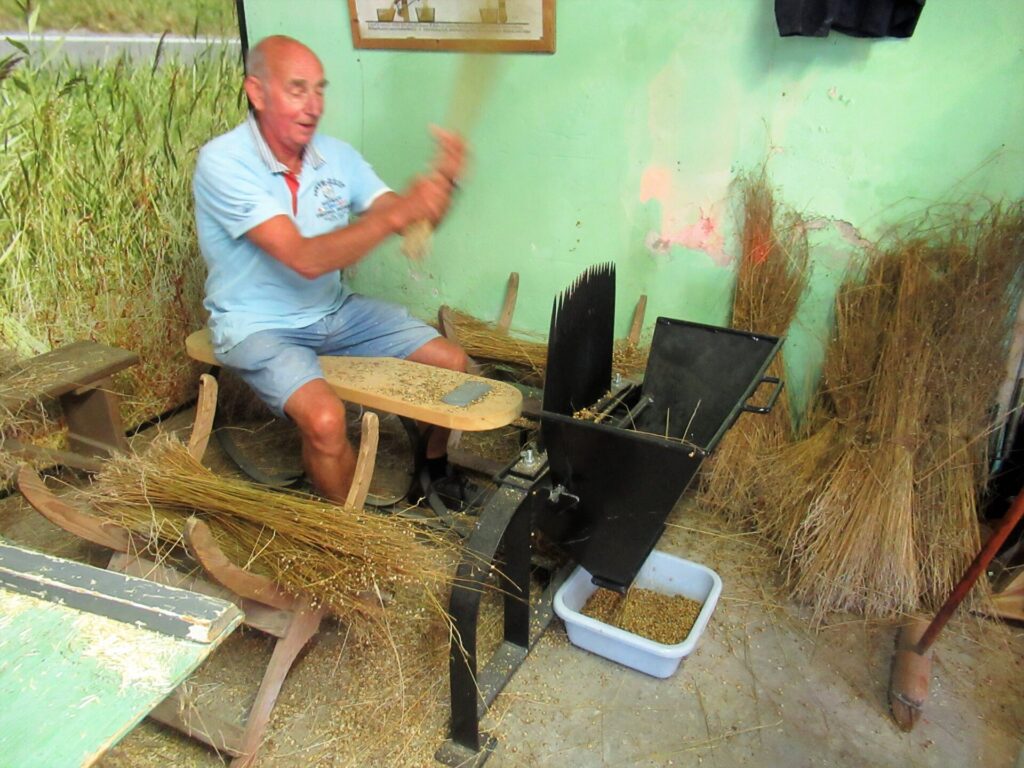
Here volunteers demonstrate how flax is processed to spinnable fibre.
I’m impressed by the number of steps and the amount of work it takes to make linen from flax.
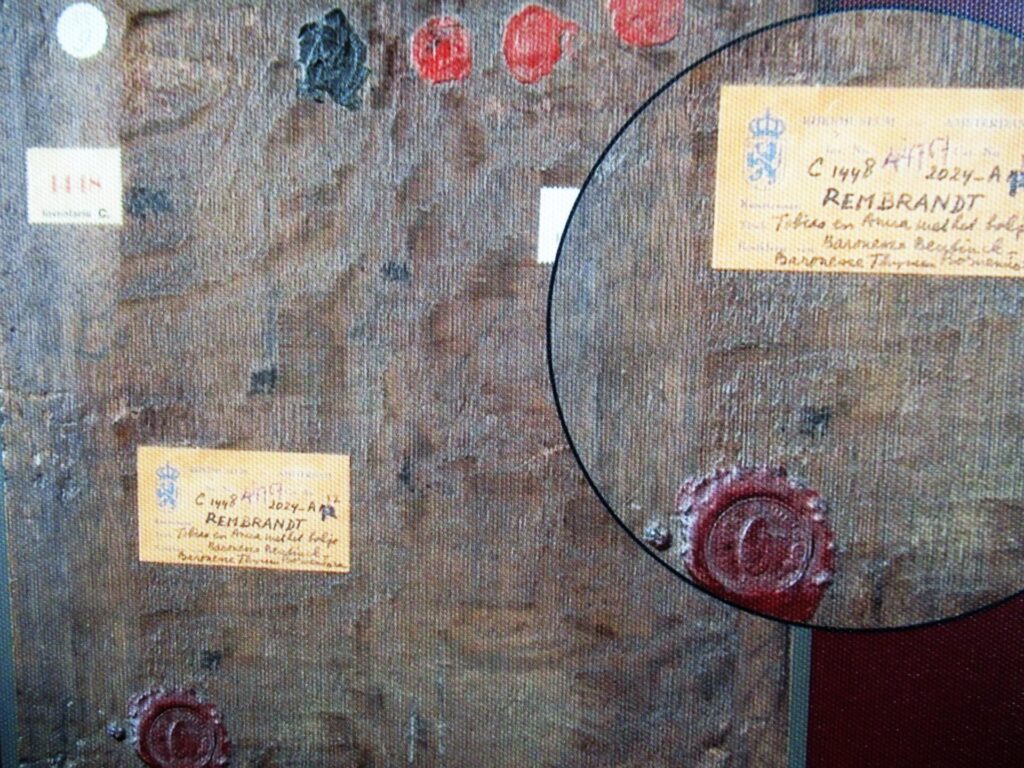
Finally, we visit an exhibition about yet a different aspect of linen – its use for painting canvases. The exhibition tells us about a research project looking at the linen used by 17th -Century Dutch masters like Vermeer and Rembrandt.
It’s fascinating what linen can tell us about paintings and the artists who made them when it is examined and reconstructed using a 17th-Century weaving loom, X-rays and microscopes.
Flax trail Follow the Blue Line can be followed through early August. The exhibition Ontrafeld Bewijs (about the painters’ linen canvases) can be visited to September 30th. Admission to everything along the trail is free!
Next week, I hope to tell you about a yarn shop just a couple of kilometres outside the flax trail. I couldn’t very well pass that by when we were so close to it, could I? Hope to see you again then. Bye!
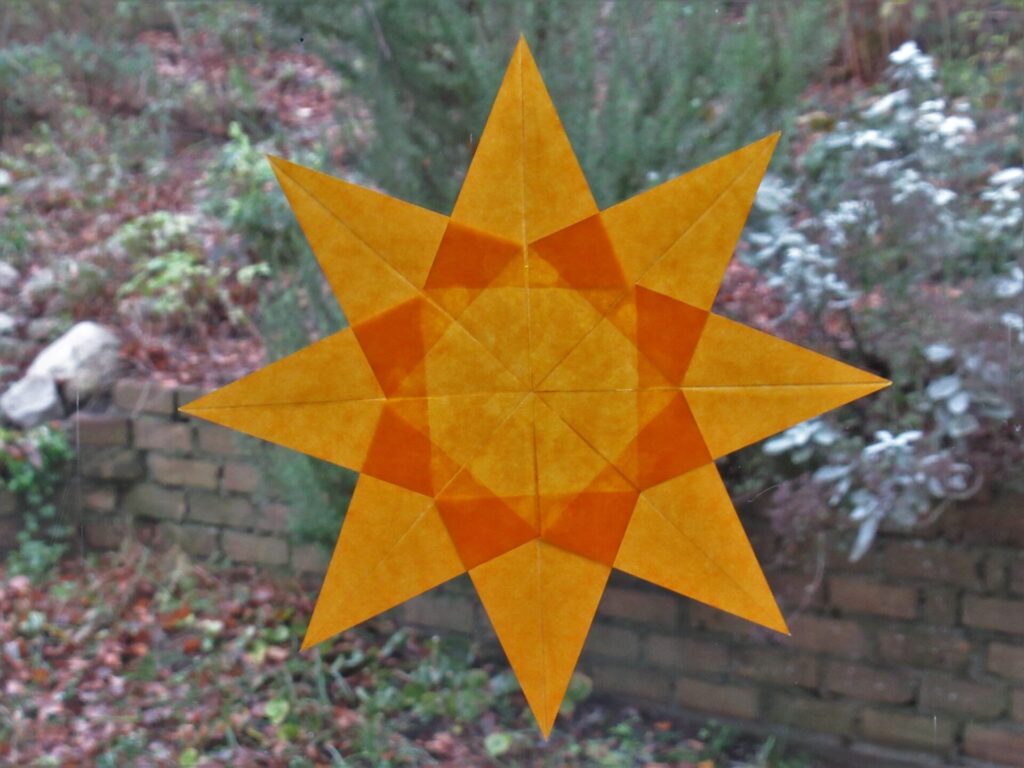
A long time ago a friend taught me to fold stars. Made from transparent paper, they showed lovely patterns when the light shone through them. Because this friend is going through a difficult time at the moment, I folded a small star and sent it to her tucked between a postcard with a personal message – a reminder of good times and a symbol of hope.
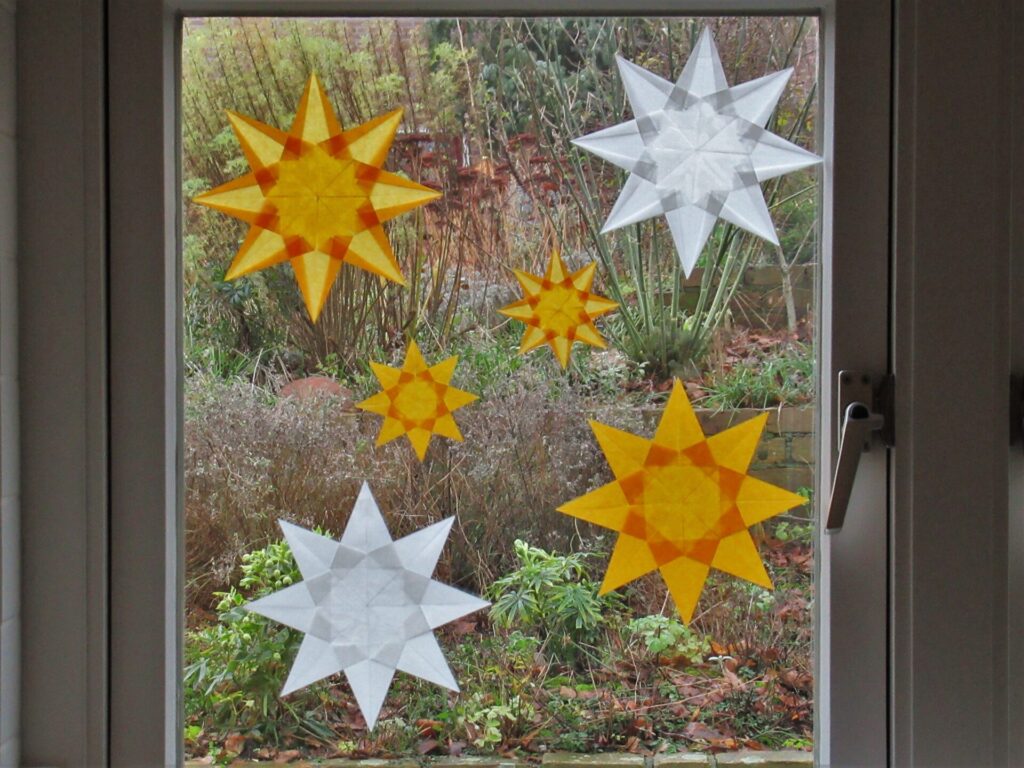
Then I folded some more to give away. Then I folded a few for our own kitchen window. And then I thought, ‘Why not share them with you here?’
What you’ll need:
Sharp paring knife
Clear glue
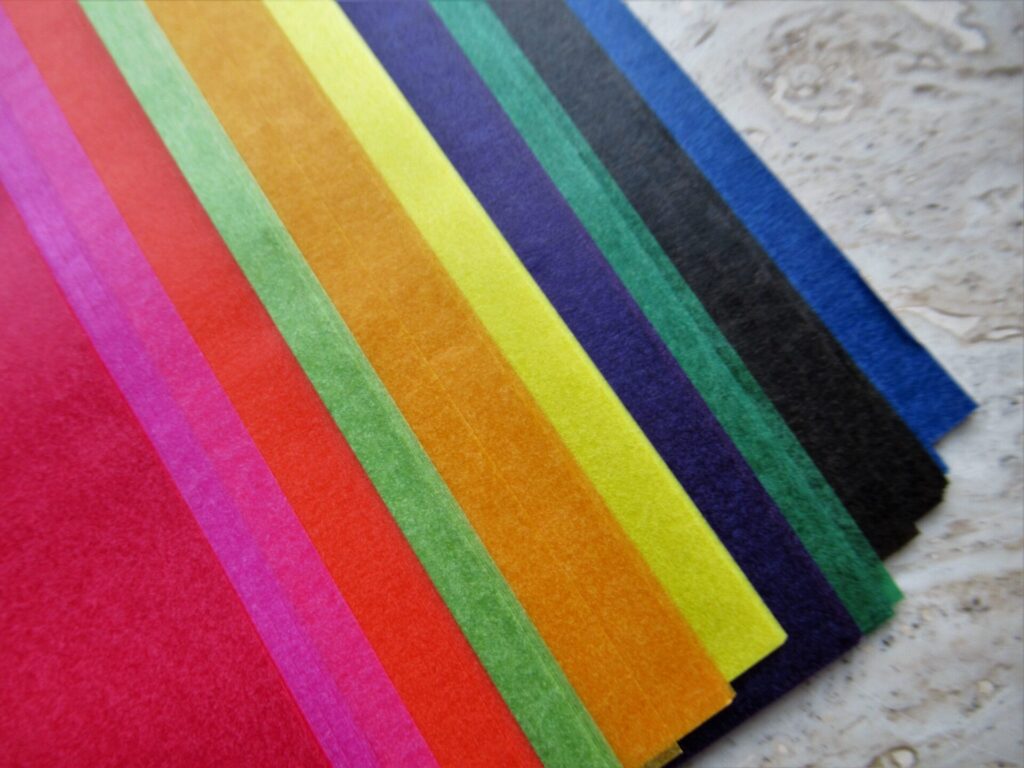
Transparent kite paper (available as larger sheets and as blocks of squares in a rainbow of colours)
Tissue paper can be used as well, but tears and fades more quickly. (For the tutorial steps below I used ordinary printer paper for the sake of clarity only.)
1) For each star, cut eight squares using the paring knife.
The paper in my block measured 16 x 16 cm (6.25 x 6.25”). For a large star I cut two sheets into four squares each (eight 8 x 8 cm squares in total). For a small star I cut half a sheet into eight 4 x 4 cm squares. The size does not really matter, as long as you end up with eight square pieces of paper. Start with a larger star – the smaller ones take a little practice.
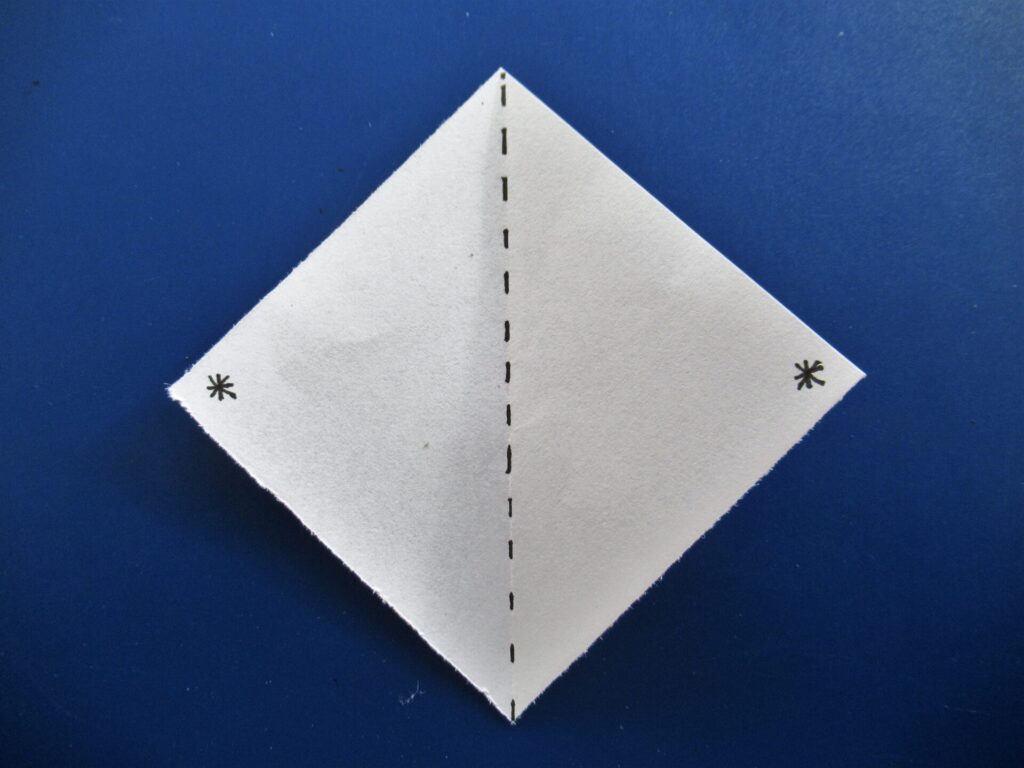
2) Fold the paper in half diagonally, so that the points marked with asterisks in the example lie on top of each other. Then open again.
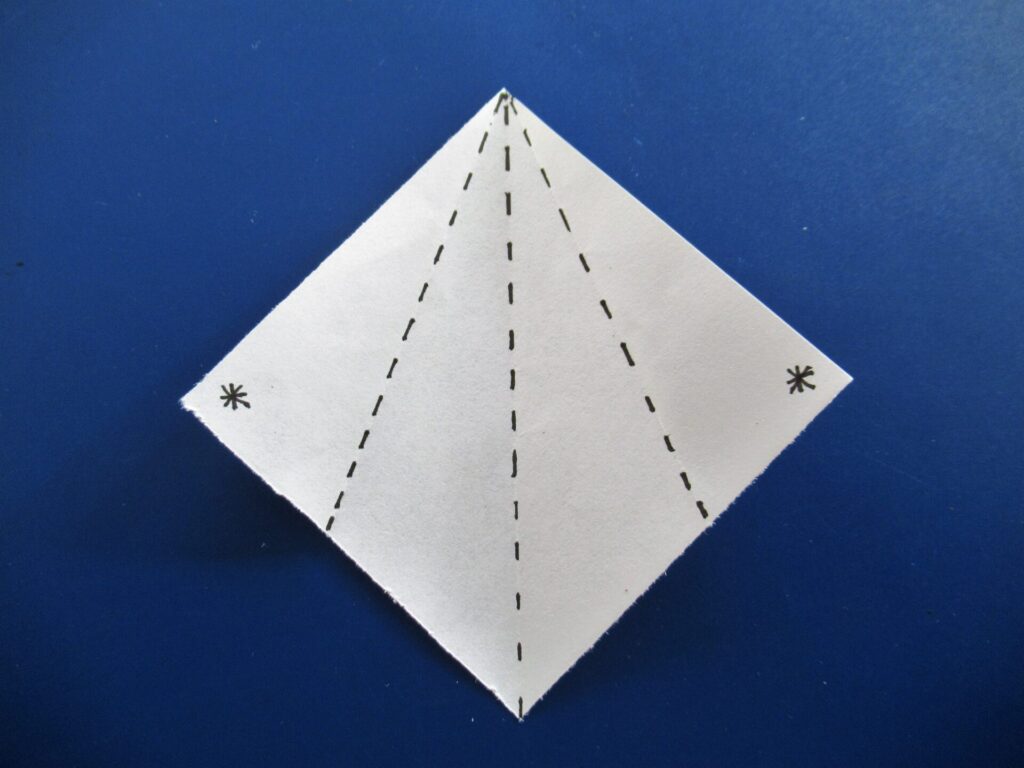
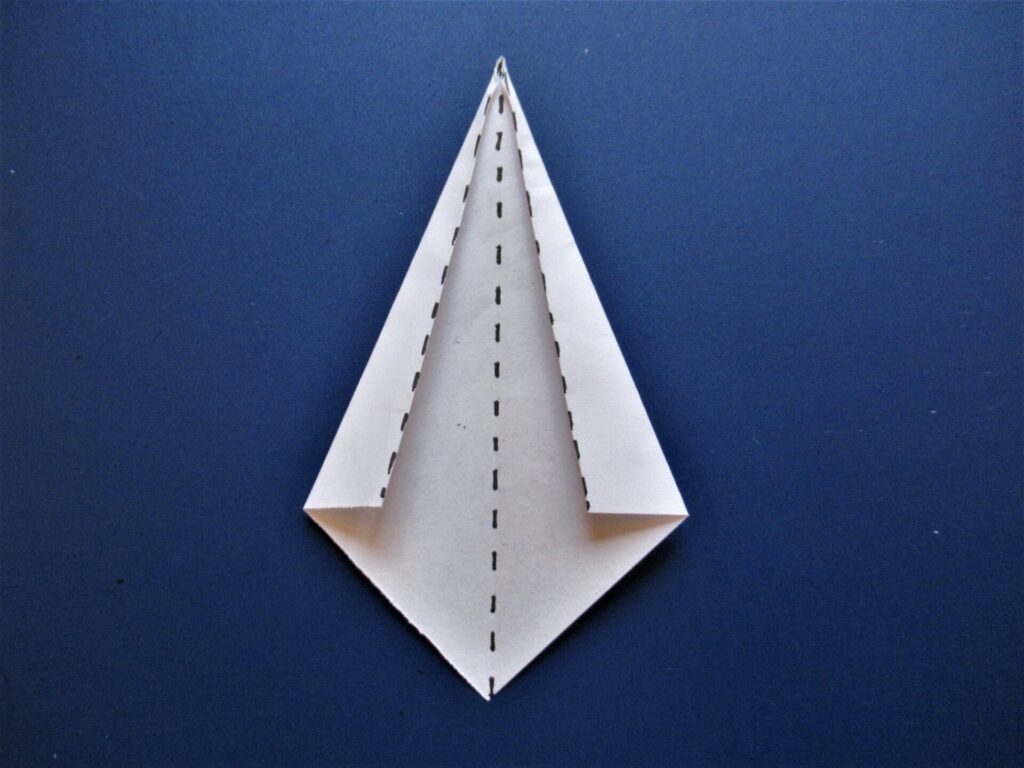
3) Next fold the asterisks toward the line in the middle, along the dashed lines:
You’ll end up with a shape like this:
Make eight of these.
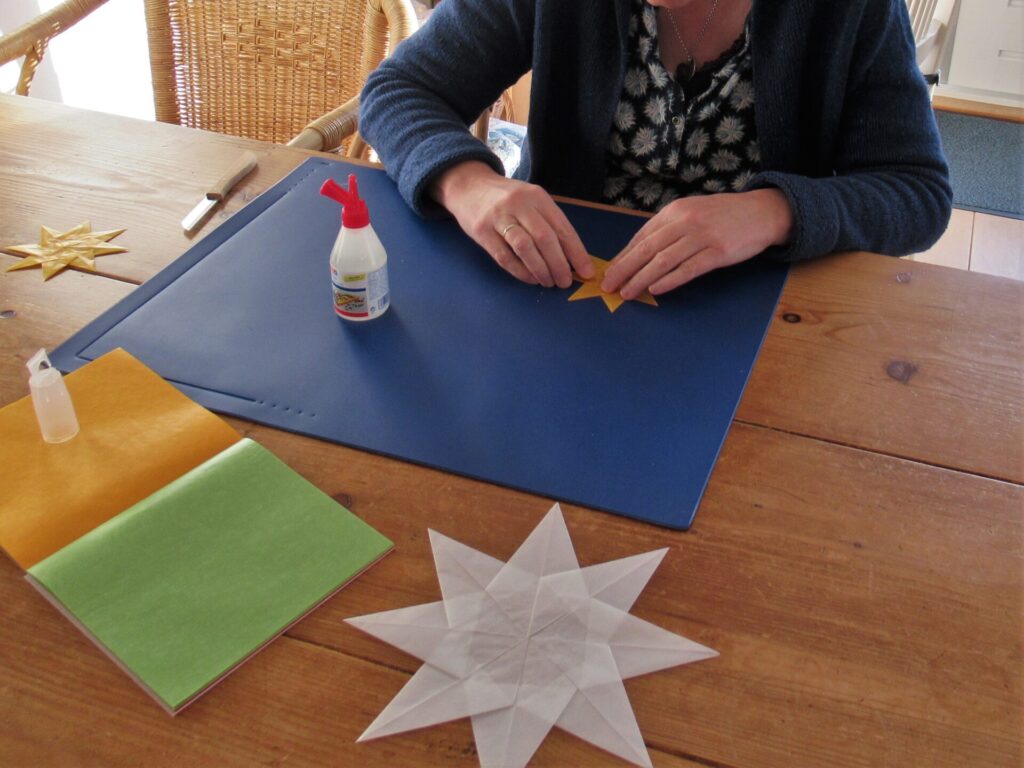
4) Using a small drop of glue, stick the points where the asterisks are in the example in place.
5) Finally assemble the eight points into a star as shown in the picture below, using a little bit of glue where the points overlap.
It’s important to use clear glue or it will show when the light shines through.
Tadaaah – one transparent paper star!
For a different variation, open the flaps last folded again and then fold them inward, with the imaginary asterisks tucked away inside.
Glue the points together to make a star as before. This simple adaptation immediately gives a much more intricate look:
Finished, my larger stars measure approx. 23 cm (9”) from tip to tip, and my smaller ones 11.5 cm (4.5”). Use a small piece of clear tape folded double (or double-sided tape if you have it) to stick stars to a window pane.
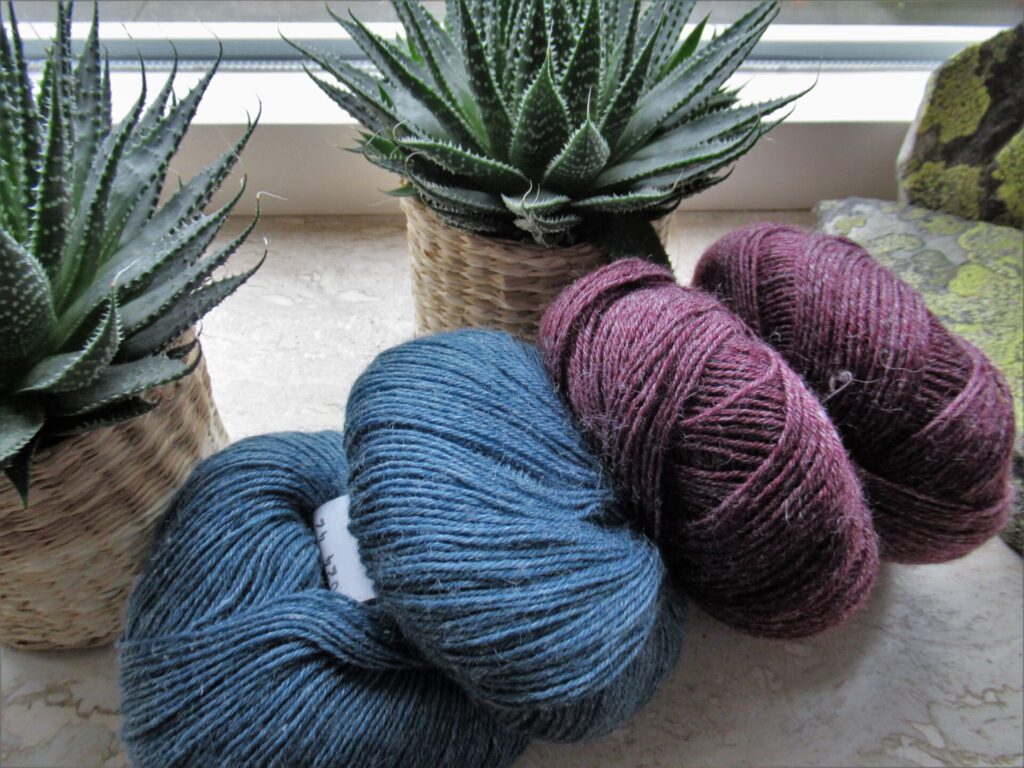
The same friend who taught me to fold stars, recently gave me some sock yarn. She had planned to knit socks with it herself, but realized she would never get round to it. It is a yarn with nettle fibres for strength and durability instead of the usual nylon.
This yarn has been around for a while, but I haven’t used it before. I’m looking forward to giving it a try. And what am I going to use it for? Two pairs of socks for my friend, of course!
Star light, star bright, First star I see tonight, I wish I may, I wish I might, Have the wish I wish tonight.
My wish for you today is that you may have some time to yourself over the coming week, to fold a star, knit a sock, or simply spend some time outside at night stargazing.
Hello, and welcome to the last of the outings on my blog this summer! Hope you have the time for a good long read. I have really tried to keep this post from getting too long, but failed miserably.
All of the other outings were close to home. This time we’re travelling a little further afield, to the city of Kampen. And this time it’s not just me, but also my husband you’re traveling with. Kampen is not very far afield (it is only about 28 miles from here), but somehow we rarely visit it and we really felt like tourists ourselves.
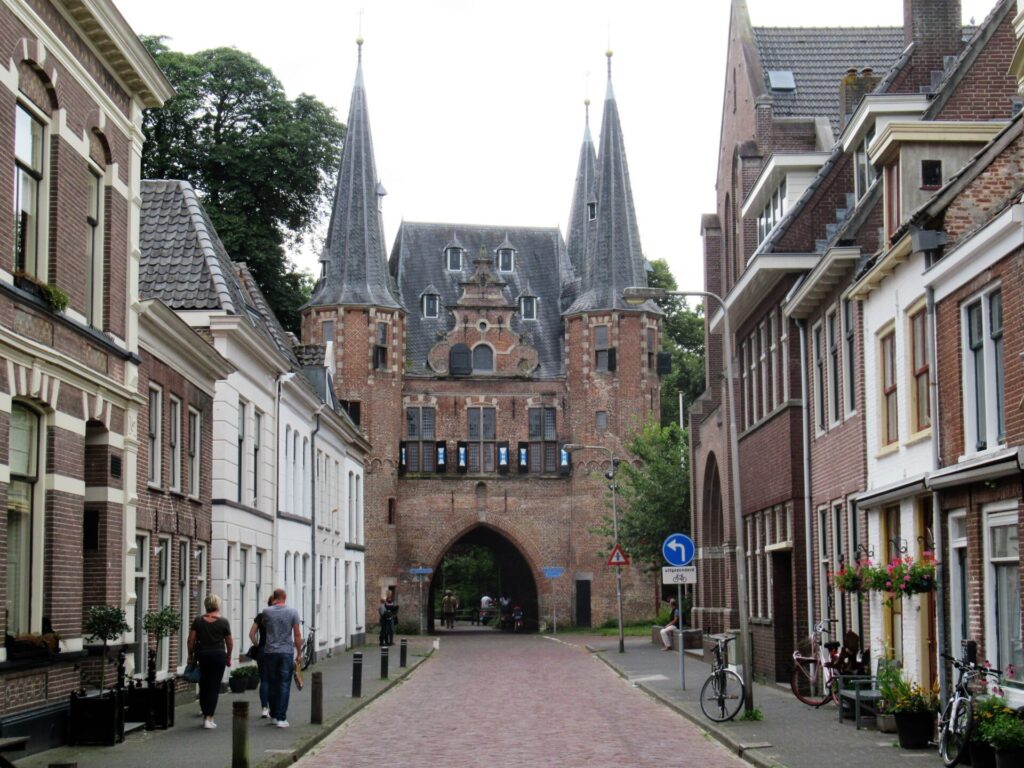
With less than 40.000 inhabitants city seems too big a word for Kampen, but that’s what it officially is, I think. One side of the city centre is bordered by a park and several old gate towers.
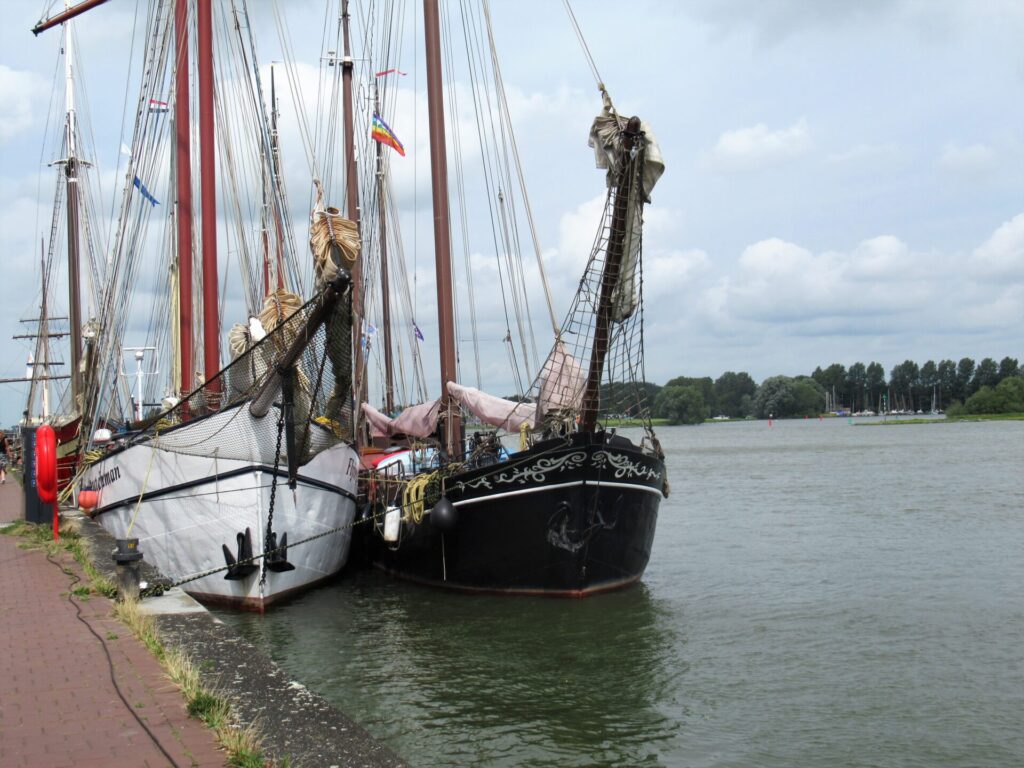
On the other side, there is the river IJssel, where several tall ships are moored today. The white ship on the left is The Flying Dutchman. When she is not in Kampen, the ship and her crew are sailing around Scotland, navigating the Caledonian canal, visiting the outer Hebrides and treating their passengers to Scottish whisky and music.
Like any other town or city at the moment, Kampen has its share of empty shops. It also has the usual chain stores that can be found everywhere else. But there are also many small and quirky shops, beautiful old buildings, museums etcetera.
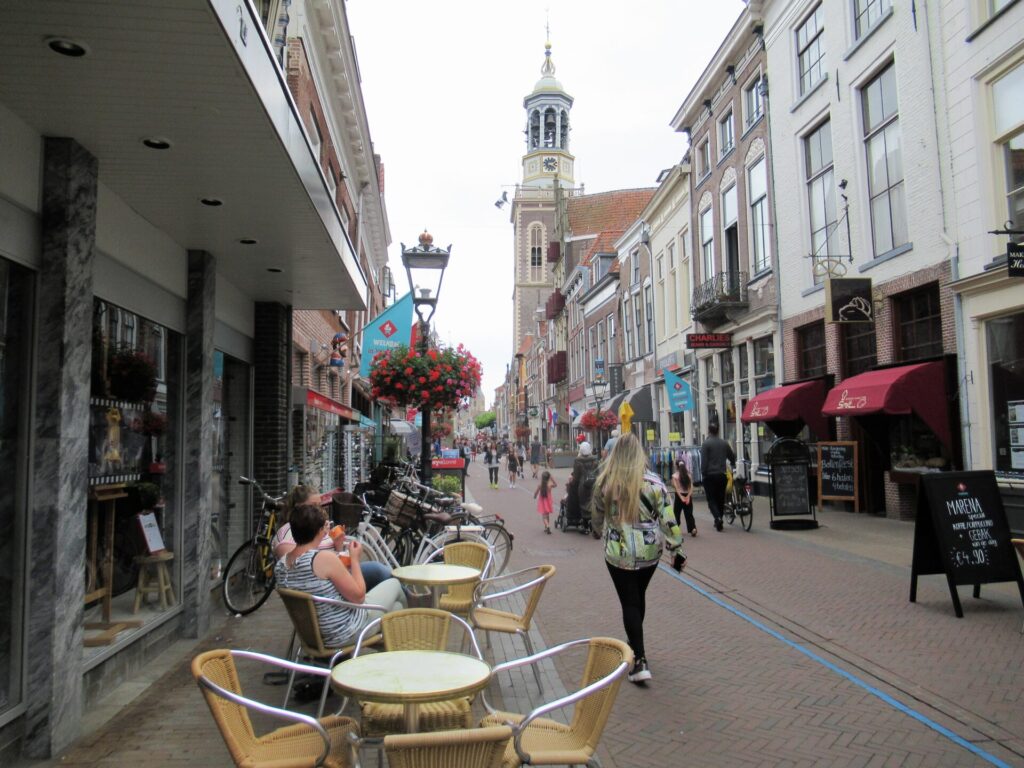
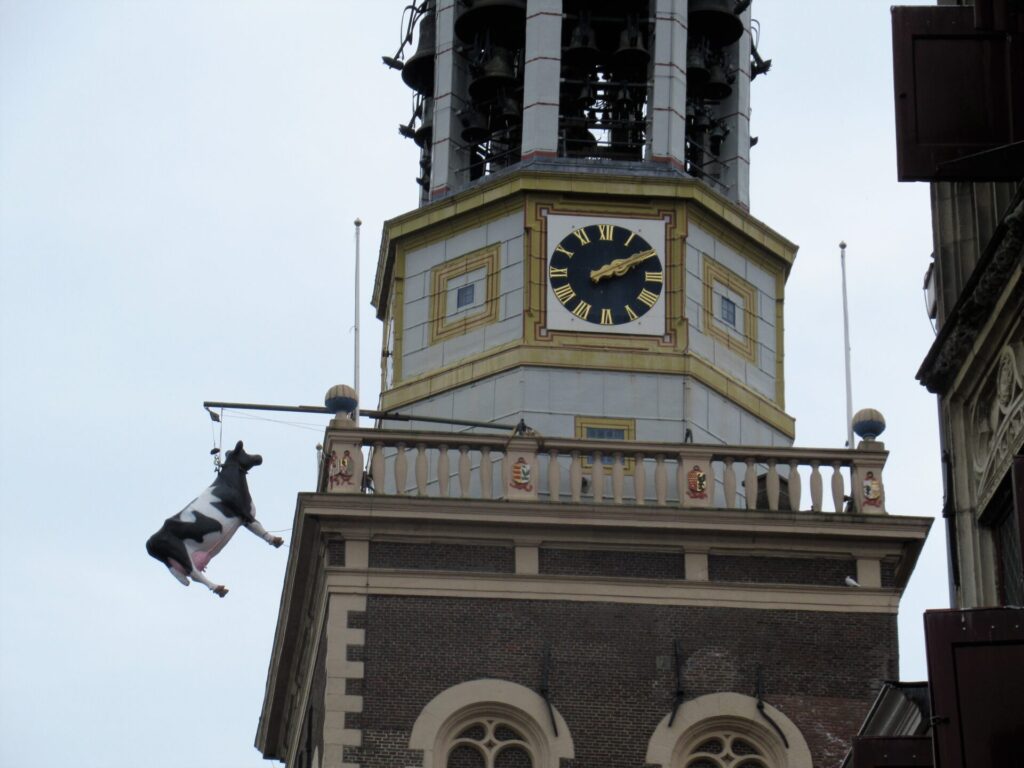
This is the main shopping street with on the right an old tower called ‘the new tower’.
Below the carillon and the clock, something is dangling from the balustrade. On closer inspection that something turns out to be a cow. (Fortunately not a real-life one.)
Why? Can it be a farmers’ protest or something?
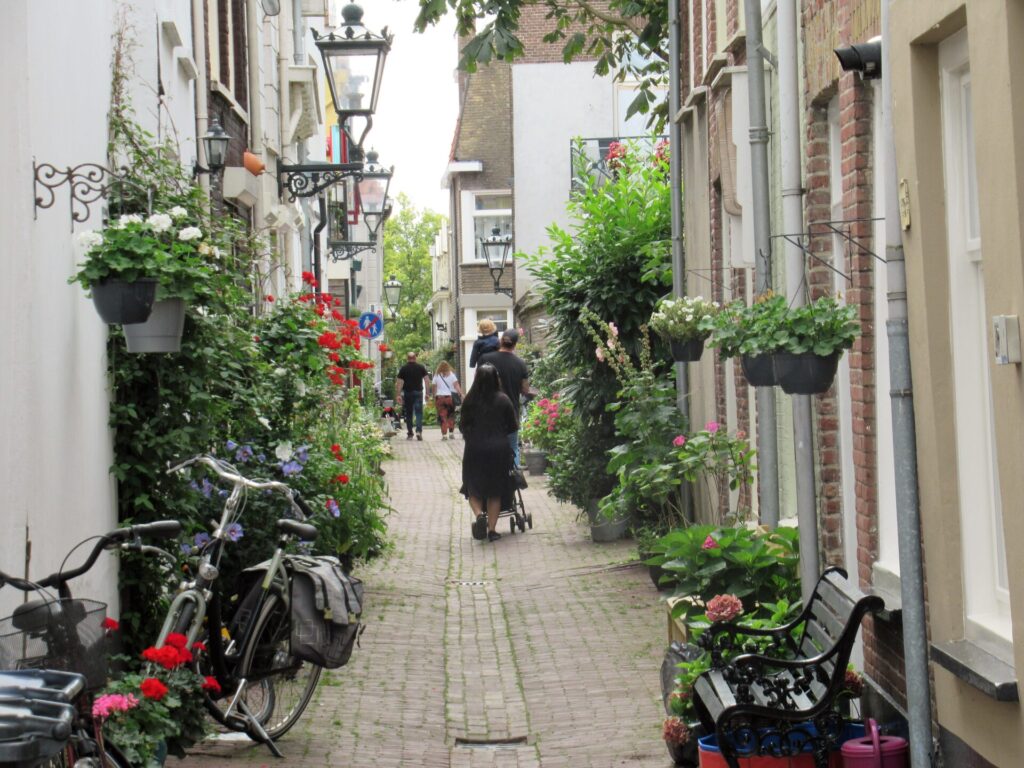
Branching out from the main shopping street there are many lovely narrow streets and alleys to discover.
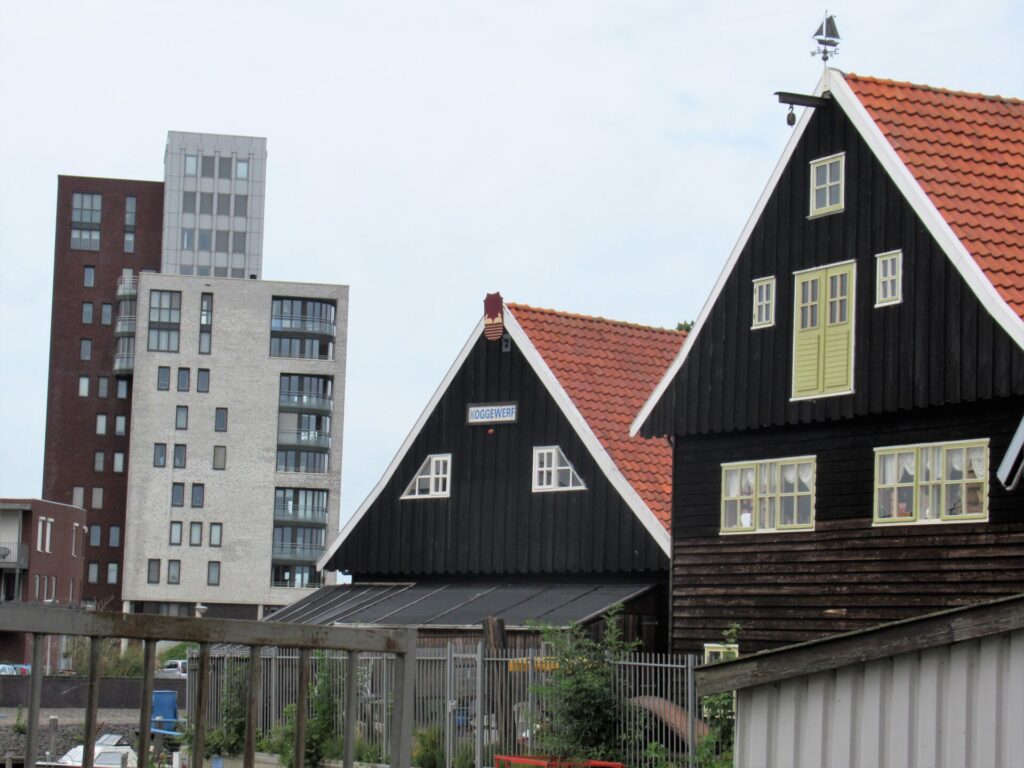
My eye is always drawn to old buildings and I feel most at home in the older parts of towns and cities, but the juxtaposition of old and new can also be attractive.
The wooden buildings on the right are the workshops of the Koggewerf, where a shipwrecked kogge (a medieval wooden sailing vessel) found here was carefully reconstructed. Unfortunately, the kogge was out sailing and the buildings were closed, but just peeking in through the windows and looking at another boat and the buildings from the outside was nice too.
What really struck me in Kampen this time, is that it is very much a city of makers. Or maybe every town and city has them and they are just more visible here. Or maybe it was just that I was more open to them this day.
Anyway, as a maker myself I feel a sort of kinship with other makers. I make things with wool and other fibres, words and sometimes fabrics. But I’m also interested in people making things with wood, metal, dough, chocolate, glass, paper or in any other medium. What materials do they use exactly, how do they use them, what do they make and why? It’s the process of making things I’m interested in at least as much as the product. And here, in Kampen, we cannot only see the finished products, but also some makers at work actually making things.
This time we didn’t visit the smithy, the coffee roasting company or the cigar factory, but from a previous visit I can tell you that even for a non-cigar-smoker cigar making is interesting and the smell is overpowering!
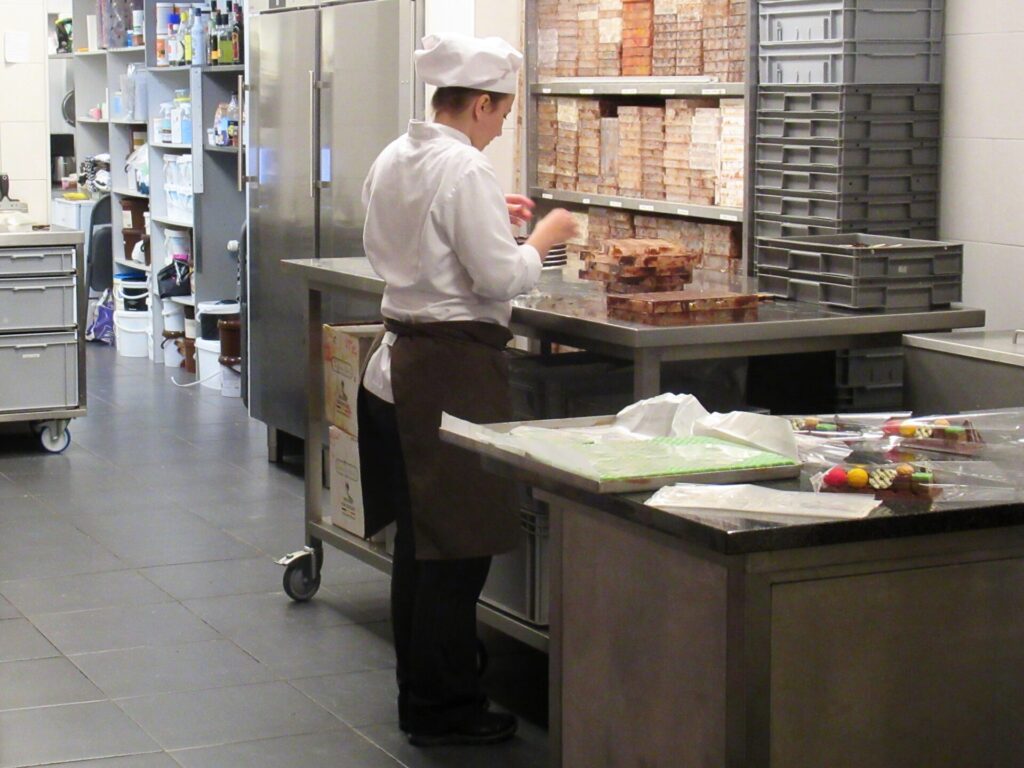
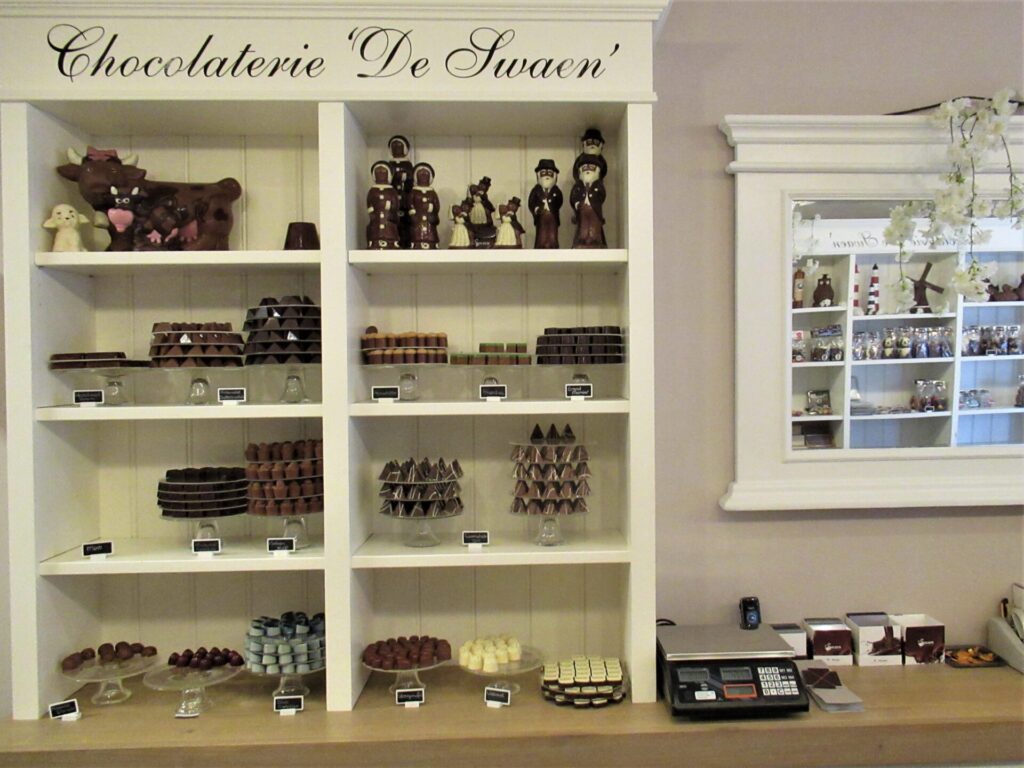
We did see the chocolatiers at work, though.
Of course we had to sample some of their products.
I think that for my husband, as a great amateur cook and occasional chocolate maker, that was the highlight of the day. For me, it was SuperGoof Quilts.
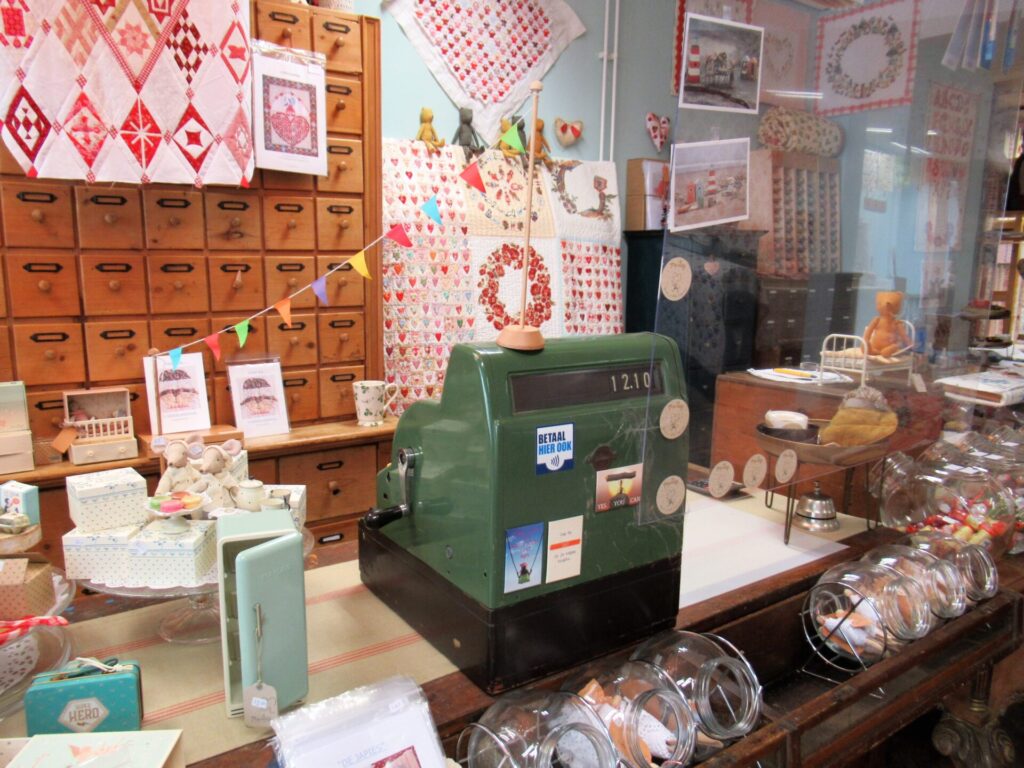
Now that was a super lovely surprise. I didn’t know anything about this quilt shop. Turns out it is owned by a blogger who has been blogging about quilting since 2007! With a great sense of self-mockery, she calls herself SuperGoof, or Goof for short.
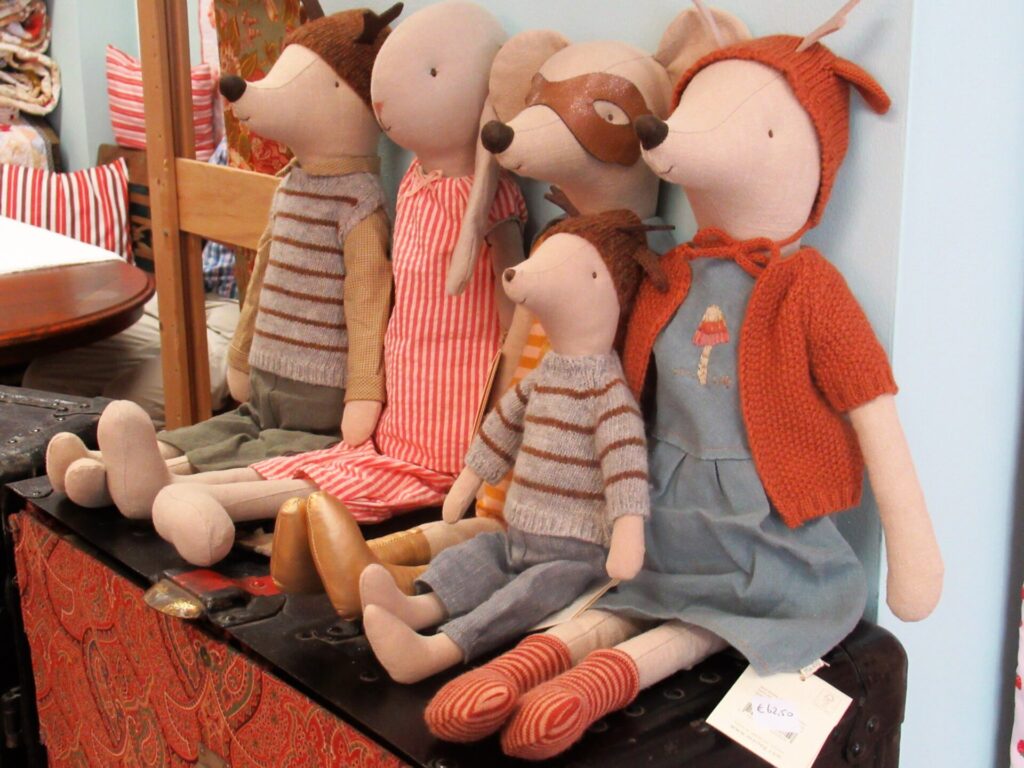
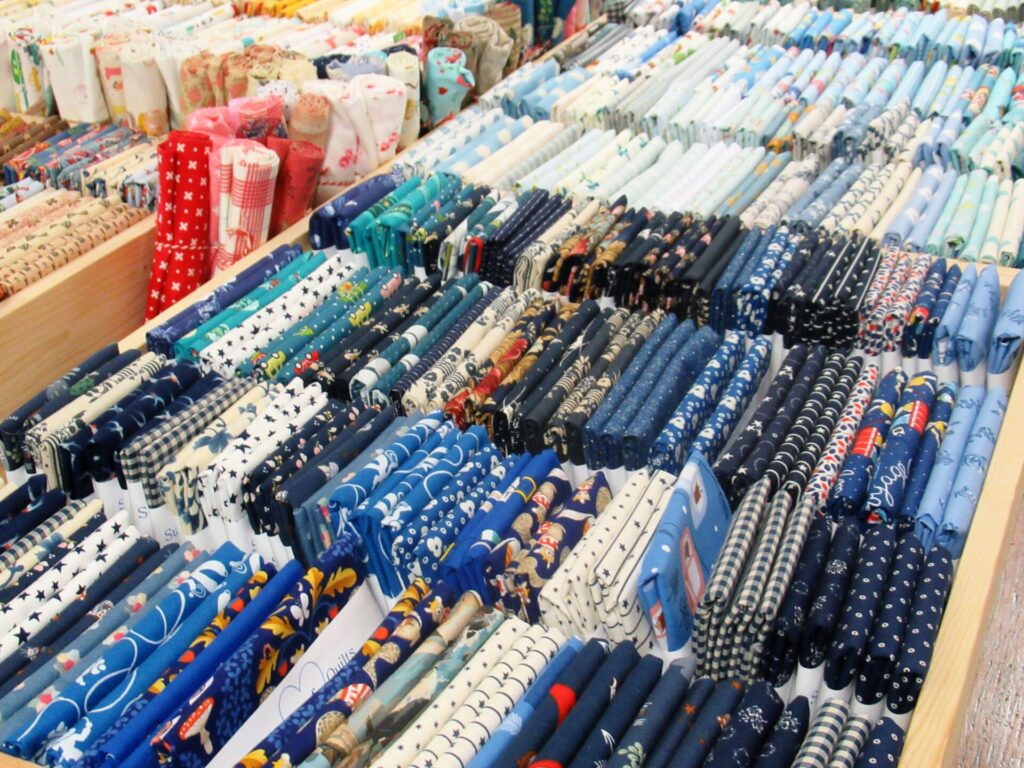
Of course SuperGoof Quilts is a shop, and of course it sells fabrics, as well as some other things. Just look at these fun stuffed toys with their finely knitted sweaters and hats:
But this is about more than buying and selling. What this is really all about is the love of making things.
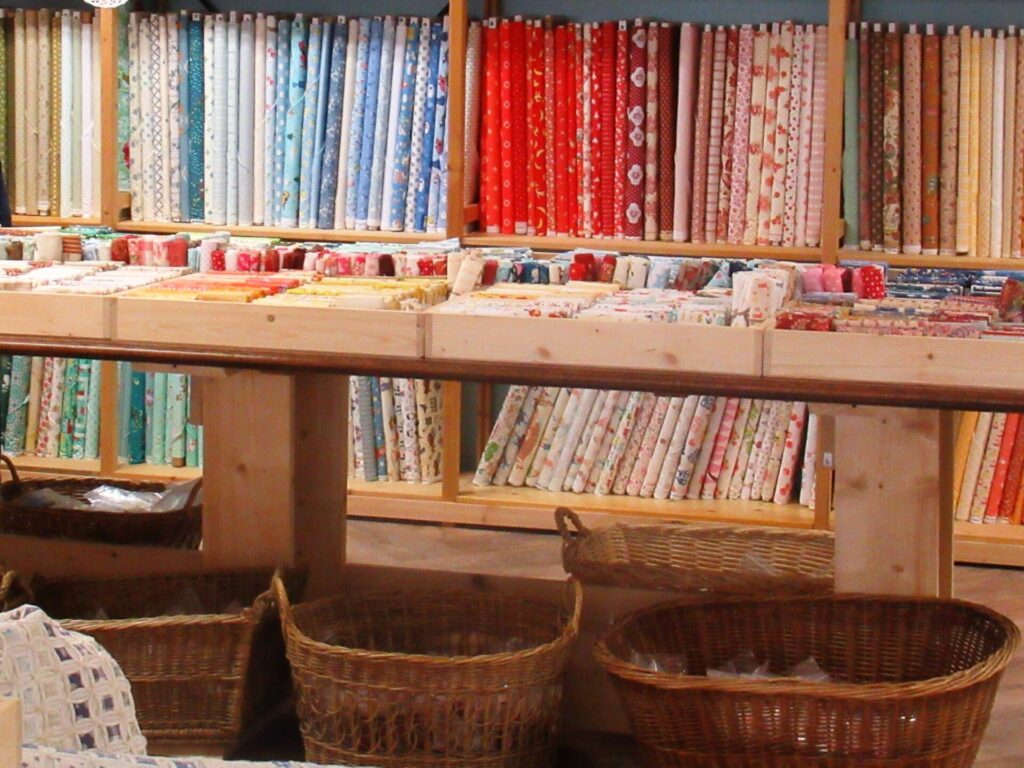
The fabrics are lovingly chosen and express Goofs exquisite taste.
The fat quarters and eighths are neatly folded and lovingly displayed by colour. Here are the blues…
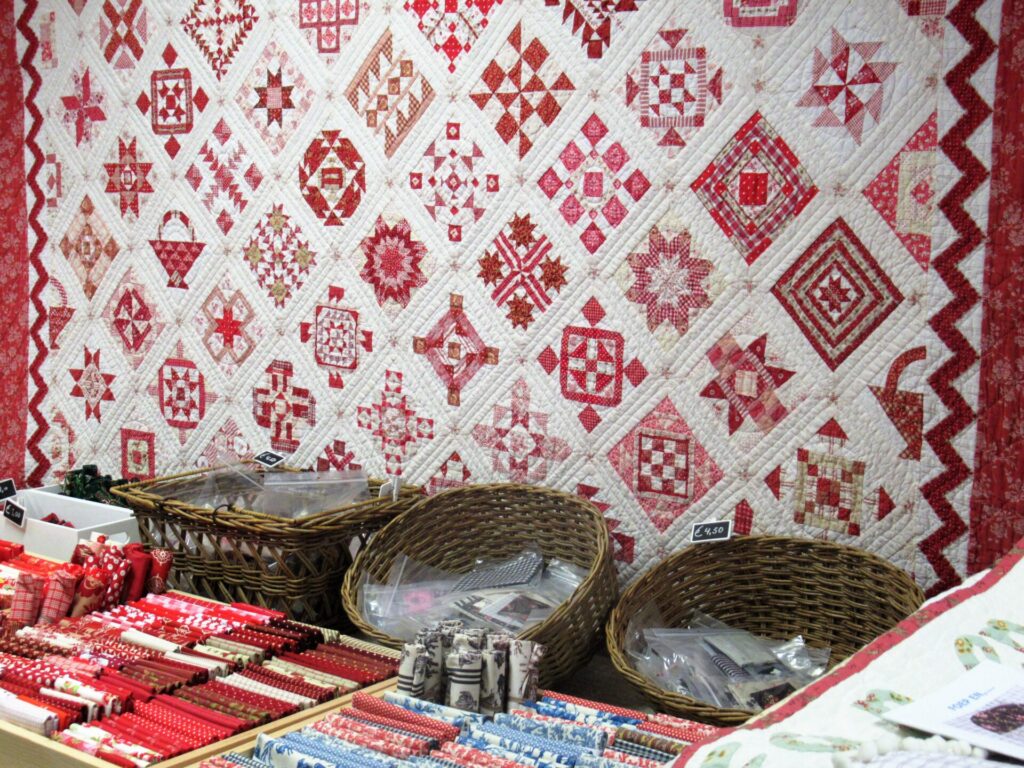
… and the reds.
I didn’t ask, but looking at the quilts on display, my guess is that red is Goofs favourite colour. Isn’t her sampler quilt stunning?
Would you believe that she doesn’t own a sewing machine? It is all done by hand! If that isn’t love.
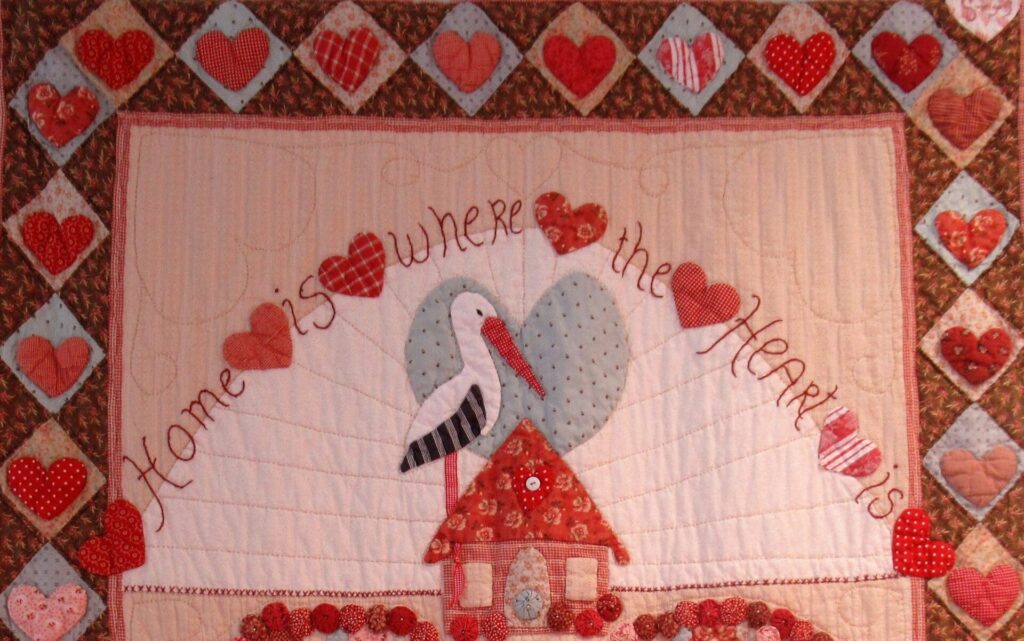
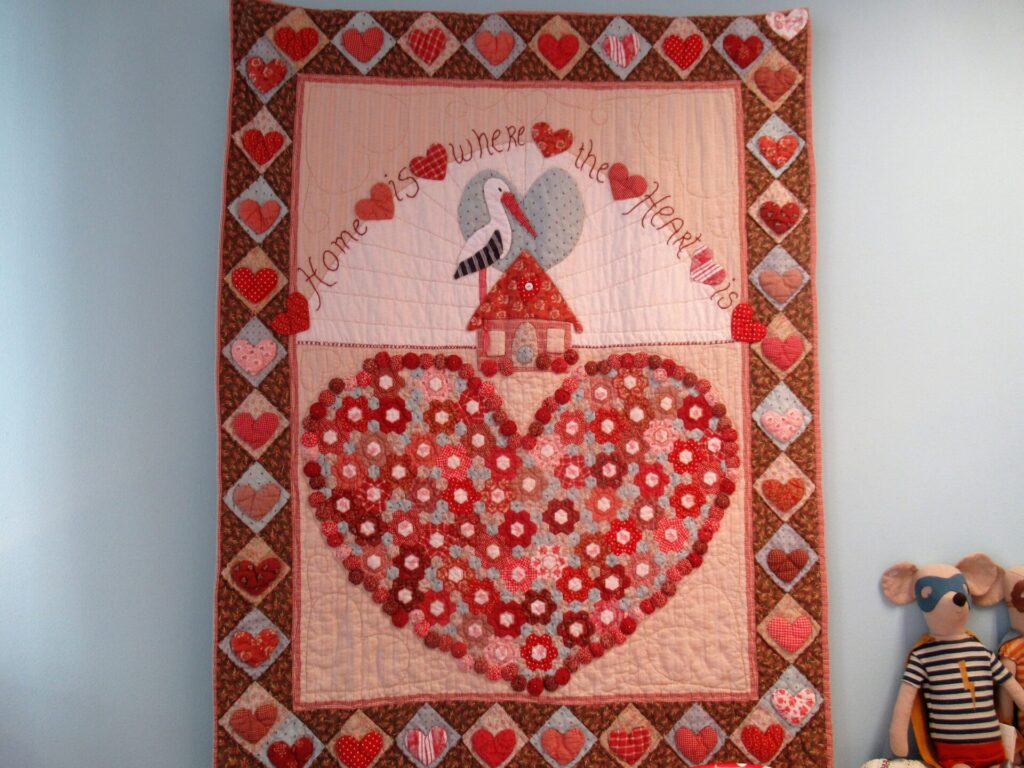
Goof (sorry, I don’t know her real name) told me that as a mother of four teenagers, carer for her parents and maternity nurse, she used to get up before everyone else for a spot of quilting. Amazing that she found the time for it in such a busy life, but at the same time I totally understand how important it was for her. The quilt with the stork and the words ‘home is where the heart is’ reflects her life at that time.
The finished quilts are beautiful, but I also like it that there is quite a bit of work in progress on display.
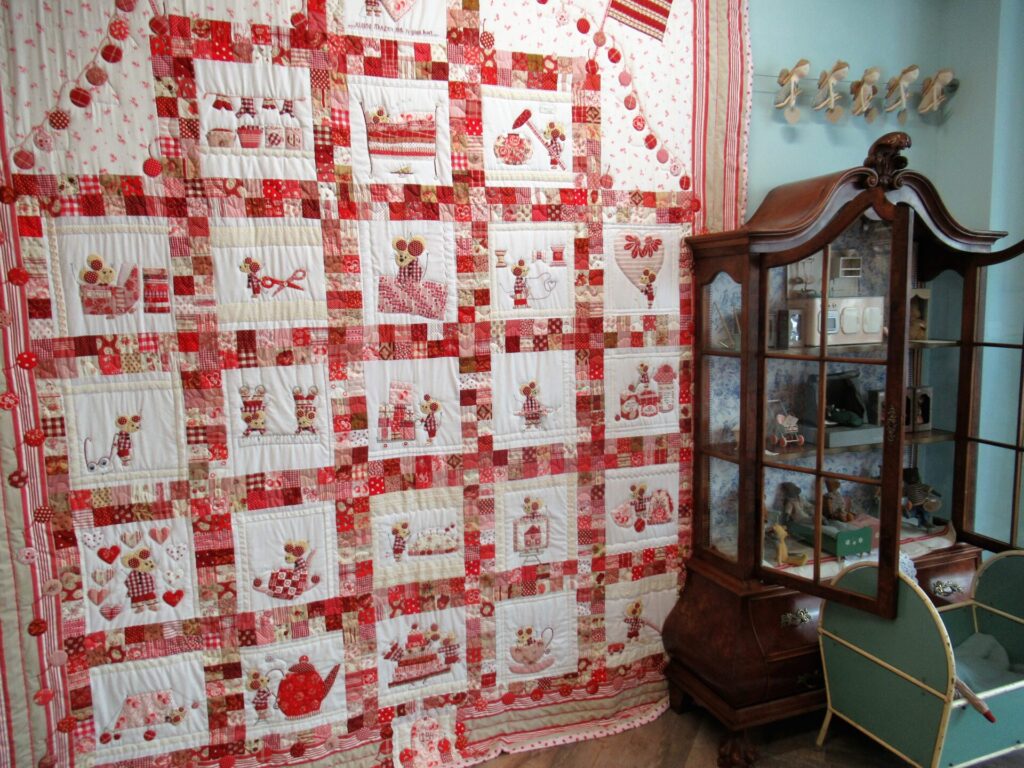
And then there is this mouse quilt that was a mystery quilt-along project from autumn 2020 to spring 2021. I don’t know if you can zoom in, but there is so much to see on it.
More pictures and information about this quilt can be found here on SuperGoofs website. She doesn’t have a webshop, so you’ll just have to travel to Kampen to visit her some time!
Since I discovered her, I’ve been reading SuperGoofs blog. It has lots of lovely pictures and her writing is light and fun. She writes in Dutch, but in the top right-hand corner of her homepage, there is a Google Translate box where you can select your language. I just loved her recent post in which she explains how she reacts when non-quilters visiting her shop comment on how much time quilting must take. Here is a quote:
“And if you love something? You don’t think about time at all. At most something like, Goodness is it that late already?”
And that’s just what I’m thinking now. Time to close off. Thanks for your time and hope to see you again next time!
Well, it’s been quite an eventful week on a national and global level, what with the resignation of our government, the inauguration of a new POTUS, and the introduction of a curfew and other stricter measures here. I frequently needed to remind myself to keep breathing.
On a personal level, one uneventful week follows another. And that’s a good thing in a way – it means that we’re OK.
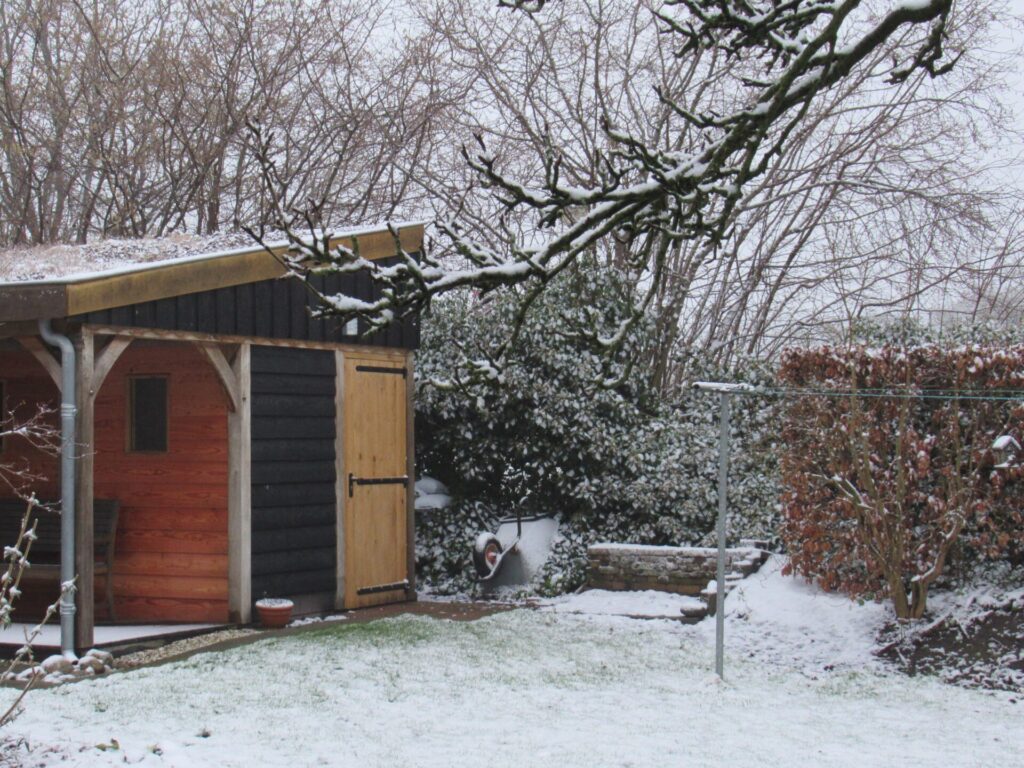
THE event of our past week was SNOW! Last Saturday it started snowing in the evening, when it was already dark. On Sunday morning, I could hear rain drops pattering on the roof, but the garden still looked lovely with its thin white blanket.
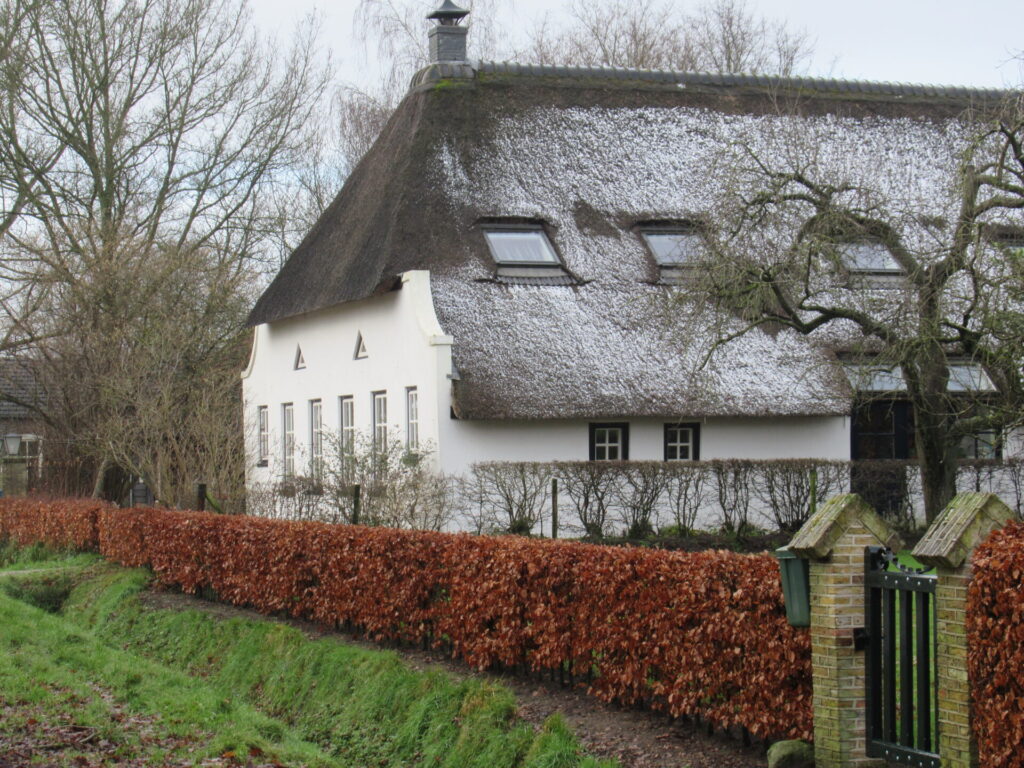
When I went for a bicycle ride after lunch, there were just a few patches of snow left. It stayed longest on the thatched roofs of some farmhouses.
An hour or two later all of the snow had gone.
Ah, well, it was lovely while it lasted. Snow days are a rare pleasure.
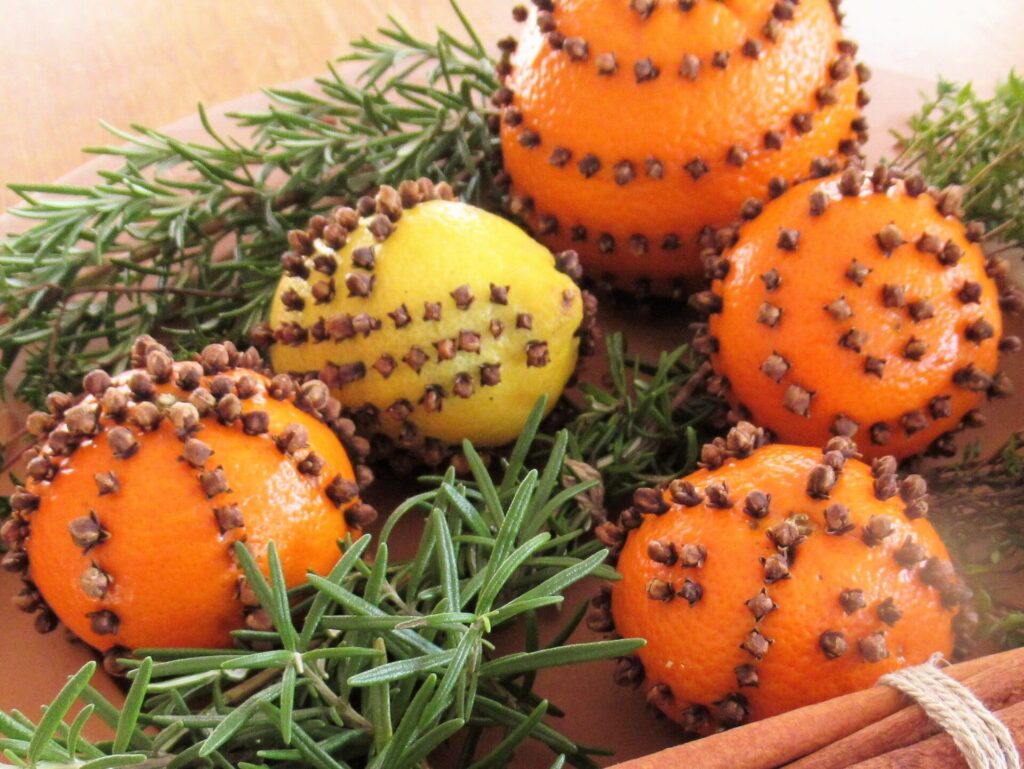
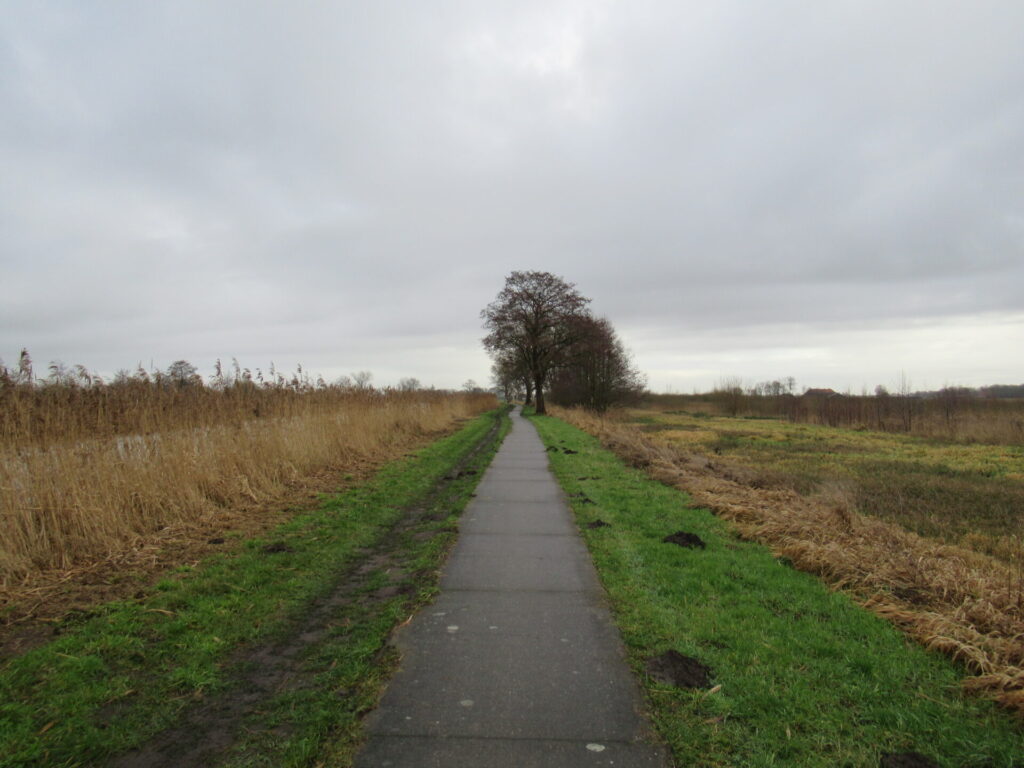
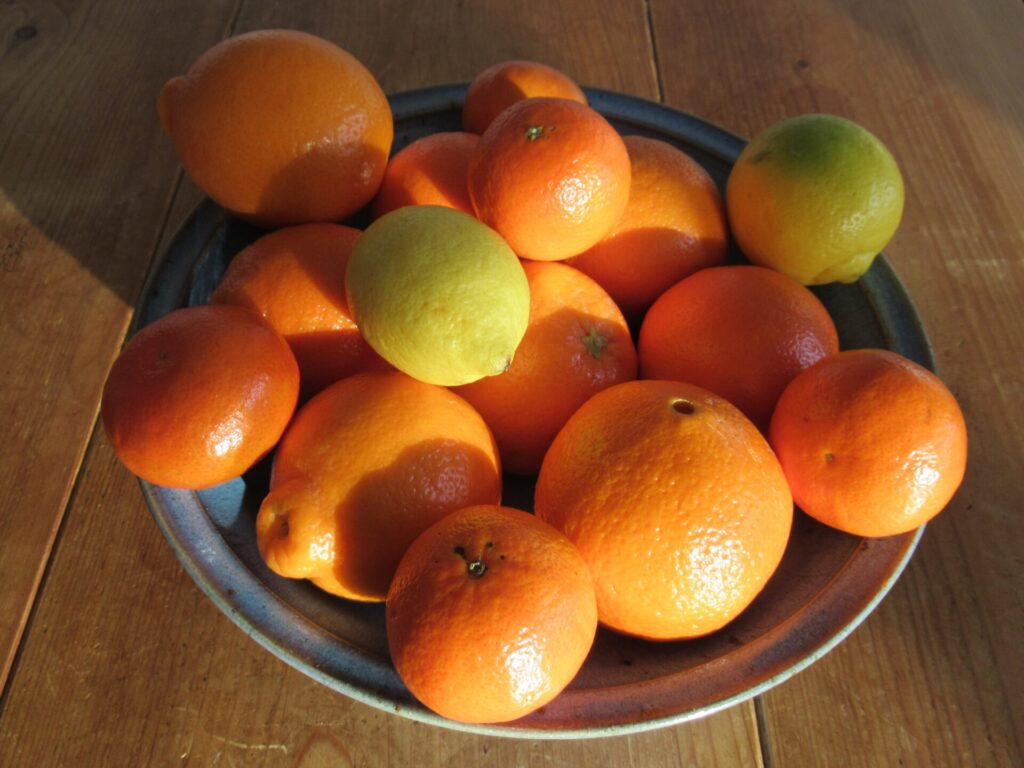
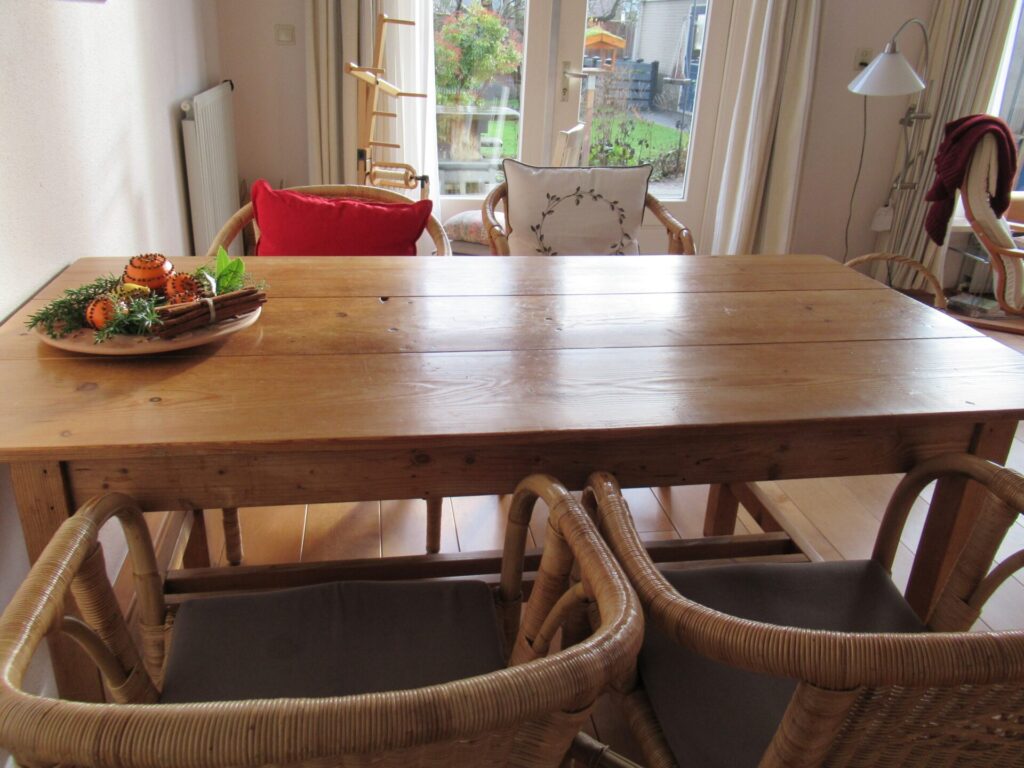
Now we’re back to more ordinary January days – dark, windy and rainy. A good time to bring some sunshine inside.
To do that, I filled a large platter with decorated citrus fruit, taking pictures during the process to share here. (I was lucky that the sun peeked out from behind the clouds now and then, giving the fruit a cheerful glow.)
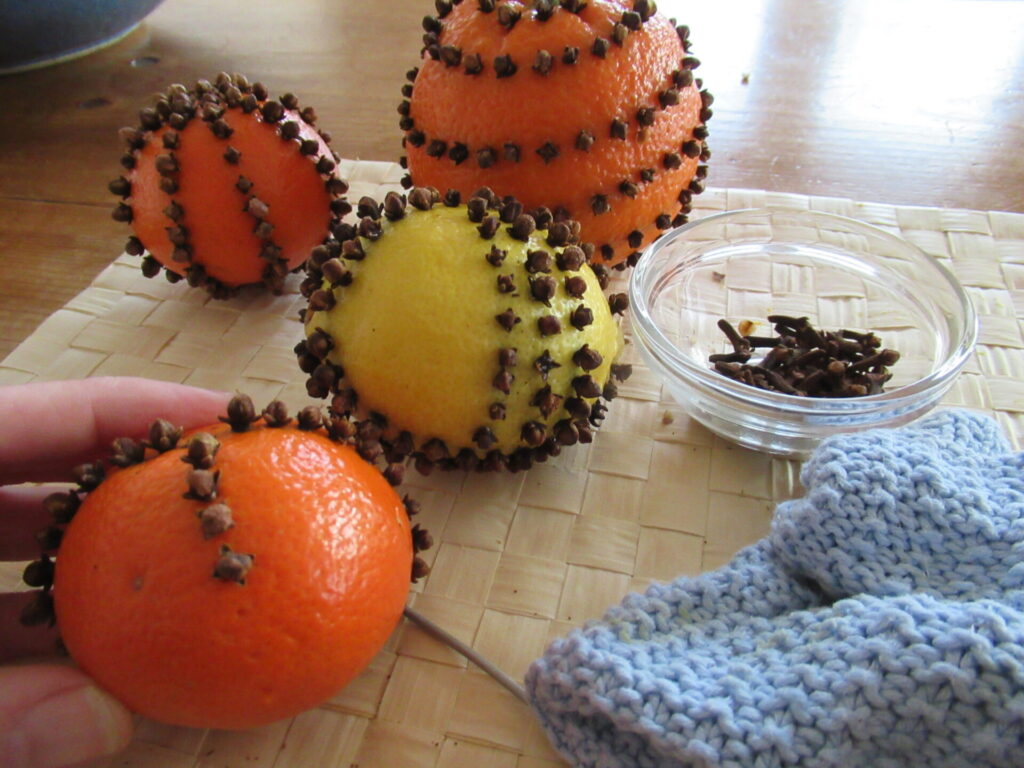
It all starts with gathering everything that is needed. First of all, different kinds of citrus fruit.
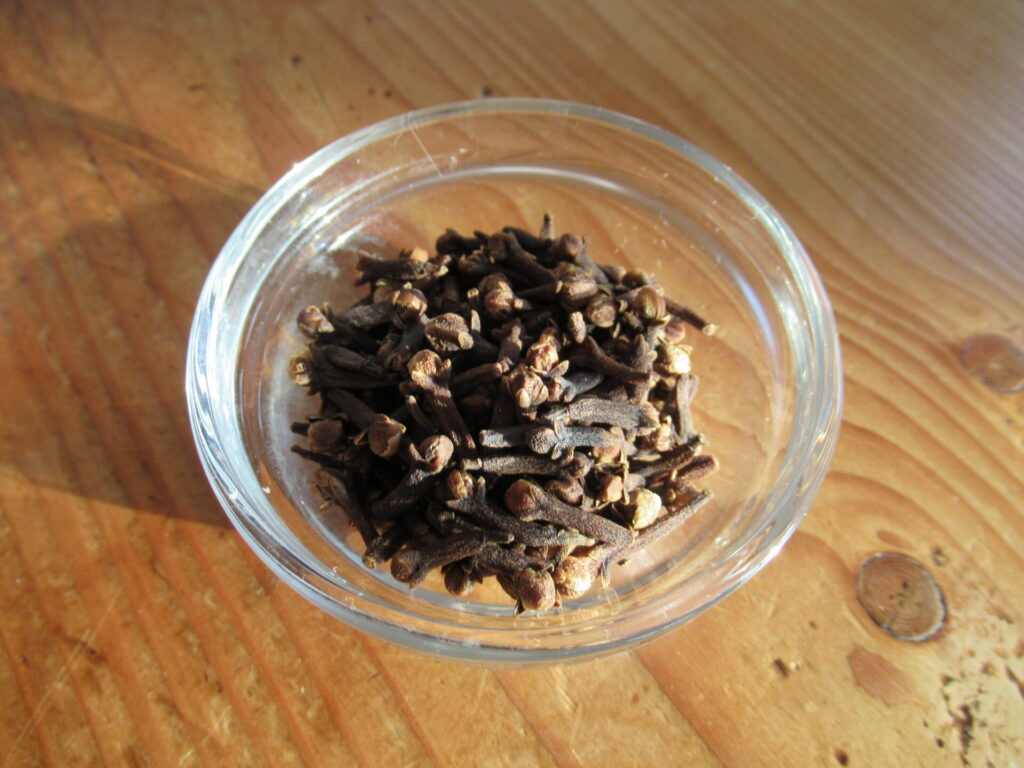
Lots and lots of cloves. (For 1 orange, 1 lemon and 3 tangerines I used 45 grams of cloves.)
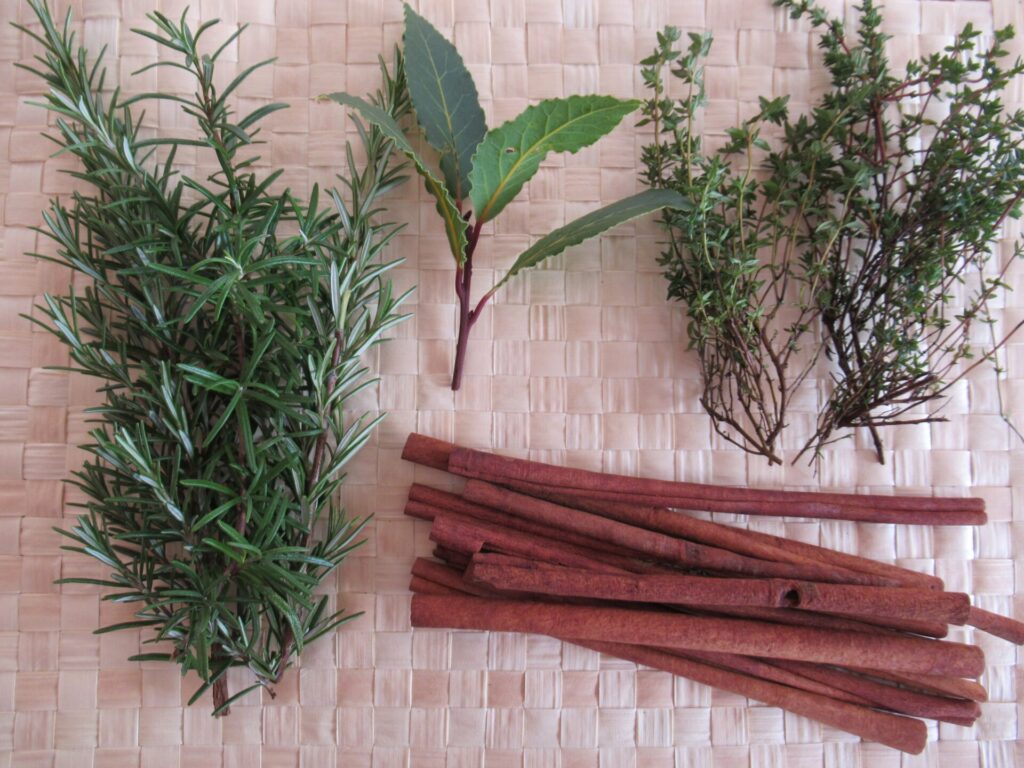
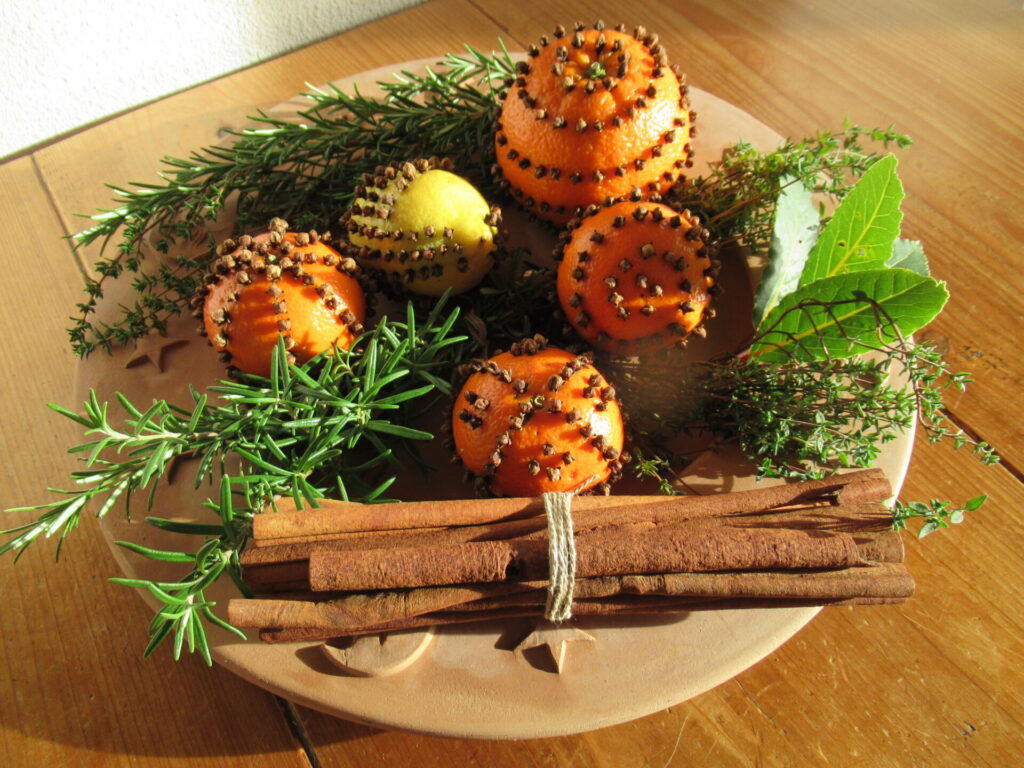
A large platter, and winter greenery and other ingredients to decorate it. I picked some rosemary, thyme and bay leaves from the garden, but conifer sprigs or other evergreen twigs or leaves would be fine, too.
I also had some jumbo cinnamon sticks I once bought at the garden centre. Not terribly fragrant, but still a nice addition to the spicy scent of the cloves. Star anise would be nice as well, if you have some.
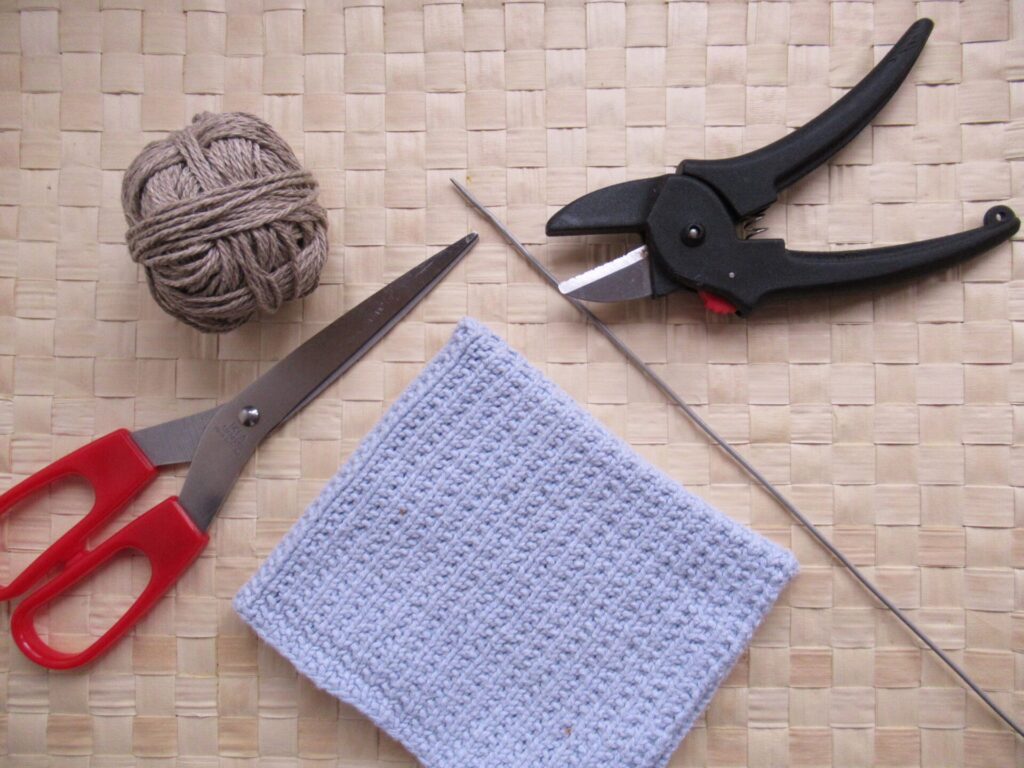
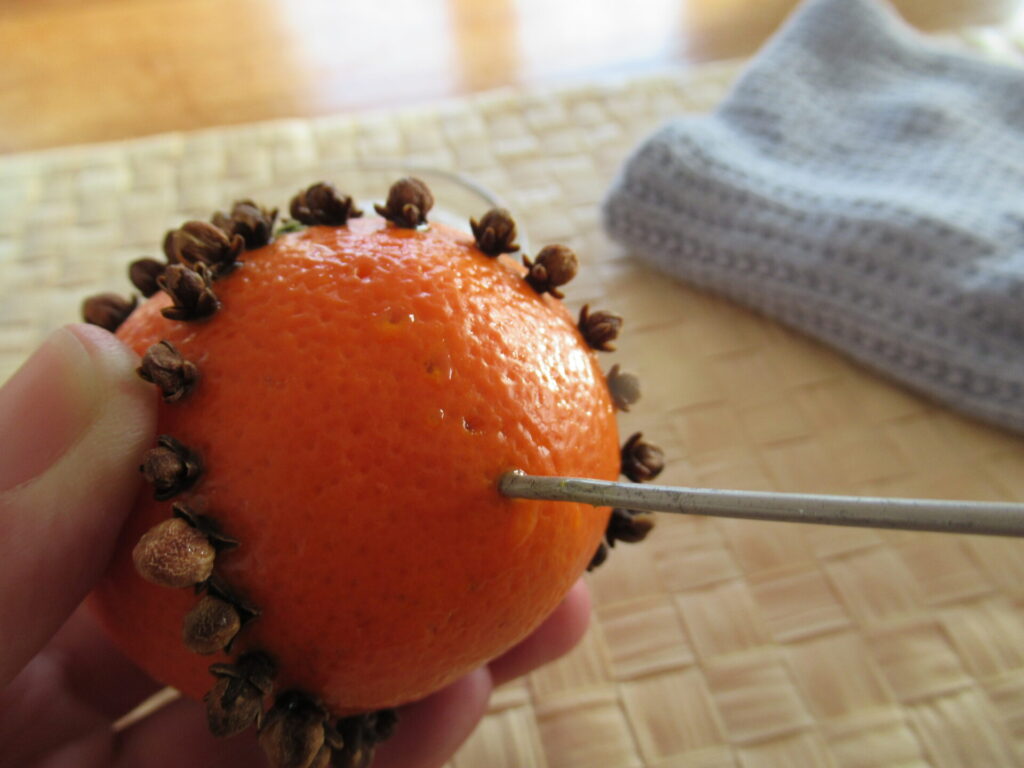
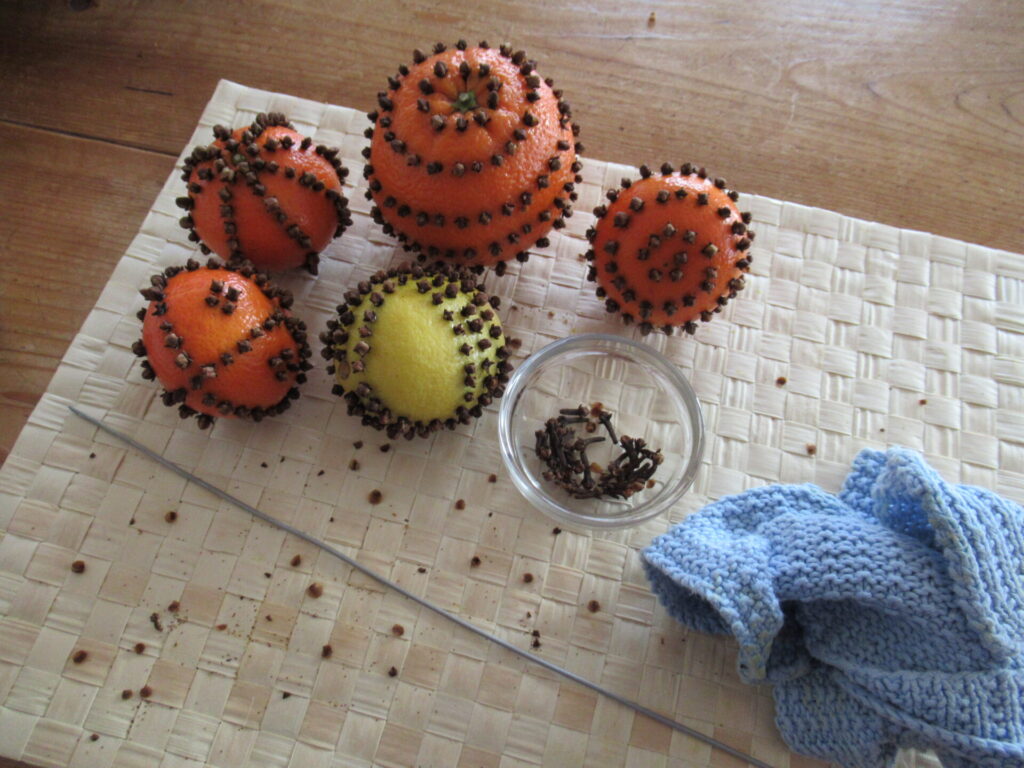
And finally a few tools and other bits and bobs. Scissors and secateurs, twine for tying the cinnamon sticks together and the twigs into bunches, a thin knitting needle (I used a size 2.0 mm/US 0) or a skewer, and a cloth to mop up the juice and dry your hands from time to time.
Oh, and if you’re working at a wooden table like ours, don’t forget to cover it with a whipeable table cloth or place mat, because juice will drip out of the fruit.
Now the fun starts. Prick holes in the fruit before inserting the cloves.
Make lines, circles, spirals, crosses, diamonds or other patterns.
There! It’ll give you sticky hands, but doesn’t make too much mess. And it’s an uplifting project that is also lovely to do with children.
Now it’s time to arrange everything nicely on a platter, together with the greenery and other spices. Tadaah!
I can’t guarantee that the fruit will keep for months. Sometimes it dries out nicely and will keep for a long time, and sometimes it gets mouldy. In the past, I’ve tried dusting it with a mixture of orris root and cinnamon powder. In theory, that should preserve it better, but it didn’t. I’ve also wrapped the fruit in tissue paper and stored it in a dark cupboard to dry, but that didn’t always work either.
My experience is that it is largely a matter of luck whether the fruit keeps well or not. But no matter how long the fruit lasts, the sunny colours are a feast for the eyes and the lovely wintry scents are a delight for the nose!
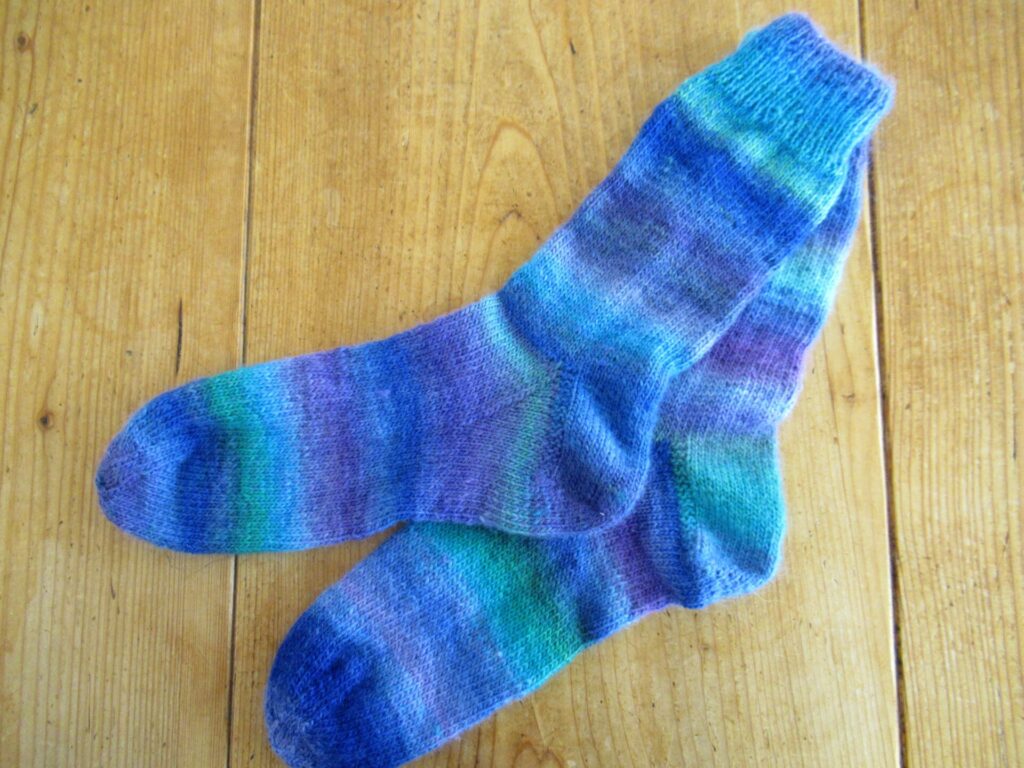
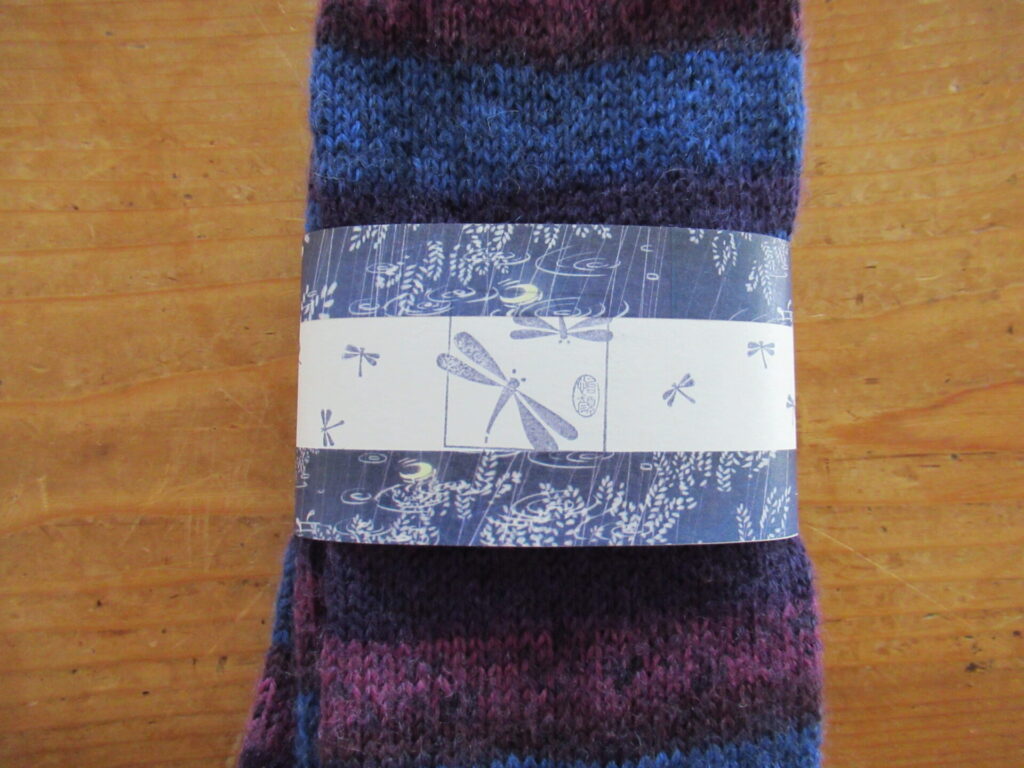
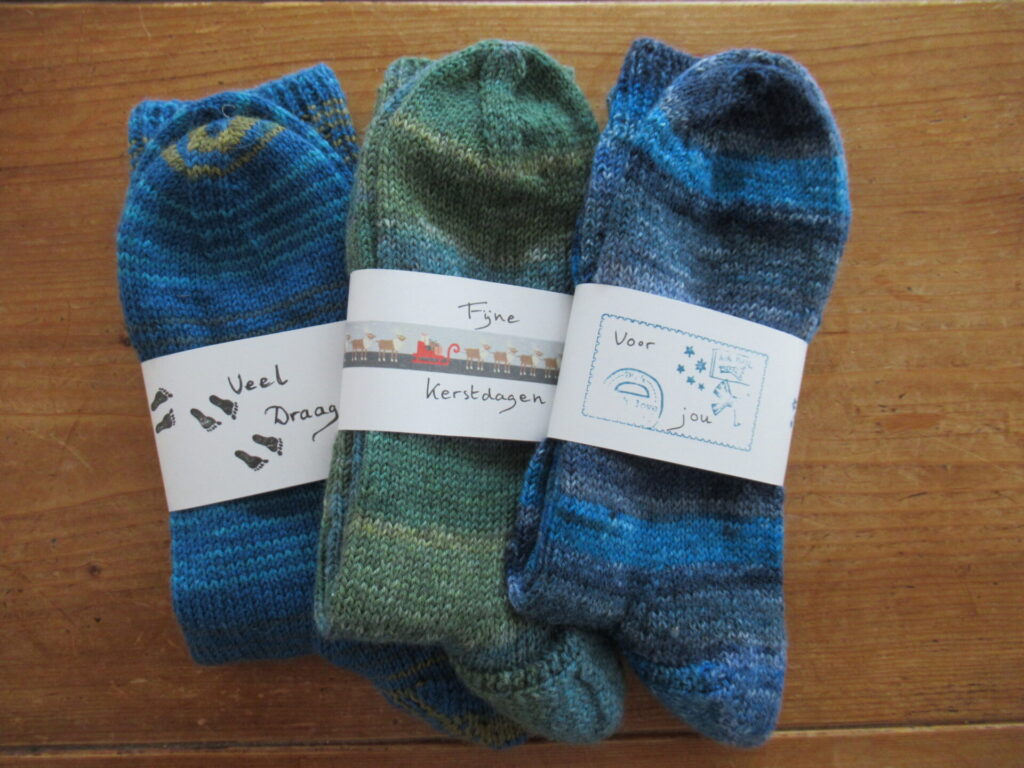
Do you remember our visit to a PYO flower garden about a month ago? And that I started knitting a pair of socks for a friend’s Birthday in early October? Well, I finished them in time.
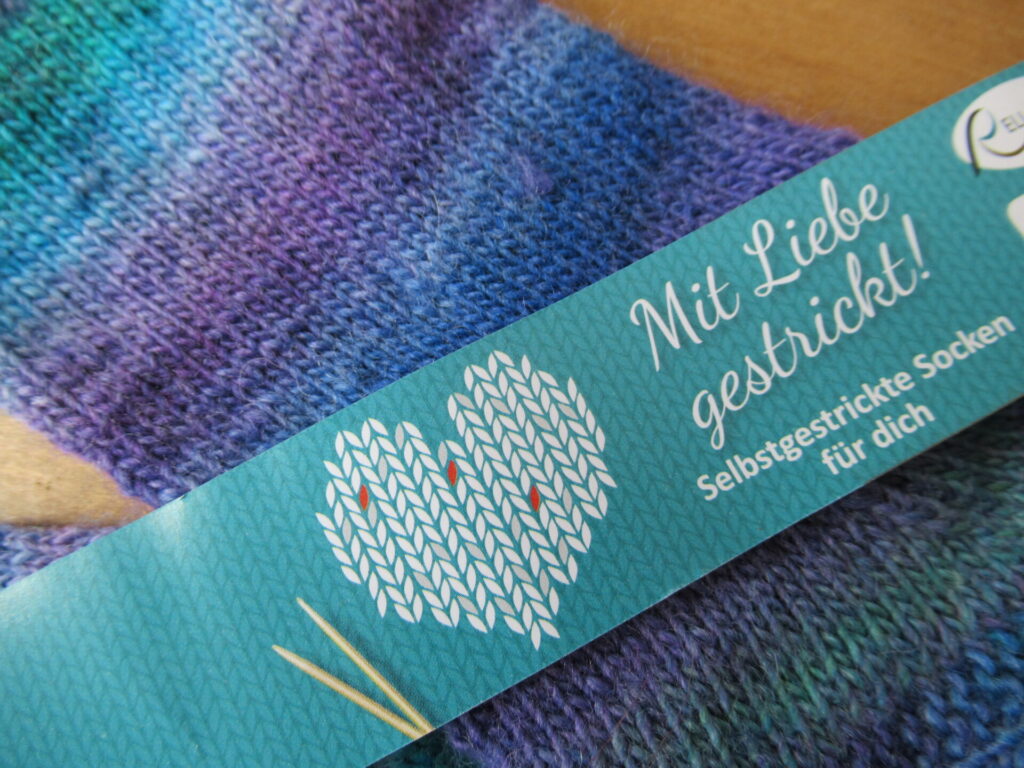
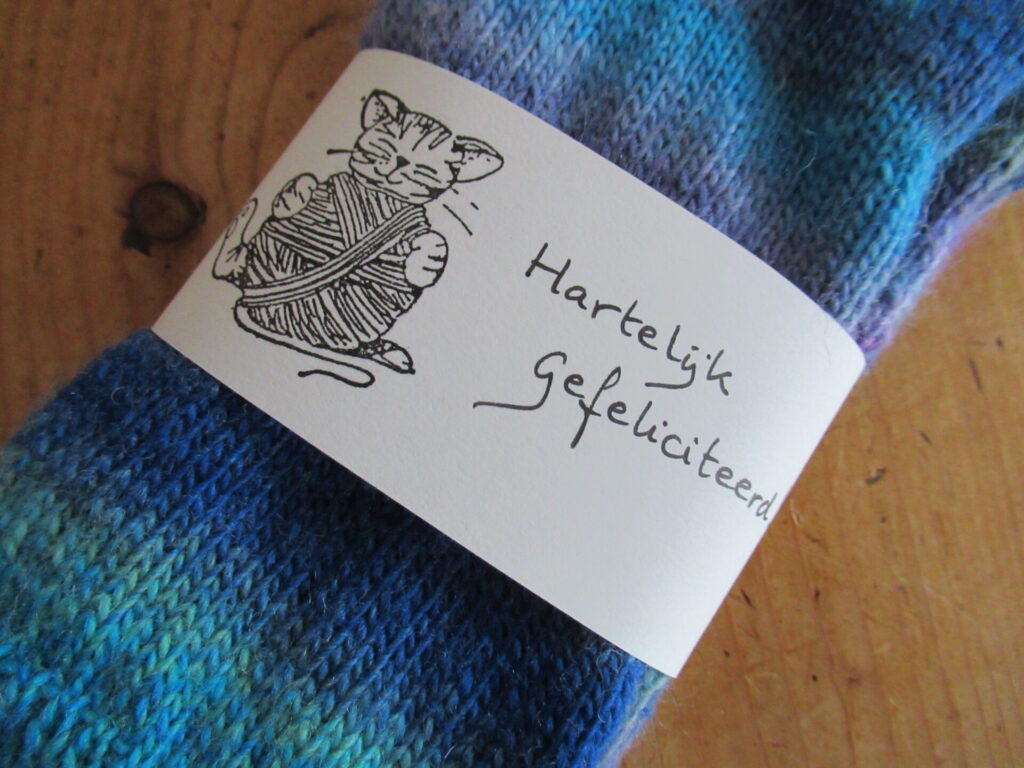
While I was knitting them, I studied the ball band for information about the composition of the yarn and noticed a circle with the text: ‘Geschenkverpackung auf der Rückseite!’ (It was a German yarn). Gift wrap on back – what could that be? Ah, the inside of the ball band was a gift label!
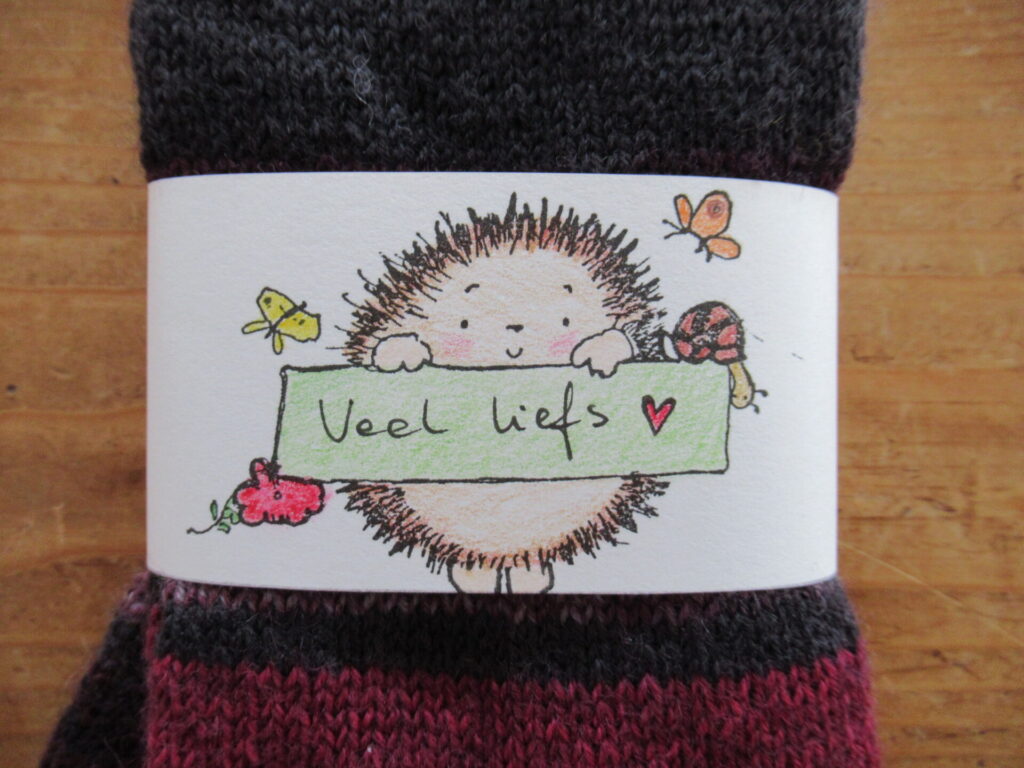
What a lovely idea! If we’d been speakers of German I would have used it straightaway. But we aren’t, and I’d rather have one in Dutch. So I decided to borrow the idea and make a personalized gift label for my cat-loving friend.
I gift-wrapped the socks, added a Birthday card and mailed them. I think socks are a perfect gift, especially now. What’s nicer than to give someone the gift of warm feet? Choosing the recipient’s favourite colours makes it even better. They fit into a letter box, are fairly lightweight and won’t break during transport.
I enjoyed this simple spot of crafting so much, that one dark and rainy afternoon I got my crafts supplies out again and made more. (If some photos look rather yellowish, it’s because of the lamp light.)
If you’d like to make some sock gift labels too, here’s what you’ll need:
Sock Gift Labels – List of Supplies
A pot of tea, mug of coffee or other comforting beverage
Calming and/or uplifting music, or blissful silence
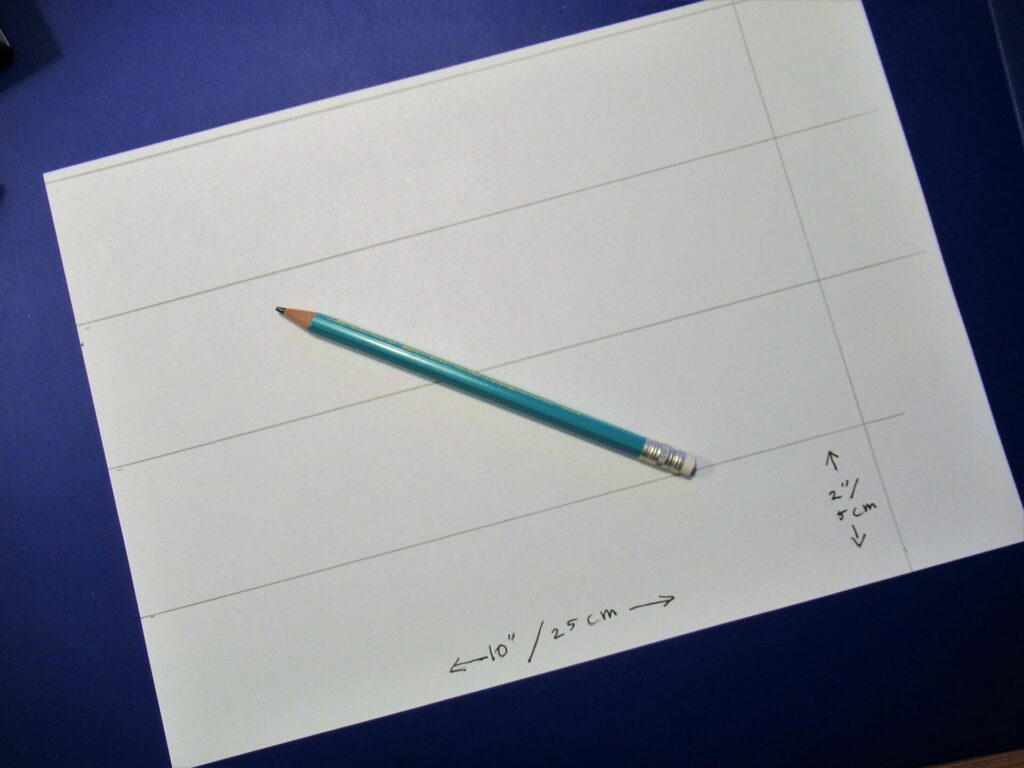
Thick paper (1 A4-sheet will make 4 labels)
Pencil
Ruler
Clear tape
Scissors
A flat surface/something to protect your table
Any other crafts supplies you have, like: stamps, inkpads, washi tape, markers, felt tips, coloured crayons/pencils, stickers…
And one or more pairs of handknit socks, of course!
Start by marking off one or several 25cm (10”) x 5cm (2”) strips, using your pencil and ruler. Cut them out.
Now let your creativity flow! Here is some inspiration.
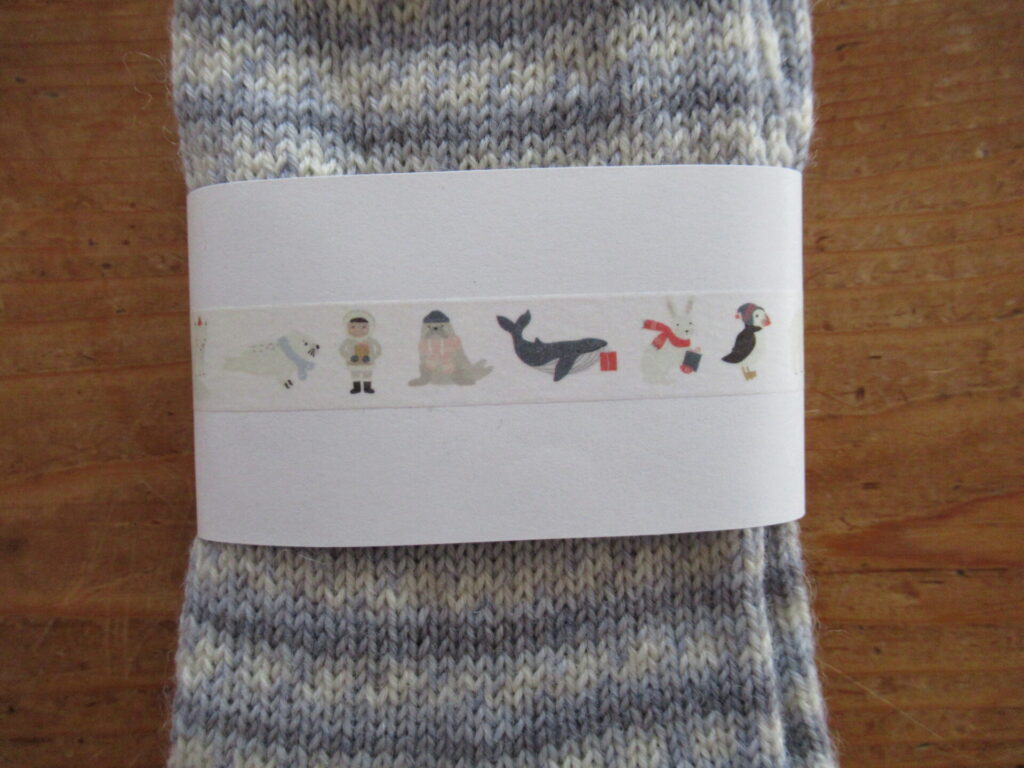
I started with some very simple ones, using just some washi tape.
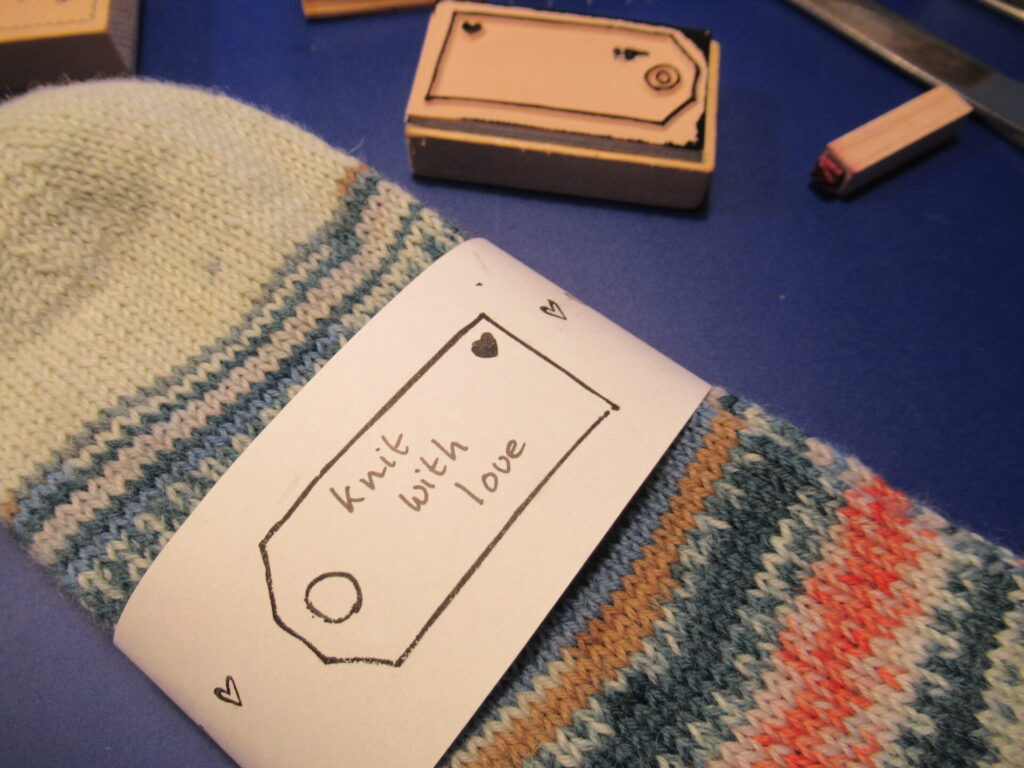
Then stamps and a marker in monochrome.
After that, I added in a little colour using washi tape and a coloured ink pad, matching the colours to the sock yarn.
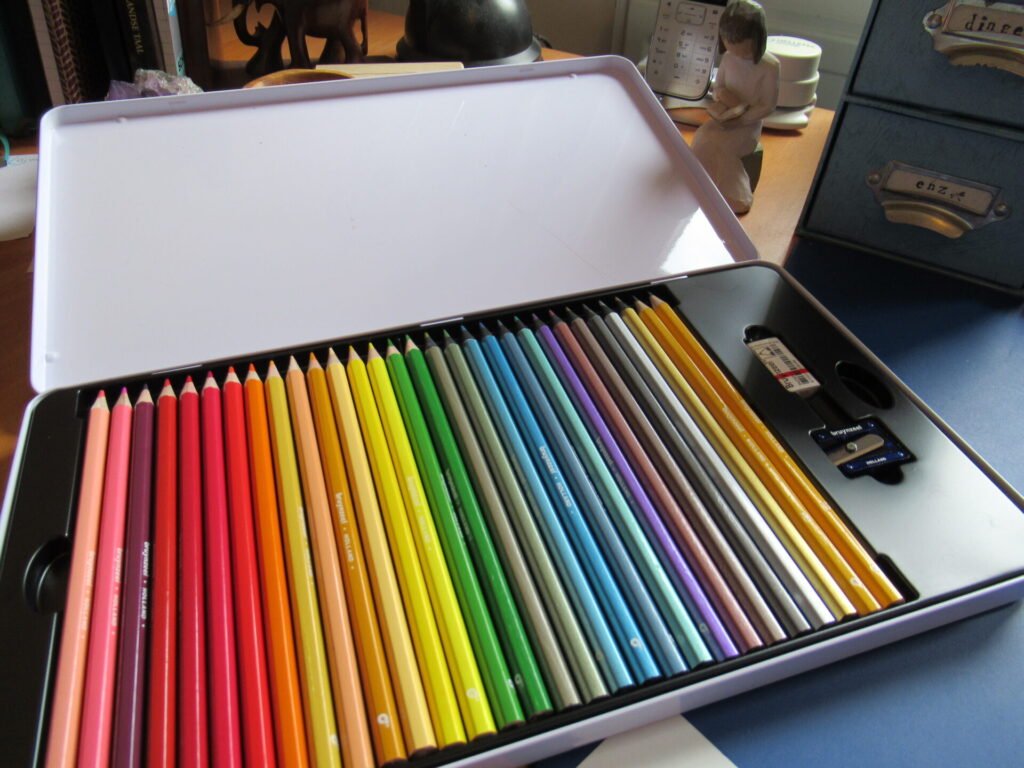
Several days later, I got out my brand new box of coloured pencils to add colour to a few more.
(A while ago, our local supermarket gave out coupons with which we could save up for lovely boxes of coloured pencils and sketchbooks. A nice change from the usual storage boxes and towels. It even has metallics like silver, gold and bronze!)
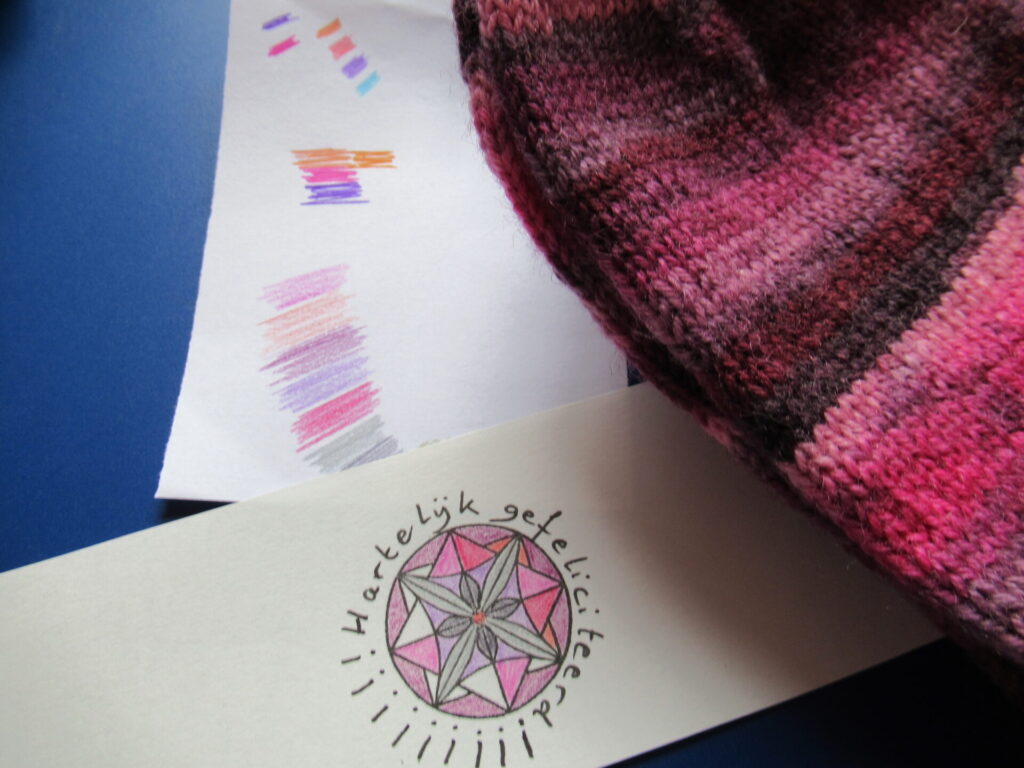
Adding colour to the stamped motifs was so much fun! On this one, I matched the colours to the sock yarn again.
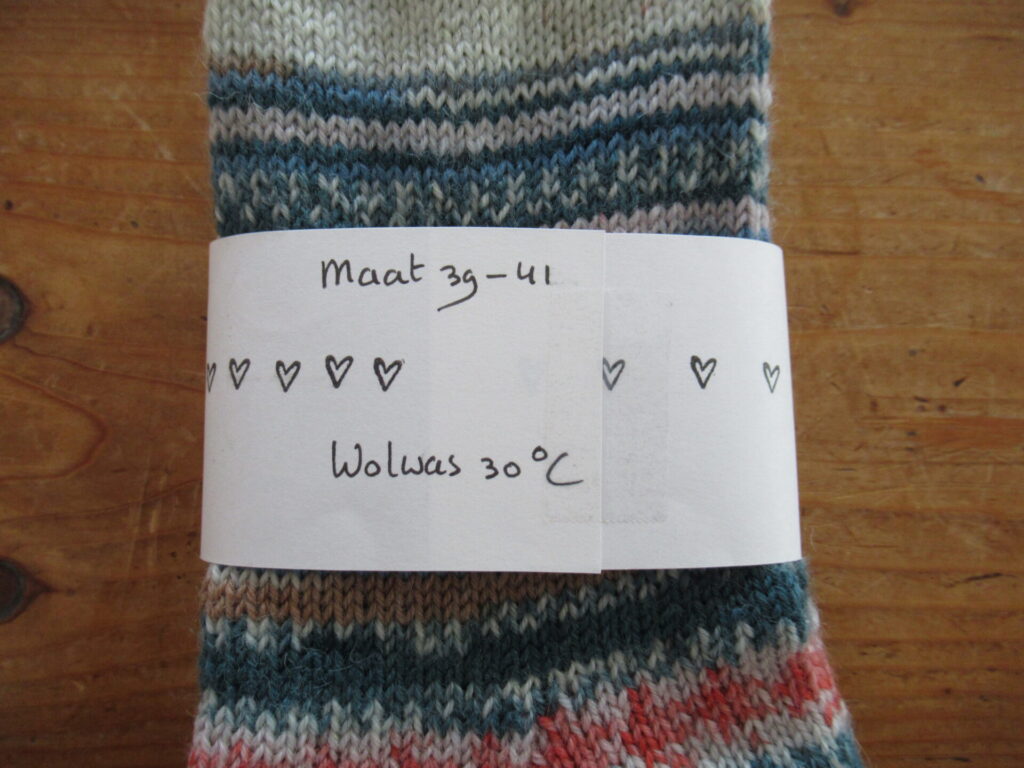
Sometimes I knit socks with a specific ‘victim’ in mind, and sometimes I just knit socks because I feel like it and will see who they’ll go to later. Adding washing instructions to the label is always a good idea. And in the latter case adding the size is useful, too.
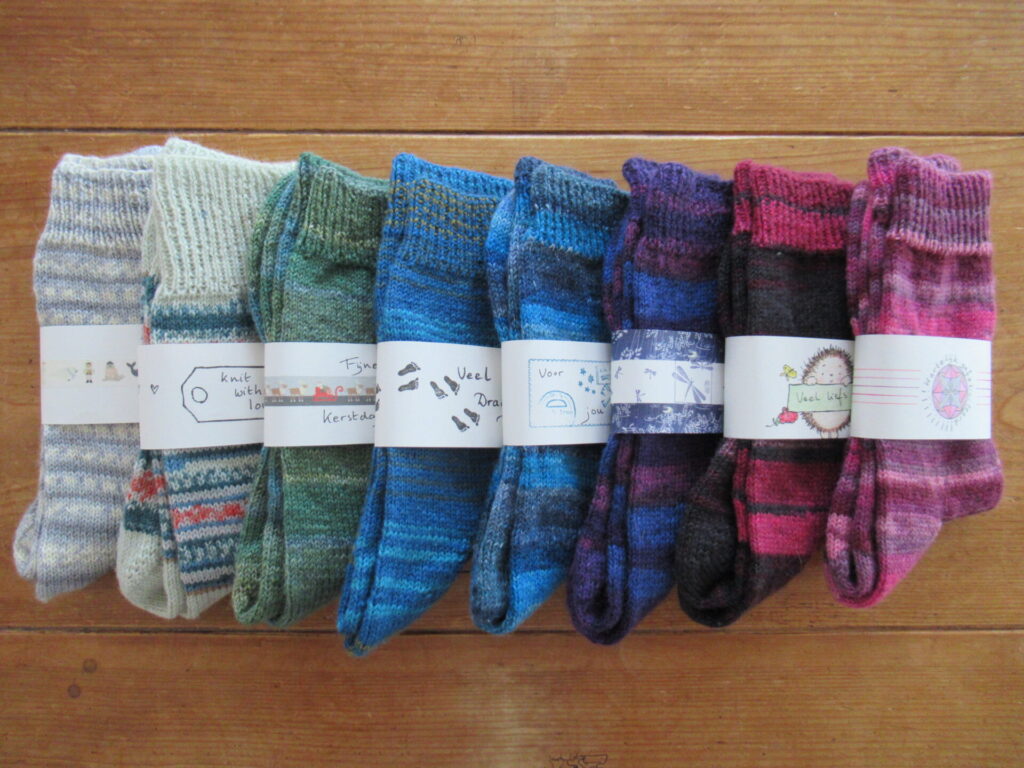
Here are 3 more pairs of socks in shades of blue and green, with labels decorated with stamps and washi tape.
I’ve really enjoyed playing around with my crafts supplies – I hadn’t used them for ages. They made me forget the time and all the woes of the world for a few hours. If you now feel inspired to make your own sock gift labels, I hope it’ll work like that for you, too. Have fun!
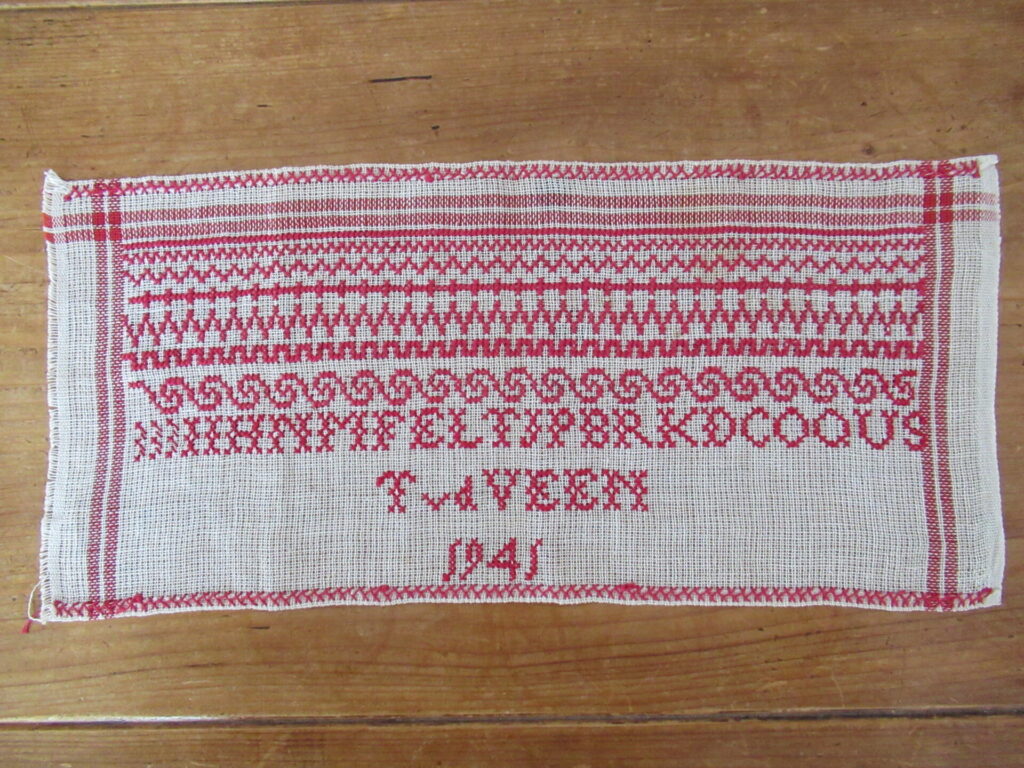
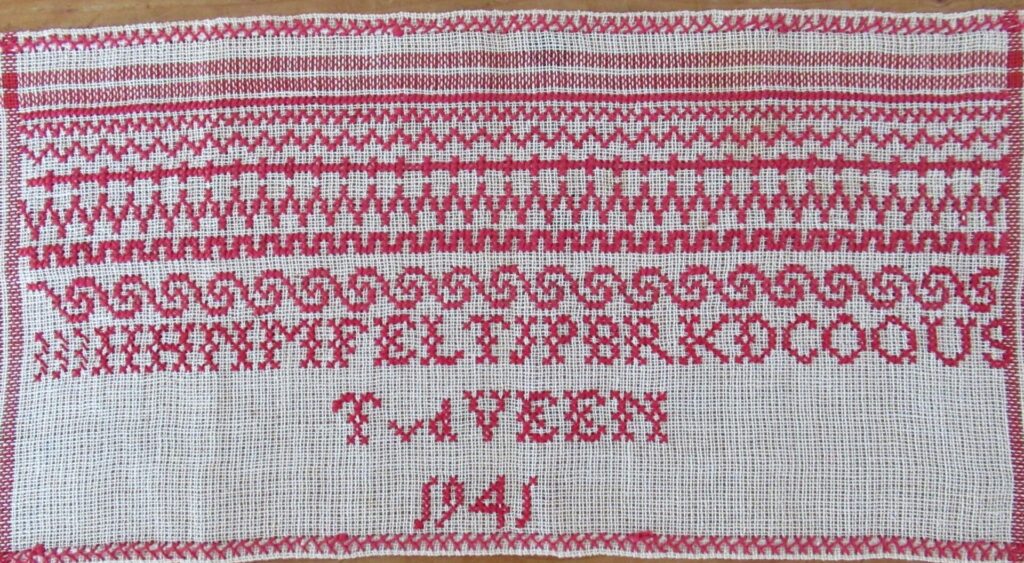
Here is the embroidery sampler I promised to show you. Like the knitting sampler I wrote about two weeks ago, this sampler isn’t spectacular or particularly beautiful. But unlike the knitting sampler, whose maker is unknown to me, I know with 100% certainty who made this embroidery sampler. It was my Mum.
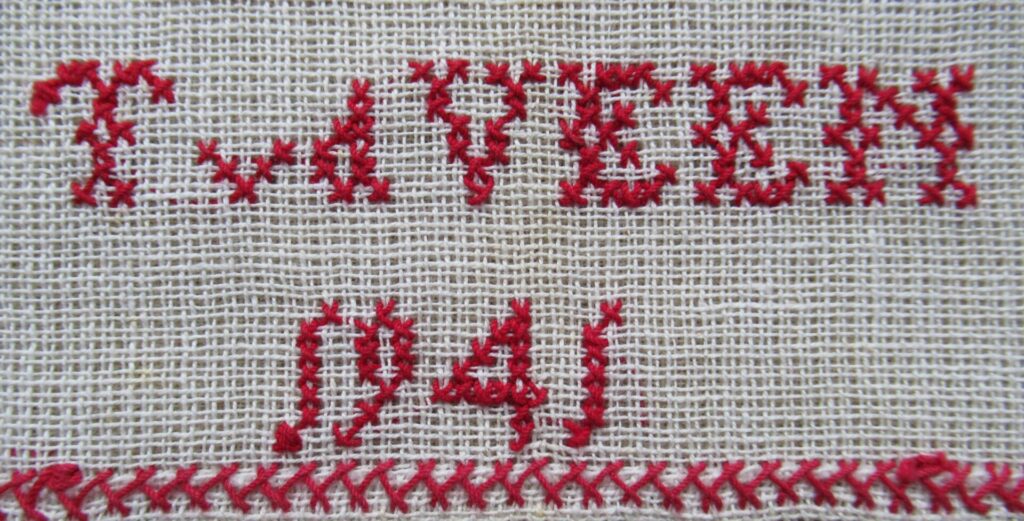
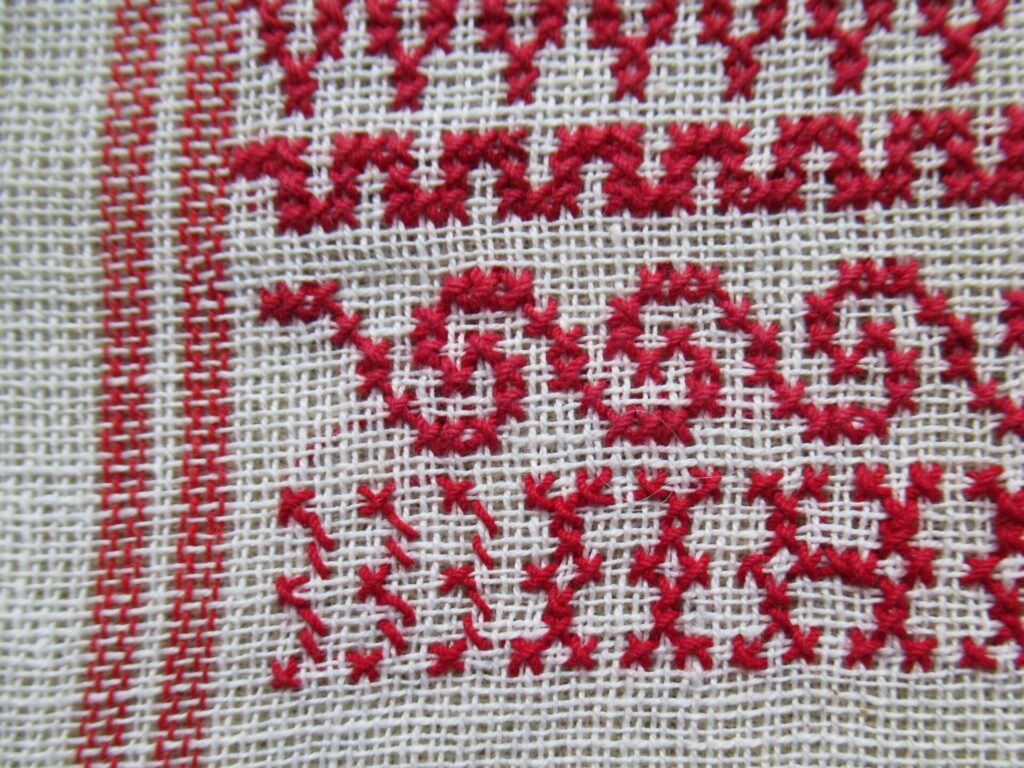
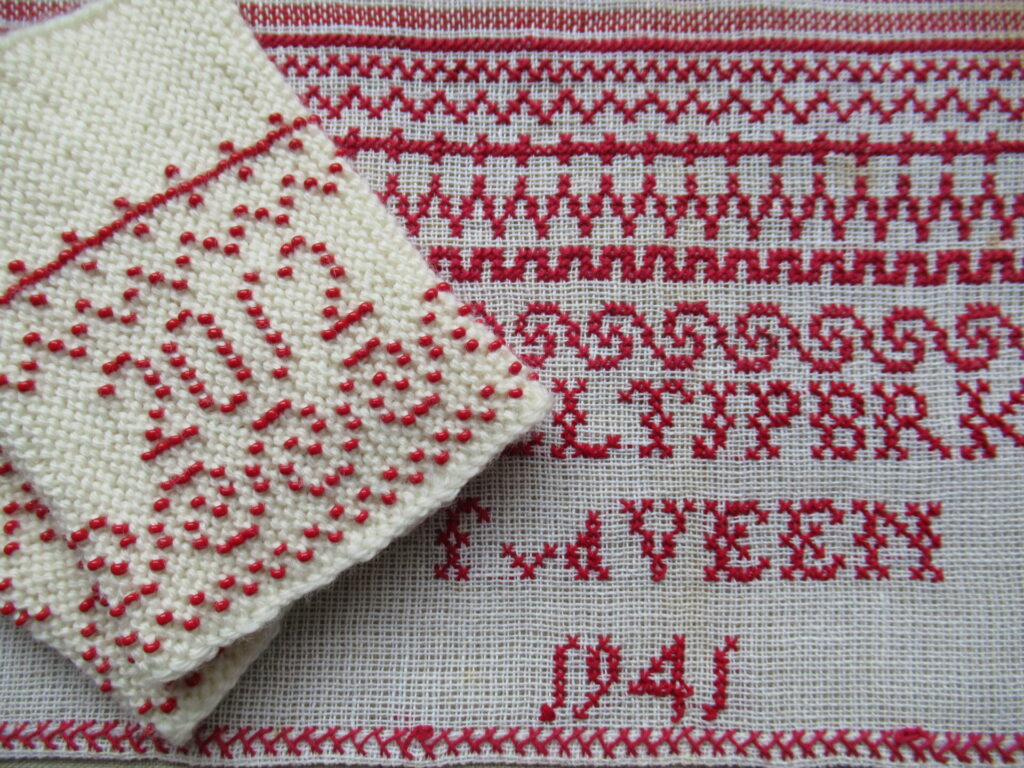
Not only did she show it to me, she also embroidered her name and the date on it.
My Mum made the sampler at school in 1941, when she was 8 or 9. It was the beginning of World War II and the family lived in Leeuwarden, the capital of Friesland. She didn’t talk about it very much, but I have heard stories of bombings and scarcity.
One story that has stayed with me, is that they sometimes had ‘guests’ staying at their house. At those times, she and her sisters shared one bed to free up their own beds. During a razzia, the children were woken up in the middle of the night. The visitors were hidden in a secret space, and the girls had to run around the house, so that the Germans couldn’t see who had been sleeping where. A strange and scary time to grow up in.
To some girls, making an embroidery sampler may have been a welcome distraction. I don’t think it was to my Mum.
I’ve seen similar samplers, and compared to those, hers has only a few decorative borders. The alphabet is incomplete and the letters are jumbled up.
To the left of the actual letters, there are 3 aborted attempts (photo below, bottom left). Or were those the place where she started, meant for practicing cross stitches?
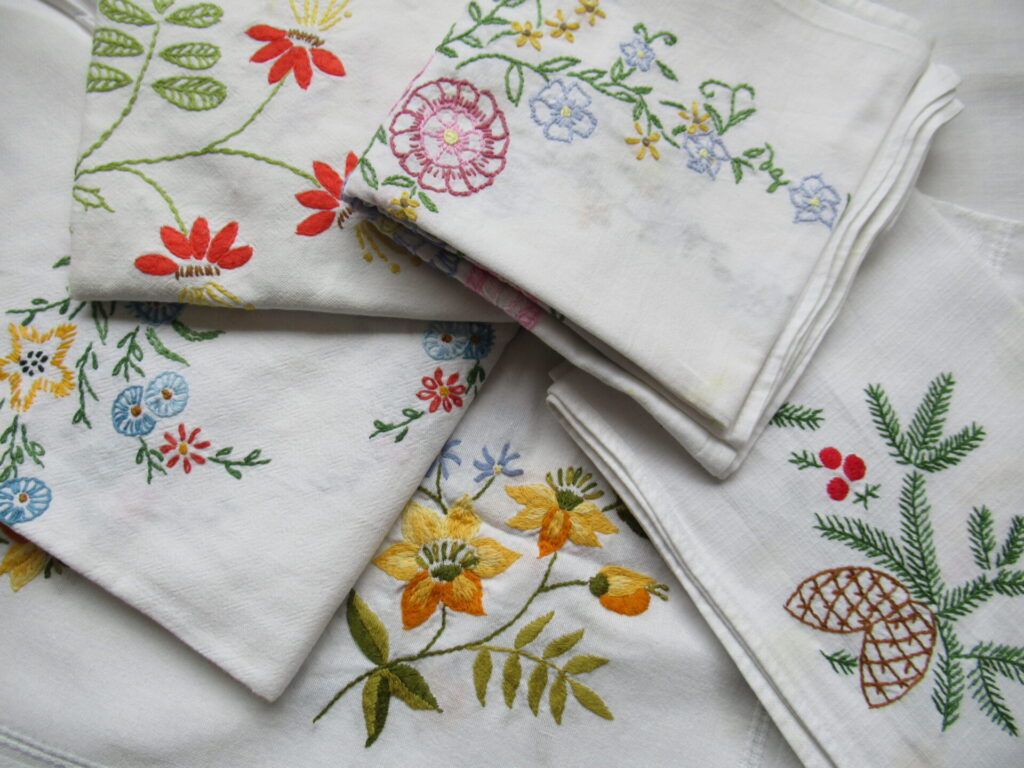
After this, she never did any counted cross stitch again. She did like embroidery, but of a different kind. She has made many, many colourful table cloths embroidering over pre-printed patterns.
Still, although Mum didn’t enjoy doing cross stitch, the sampler must have been special to her. After WWII, in the early 1950s, the family (minus one daughter who was already married) emigrated to Australia, hoping for a better life.
My Mum’s fiancé (later my Dad) came with them, but couldn’t acclimatize. And several years later my Mum and Dad came back to the Netherlands, with just one suitcase each holding all of their earthly possessions. The embroidery sampler must have been in her suitcase, travelling all the way to Australia and back again. An extraordinary story about an ordinary sampler.
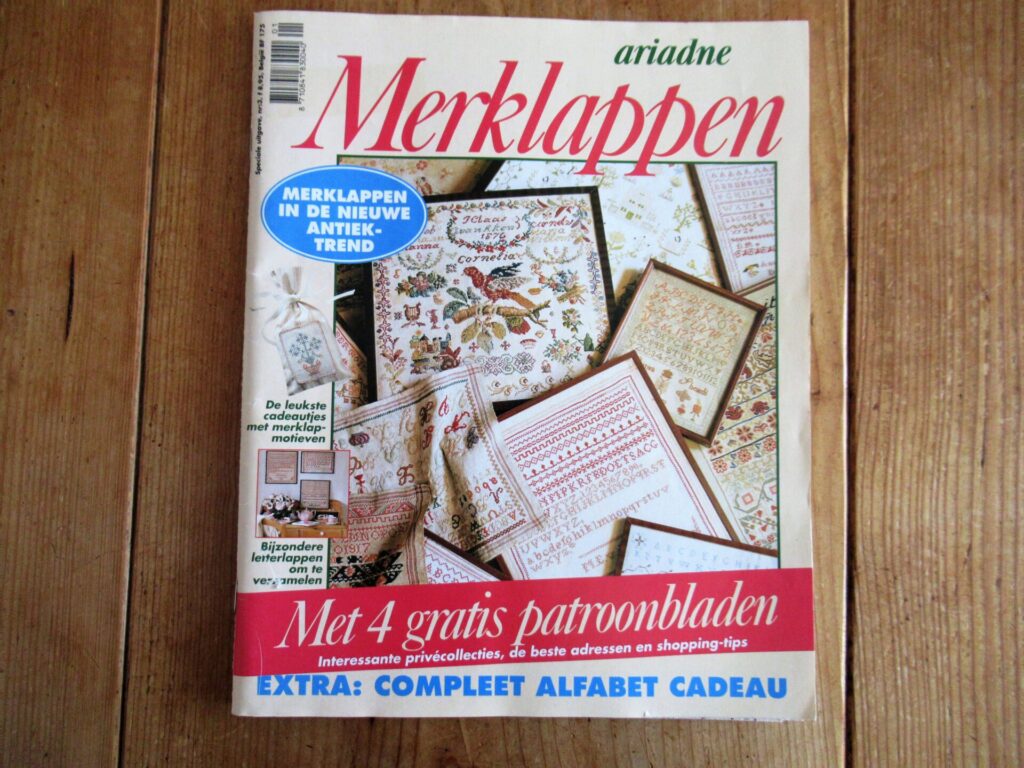
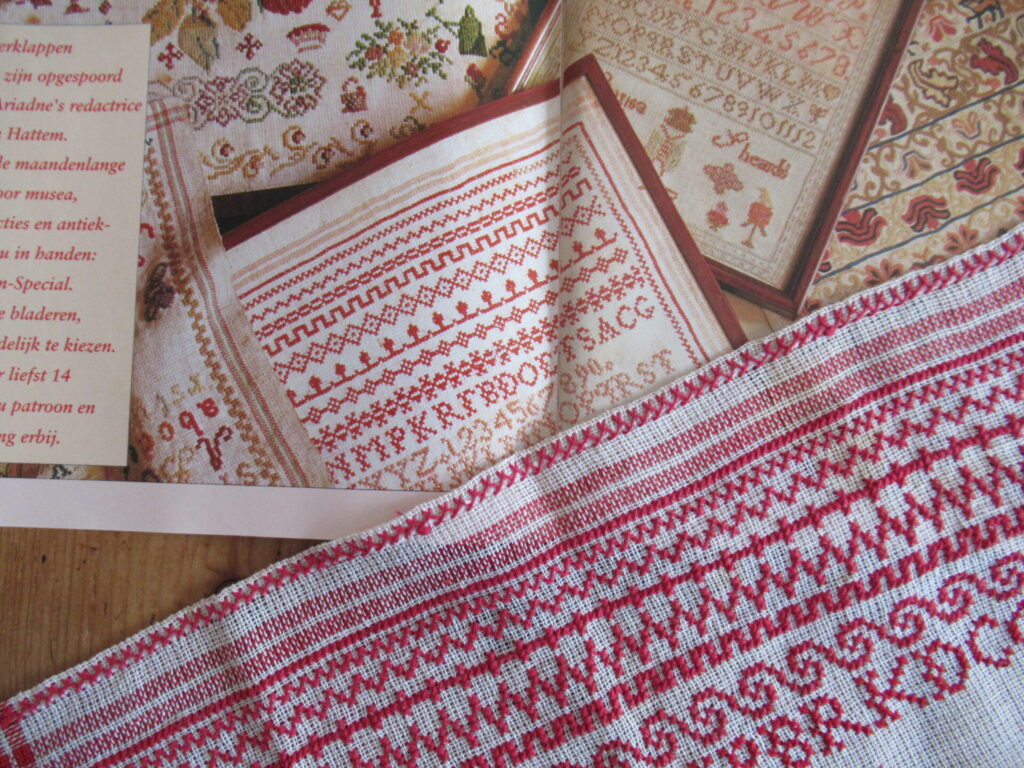
I have an old magazine packed with pictures and patterns of embroidery samplers.
There are many much more elaborate samplers in it, but also several school samplers. Here is Mum’s sampler next to one in the magazine. Same kind of letters, same kind of decorative borders.
And here are three similar ones framed on a wall. They are almost always embroidered just in red thread, with a few exceptions using blue as well as red.
I’m thinking of having Mum’s cleaned and framed now, too.
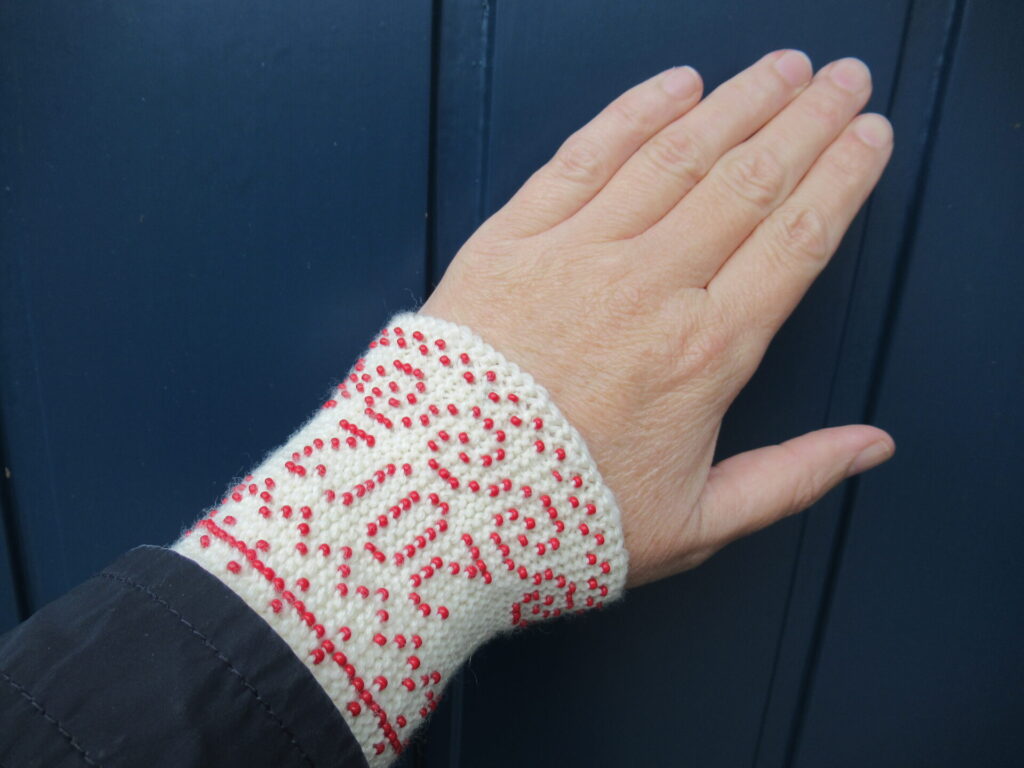
Years ago, I knit a series of beaded wrist warmers…
…including a pair inspired by the embroidery sampler. One of them with my initials, and the other with the year I made them on it.
They are nice accessories that keep the wind from blowing up my sleeves when I’m riding my bicycle.
I’m now working on a project incorporating elements from both the knitting sampler and the embroidery sampler. More about that in a few weeks’ time, I hope.
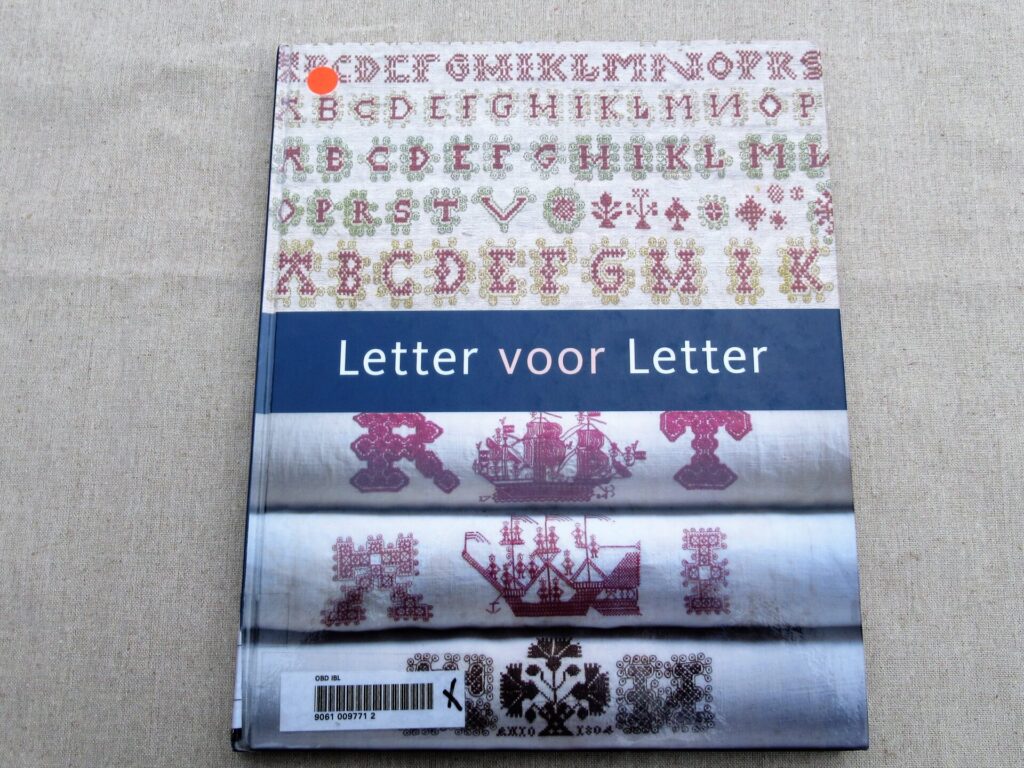
For those of you who’d like to know more, this is THE book on Frisian embroidery samplers:
Letter voor Letter was written by Gieneke Arnolli, the now-retired Fashion and Textiles curator of the Fries Museum in Leeuwarden, and Rosalie Sloof. It contains loads of information, many beautiful photographs, an English summary, and a complete fold-out pattern for a sampler. It is out of print, unfortunately, but there are some second-hand copies around, and it can still be borrowed from Dutch libraries.
The Fries Museum has a collection of over 600 samplers from the 17th to the 20th Century. A large part of the collection can be viewed on the website friesemerklappen.nl. A wonderful source of information and inspiration. Most examples of red school samplers like my Mum’s can be found on pages 6 and 7 of the website.
Click on the button ‘Alle merklappen’ for an overview. Zoom in on the samplers by holding the Ctrl key and scrolling simultaneously, or by holding the Ctrl key and using the + to zoom in and – to zoom out. Be amazed and have fun!
Hello again, and thank you for your ideas, both on and offline, about last week’s grey yarn. More about that project soon, but today’s blog post is about something completely different.
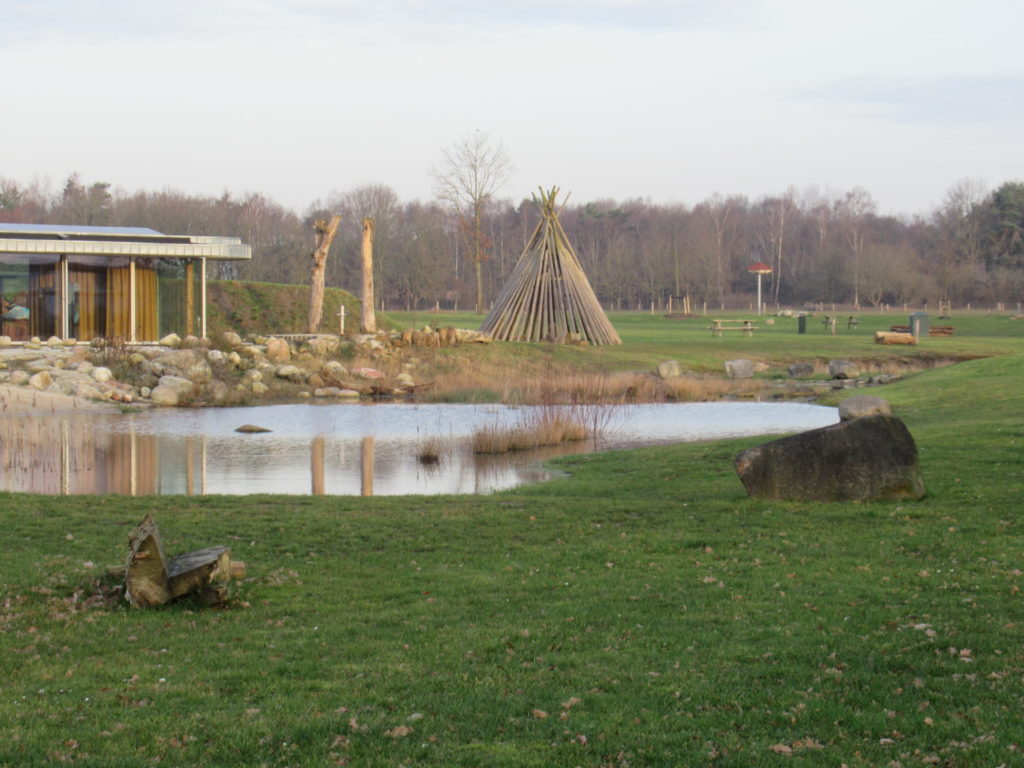
If you’ve been reading my blog for a while, it won’t come as a surprise that making things is an important part of my life. It’s usually something to do with yarn or wool, but I also enjoy excursions into other mediums now and then. Recently I spent a Saturday morning at a nearby visitor centre (above) making something with clay.
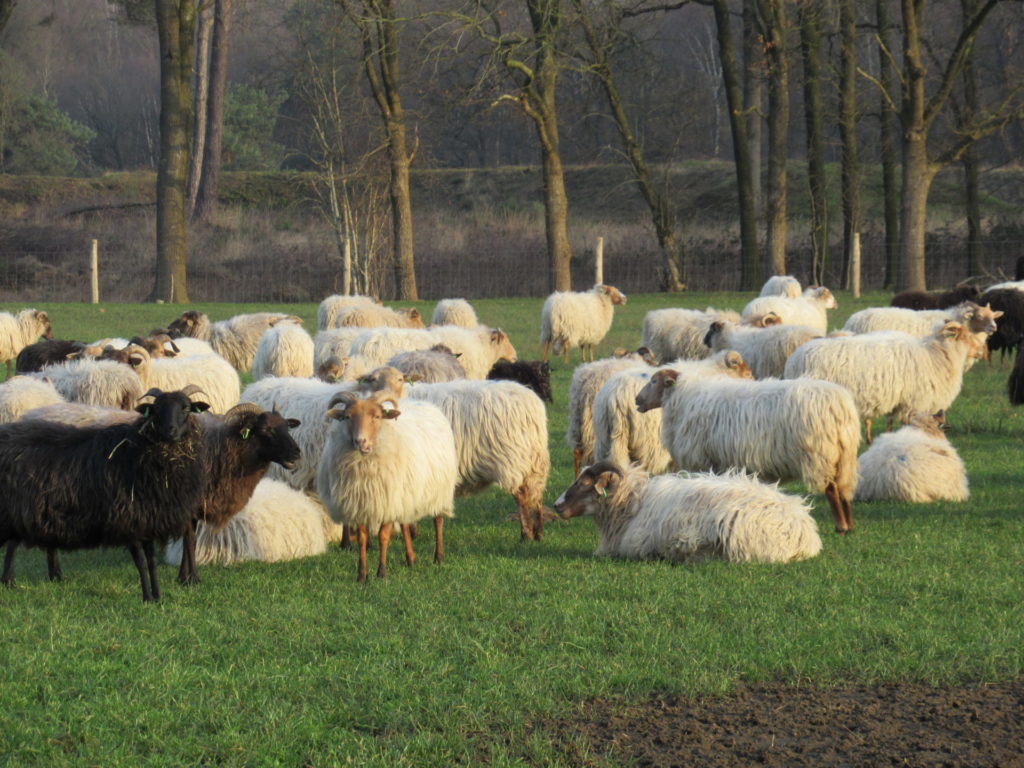
The visitor centre is in the same area where I once had an interesting chat with a shepherd. It is, in fact, next to the sheep fold, so I arrived a little early to say hello to the sheep. Good morning!
The sheep didn’t answer, but quietly kept munching grass and hay before starting their daily walk on the heath.
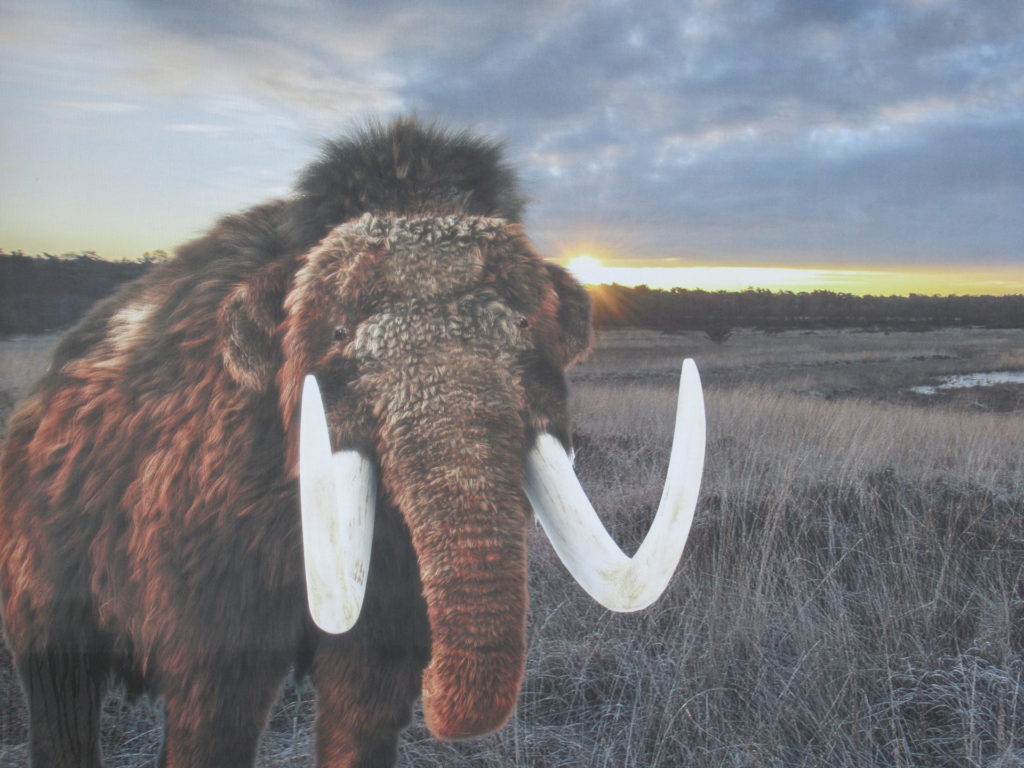
Walking on, I ran into this big guy (or gal). Whoa!
Fortunately it was just a print on a big banner on the outside wall of the sheep fold.
I’m not just including this photo here for fun, but also because this morning was about going back in time. Not quite as far back in time as this mammoth, but almost. Wikipedia tells me that the mammoth died out around 4,000 years ago. On this Saturday morning, we were going back to the funnel beaker culture, which started here around 3,400 years ago.
The morning began with a short talk about the people who became known for their funnel-neck pots, but also made pottery in other shapes. They were not the first inhabitants of this area, but they were the first farmers, and thousands of shards of their pots have been found around here. They are also the people who built the dolmens and tumuli that are still visible in our landscape today.
Well, I can’t tell you everything I’ve learnt, but I can tell you that it was fascinating.
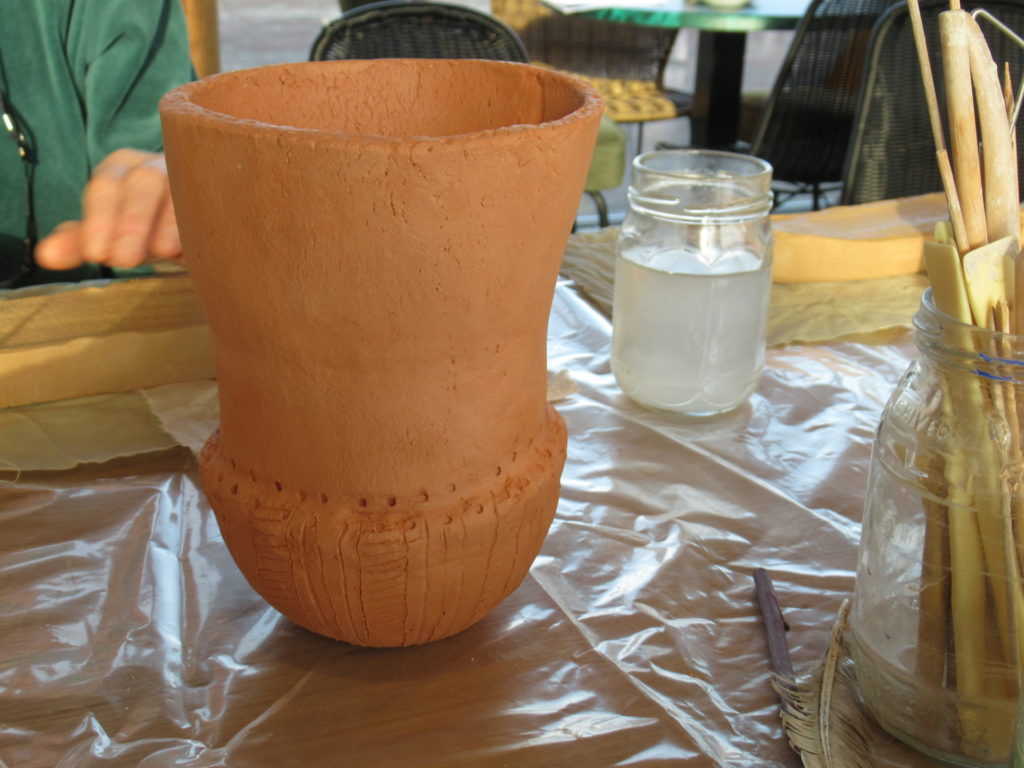
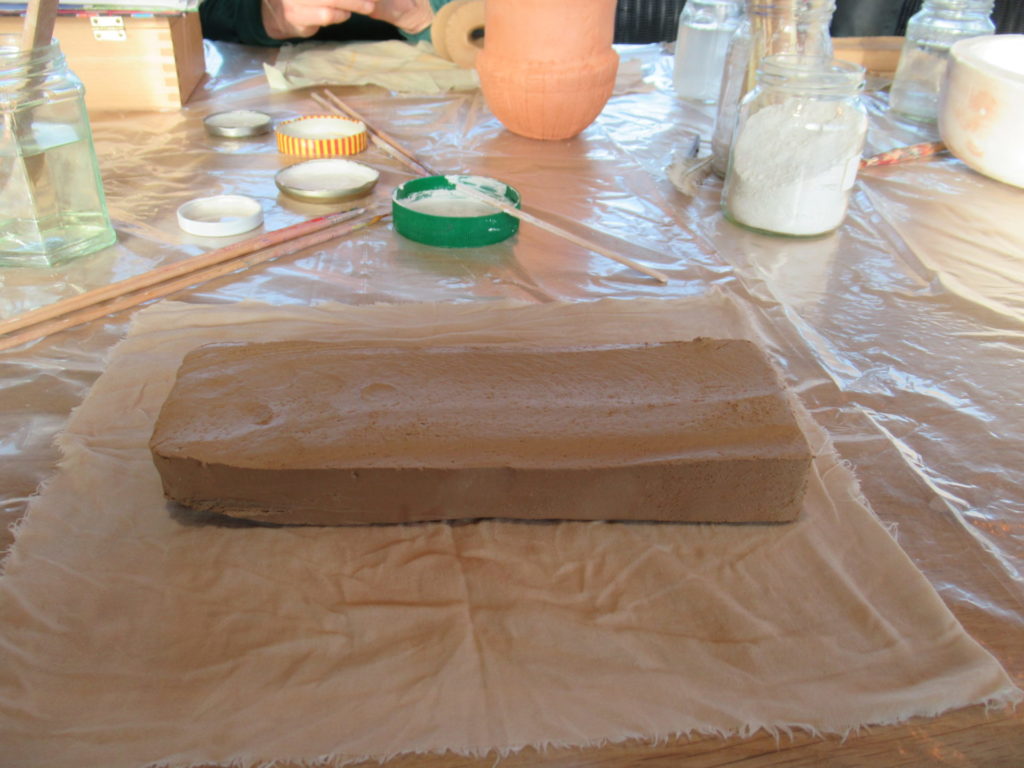
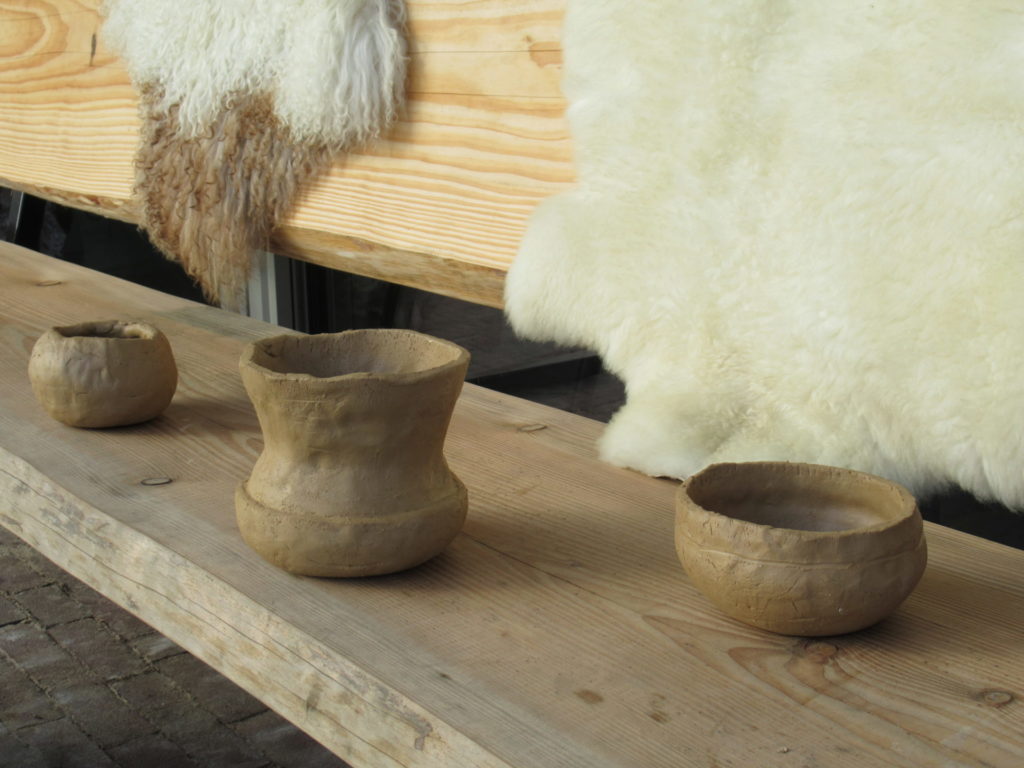
Then it was time to roll up our sleeves and make a funnel beaker ourselves. The artist who gave the workshop had made two examples. This is one of them:
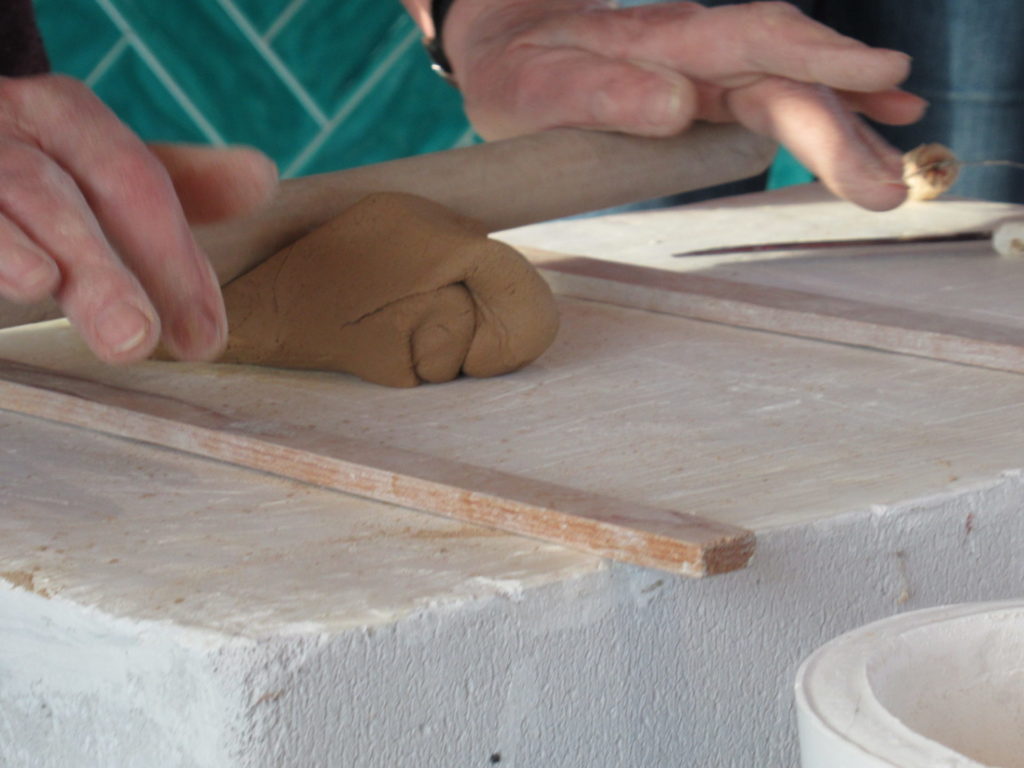
Unlike the original funnel beaker makers, we didn’t have to travel a long way to find the right kind of river clay for our pots. We were given a slab of a similar clay…
… and started by rolling it out.
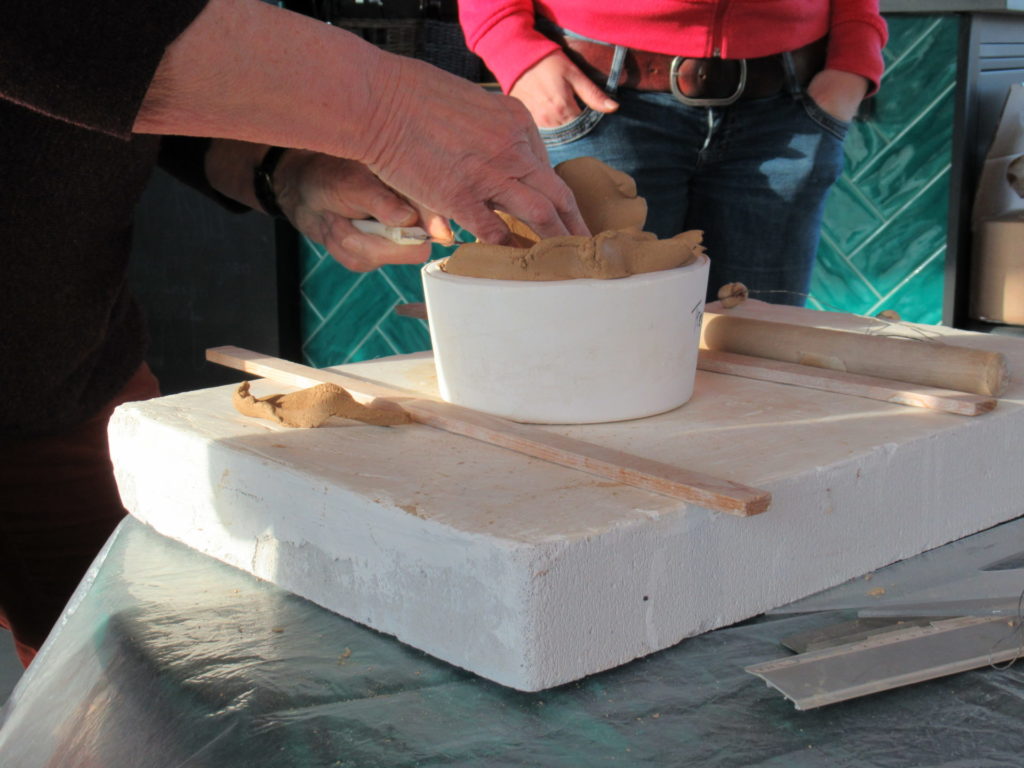
Originally the base would have been shaped by hand, and that’s what some of the more experienced participants also did. For those of us with little or no experience (like me) there were moulds to use.
My neighbour at the table was more experienced and had shaped her beaker in no time.
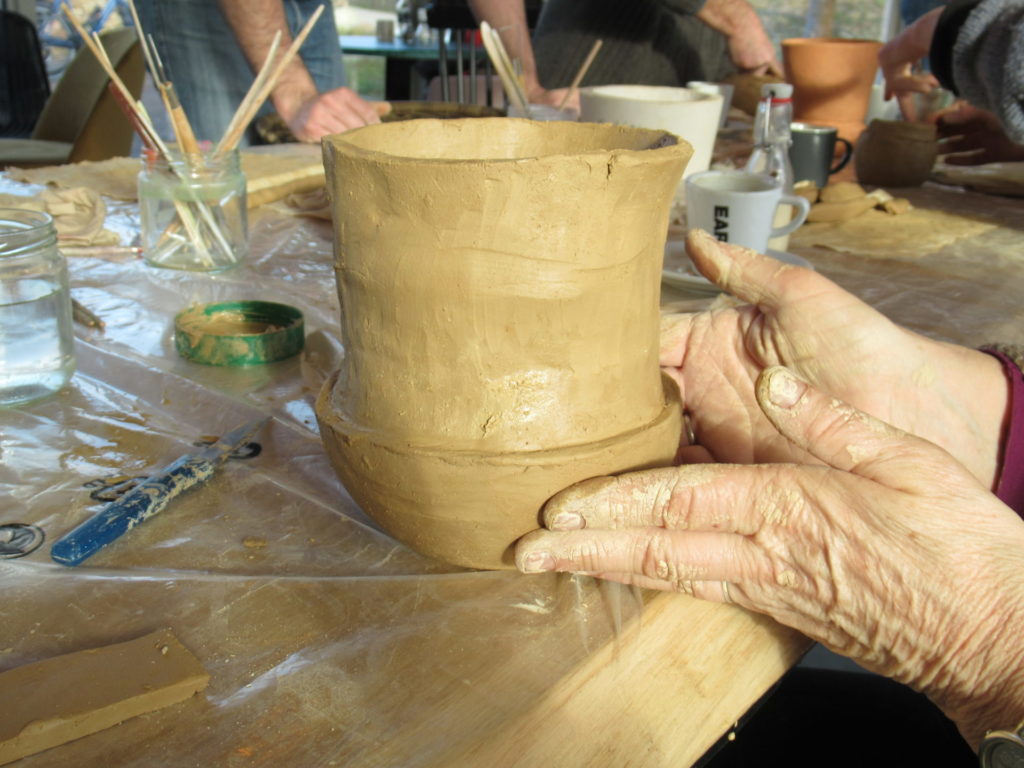
I used too much water to ‘glue’ the next layer onto the base and had to place the beginnings of my pot on a bench outside to dry a little before I could continue, next to those of two other beginners. Mine is on the right.
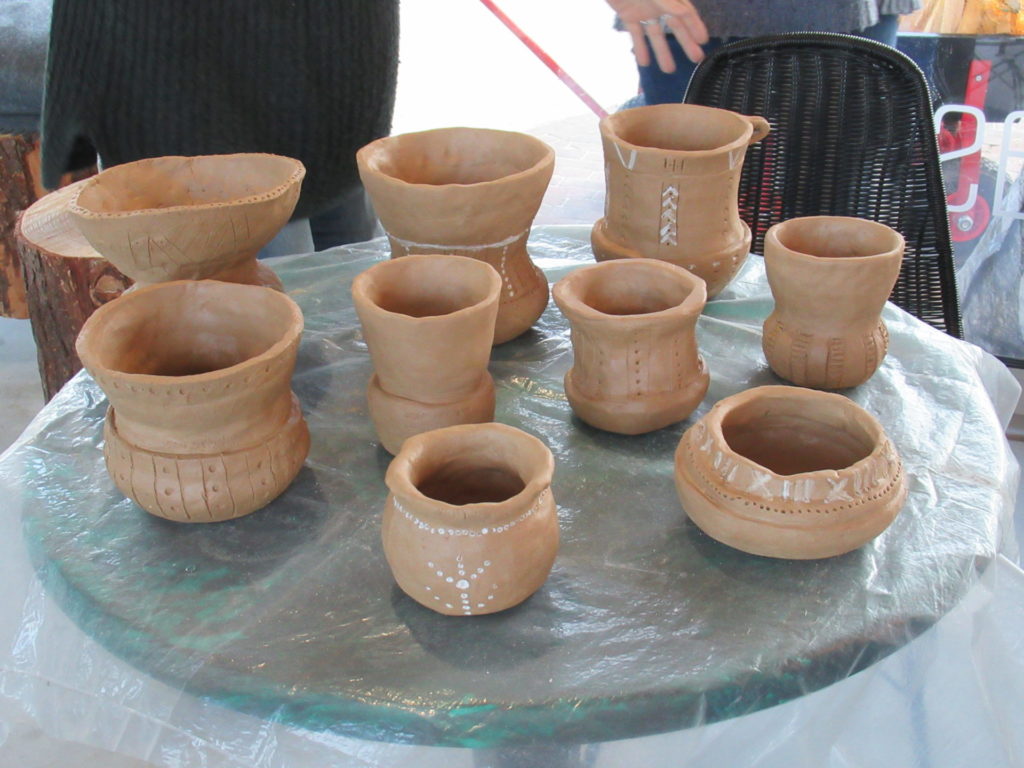
Several hours later we had all made something that looked more or less like a funnel beaker. Some of the pots were fairly small, like the ones that would originally have been used to store seeds. Others were a lot bigger, like the ones used to hold water or as cooking pots.
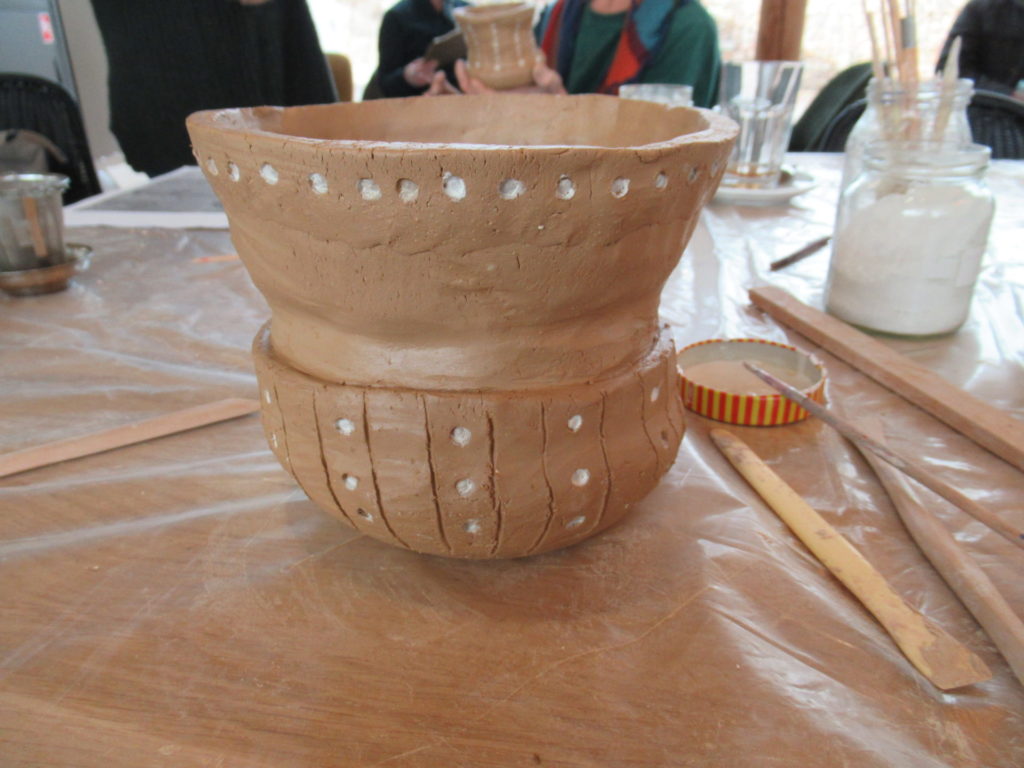
The pottery shards of the funnel beaker culture found around here are often richly decorated. In the past, people used feathers, pieces of wood or bone and their fingernails to make the decorations. I used a spatula for the lines and a stick for the dots on my pot.
It was while I was carefully pressing my stick into the soft clay to make dots, that I suddenly felt transported back a few thousand years. In my mind, I was sitting outside, in front of a wattle and daub dwelling, decorating my pot. There was a piercing wind, but dressed in animal skins, I didn’t feel the cold. I could hear sheep bleating and pigs grunting, and I could smell the sweet smell of the cows grazing nearby. I was looking forward to our meal of lentils and foraged greens. Life was hard and uncertain, but it also had its good moments.
Fast forward to the present, I finished my pot by adding a few details in white. Originally a substance made from ground bones and some kind of binder would have been used, but we used a modern paint of which I’ve forgotten the name.
Now my funnel beaker is drying in the artist’s studio, waiting to be fired in her kiln. It should be a soft rosy colour when it comes out. I’m really looking forward to seeing how it’s turned out.
Links:
The talk about the funnel beaker culture was held by someone from the Oermuseum, a small but interesting museum with archaeological finds and information about how people lived and worked in the north of the Netherlands from the last ice age to the iron age.
The artist who kindly and expertly taught us how to make a funnel beaker was Elisa van den Berg.
A knitter can’t live without baskets. At least, that’s what I think. There are baskets dotted all around our house, filled with knitting projects, yarn, unspun wool, more yarn and more knitting projects. Some of these baskets were made by Jannie, a basket weaver I often run into at fairs, markets and sheep shearing festivals. This summer I discovered that she doesn’t only make baskets, but also teaches others how to make them, and I entered my name for a workshop.
I asked a friend (who also knits and spins) if she’d like to join me. She said, ‘I’d love to!’, and together we set off early last Saturday.
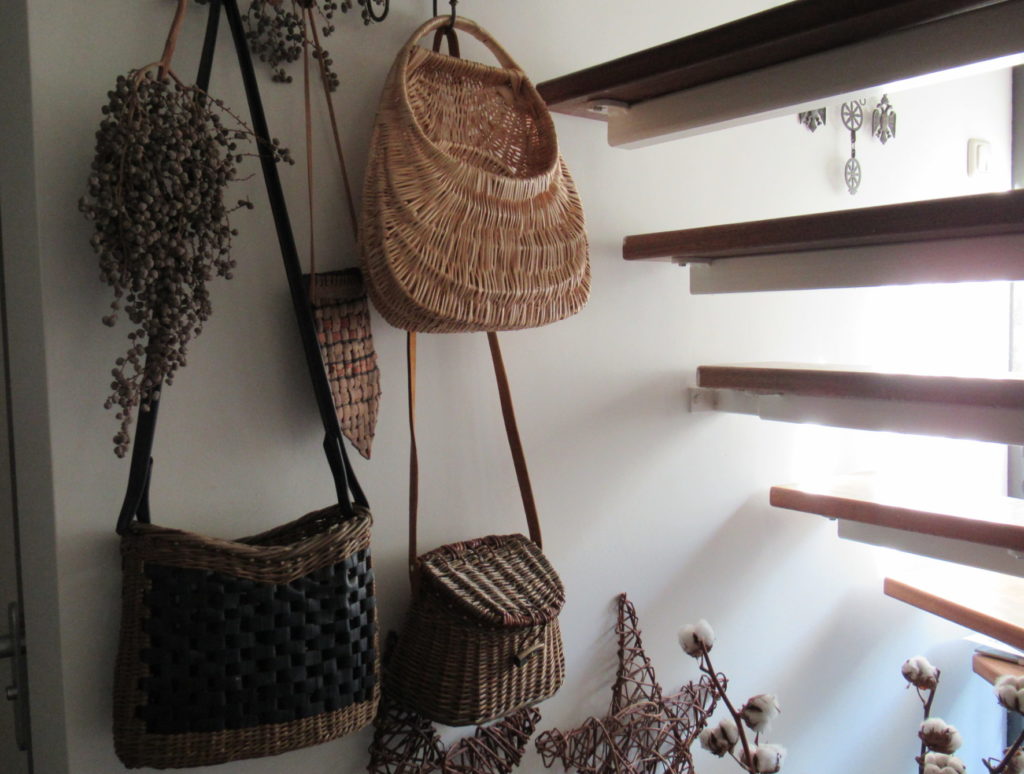
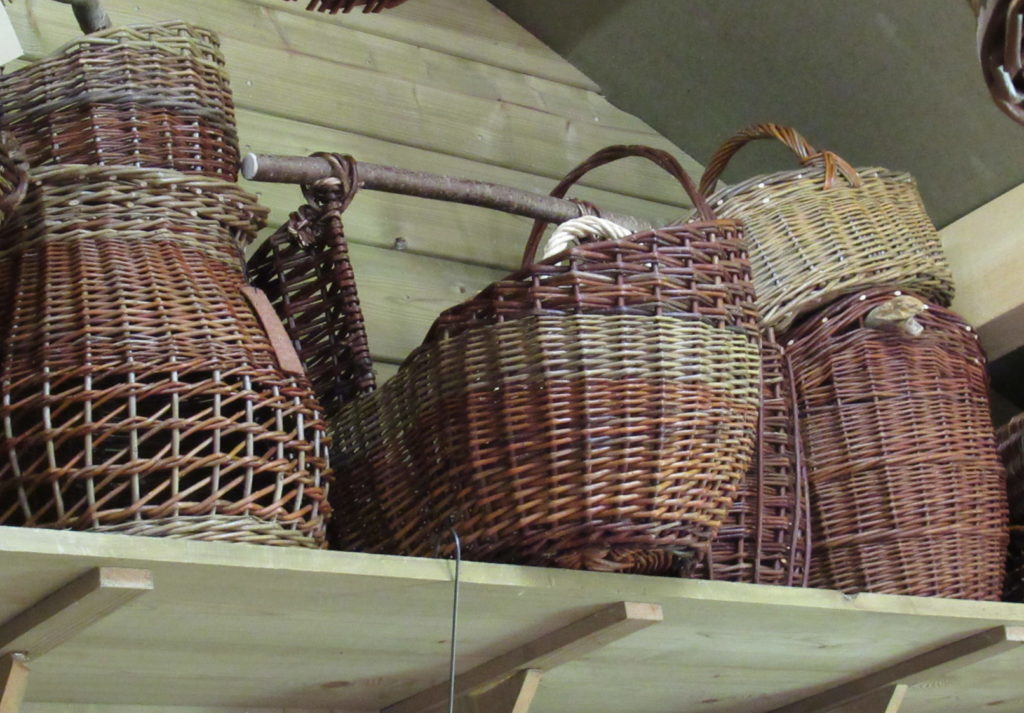
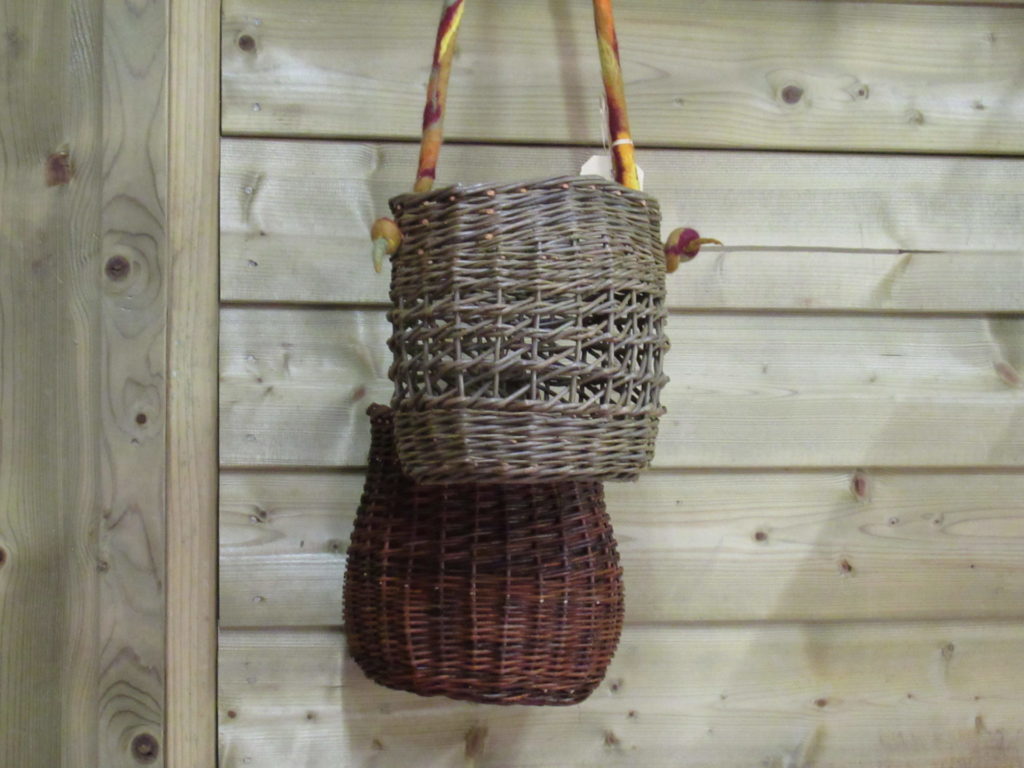
As soon as we arrived, we were surrounded by baskets. Baskets hanging under the stairs.
And baskets stacked high on shelves.
There were small, fairly simple looking baskets.
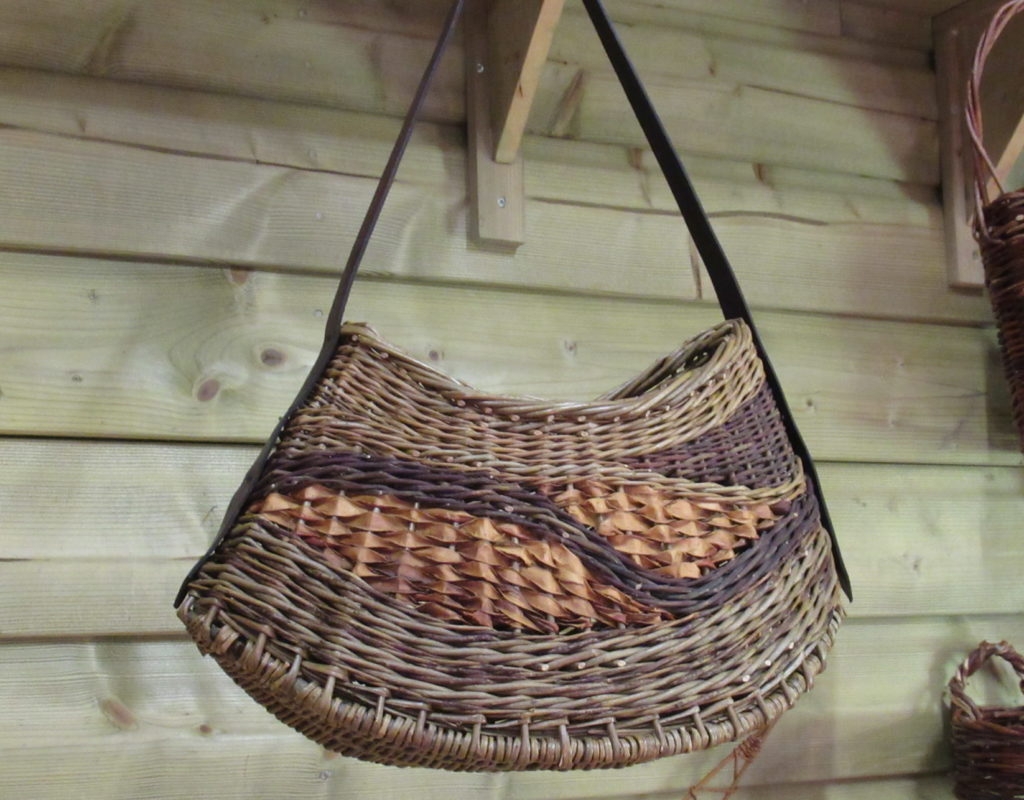
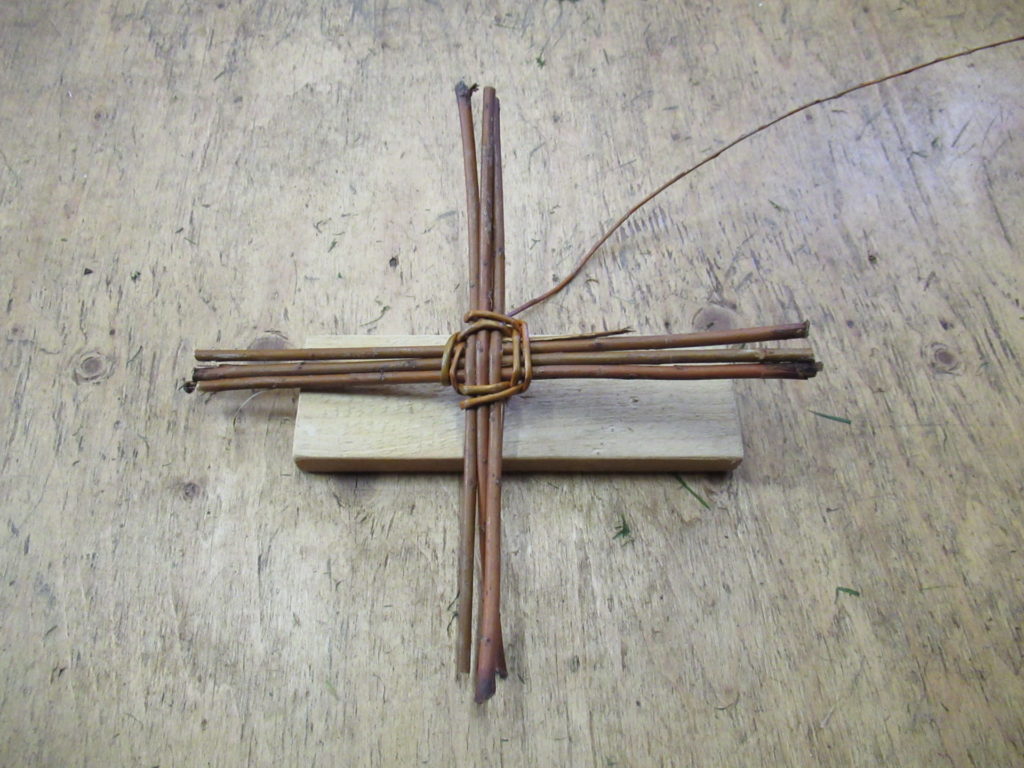
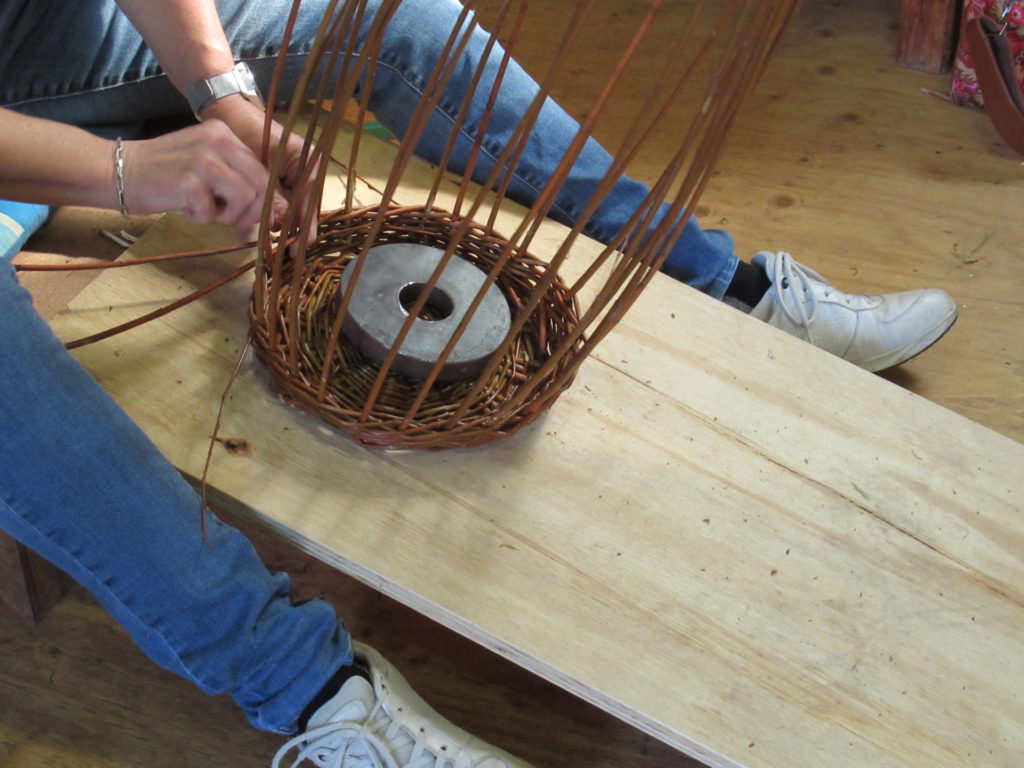
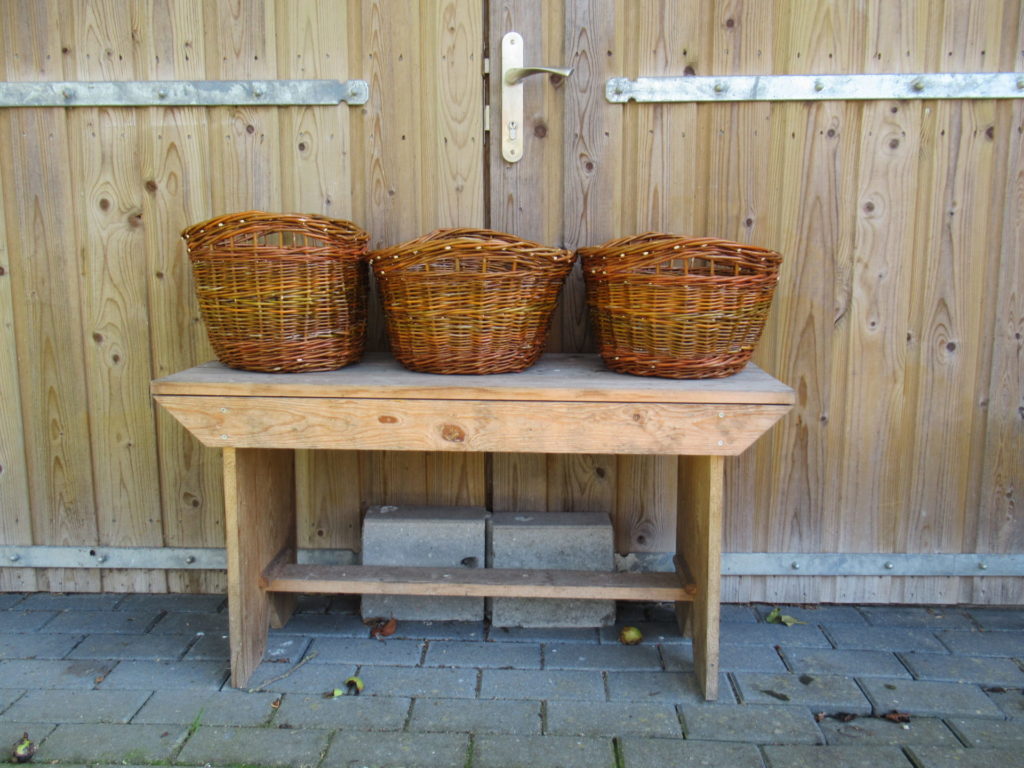
And bigger, very complicated looking baskets. (The picture at the top of this post is a close-up of the basket below).
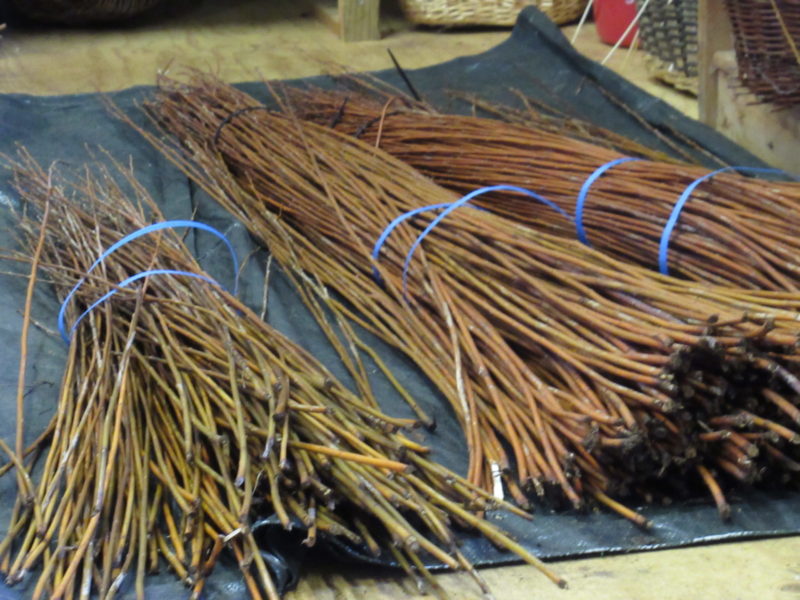
Something like this would be way too difficult for a first effort, of course. What we were going to make, was a round, medium-sized basket with handles. And this is the material we were going to use:
Willow shoots, or osiers. These were sorted by thickness and length and pre-soaked for about 10 days.
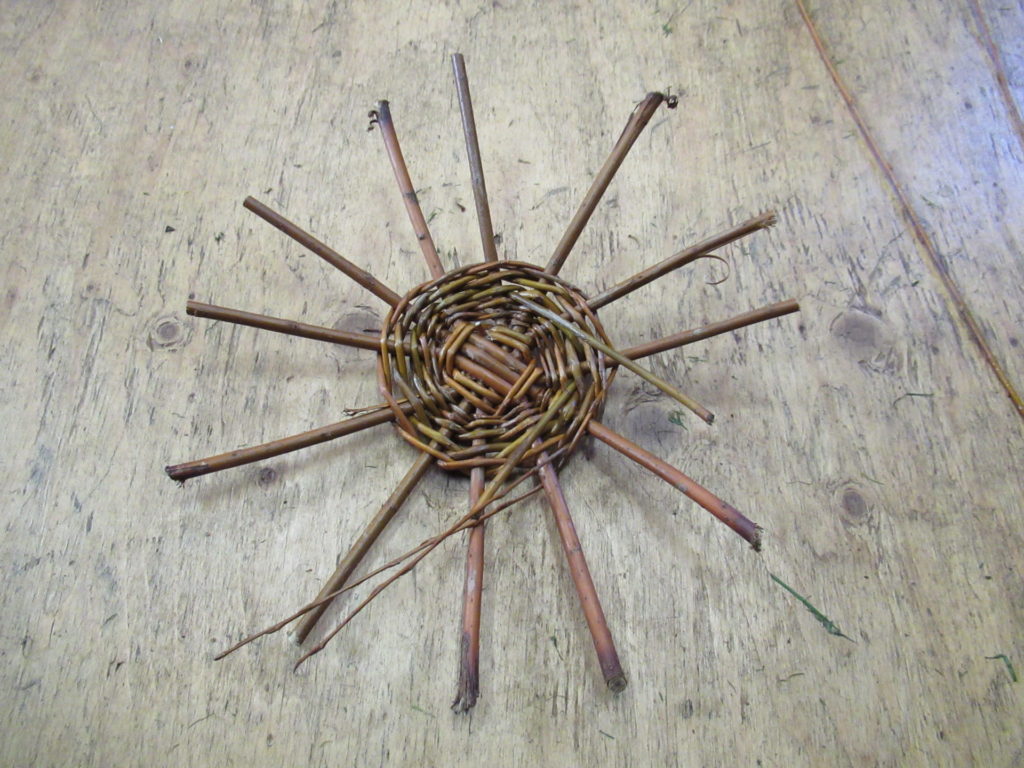
We started by slitting three thick pieces of osier in the middle and threading three others through them. With a thinner shoot we started weaving the base.
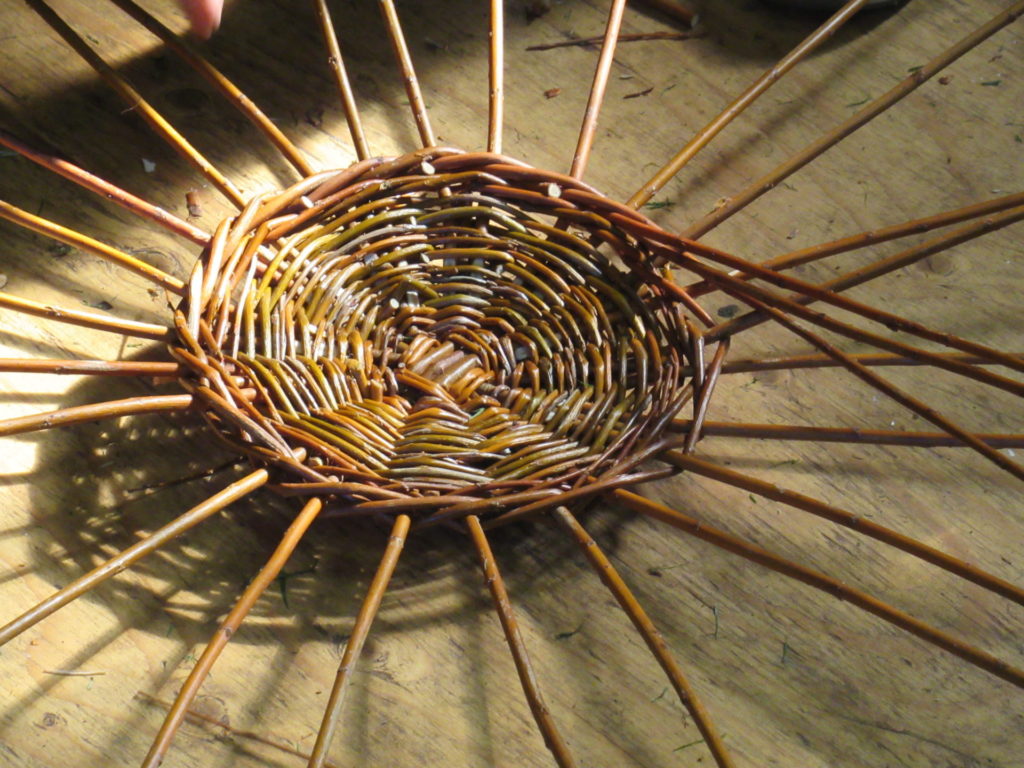
We continued weaving, while separating the spokes, until it was a reasonable size.
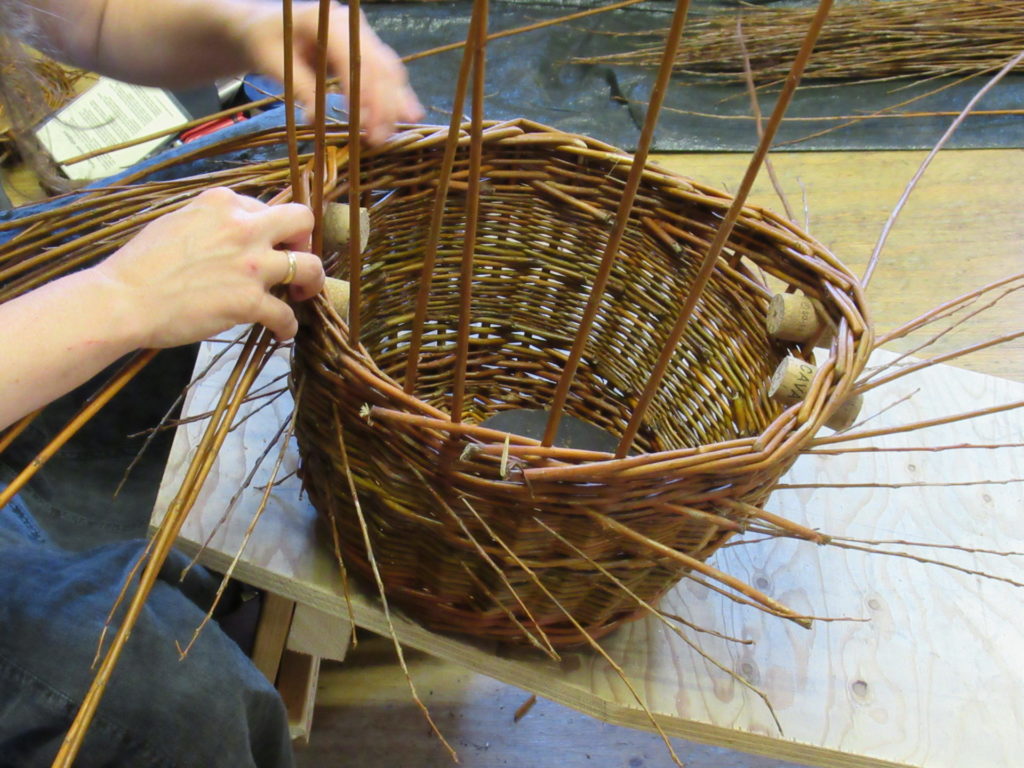
Then we cut off the starter shoots, stuck 24 new long shoots into the base, and added a few rows in a different ‘stitch’ as I would call it as a knitter. I have no idea of basket weaving terminology, but I looked it up, and I think the last few rows in the photo below are called a ‘randing’. They make for a firm base.
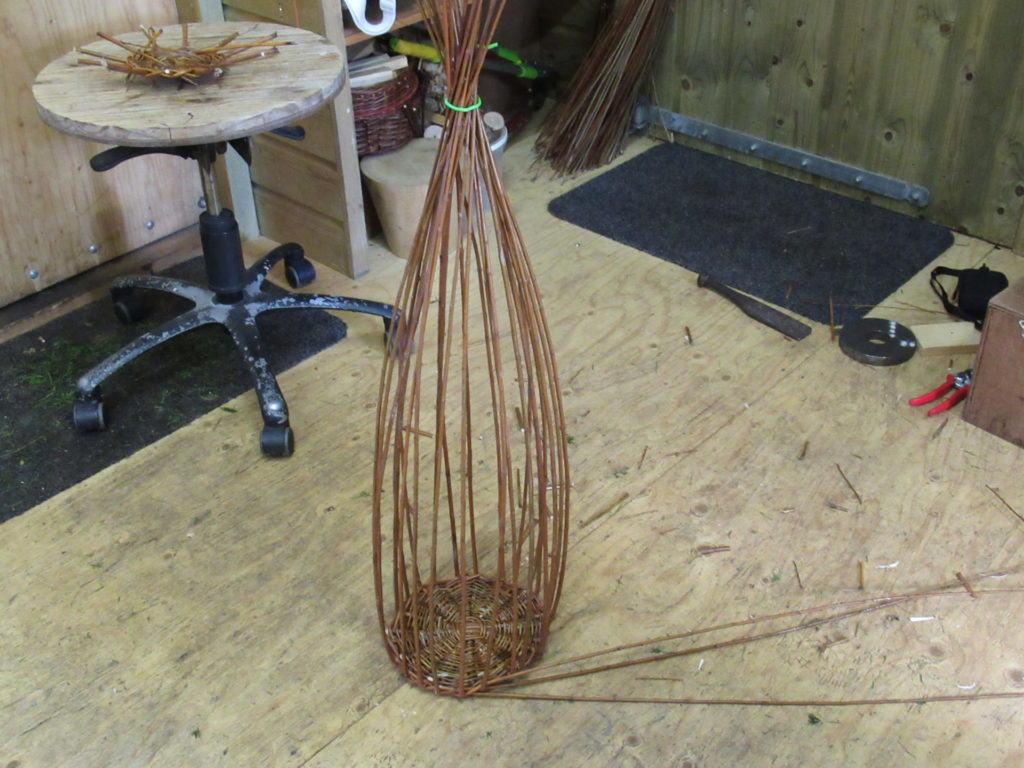
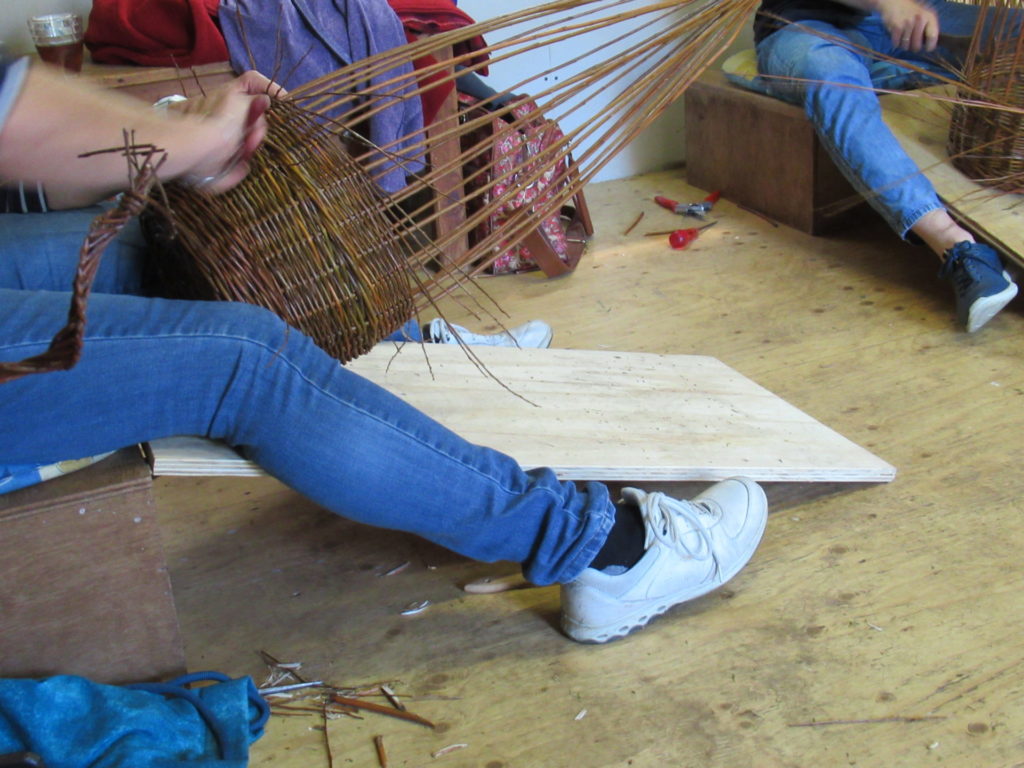
Now it was time to bend the shoots upwards. They were tied together near the top, to keep them out of the way and pointing in the right direction. The 3 shoots you can see sticking out on the floor, are the ones we were going to continue weaving with.
We were sat on low wooden benches, with a sloping wooden work surface attached to them. At this stage, a heavy weight was placed inside the basket in progress, to keep it from sliding down the work surface.
Phew, basket weaving is hard work! In need of a short break, I stepped outside. It was a lovely, sunny morning, and the garden around the basket weaving shed was idyllic.
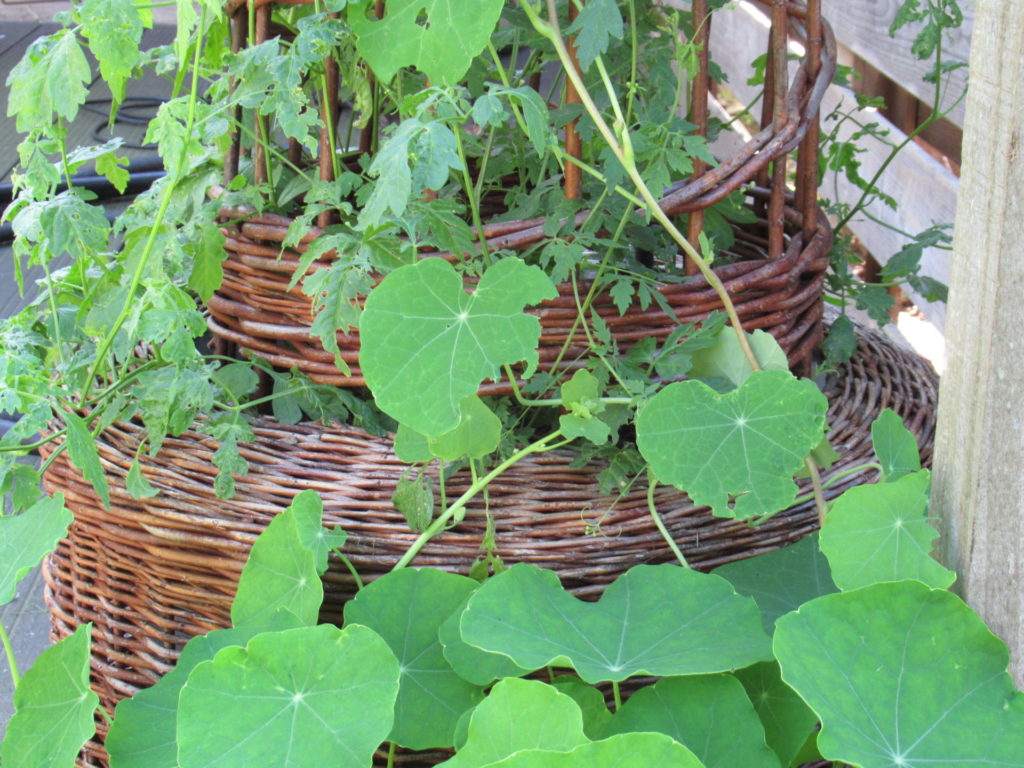
Even outside there were basket-like decorations and structures everywhere, overgrown with plants.
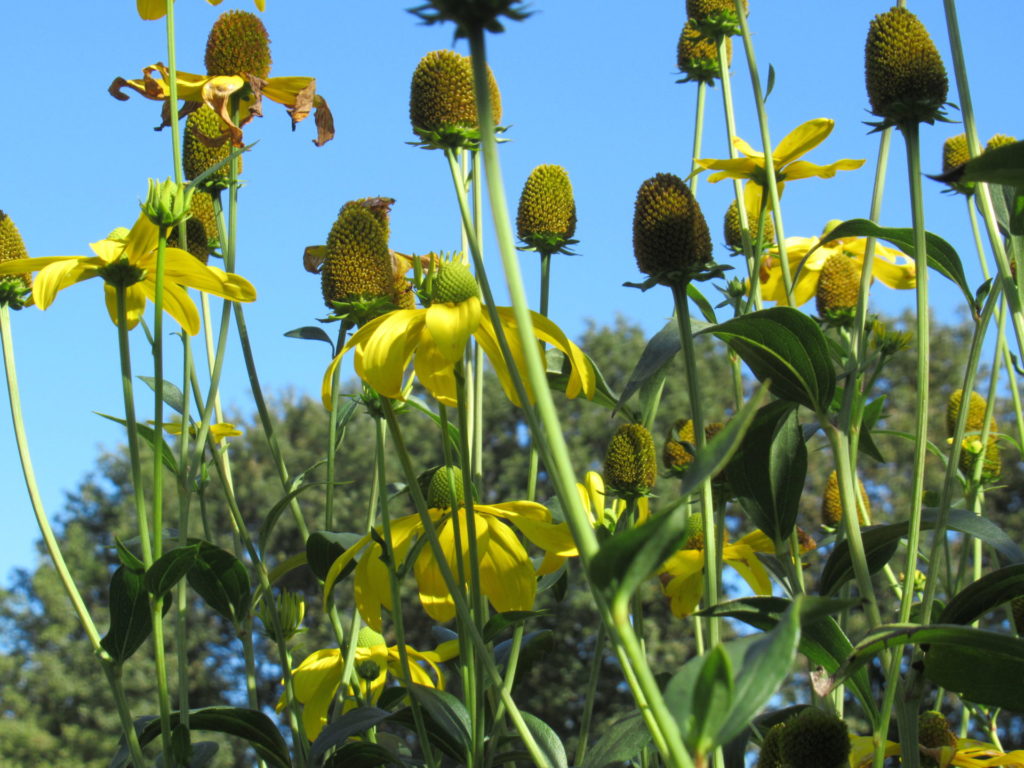
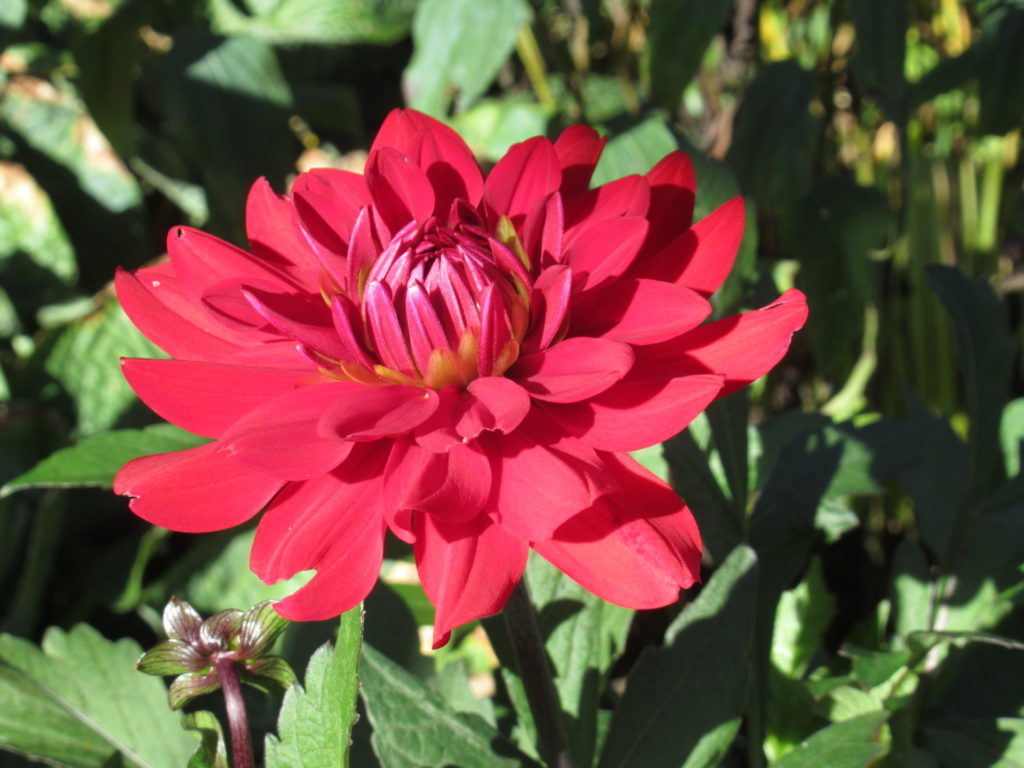
The chickens (and a guinea fowl) were making soft, clucking noises. There were literally heaps of courgettes and tomatoes on the patio, and there were some gorgeous dahlias in bloom.
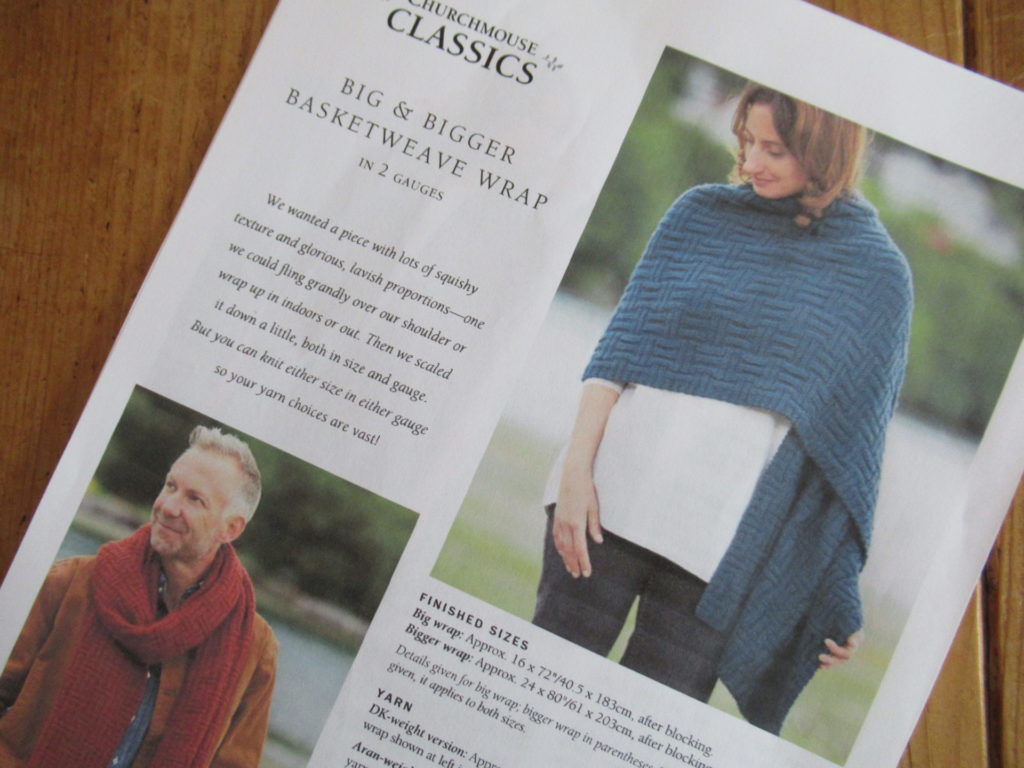
The same week I went basket weaving, I won a knitting pattern on Ravelry. Although ‘won’ isn’t the right word for it, perhaps. All I did was chat with other knitters about the things we were making and post some pictures. But still, my name was drawn and I received a digital pattern for a big, cosy wrap in a basketweave pattern.
Wasn’t that a nice coincidence? I’m really tempted to cast on straightaway, but I already have so many other plans for the coming months. I think I’ll keep it till later.
Well, after this short break I’m ready to get back inside. Are you coming?
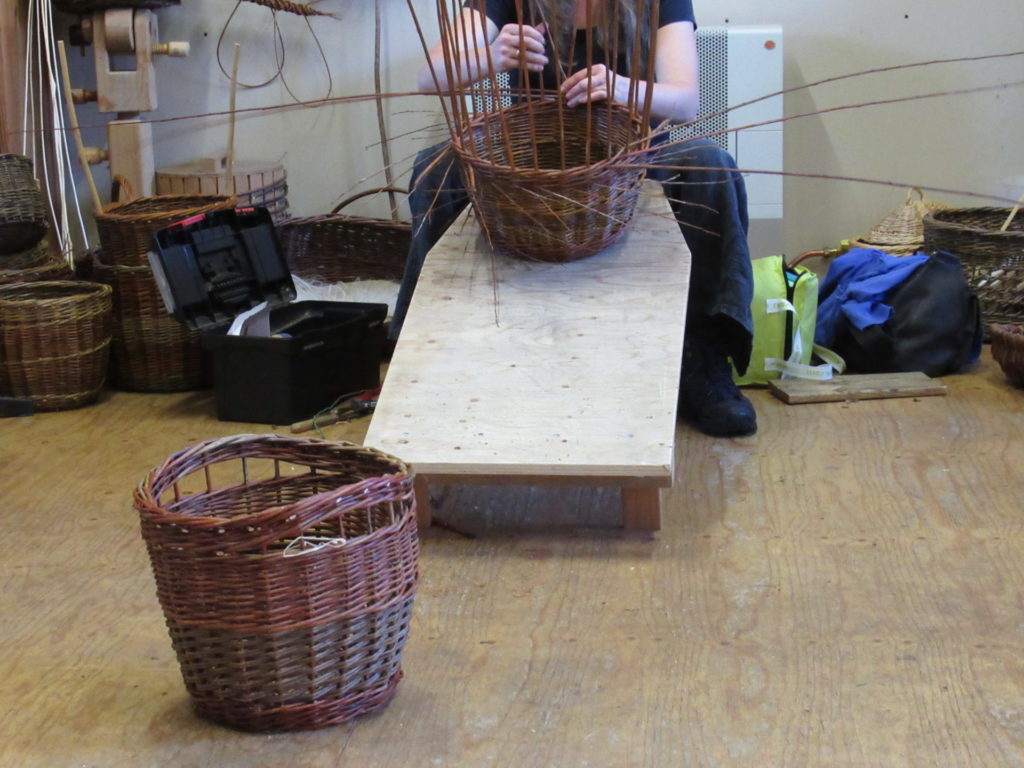
It’s already starting to look like a real basket.
Our example was placed in the middle of the room for inspiration.
Using champagne corks we made even spaces for the handles.
After braiding a sturdy rim and snipping off all the ends sticking out, our baskets were finished. And here they are – tadaah!
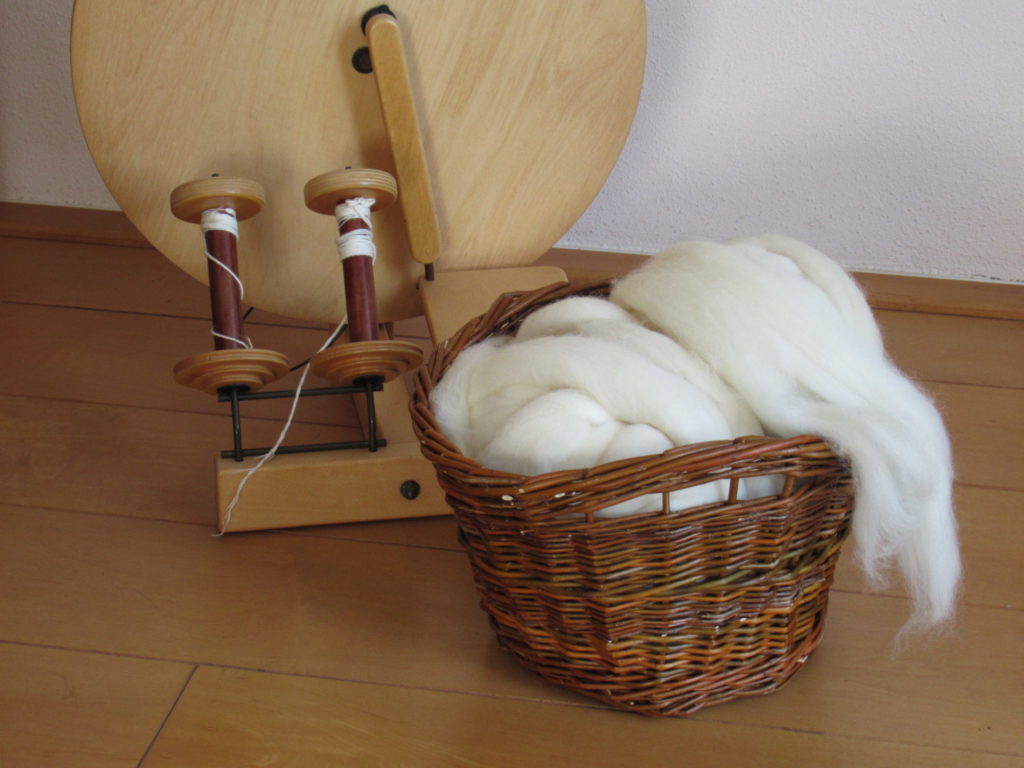
And here’s mine at home, filled with some undyed Shetland roving. I’m so proud of my very first, slightly lopsided willow basket.
My friend and I made our baskets at Vlechterij Vinkenslag. Jannie is a very knowledgeable, friendly and patient teacher. Apart from teaching basket weaving, she sells her beautiful baskets, bird feeders and decorative ornaments at crafts markets and fairs.
On a day that was too hot for walking through woods or across heathland, we thought a walk along the coast might be a good idea, with hopefully a refreshing breeze. So we set off for my native Friesland. Our starting-point was the old town of Stavoren (photo above), and our destination was Hindeloopen, another small harbour town. (It was a one-way walk – we took the train back.)
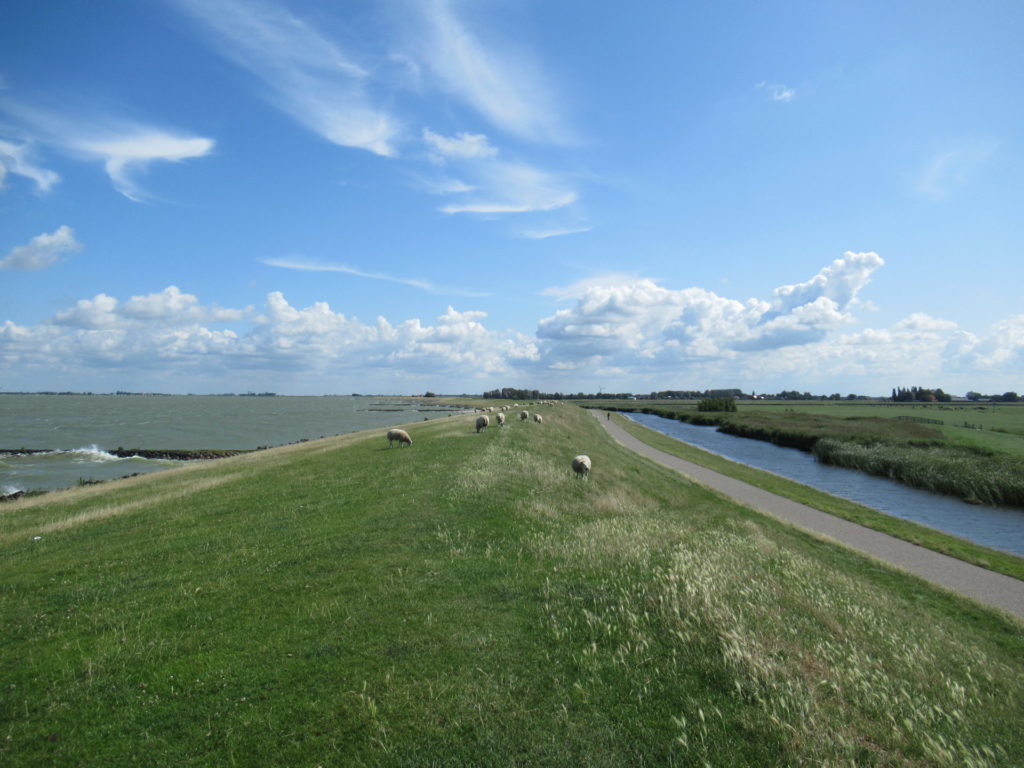
This isn’t the coast as in sea shore, but rather the coastline along the IJsselmeer, a former inland sea that was closed off around 1930 and is now a big freshwater lake. The dykes are still there, and our trail ran right across the top. Well, it wasn’t really a trail, just grass, but you get the idea.
In reality the dyke is much steeper than it looks here. The narrow road on the right is a bicycle track. Nice when you’re cycling, because it’s sheltered from the prevailing wind. But not much fun when you’re walking, because you’d miss the lovely views over the lake.
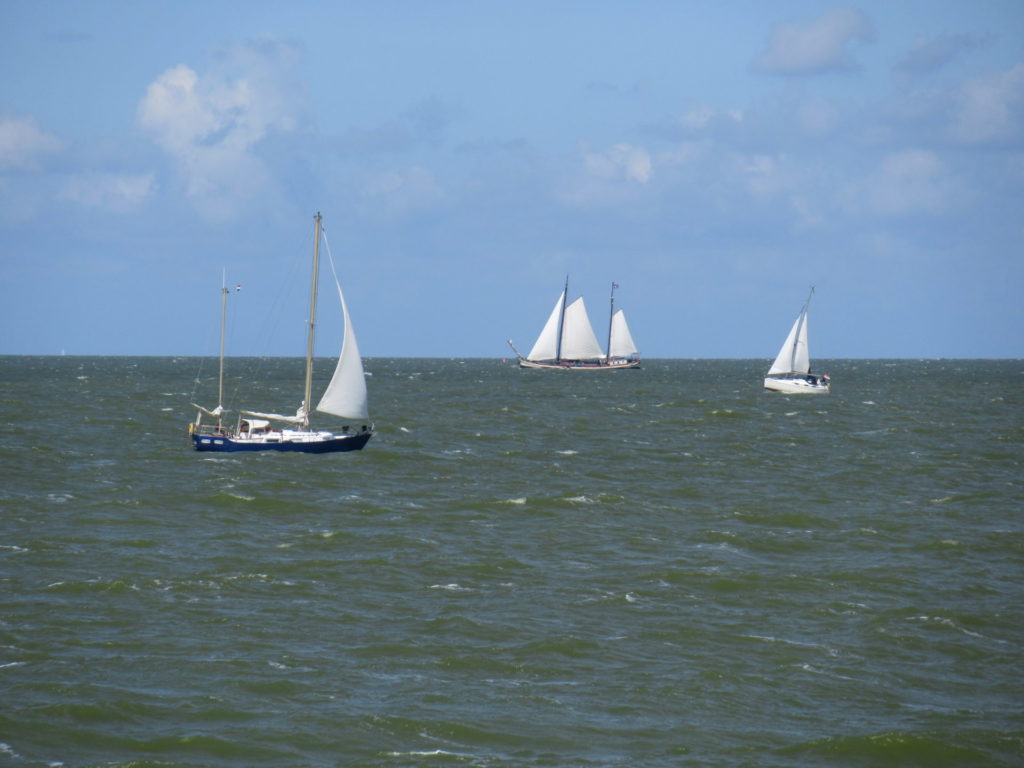
With a delicious breeze from behind it was an ideal day for this walk. Looking to the left, we saw a choppy lake with some sailing boats.
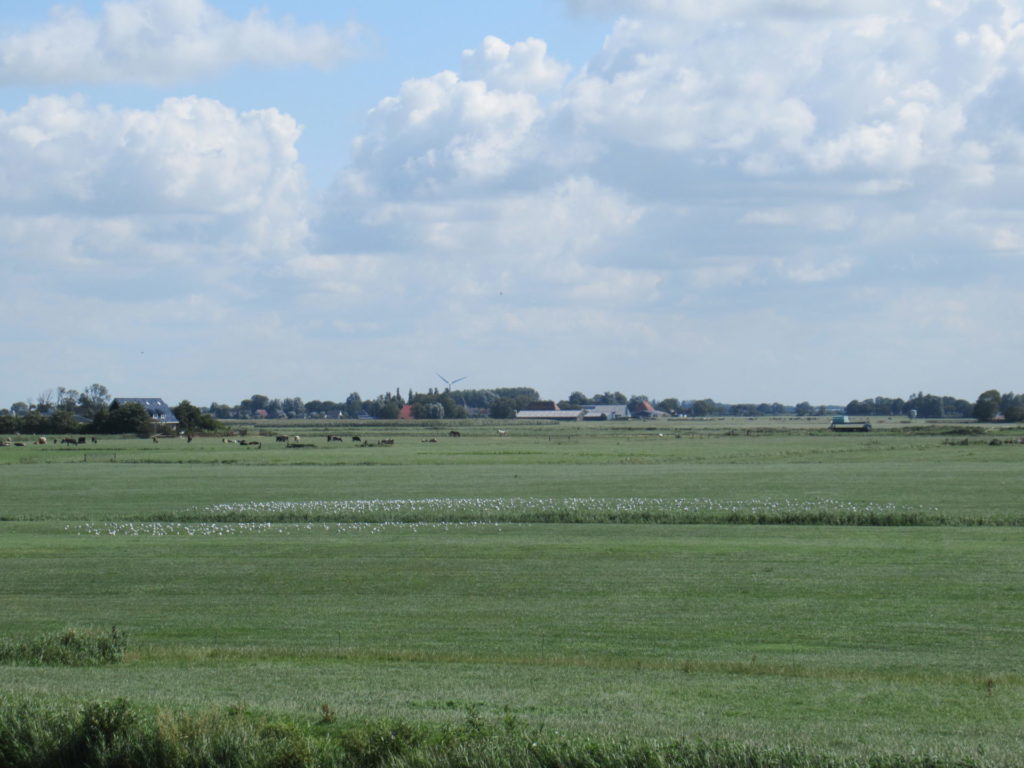
And looking to the right, we saw agricultural land, with some farms and modern windmills. Completely flat, with endless horizons.
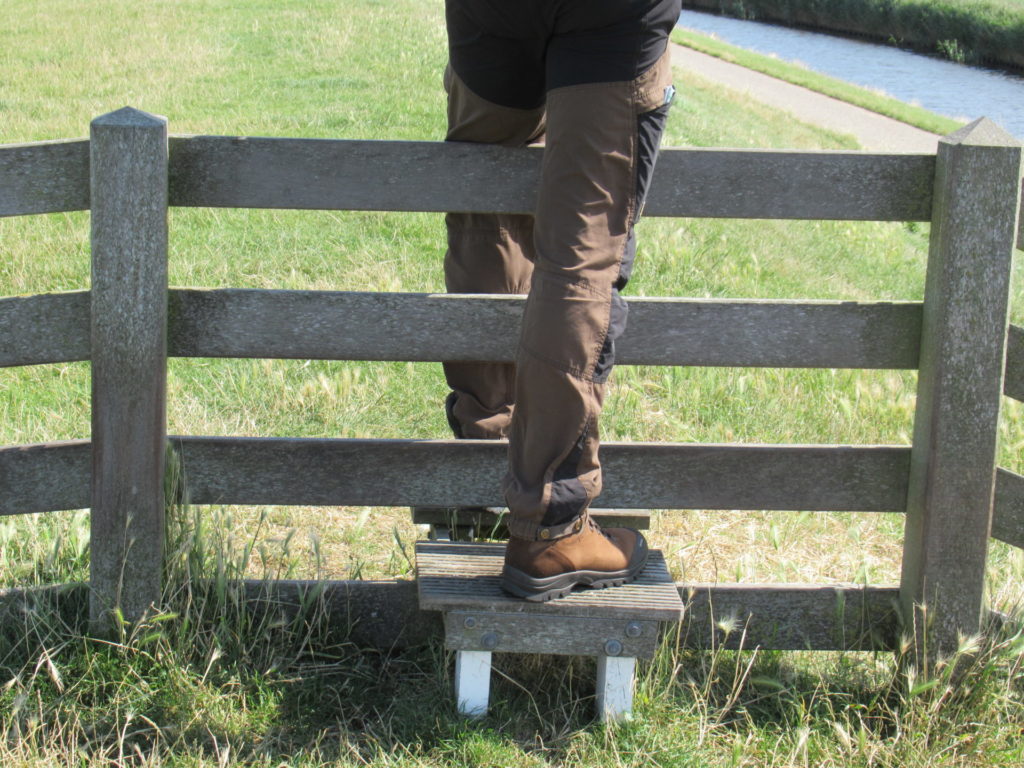
All along the dyke, there were lots of fences with stiles to climb.
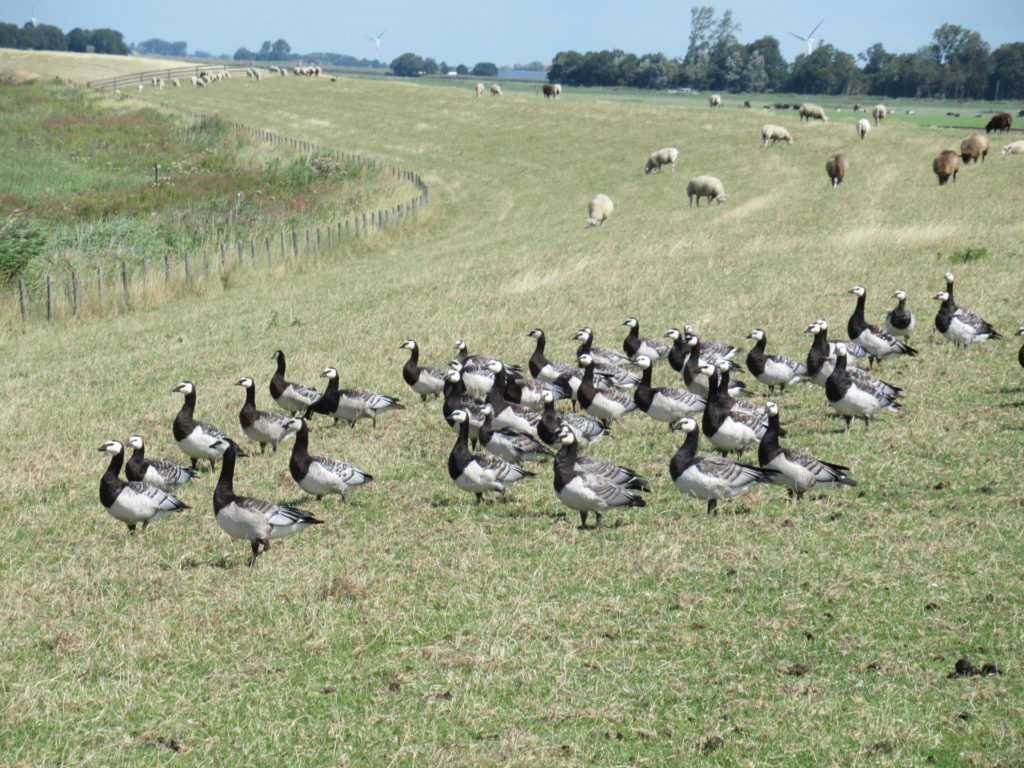
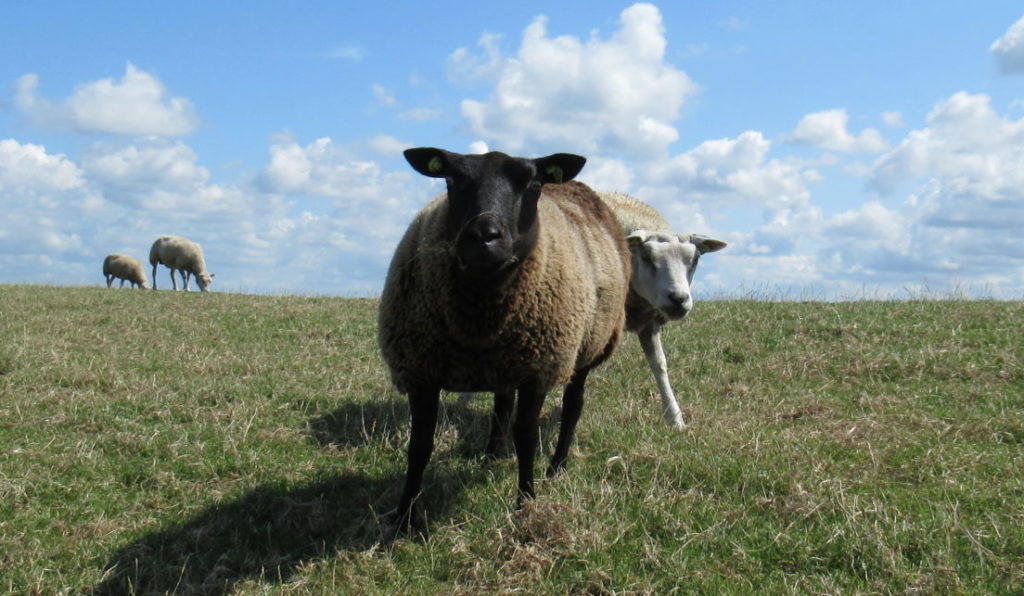
The fences are there to confine the Texel sheep to certain sections of the dyke. The sheep are kept company by water birds, like these black and white barnacle geese.
The sheep were not shy at all. They didn’t run away when we came close, like they usually do. We had to step around and over sheep and lambs lazing and grazing on our path. And some of the sheep were downright pushy. When we sat down on the grass to eat our sandwiches, they came begging for a share. They must have been fed by other walkers.
‘Come on, give us some of your bread,’ they seemed to say. And, ‘I really like the smell of that cheese.’ They refused to be shooed away and were so insistent, that in the end we got up and walked on, eating the rest of our lunch along the way.
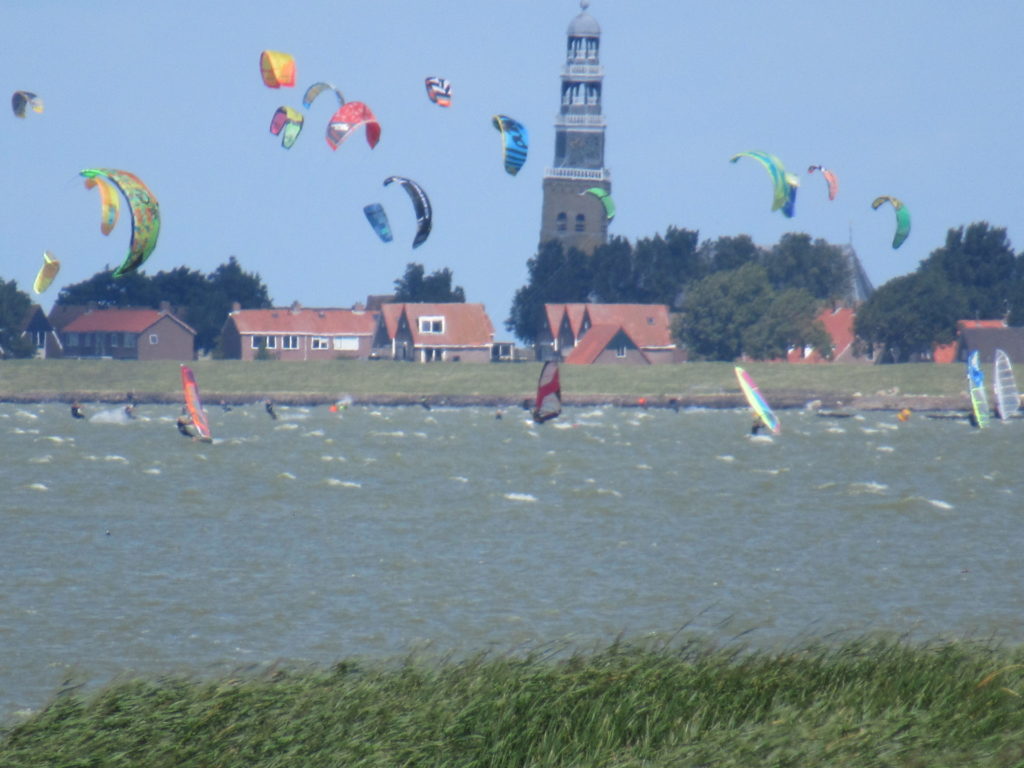
In the distance we could already see our destination. It wasn’t just a perfect day for walking, but for wind and kite surfing, too.
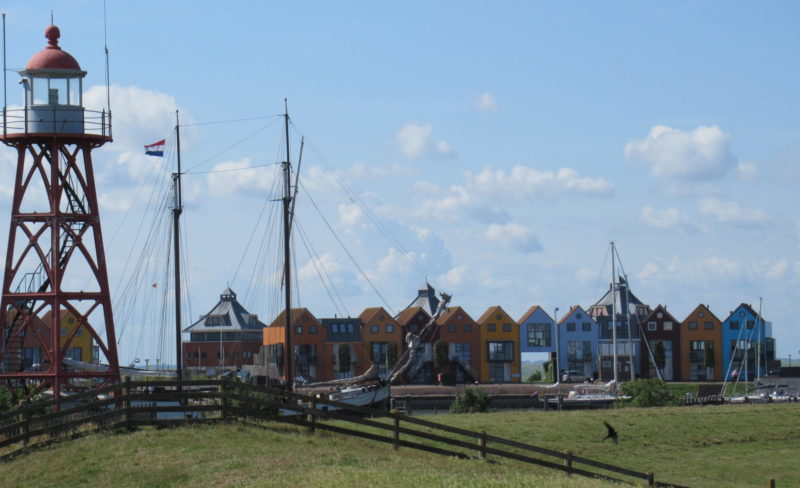
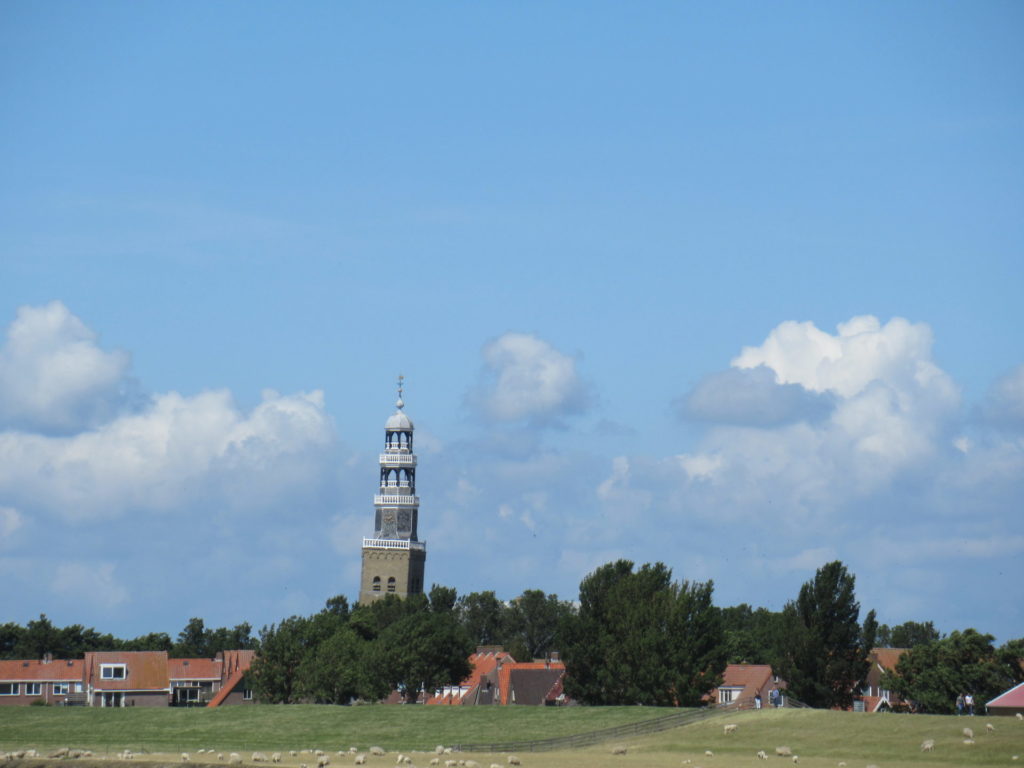
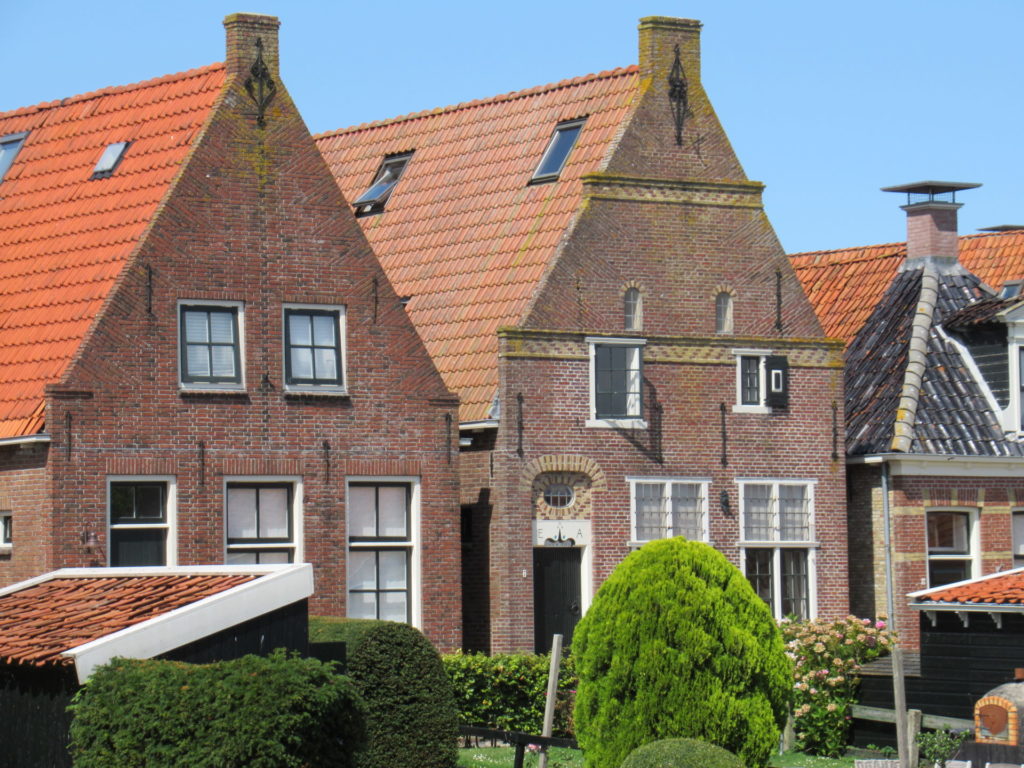
Against the big blue sky, Hindeloopen looked very small, with its church and the houses with their red roofs huddled behind the dyke. And, in fact, it is small now, with under 900 inhabitants. In the 17th and 18th centuries, when the lake was still a sea, it used to be an important harbour and trade centre, with three times the number of people and a fleet of around a hundred ships.
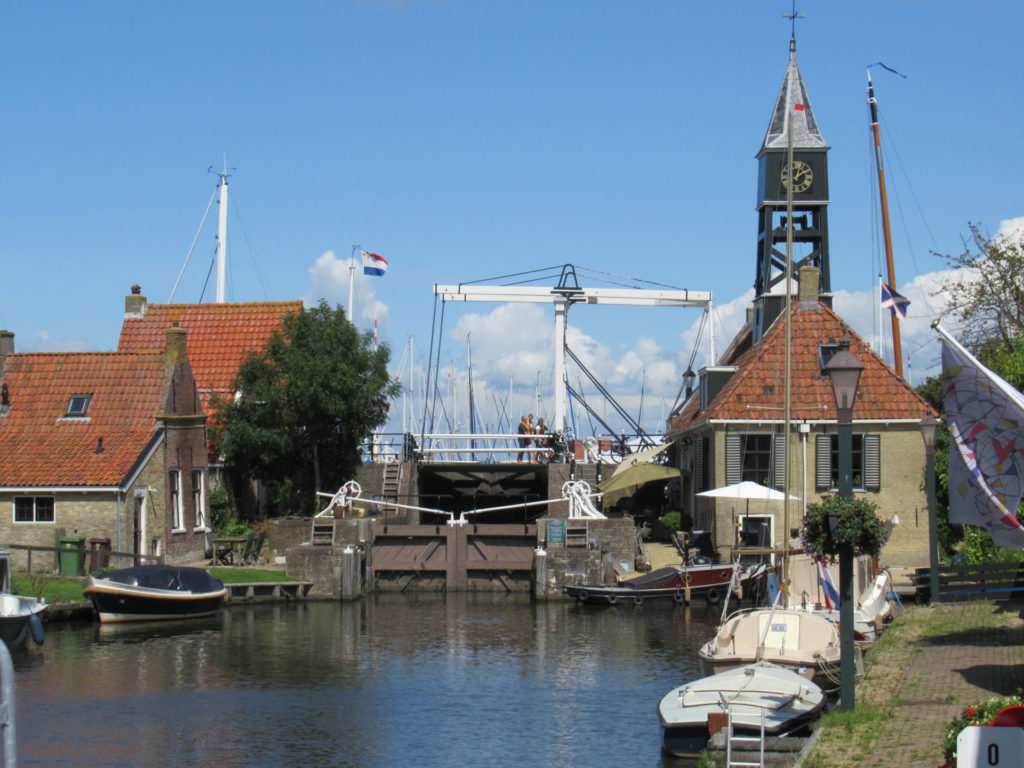
It’s nice to imagine merchant ships leaving and entering the town via the lock (photo below) that is now used by pleasure boats. On their outward-bound journeys they would be filled with gin and wool. And coming back from Scandinavia and Russia they would be carrying wood.
We slowly strolled through the old town centre and saw some monumental merchant’s houses – a sign of great wealth in earlier times.
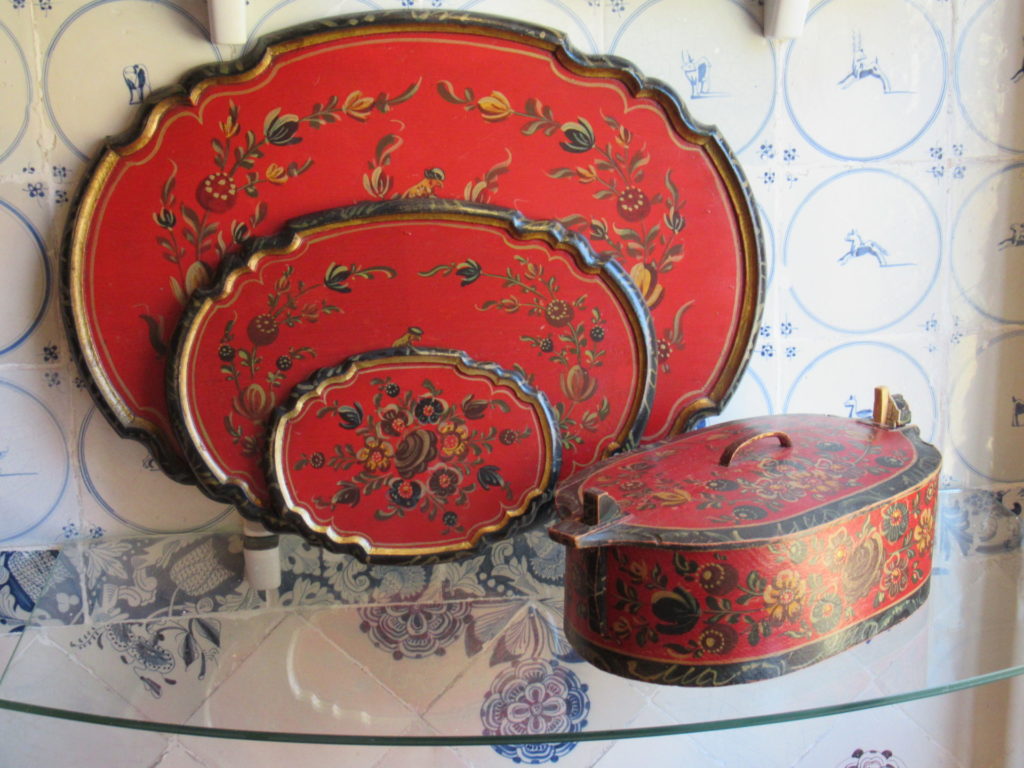
There was a museum, too, as well as several shops selling local traditional crafts. Hindeloopen is renowned for its decorative painting style, with garlands and stylized flowers on a red, green, blue or cream background. Here are several trays and a ‘butte’.
A butte is a traditional travelling case used by seamen for their personal belongings. I think it’s a thing of beauty and would like to own one someday. But as it’s all handmade, it has quite a hefty price tag. It’s not that it isn’t worth it, but it isn’t an amount I’d spend on a whim.
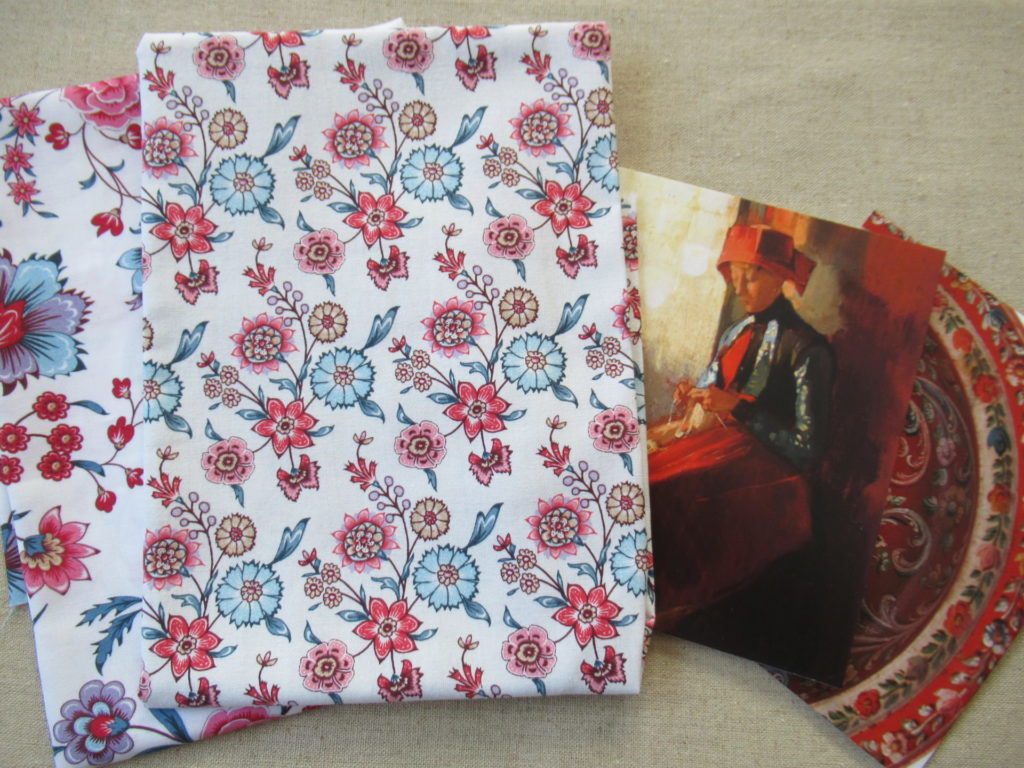
I came home with some more modest souvenirs – two pieces of fabric and two postcards.
The fabrics are inspired by some of those used in the colourful traditional costumes of Hindeloopen. I don’t know what I’m going to use them for yet, but I’ll think of something.
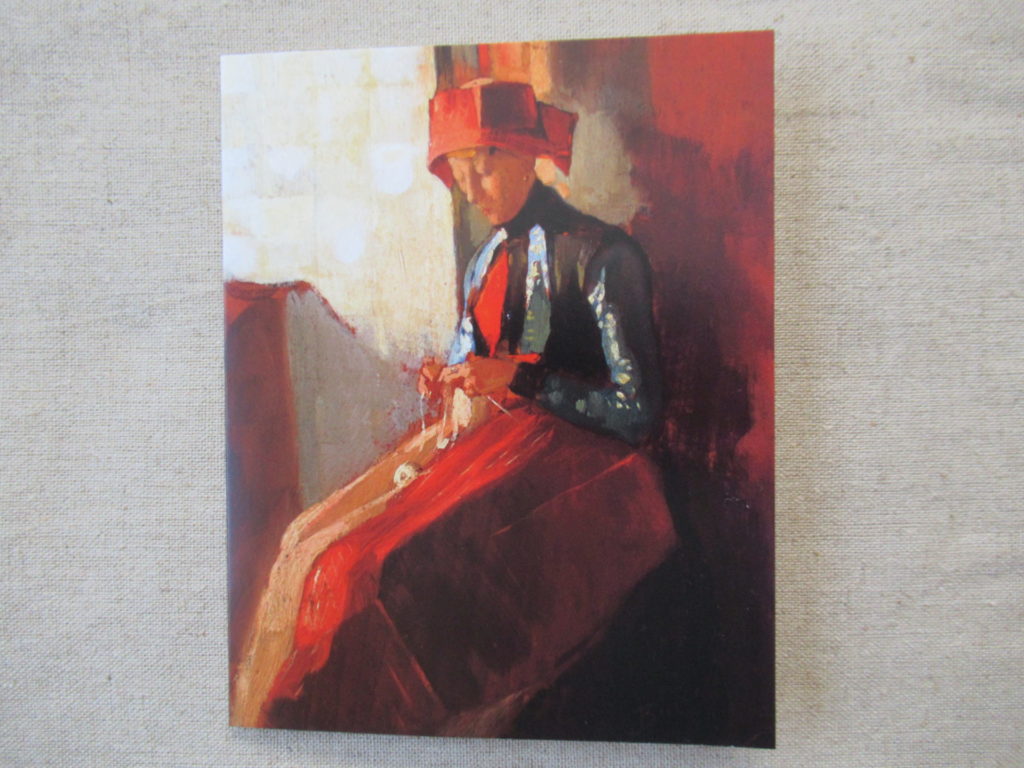
One of the cards shows some of the typical decorative painting on a wooden platter. And the other shows a woman in traditional dress. (Unfortunately the postcard doesn’t tell us who the artist is.) In the painting, the fabrics are simplified to solid colours. In reality they would be flowered and checked, in mainly red, blue and white. There’s an picture of a complete costume on the town’s museum website.
And what is the woman doing? Knitting – what else?