Remember that I was looking for something simple to knit alongside more challenging projects? Simple stocking stitch socks are my usual mindless knitting projects, but variety being the spice of life, I want something different from time to time. Looking for inspiration and materials for a simple scarf, shawl or wrap in a yarn shop, I couldn’t find anything that spoke to me. And then it occurred to me that I already had most of the ingredients at home!
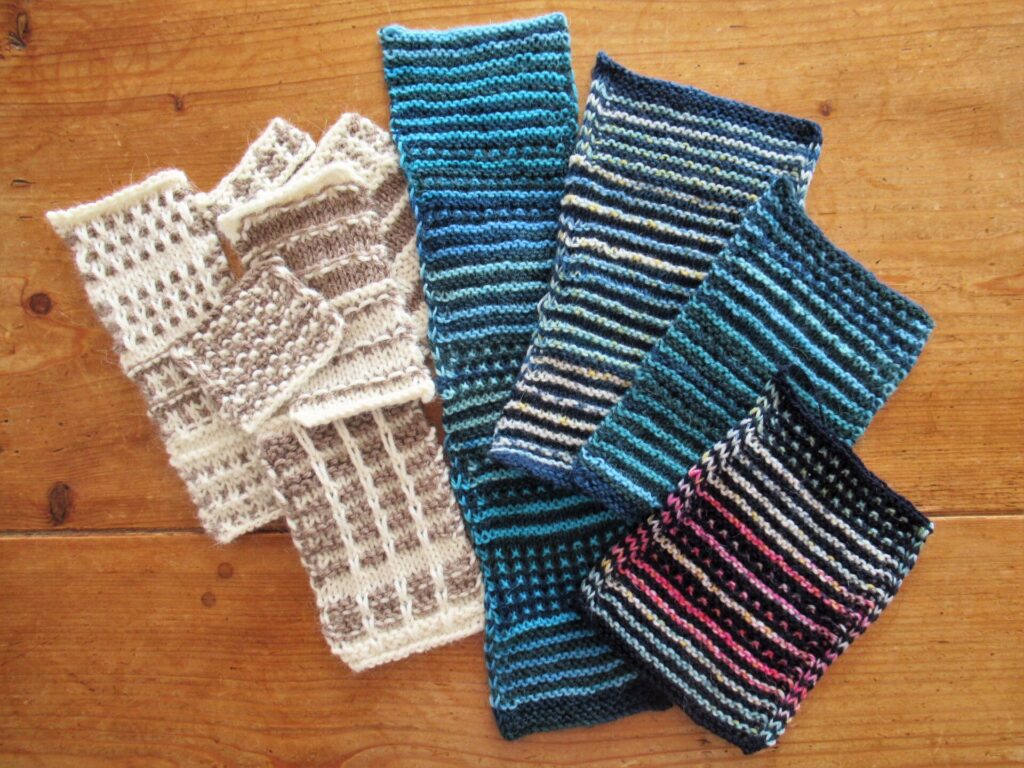
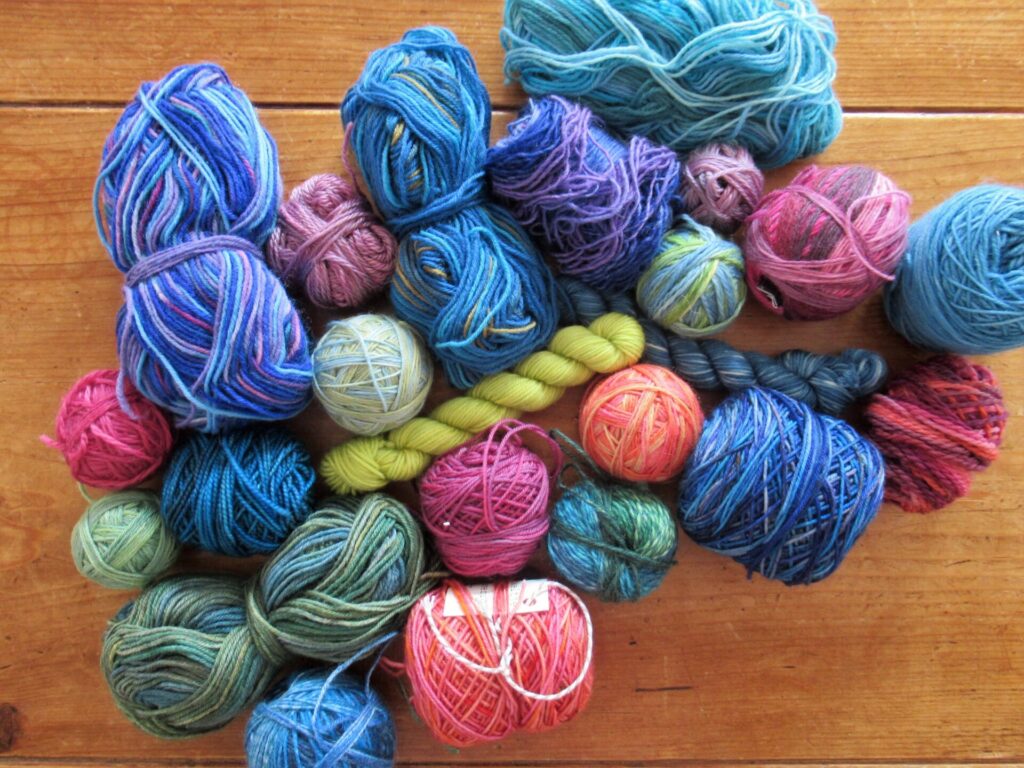
Through the years I’ve knit many, many pairs of simple socks for family members, friends and myself. From every pair of socks there is always a small quantity of yarn left over. I’ve used some of these to make Soothing Sachets, Gift Leaves and an earrings-and-pendant set. These small projects didn’t even make a dent in my sock yarn remnant stash, though, and I’ve still got more than enough for several larger projects.
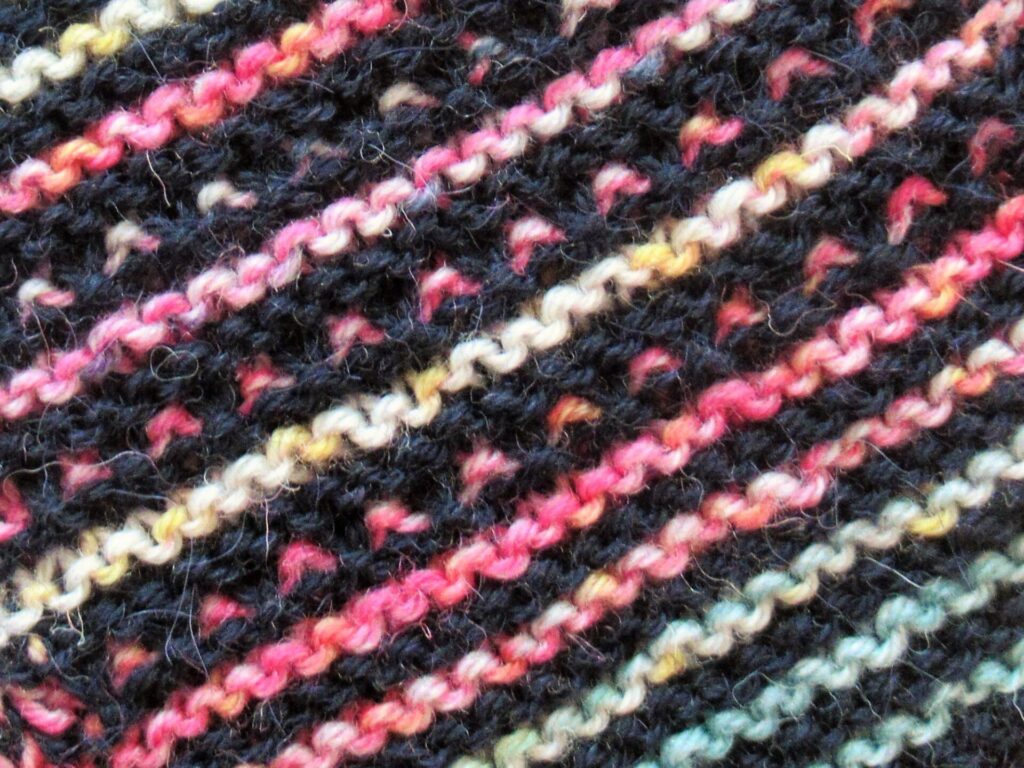
I’d already been knitting some slip-stitch swatches and knit some more using sock yarns, using the simplest of slip stitch patterns combined with garter and stocking stitch. I experimented with many different edge stitches, too.
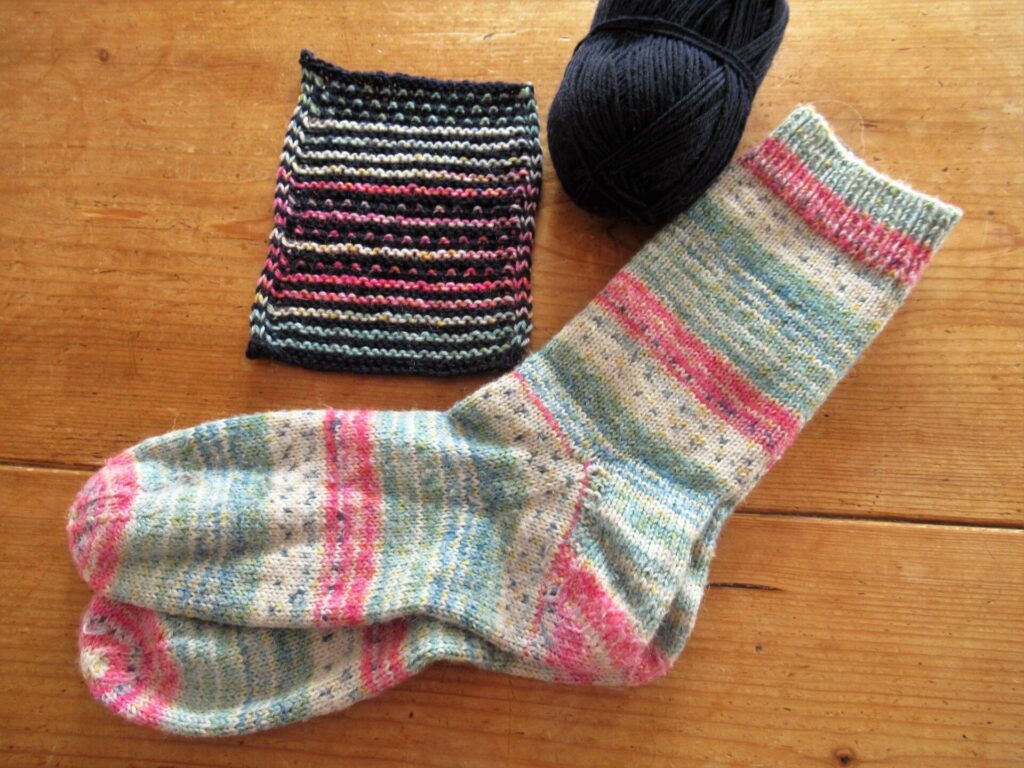
Something colourful would be fun, but it should also be wearable, so I decided to use a dark neutral as a backdrop for the remnants. Here is my final swatch, using a solid navy yarn combined with some yarn left over from the socks beside it – garter stitch stripes alternated with slip stitch rows:
My guess is that many of you also have a considerable quantity of leftover sock or other fingering weight yarn. Or perhaps you’ve taken out a mini-skein subscription or treated yourself to a mini-skein Advent Calendar and still have some of those lovely little skeins left? In case you’d like to use them for a scarf like mine I’ll describe how I’m going about it.
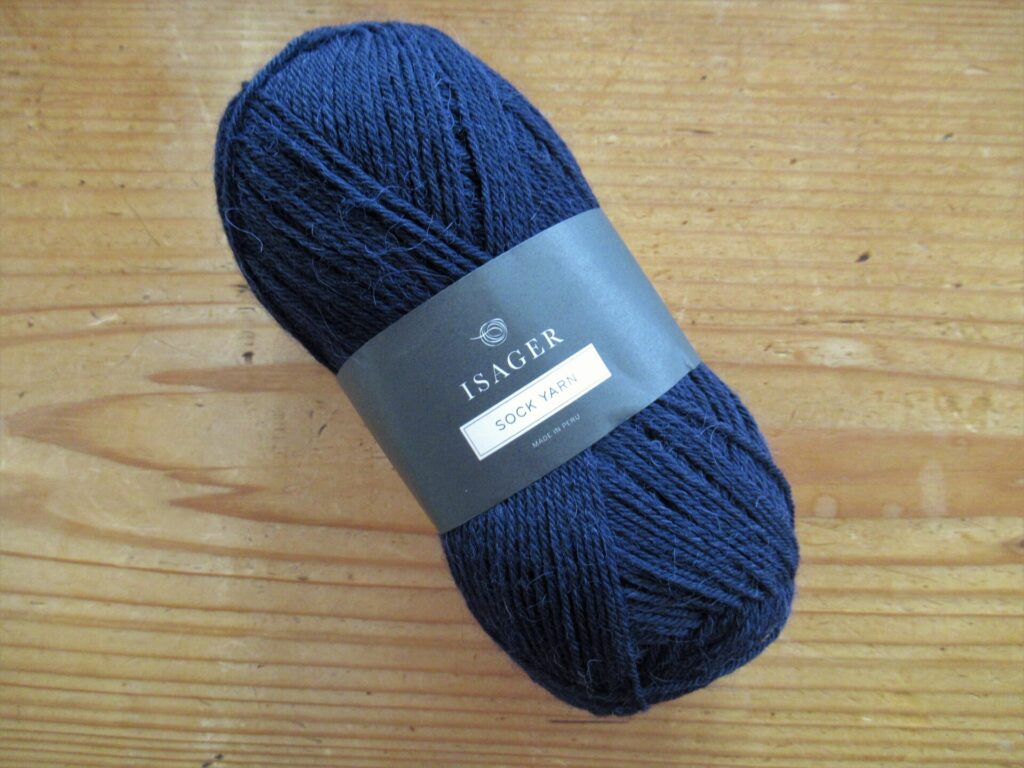
I’m going to knit a rectangular scarf measuring approximately 45 cm/18” wide by 1.80 m/71” long. Based on my swatches, this should take about 440 grams of sock yarn in total: 220 grams of the solid background colour and 220 grams of sock yarn remnants. I’m using five 50-gram skeins of Isager Sock Yarn in navy blue for my background colour.
Other dark neutrals that would make good background colours are black, charcoal, deep purple or dark brown. A light neutral, like cream, pale grey or light beige, would work well, too.
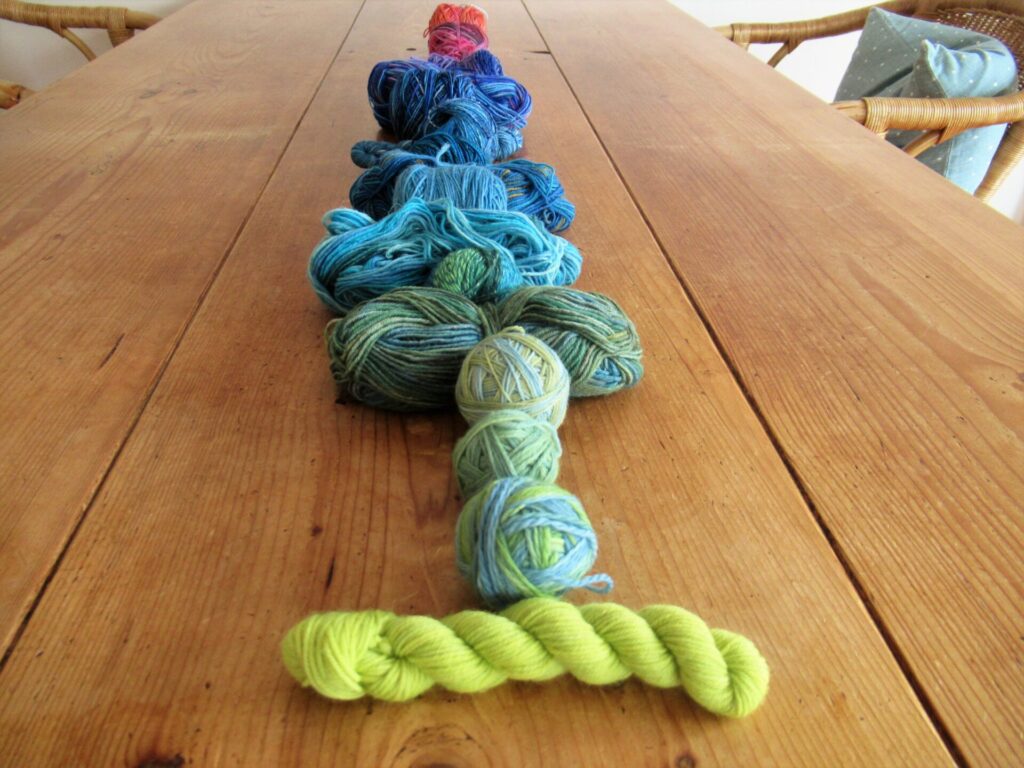
For the contrast colours, I chose 22 different sock yarn remnants of at least 10 g each (+ a few extra). I left the dark colours out (not enough contrast), and the very light ones as well (too much contrast). So they’re all in a medium shade range.
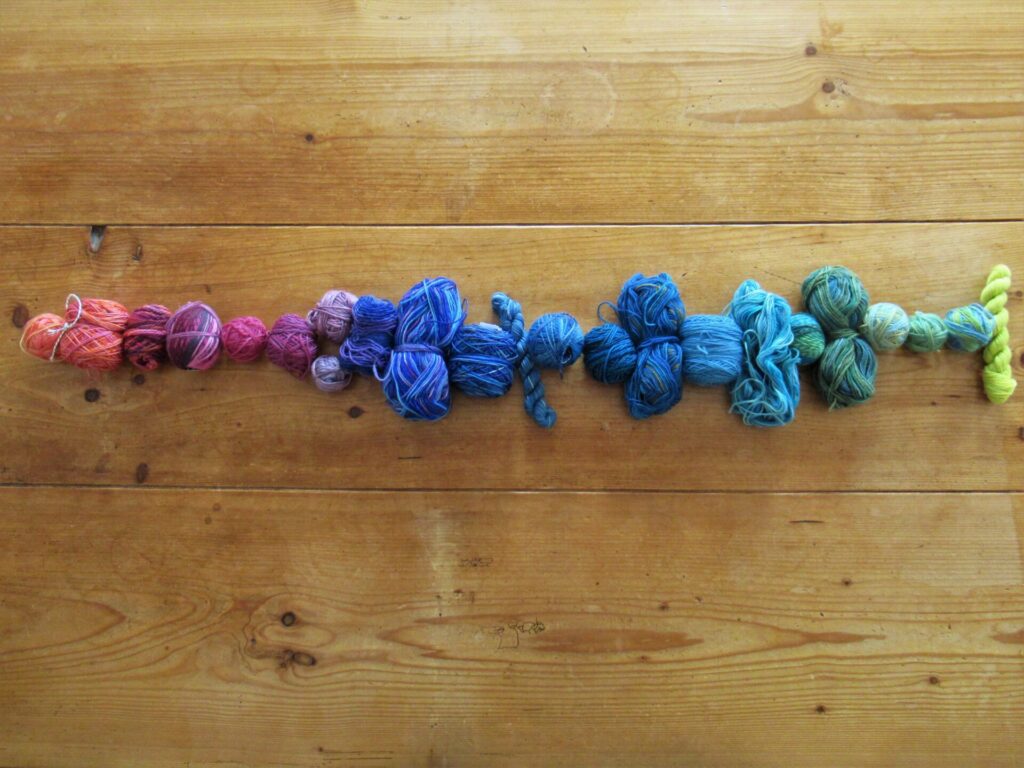
The remnants could be grabbed at random, eyes closed, but being an orderly sort of person I decided to arrange them into a sort of colour wash, from greens through blues, purples, pinks and finally oranges (read from right to left).
You could use a colour wheel, but I just followed my intuition, personal sense of colour, taste or whatever it’s called.
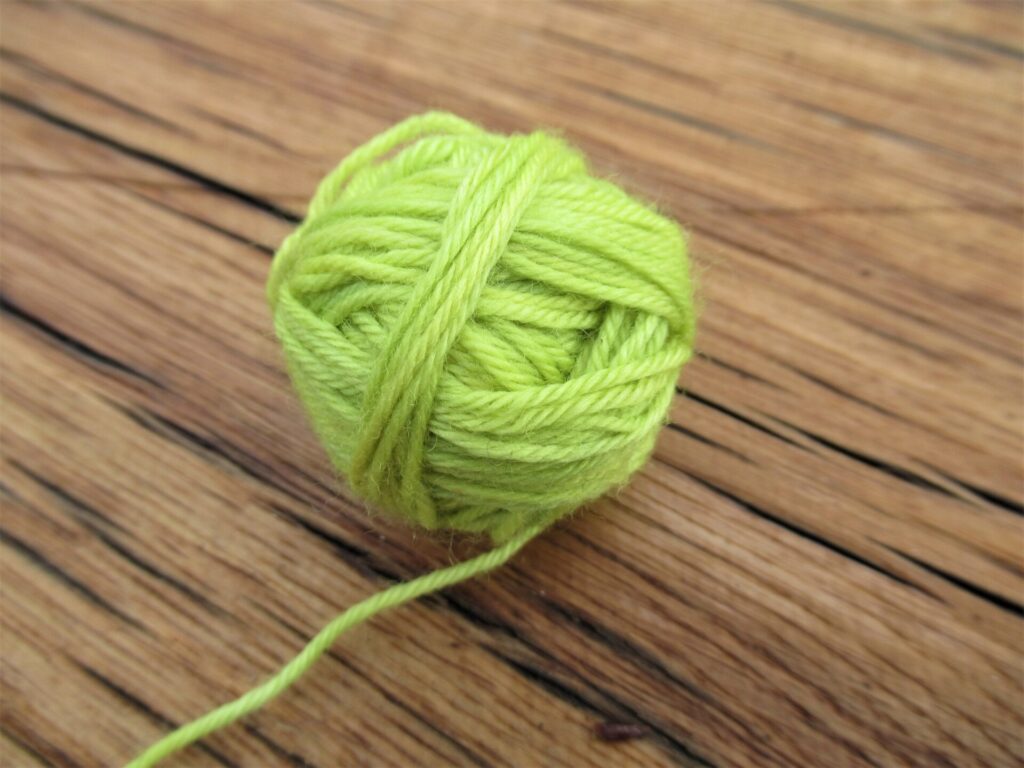
The colour I’m starting with, next to the navy blue, is a shocking acid green. It came with a mini-skein subscription years ago, and was dyed by Amanda Perkins of The Natural Dye Studio who stopped dyeing years ago. It isn’t a colour that I’d think I’d ever use. Confession: I did knit a scarf in neon green acrylic when I was ten. Since then my taste in colours has changed quite a bit, but I think/hope it will look fun in this scarf.
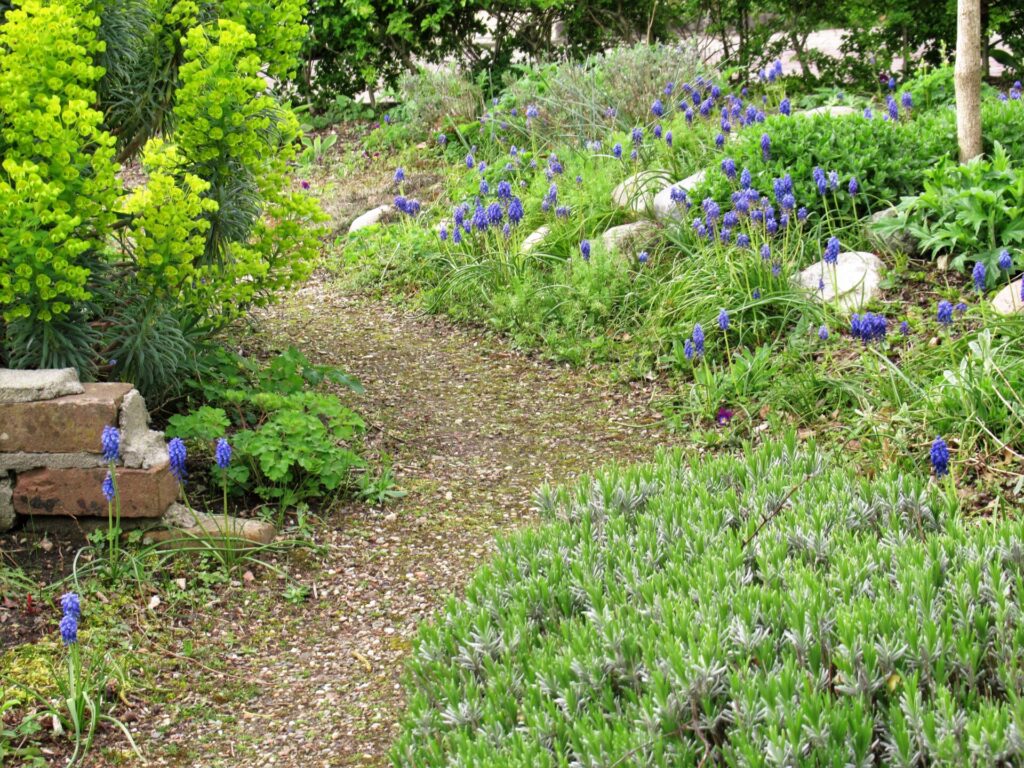
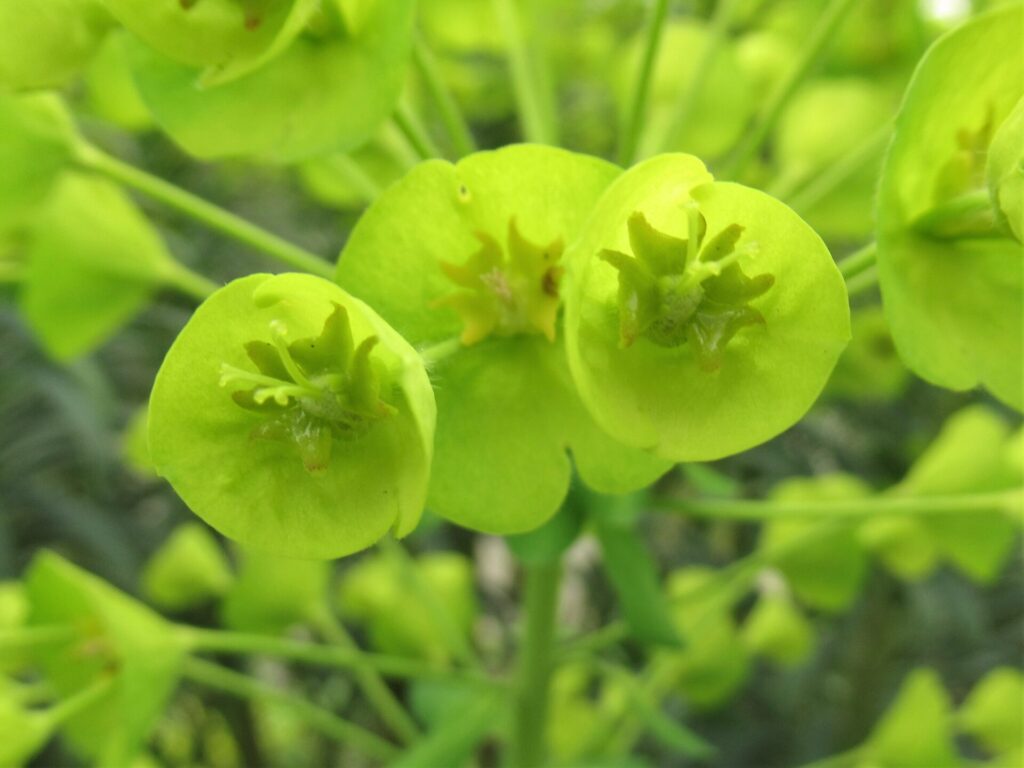
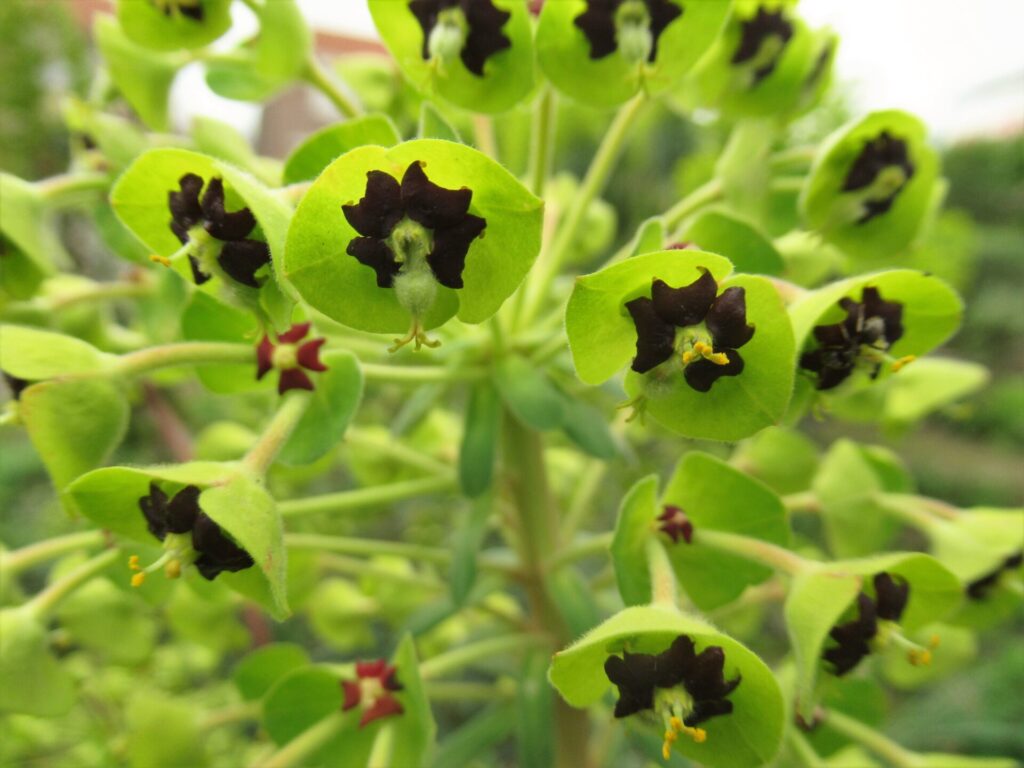
It’s the same colour as the Euphorbias flowering in our front garden now, that look so great with the blue of the grape hyacinths.
Some of the Euphorbias are entirely in this strange yellowish green colour,
while others have very dark aubergine, almost black centres.
I will give you the recipe for how to knit this scarf in my next blogpost. For the time being I’m calling it my Simple Sock Scrap Stripe and Slip Stitch Scarf, but it really needs a simpler name. Any suggestions are welcome!
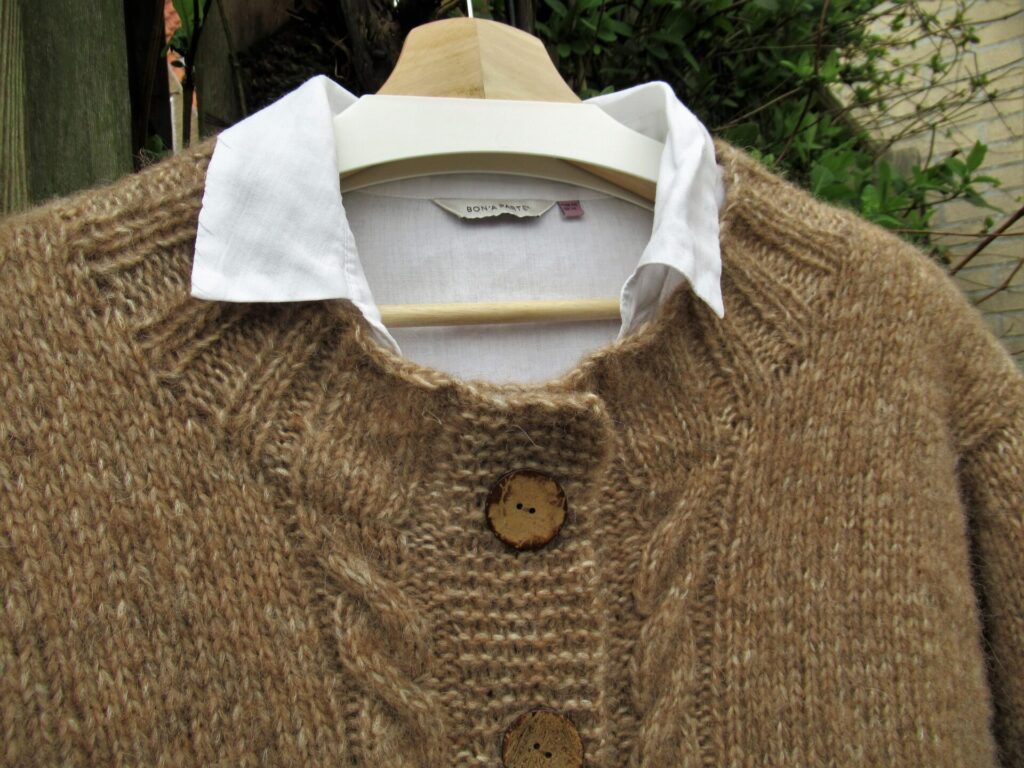
Instead of just showing you the cardigan I’ve designed and knit for our daughter, I thought it might be more interesting to tell you how I did it.
There are many approaches to designing things, of course. This is merely my simple, practical way for designing a sweater knit from the bottom-up in pieces sewn together later. I’ve developed this method over the years and have tried to summarize it in 10 (hopefully easy to follow) steps. So, here we go.
How to Design Your Own Sweater in 10 Steps:
1 – Decide what you’re going to make For whom would you like to knit a sweater: For yourself? A loved one? What type of sweater would you like to make: A pullover? A cardigan? A summer top?
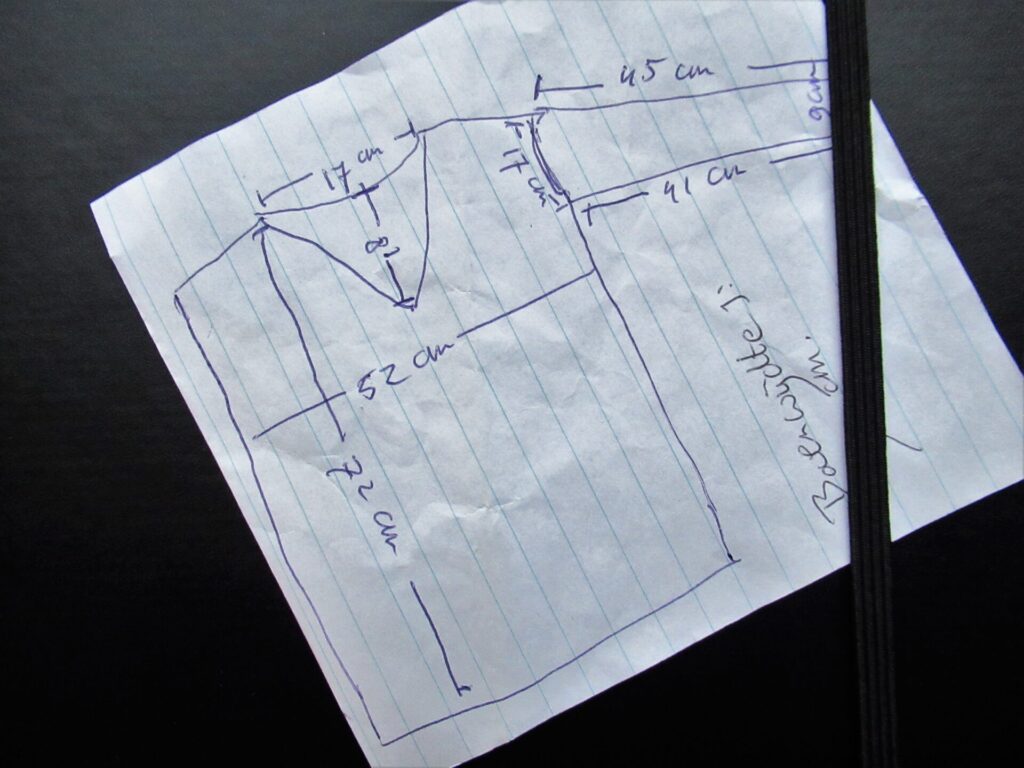
2 – Take measurements and draw a diagram Find a garment with approximately the fit you’re looking for and measure:
Chest width
Length
Armhole
Neck width and depth
Width at shoulders
Sleeve length
Sleeve circumference at wrist
Any other things you think may be useful
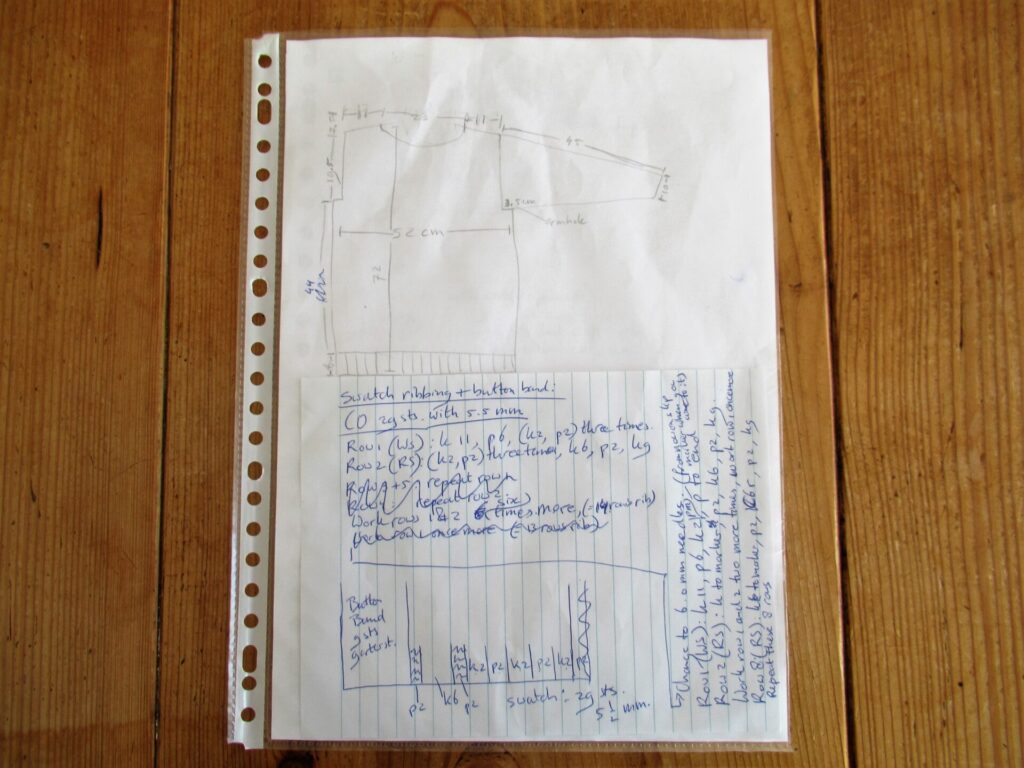
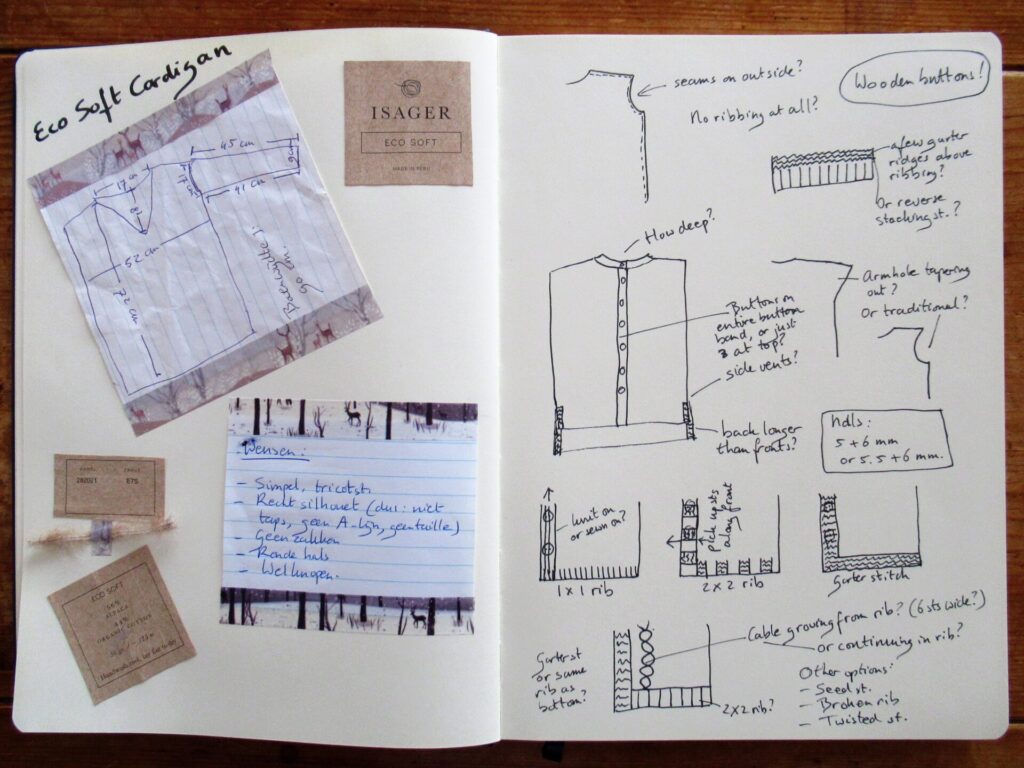
The chest/shoulder/armhole part is the most important. The rest is easy to adapt. Draw a diagram incorporating these measurements. It doesn’t need to be to scale, it’s just for your own reference. This is mine:
3 – Think about what you want and draw another diagram Things to consider are:
Details: buttons, pockets, stitch pattern, ribbing or no ribbing…
Add any relevant measurements to your new diagram.
Tip: If you have never designed anything before, keep it simple. If you have a little experience, you could set yourself a challenge. I used a very simple armhole and sleeve cap:
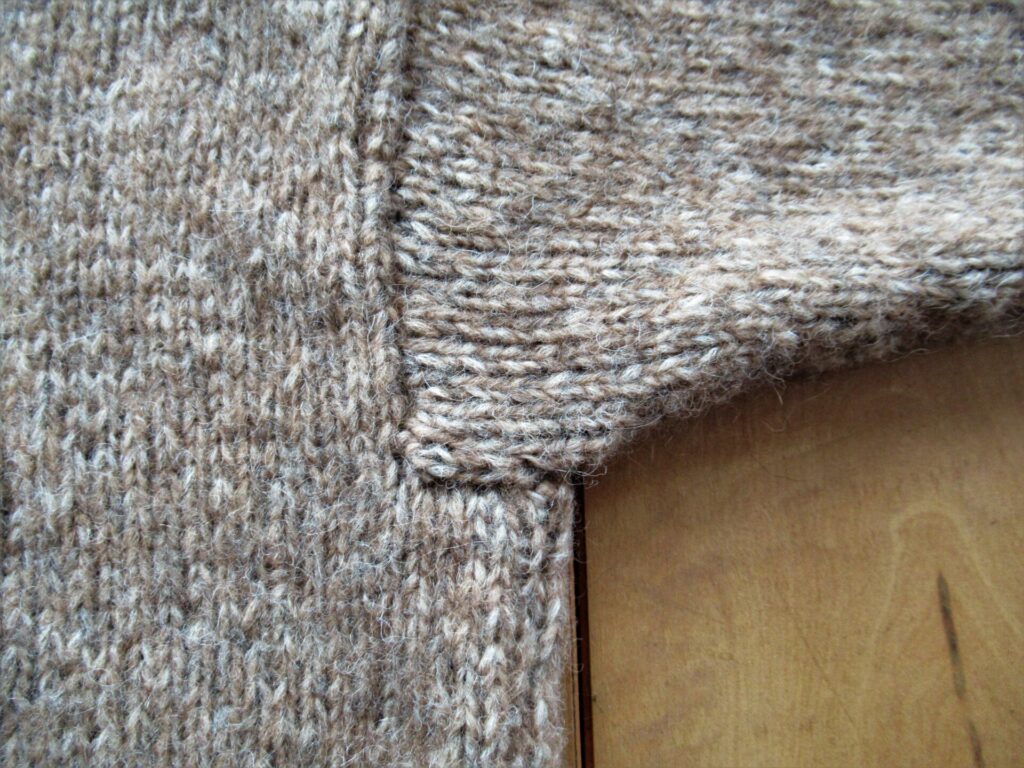
And gave myself the challenge of adding a cable, flowing from the ribbing at the bottom and into the neckband.
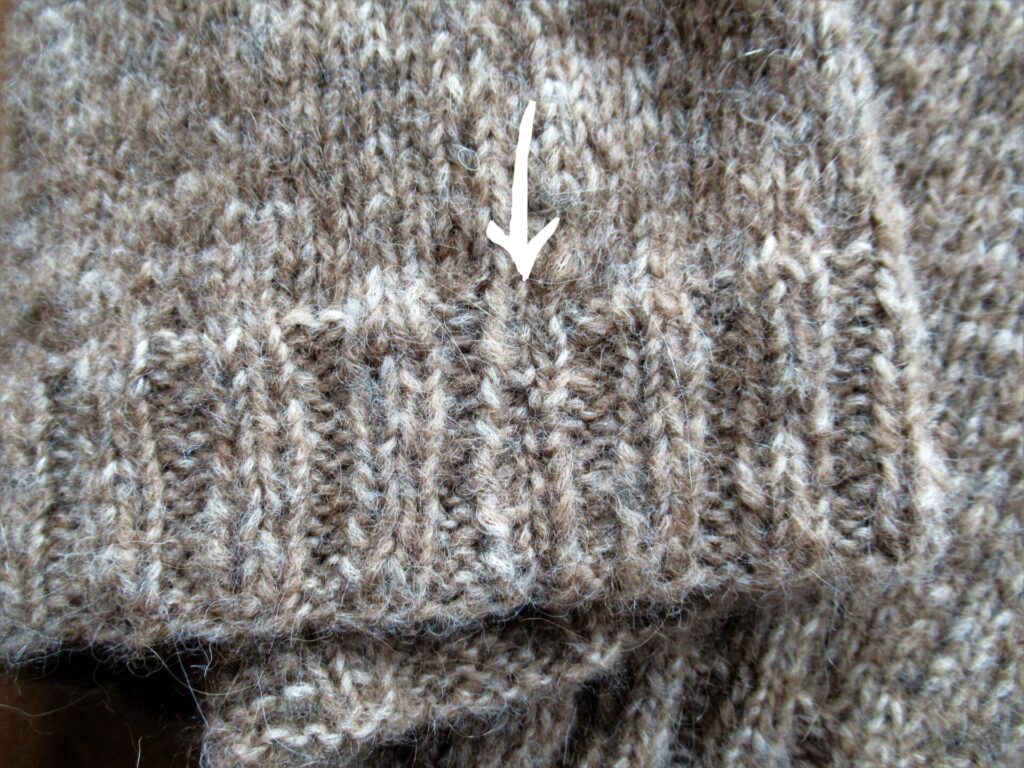
Another challenge I set myself was matching the ribbing of front and back so that the seam would be near invisible.
4 – Choose your yarn and work out approximately how much you’ll need If you’re an experienced knitter you’ll probably have some idea. It also helps to look at other people’s projects from the same yarn on Ravelry. Find a few similar garments in a similar size and check how much they took. Then add some extra for swatches and to be on the safe side.
Note: I did it the other way around: Fell in love with the yarn first and bought a generous quantity. Far too generous as it turns out. Never mind – it only means that I have enough left for a hat and a scarf.
5 – Swatch a – First swatch to decide what needle size you’re going to use: how open, drapey or dense do you prefer your knitted fabric for this project? Knit generous swatches – aim for at least 12 x 12 cm/5 x 5”. Wash your swatches and leave them to dry flat, or block and/or press them, just like you intend to treat your finished sweater. b – Then knit more swatches. This time in different stitch patterns and ribbings you might want to use. Again wash/block/press them.
6 – Decision time Decide what needle size(s) and pattern stitch(es) you’re going to use, how wide your ribbings and button bands (if any) will be, exactly what your neckline is going to look like, where any pockets will be placed etc. Add details to your diagram if you think that will be helpful.
7 – Start knitting the back Using your swatches, calculate how many stitches you need to cast on. Do you need to increase or decrease for, say, an A-line or waist shaping? Write down everything you do and keep your notes together. It isn’t necessary to work everything out beforehand. You can think about the armhole, neck and shoulders while knitting.
8 – Do the maths for the front(s) If you’re designing a cardigan with button bands, make sure they overlap. Work any buttonholes in the second front. Think deep about your neckline, and work out how to get what you want.
9 – Work out the sleeves How long? How many rows to armhole? How many stitches do you start with? How many do you need at the armhole? Spread the increases out over the length.
10 – Work out and knit the final details Now all you need to do is wash, block and/or press your pieces and seam everything together. Add button bands (if not incorporated), patch pockets, neckband etc.
There, all done!
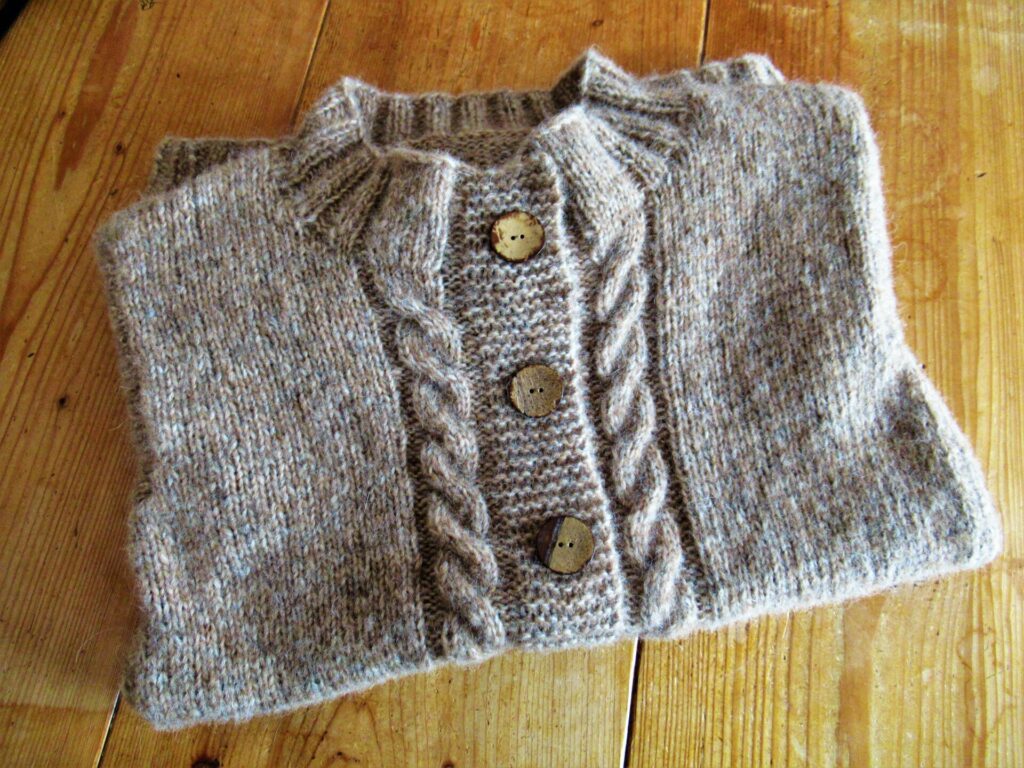
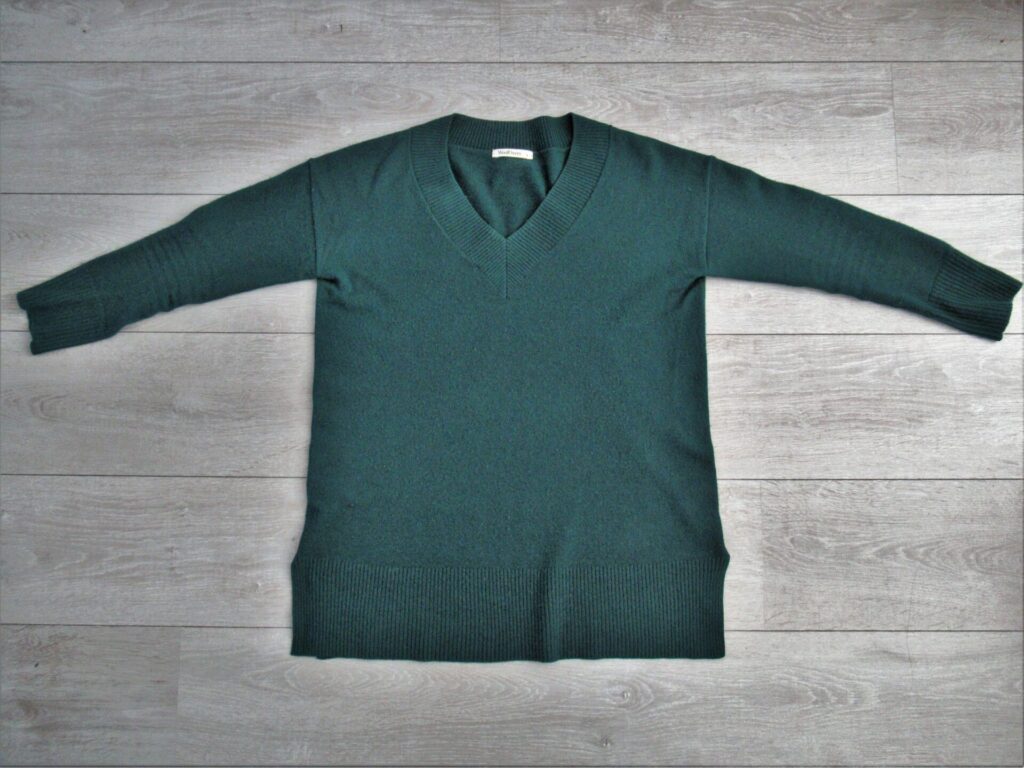
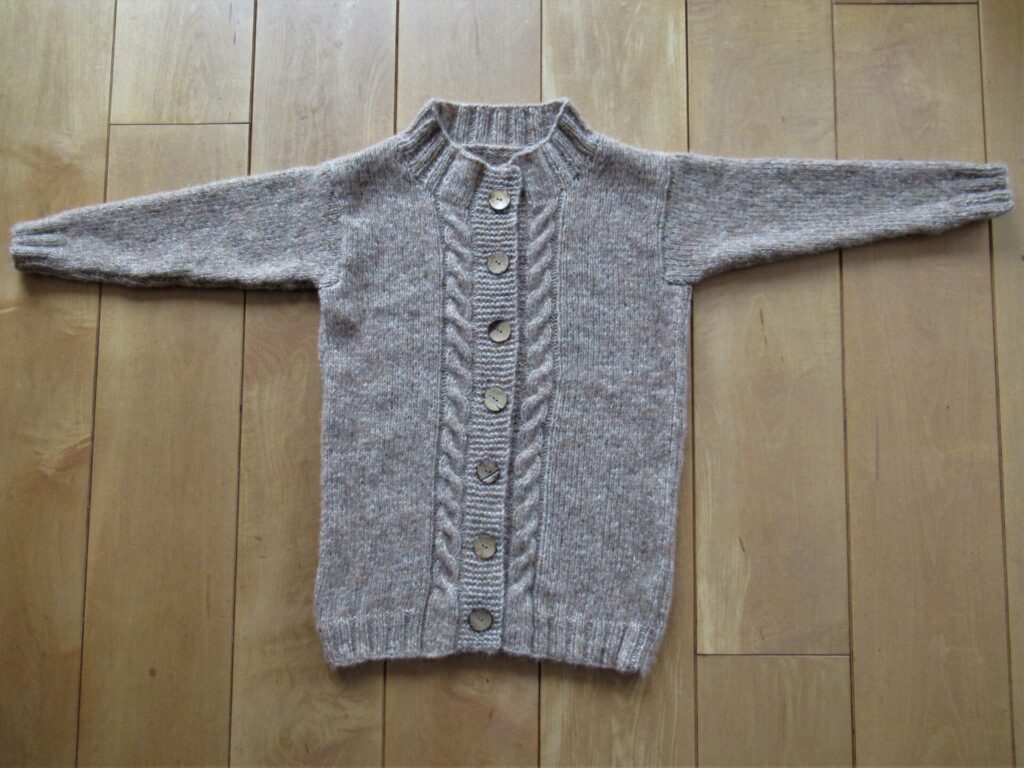
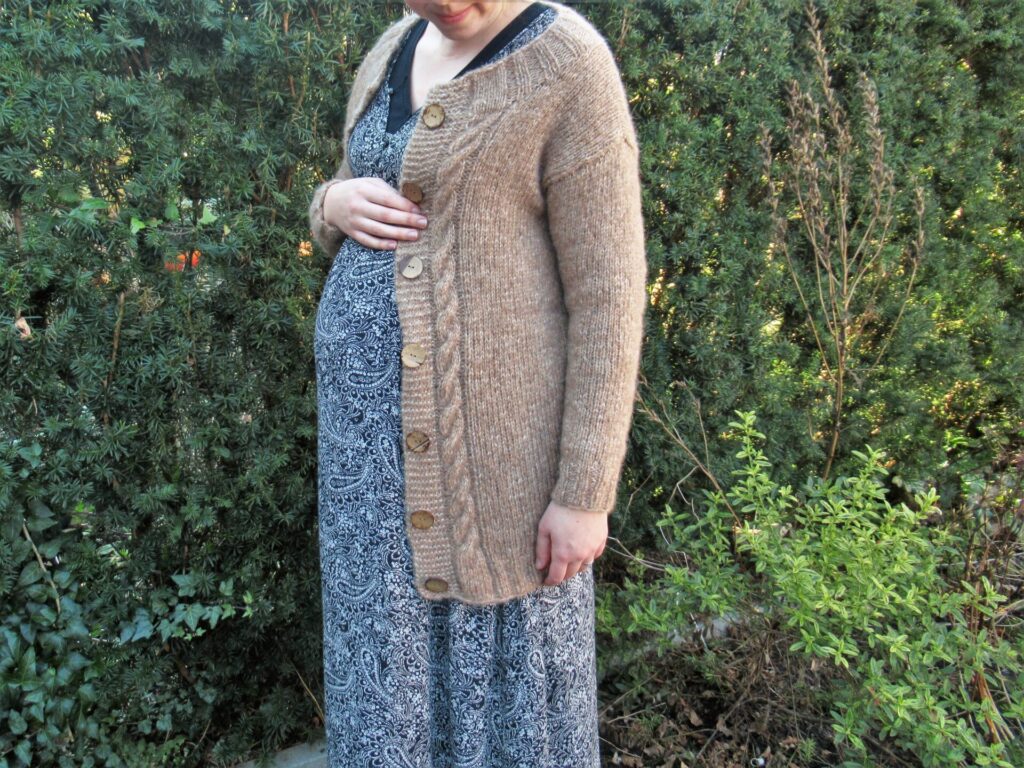
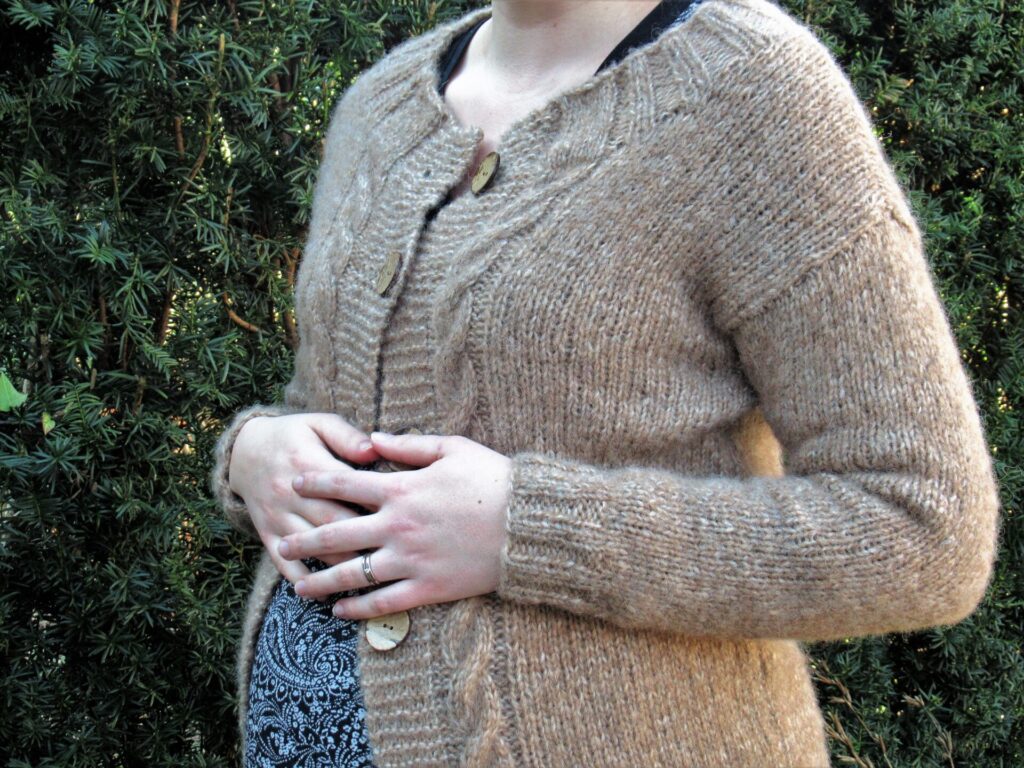
Starting from a deep green, finely knit, shop-bought V-neck pullover, I arrived at a fawn, chunky, hand-knit cardigan with a round neck and cables along the fronts.
It does not fit over our daughter’s already impressive bump, but will keep her back and shoulders warm.
With quite a few weeks to go, how much more will that belly grow?
Well, I hope this all makes sense. Do you sometimes design your own sweaters, too? Is your method very different from mine? If you’ve never designed anything yet, why not give it a try? Your sweater may not turn out perfect or exactly how you envisioned it, but it will be uniquely yours.
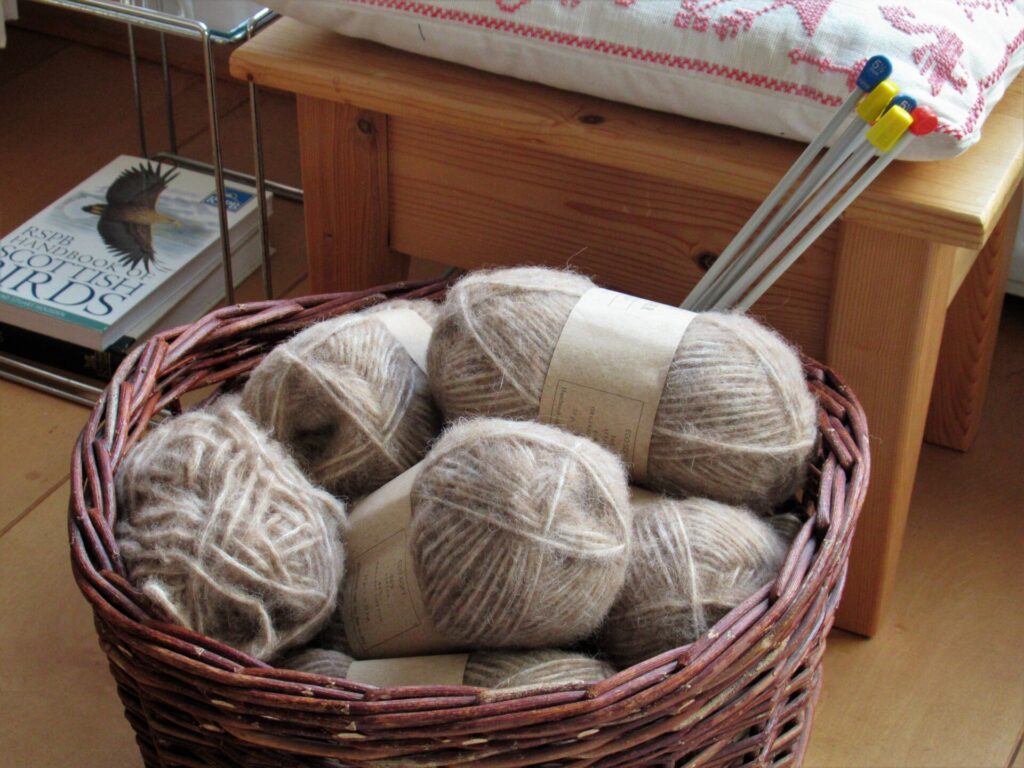
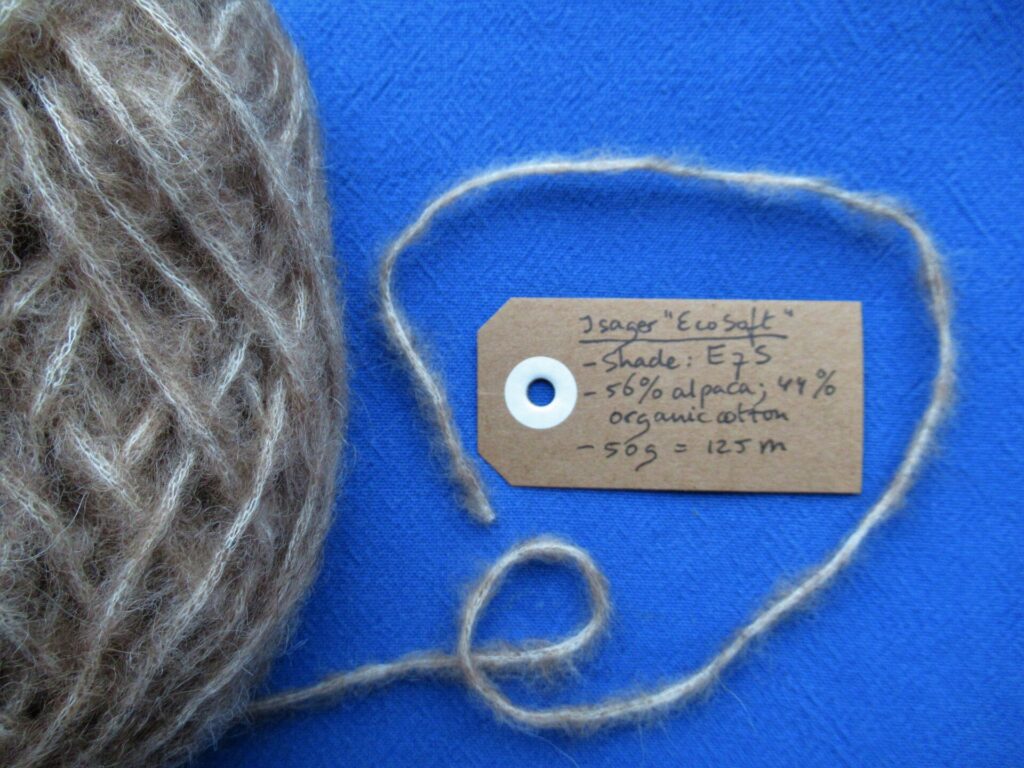
Do you remember our trip to Harlingen last autumn, and my visit to the local yarn shop? That’s when I bought the yarn in the basket above. It is Isager ‘Eco Soft’ from Denmark – a bulky yarn of 56% alpaca and 44% organic cotton. It is very soft indeed.
I bought it on a whim, with the idea that it would be perfect for a cosy cardigan for our daughter. Other than that I didn’t have a clue as to what it was going to look like or what pattern I was going to use. Or how much yarn I’d need (I hope I’ve bought enough).
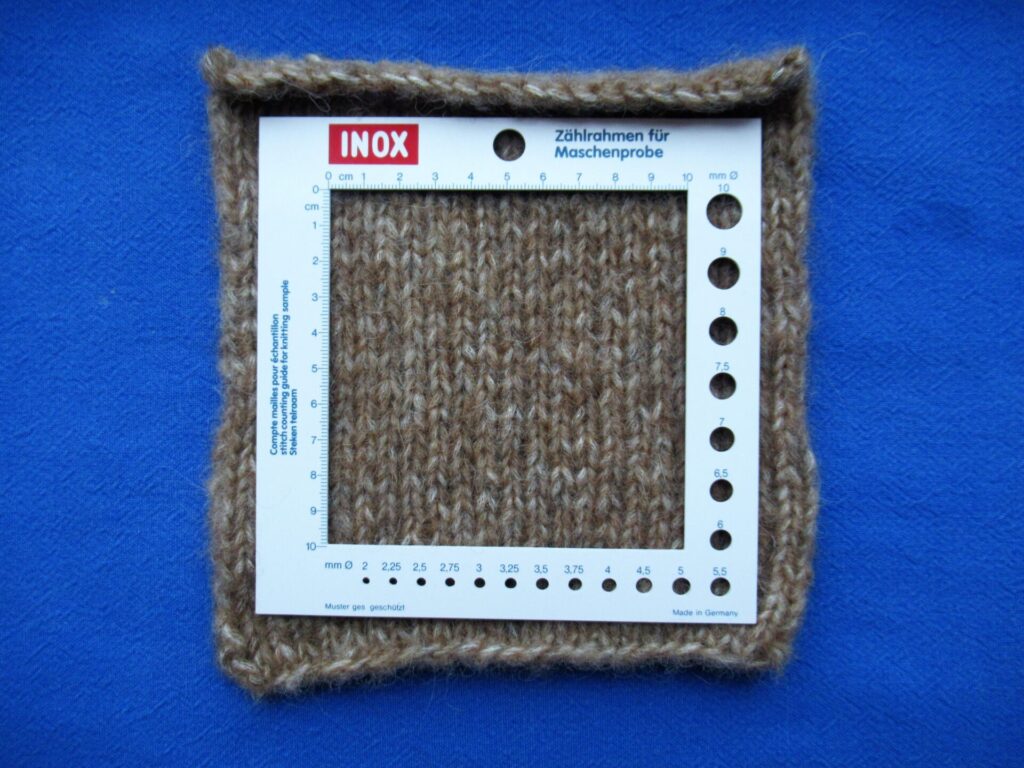
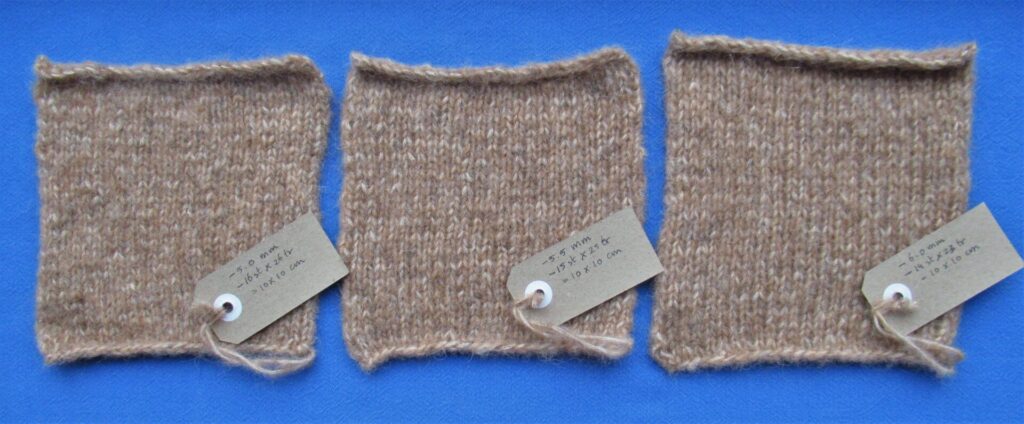
The ball band didn’t give any clues about needle sizes to be used or gauge suggestions, which is very unusual. So, I started swatching. I have a handy tool for determining how many rows and stitches go into 10 x 10 cm/4 x 4 inches.
It isn’t really necessary. A measuring tape will suffice, too, but it makes things easier.
I took the swatches along to our daughters place. She is way past the age that I buy clothes for her, and I never push any knitwear on people that they may not want. So my first question was, ‘Would you like a sweater in this yarn? I was thinking of a cardigan, but if you don’t like it, please feel free to say so and I’ll find a different destination for it.’
I was glad to hear that yes, she would love to have a cardi from this yarn.
Eco Soft is a brand-new yarn, and I soon found out that only 4 patterns using it have been published to date, all for children. I could have looked for a pattern in a similar yarn, but decided that it would be more fun to think up something myself. A bespoke cardigan, so to speak.
I thought it might be nice to show you how I go about it. (Fingers crossed that I’ll end up with a wearable cardi.)
First, I quickly made a schematic drawing of a favourite, shop-bought sweater with approximately the kind of fit she wanted. It wasn’t a cardigan but a pullover and made from a very thin yarn, but that didn’t matter. This was just to get a general indication of the fit to aim for – oversized, but not hugely so.
I also asked her a few questions about shape, neckline etc, and these were the clues she gave me:
Simple
Stocking stitch
Straight silhouette (so no tapering, A-line or waist shaping)
No pockets
Round neckline
Buttons
I have a sketchbook for brainstorming about knitting ideas, and these are the pages I made for this cardi.
Next steps: knit more swatches, make decisions.
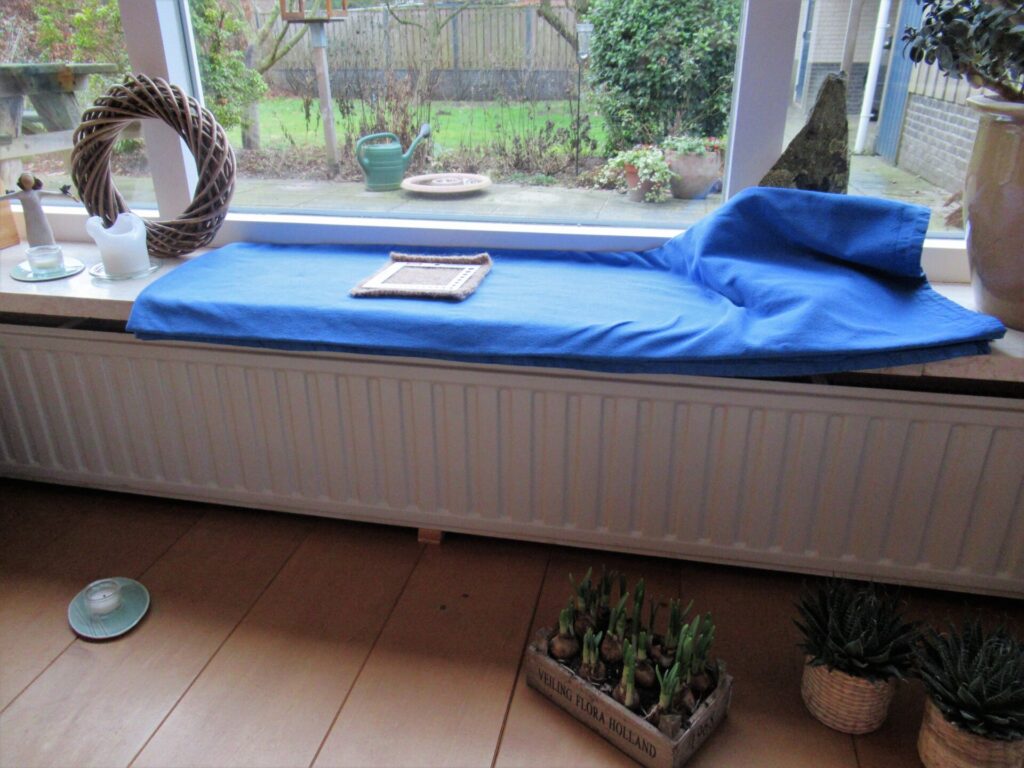
Many January days are so cloudy and dark that I often take my knitting outside to photograph it. This time, I removed some plants and things from the window sill, and covered it with a folded table cloth. It is the lightest place inside and fine for photographing small items.
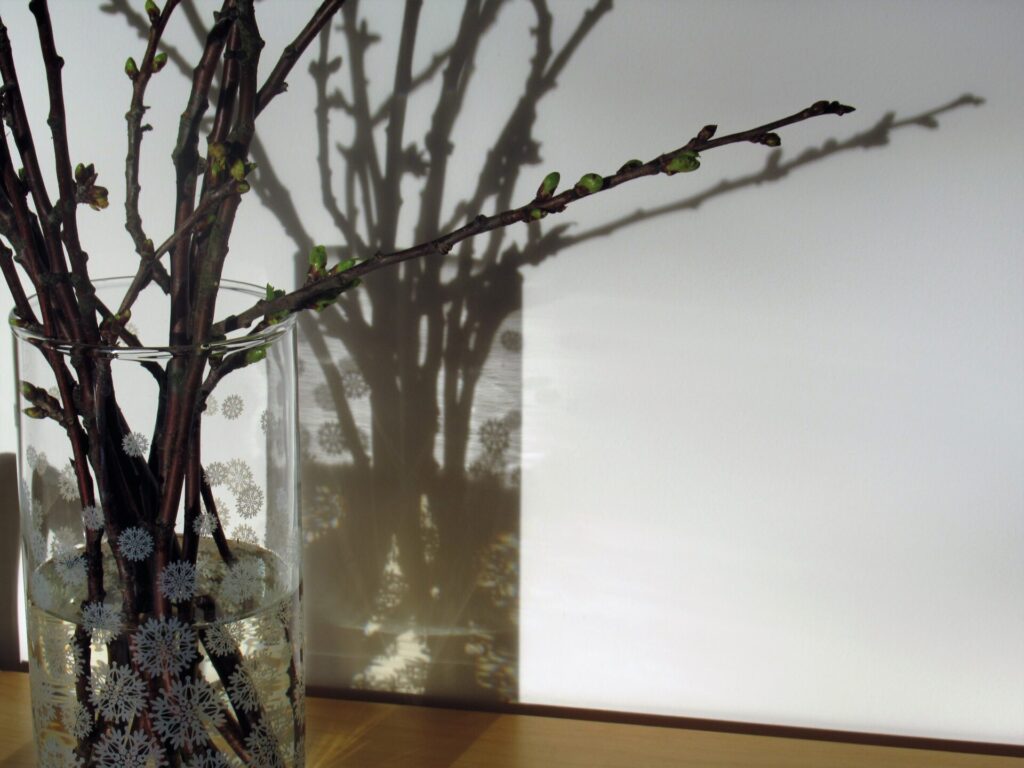
Fortunately, those dark days are interspersed with lighter and sometimes even sunshiny ones. One morning, sunlight streamed through the windows and suddenly there were two vases of cherry branches – the real one and its shadow.
It’s always uncertain whether the buds on branches like these will open, but this time we were lucky. White cherry blossoms against a white wall – simply beautiful.
I’ll tell you more about the cardi-with-a-few-clues-now when I’ve made some progress. Bye for now and take care!