Seventh Heaven Scarf

Hello!

First of all, thank you to those of you who suggested better names for my Simple Sock Scrap Stripe and Slip Stitch Scarf – great suggestions, all of them!

When deciding on a name for a knitting pattern, besides choosing something I like, it’s also about how findable it is on Ravelry. Taking everything into consideration, I’ve decided to go with Lynn’s idea and call it Seventh Heaven Scarf. Thank you, Lynn! It’s not just great because of its reference to the seven Ss in the original name, but also because for me, playing with yarn and colours is one of the fastest routes to seventh heaven!

In case you’d like to knit something like my Seventh Heaven Scarf, too, I’ll give you the preliminary pattern here. It’s going to be a fairly large rectangular scarf in garter stitch and slip stitch stripes (but it can be made in any size). This is what mine looks like so far:

Measurements
I’m aiming for a width of approximately 45 cm/18” and a length of 1.80 m/71” or a little longer.

Yarn
Main colour (MC): 220 g of fingering-weight/sock yarn in a very dark or very light (semi) solid colour. I’m using 5 skeins of Isager Sock Yarn (50 g/193 m; 40% alpaca, 40% merino, 20% nylon) in colour 100 Navy blue.
Contrast colour (CC): 220 g of fingering-weigh/sock yarn remnants (+ some extra just in case). Anything will work: solids, semi-solids, variegated and/or self-striping yarns.
(These are estimated quantities. The actual scarf may take a little more or less yarn.)

For my scarf I’ve chosen 22 different yarn remnants of at least 10 grams each. They include: Lana Grossa Meilenweit, Regia 4-ply, Schoppel Crazy Zauberball, various hand-dyed yarns from indie dyers, Drops Fabel, Zitron Trekking XXL and other yarns that have lost their labels.

To remind myself of the order I’m planning to use my CC yarns in, I’ve split them up into 3 smaller groups, photographed them and put each group in a separate plastic bag.

Needles and Gauge
Knitting needles: 3.5 mm/US 4 (For socks I’d use 2.5 mm/US 1.5 needles for these yarns, but for a drapier scarf I’ve gone up several needle sizes.)
Gauge: 23 sts x 50 rows = 10 x 10 cm/4 x 4” in stripe pattern.

Pattern notes:

  • The scarf has 3-stitch I-cord edges (photo below). The first 3 sts of every right-side row are knit in the colour of the previous row.
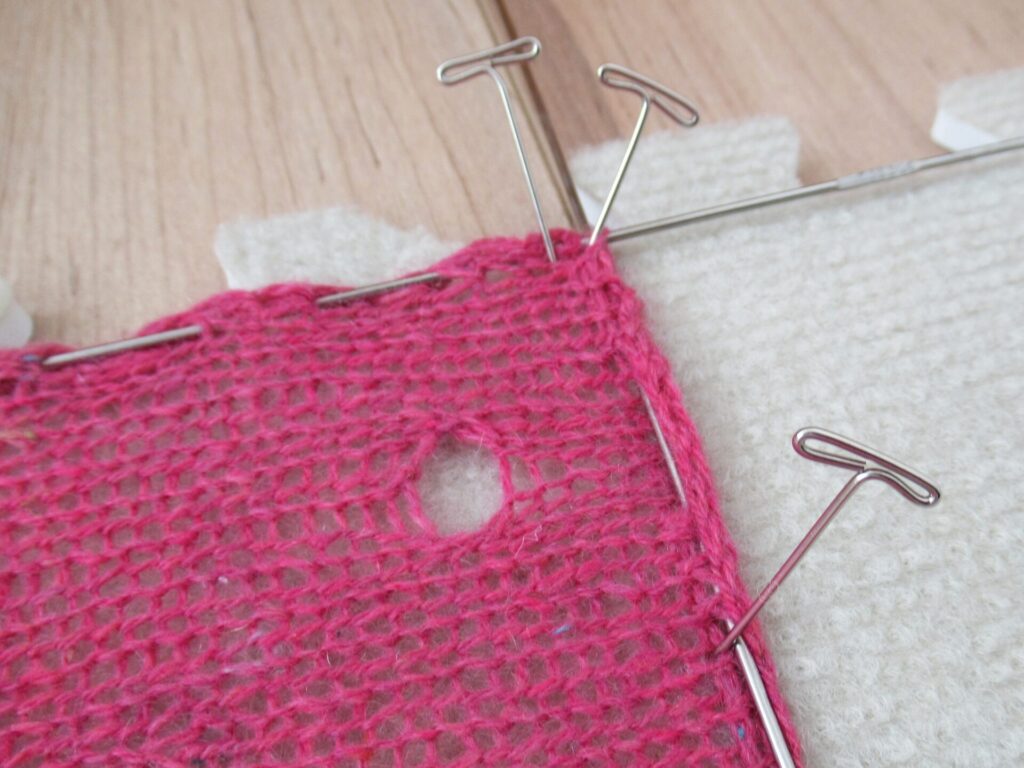
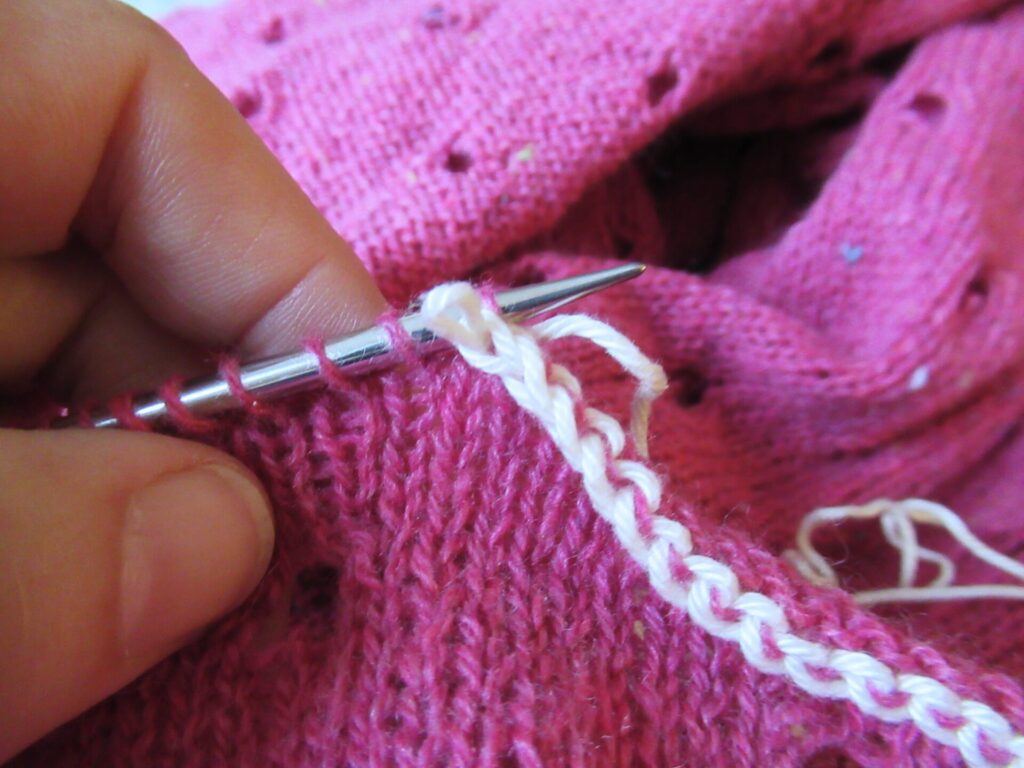
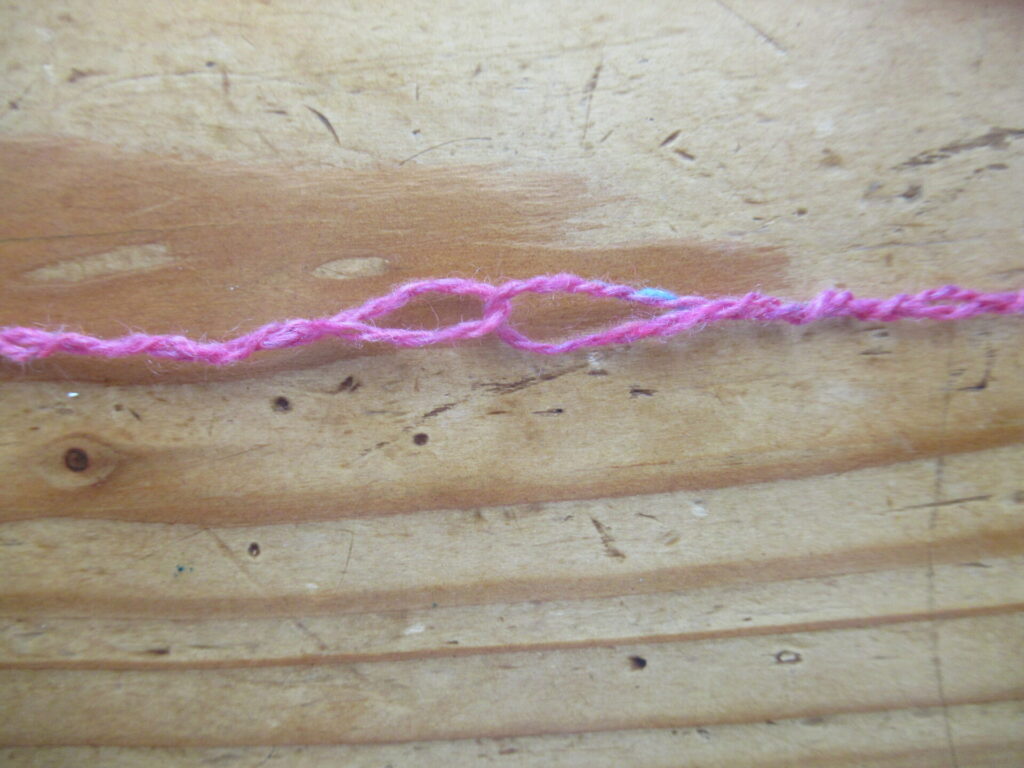
  • When changing colours after the 3 edge stitches on right-side rows, always pass the ‘new’ yarn in front of the ‘old’ yarn.
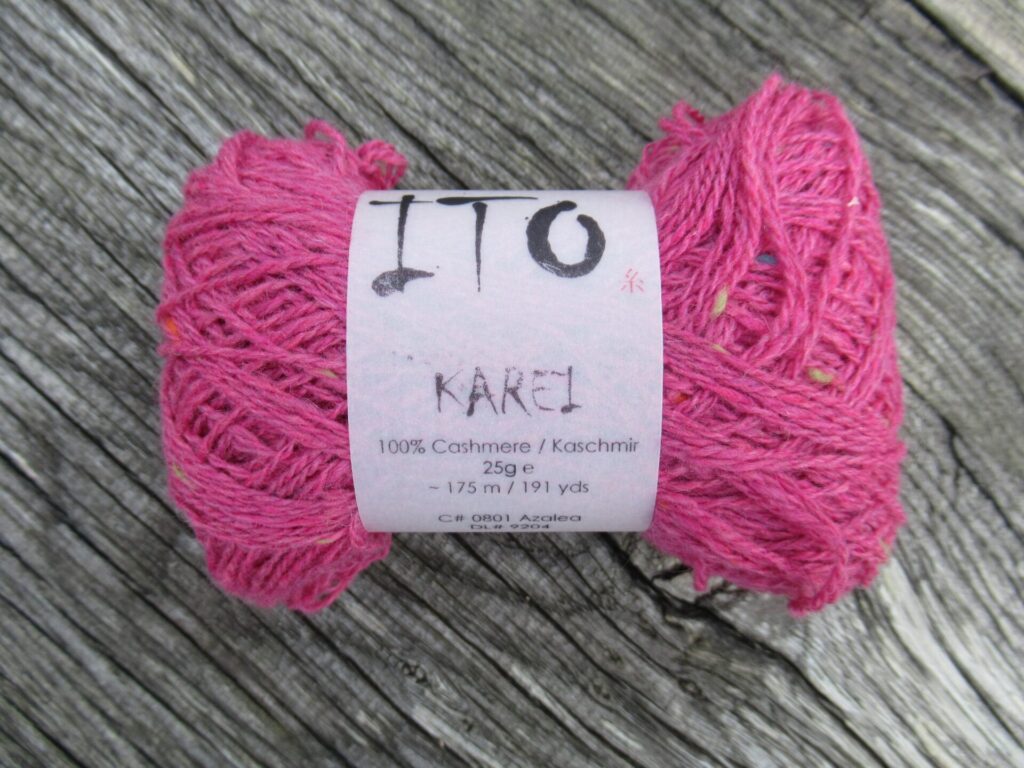
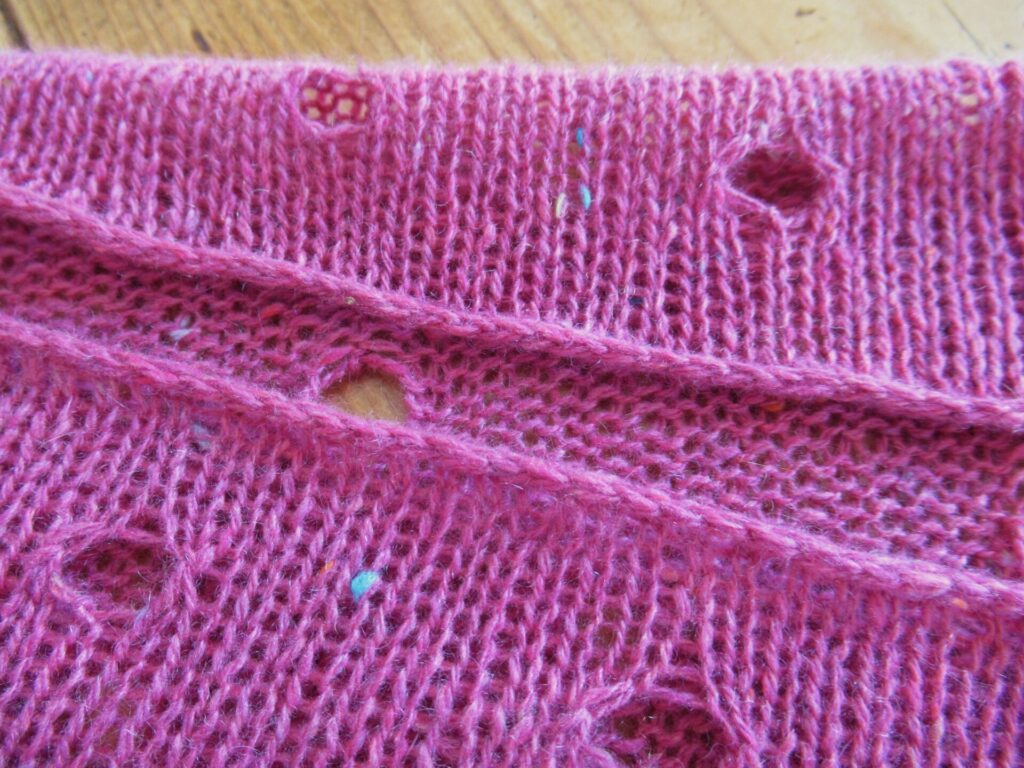
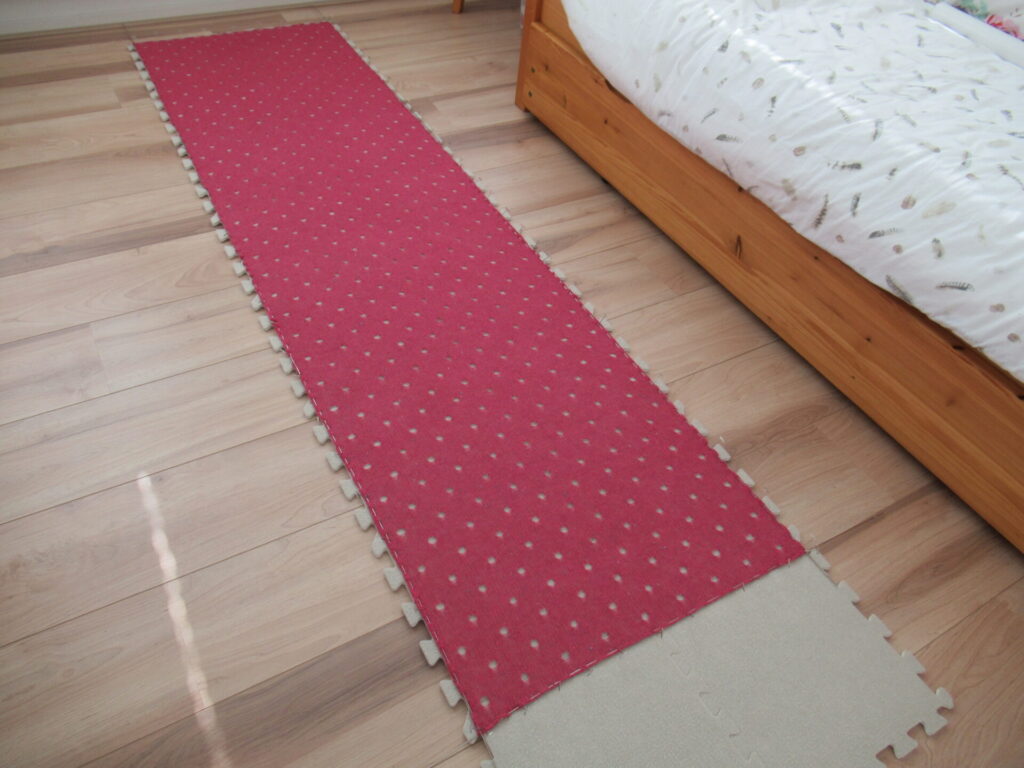
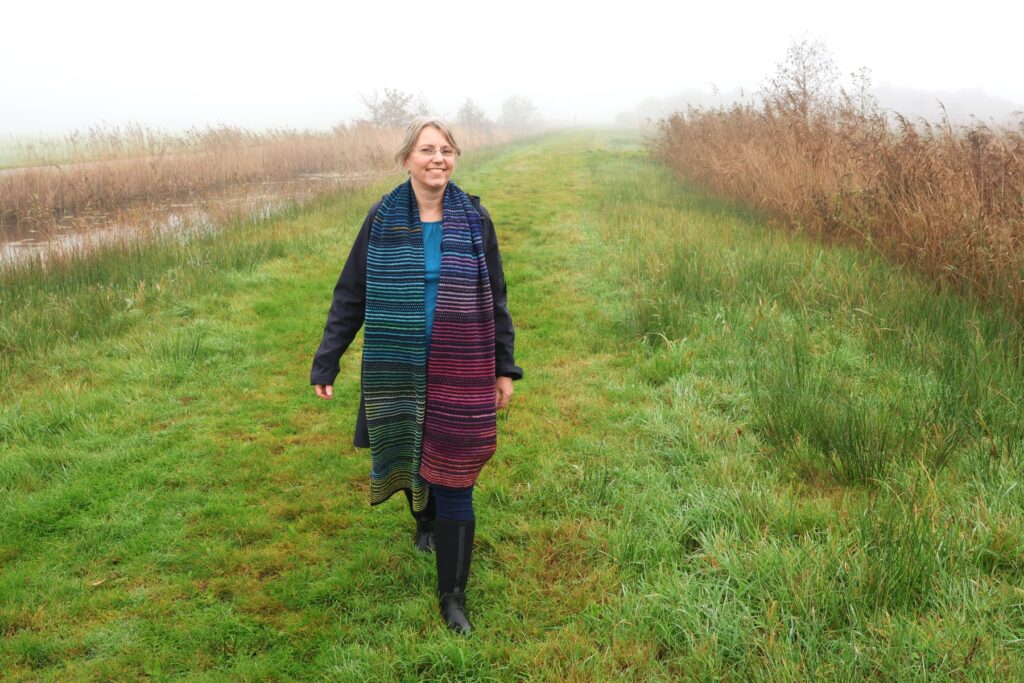
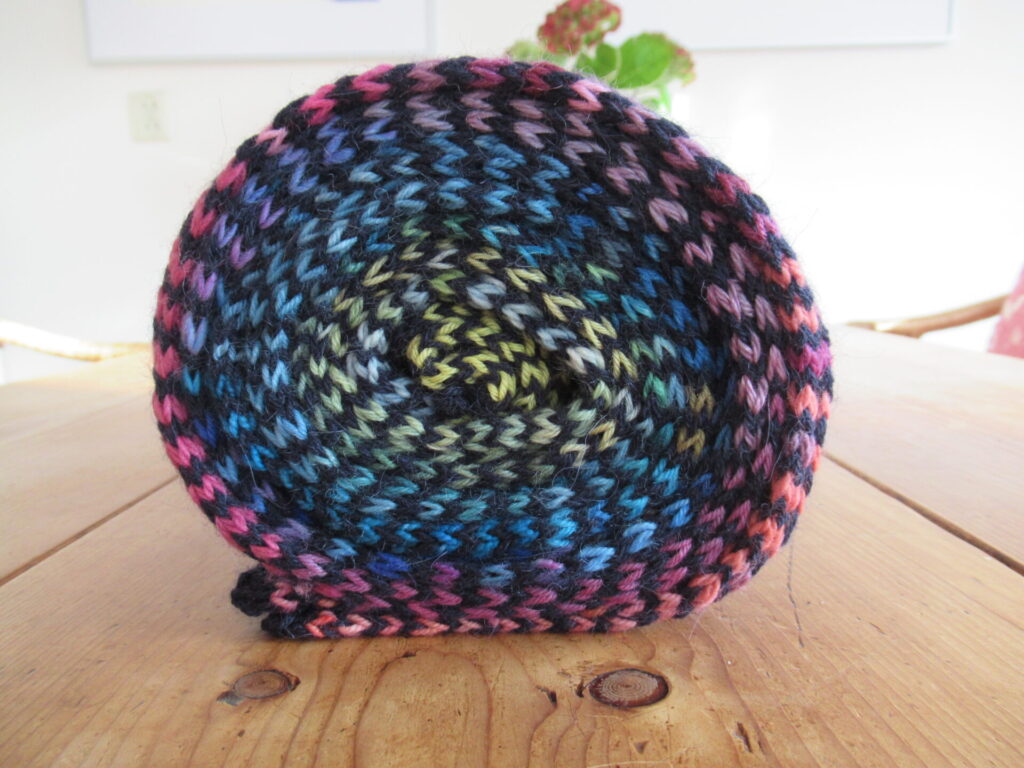
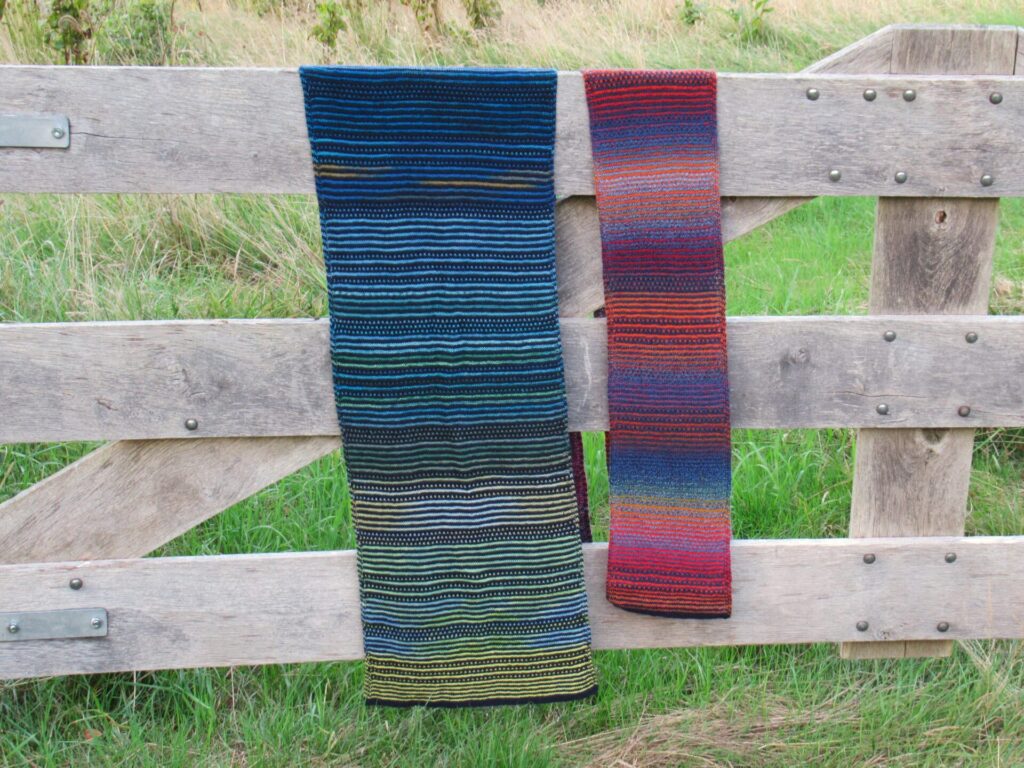
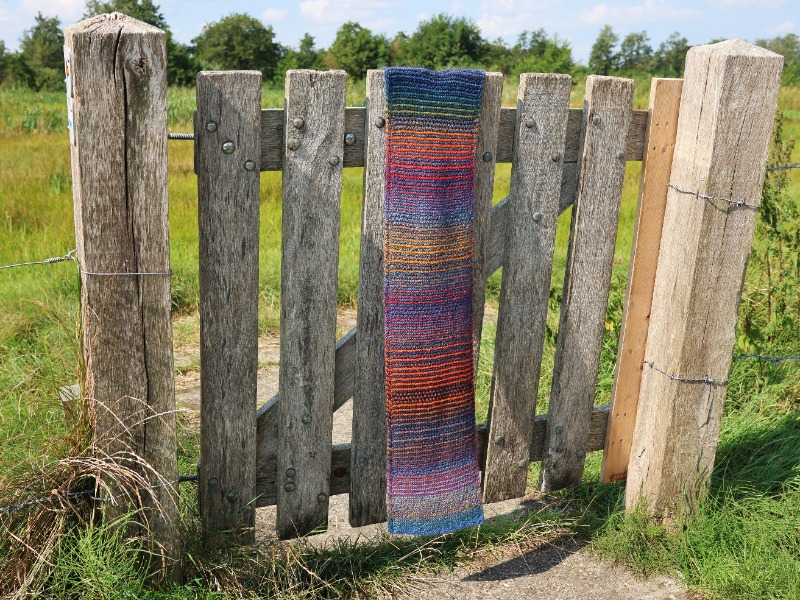
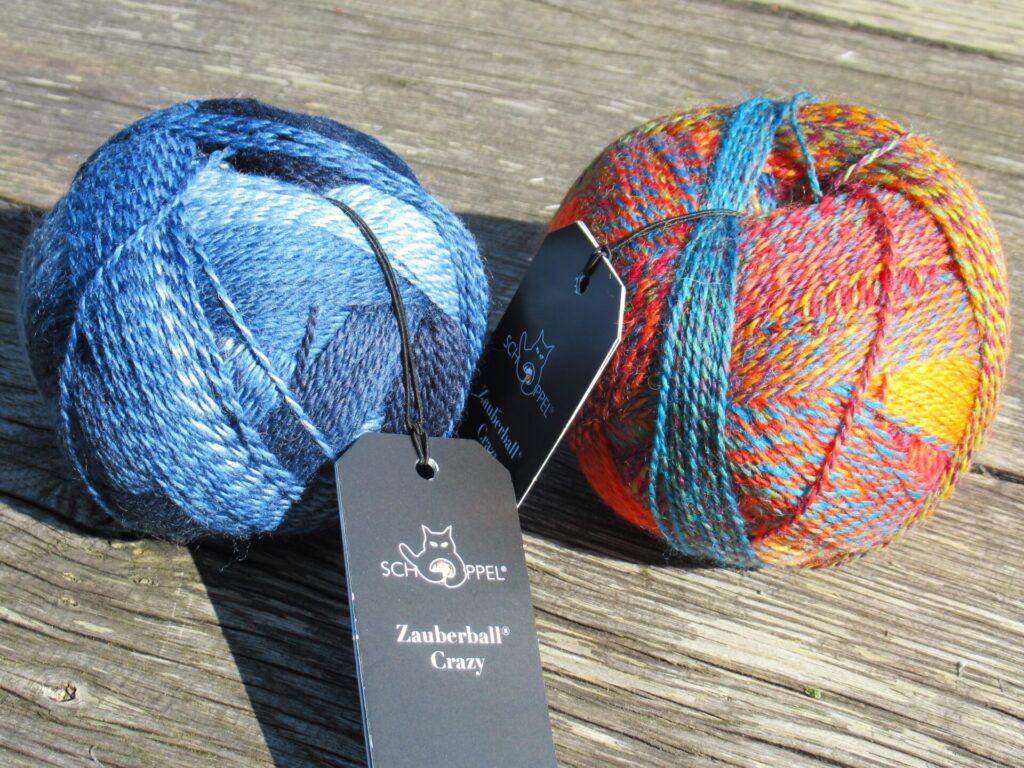
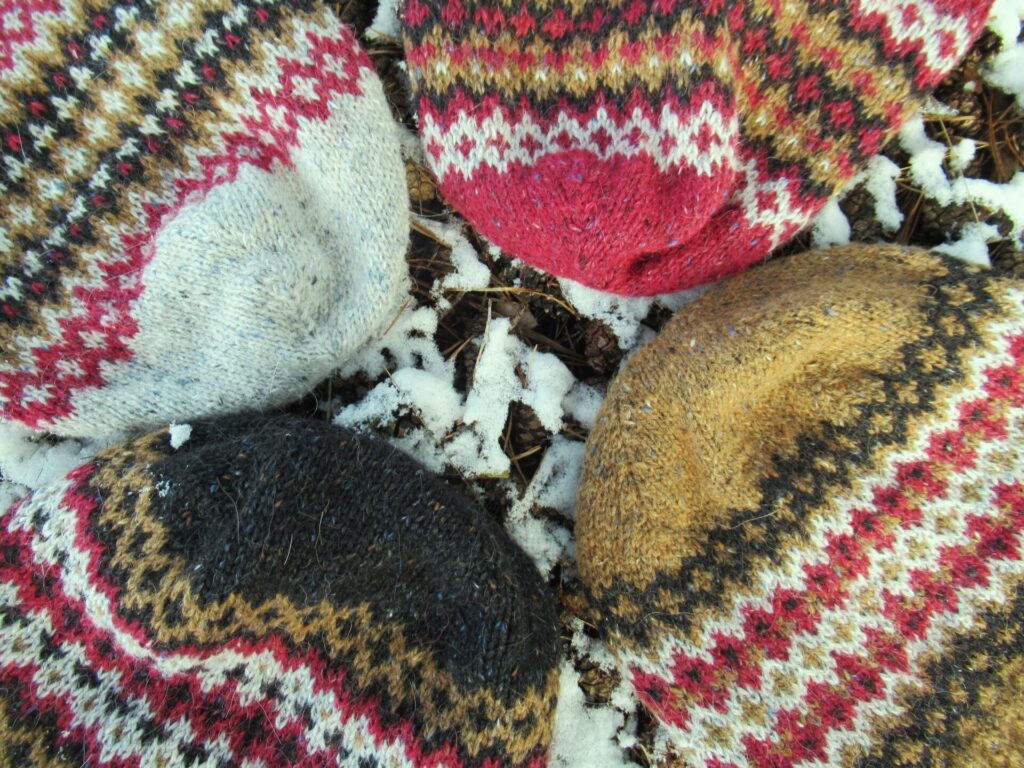
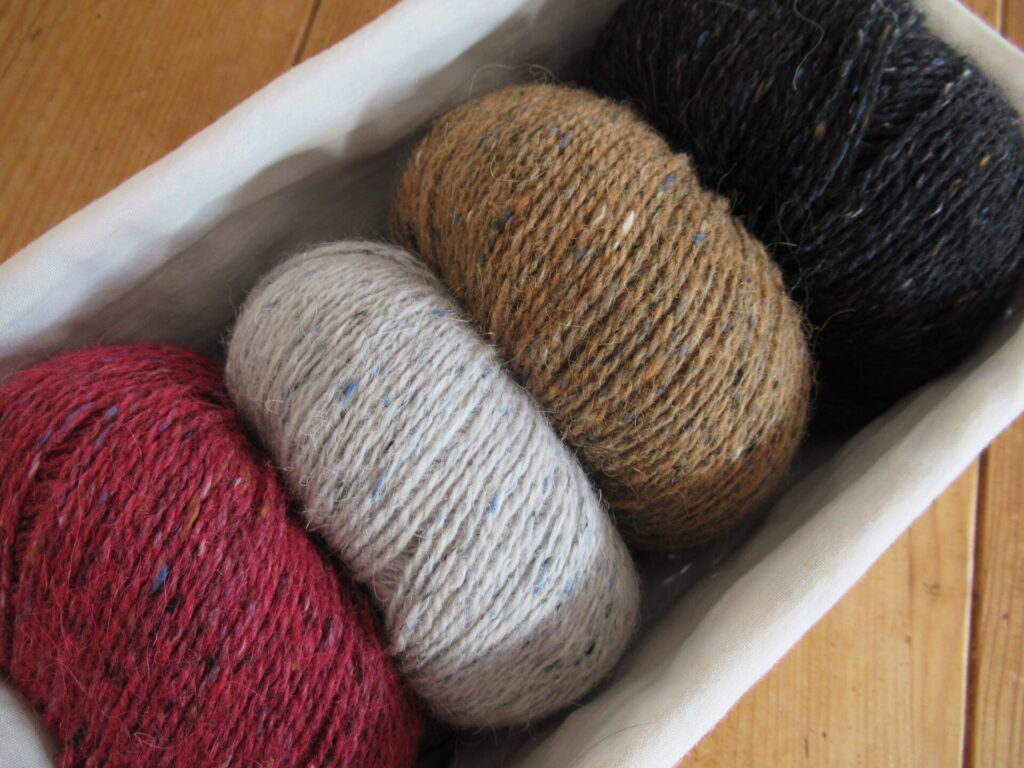
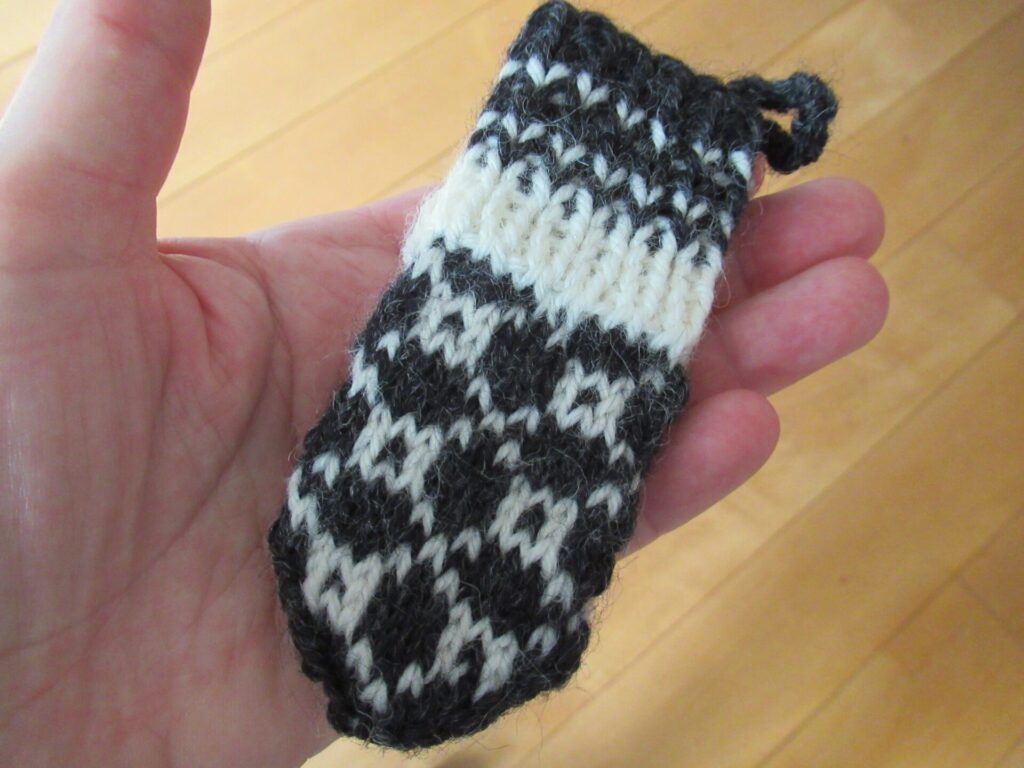
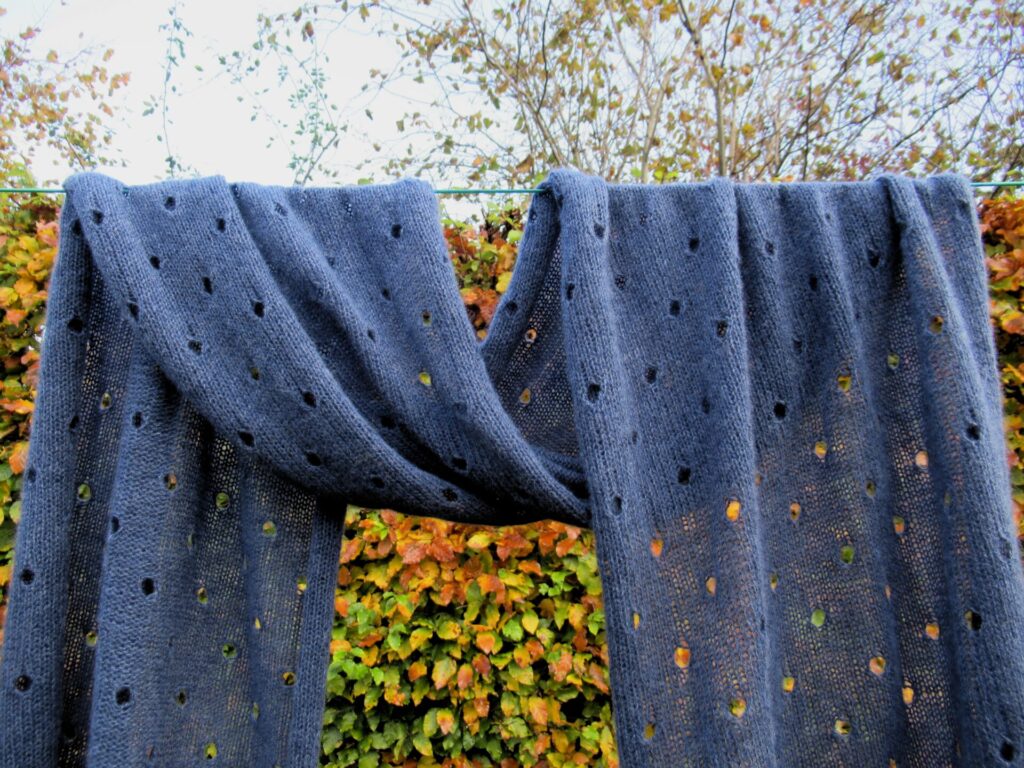
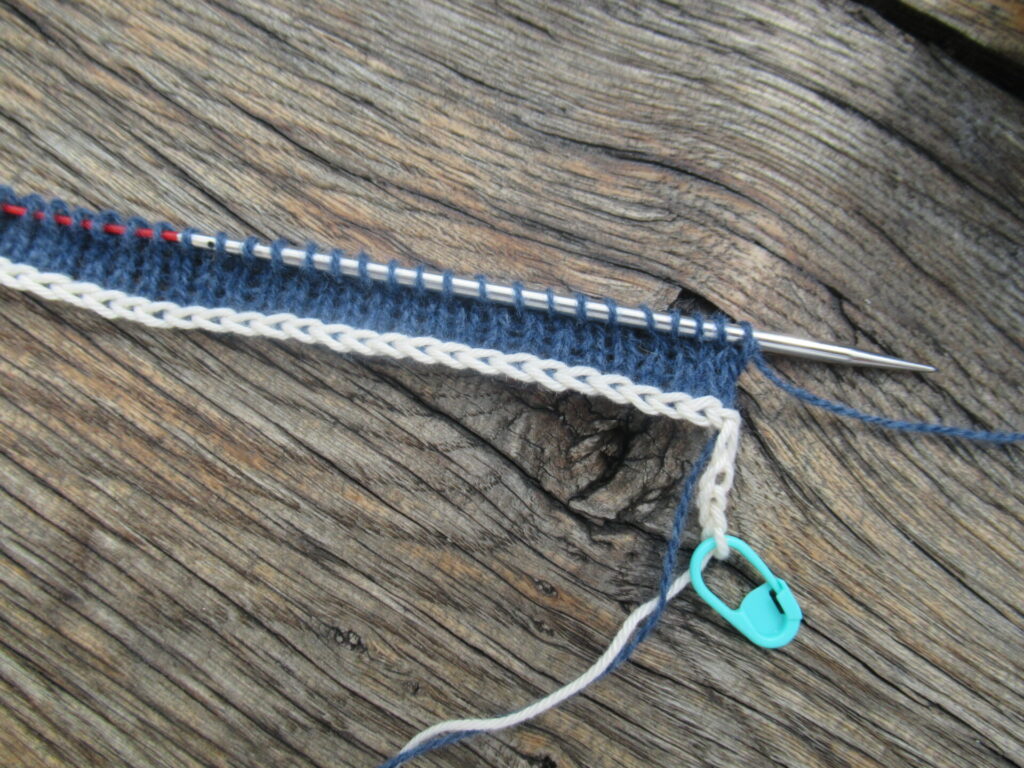
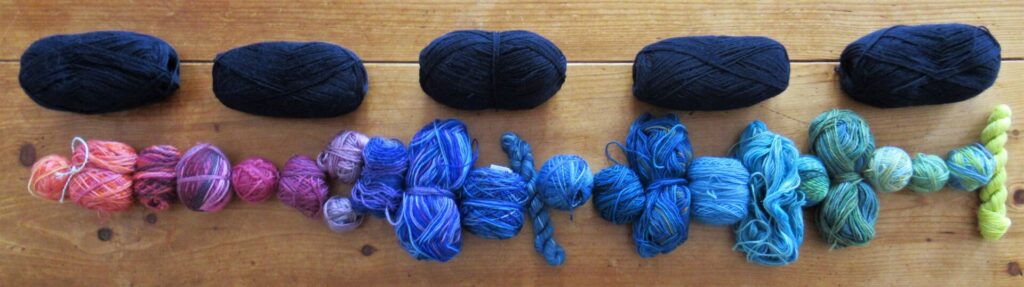
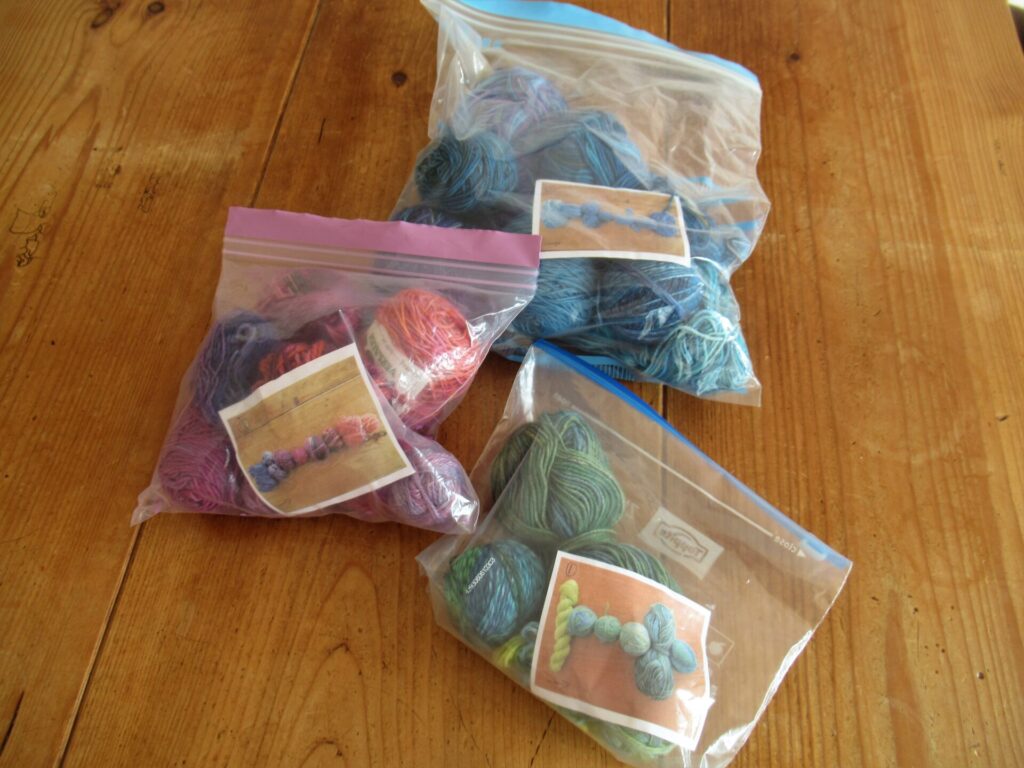
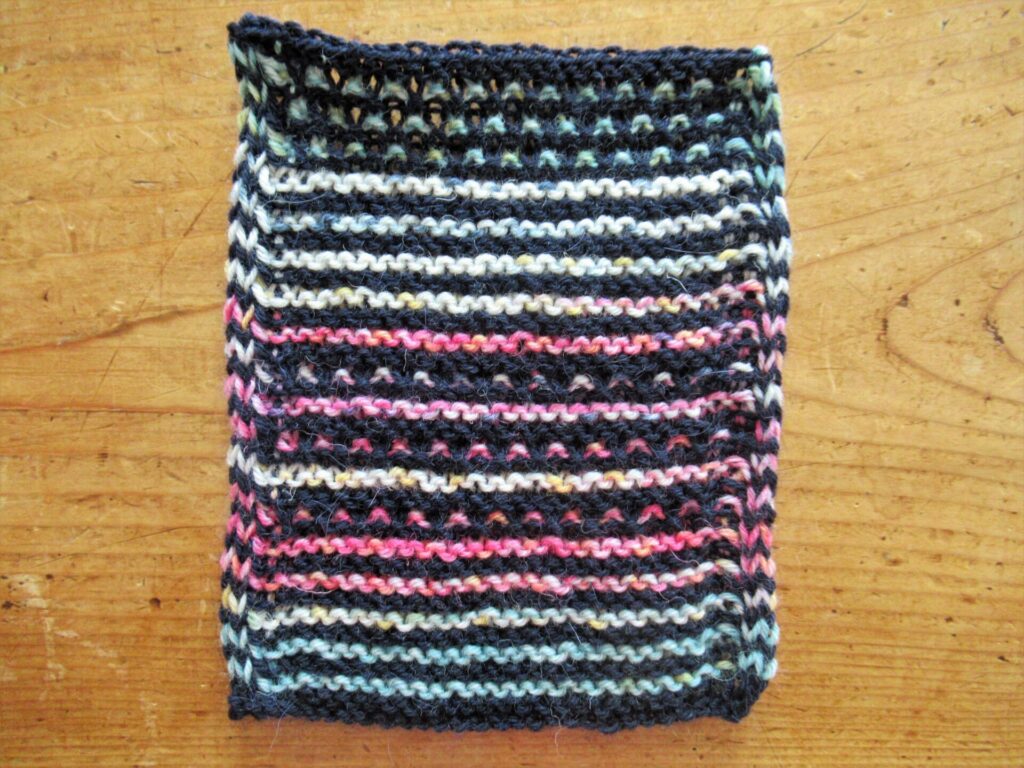
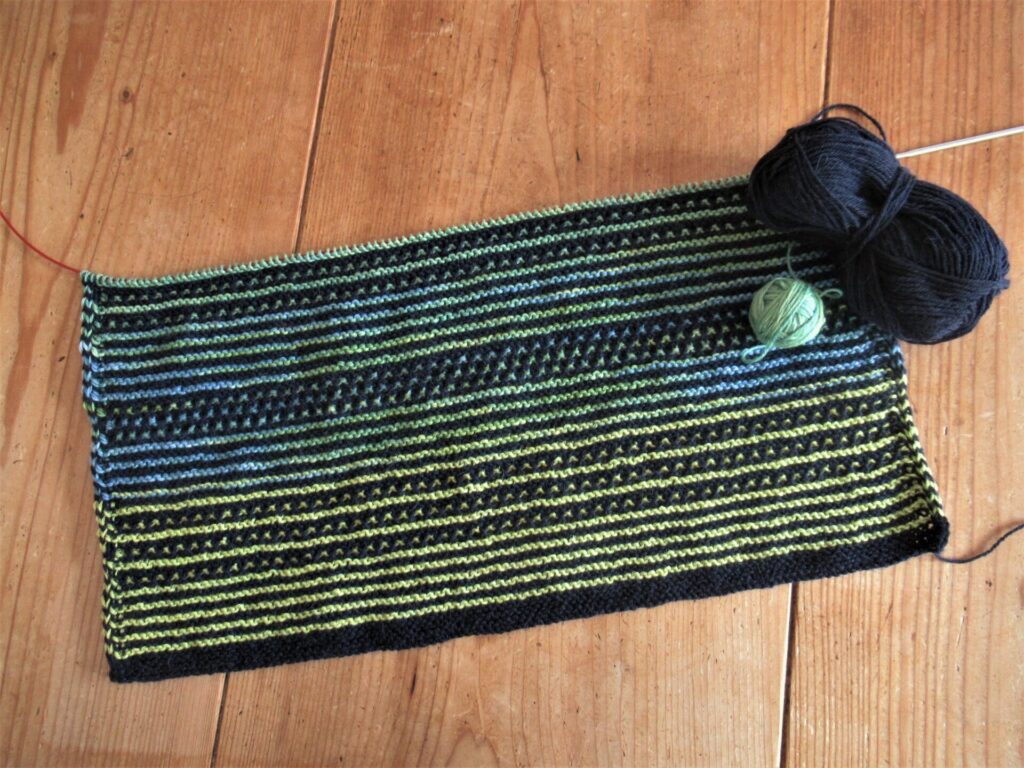
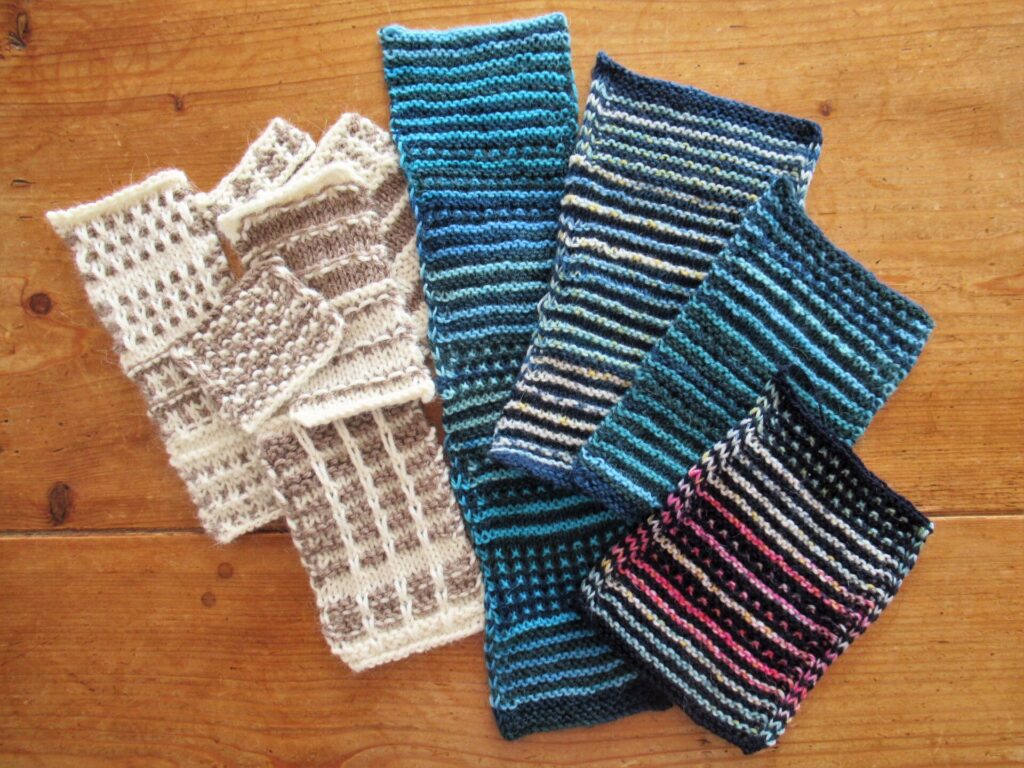
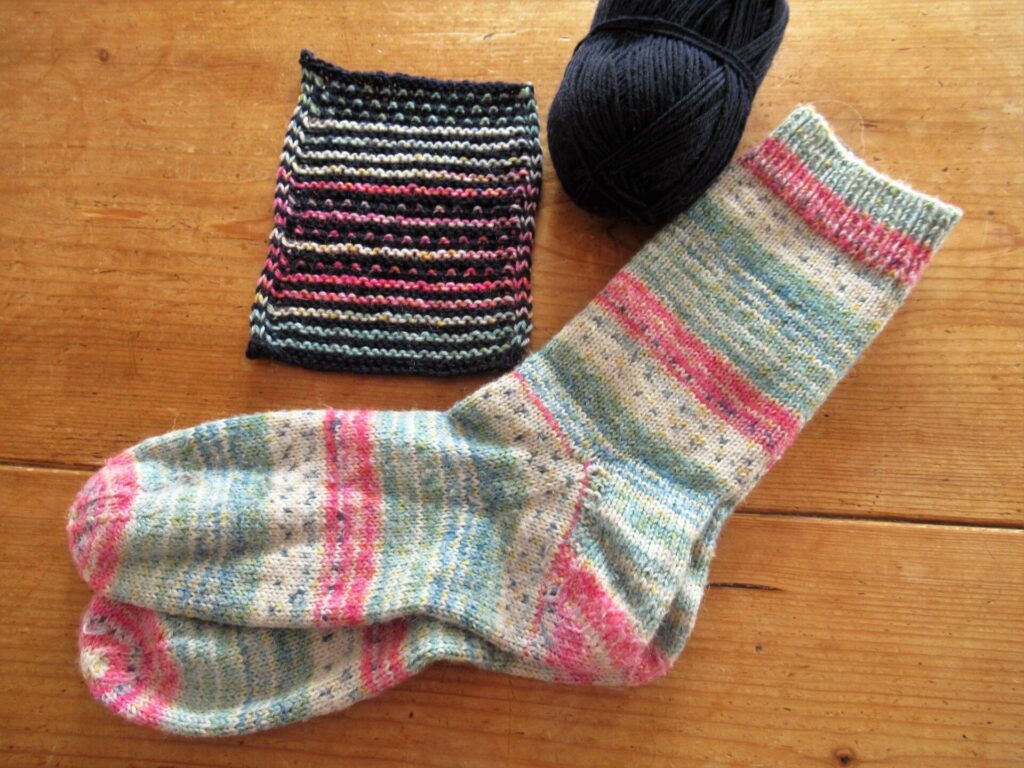
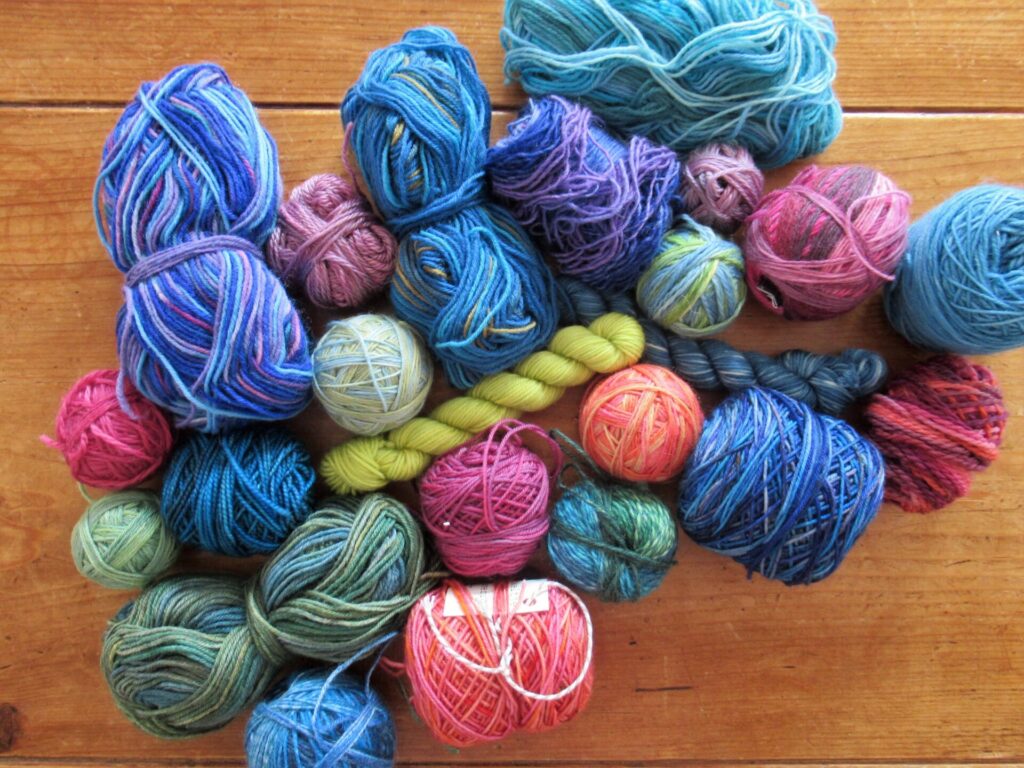
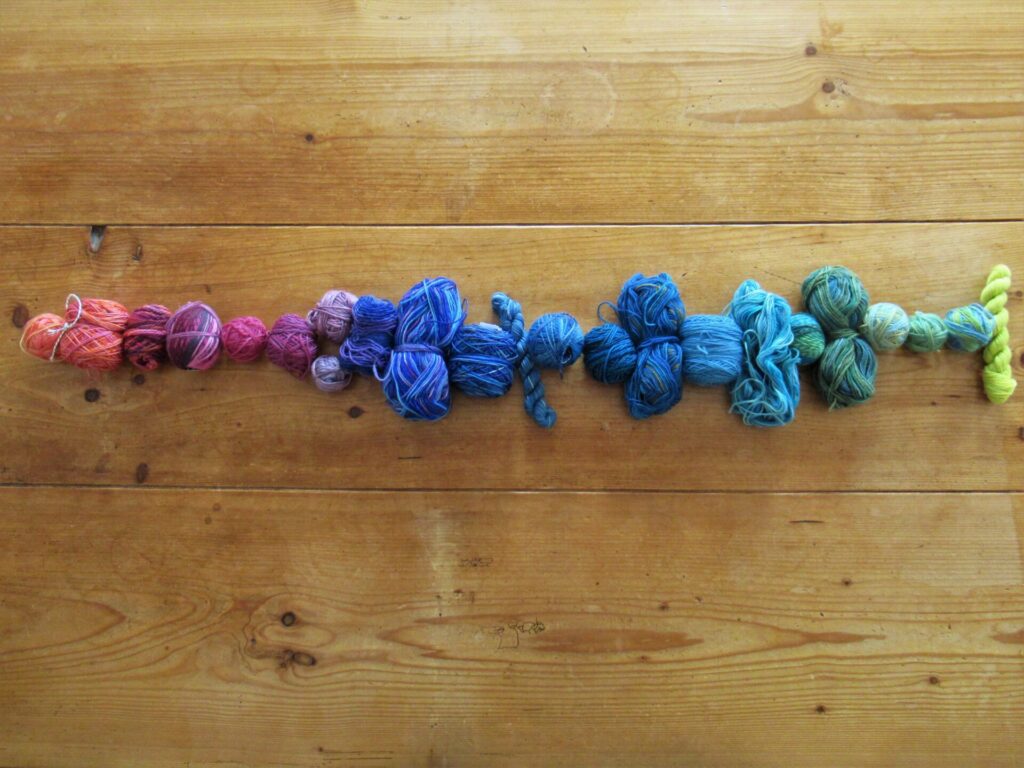
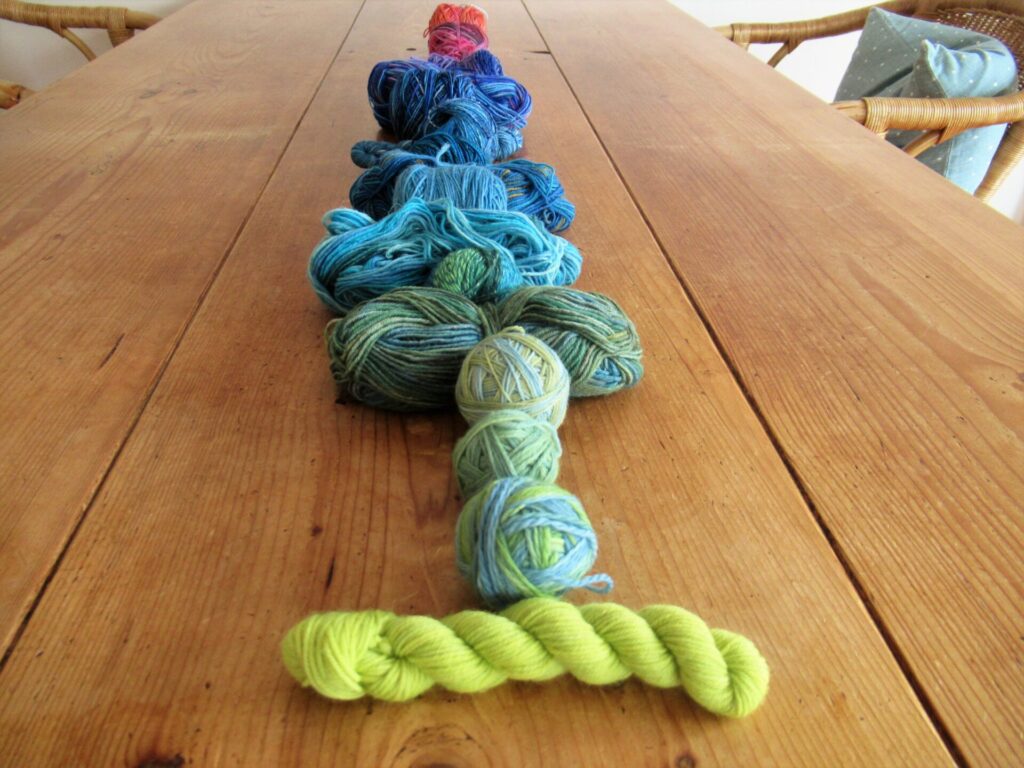
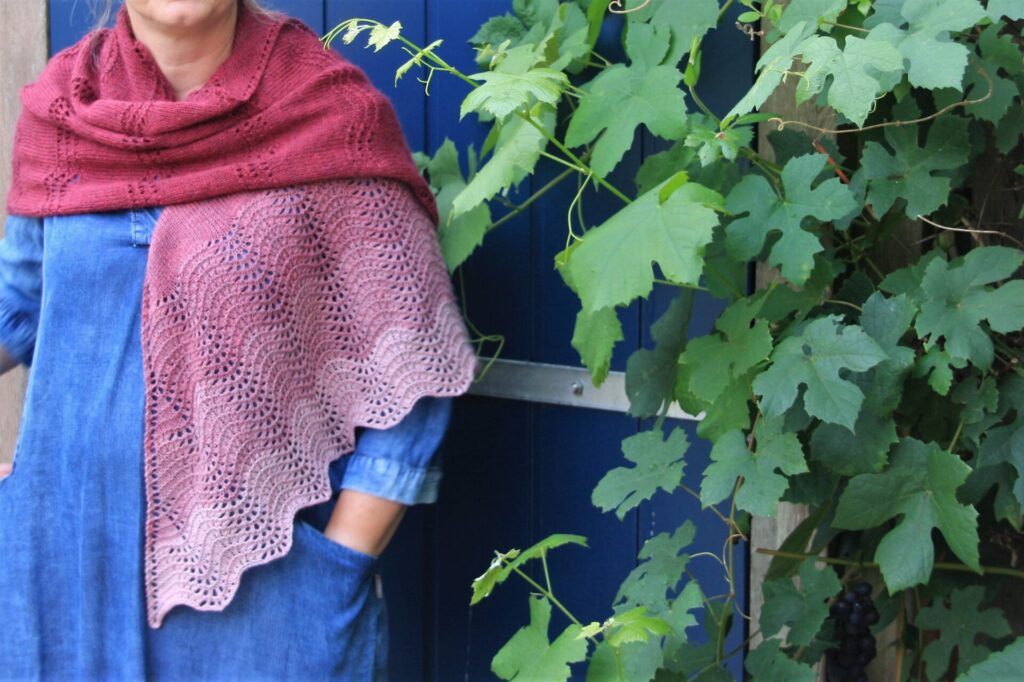
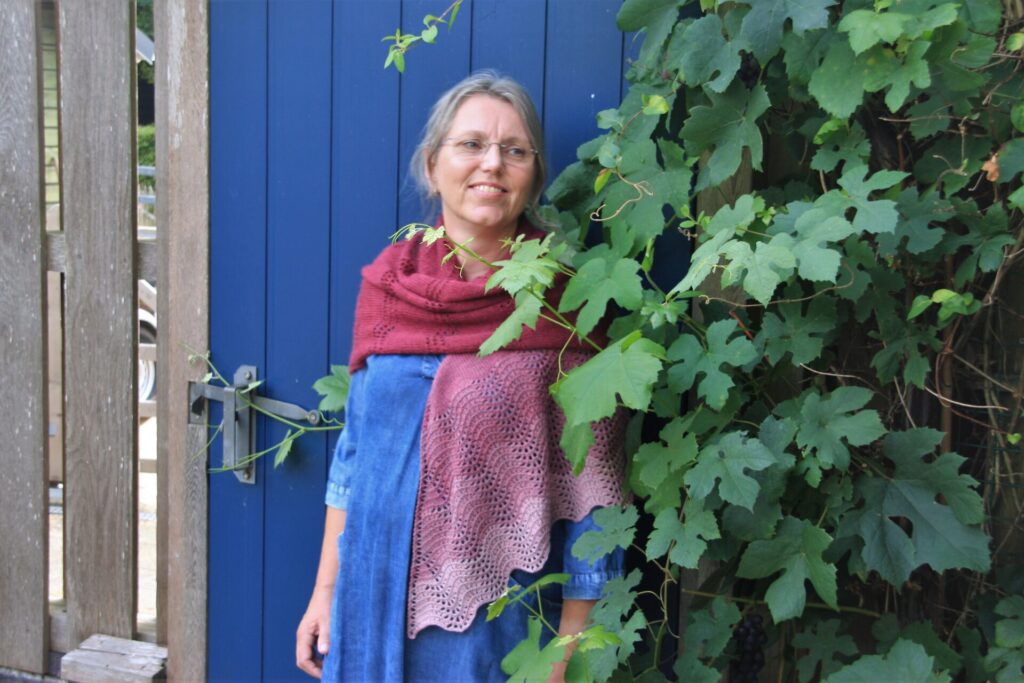
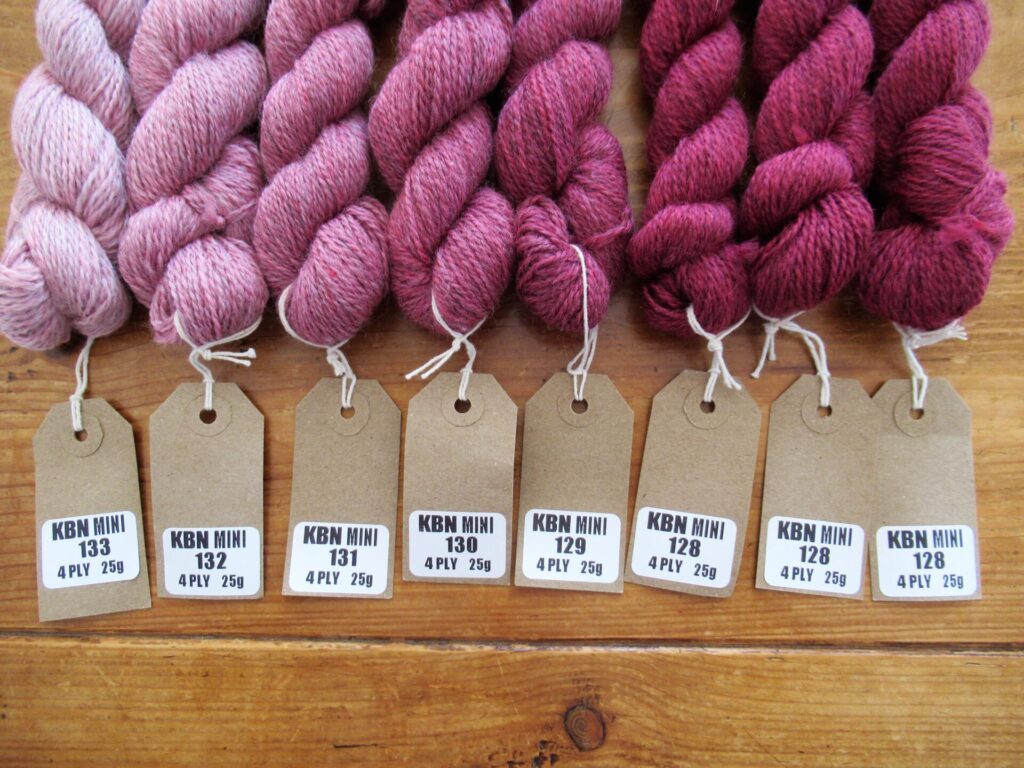
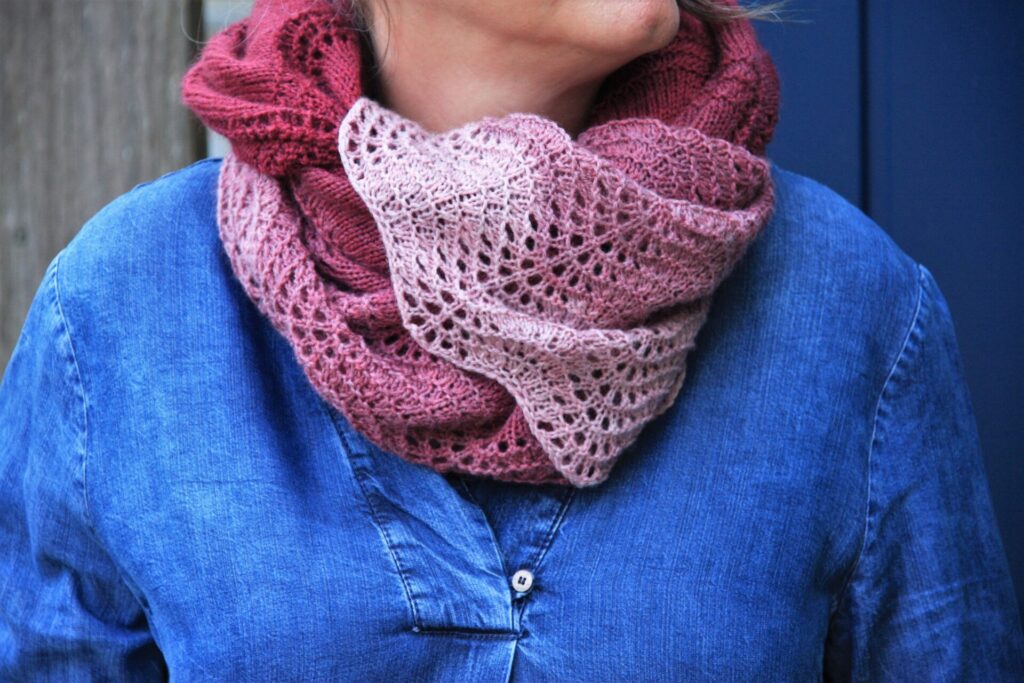
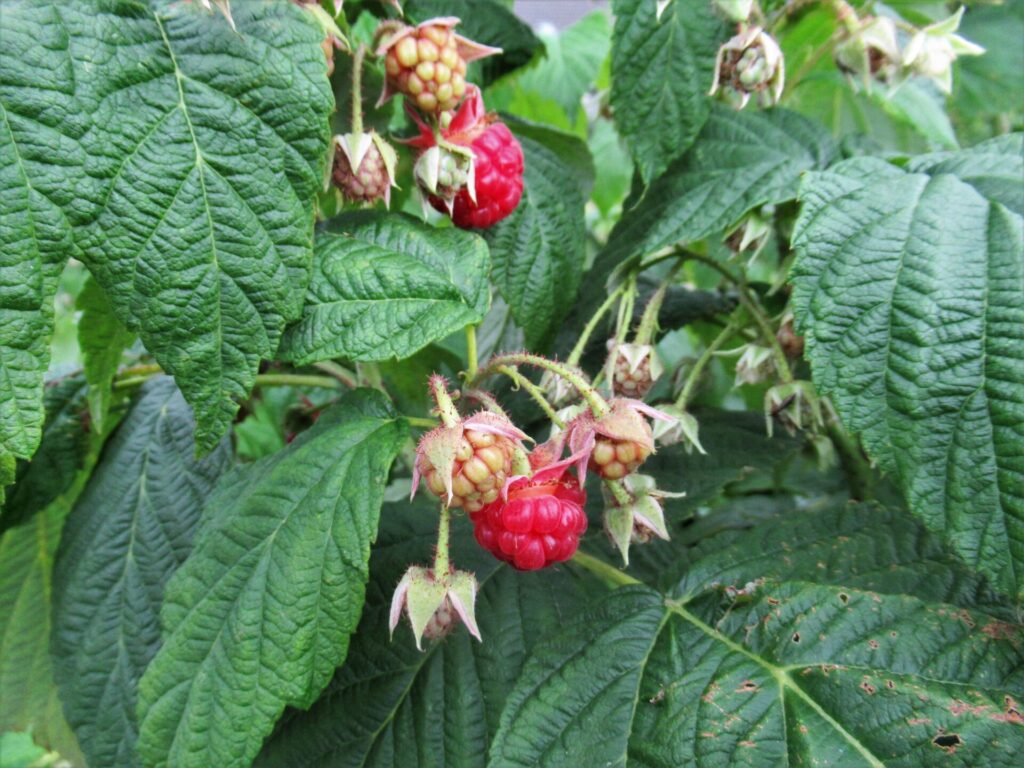
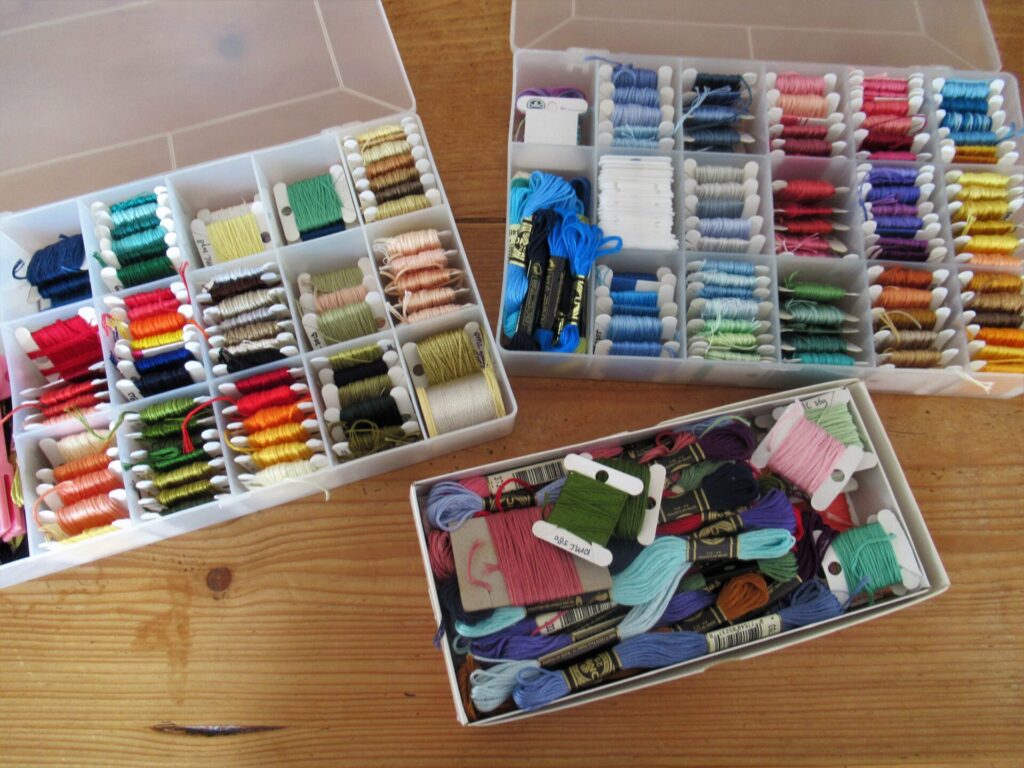
  • The scarf can be made in any size or yarn weight you like. Decide on the measurements you’d like, knit a generous swatch, and then weigh and measure it. Based on this swatch, calculate how much yarn you’re going to need and how many stitches you need to cast on. The instructions below are for my size.
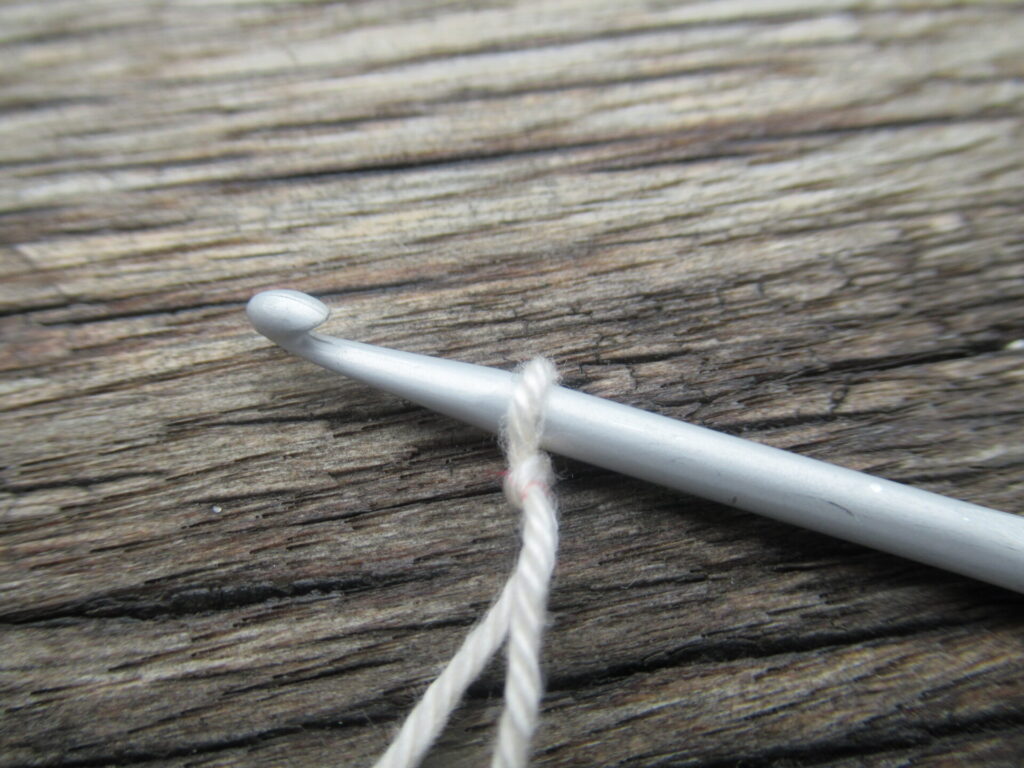
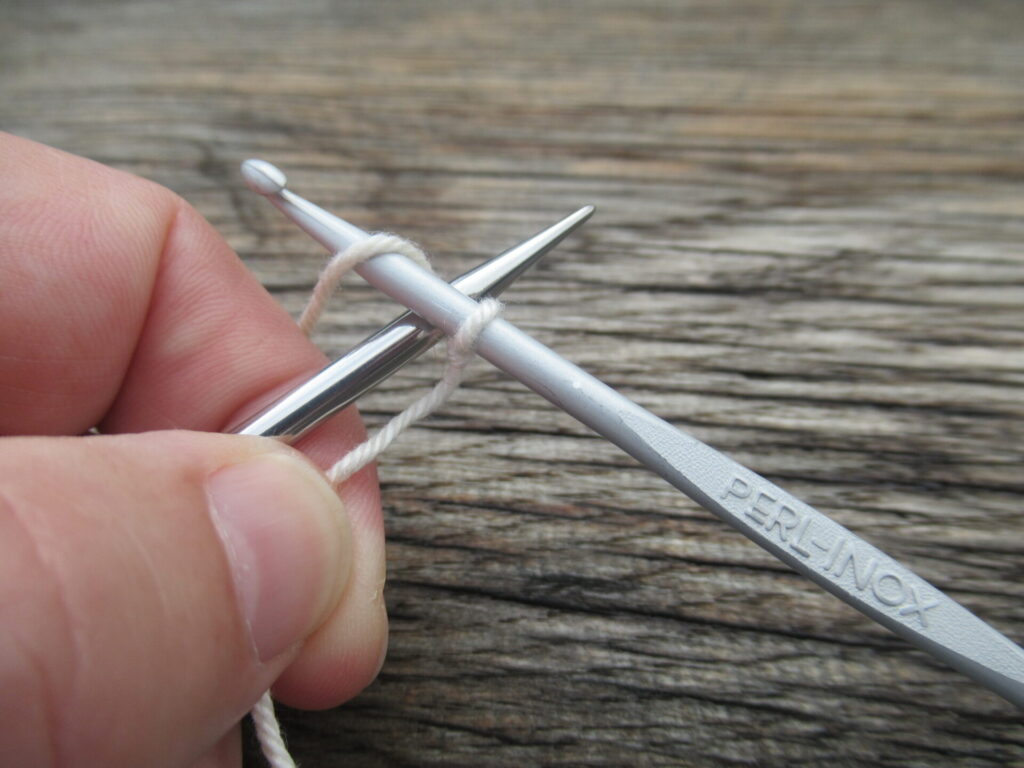
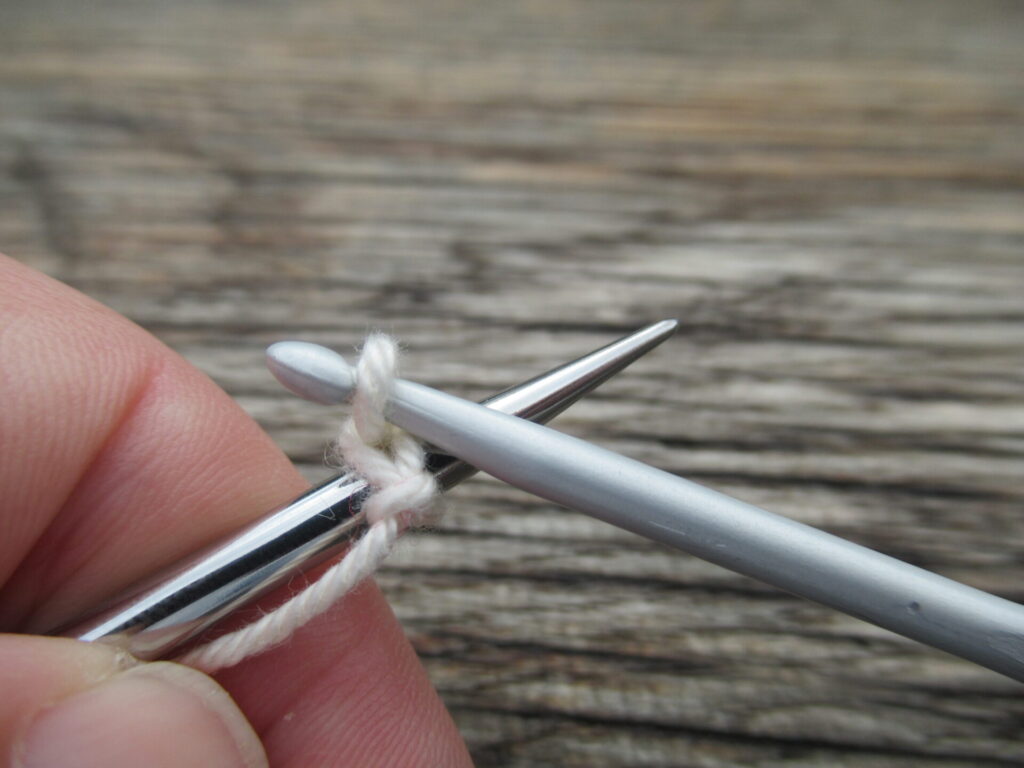
  • Always cast on an odd number of stitches.
  • Work the same number of rows with every remnant or vary the number of rows.
  • For a smoother transition from one CC yarn to the next, switch to a new CC yarn on a wrong-side A, C or D row (see below).
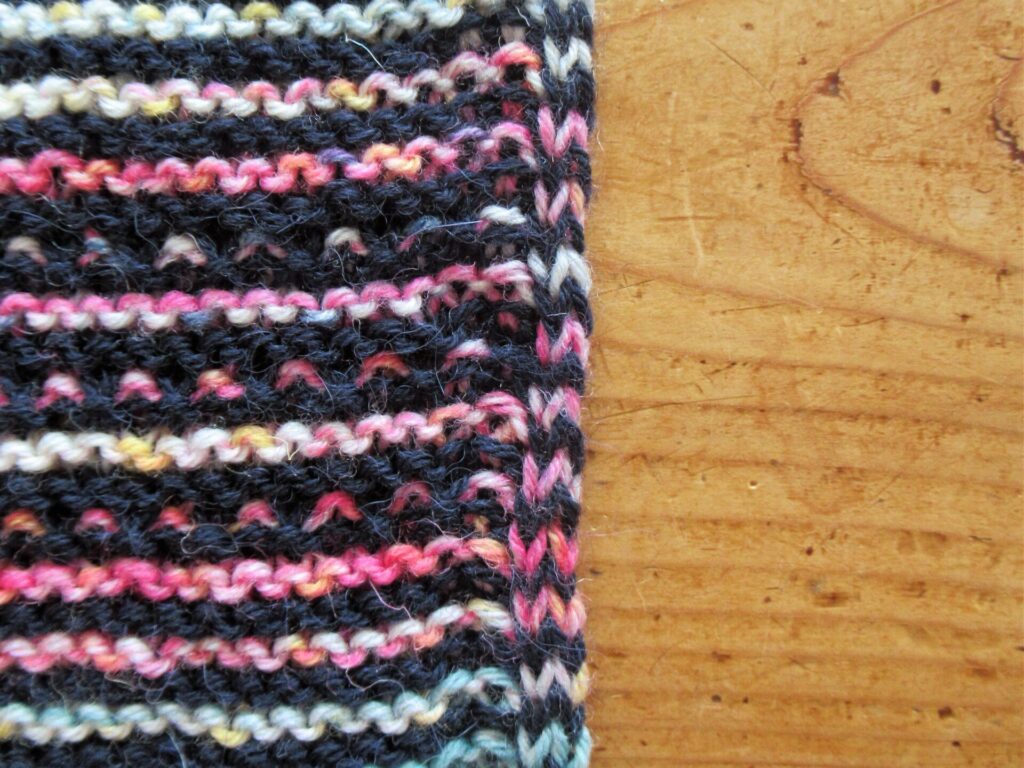
  • All slip stitches are slipped as if to purl (i.e. inserting the needle from right to left), sometimes with the yarn held in front (wyif), sometimes with the yarn held in back (wyib). Sl1 = Slip 1 stitch; Sl3 = Slip 3 stitches, Sl4 = Slip 4 stitches.
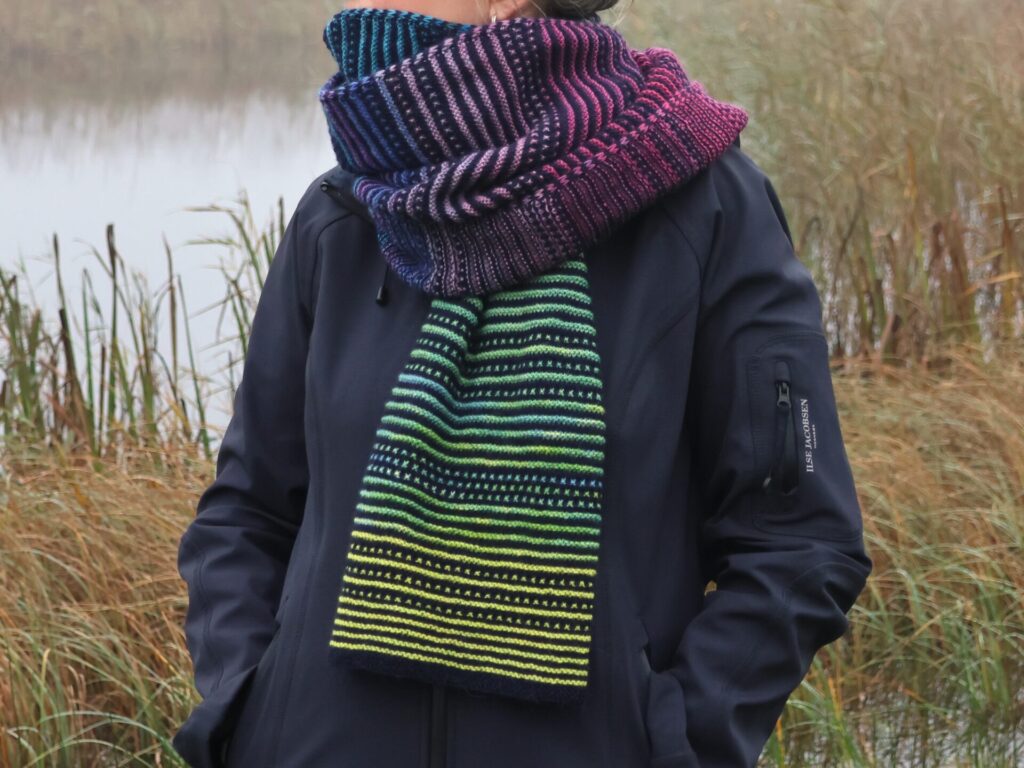
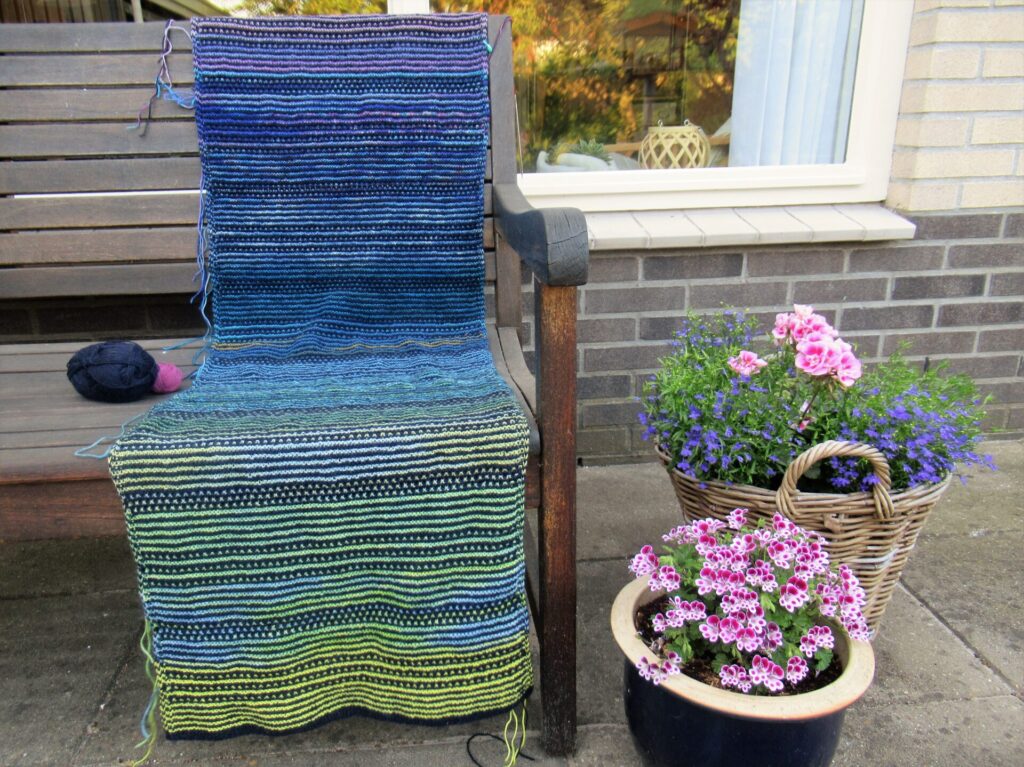
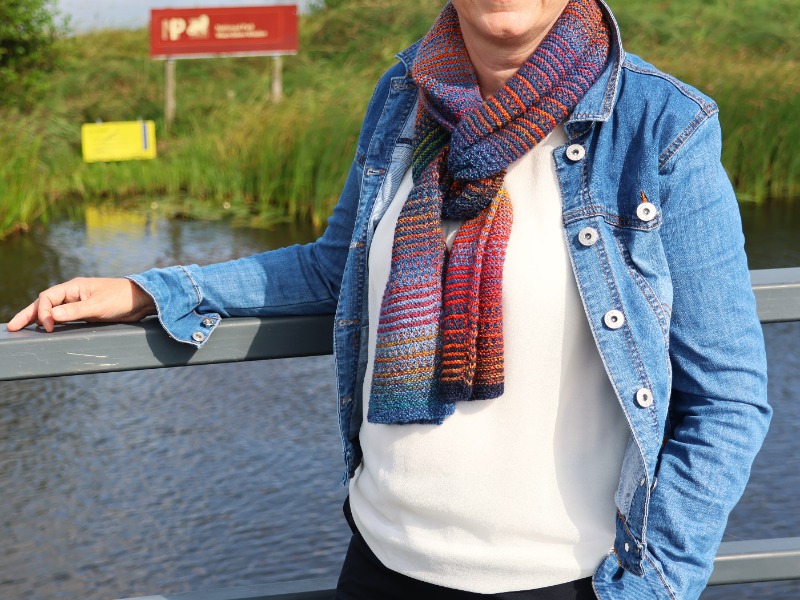
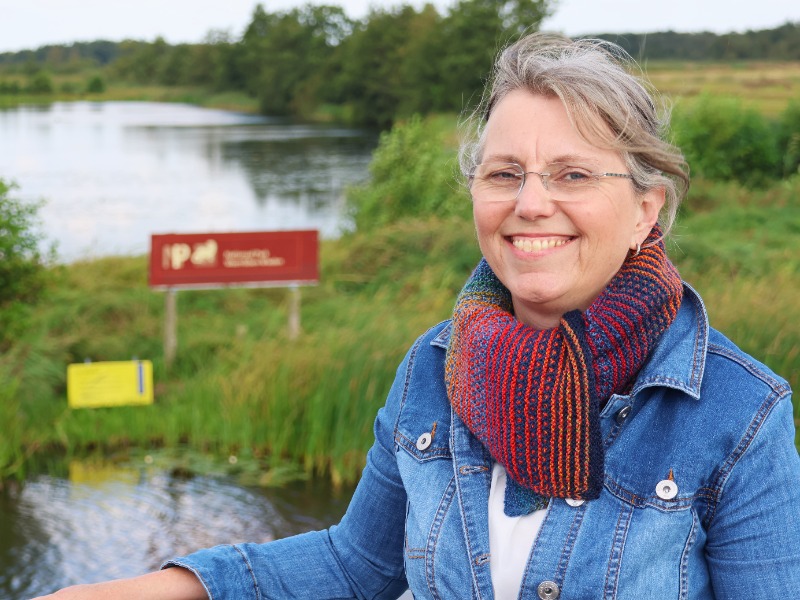
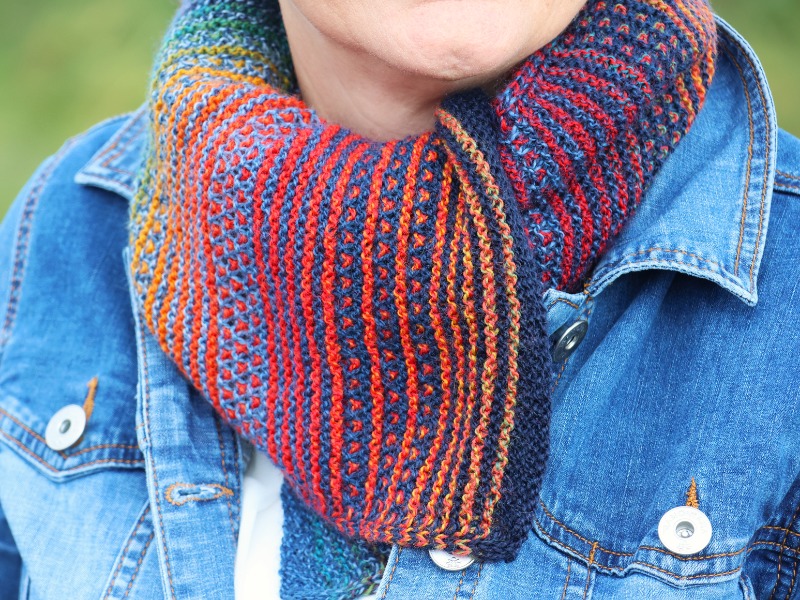
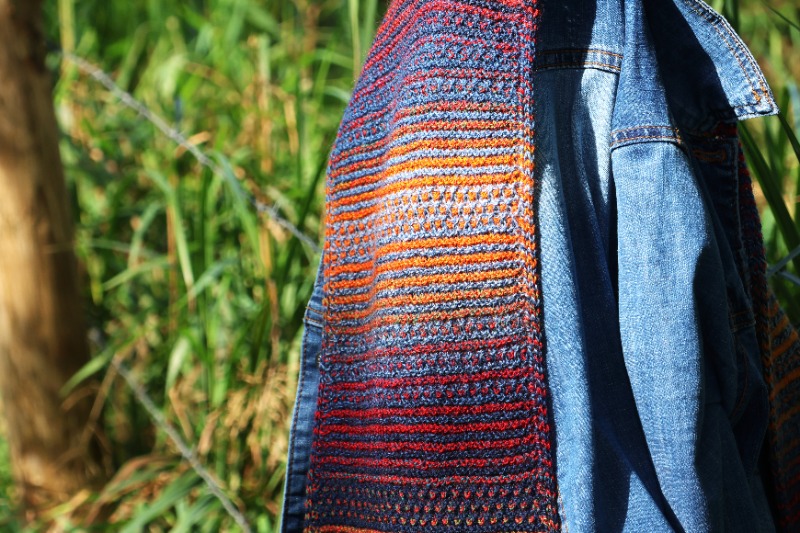
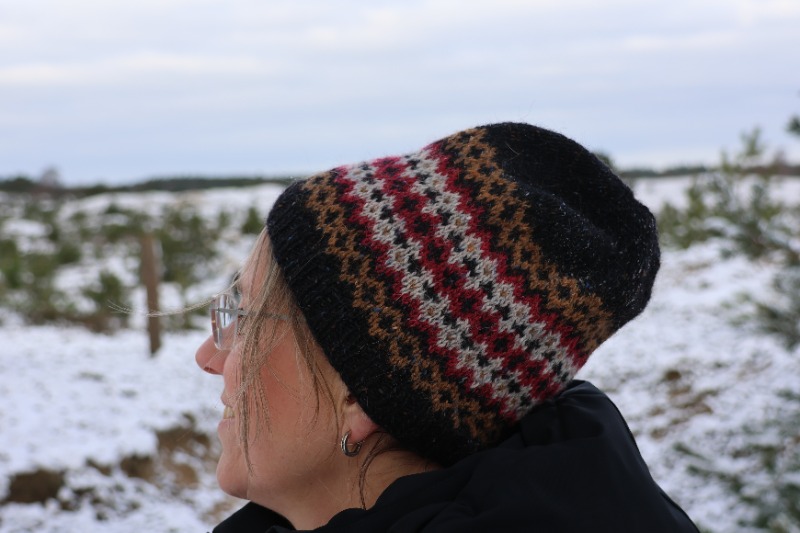
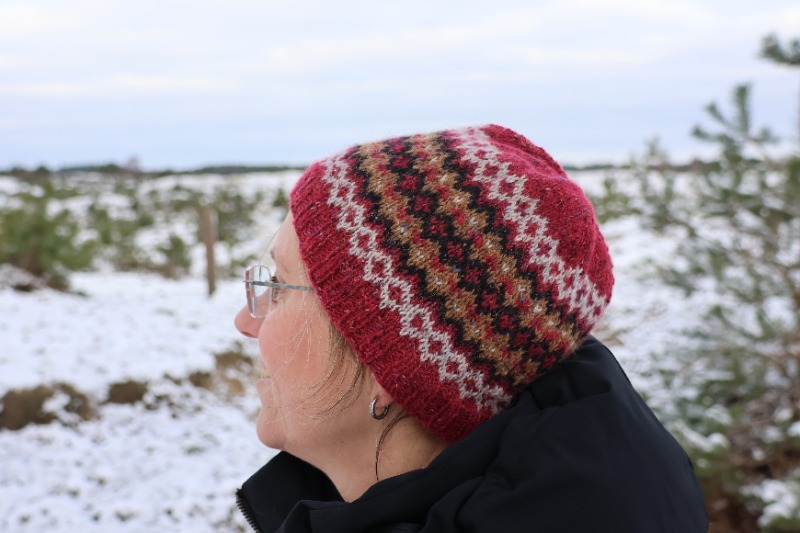
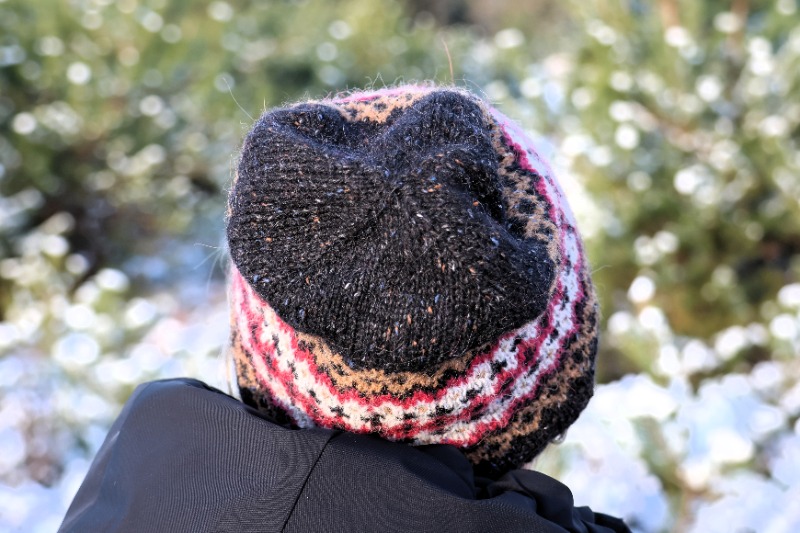
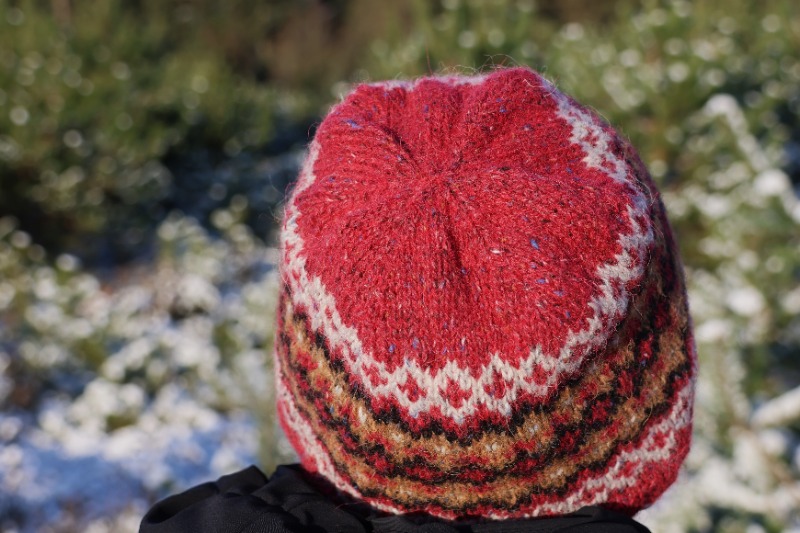
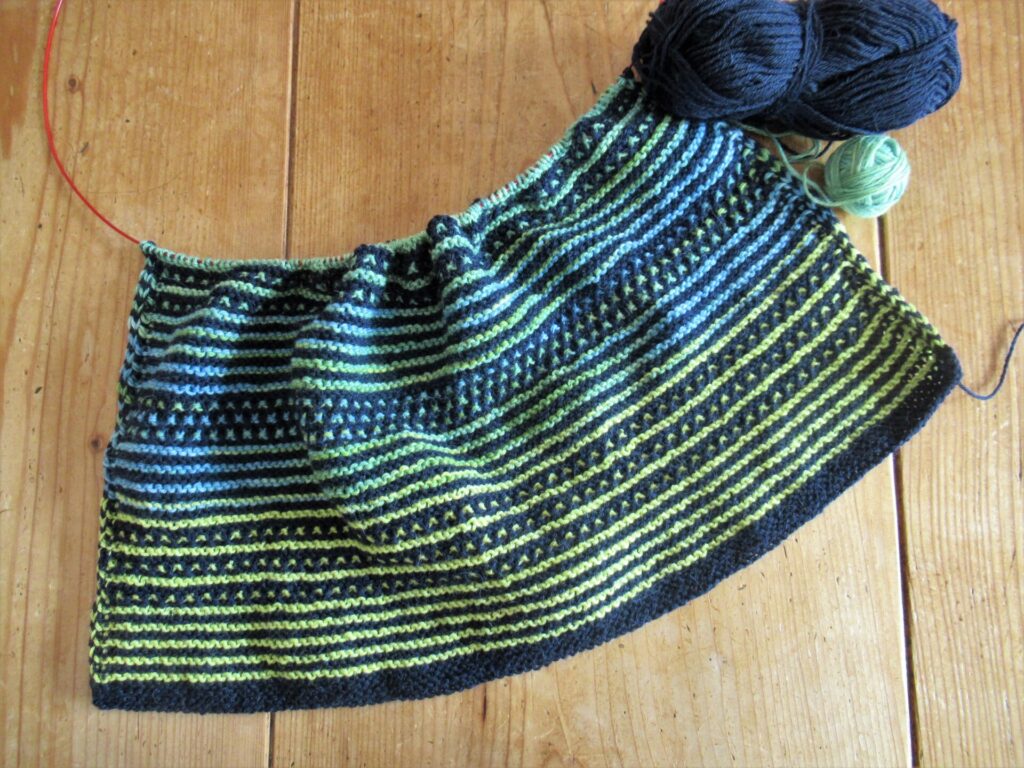
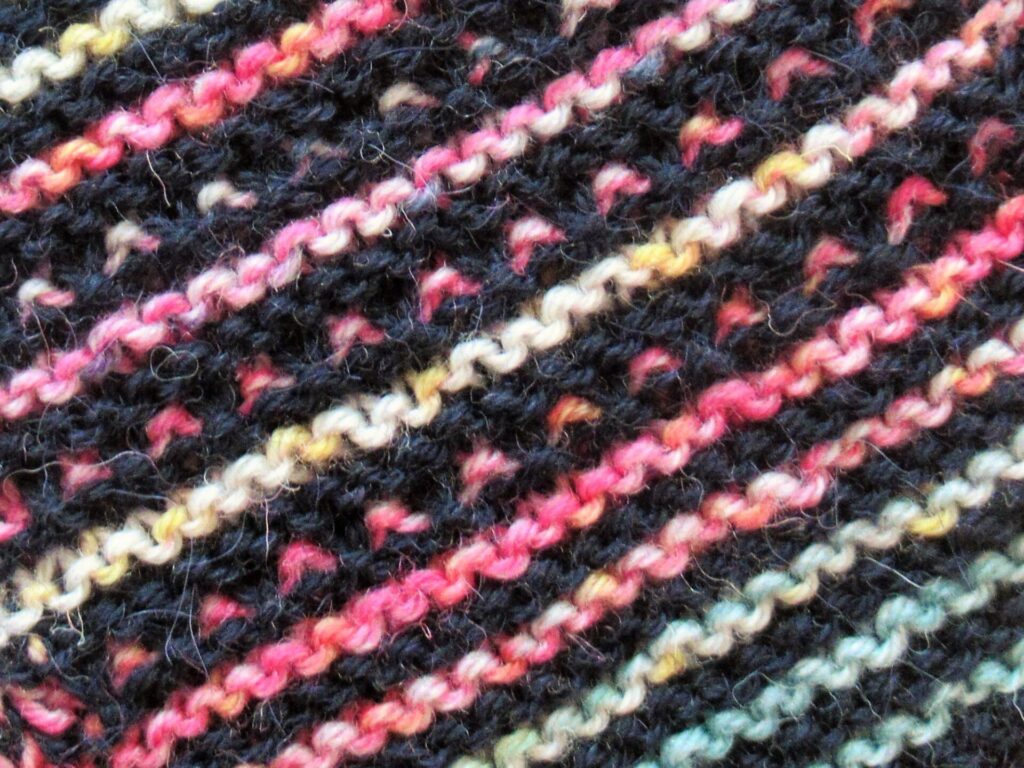
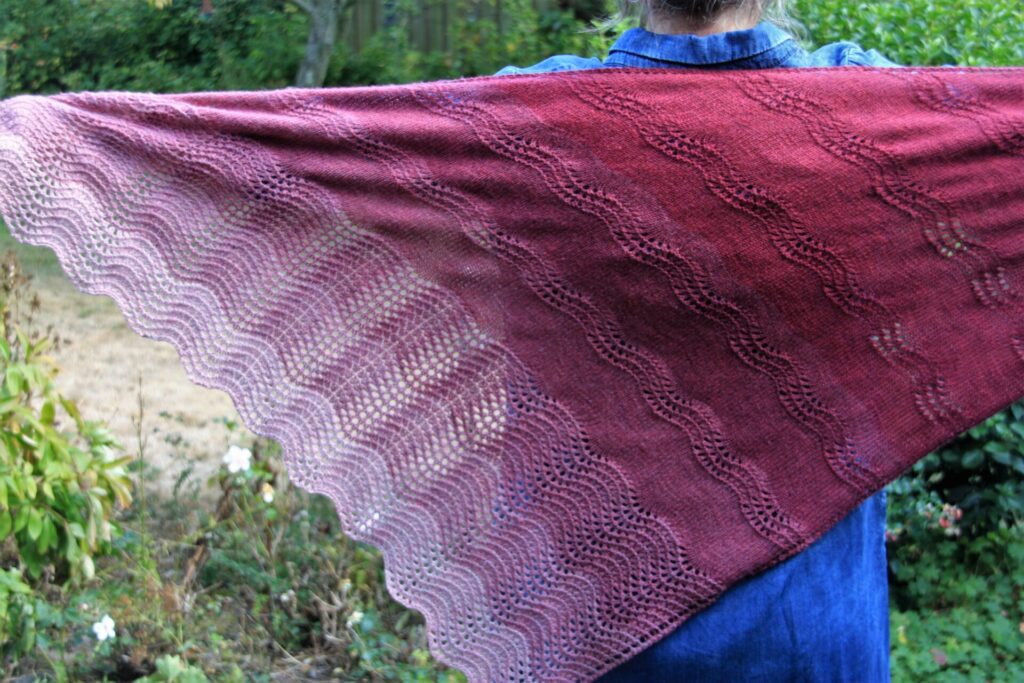
ABCD stripes
Basically, the scarf is composed of 4 different pairs of rows – A, B, C and D:

A (CC garter ridge):
Row 1 (RS): With MC knit 3 sts, switch to CC and knit to end.
Row 2 (WS) (CC): Sl3 wyif, k to last 3 sts, sl3 wyif.

B (MC garter ridge):
Row 1 (RS): With CC knit 3 sts, switch to MC and knit to end.
Row 2 (WS) (MC): Sl3 wyif, k to last 3 sts, sl3 wyif.

C (CC slip stitch pattern starting with a k st):
Row 1 (RS): With MC knit 3 sts, switch to CC and (k1, sl1 wyib) to last 4 sts, k4.
Row 2 (WS) (CC):  Sl3 wyif, (k1, sl1 wyif) to last 4 sts, k1, sl3 wyif.

D (CC slip stitch pattern starting with a sl st):
Row 1 (RS): With MC knit 3 sts, switch to CC and (sl1 wyib, k1) to last 4 sts, sl1 wyib, k3.
Row 2 (WS) (CC):  Sl4 wyif, (k1, sl1 wyif) to last 5 sts, k1, sl4 wyif.

INSTRUCTIONS

Cast-on and set-up rows:
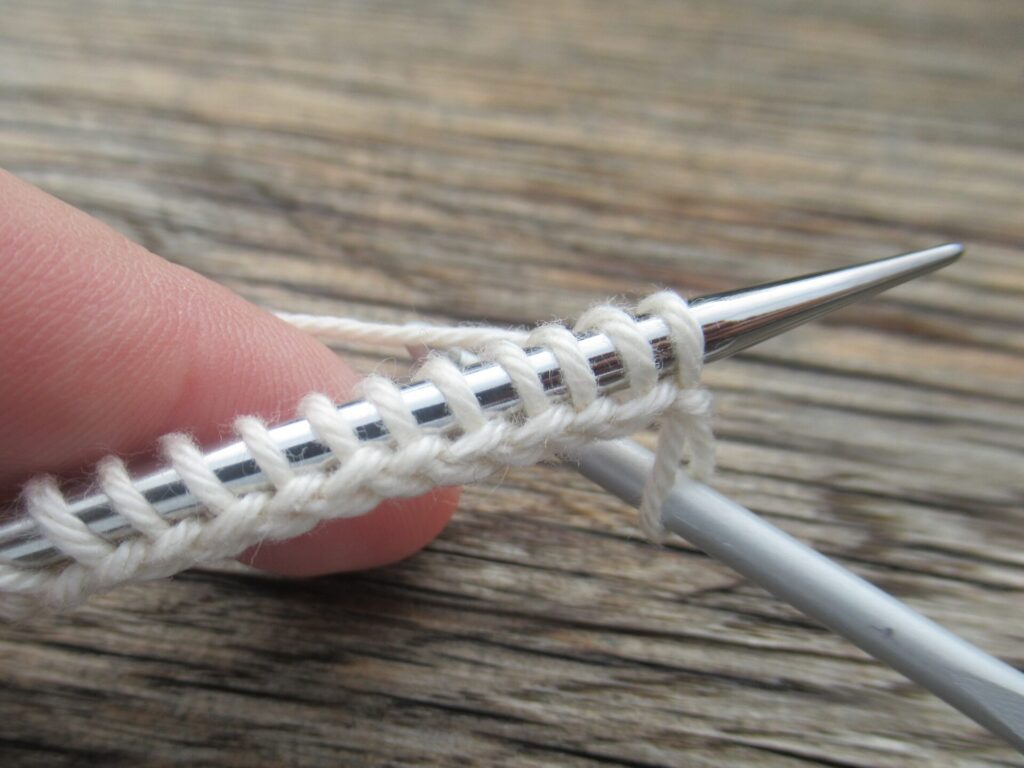
With MC cast on 111 sts.
Row 1 (RS): knit.
Row 2 (WS): sl3 wyif, k to last 3 sts, sl3 wyif.
Work rows 1 and 2 two more times.

Start working in stripe sequence:
(The swatch above shows one complete stripe sequence.)
Rows 1-20: Starting with A, work A and B five times in total (= 10 garter ridges alternating CC and MC).
Rows 21-22: C.
Rows 23-28: B, A, B.
Rows 29-30: D.
Rows 31-36: B, A, B.
Rows 37-38: C.
Rows 39-40: B.
Rows 41-60: Repeat rows 1-20.
Rows 61-72: C, B, D, B, C, B.
Repeat these 72 rows until you’ve almost reached the desired length.
Work 4 rows in MC in the same way as set-up rows 1-2. Bind-off loosely. Weave in ends, soak and block.

Knitting with all these bits of yarn in different colours is such fun. My first little ball was the yellow-green of the Euphorbias in our front garden. The second one is a variegated blue and green yarn:

It’s like fresh young hawthorn leaves against a blue sky.

I’m enjoying knitting up the greens and can’t wait to get to the heavenly blues and then the flowery purples, pinks and oranges.

Note: This is only a preliminary pattern – I’ll publish a complete downloadable pattern on Ravelry later, when my scarf is finished. I hope everything is clear so far. If you’re going to knit your own Seventh Heaven Scarf, have fun! For any questions, please leave a comment and I’ll try to answer asap.

Simple Sock Scrap Slip Stitch Scarf

Hello!

Remember that I was looking for something simple to knit alongside more challenging projects? Simple stocking stitch socks are my usual mindless knitting projects, but variety being the spice of life, I want something different from time to time. Looking for inspiration and materials for a simple scarf, shawl or wrap in a yarn shop, I couldn’t find anything that spoke to me. And then it occurred to me that I already had most of the ingredients at home!

Through the years I’ve knit many, many pairs of simple socks for family members, friends and myself. From every pair of socks there is always a small quantity of yarn left over. I’ve used some of these to make Soothing Sachets, Gift Leaves and an earrings-and-pendant set. These small projects didn’t even make a dent in my sock yarn remnant stash, though, and I’ve still got more than enough for several larger projects.

I’d already been knitting some slip-stitch swatches and knit some more using sock yarns, using the simplest of slip stitch patterns combined with garter and stocking stitch. I experimented with many different edge stitches, too.

Something colourful would be fun, but it should also be wearable, so I decided to use a dark neutral as a backdrop for the remnants. Here is my final swatch, using a solid navy yarn combined with some yarn left over from the socks beside it – garter stitch stripes alternated with slip stitch rows:

My guess is that many of you also have a considerable quantity of leftover sock or other fingering weight yarn. Or perhaps you’ve taken out a mini-skein subscription or treated yourself to a mini-skein Advent Calendar and still have some of those lovely little skeins left? In case you’d like to use them for a scarf like mine I’ll describe how I’m going about it.

I’m going to knit a rectangular scarf measuring approximately 45 cm/18” wide by 1.80 m/71” long. Based on my swatches, this should take about 440 grams of sock yarn in total: 220 grams of the solid background colour and 220 grams of sock yarn remnants. I’m using five 50-gram skeins of Isager Sock Yarn in navy blue for my background colour.

Other dark neutrals that would make good background colours are black, charcoal, deep purple or dark brown. A light neutral, like cream, pale grey or light beige, would work well, too.

For the contrast colours, I chose 22 different sock yarn remnants of at least 10 g each (+ a few extra). I left the dark colours out (not enough contrast), and the very light ones as well (too much contrast). So they’re all in a medium shade range.

The remnants could be grabbed at random, eyes closed, but being an orderly sort of person I decided to arrange them into a sort of colour wash, from greens through blues, purples, pinks and finally oranges (read from right to left).

You could use a colour wheel, but I just followed my intuition, personal sense of colour, taste or whatever it’s called.

The colour I’m starting with, next to the navy blue, is a shocking acid green. It came with a mini-skein subscription years ago, and was dyed by Amanda Perkins of The Natural Dye Studio who stopped dyeing years ago. It isn’t a colour that I’d think I’d ever use. Confession: I did knit a scarf in neon green acrylic when I was ten. Since then my taste in colours has changed quite a bit, but I think/hope it will look fun in this scarf.

It’s the same colour as the Euphorbias flowering in our front garden now, that look so great with the blue of the grape hyacinths.

Some of the Euphorbias are entirely in this strange yellowish green colour,

while others have very dark aubergine, almost black centres.

I will give you the recipe for how to knit this scarf in my next blogpost. For the time being I’m calling it my Simple Sock Scrap Stripe and Slip Stitch Scarf, but it really needs a simpler name. Any suggestions are welcome!

Raspberry Ripple

Hello!

The long, very hot and very dry summer finally seems to be coming to an end here. I’m ever so grateful for the rain we’ve had the past couple of days, and am hoping for lots more as everything is parched. The only thing that has done well in our garden this year are our grapes.

My summer knitting projects are also nearing completion – more about those soon, I hope. But today, it’s Raspberry Ripple day!

First of all, here is a shawl I finished knitting quite some time ago and have finally blocked. The shawl pattern is called Morbihan, but I’m calling this version Raspberry Ripple.

The yarn I’ve used for it is John Arbon’s Knit by Numbers 4-ply. It’s a 100% organically farmed Falklands merino, and each colour is available in a gradient of 6 shades. The colour shown here is called Raspberry (what else?), and in total I’ve used eight 25-gram mini skeins – 3 of the darkest shade and 1 each of the other 5 shades.

This is what my Raspberry Ripple Shawl looks like spread out:

I like wearing triangular shawls scrunched up and wrapped around my neck like this:

Morbihan was first published in English only, but now I’ve also translated into Dutch. The pattern can be found here on Ravelry in both languages.

Morbihan was eerst alleen in het Engels beschikbaar, maar ik heb het patroon nu ook in het Nederlands vertaald. Het is hier op Ravelry te vinden.

Raspberries, how I love them. Not just their colour, but their taste, too. If I want some for a dessert, I need to make a trip to the supermarket. We do have wild raspberries around here, but they are rare.

It’ll soon be woolly-shawl-weather again, but at the moment it’s still warm enough to be ice-cream-weather. So here is my simple (no ice cream maker needed) recipe for Raspberry Ripple Ice Cream.

Raspberry Ripple Ice Cream

(makes approx. 1 litre)

Ingredients:

  • 250 g raspberries
  • 130 g caster sugar
  • 3 egg yolks
  • 250 ml milk
  • 250 ml double cream

1) Place the raspberries in a small saucepan with 30 g of the sugar. Cook on medium heat, stirring from time to time and squashing the raspberries with a wooden spoon. Simmer for about 5 mins without the lid on. Push through a sieve with your wooden spoon. Discard the seeds and the last bit of pulp left in the sieve. Leave to cool.

2) Whisk the egg yolks and the remaining sugar together. Pour the milk in a pan and bring to boiling point. Pour the hot milk on the egg-and-sugar mixture, whisking all the time. Return the eggy milk to the pan and heat slowly, stirring until it has thickened slightly (make sure it doesn’t boil!). Leave this to cool as well.

3) When the raspberry sauce and the custard have cooled completely, whip the double cream until it forms soft peaks. Gently fold the cream into the custard. Pour the creamy custard into a container (holding at least 1 litre).

4) Pour in the raspberry sauce and make swirls and ripples using the handle of a wooden spoon. Cover, place in the freezer, and freeze overnight.

Enjoy!

PS: More details of my Raspberry Ripple Shawl can be found here in my Ravelry project notes.

Knit Leaf Earrings and Pendant

Hello!

The past few days have been lovely, weatherwise. Quoting Goldilocks, neither too hot, nor too cold, but just right. Over the past two weeks we’ve had several hot days, though, with one when our outdoor thermometer reached 39 ˚C (102 ˚F) in the shade. Pffffff, waaaay too hot to have a pile of knitting on my lap (we don’t have an air conditioner). What is a person who can’t NOT knit to do on days like that?

Faced with that conundrum, I thought of knitting something really small. Some more of those Gift Leaves, but even smaller than the ones I knit before, for an earrings-and-pendant set. At first, I thought I’d use embroidery floss – all those lovely colours to choose from!

But that didn’t work as it is completely non-stretchy and terribly splitty (duh, that’s the essence of embroidery floss), which made knitting and especially a sl1-k2tog-psso-manoeuvre sheer torture. Rummaging around for something else, I came across some small remnants from my Tellina cowls. Remember them? (Click on images to enlarge.)

This what I had left after knitting two cowls:

Since then, I’ve used part of the leftover yarn for a Blogiversary Bag and a Soothing Sachet, but there was plenty left for this set (and more small future projects).

If you’d like to make a set, too, here’s what you’ll need and how to go about it.

WHAT YOU’LL NEED:

  • Two 1.25 mm/US 0000 knitting needles
  • Small quantity of fine fingering-weight yarn
  • Tapestry needle
  • Pair of ear wires
  • Metal or leather necklace

Optional:

  • Three 4 mm Ø and three 2 mm Ø beads
  • Sewing thread
  • Needle small enough to pass through smallest bead

The yarn I used was Manos del Uruguay ‘Fino’ (70% Merino; 30% Silk; 448 m/490 yds/100 g) in the colour Velvet Pincushion. The pendant took only 0.50 g and the earring leaves even less.

I used ear wires in this shape (the kidney-shaped ones and hoops will work as well, but not the ones with a small closed eye):

HOW TO KNIT THE LEAF EARRINGS AND PENDANT SET:

  1. Download the free Gift Leaves pattern from Ravelry.
  2. Knit 2 leaves size S for the earrings and 1 leaf size M for the pendant, knitting 2.5 cm/1” long stalks.
  3. Weave in the ends at the leaf tips. Use the yarn tail on the stalks to sew them into loops. For the earrings make the loops flat by sewing the beginning of the stalk next to where the stalk ends and the leaf begins. For the pendant fold the stalk in half towards the back of the leaf and fasten it behind the place where the leaf starts.
  4. If you like, sew on beads to resemble little raindrops drip-drip-dripping from the leaves. (I used clear glass beads with a silver lining and white sewing thread.) Fasten the sewing thread to the back of the leaf with a few small stitches and let it come out at the leaf tip. Pass the thread through the larger bead, then through the smaller bead, back through the larger bead and into the leaf tip. Fasten off at the back.

Knitting on these small needles is fiddly and for me required good, bright daylight. But it is really rewarding. For comparison, below you see a Gift Leaf in size M knit with ordinary sock/fingering-weight yarn on 2.5 mm/US 1 needles next to the pendant in size M knit with fine fingering-weight yarn on 1.25 mm/US 0000 needles.

Early one morning, while I was quietly knitting a leaf with the French windows wide open to let in as much cool air as possible, a young great tit came to visit. After fluttering around frantically for a bit, it alighted on the highest perch in our living room: the wooden eagle on top of a book case.

I was afraid it would hurt itself trying to get out, but between the two of us my husband and I were fortunately able to guide it back outside safe and sound.

These leaf earrings and pendant are quick little items to make for yourself or for gifts. One earring leaf took me about 30 minutes to knit, the pendant a little longer, plus a little time to sew on the beads. Here are a few pictures of me wearing them to give you a sense of scale.

Goodness, how I’ve aged since the Tellina pictures were taken just three years ago. Or is it that this picture lacks the rosy glow of the make-up I was wearing in the earlier pictures?

Here you can see how the stalk is fastened into a loop to make the leaf hang flat facing to the front:

And this photo shows how that is different for the pendant:

I chose green for my leaves, but who says that leaves need to be green? Why not choose a lovely autumnal colour, like warm red, fiery orange, bright yellow, or earthy brown? If you like making fiddly little things and are going to knit yourself or someone else a set of these, I wish you happy knitting!

Hydrangea Story

Hello!

Why do we knit? Or rather, why do I knit? (I can only ever speak for myself.) Sometimes it is because I want something to wear that I can’t find in the shops. Other times it is because I want to give someone else a knitted embrace, toasty feet or warm hands. Often it is because I need something to occupy my hands and soothe my mind. Or I see a pattern and think: That is so beautiful – I’d love to make something like that!

This time it was the yarn that did it. The yarn in the photo above. It is a new Rowan yarn called ‘Felted Tweed Colour’ – a sibling to their all-time favourite ‘Felted Tweed’, but now in a slow gradient of colours. The palette was developed by the famous designer Kaffe Fassett. As soon as I saw it, I thought: Wow, those colours!

I chose the colourway called ‘Frost’. It doesn’t remind me of frost, snow or ice at all, however. It reminds me of hydrangeas. Maybe you remember my blog post about cycling to Giethoorn this summer, when I took this picture:

A few days ago, I popped over to Giethoorn again. This is the same spot at this time of the year:

Here the hydrangeas have lost all their colour. In other places there are only lacy skeletons left:

But some hydrangeas have retained their colour and just become more muted than in summer:

It’s these that the ‘Frost’ yarn reminded me of.

And what did I do with the hydrangea yarn? I combined it with some Kidsilk Haze to knit another Story Lines shawl. At first I thought of using some pale pink from my stash:

But then I decided that the contrast was too strong and chose a purple shade called Dewberry instead.

I took the finished shawl along to Giethoorn and asked Albert Mol if he was okay with being my model. Listening carefully I thought I could hear him say: ‘Of course darling. Fabulous idea!’ (Albert was a very gay person in every sense of the word.)

In hindsight I think a little more contrast would have been a good thing. In some places the Felted Tweed is exactly the same shade as the Kidsilk Haze. The stripes are visible, but don’t stand out very much.

The back view below shows how the Felted Tweed Colour yarn moves gradually from one colour to the next, forming wide stripes.

I’ve given this shawl a wider garter stitch band at the end. Neither the Romantic Ruffle nor the Dainty Droplets I used for the other two Story Lines shawls (shown in this blog post) seemed right for this yarn. I used the Basic Bind-off also described in the pattern instead.

Some of you may remember Albert Mol. For those of you who have never heard of him, he was a Dutch dancer, writer, actor and comedian. Giethoorn has honoured him with a statue because of his role in the 1958 comedy film Fanfare that was shot in the village. As there are many people in Giethoorn going by the name of Mol, I suppose he must have family roots here as well.

Part of the action takes place in Café Fanfare, which hasn’t changed much since then:

Fanfare is about two rivalling local brass bands that both want to win a competition and are prepared to do anything to prevent the other band from winning. It is in black and white and obviously rather old-fashioned, but still great fun.

Just like Café Fanfare, the rest of Giethoorn (called Lagerwiede in the film) is still very much like it was back in 1958, too.

If you feel like watching some fun slow tv on a dreary December day, Fanfare can be viewed here on YouTube, with English subtitles. (Albert Mol plays the role of one of the conductors, much younger than his bronze statue and without beard.)

And in case you’d like to make a similar Story Lines shawl, it takes 2 skeins of Felted Tweed Colour and 2 skeins of Kidsilk Haze. The Story Lines pattern can be found here on Ravelry, and my notes about the hydrangea version here.

I wish you an enjoyable weekend, with something fun to do, watch and/or knit!

Story Lines

Hello!

It won’t come as a surprise that I love knitting. To me (and I know to some of you, too), seeing a knitting project grow stitch by stitch and row by row is immensely satisfying. Although I haven’t written much about books until last week, I love reading a good story just as much.

Now I’ve combined the two and knit a story in the shape of a shawl! Or rather two shawls, knit along the same lines but telling different stories.

The watery blue version of Story Lines, as I’ve named the design, tells the saga of a drowned village.

It is a slightly asymmetrical triangle that starts off on a light and airy note – transparent stocking stitch stripes with widely spaced out garter stitch lines. Later on, the plot thickens and the lines are knit closer together.

A village really did drown in the lake where these pictures were taken.

It was the village of Beulake. Extensive peat extraction had already made the area vulnerable. And when the dykes broke during a storm in 1776, Beulake disappeared beneath the waves. Only the church, where the villagers had fled to, was spared.

Fortunately no lives were lost, but the people who lost their homes must have shed a few tears. A row of Dainty Droplets seemed a fitting ending for this shawl.

Although the basic pattern is the same, the other shawl I knit has a different tale to tell. In fiery reds, it tells a love story from a time long gone by.

This story is set against the backdrop of a castle ruin, not far from the lake of the drowned village.

It is Toutenburg, the remains of a medieval castle in the town of Vollenhove. An utterly romantic spot. There is a moat around it, with a lovely fountain.

This version of Story Lines needed a different ending – a Romantic Ruffle. I’m not really a ruffle-y type, so I’ve kept it modest.

Story Lines is a very easy knit. The only reason I wouldn’t recommend it to an absolute beginner is that the thinner of the yarns used takes a little experience to handle.

The design combines two types of yarn: a lace-weight mohair/silk blend and a fingering-weight single-ply merino yarn – 1 skein (50 g) of the former and 1 skein (100 g) of the latter.

The yarns I used for both shawls come from an indie dyer in my little corner of the world. She creates many gorgeous colours. Below you can see the mohair/silk blend I used on the left, the 1-ply merino on the right:

‘My’ indie dyer is happy to ship world-wide,  but those of you not living in the Netherlands could also look for yarn closer to home. Here is a list of very similar yarns from indie dyers all over the world:

  • Canada: Lichen and Lace (Marsh Mohair/1-Ply Superwash Merino Fingering-Weight)
  • France: La Bien Aimée (Mohair Silk/Merino Singles)
  • Germany: Walk Collection (Kid Mohair Lace/Cottage Merino)
  • Ireland: Hedgehog Fibres (Kidsilk Lace/Skinny Singles)
  • Norway: Norne (Kid Silk/Singles)
  • Sweden: Fru Valborg (Fuzzy Mohair/Merino Singles)
  • UK: Qing (Kid Mohair Silk/Merino Singles)
  • US, New York: The Wandering Flock (Laceweight Mohair Silk/Fingering Weight Singles)
  • US, Oregon: Ritual Dyes (Fae/Crone)

Some people find a triangle a difficult shape to wear and I understand. Worn in a traditional way it can look old-fashioned. But it can be worn in so many ways, as already shown in some of the pictures above. Here are some more ideas.

Worn nonchalantly with the two long ends on one side:

Rolled up with the point at the back of the neck inside, worn much like a rectangular scarf:

With the ends knotted loosely:

Or scrunched up cosily:

The shawl has a versatile shape and can tell many different stories, depending on the colours chosen. Choose icy shades for an arctic adventure, greys for a ghost story, greens for a jungle book, or………………… The possibilities are endless.

If you’d like to knit your own Story Lines,

you can find the pattern HERE ON RAVELRY

In addition to the Dainty Droplets and Romantic Ruffle shown here, the pattern also includes instructions for a Basic Bind-off that ties everything up neatly. And there is a Dutch as well as an English-language version.

Well, that brings us to the end of today’s story. Thank you so much, dear photographer, for your patience and for capturing everything so well. And thank you, dear friends near and far, for reading and for your always kind support!

Gazelle Mitts

Hello!

Thank you so much for all your kind and supportive words after last week’s post, here and through other channels. While I’m writing this, we’re waiting for the plaster on our walls to dry with as many doors and windows open as possible. I’m using this quiet interlude before the next stage (ceiling repairs) for some focused work, and I’ve finally finished my pattern for a pair of fingerless mitts. Or rather, two pairs.

Meet the Gazelle Mitts!

I’ll explain why I photographed them on a cycling map and with a thermos flask further on. First a little about the design.

Taking the inherited knitting sampler I’ve written about before as a starting point, I began visualizing, drawing, thinking, calculating and swatching. After lots of swatches and prototypes I was ready to knit the final mitts in a single-coloured and a two-coloured version. I already had the yarn, but kept changing my mind about which colours to use for which version.

Red and cream together and blue on its own? Or blue and cream together and red on its own? In the end I asked your advice, and you were unanimous: Blue and cream for the two-colour version and red on its own.

So that is how I knit them.

The red single-colour mitts combine three knit-and-purl stitch patterns from the sampler. For the palm of the hand, I used the sampler’s diagonals.

For the back of the hand, I took the zigzags and mirrored them to make diamonds.

And a two-by-two knit-and-purl rib with purl ridges was perfect for the cuffs and thumbs. Only I changed it into a three-by-two rib to link it up with the diagonals and diamonds.

Although they look very different, the two-colour mitts are basically the same. They have the same diagonals and diamonds, and the same ribbing on cuffs and thumbs. Only this time instead of knit and purl stitches on the palm and back of the hands the patterns are knit entirely (no purling) and picked out in different colours.

Diagonals on the palms…

… and diamonds on the backs of the hands.

With bicycle rides on chilly days in mind, I named the mitts for my trusty Gazelle bicycle, my friend for over 15 years.

It gives me a sense of freedom and keeps me fit. I’m very much attached to it and not yet ready to trade it in for an e-bike like many people do nowadays.

We (well, mainly my husband – thank you!) took most of the pictures for this post along one of my favourite stretches of bicycle track. It meanders through the wood just outside our village.

For the picture below, I’ve pulled up my coat sleeve to show you the nice and snug cuff.

And here is a picture of my bicycle bell. It not only shows you the construction of the mitt’s thumb, but also tells you what my favourite beverage is. If I place my thumb on the teapot spout and release it, it gives off a sharp PING!

On longer bicycle rides, I often bring a thermos flask of tea. (Just for me – my husband prefers coffee.) Coffee-and-tea-to-go places have sprung up during the past year even around here, but they are still few and far between. And anyway I prefer my own.

The Gazelle Mitts can be knit on a set of double-pointed needles or on long circulars using the Magic Loop method. Personally, I prefer double-pointed needles for the cuffs and thumbs…

… and the Magic Loop method for the hands.

The yarn I’ve used is Brooklyn Tweed ‘Peerie’. One 50-gram skein for the single-colour mitts. And two 50-gram skeins in different colours for the two-colour version, with enough yarn left for a second pair with the colours reversed.

The Gazelle mitts can, of course, be knit in different yarns – I think that for instance many sock yarns are suitable. But should you decide to knit them, make sure your yarn is the same weight (fingering), and is smooth with a good stitch definition. And always check your gauge.

For those of you who’d like to make a pair,

The pattern for the Gazelle Mitts can be found here on Ravelry
(available in English and Dutch, also to non-Ravelry members)

There is more information there on needles & notions, finished measurements etcetera. I’ve done my utmost to make the pattern as clear as possible. Apart from detailed instructions, photographs of the mitts, and charts for the diagonals and diamonds, I’ve also included a photo tutorial for the ‘afterthought’ thumb.

Well, that’s all about my Gazelle Mitts for now. If you have any questions, please leave a comment here or contact me through Ravelry (my Ravelry name is MerulaDesigns). As always, thank you for reading!

Thinking about Flow

Hello!

(Because I think it would interrupt the flow of this blog post too much to insert links into the actual text, I’ve added a list at the bottom.)

It was yarn that first made me think about flow. Two skeins of a beautiful blue-green yarn hand dyed by Catharina at Wolverhalen. I chose this colour first of all because it caught my eye. The name – Flow – was of secondary importance, but it did catch my attention.

I asked Catharina about it, and she told me that she dyes a whole series of colours named for states of mind. Flow is one of them. Others are Positivity, Wisdom, Joy, Passion, Faith, and Stillness.

Flow… What exactly is it? It makes me think of water.

It also makes me think of  somebody with the unpronounceable name Mihaly Csikszentmihalyi. In my previous life as a translator, I’ve translated many psychology books and articles. During my background reading, I repeatedly came across his research.

In his famous book Flow: The psychology of optimal experience (that I haven’t read), he defines flow as: ‘…the state in which people are so involved in an activity that nothing else seems to matter…’ It is a particular kind of focus that seems to lead to intense feelings of happiness.

Am I ever in a state of flow? I don’t really know.

I used the flow yarn to knit another Thús 2 – a design I published in November last year.

Am I in flow when I’m knitting? Or when I’m designing a pattern?

Or when I’m faffing about with photography?

Or when I’m writing? Or when I’m doing other things entirely? Yes, no, well, maybe, sometimes…

Flow as a yarn colour is something that makes me happy. Flow as a state of mind is something I’d like to know more about. Are people generally aware of being in this flow state? What does it take to get there?

Flow is also a Dutch magazine that I sometimes buy. In the editors’ words, it is about ‘Celebrating creativity, imperfection and life’s little pleasures’. This is the first issue of 2021.

There used to be and English edition as well, but they’ve recently stopped publishing that. They do still have an interesting English-language website, and back issues and specials are still available.

My favourite articles in the latest issue are about navigating life in uncertain times and about tools for people working from home. And the item about Aheneah, a Portuguese artist who does cross stitch on a large scale, made me smile.

The message Aheneah gives off with her installations is to think outside the box and look at one’s roots and traditional techniques as things that can be transformed in unexpected ways and so given a new lease of life.

I’m ending today’s post with a poem by Wilder Poetry that really spoke to me. It comes from the Flow ‘Calm Down’ special.

Thank you for reading!

If you’d like to read more (or knit your own Thús 2), here is a list of links:

Knitting Spa

Hello!

OK, complete focus on knitting today – no tangents or digressions. Maybe this is all old hat to you, but I thought I’d show you what happens to my knitwork after the actual knitting is finished and the ends have been darned in.

Last week I said the hat and scarf I made for my brother needed some TLC to relax. Well, they got more than just some TLC – they received a full 4-star spa treatment!

It all started with a bubble bath.

Aaaaah, so relaxing, especially when combined with aromatherapy. To make the bubbles, I use a no-rinse detergent for delicate fabrics – Eucalan or Soak. There may be other brands, but these are the only two I know.

I can’t say that I prefer one to the other. Eucalan is sort of syrupy and yellowish, whereas Soak is thinner and clear. Both are available in various lovely scents. The Eucalan I have has a very mild lavender scent. My Soak favourite is Lacey, a subtle flowery scent that is harder to pinpoint.

Only a teaspoon of detergent is needed, so a bottle lasts forever. Both also come in small trial packages, that are ideal not only to try out the products, but also to tuck in with a knitted gift.

As their name says, no-rinse detergents do not need to be rinsed out. After a bubble bath of about 30 minutes, I first gently squeeze out most of the moisture. After that I’d roll a more fragile knit in a towel to squeeze out more water, but robust knits like these I put in the spin dryer.

Now, still slightly moist, the scarf and the hat get different wellness treatments, tailored to their specific needs. I thought the scarf would benefit from acupuncture, while some steam would be best for the hat.

First the scarf. These are my acupuncture (in knitting terms also known as blocking) tools.

Foam blocking mats, blocking wires (that come with a wooden ruler), and T-pins (stainless steel pins in the shape of a capital T). At first I used this kit only for lace knits, but now I’m using it for many other projects, too.

I threaded wires along the long sides of the scarf, between the edge stitch and the next, going up and down every other row.

Then I pinned it onto the blocking mats, smoothing the scarf out along its length and pulling firmly widthwise. (Never do this on a wooden table or floor – the T-pins may prick through the mats and damage the surface underneath.)

And here is a close-up. I hope you can see the wires and T-pins.

Now, let’s leave that to dry and continue with its mate. The still moist hat is pulled around the end of the ironing board.

Then it is covered with a moist press cloth (i.e. an old tea towel that doesn’t give off colour) and steam-pressed. I used the lowest setting that will give steam (silk/wool). If the picture looks slightly blurry, that’s the steam.

I tried all this out on a swatch first, to make sure nothing terrible (like felting) happened to my ‘clients’ and they would benefit from their treatments.

After pressing the hat was still slightly wet and I placed it on the blocking mats with the scarf. Twenty-four hours later everything was dry and I unpinned the scarf.

A lot of work for a simple hat and scarf. Is it really worth all the effort? I think it is – very much so. I took before and after pictures, but unfortunately they are not very clear because of the dark yarn colour and the dark weather.

Here are the hat and scarf (before on the left and after on the right):

And here is a close-up of the k2, p2 rib pattern (again before left and after right):

Can you see the difference? Before blocking the knitting was irregular, and the purl stitches disappeared between the knit stitches. After blocking the knitting evened out and the purl stitches became visible. And before blocking the scarf was 1.5 m x 14 cm, so stiff that it could almost stand up on its own, and slightly scratchy. After blocking it was 1.6 m x 25 cm, with a lovely drape and nice and soft.

Now all that’s left to do is gift-wrap the set, put it in a box, add a few Dutch treats and send it off to Germany, in time for my ‘little’ brother’s Birthday.

Here is a behind-the-scenes picture of the ‘Knitting Spa’ photo shoot.

The kitchen counter was the lightest place in the house on a dark day, and the bread kneading board made a nice natural surface for photographing the tools and detergents. A perfect Knitting Spa with everything to hand: hot & cold water, a bath tub, teas & tisanes, and a nice view of the front garden.

The yarn and the pattern I used:

Comfort and Joy

It’s Christmas Eve, and we’re nearing the end of a challenging year. Thinking about writing this post beforehand, I felt that I should say something Profound and Meaningful, but what? I wouldn’t know where to begin. I’m not some kind of oracle or Wise Woman, after all. I’m just an ordinary person muddling along like everybody else.

In the end, I’ve gone back to what this blog is basically about and decided to share a few of the things that have given me comfort and joy over the past weeks, hoping they’ll do the same for you.

The front door with the lovely garland at the top of this post isn’t ours. It belongs to a house further down the street.

Every time I pass this house, looking at these neighbours’ stylish grey-and-white decorations brings me joy.

Our style is more traditional, mainly red, green and silver. It’s comforting to take the same old Christmas baubles from their box every year. This one symbolizes 2020 for me.

White hyacinths opening their flowers at exactly the right time scent our living room.

The upstairs Advent calendar has now opened its last door. And I put the star on the top of the downstairs one this morning. One of the first creatures I placed on this cardboard fir tree was a woodpecker.

It looks just like the great spotted woodpeckers that visit our garden. They’ve been away for a while, retreating to the wood during their moulting period, but are back in full force now. Sometimes there are four of them at the same time, looking for insects on the branches of our old pear tree and fighting for a place on the peanut feeder.

Watching these beautiful birds always brings me joy. They are fairly shy, but if I’m very quiet and patient, they allow me to take a picture now and then.

Something that always brings me a lot of comfort is knitting. It is the feeling of the yarn in my hands combined with the rhythmic movement that makes it so. And what’s more, knitting things for others makes me feel connected with them during a time we are unable to meet. That’s also a comfort.

Apart from knitting several pairs of socks, a scarf and a hat to give away, I’ve treated myself to two skeins of exquisitely soft yarn for a hat and a cowl.

The hat pattern was a freebie from Churchmouse Yarns & Teas. They have a very active and friendly knitting group on Ravelry that I’ve enjoyed being a part of for years. The moment I saw this simple hat and read that the yarn they used for it was a sustainable cashmere, I knew that this was going to be my special December knit for me this year.

I was not just going to knit the hat, but also a matching cowl. Although I could have finished each of these projects in an evening, I decided to take it slow and enjoy every minute of the process, including winding the yarn and taking photos along the way.

I limited myself to knitting no more than a few rows a day. During these quiet, contemplative moments, I first saw my hat grow.

And then my cowl.

Knitting a pattern thought out by someone else is especially comforting – no stress about how many stitches to cast on, getting the right size, what decreases to use, and whether there will be enough yarn. I’ve given my own twist to it by adding a bit of contrasting colour to the rim of the hat, making a matching cowl, and finally duplicate stitching hearts onto both.

For the duplicate stitching I’ve tried out a new (to me) type of needle, with a bent tip. I’ve laid my ordinary darning needles and the new ones out on the finished cowl to show the difference.

The new ones are officially called tapestry needles, and they are a real improvement for duplicate stitching, I have to say. The bent tip slides easily between the knit stitches and is really nice to work with. (I’ll keep using the regular straight ones for darning in yarn ends, though.)

And here are my hat and cowl all finished.

They were a joy to knit, and I know they’ll be a joy to wear for a long time to come.

Now there is just one last thing I’d like to share with you – a gift we received on Tuesday. This year the organic farm that delivers groceries to our door, gave all their customers a bag of organic daffodil bulbs. It came with a message on a bit of sunny yellow paper. Translated it said:

When all of a sudden ordinary things
Can no longer be taken for granted
We realize how extraordinary
Ordinary things really are

Such a lovely gift – a ray of sunshine and hope during these dark days.

Thank you so much for reading my blog over the past year, and leaving a comment now and then. These small virtual moments of contact mean a lot to me. I’m taking a break now and hope to be back here somewhere in the course of January. I’m looking forward to ‘seeing’ you again then.

I wish you a safe and peaceful Christmas and the very best for 2021!