A long time ago a friend taught me to fold stars. Made from transparent paper, they showed lovely patterns when the light shone through them. Because this friend is going through a difficult time at the moment, I folded a small star and sent it to her tucked between a postcard with a personal message – a reminder of good times and a symbol of hope.
Then I folded some more to give away. Then I folded a few for our own kitchen window. And then I thought, ‘Why not share them with you here?’
What you’ll need:
Sharp paring knife
Clear glue
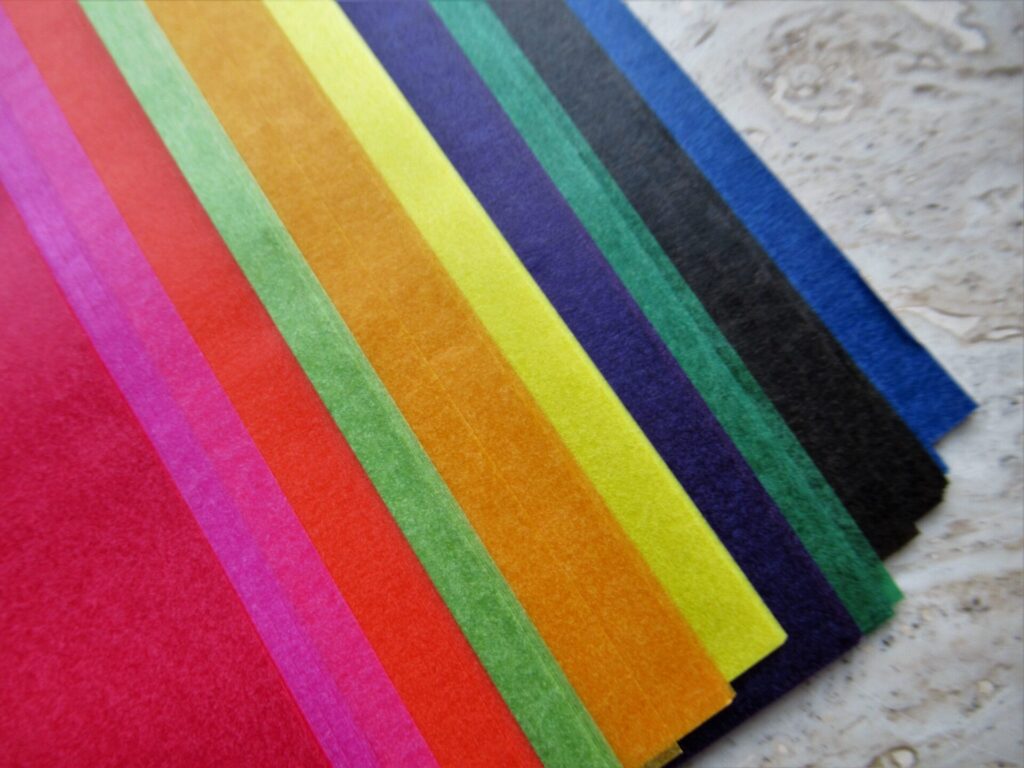
Transparent kite paper (available as larger sheets and as blocks of squares in a rainbow of colours)
Tissue paper can be used as well, but tears and fades more quickly. (For the tutorial steps below I used ordinary printer paper for the sake of clarity only.)
1) For each star, cut eight squares using the paring knife.
The paper in my block measured 16 x 16 cm (6.25 x 6.25”). For a large star I cut two sheets into four squares each (eight 8 x 8 cm squares in total). For a small star I cut half a sheet into eight 4 x 4 cm squares. The size does not really matter, as long as you end up with eight square pieces of paper. Start with a larger star – the smaller ones take a little practice.
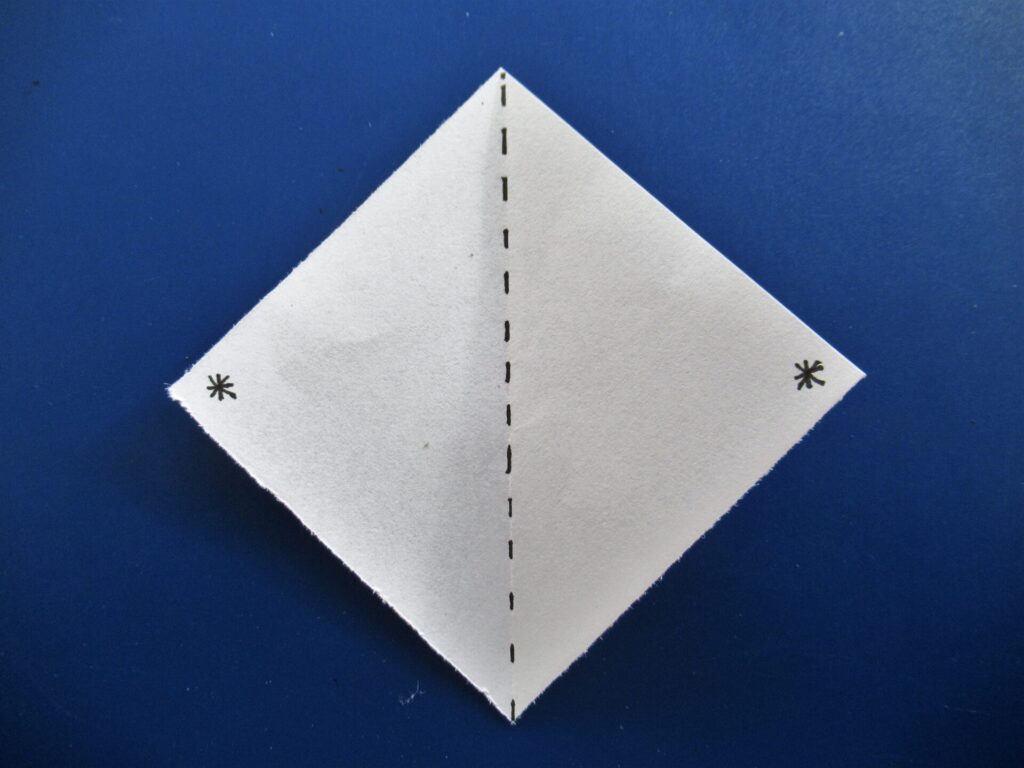
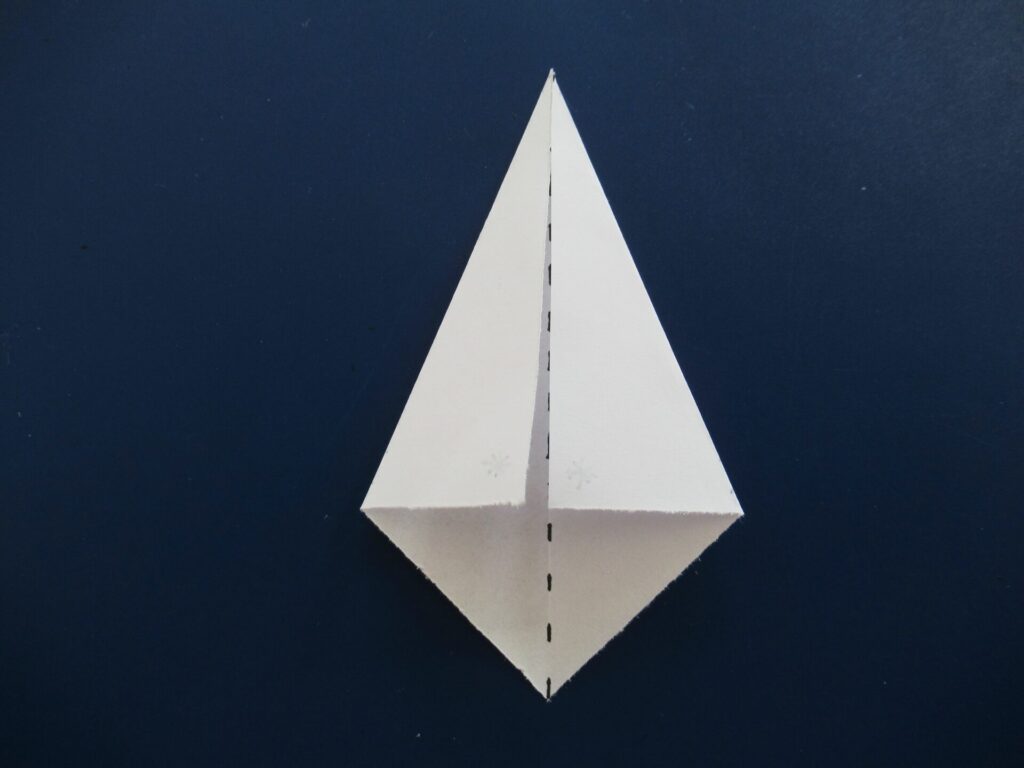
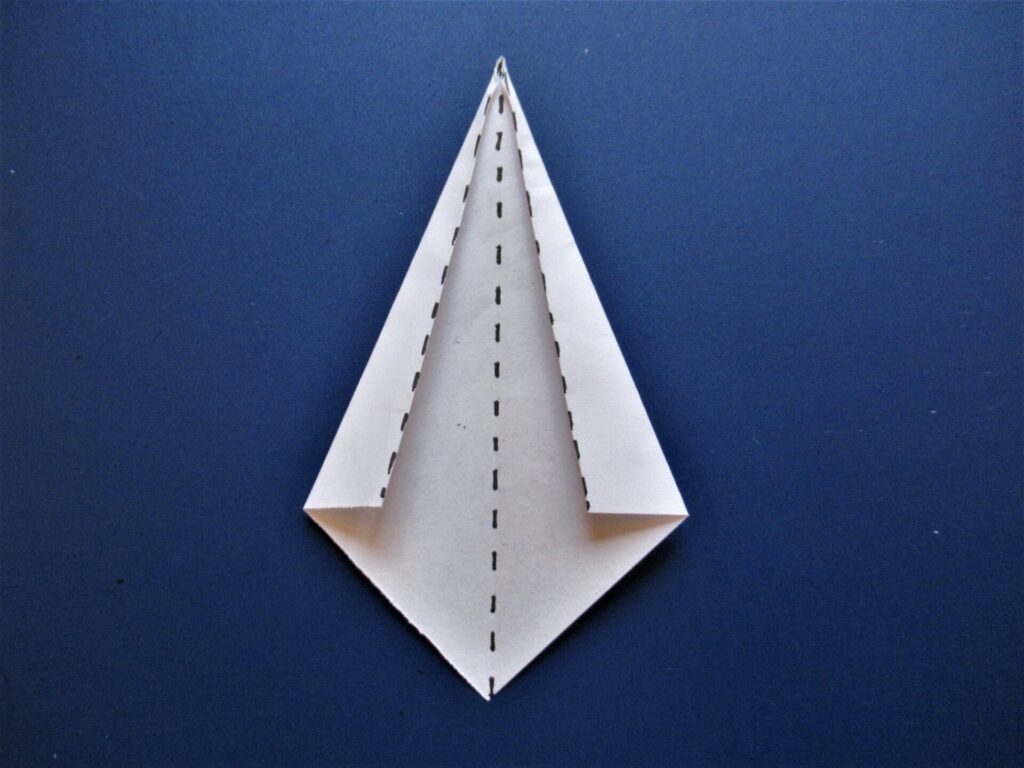
2) Fold the paper in half diagonally, so that the points marked with asterisks in the example lie on top of each other. Then open again.
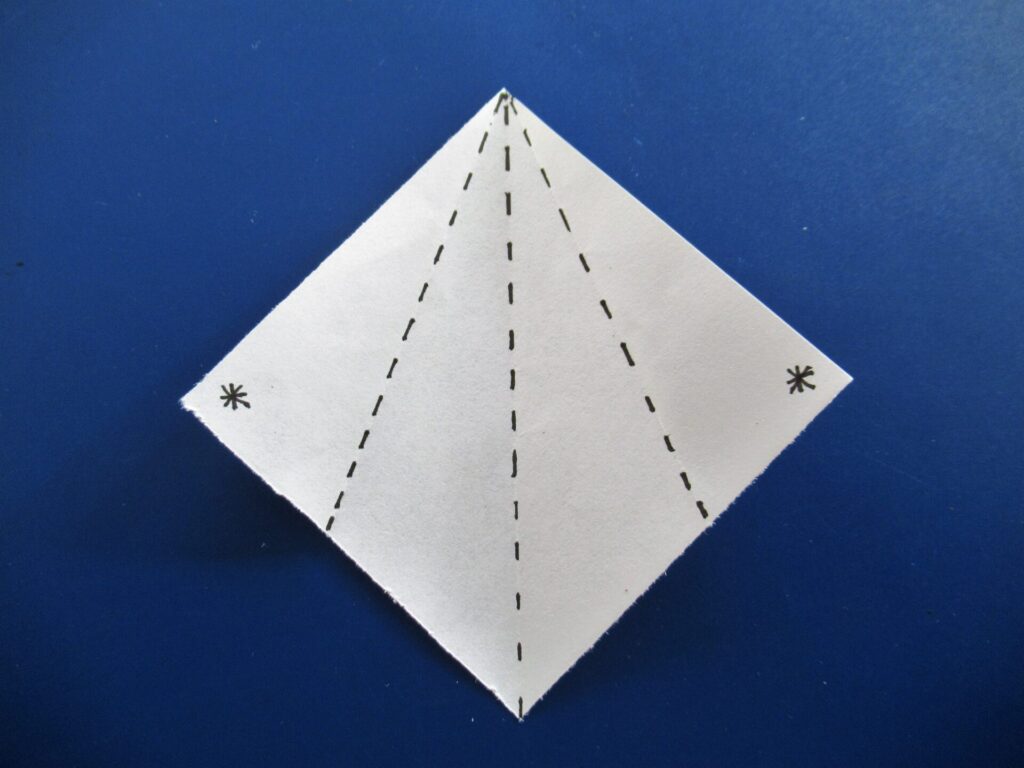
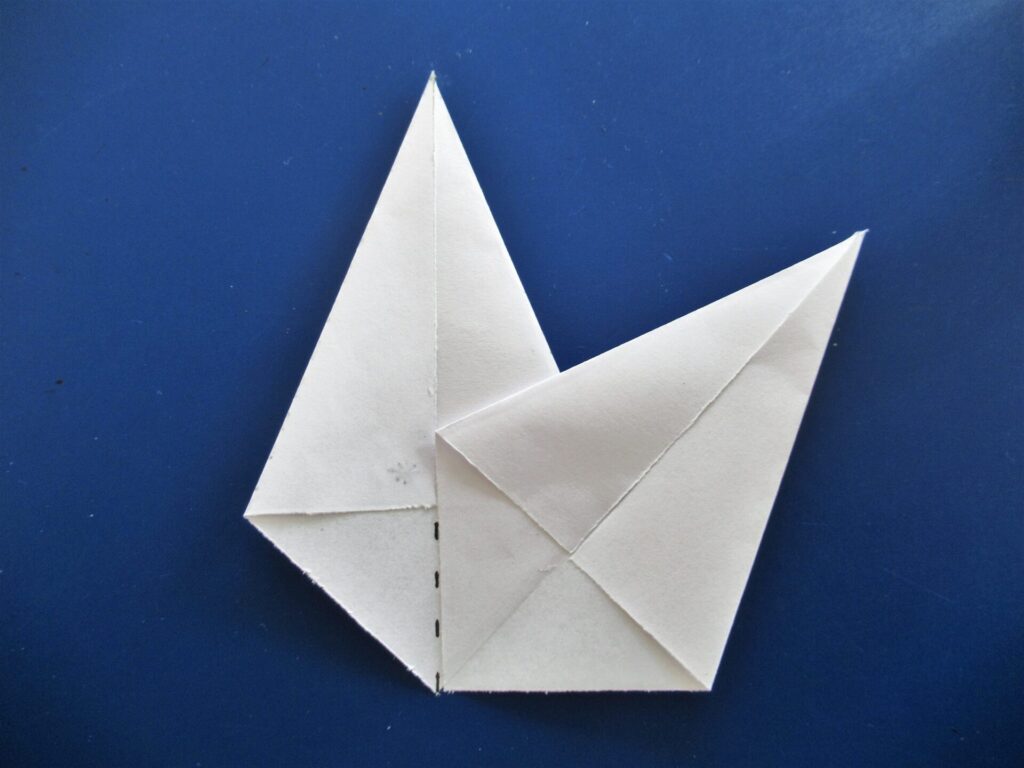
3) Next fold the asterisks toward the line in the middle, along the dashed lines:
You’ll end up with a shape like this:
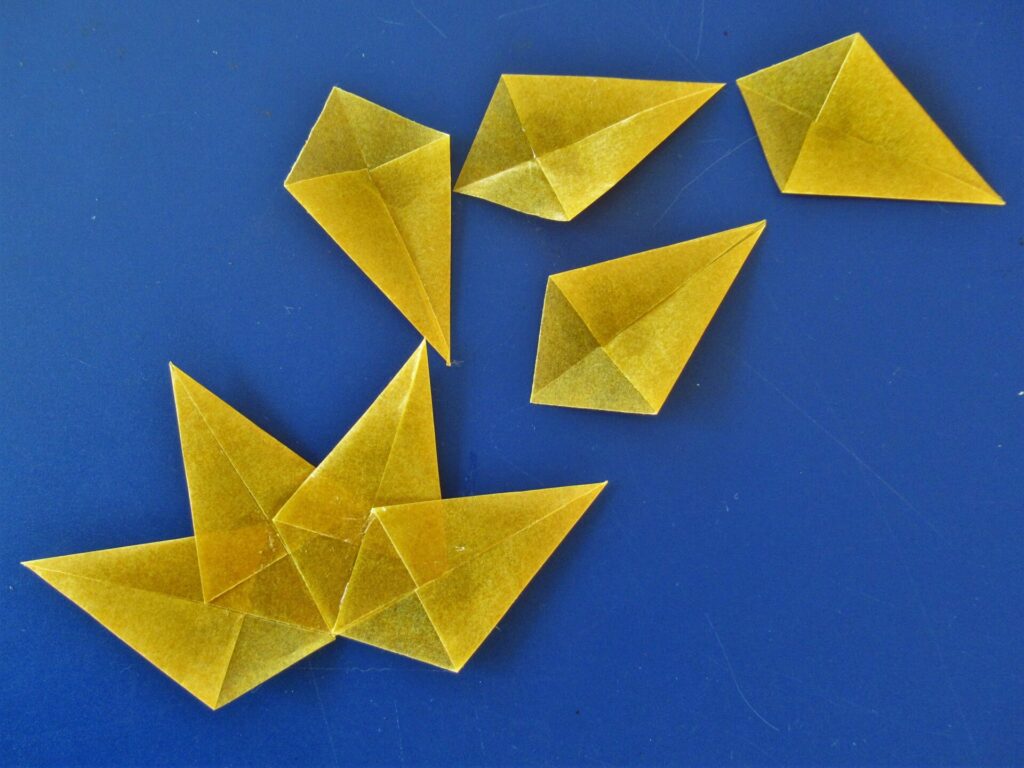
Make eight of these.
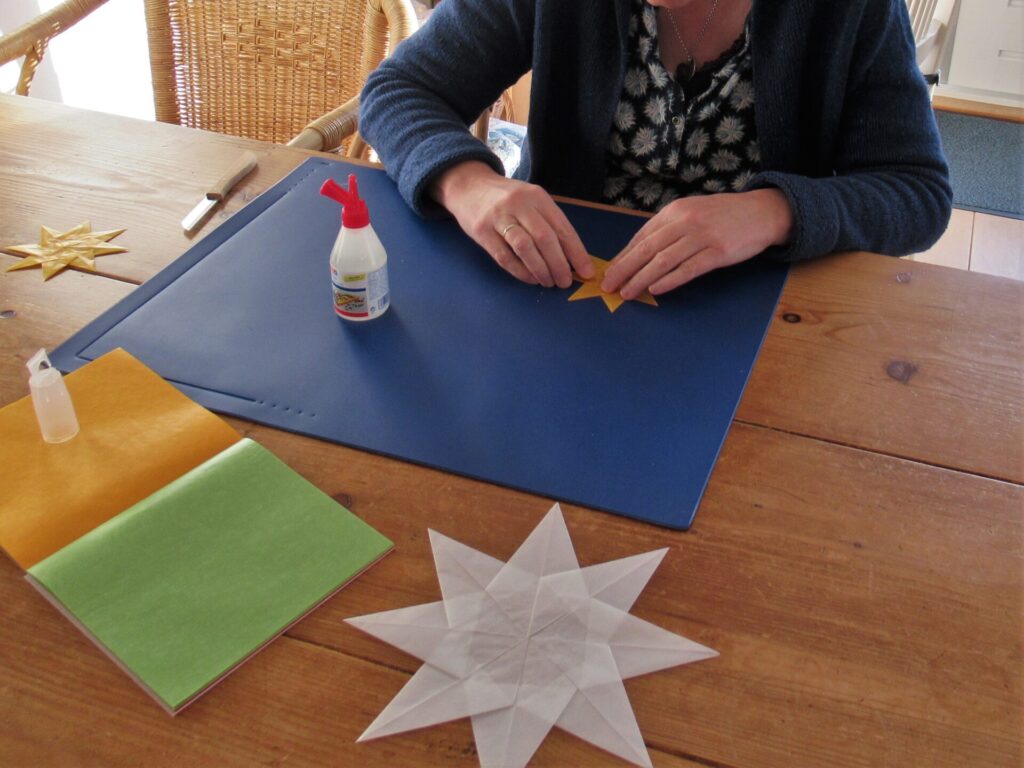
4) Using a small drop of glue, stick the points where the asterisks are in the example in place.
5) Finally assemble the eight points into a star as shown in the picture below, using a little bit of glue where the points overlap.
It’s important to use clear glue or it will show when the light shines through.
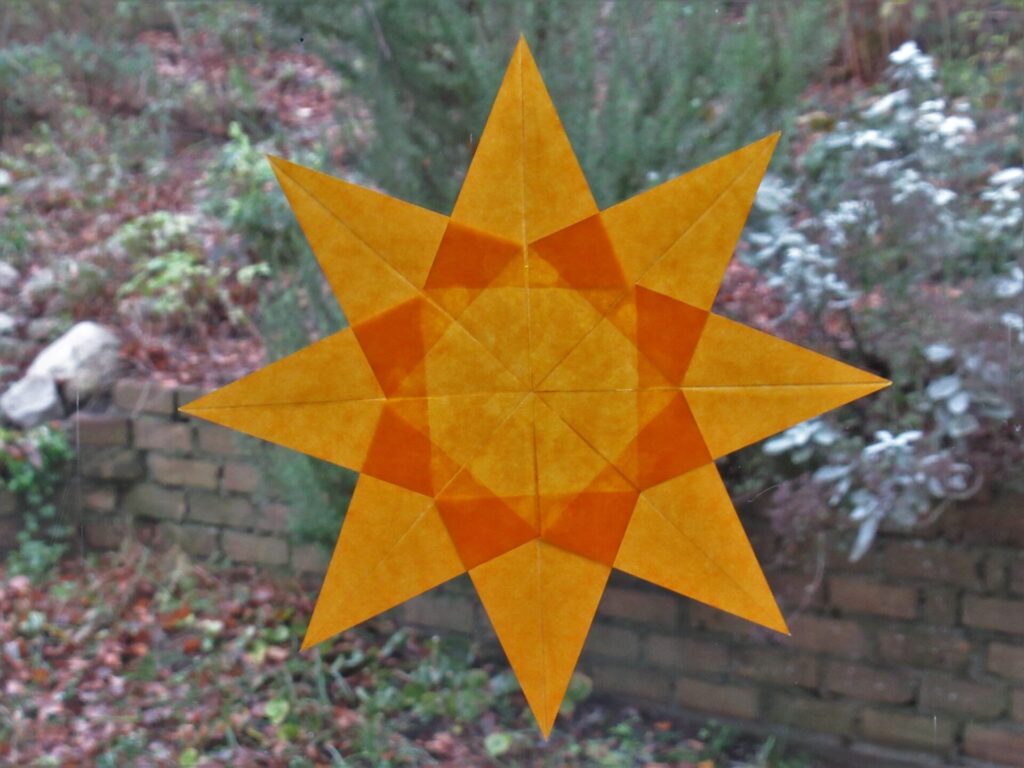
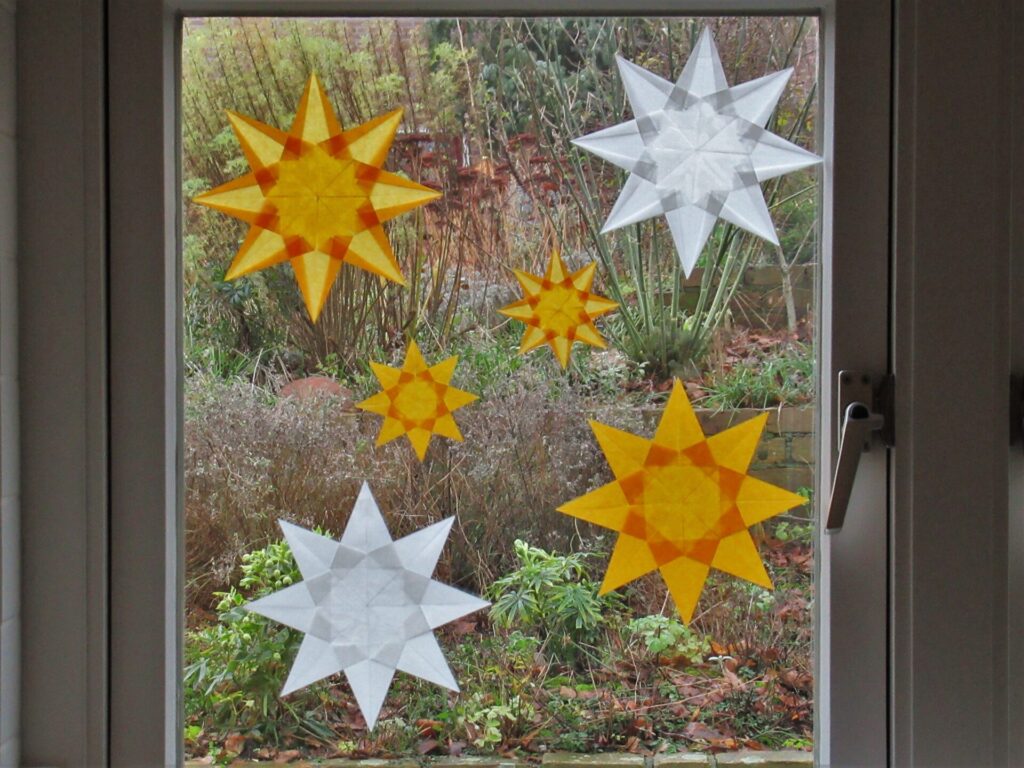
Tadaaah – one transparent paper star!
For a different variation, open the flaps last folded again and then fold them inward, with the imaginary asterisks tucked away inside.
Glue the points together to make a star as before. This simple adaptation immediately gives a much more intricate look:
Finished, my larger stars measure approx. 23 cm (9”) from tip to tip, and my smaller ones 11.5 cm (4.5”). Use a small piece of clear tape folded double (or double-sided tape if you have it) to stick stars to a window pane.
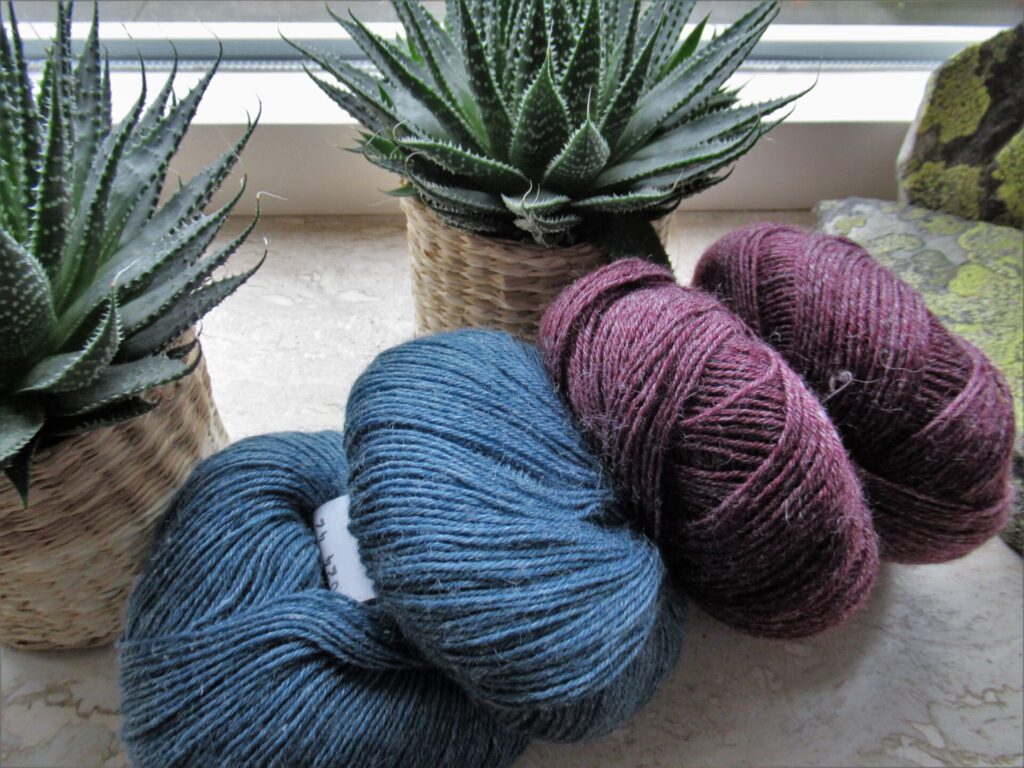
The same friend who taught me to fold stars, recently gave me some sock yarn. She had planned to knit socks with it herself, but realized she would never get round to it. It is a yarn with nettle fibres for strength and durability instead of the usual nylon.
This yarn has been around for a while, but I haven’t used it before. I’m looking forward to giving it a try. And what am I going to use it for? Two pairs of socks for my friend, of course!
Star light, star bright, First star I see tonight, I wish I may, I wish I might, Have the wish I wish tonight.
My wish for you today is that you may have some time to yourself over the coming week, to fold a star, knit a sock, or simply spend some time outside at night stargazing.
4 thoughts on “Folding Paper Stars”
I love this! Thank you!
🙂 It’s always good to hear your voice here.
These are just lovely. I am thinking of trying these with my students. The folding doesn’t look to complex. Thank you for sharing!
Dawna
aka Pugs
These aren’t complex at all and would make a great little project to do with your students, pugs! Don’t make them too small, though. A minimum of 3 x 3 inches, I think.