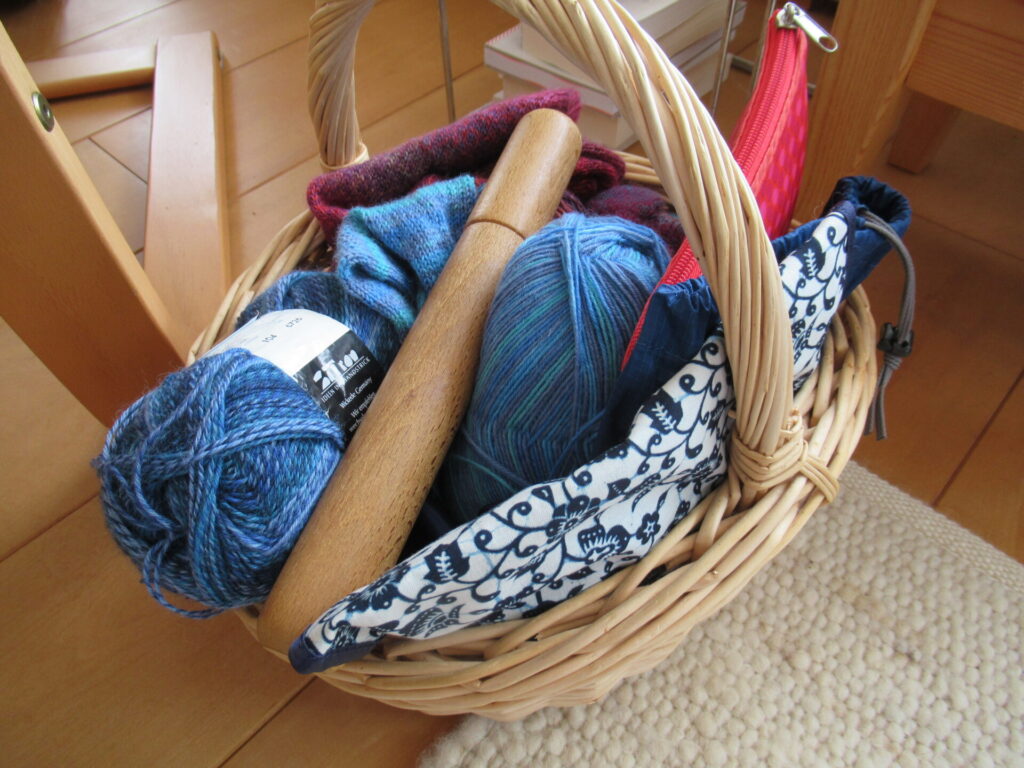
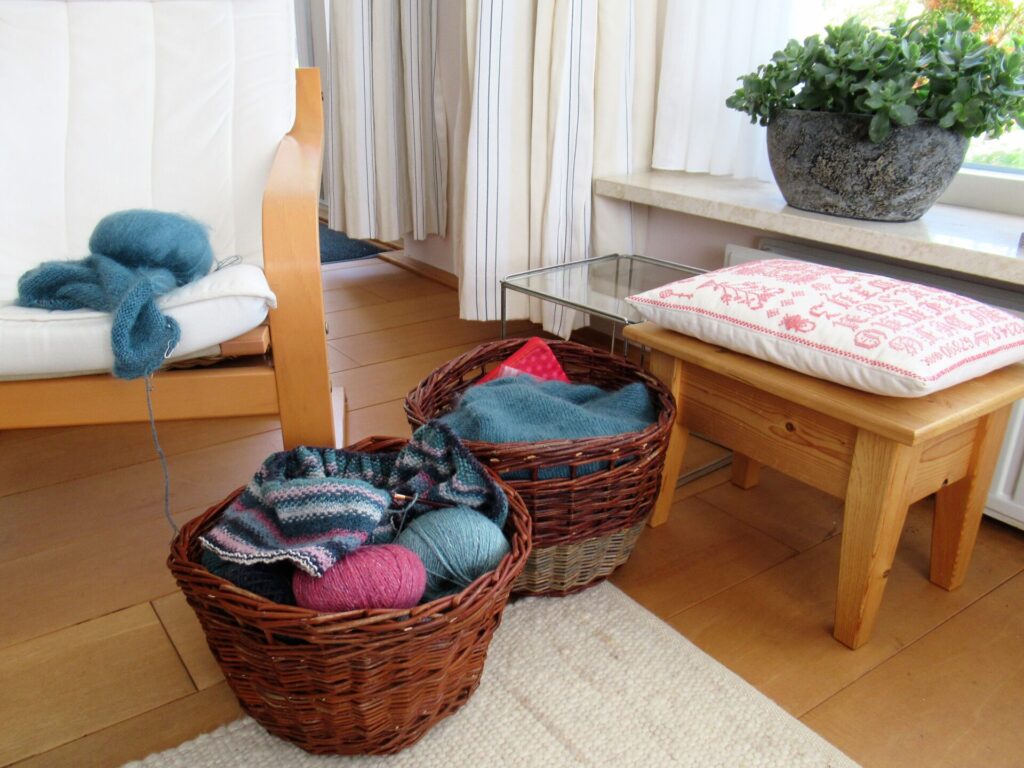
Several weeks ago, some of you commented on how tidy my knitting baskets looked. Well, they don’t look like that all of the time.
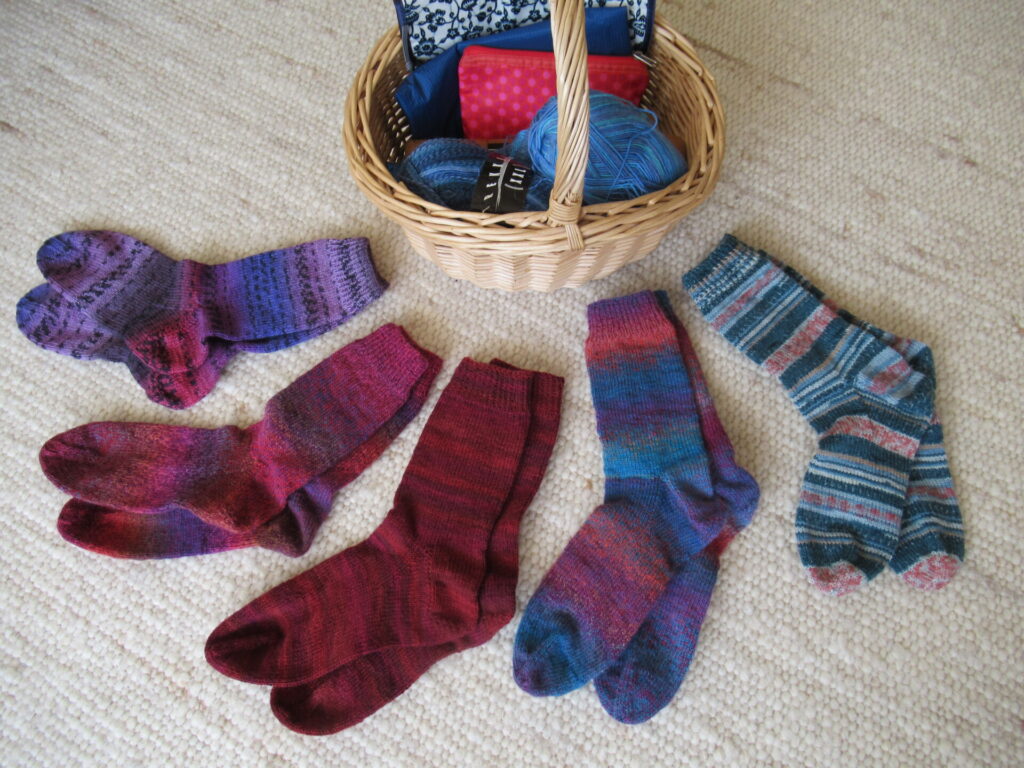
Do you know that feeling, that things seem to pile up of their own accord? This time it’s my sock knitting basket. It doesn’t look too bad in the picture above, but it really is crammed to the brim. This week’s cooler days are perfect for tackling it. So, let’s turn it upside down.
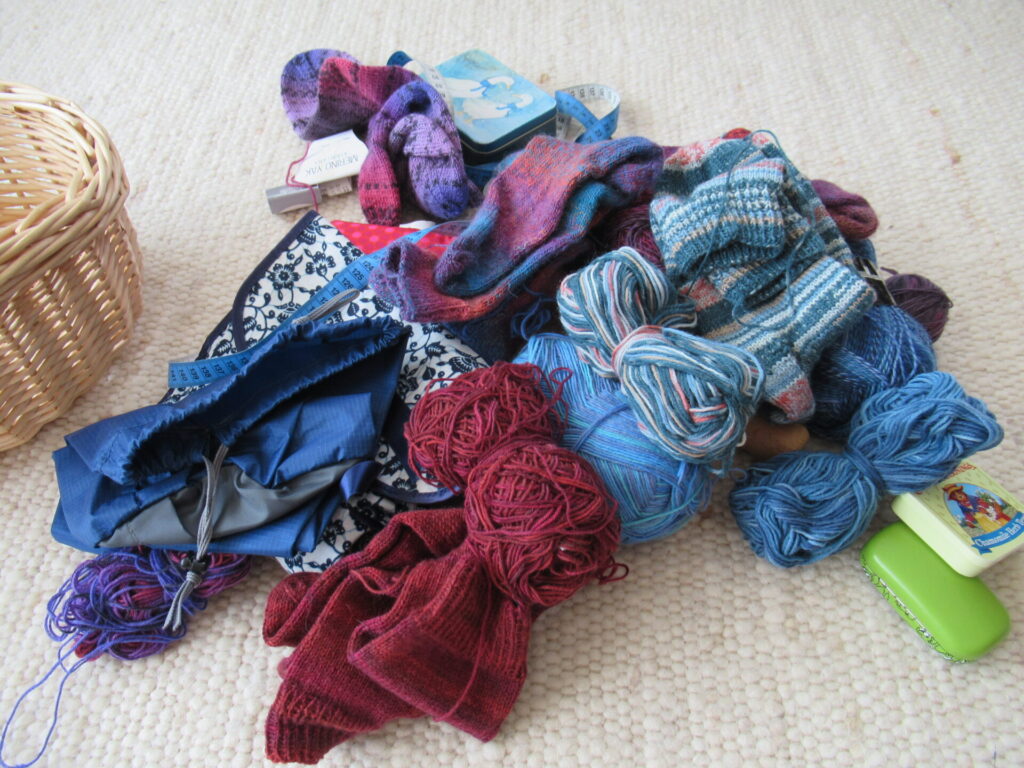
It’s amazing how much stuff a relatively small basket can hold.
First of all there are five pairs of socks with the ends still to weave in. And for every pair of socks there is some leftover yarn.
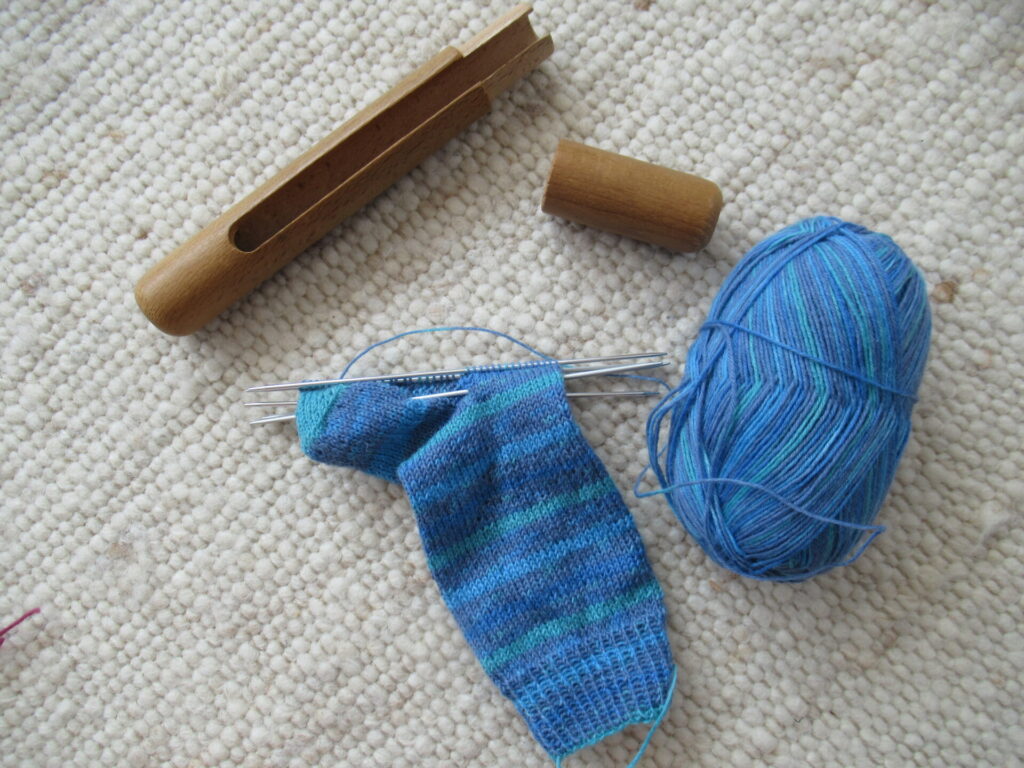
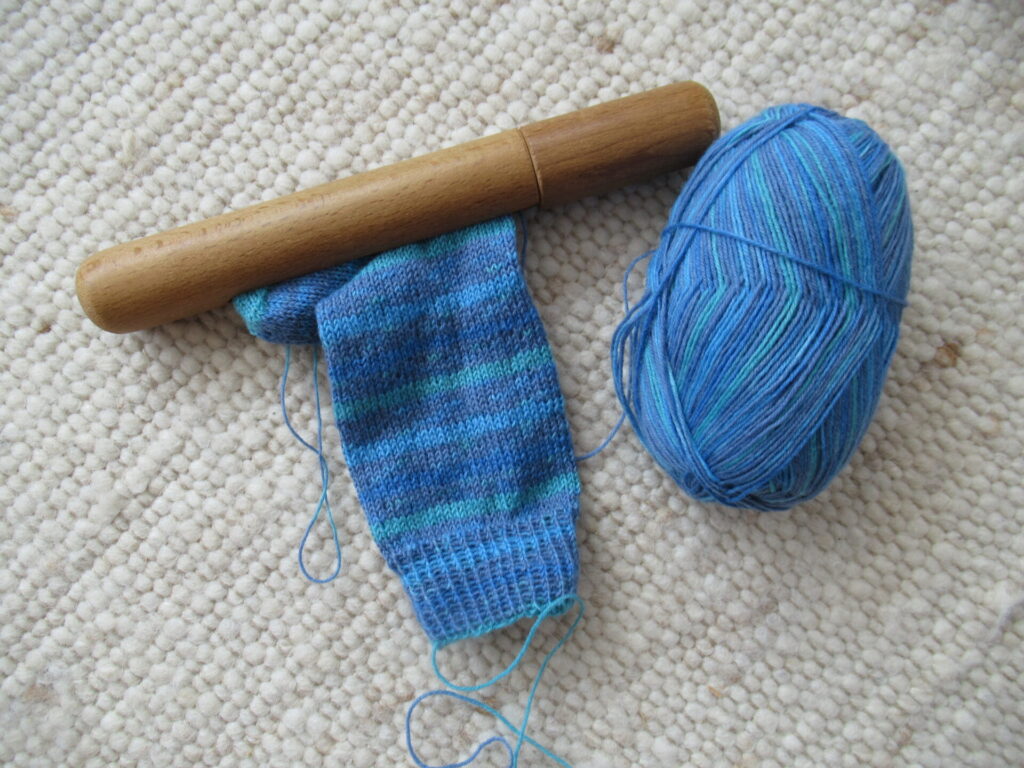
There is pair of socks in progress in the basket, too. I always have a simple sock on my needles. It takes me anywhere from several days to months to knit a pair, depending on what else I’m knitting and what is going on in my life.
The thing next to it is a wooden sock-knitting-needles-with-a-sock-on-them-protector. Is there a name for these things? Can you even buy them? Mine was a free gift with a magazine four decades ago and is one of my most beloved possessions.
This is what it looks like closed.
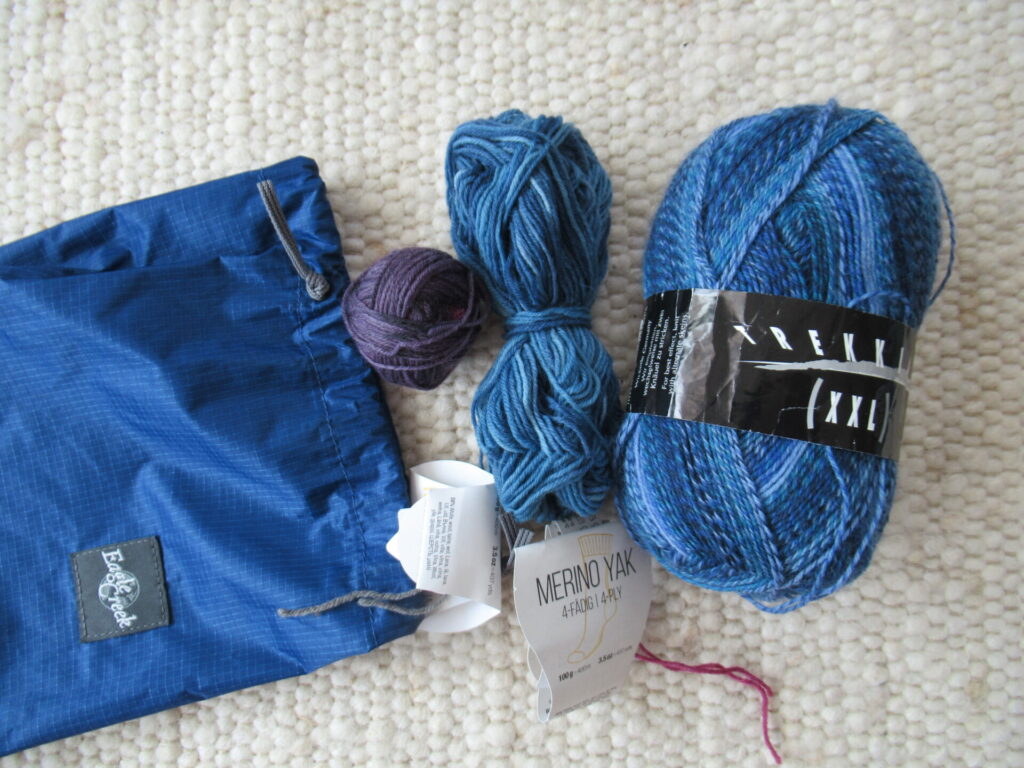
Also in my basket are some leftover bits of yarn and labels of socks that I don’t even remember knitting, yarn for the next pair of socks, and a project bag.
There are all kinds of cute hand-sewn project bags around, but I prefer these plain ones. I have several of them and bought them at an outdoor sports store. I prefer them because of the smooth material. It’s easy to slip my sock knitting into them, and they are also easy to slip into a bag or backpack. Besides, they are water-resistant.
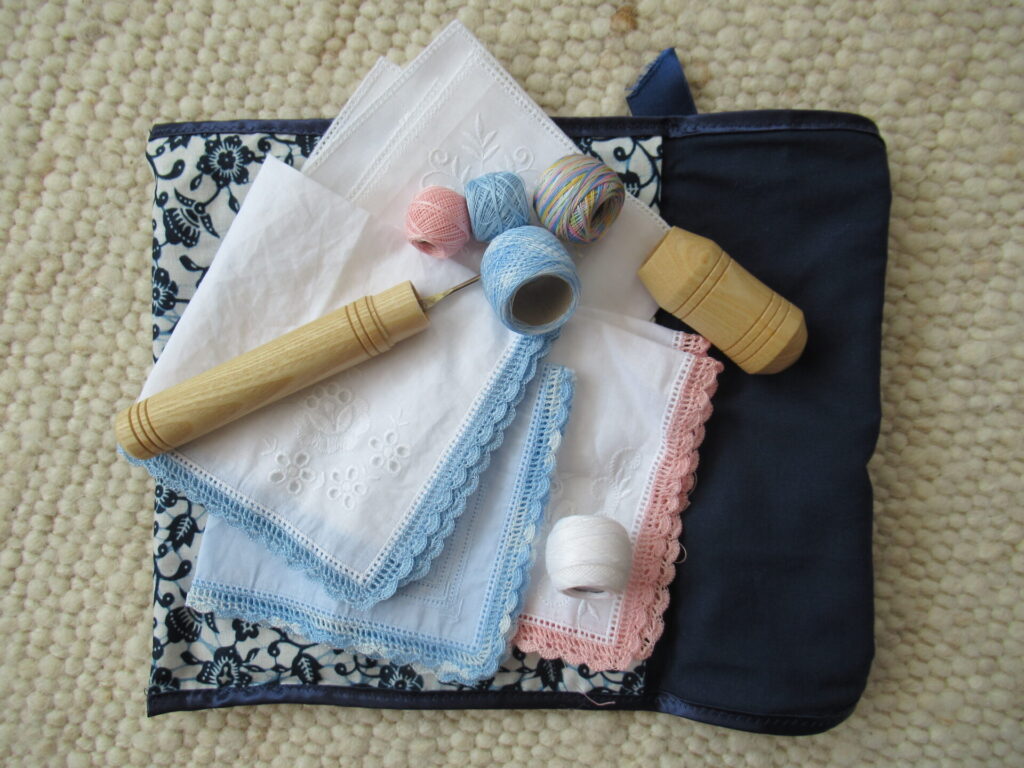
The next thing in my sock knitting basket is something that doesn’t really belong there – my crochet lace hankies. They do live in a cute hand-sewn project bag (I’m not entirely consistent), that was made by my late mum.
I know it’s a very old-fashioned thing to do, but I love doing this fine crochet. And I love the delicate hankies themselves too, for polishing my glasses when they get steamed up or wet from cycling in the rain.
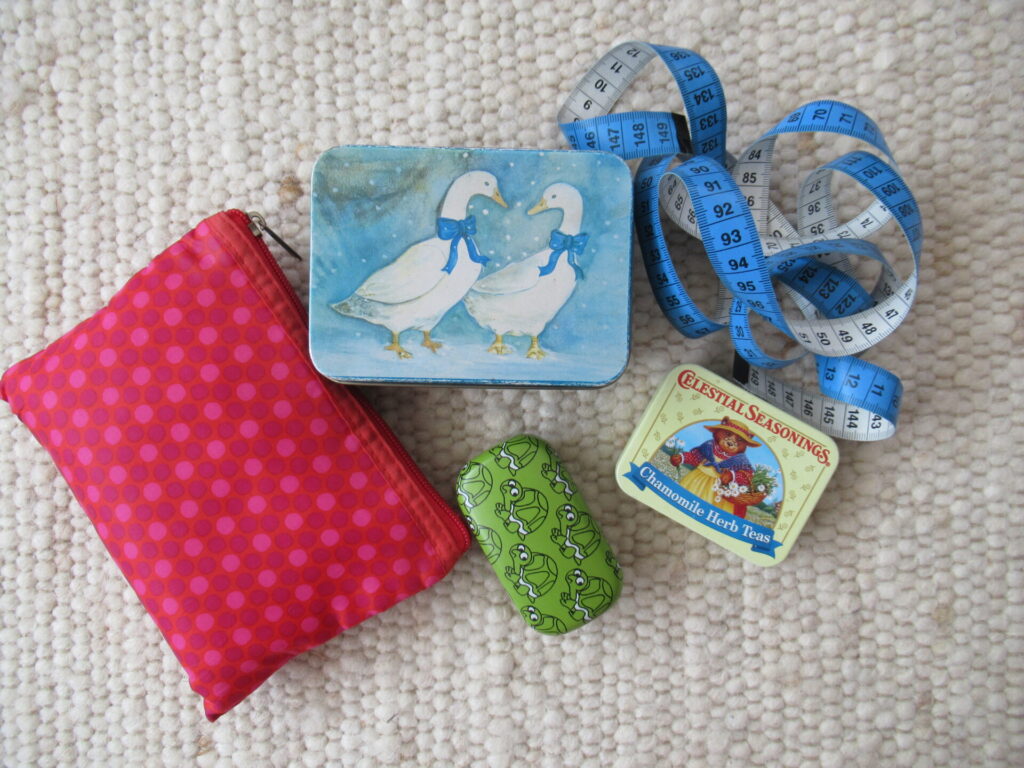
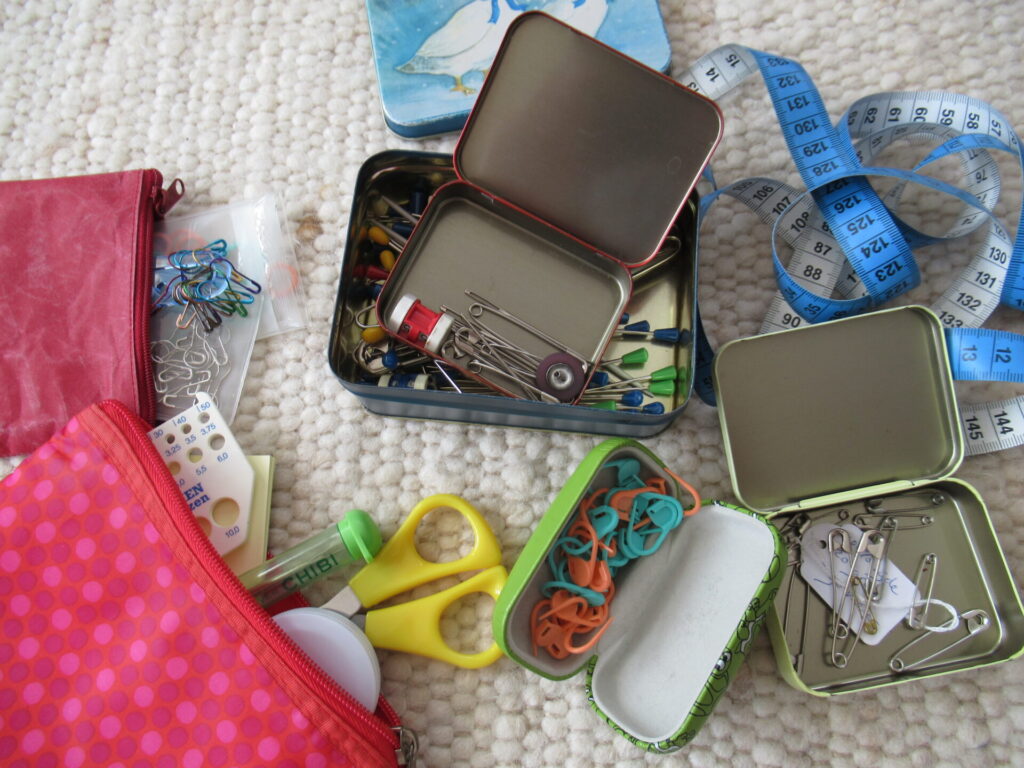
There are also several boxes and pouches in my knitting basket.
They are filled with all kinds of knitting tools and notions that I like to keep handy.
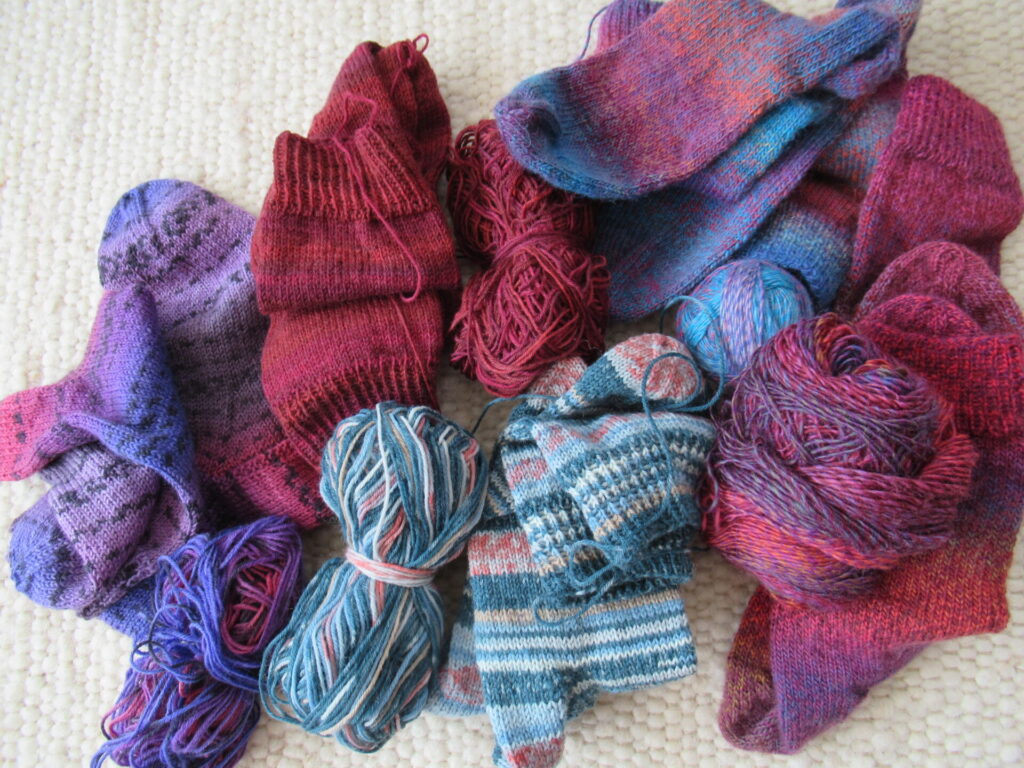
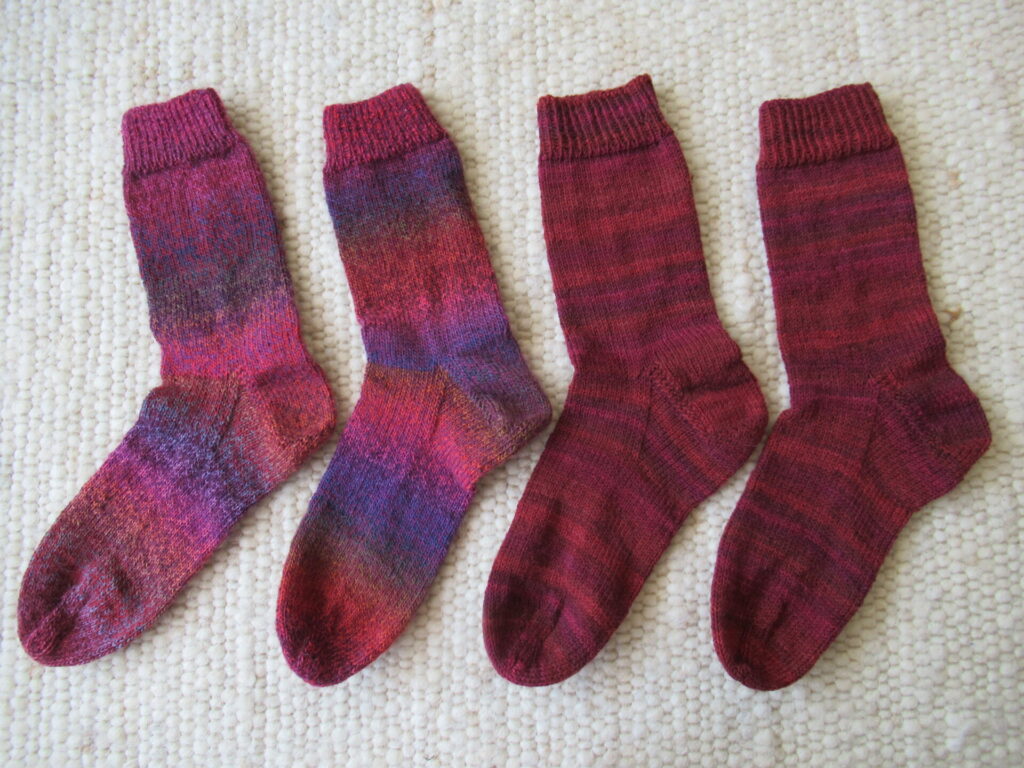
There is a problem with one of the pairs of socks in the basket (the ones below left). I’ve made them for a friend. I made another pair from the same yarn for someone else, and have since discovered that this yarn isn’t suitable for socks at all. Those socks were worn to shreds after just a couple of weeks.
It’s like that with some sock yarn. It would be lovely for, say, a shawl, but shouldn’t be sold as sock yarn, in my opinion.
But I only found that out after I had knit these pink-and-purple ones. I thought of ripping them out and using the yarn for something else. But I’ve decided to give them to my friend after all and tell her to give them to her cats to play with when they get too ratty. (I can already hear her cats meowing, ‘Did someone say ratty? We love all things ratty!’)
I also knit her another pair in a really good sock yarn (the ones on the right).
In less than an hour, my sock knitting basket is tidy. (How long will it stay that way?) And I have five pairs of finished socks that only need to be washed and dried before they can be worn or given away.
The leftover yarn has joined the rest of my sock yarn scraps. I used to give them all away, but now I have a few ideas for things to make with them myself. If they materialize, I’ll share them here with you.
Are you a sock knitter too? What do you do with your sock yarn scraps?
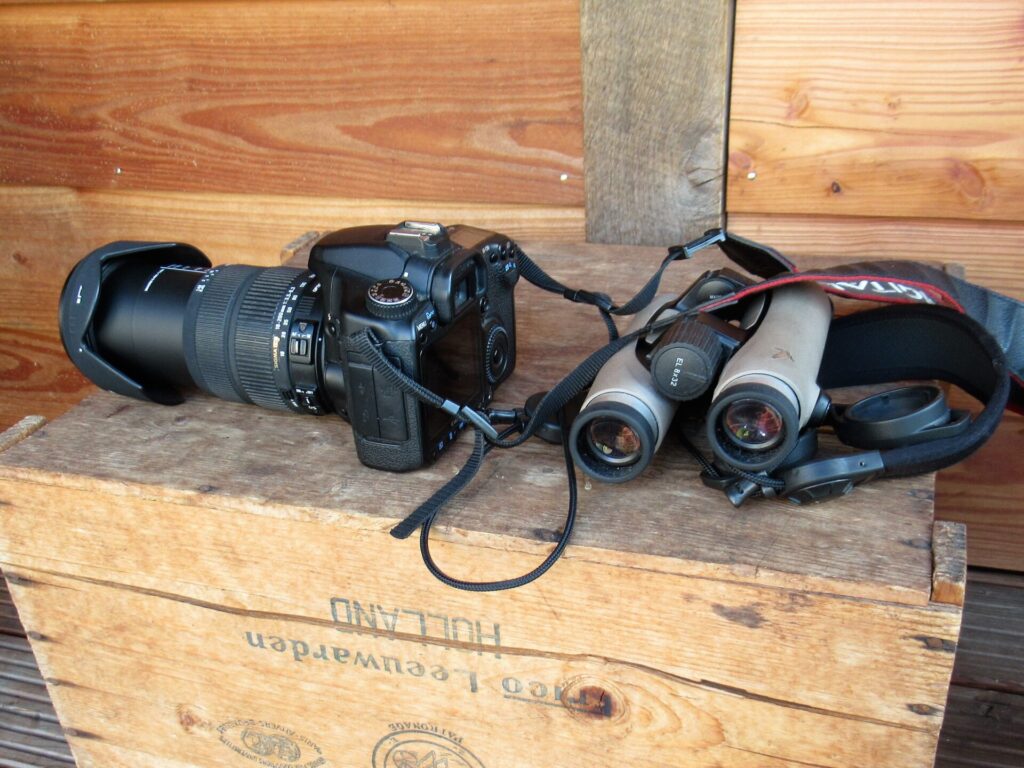
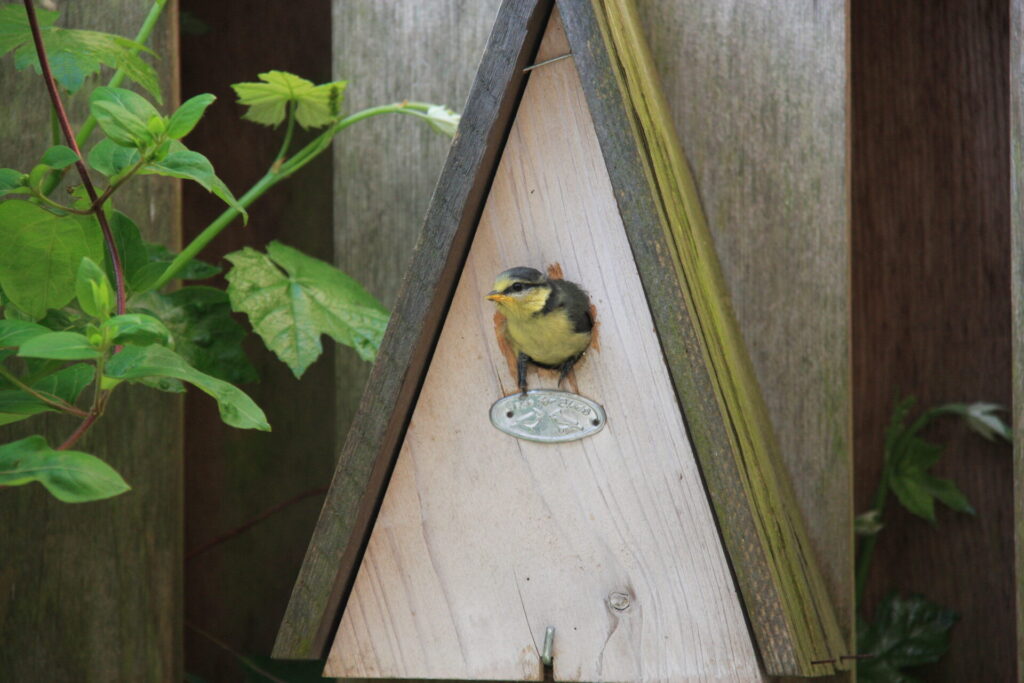
On weekdays, when I come downstairs my husband is already at the table having breakfast and reading the morning paper. But one morning a few days ago, he wasn’t there. I found him on the veranda with his camera and binoculars. ‘Shhh,’ he said, ‘the blue tits are fledging.’
I grabbed my small camera, too, and together we sat watching the blue tits leave the nest box just outside our living room window (some of the pictures in this post are his). First one stuck its head out. And when it got a little bolder, its feet came out as well, grabbing the edge of the opening.
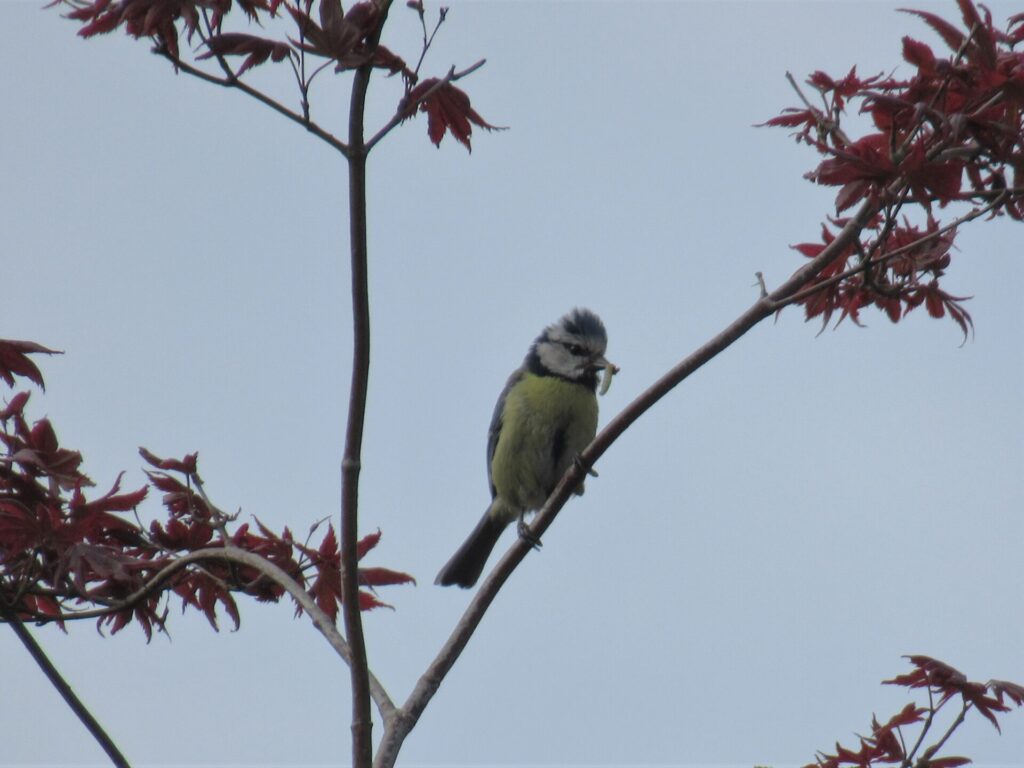
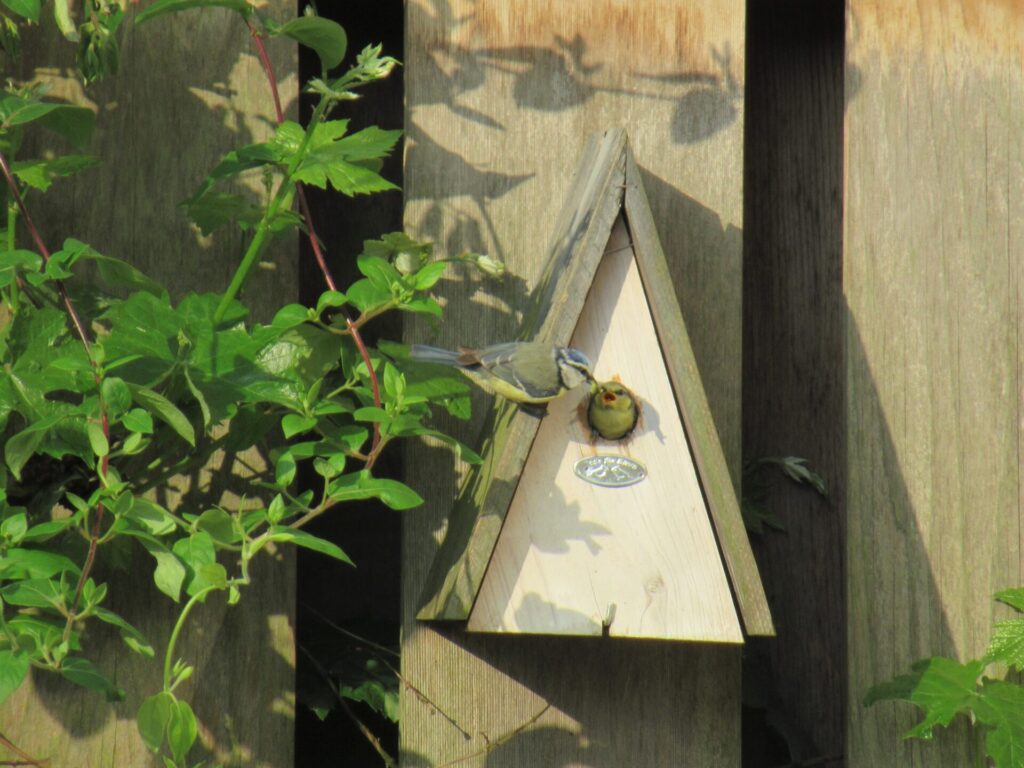
Then it decided ‘no, I’m not ready yet’ and popped back inside. They took their time fledging. While the young were plucking up courage, the parents kept plucking caterpillars from trees and bushes.
They kept feeding their young all the time.
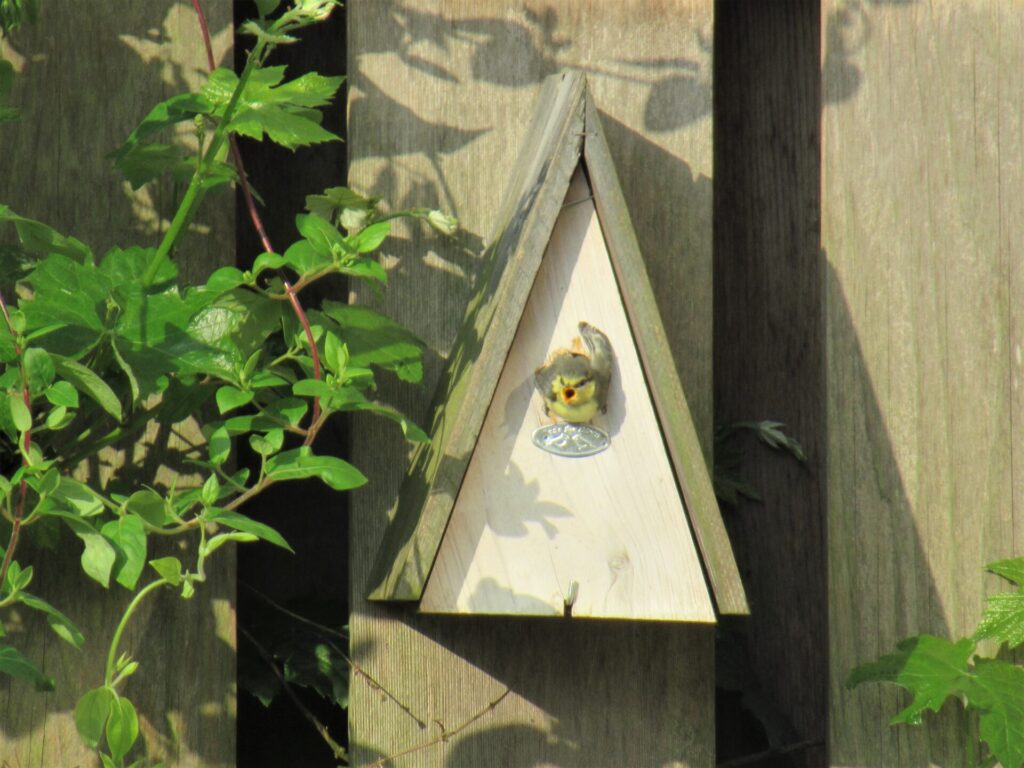
And then, one by one, the young birds decided that the time was right. With a wriggle and a wrench they flew out.
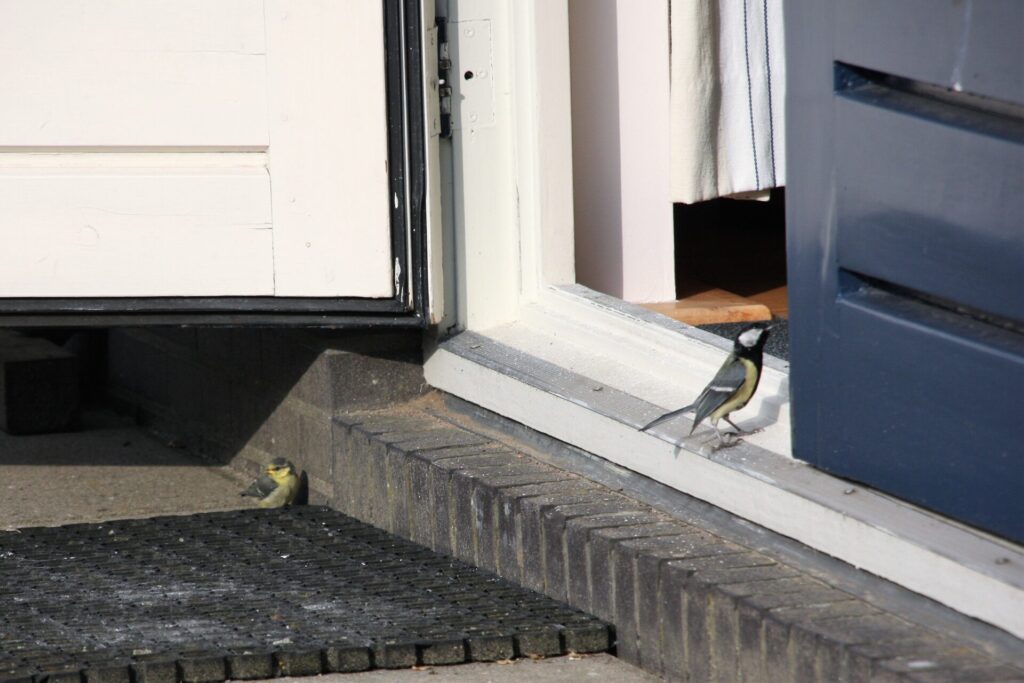
When we had counted 7, we thought that the nest box was empty. But after a while, another little blue tit came out. The others all immediately flew up into a tree or onto the fence, but this one seemed weaker. It flew down to the rubber mat in front of the French windows.
And while it was sitting there, looking around at the big wide world, a great tit flew onto the threshold. It took one look around and then disappeared into our living room. I wonder what it thought when it came flying out a few minutes later. ‘Goodness, so much space! And what do they want with all that stuff inside their nests? Aren’t humans weird creatures?!’
After a while, the last little blue tit scurried away to find cover.
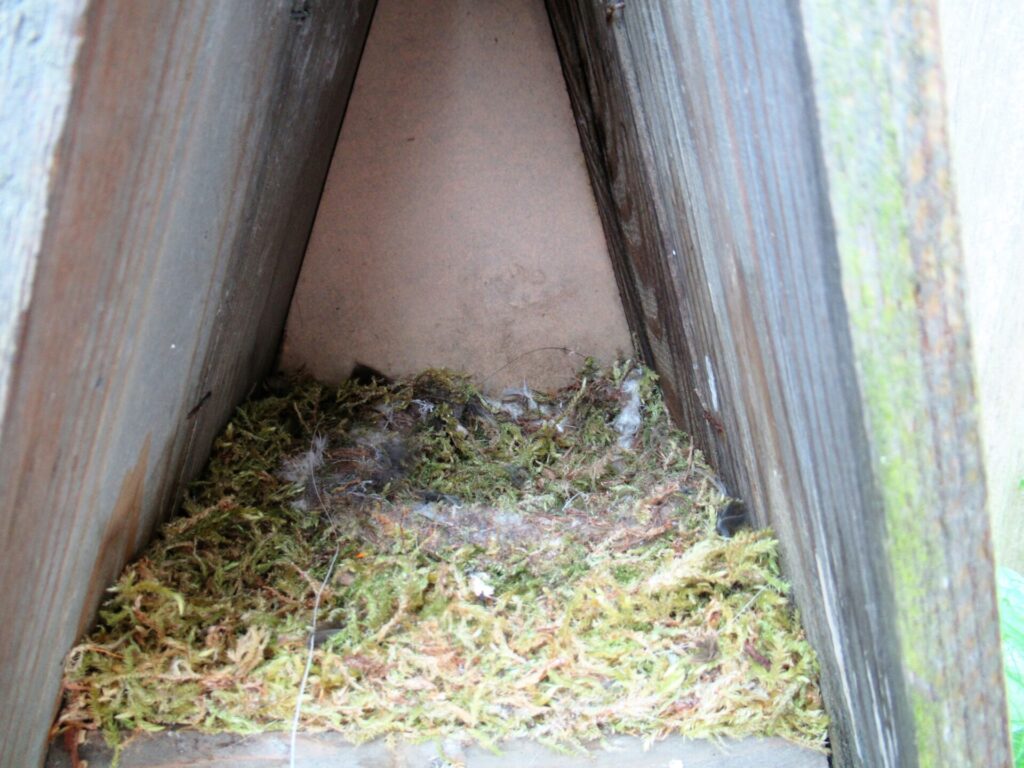
That evening we cleaned out the nest box. Unlike us, the blue tits didn’t have much stuff inside their nest – just a thick layer of moss and some feathers.
We heard that it’s a difficult year for blue tits. Because of the cold and wet spring there were not enough caterpillars when they needed them. With 8 healthy chicks, ours were lucky. Maybe the peanuts from our feeder also helped a little.
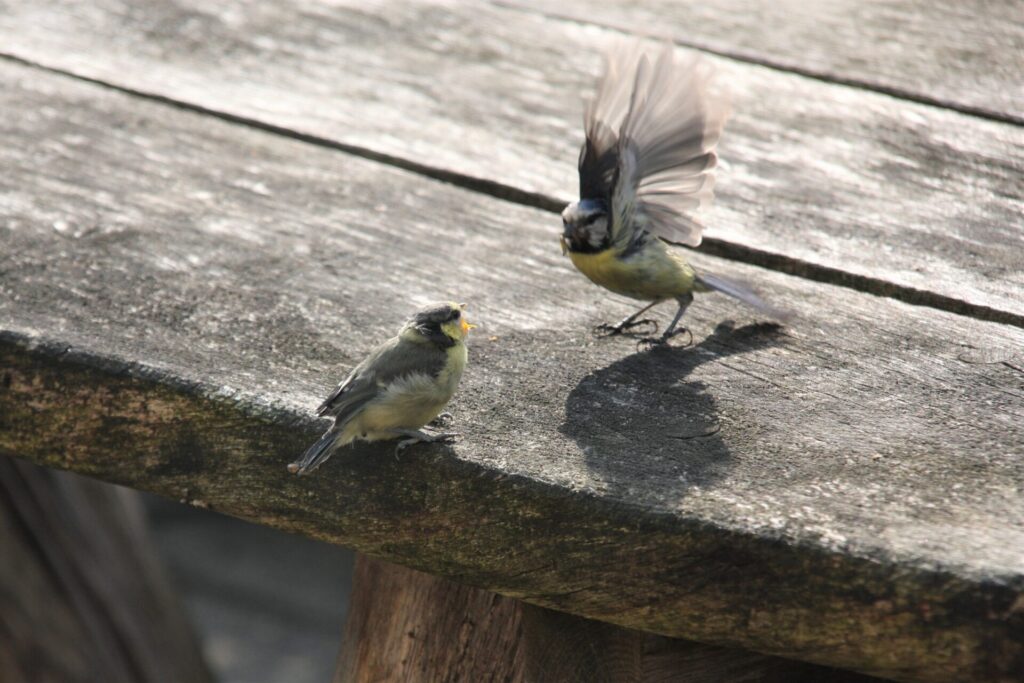
The parents will keep feeding their young until they can fend for themselves.
Now we’re waiting for the great tits. They have nests in two other nest boxes in our garden. And also for the second nest of the blackbirds in the beech hedge.
Meanwhile I am incubating a clutch of knitting ideas. It’s not a straightforward as with the blue tits’ eggs. I don’t know how long the incubation will take and exactly what I need to feed them when they hatch. What kind of TLC do they need if I want them to fledge? I can only go by what my intuition tells me.
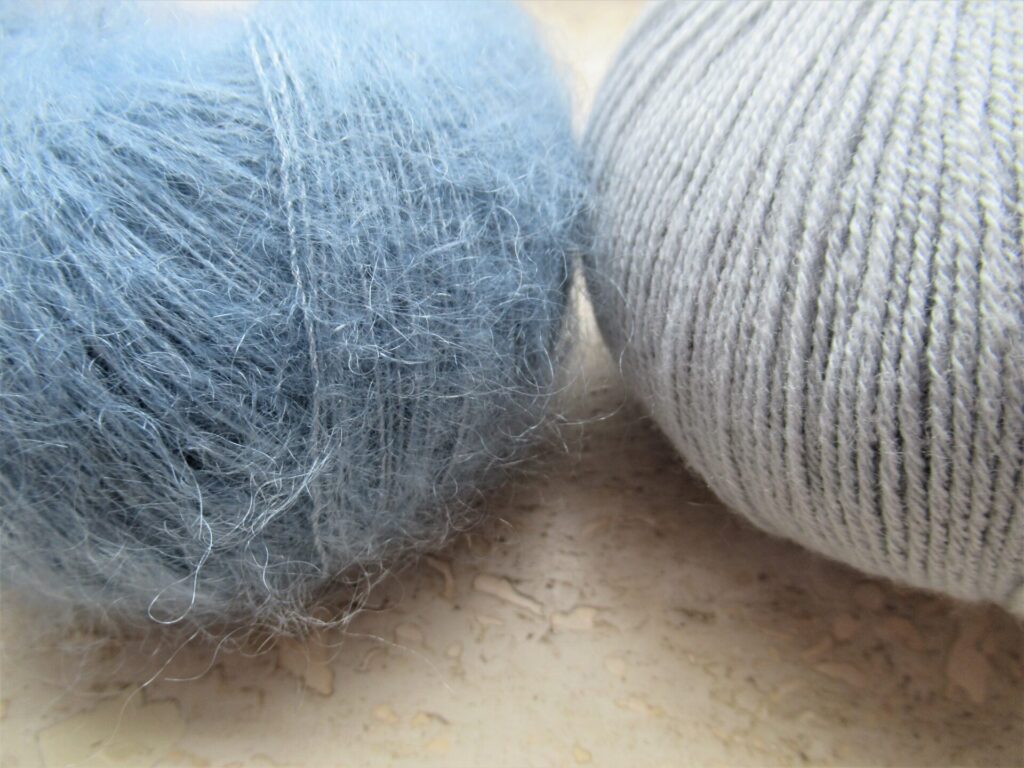
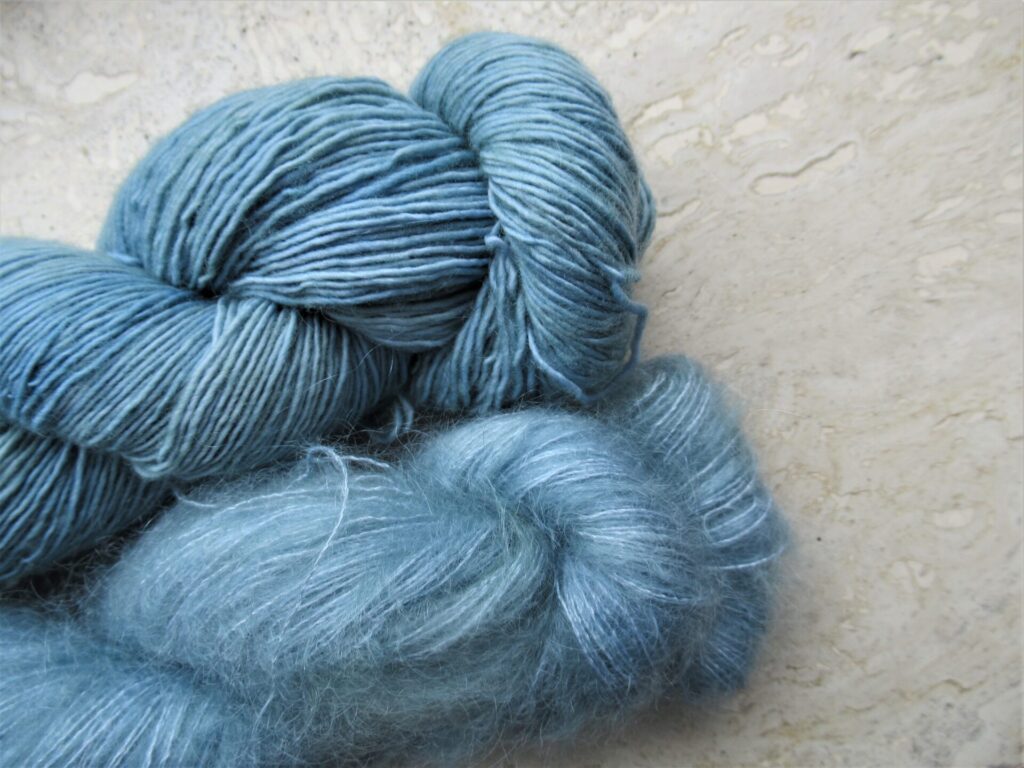
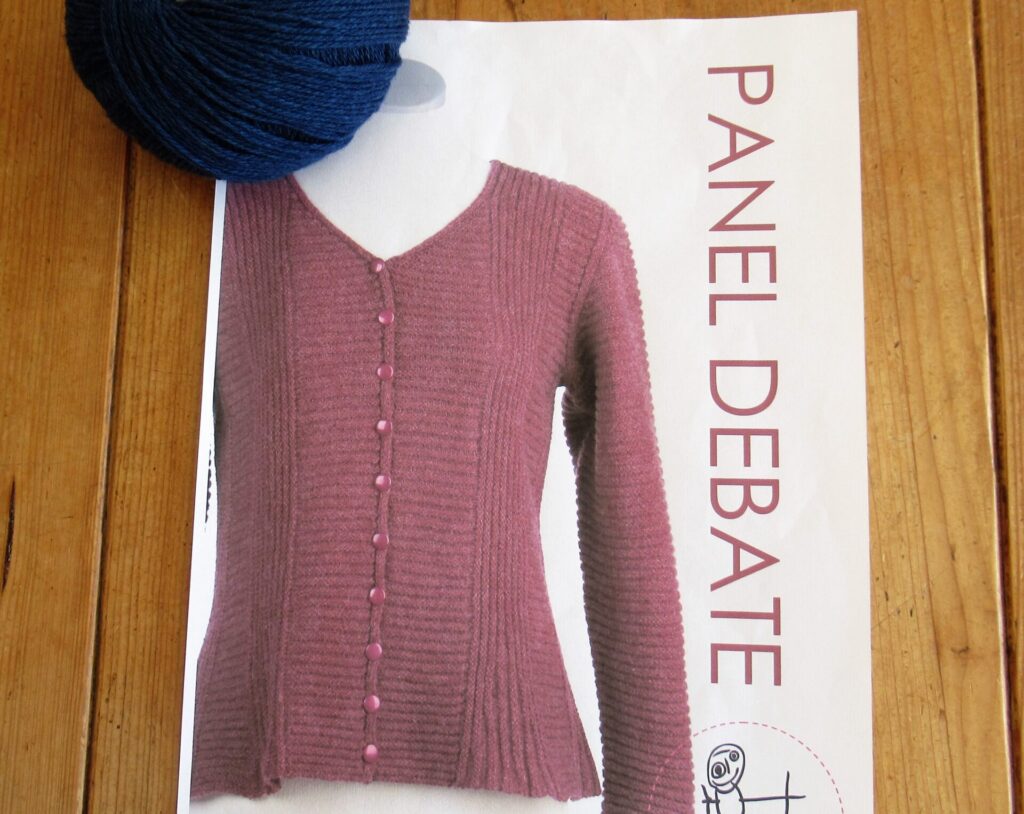
One thing my intuition told me was, ‘Buy yarn’. I wondered at the wisdom of this advice at this early stage, but I let myself be led by it anyway and bought some yarn in blue tit blue.
And some more yarn, also in beautiful hues of blue.
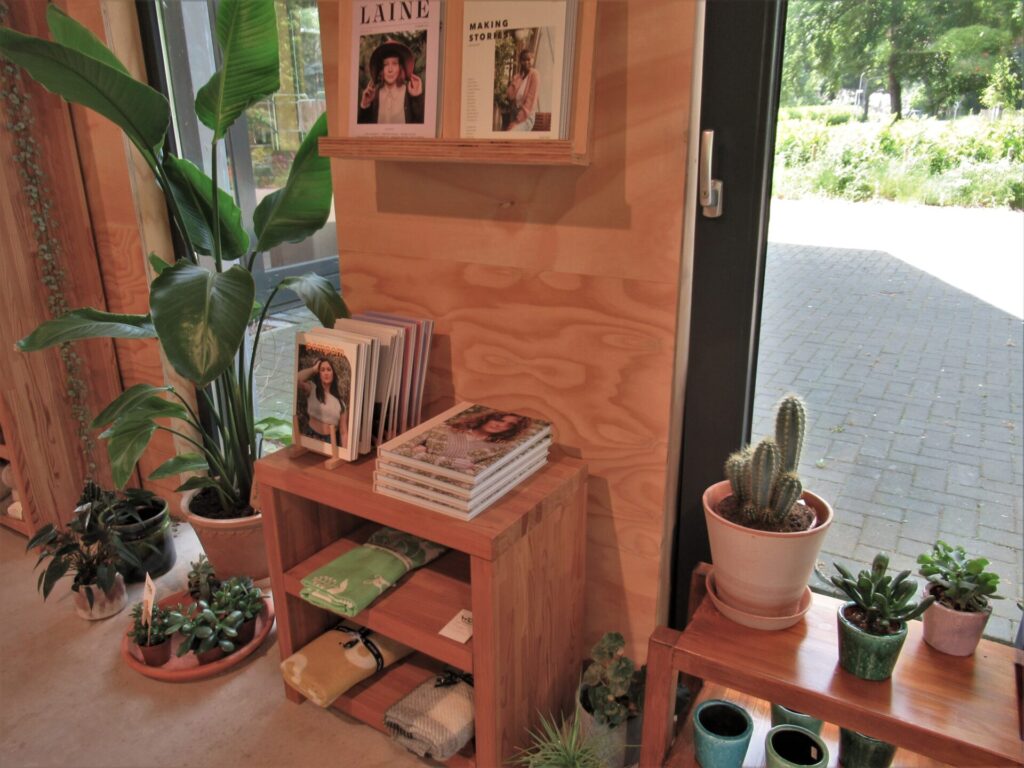
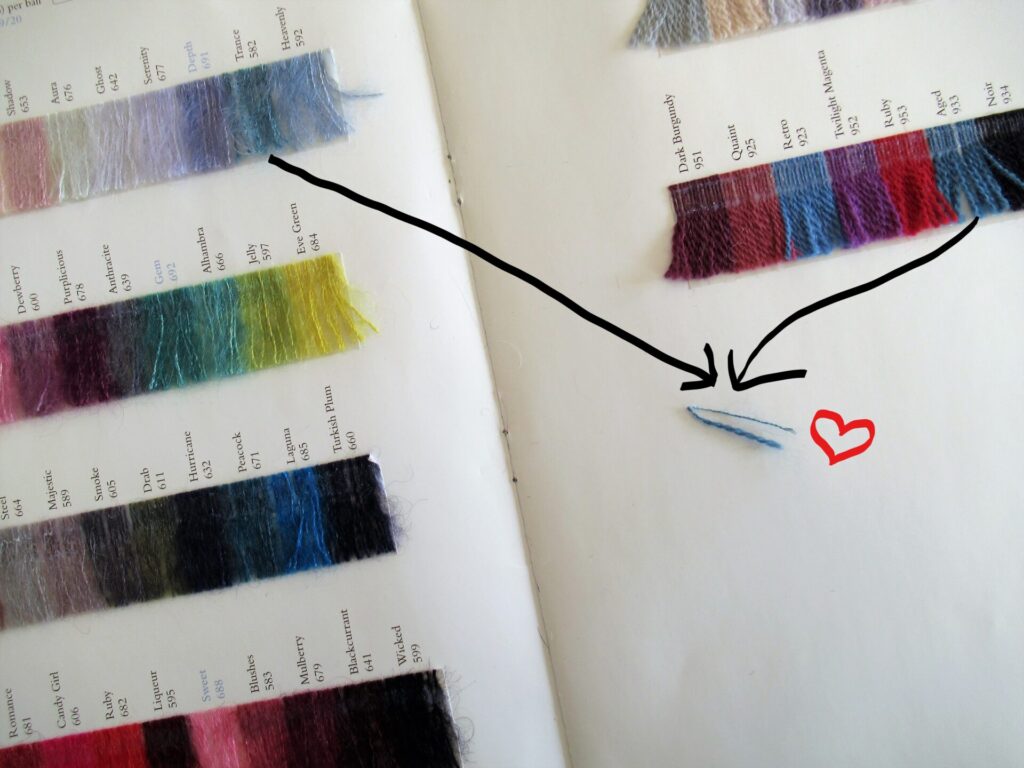
Time will tell whether this was a wise thing to do. At least browsing around Wolverhalen was a very enjoyable thing to do. (You may have read about it in a previous post.) Leafing through some pattern books and magazines…
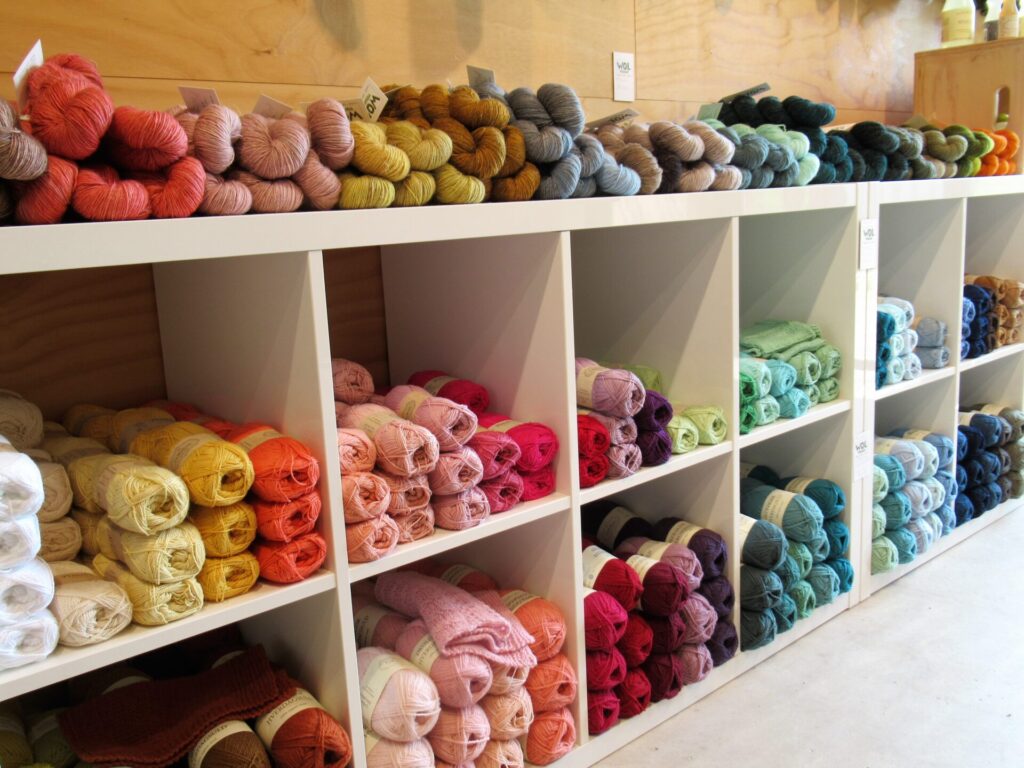
… immersing myself in colour…
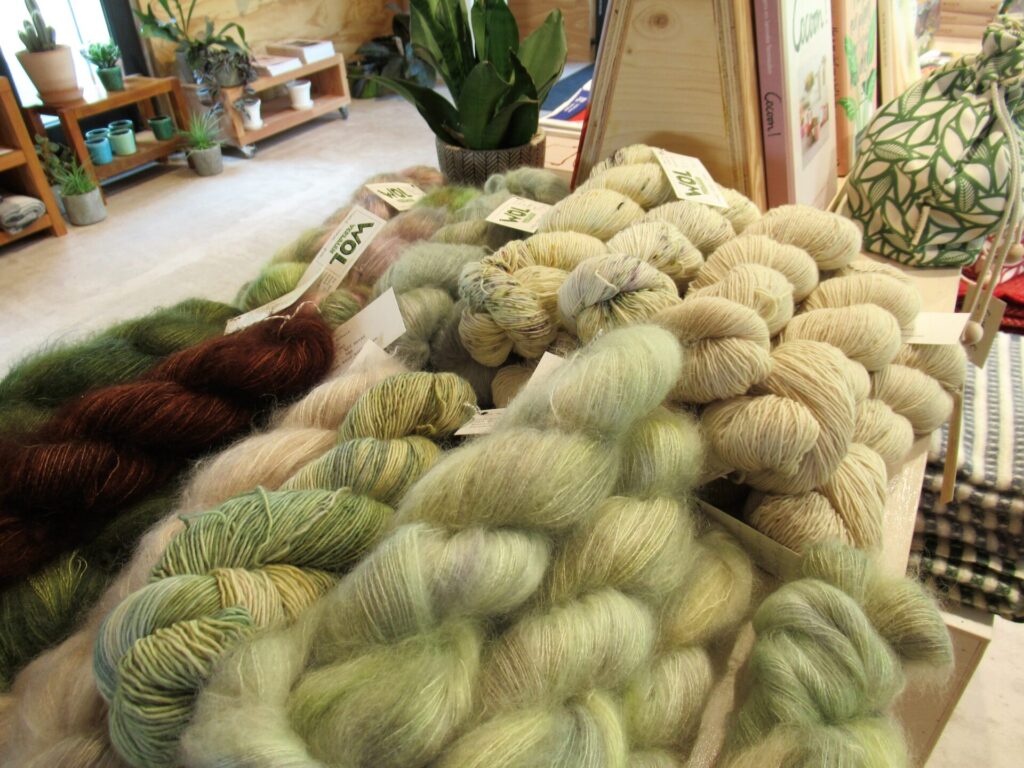
… and swooning over skeins lovingly hand dyed by Catharina.
I don’t know yet what shape my ideas will take. I’ll do what I can to make them fledge successfully and hope to show you more if and when they’re ready to fly out into the big wide world.
Until then, I’ll try to keep feeding you/myself/us all kinds of other tasty morsels. Bye for now and take care!
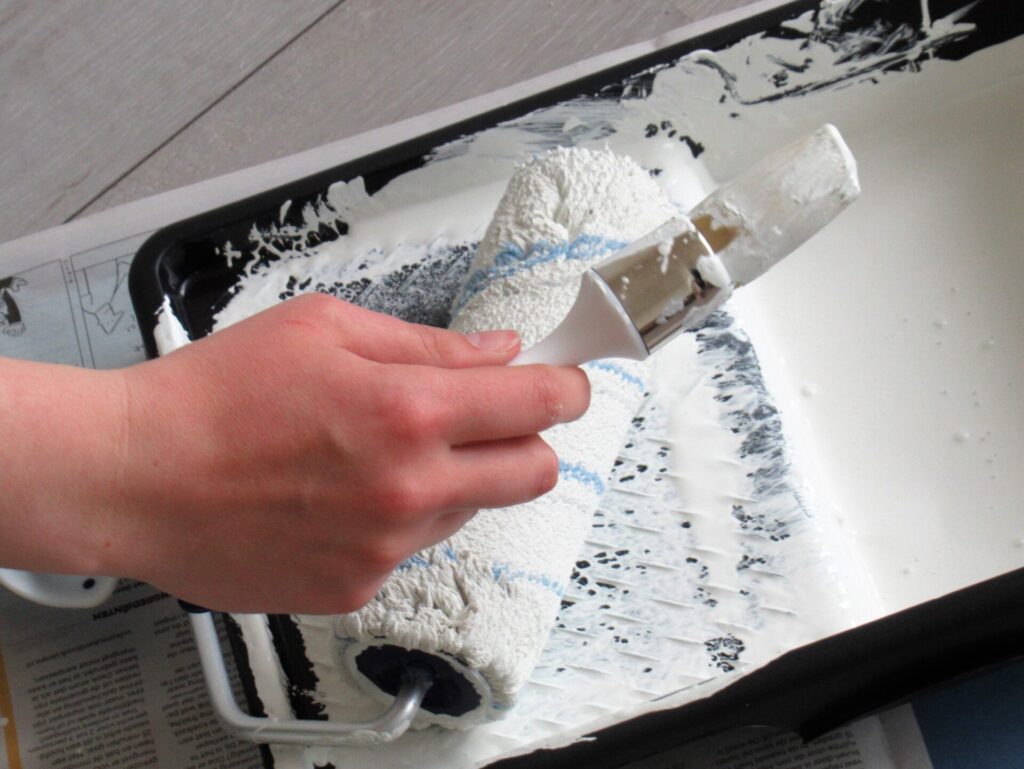
It’s good to be back here after a busy and bumpy couple of weeks. What with several ups and downs, keeping up with everyday life, and helping our daughter and her boyfriend husband paint their new home…
…there hasn’t been much progress on the knitting front. All I’ve done is knit row after comforting row on my Striped Linen Stitch Wrap.
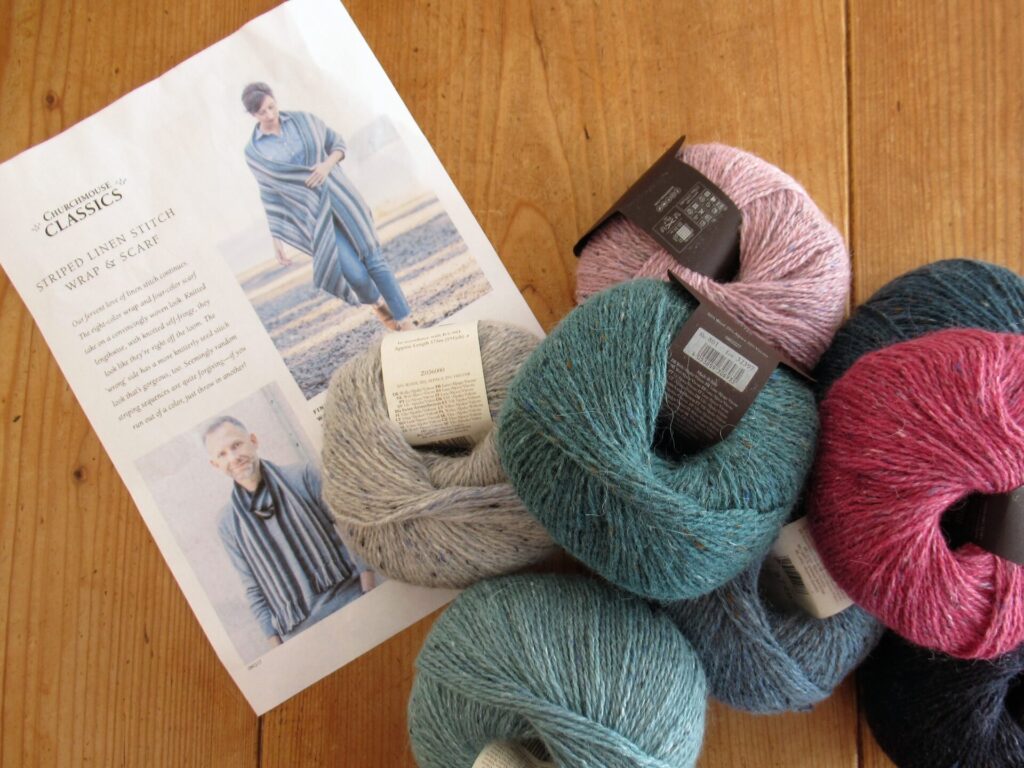
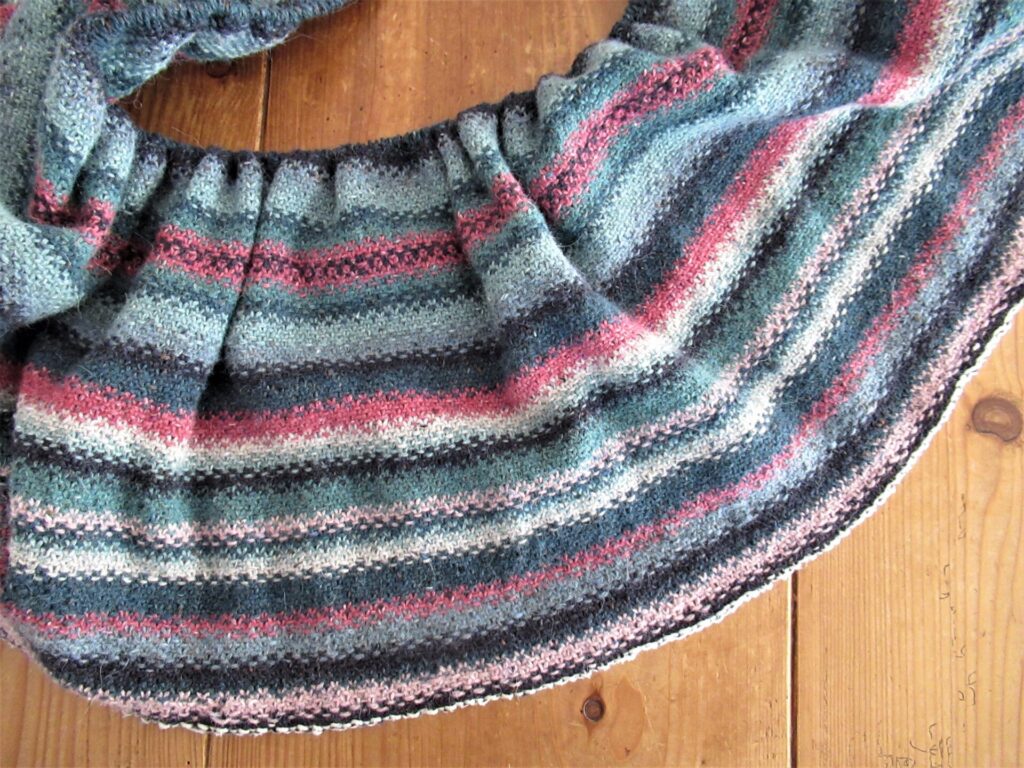
So, I thought I’d write about that a bit. I’m knitting it in 8 colours of Rowan Felted Tweed. Different colours from the ones used in the pattern, but I’ve tried to find the same balance between darker and lighter shades. I chose 5 blues/greens, 2 pinks and 1 grey.
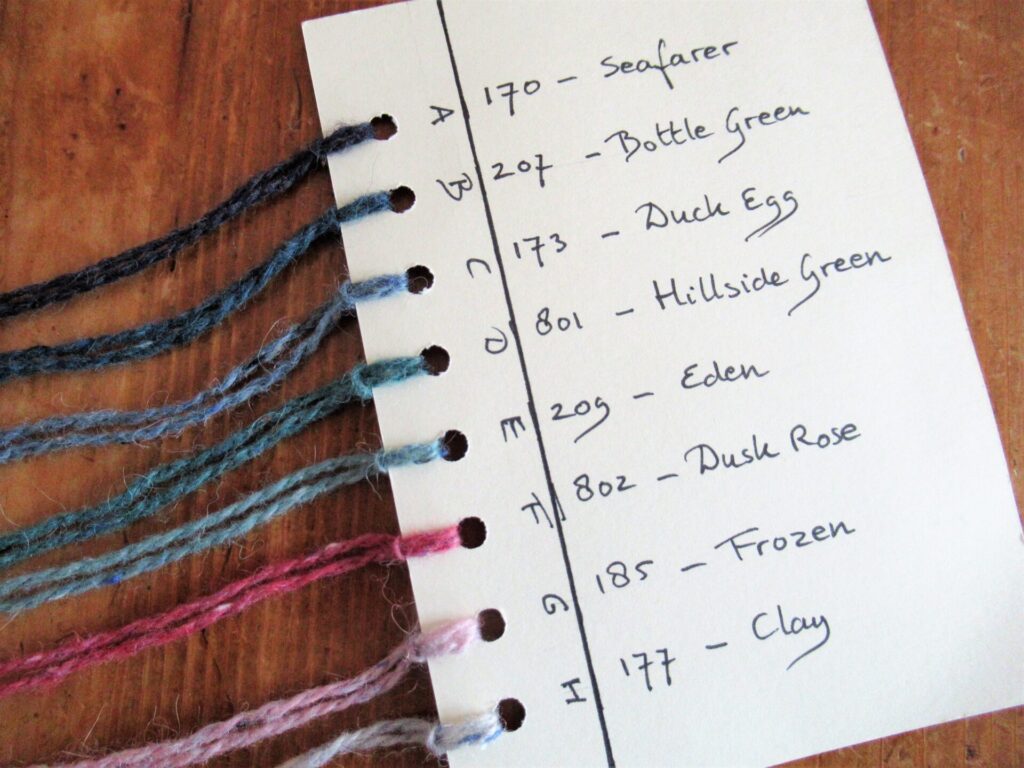
Because some of the blues and greens are hard to distinguish in the evenings, I decided to make a colour card, similar to embroidery floss organizer cards. With the colours from A-H with their names on the front…
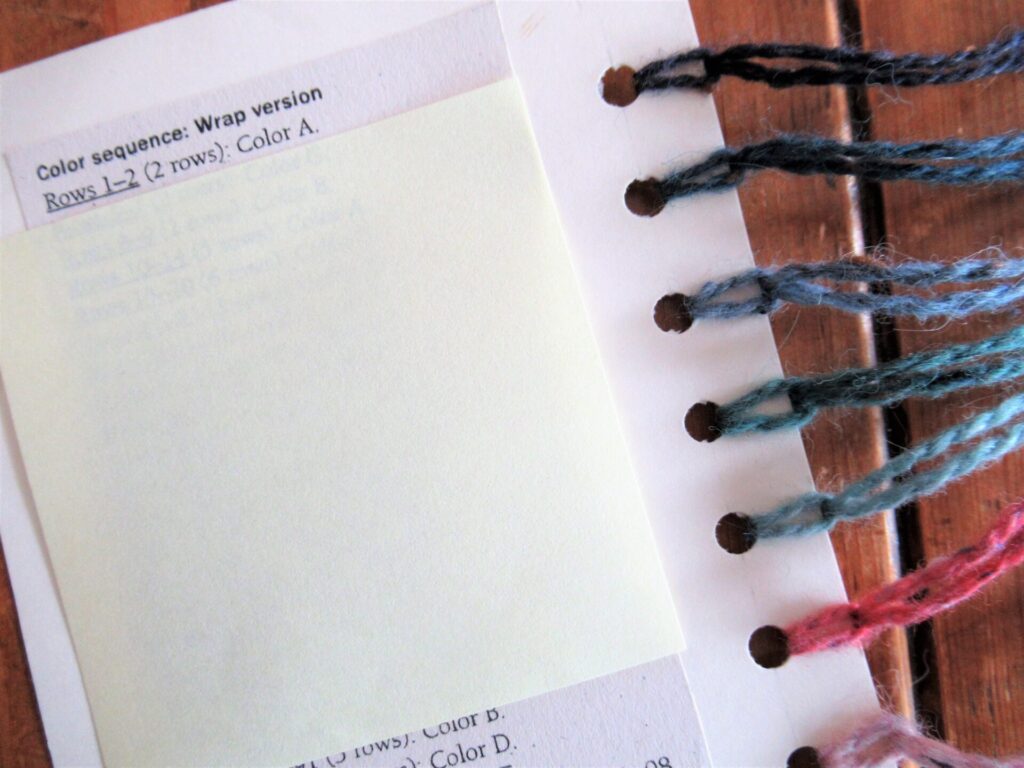
… and the description of the stripe sequence cut out from the pattern glued to the back. I’m using a sticky note to keep track of where I am in the pattern.
Making the card was a fun little project, and it turned out to be a handy tool. A great idea for multi-colour knitting, if I say so myself. I used a standard blank 10.5 x 5 cm (5¾ x 4¼”) correspondence card, measured out the places for the holes with a ruler and pencil, and punched the holes with an ordinary 2-hole punch held at an angle to make one hole at a time.
This linen stitch wrap starts with a provisional cast-on, which will be unravelled later to knit an I-cord along the entire length. I think the best-know type of provisional cast-on is picking up stitches from a crocheted chain – the method I used for my Thús loop.
The method used for this wrap, just called ‘provisional cast-on’ in the pattern, is a little more sophisticated. In June Hemmons Hiatt’s 2 kg/712 page tome The Principles of Knitting it is called ‘Hook and Needle Chained Cast-On’.
If you’re like me and are interested in all kinds of cast-ons and bind-offs, edge stitches, increases and decreases, etc. etc. this is definitely a book for your Birthday or Christmas wish list.
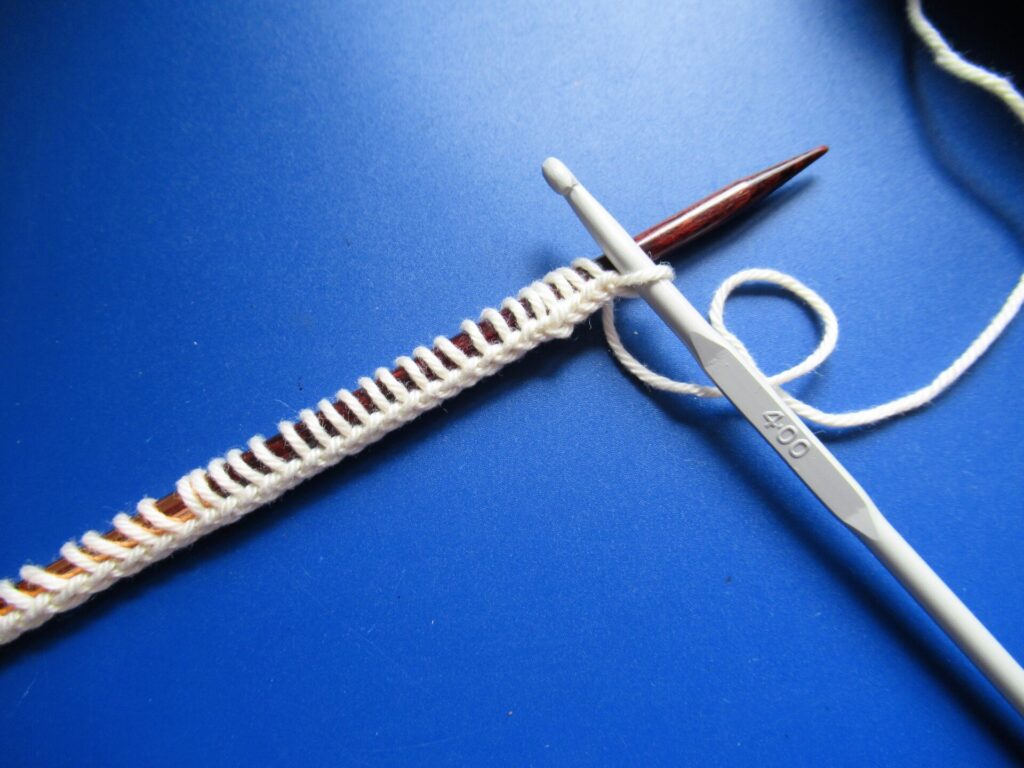
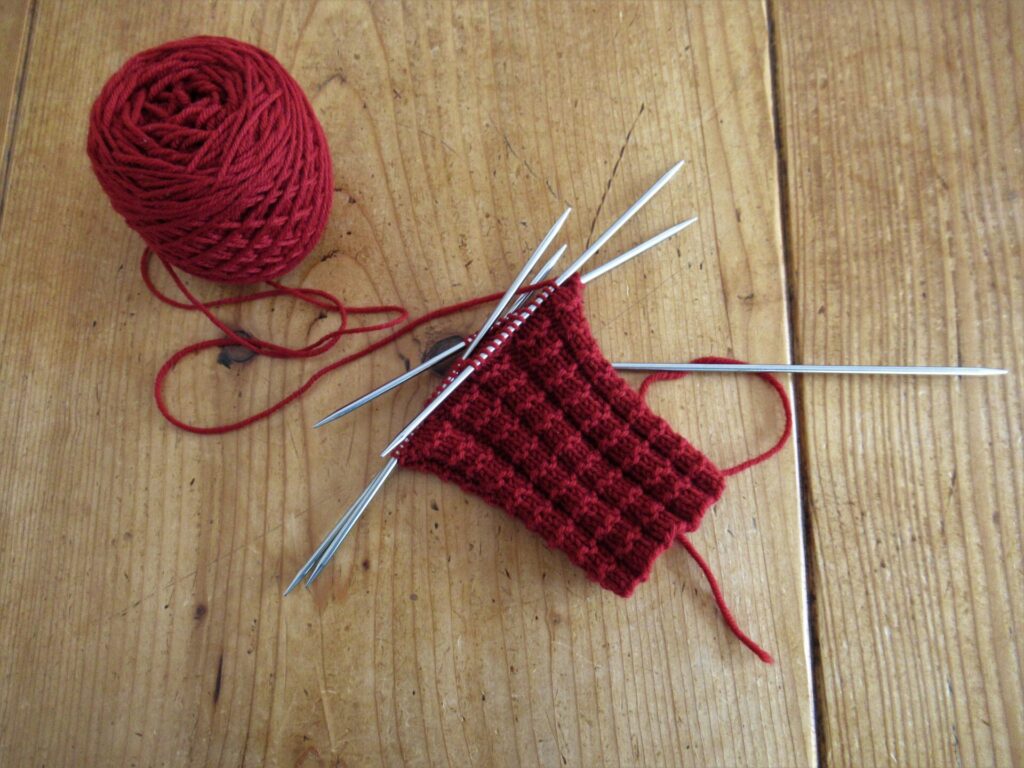
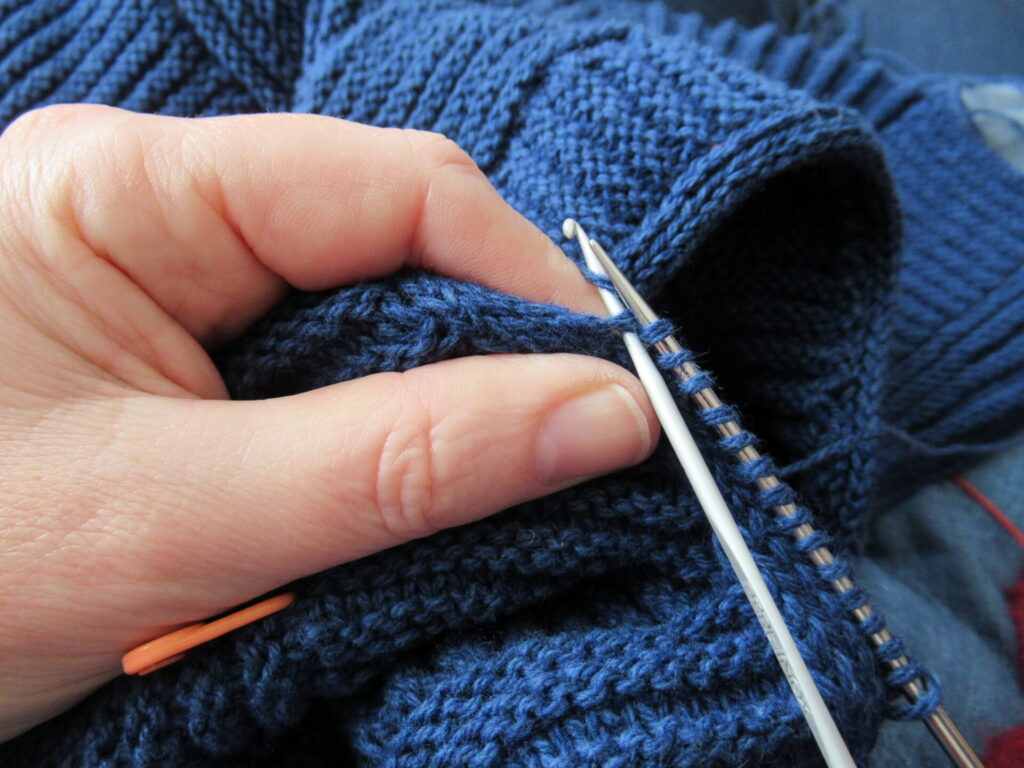
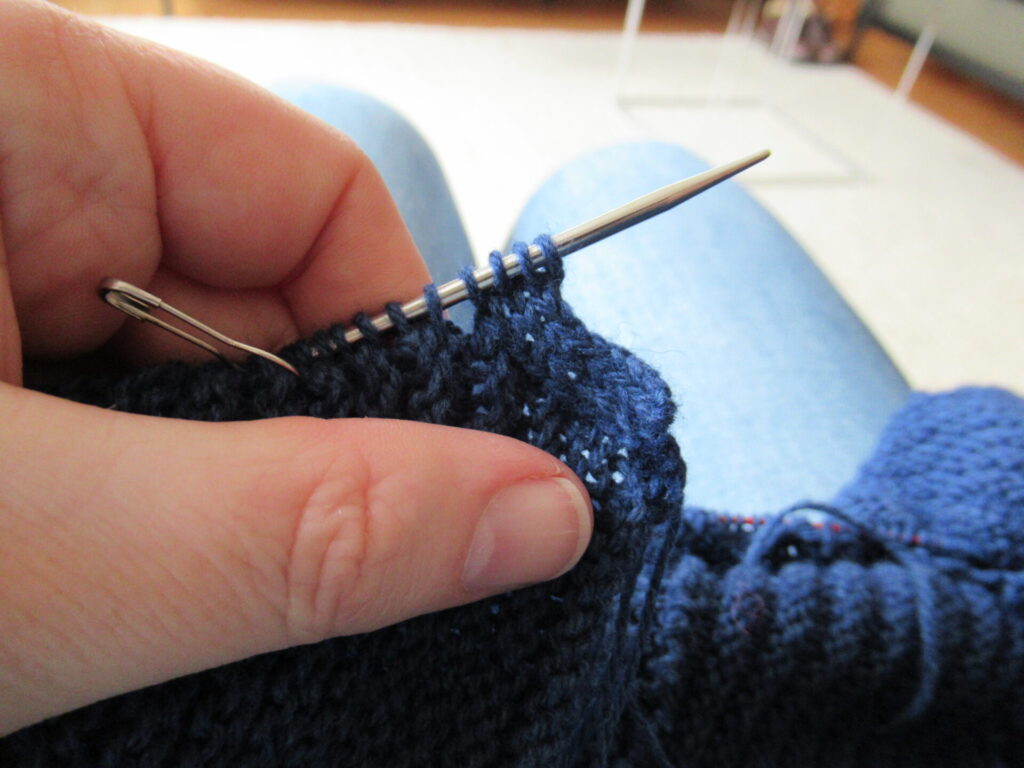
I’ve taken pictures of the Hook and Needle Chained Cast-On as I went along, hoping it might be helpful and interesting to other knitters. The method uses a knitting needle, a crochet hook and a piece of smooth waste yarn. This is how it’s done step by step.
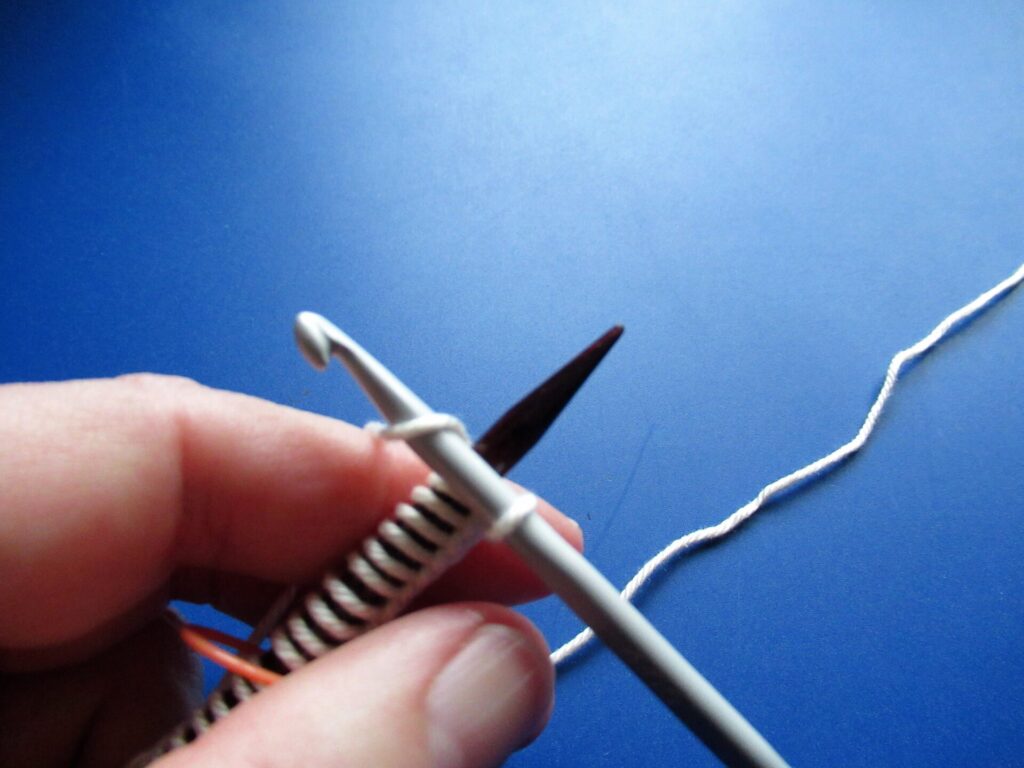
First of all, make a slip knot in the waste yarn and place it on the crochet hook. (I took my pictures after I already had a few stitches on my needle.)
Hold the knitting needle in your left hand, crochet hook in your right hand, and waste yarn over your left index finger. Knitting needle and hook form an X. The crochet hook is in front and the yarn runs behind the knitting needle.
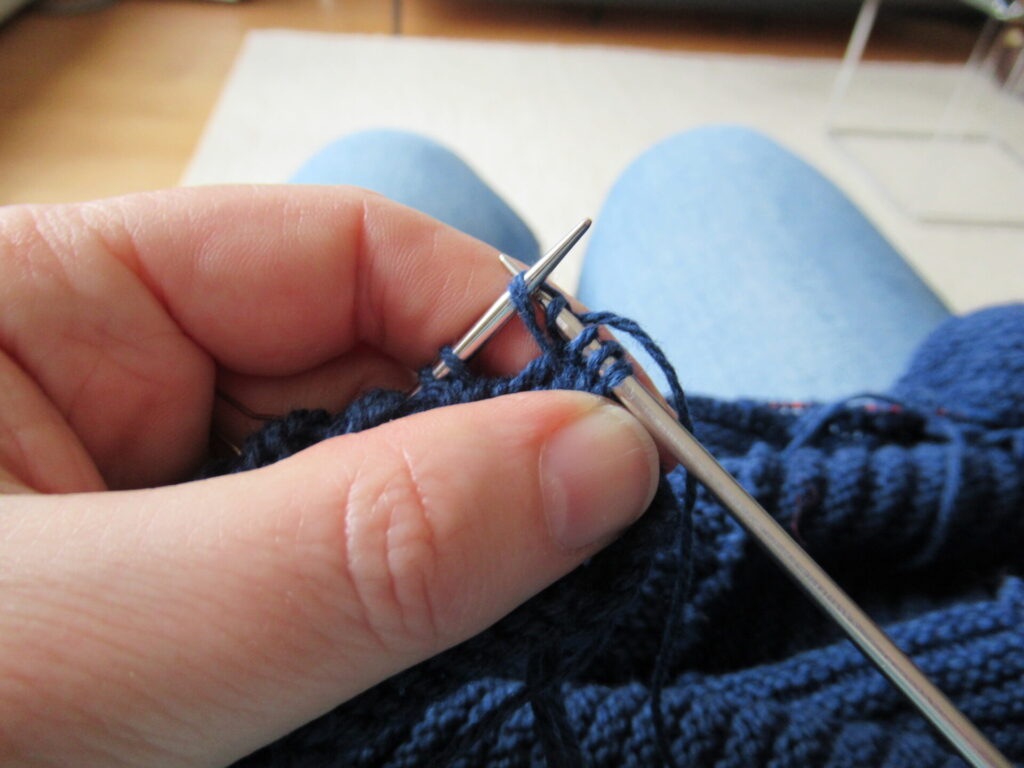
Wrap the yarn around the crochet hook…
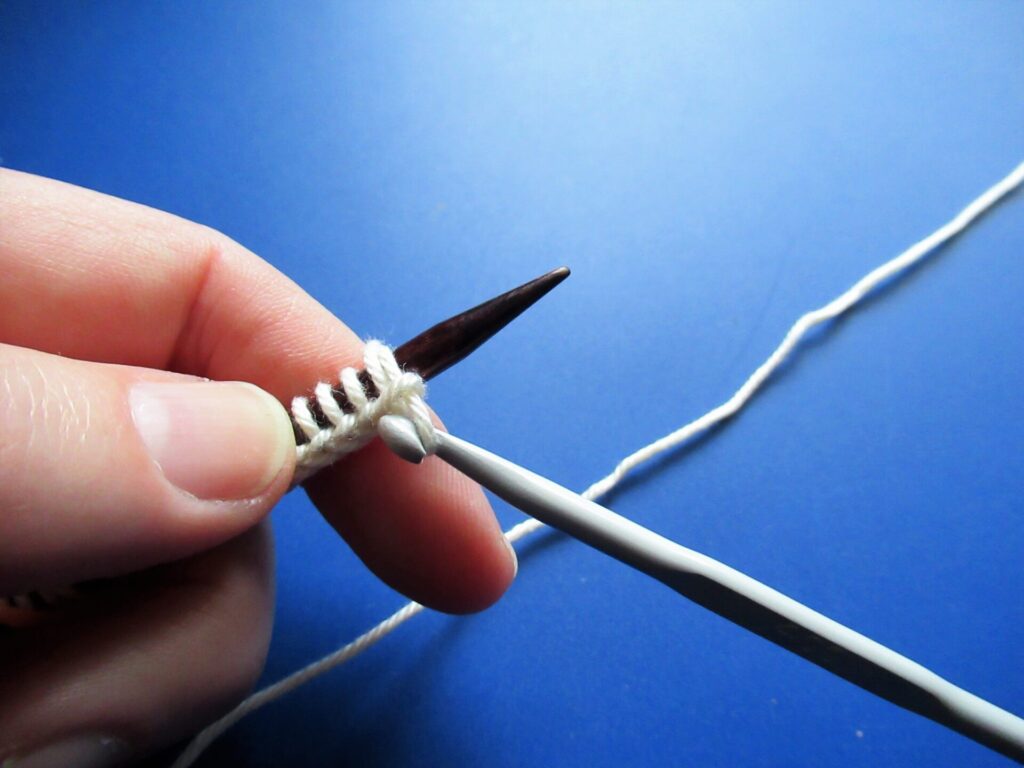
… and pull the yarn through the loop.
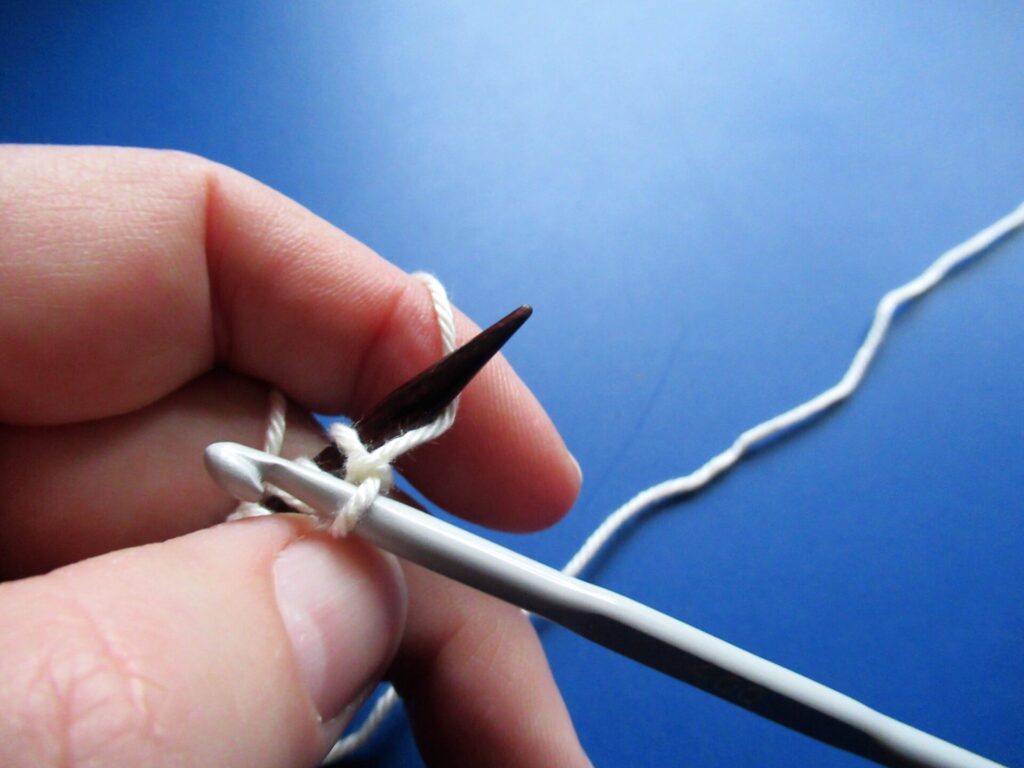
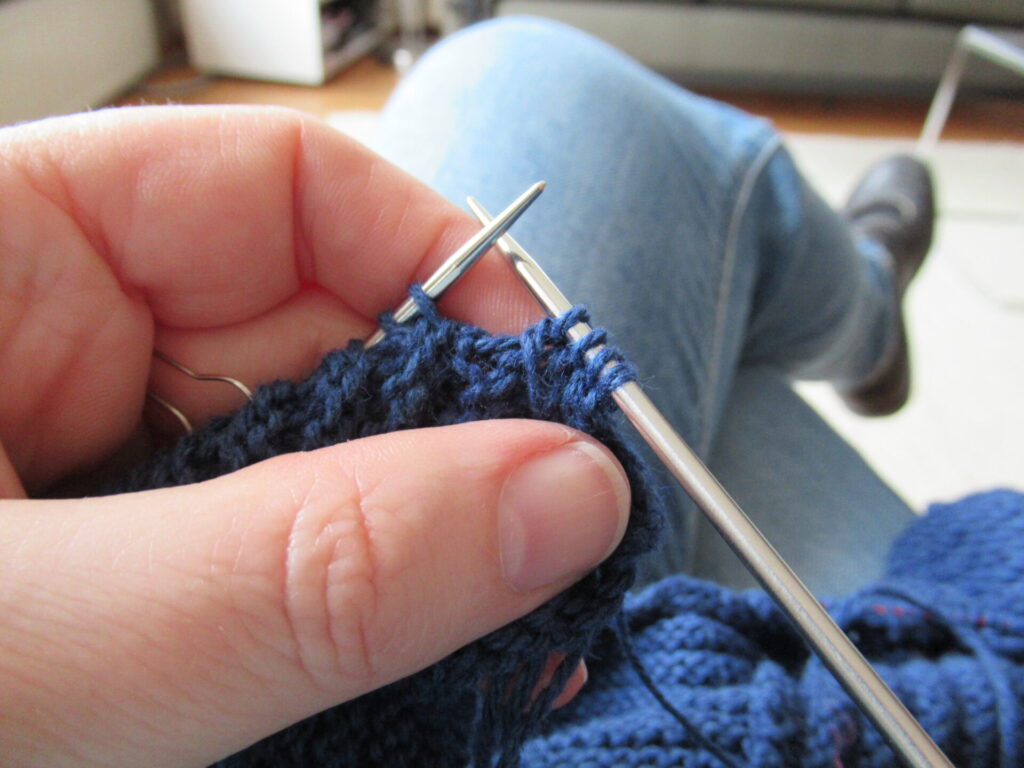
With your finger, or with the help of your hook, return the yarn under the needle and to the back. Now it is in the same position as in step 1.
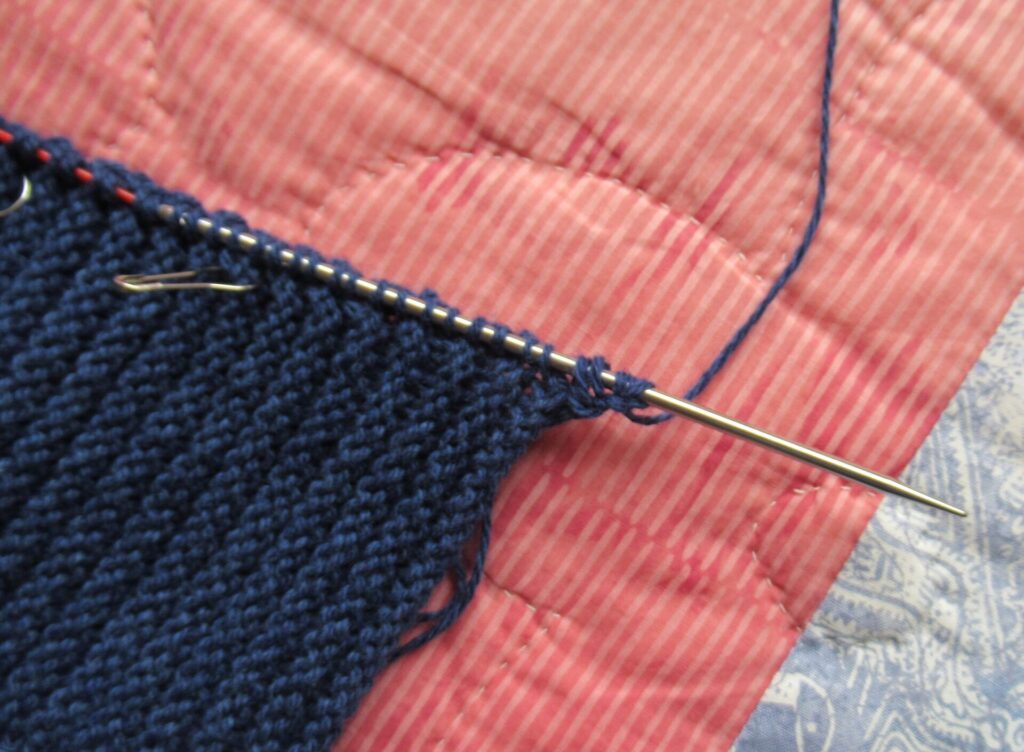
Repeat steps 1-4 until the required number of stitches is on the needle. The stitches end up on the needle like any knitting stitches, with a neat row of chains running along the length of the knitting needle. This is very easy to unravel later on.
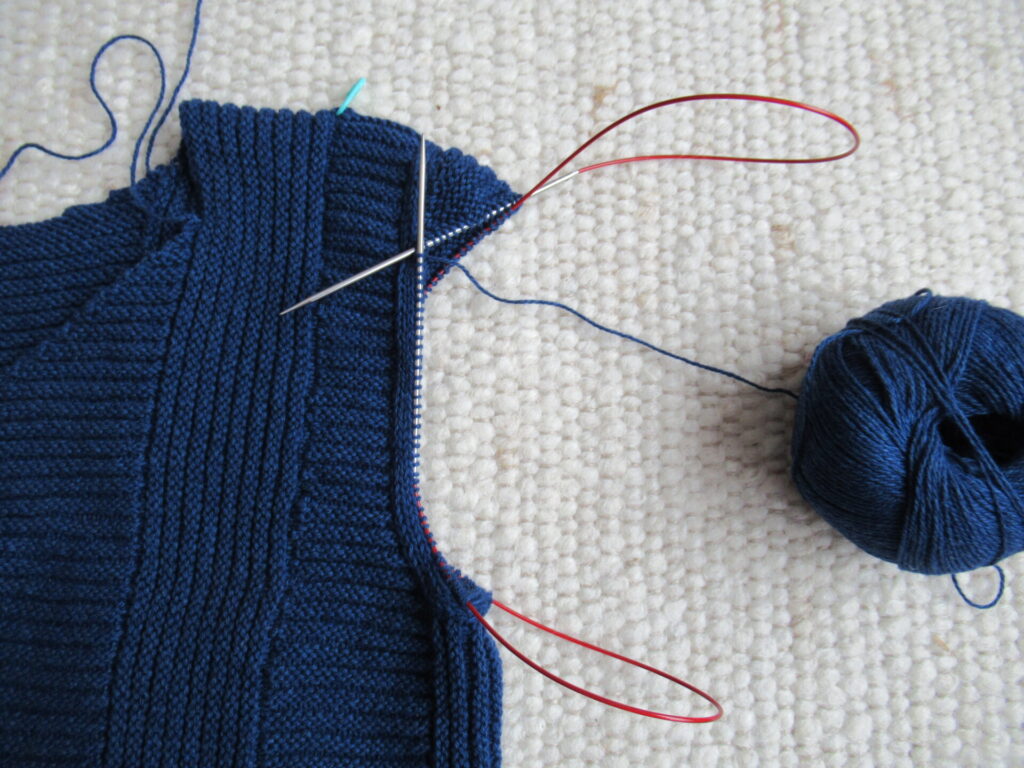
For my wrap, I needed to cast on 400+ stitches. I didn’t time myself, but I think it took me about two hours. Phew! But I know it’s worth the time and effort.
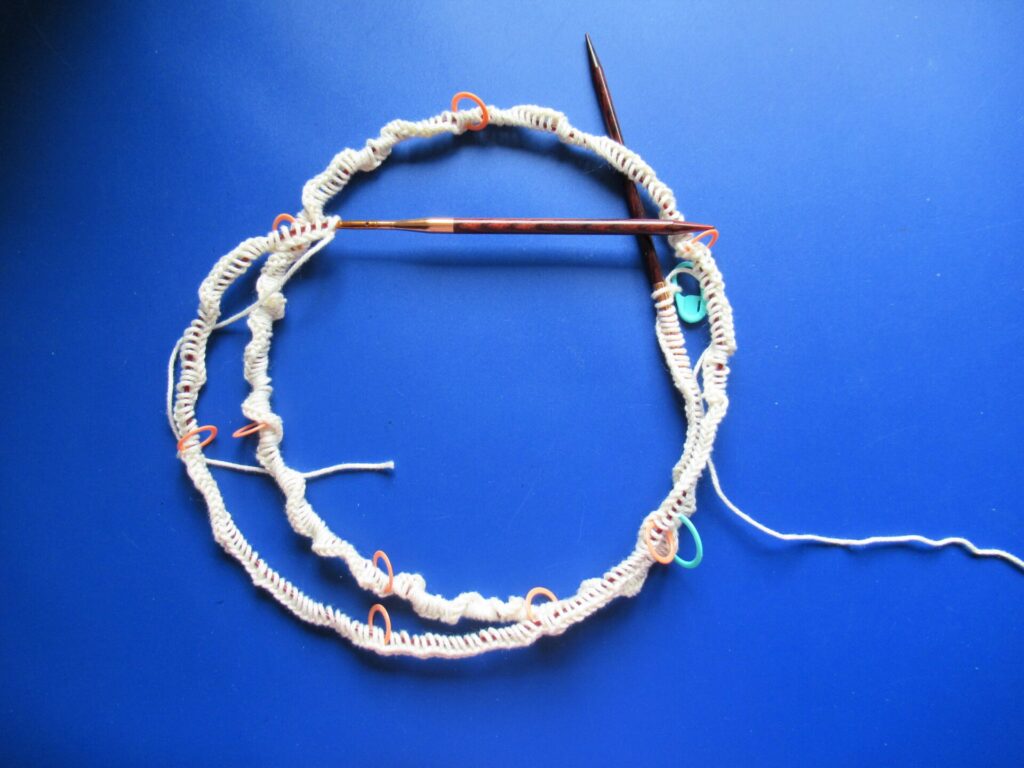
The stitch markers (picture below) are there to make counting this large number of stitches easier. I removed them as soon as I started knitting.
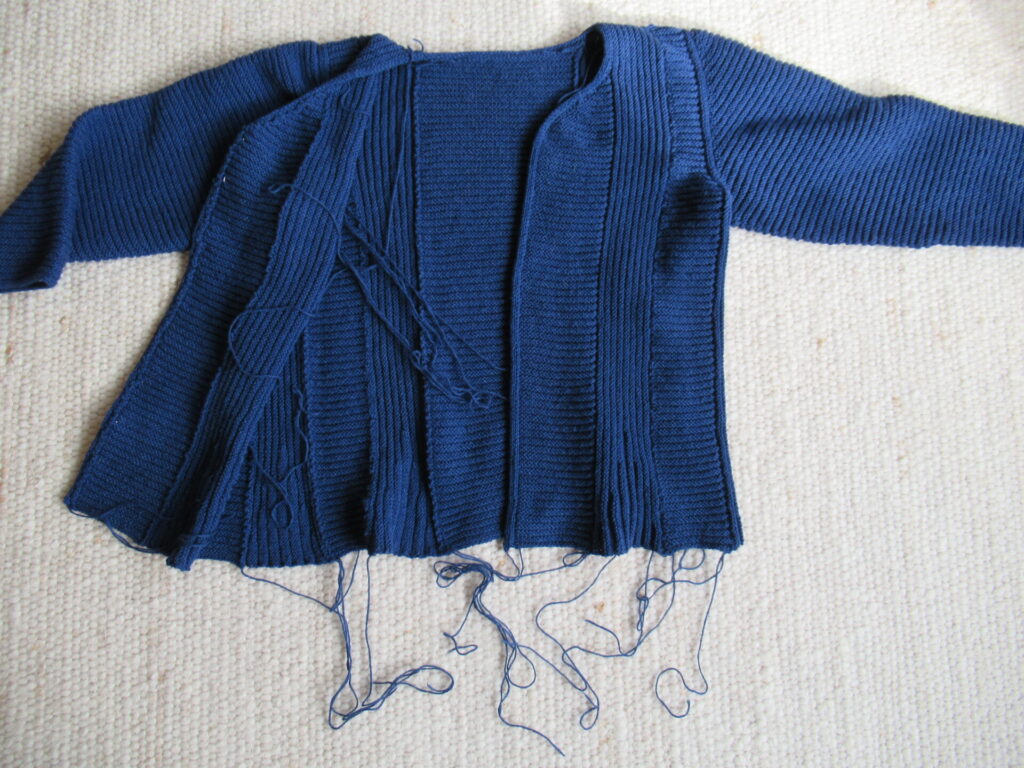
This was meant to be a project I would only work on in between projects requiring more attention. But the long rows of linen stitch are so addictive that I’m over halfway already. The white stitches along the bottom are the provisional cast-on.
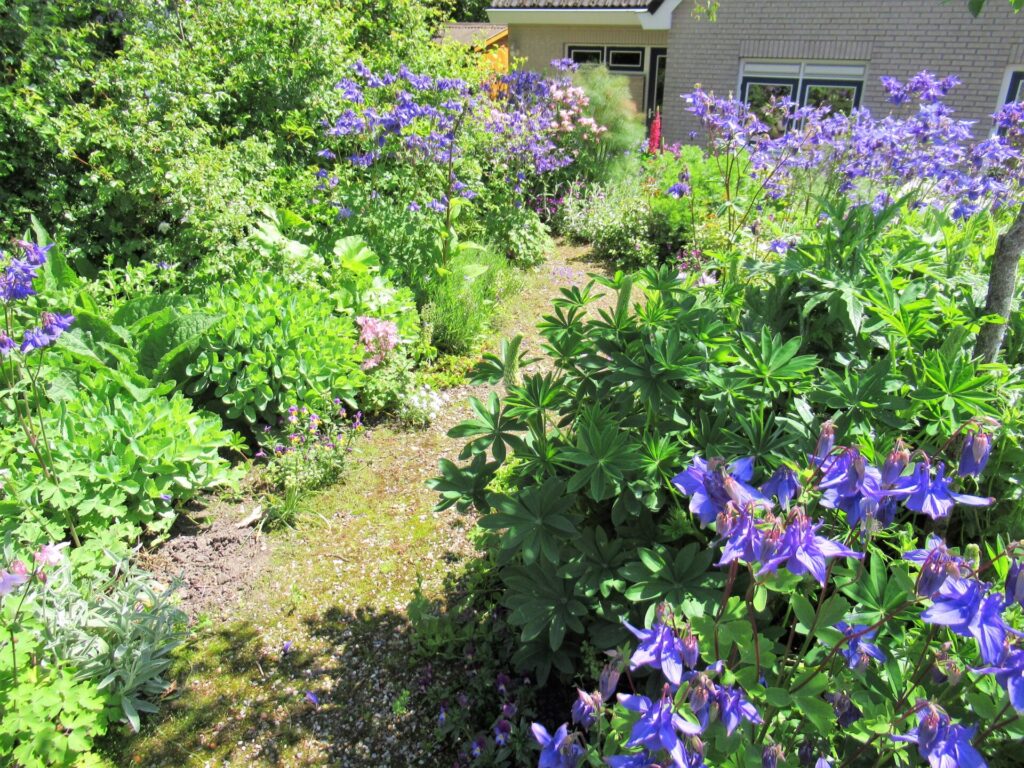
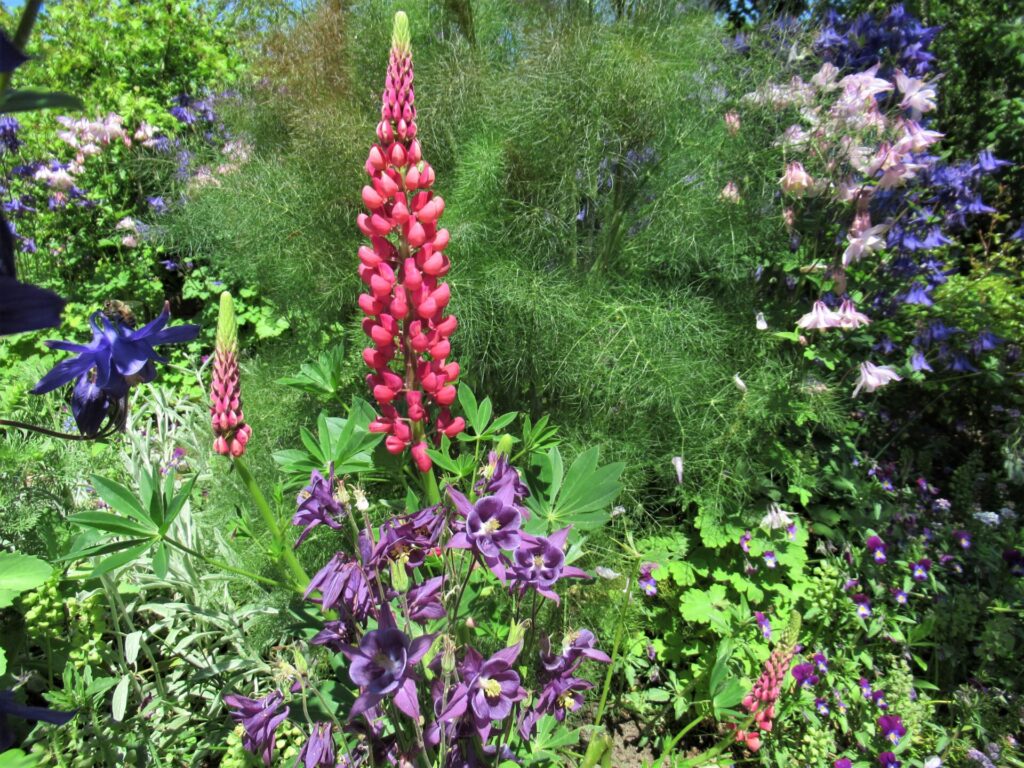
I’m going to put it aside for a while now, though, because after a rainy and cold spring, it suddenly feels like summer! Thanks to all of the rain, our front garden is a sea of lush greenery, with white, pink and purple aquilegias…
… and here and there a lupin.
It’s far too hot to have a large woolly wrap on my lap now. My mind is already bubbling with ideas for projects for summery temperatures, but I also think I should finish a few things before I start anything new. Last week, I thought I had run out of ideas and things to write about, and now I don’t know what to do first or last. I’m so glad it was only a temporary slump.
I hope your life is moving along without too many bumps in the road. See you again next week (if I don’t get held up or sidetracked again)!
As you can see, my knitting baskets are back where they belong – next to my knitting chair in the living room. This means that all the repair work to the house is finished, the paint is dry, the heating is back on and we’ve moved everything back to its rightful place.
I’m so glad that it’s all behind us now. And I’m particularly glad that I’m surrounded by books again. Moving back in, I came across one that I thought might be interesting to discuss here:
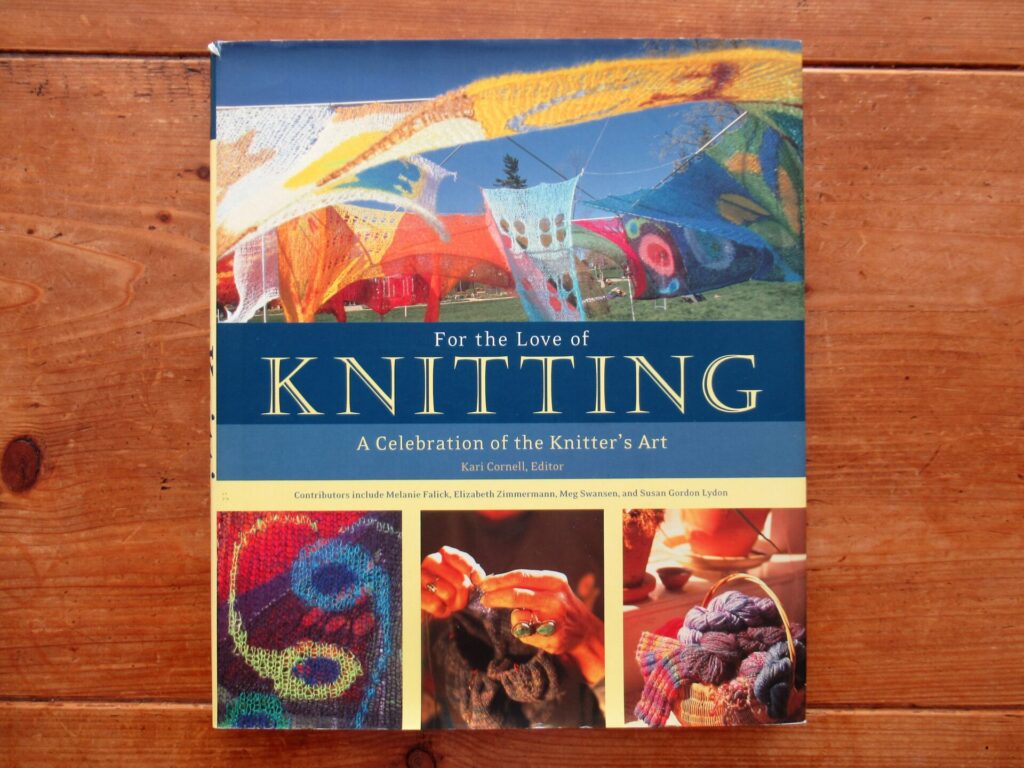
Kari Cornell (ed.), For the Love of Knitting, Stillwater (MN): Voyageur Press, 2004.
For the Love of Knitting is different from most other knitting books in that it doesn’t contain any patterns. It is filled with stories and essays about all kinds of aspects of knitting, and illustrated with many interesting pictures.
The book’s subtitle is: A Celebration of the Knitter’s Art. That’s interesting, because knitting is usually considered a craft. In an essay with the title: ‘The Search for a Proper Place among the Arts’ Teva Durham tries to answer the question ‘Why is knitting considered less of an art than painting, sculpting, or weaving?’ That’s an interesting question, and the essay contains interesting thoughts. A quote (p. 109): ‘For the proponents of the Arts and Crafts Movement it was enough for a work of art to be “a well-made thing” where “design interpenetrates the workmanship,” showing it was “made by a human being for a human being.” […] What could be more applicable to this than knitting?’
What indeed? Still, I wouldn’t call the things I knit art. But does it really matter whether something is considered art or craft? Hmm, it’s mainly a matter of status, I think. And the price people are willing to pay for one or the other will differ a lot. So, yes, perhaps it does matter.
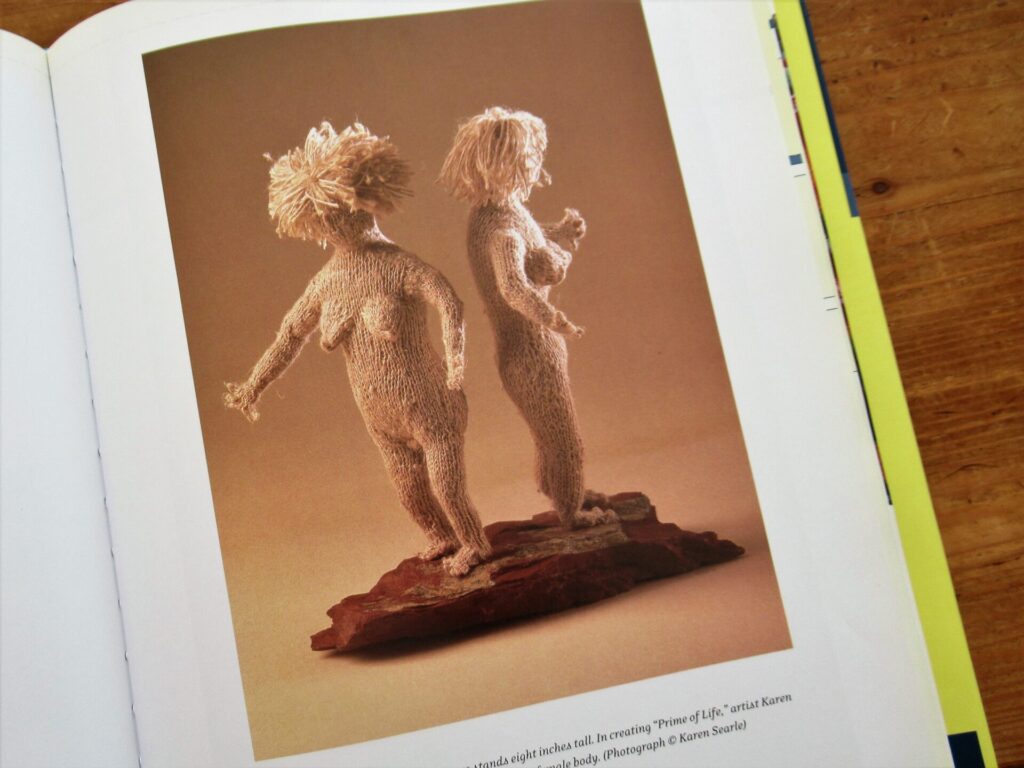
The things I knit are usually of the useful and wearable kind. This book shows many other applications of the art/craft of knitting, including knitted chairs, a knitted boat (yes, really, it even floats), and these two ladies.
This work of knitting art made by Karen Searle is called Prime of Life. According to the caption, the artist ‘wanted to illustrate the beauty of the aging female body.’ If you’re as intrigued by this as I am, there is an article with more pictures of Searle’s work here.
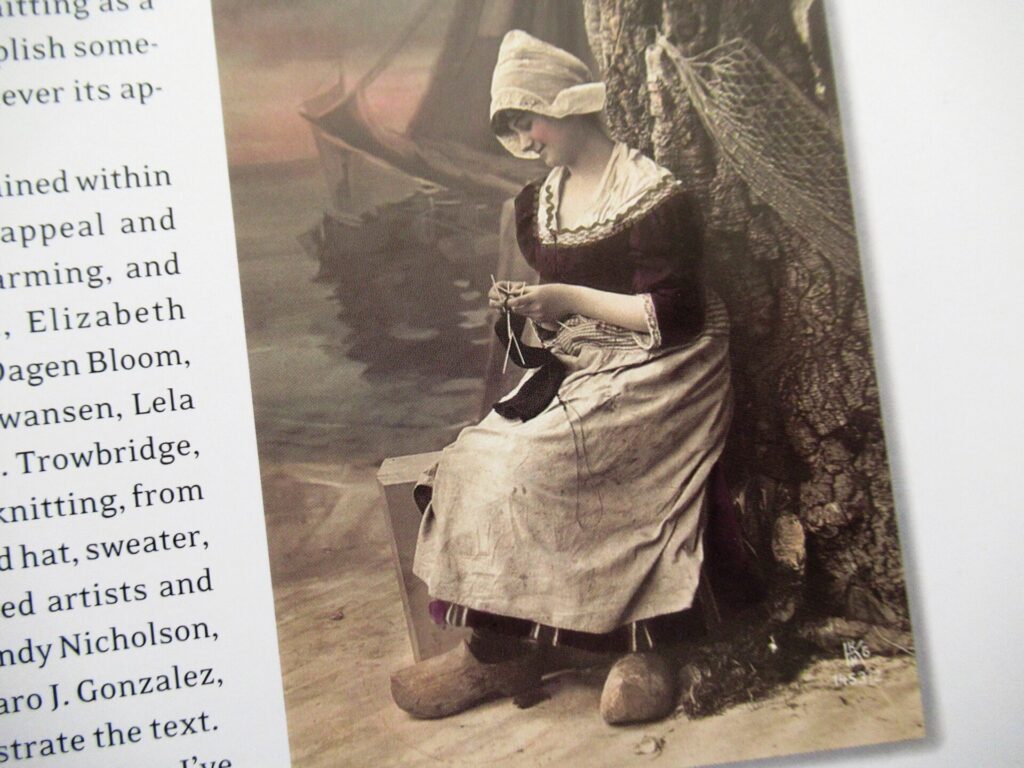
I just have to show you this gem, with the caption: ‘A young Dutch maiden knits contently by the sea in this vintage, hand-colored postcard.’ It could be me! (Just kiddin’.)
One thing in the book that makes me laugh out loud, is ‘Lily Chin’s Top 10 Ways to Hide the Stash’. One of her fun yarn storage tips is ‘Put a slipcover over a bag of yarn, stick it on the couch, call it a pillow.’ And why not? Another one is, ‘Never cook, only order take-out or go to restaurants. You’ve now got the whole oven!’
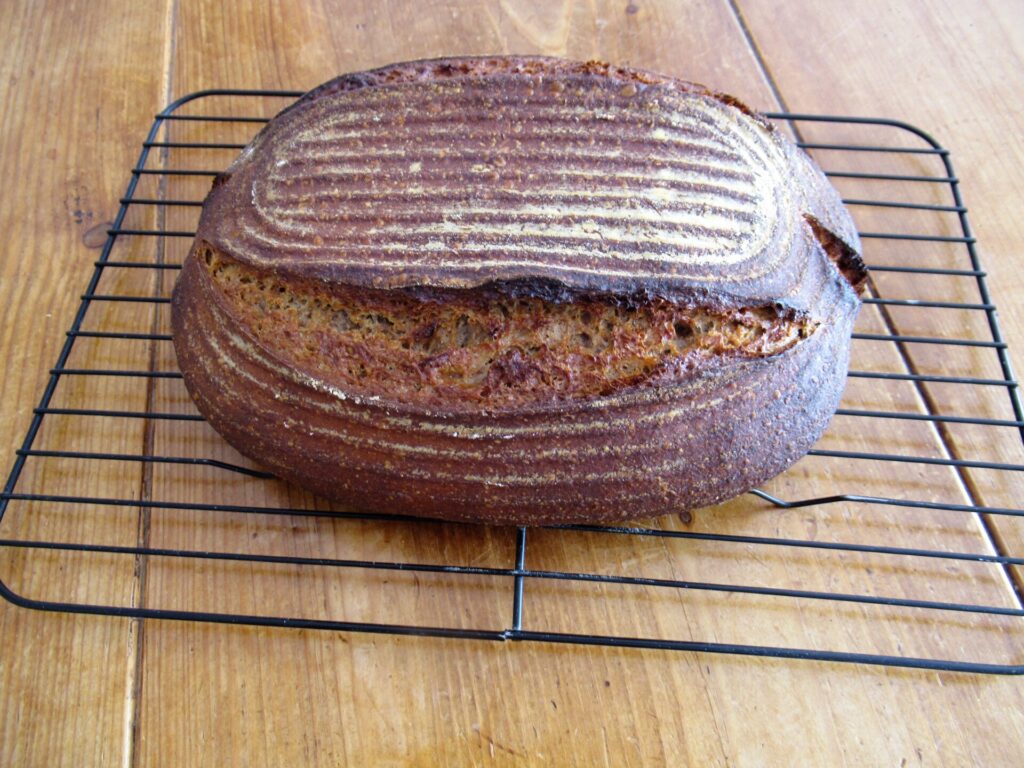
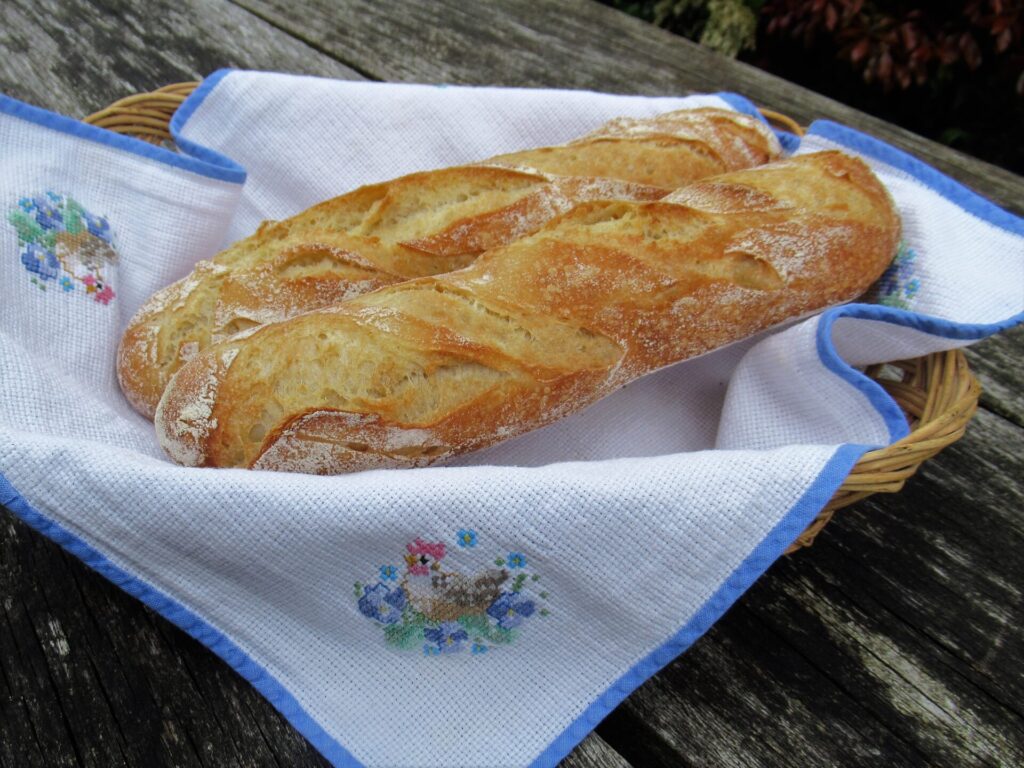
Haha, nooo, storing yarn in the oven would never work for me. We just LOVE,
LOVE,
LOVE
our oven and use it almost every day.
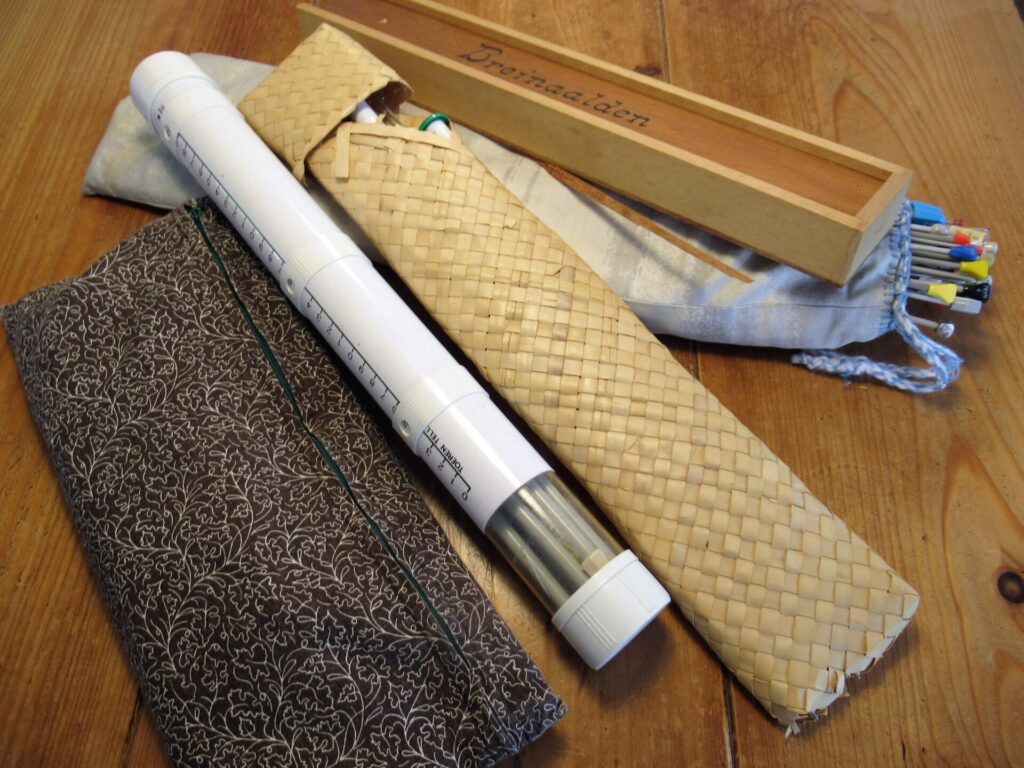
Something else I came across while moving back in was my collection of straight knitting needles. My needle cases for these are getting rather ratty, splintering or falling completely apart.
I knit almost everything on circulars nowadays. Apart from the double-pointed ones, I hardly use straights anymore. But I’m still attached to them, so what shall I do? Give them away? Invest in new needle cases? And where am I going to find those?
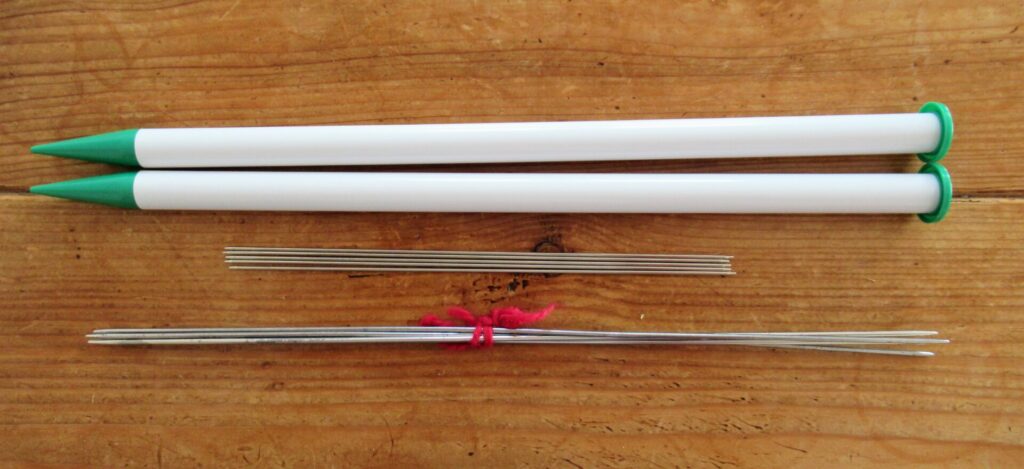
Here are several special pairs/sets – from top to bottom:
My thickest knitting needles (15 mm)
My thinnest knitting needles (1.5 mm)
Some of my Mum’s old, slightly rusty steel knitting needles
After moving back in, I’m trying to rest and relax as much as possible this week. I’ve had my first dose of vaccine. Apart from a sore arm and a slight headache that may have had different causes, I haven’t felt sick from it at all, but I thought it might be a good idea to take it easy anyway.
I’m really surprised at how happy I feel that is now my turn to be vaccinated. Apparently, I’ve felt more oppressed by the whole situation than I realized. It also feels as a relief that we’re able to do something to protect ourselves and others apart from keeping ourselves to ourselves. I feel very privileged and hope that everybody around the world will get the opportunity to get vaccinated soon.
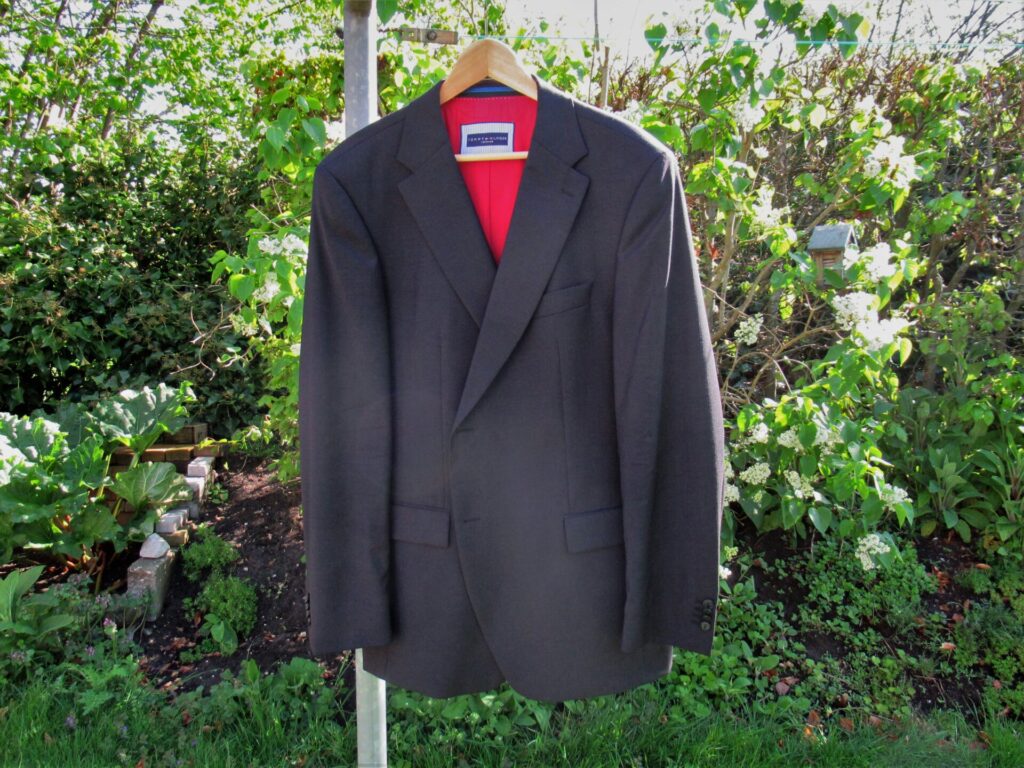
Besides unpacking, I’ve been knitting, pottering in the garden…
… airing my husband’s best suit (can’t remember the last time I saw him wearing a suit)…
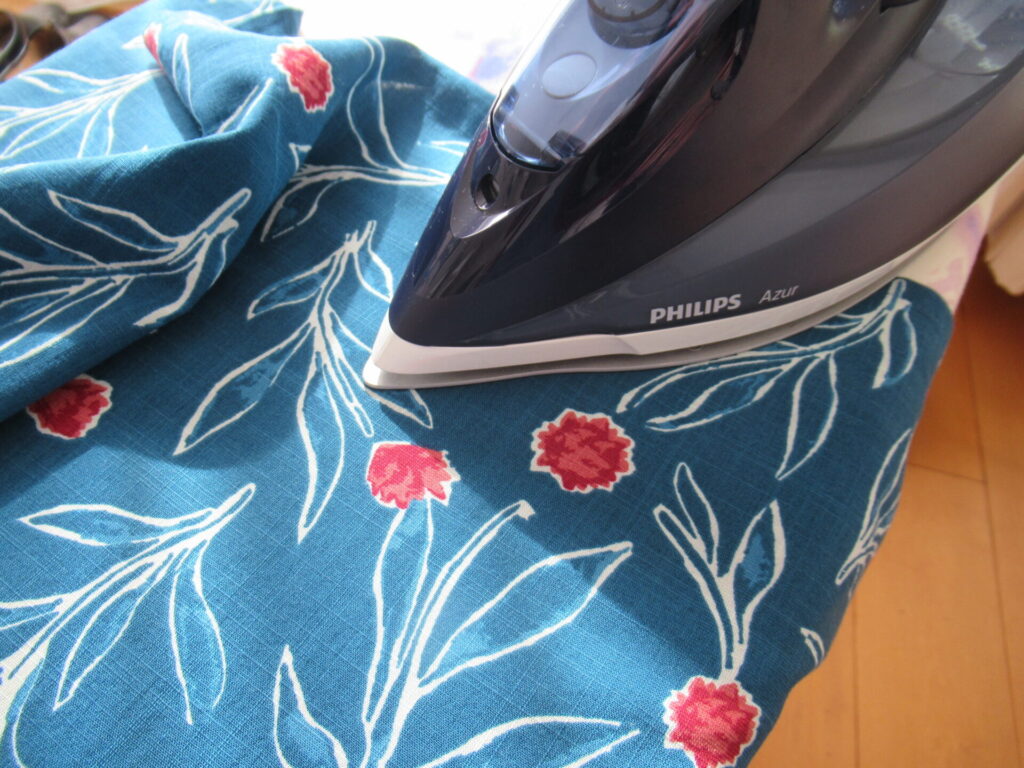
… and washing and ironing my new dress for a very special occasion in the near future.
More about that soon, I hope. Bye for now and enjoy your weekend!
Thank you so much for all your kind and supportive words after last week’s post, here and through other channels. While I’m writing this, we’re waiting for the plaster on our walls to dry with as many doors and windows open as possible. I’m using this quiet interlude before the next stage (ceiling repairs) for some focused work, and I’ve finally finished my pattern for a pair of fingerless mitts. Or rather, two pairs.
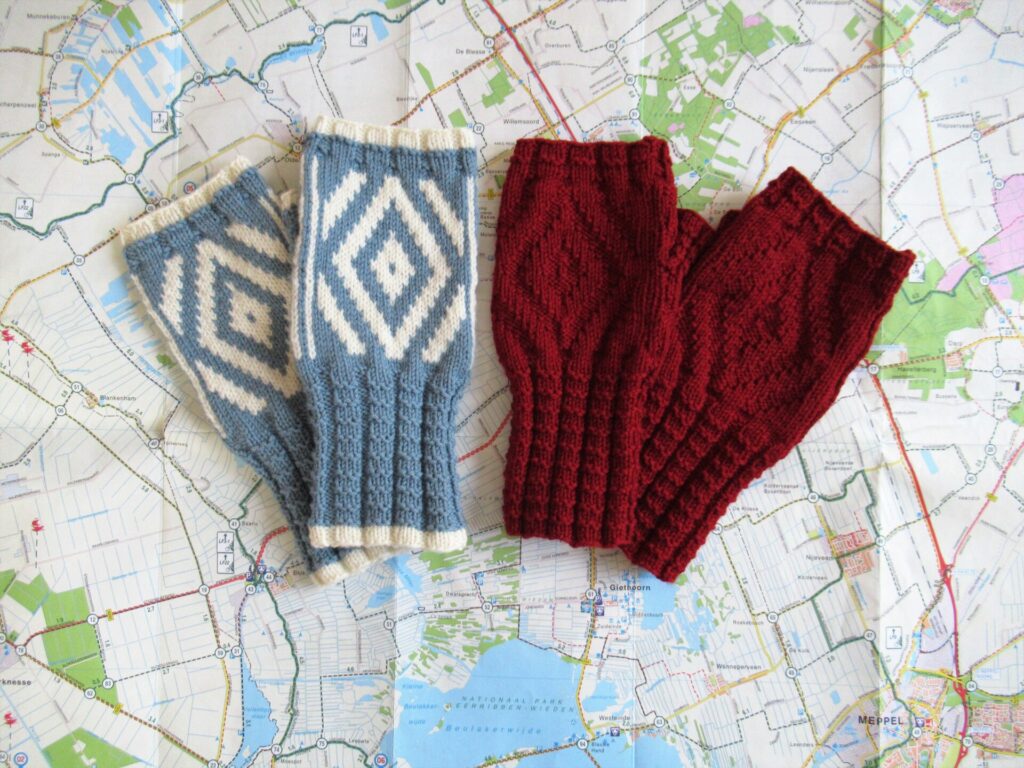
Meet the Gazelle Mitts!
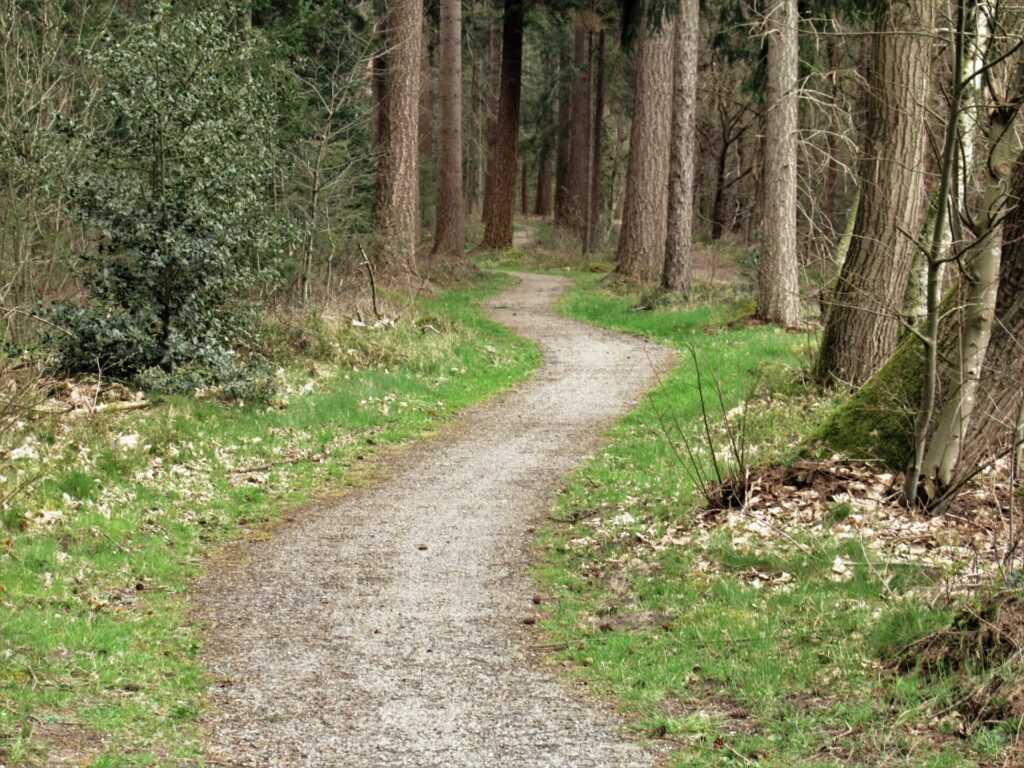
I’ll explain why I photographed them on a cycling map and with a thermos flask further on. First a little about the design.
Taking the inherited knitting sampler I’ve written about before as a starting point, I began visualizing, drawing, thinking, calculating and swatching. After lots of swatches and prototypes I was ready to knit the final mitts in a single-coloured and a two-coloured version. I already had the yarn, but kept changing my mind about which colours to use for which version.
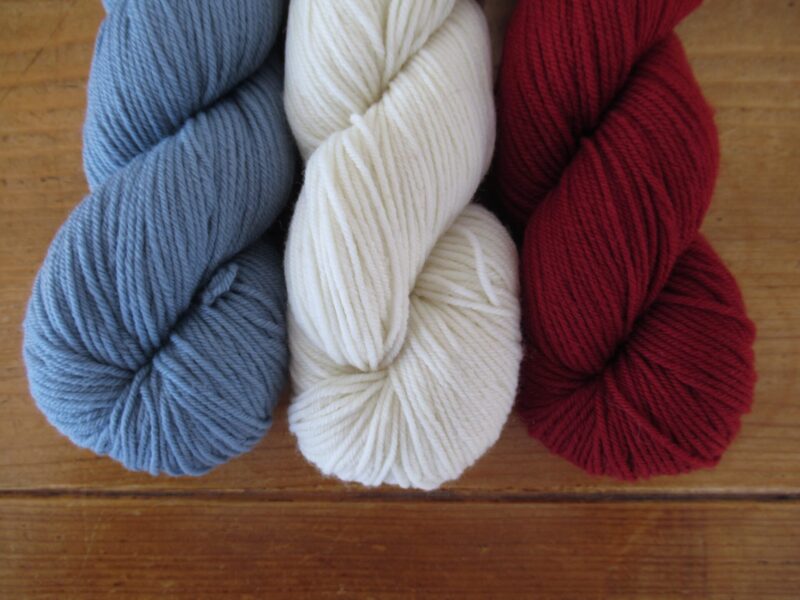
Red and cream together and blue on its own? Or blue and cream together and red on its own? In the end I asked your advice, and you were unanimous: Blue and cream for the two-colour version and red on its own.
So that is how I knit them.
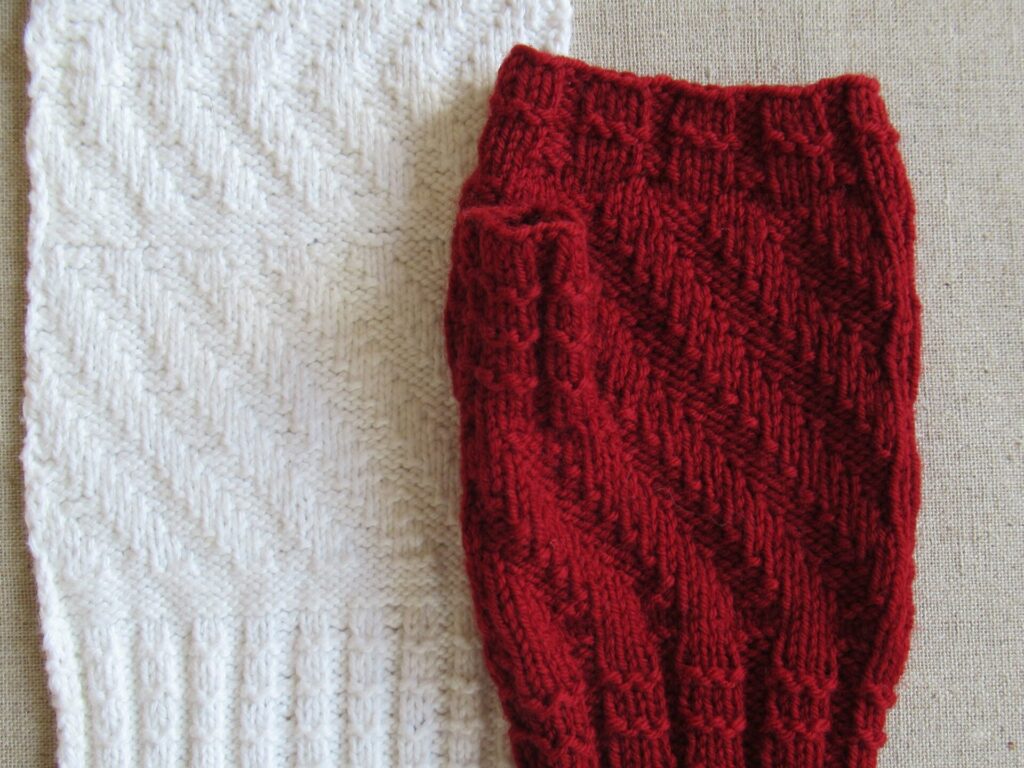
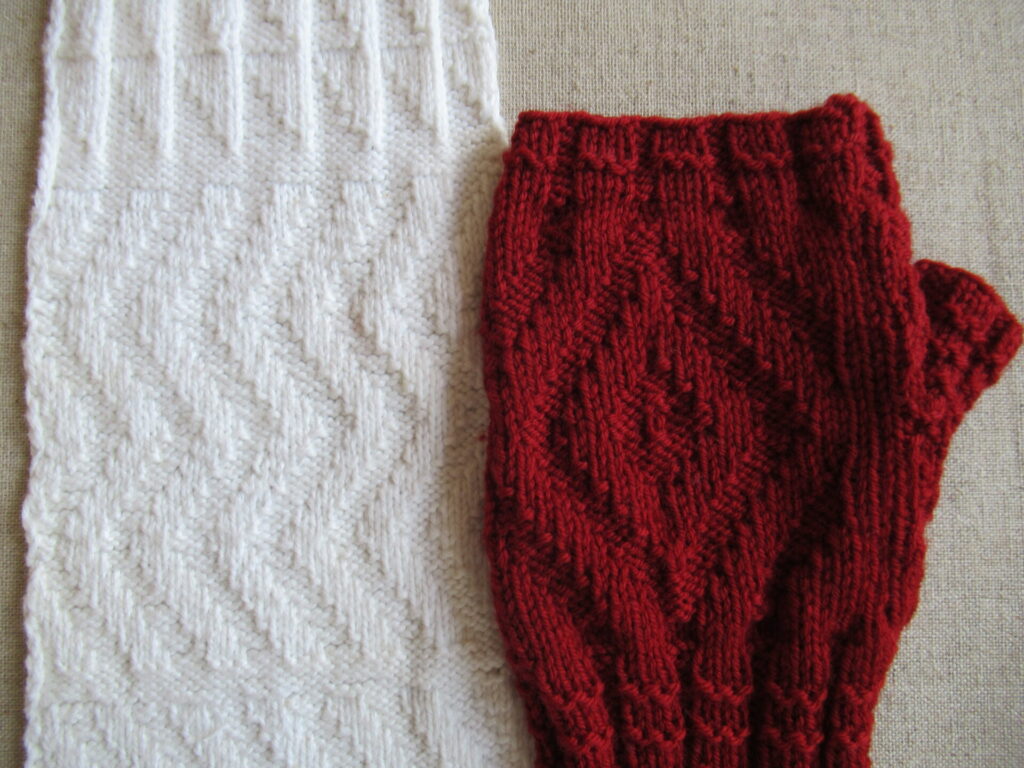
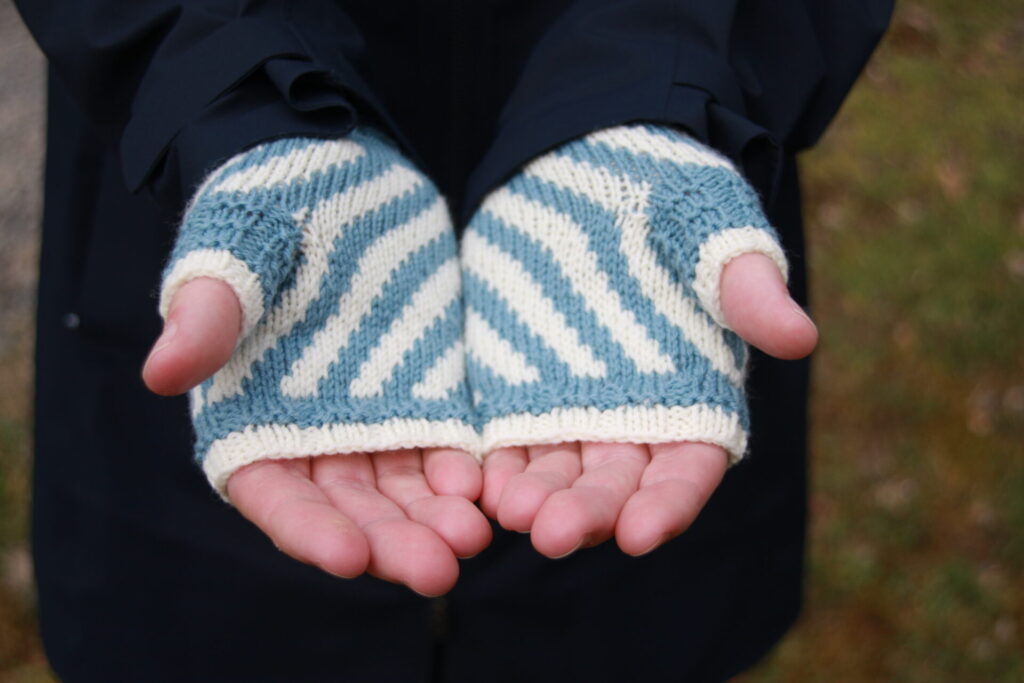
The red single-colour mitts combine three knit-and-purl stitch patterns from the sampler. For the palm of the hand, I used the sampler’s diagonals.
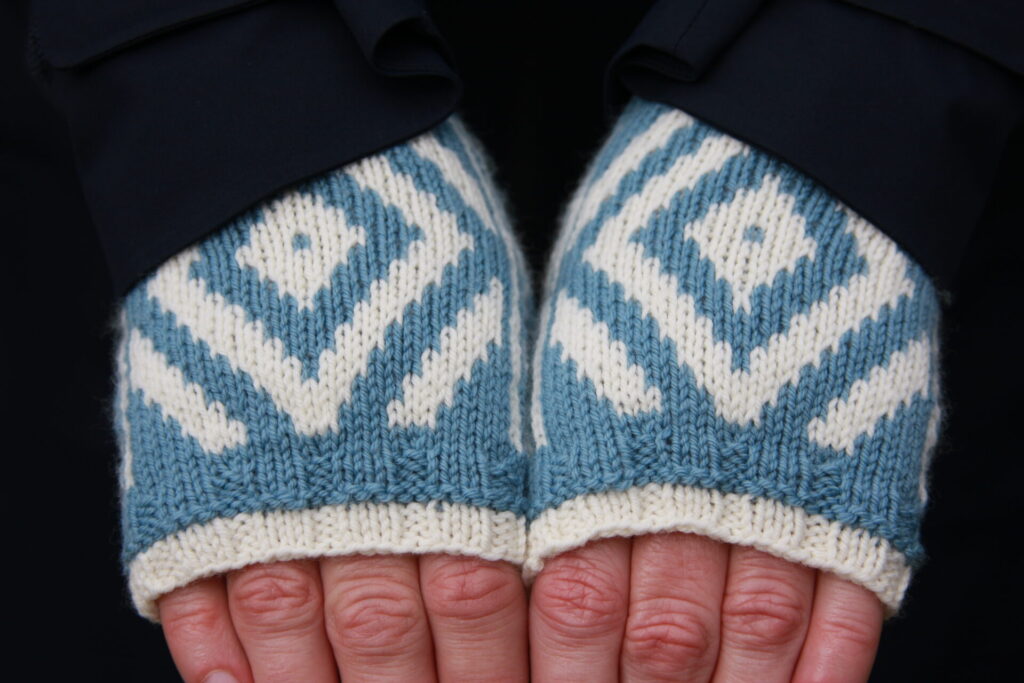
For the back of the hand, I took the zigzags and mirrored them to make diamonds.
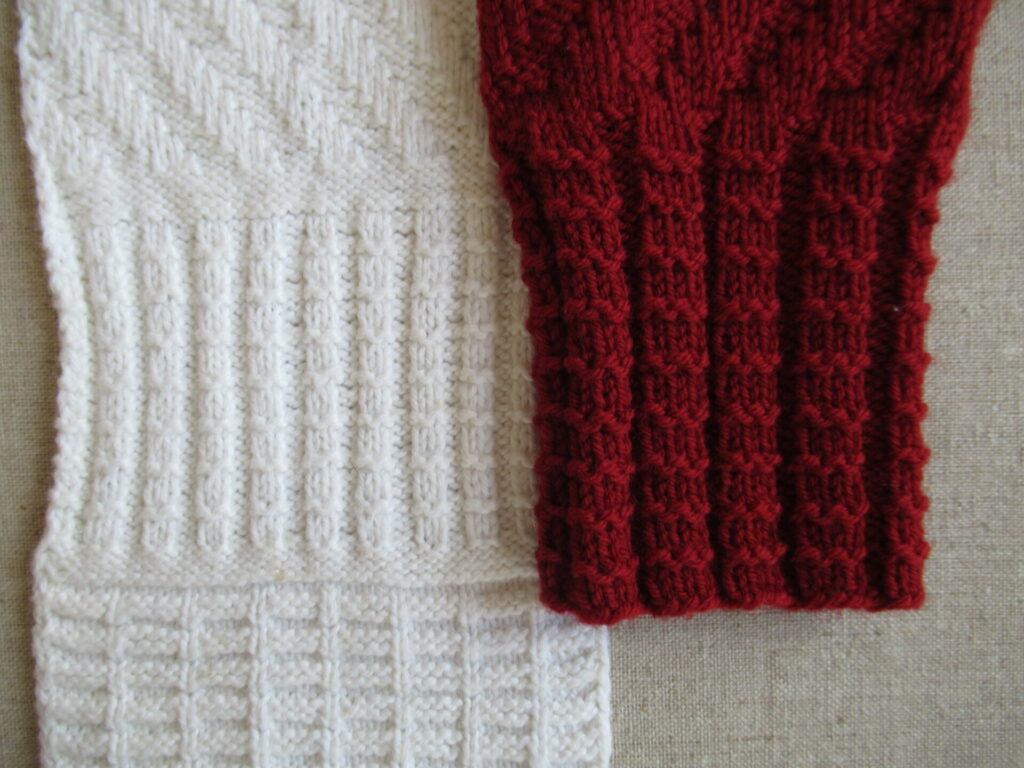
And a two-by-two knit-and-purl rib with purl ridges was perfect for the cuffs and thumbs. Only I changed it into a three-by-two rib to link it up with the diagonals and diamonds.
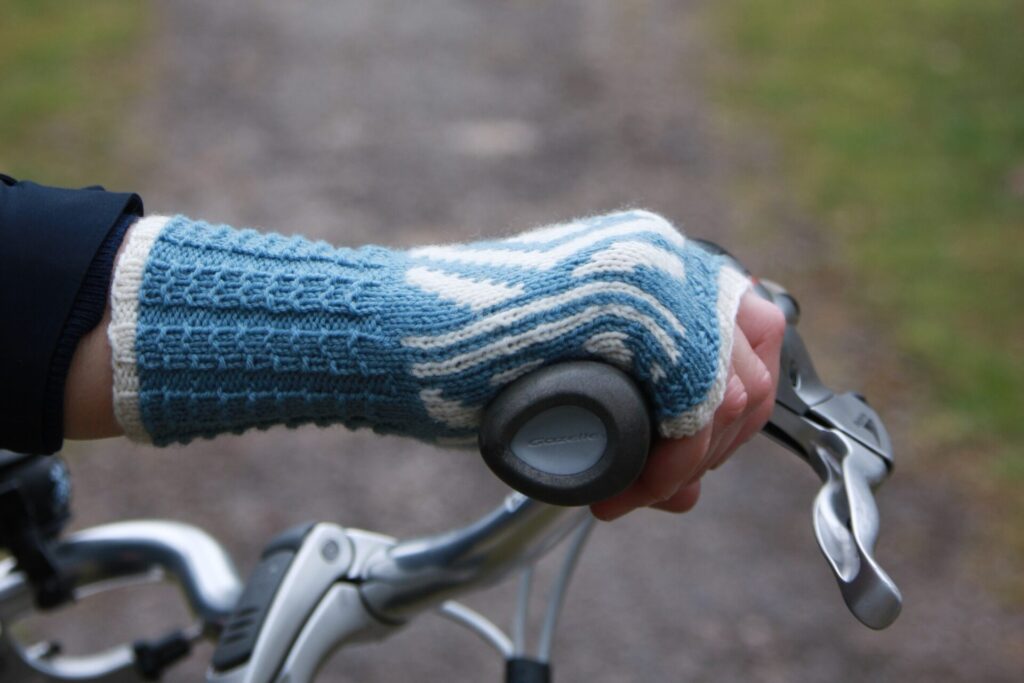
Although they look very different, the two-colour mitts are basically the same. They have the same diagonals and diamonds, and the same ribbing on cuffs and thumbs. Only this time instead of knit and purl stitches on the palm and back of the hands the patterns are knit entirely (no purling) and picked out in different colours.
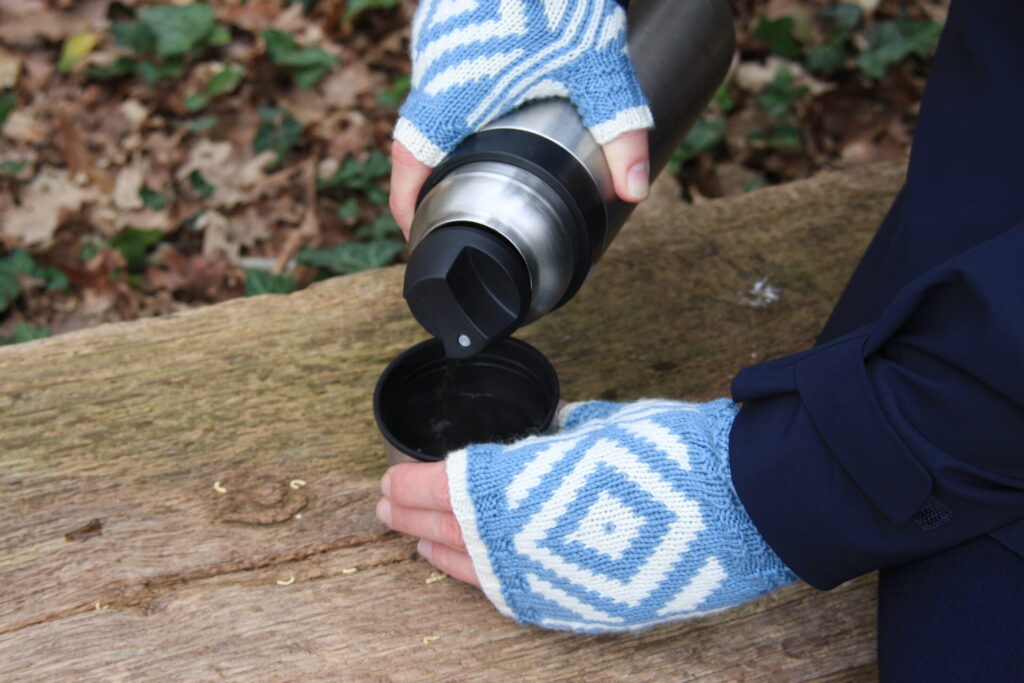
Diagonals on the palms…
… and diamonds on the backs of the hands.
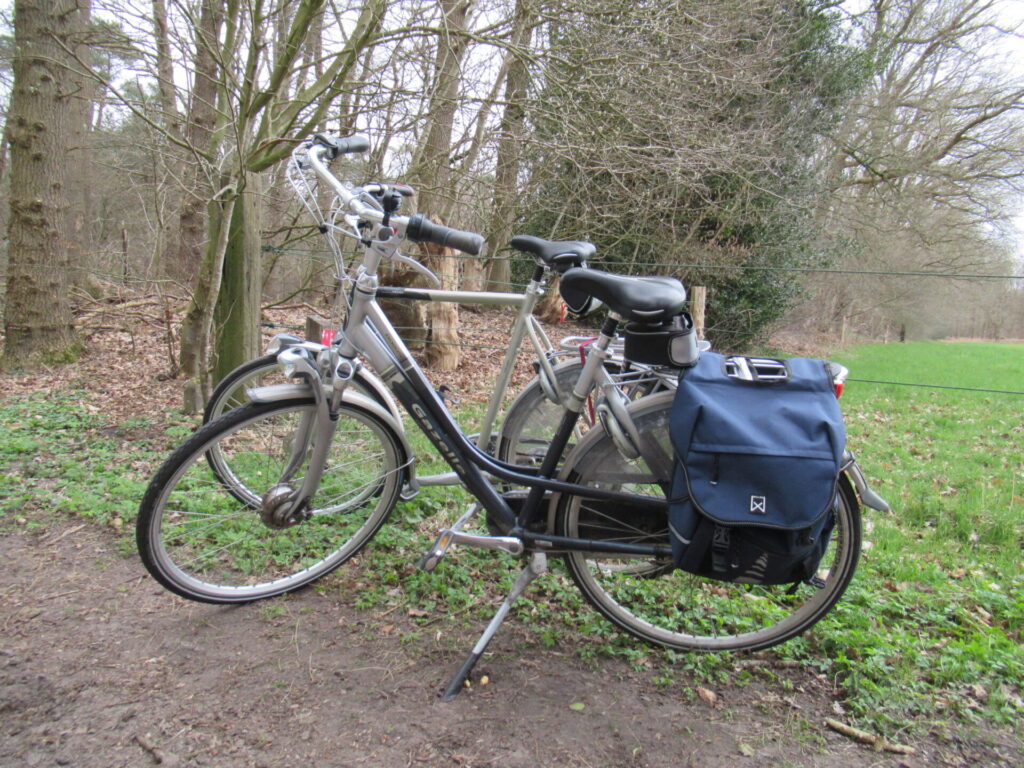
With bicycle rides on chilly days in mind, I named the mitts for my trusty Gazelle bicycle, my friend for over 15 years.
It gives me a sense of freedom and keeps me fit. I’m very much attached to it and not yet ready to trade it in for an e-bike like many people do nowadays.
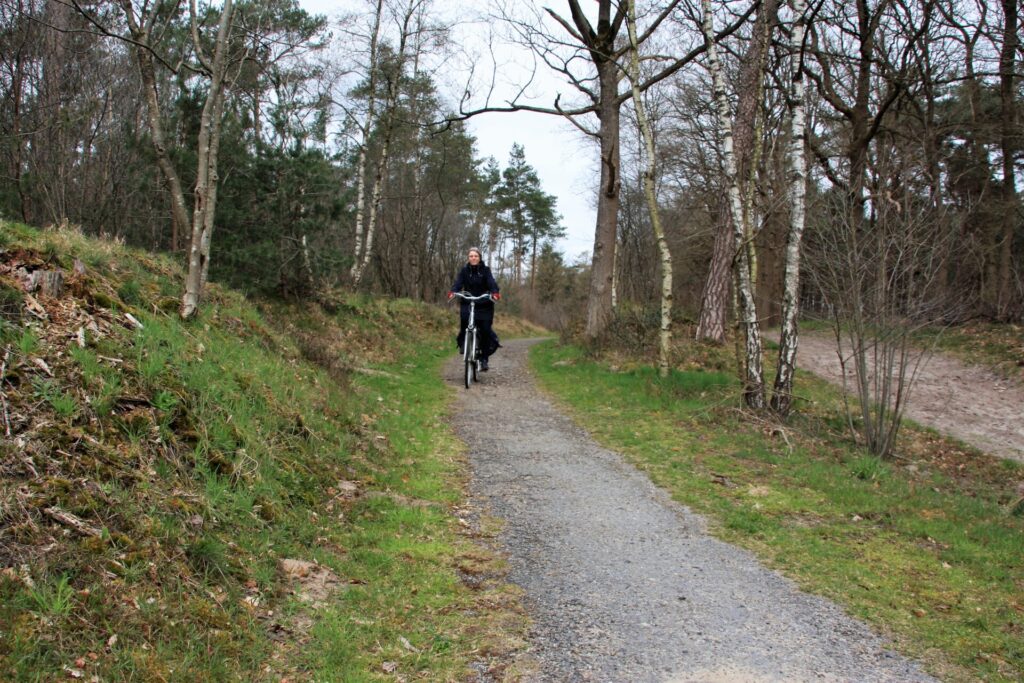
We (well, mainly my husband – thank you!) took most of the pictures for this post along one of my favourite stretches of bicycle track. It meanders through the wood just outside our village.
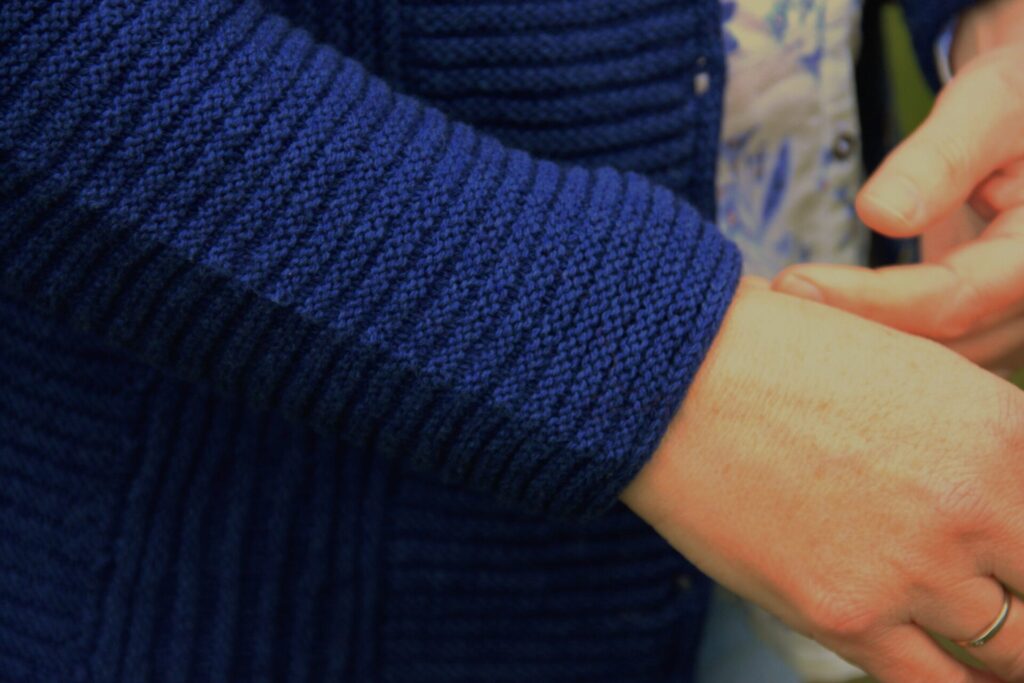
For the picture below, I’ve pulled up my coat sleeve to show you the nice and snug cuff.
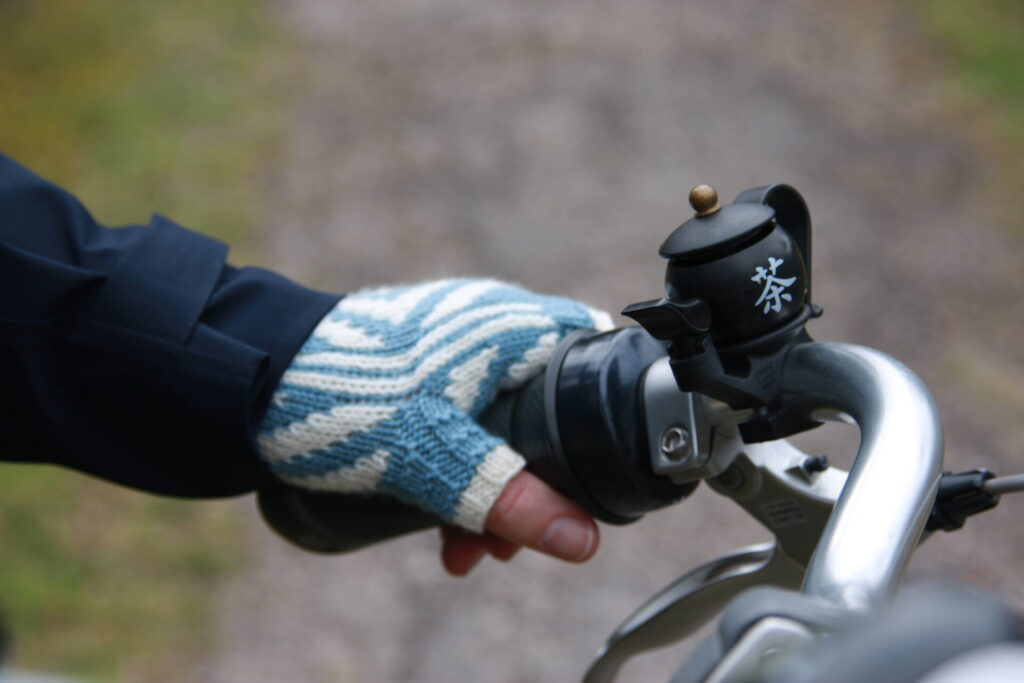
And here is a picture of my bicycle bell. It not only shows you the construction of the mitt’s thumb, but also tells you what my favourite beverage is. If I place my thumb on the teapot spout and release it, it gives off a sharp PING!
On longer bicycle rides, I often bring a thermos flask of tea. (Just for me – my husband prefers coffee.) Coffee-and-tea-to-go places have sprung up during the past year even around here, but they are still few and far between. And anyway I prefer my own.
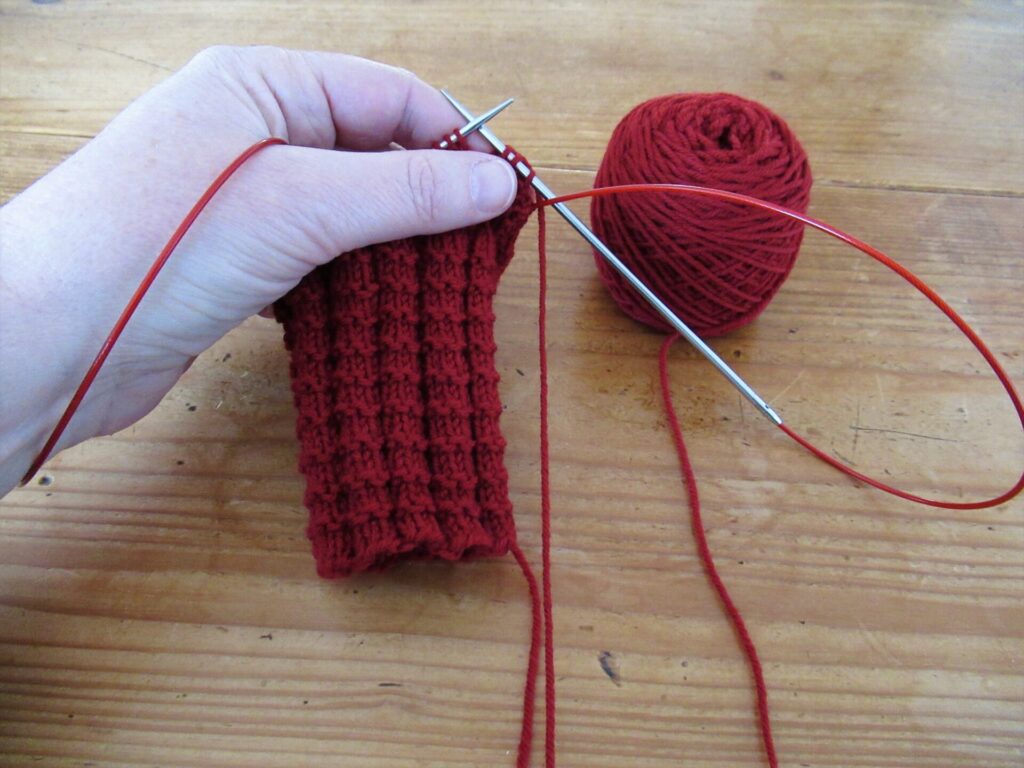
The Gazelle Mitts can be knit on a set of double-pointed needles or on long circulars using the Magic Loop method. Personally, I prefer double-pointed needles for the cuffs and thumbs…
… and the Magic Loop method for the hands.
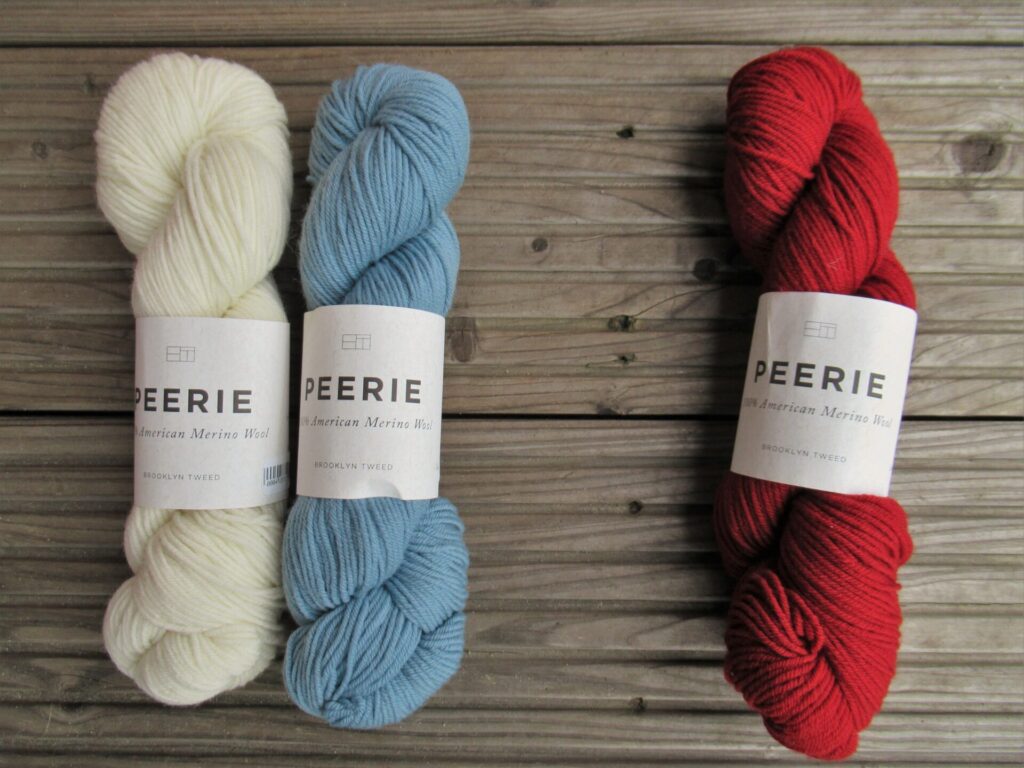
The yarn I’ve used is Brooklyn Tweed ‘Peerie’. One 50-gram skein for the single-colour mitts. And two 50-gram skeins in different colours for the two-colour version, with enough yarn left for a second pair with the colours reversed.
The Gazelle mitts can, of course, be knit in different yarns – I think that for instance many sock yarns are suitable. But should you decide to knit them, make sure your yarn is the same weight (fingering), and is smooth with a good stitch definition. And always check your gauge.
For those of you who’d like to make a pair,
The pattern for the Gazelle Mitts can be found here on Ravelry (available in English and Dutch, also to non-Ravelry members)
There is more information there on needles & notions, finished measurements etcetera. I’ve done my utmost to make the pattern as clear as possible. Apart from detailed instructions, photographs of the mitts, and charts for the diagonals and diamonds, I’ve also included a photo tutorial for the ‘afterthought’ thumb.
Well, that’s all about my Gazelle Mitts for now. If you have any questions, please leave a comment here or contact me through Ravelry (my Ravelry name is MerulaDesigns). As always, thank you for reading!
Last time I was here on my blog, I told you that I have a lot on my plate at the moment. The picture of our hallway above gives an indication of one of the things on it. No, we’re not moving house. Let’s take a look at our living room for further clues.
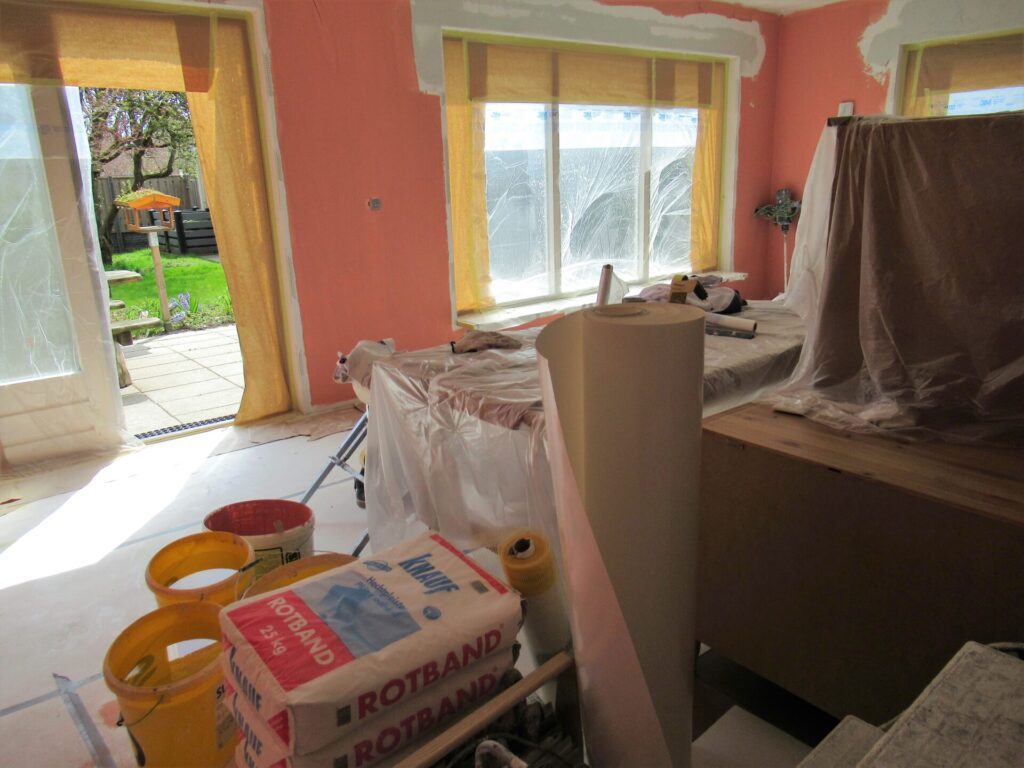
Redecorating? Nope, not redecorating either. Or sort of, but not voluntarily. Actually, it’s more restoring than redecorating.
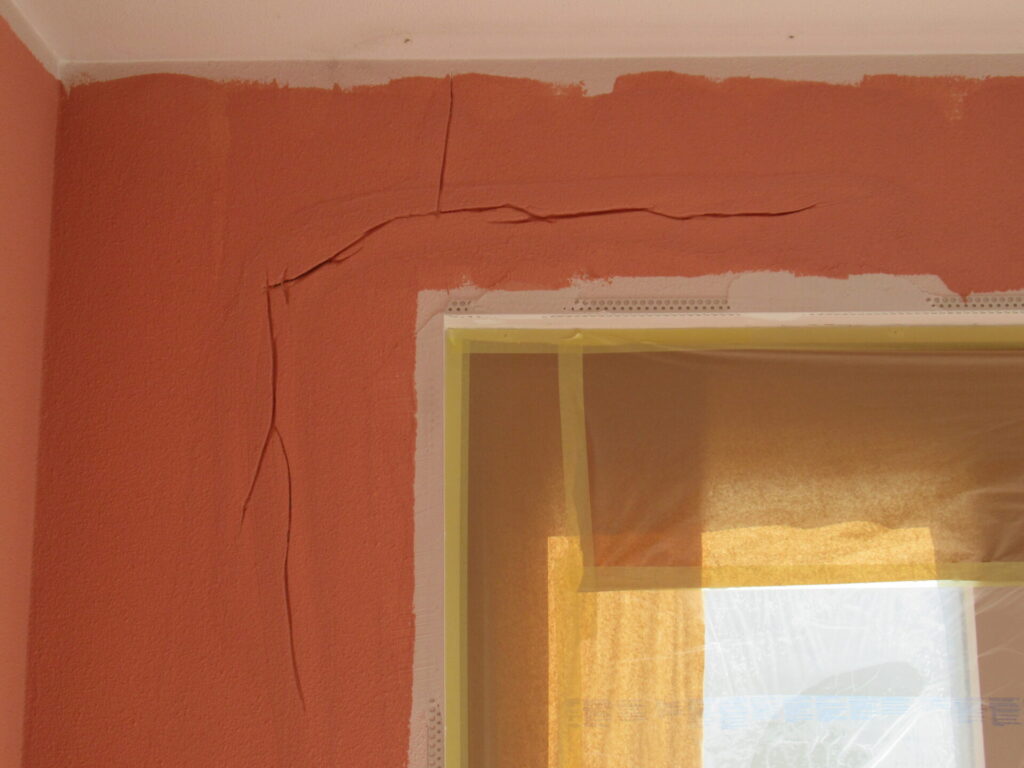
Last autumn, a concrete sheet pile wall was hammered into the soil a little ways away from our house with so much force that it felt like a minor earthquake and cracks appeared in our walls.
This is just a small, elegant crack that only needs some filler. In other places the plaster needs to be hacked away and restored entirely. Fortunately the #@*&%#! company that caused the damage is insured, but for us it’s still a lot of upheaval, noise, dust etc.
Just like the house, I’m thoroughly shaken, but trying to be philosophical about it. Compared to the bombed houses in Syria or Iraq we sometimes see on the news, this is absolutely nothing. Besides, we’re lucky that our bedroom was left unscathed. I’m acting as if it’s a room in a boutique hotel. Room service is lacking, but unlike the rest of the house, it is warm. It also has a good bed and exactly the books I love beside it, as well as a perfect knitting chair where I can spend the evenings knitting.
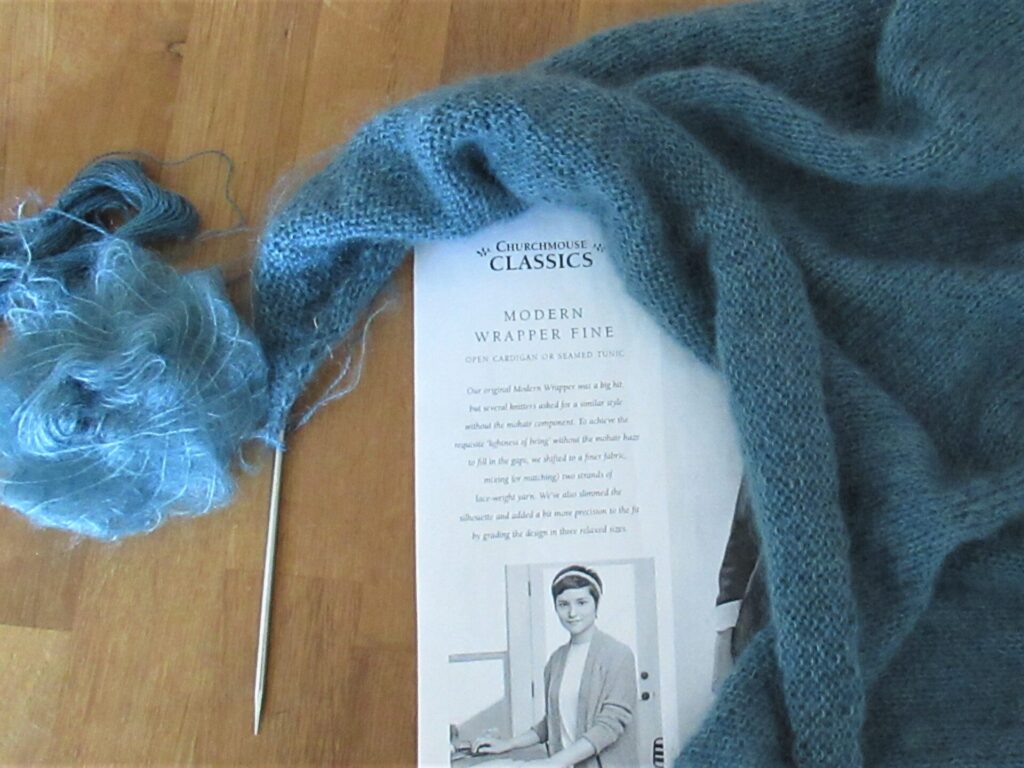
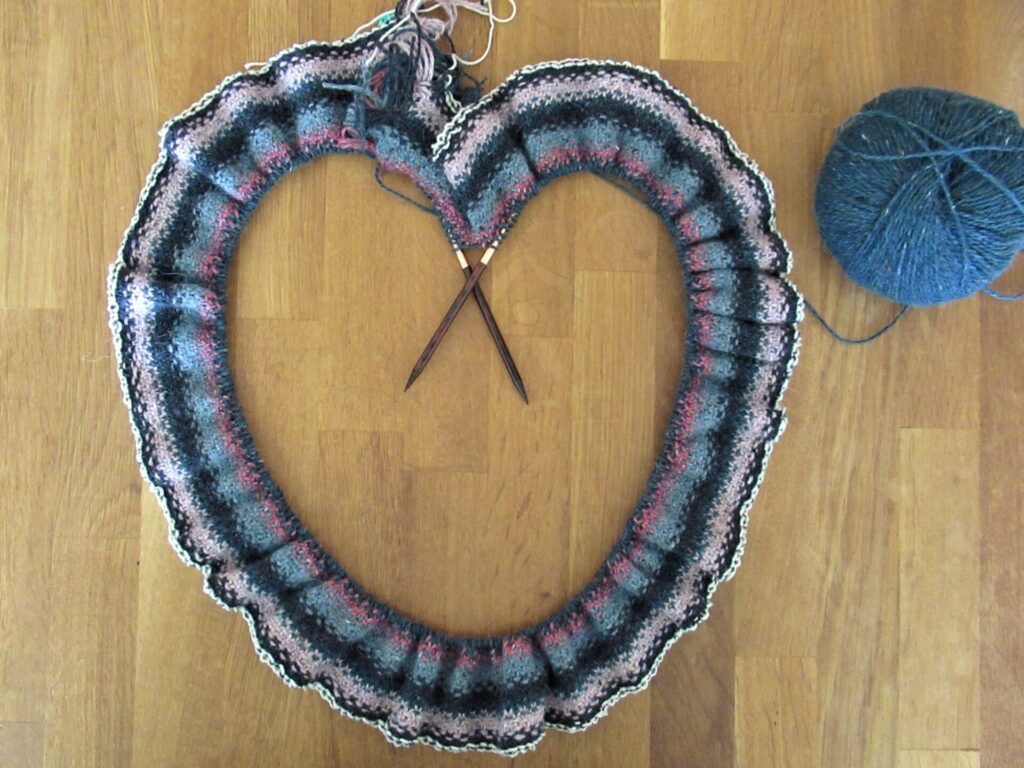
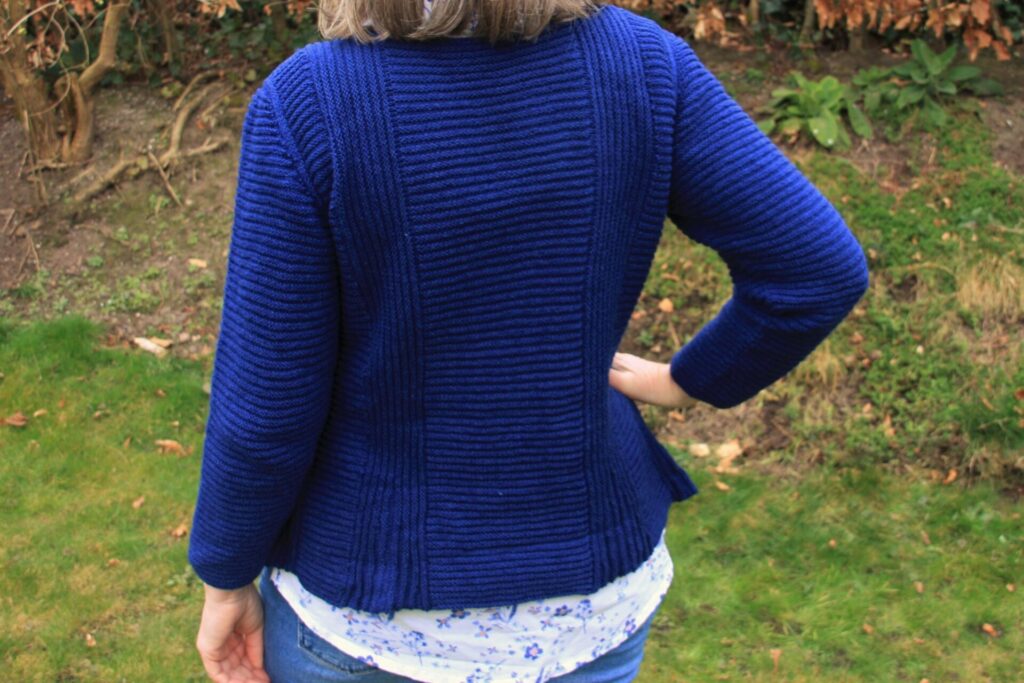
During the daytime, I can also sit outside if I have a few moments to spare. It’s still rather chilly, but the back of the cardigan I’m knitting has grown so fast that it’s like a small, cosy lap blanket.
The pattern I’m using is Modern Wrapper Fine. I’ve made one before and knew that it would be perfect comfort knitting during this period of upheaval.
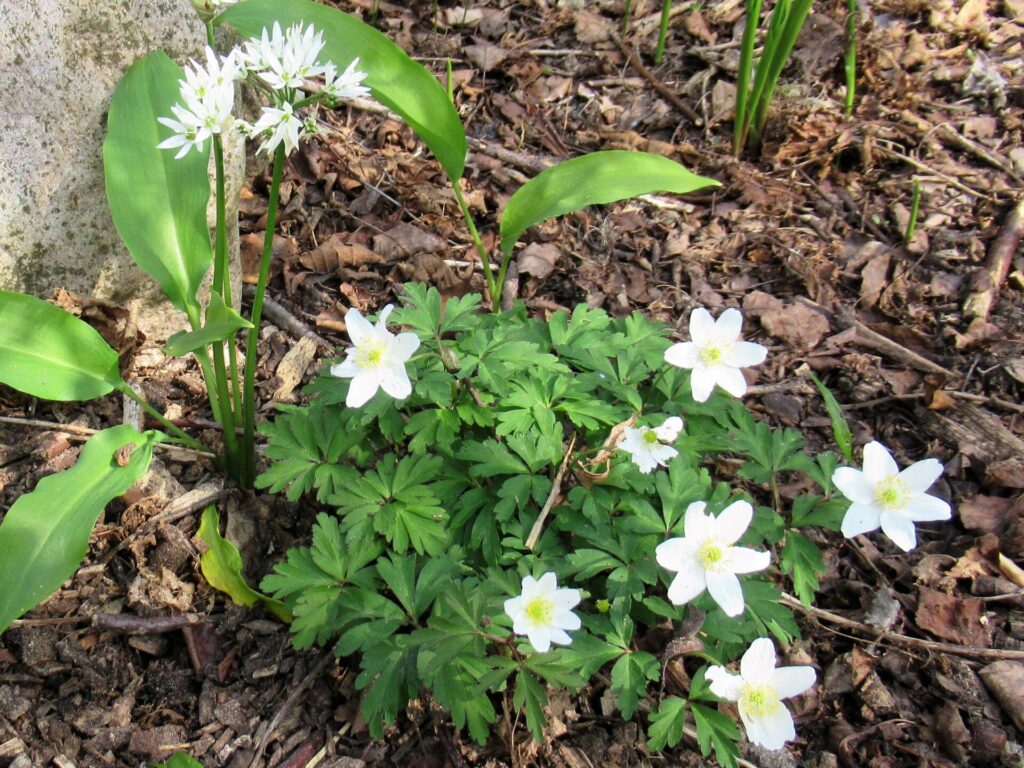
The garden is also giving me some solace. The pear tree and the Amelanchier are opening their first blossoms, and the wood anemones and wild garlic are lighting up a slightly shady area.
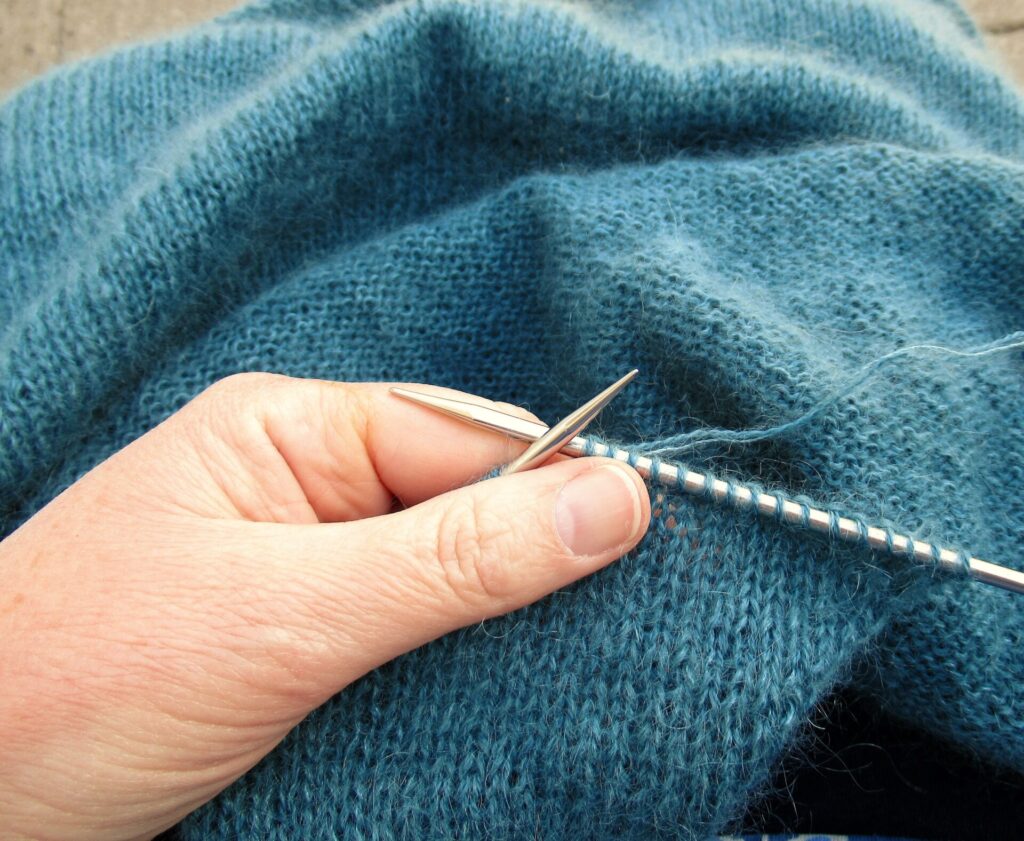
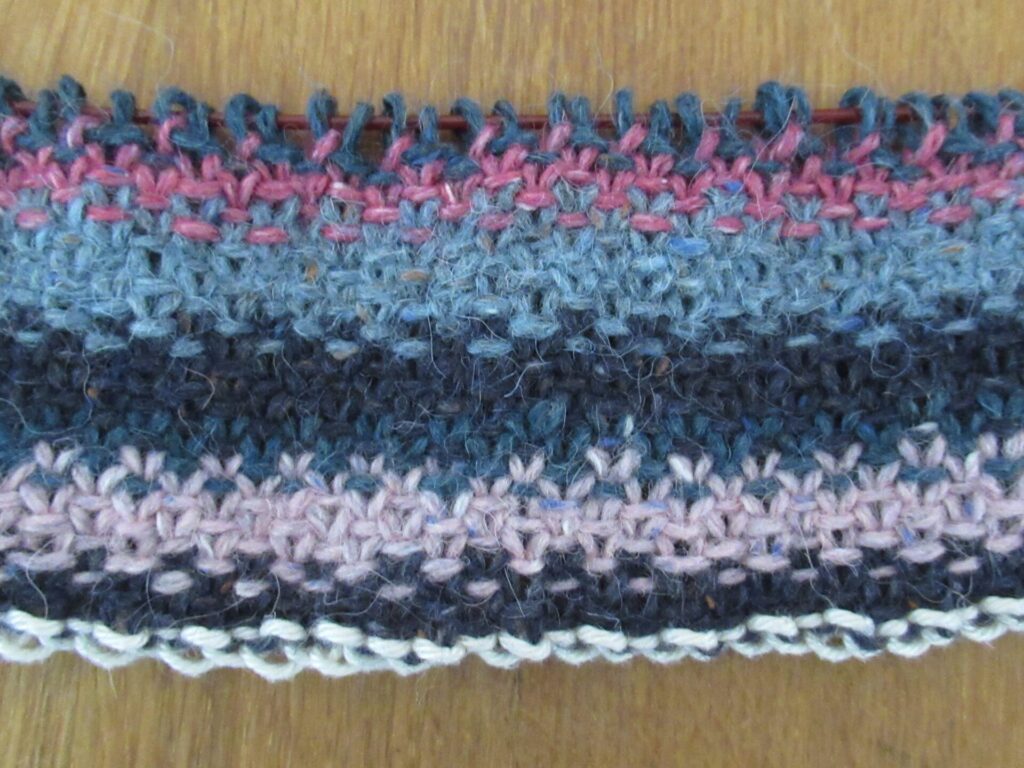
Another project that is growing, albeit more slowly than the cardi, is my linen stitch wrap in Felted Tweed. I love the way linen stitch always blends colours together. (The white row at the bottom is a provisional cast-on I’ll write more about when I can find the time.)
Knit, yarn forward, slip, yarn backward. Knit, yarn forward, slip, yarn backward… A great way to meditate.
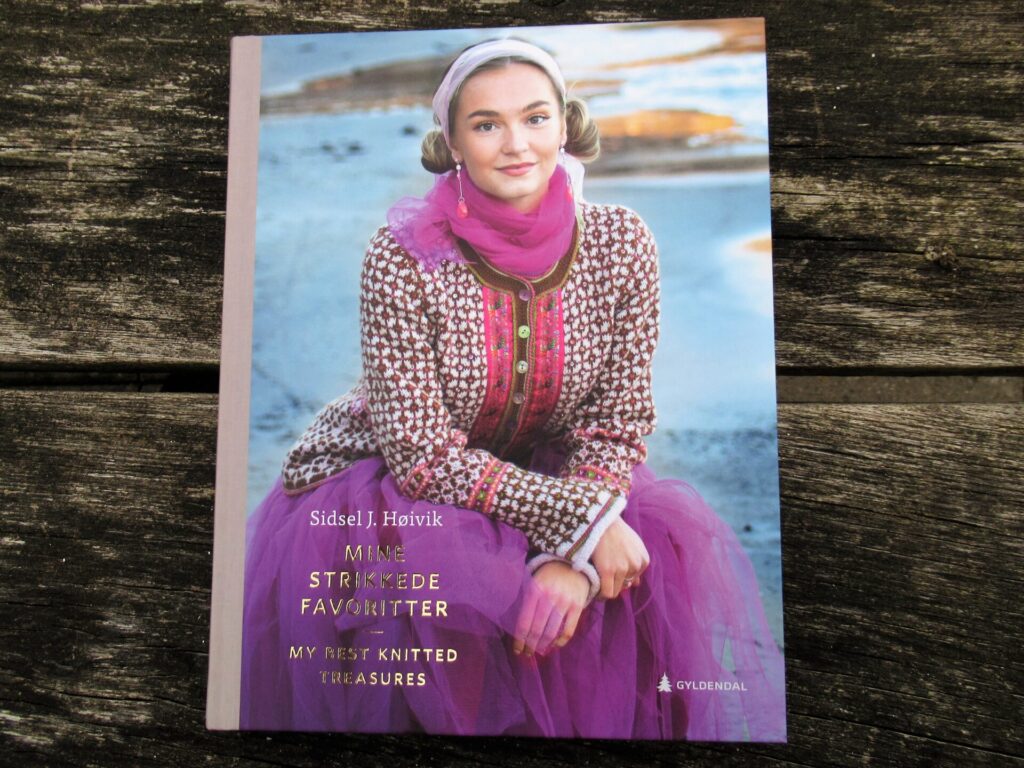
One of the books beside my bed in the ‘boutique hotel room’ is brand new – Mine Strikkede Favoritter by Norwegian designer Sidsel Høivik.
From the foreword I gather that, as well as new designs, it contains several re-knits from her other books. I don’t have any of her other books, so that’s fine. If you do, check if you still need this one. The difference with her other books is that they are entirely in Norwegian and this one is bilingual (Norwegian and English).
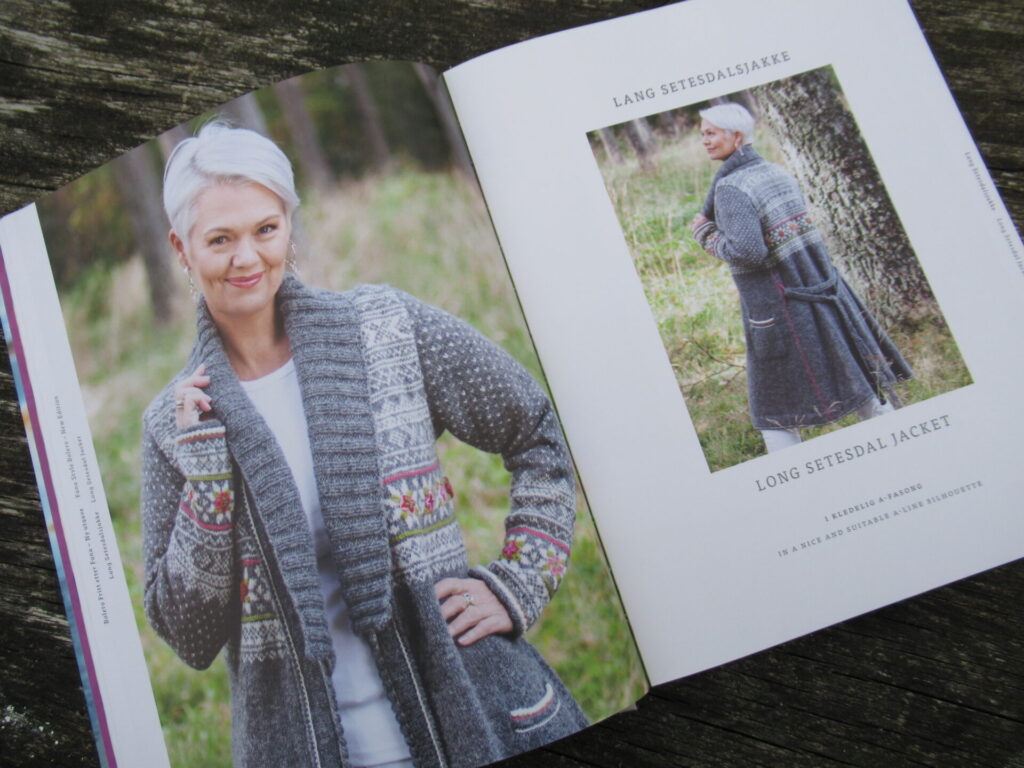
Sidsel’s signature style is traditional Norwegian with a twist. She uses lots of embellishments on her designs, like embroidery, beads, sequins and ribbons. The book contains patterns for sweaters, cardigans and several accessories. My favourite design is a long cardigan with traditional Setesdal patterns on the upper part of the body and the sleeves, with embroidery on the star motifs, a nice length, pockets and a cosy collar.
All of the yarns used in the book are from Hillesvåg Ullvarefabrikk, the small Norwegian family-run spinning mill I visited years ago and wrote about in this blog post. I bought my copy from a small yarn shop 20 minutes cycling from here. It is also available from Sidsel Høiviks own website, which offers kits for her lovely designs as well.
Well, that’s all from me for now. The builders will still be here next week and the week after, but I hope that I’ll become used to all the upheaval (and also that the other things on my plate will shrink) soon, so that I’ll be able to go back to blogging as usual. Maybe I’ll even be able to finish and publish my new pattern! Or am I now being too optimistic?
Anyhow, I hope you’re safe and well. Take care! xxx
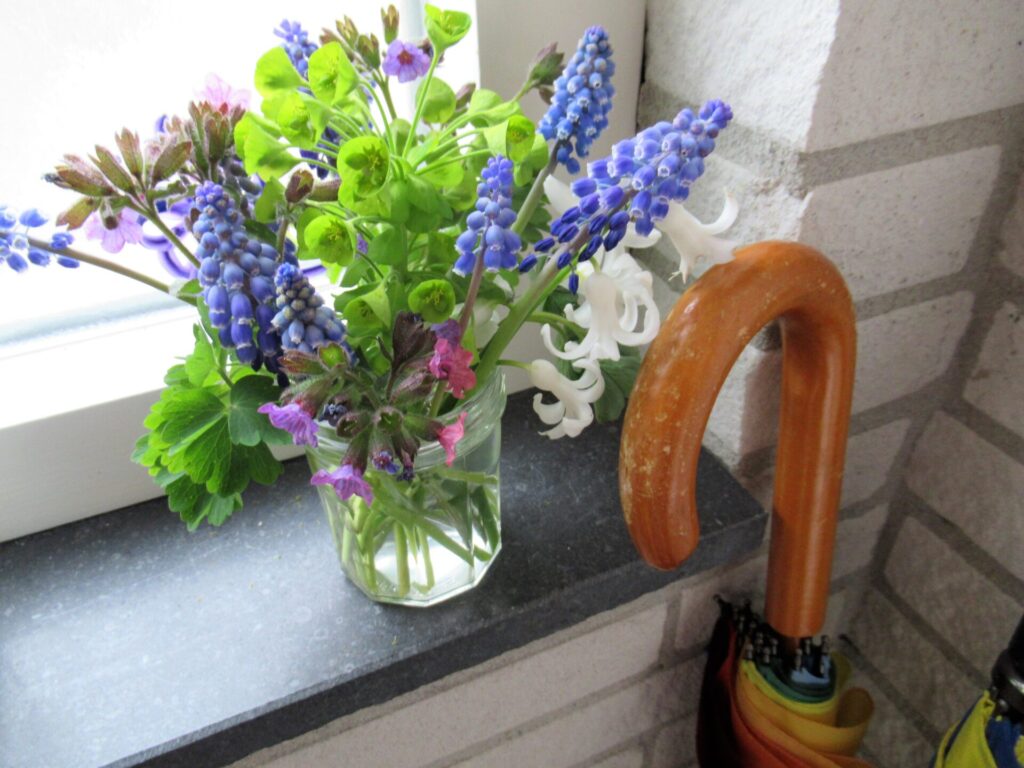
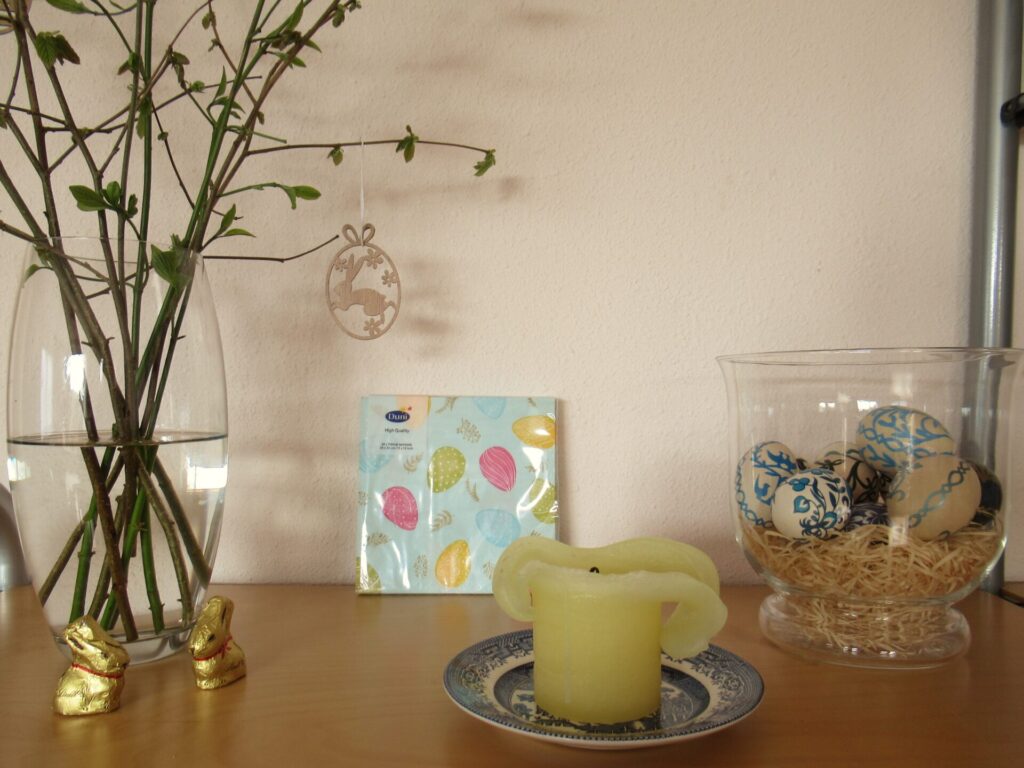
While for some of you Summer is coming to an end (hello New Zealand and Australia!) we’re moving into the milder weather of Spring. At least in theory. I have been able to pick a small posy of spring flowers from the garden to brighten up the hallway…
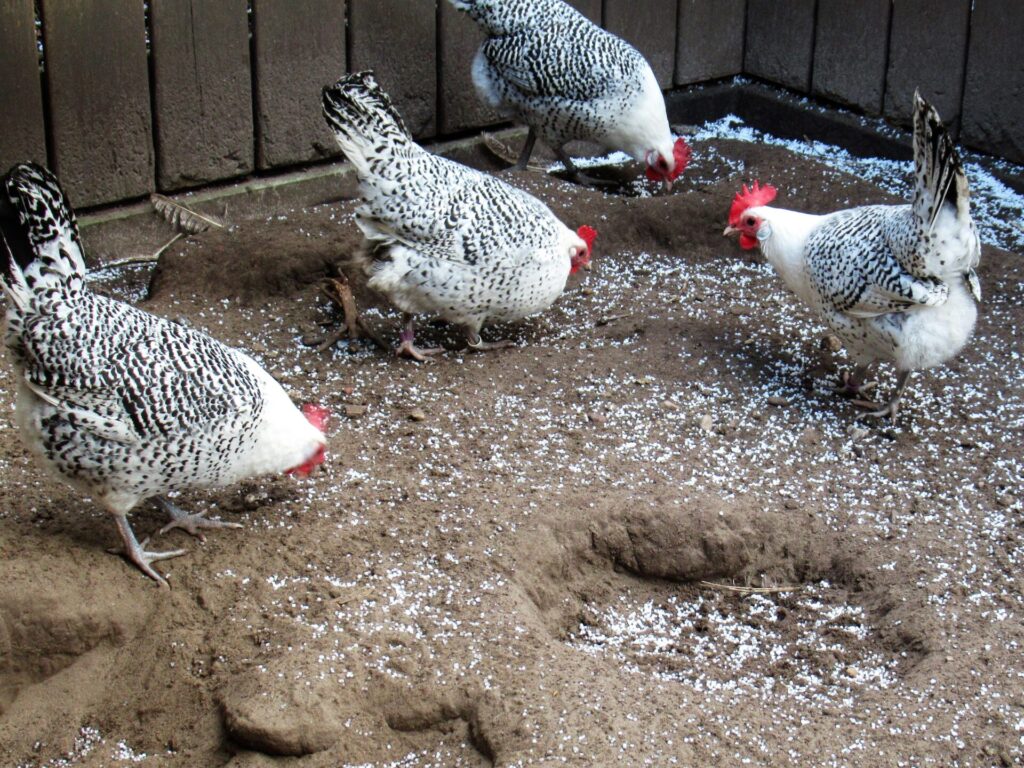
… but over the Easter weekend, the weather didn’t look much like Spring at all. Brrr, it was close to freezing, with strong winds and hail storms.
Our chickens loved it! To them, hailstones are like sweets falling from the sky – white instead of multicoloured hundreds-and-thousands.
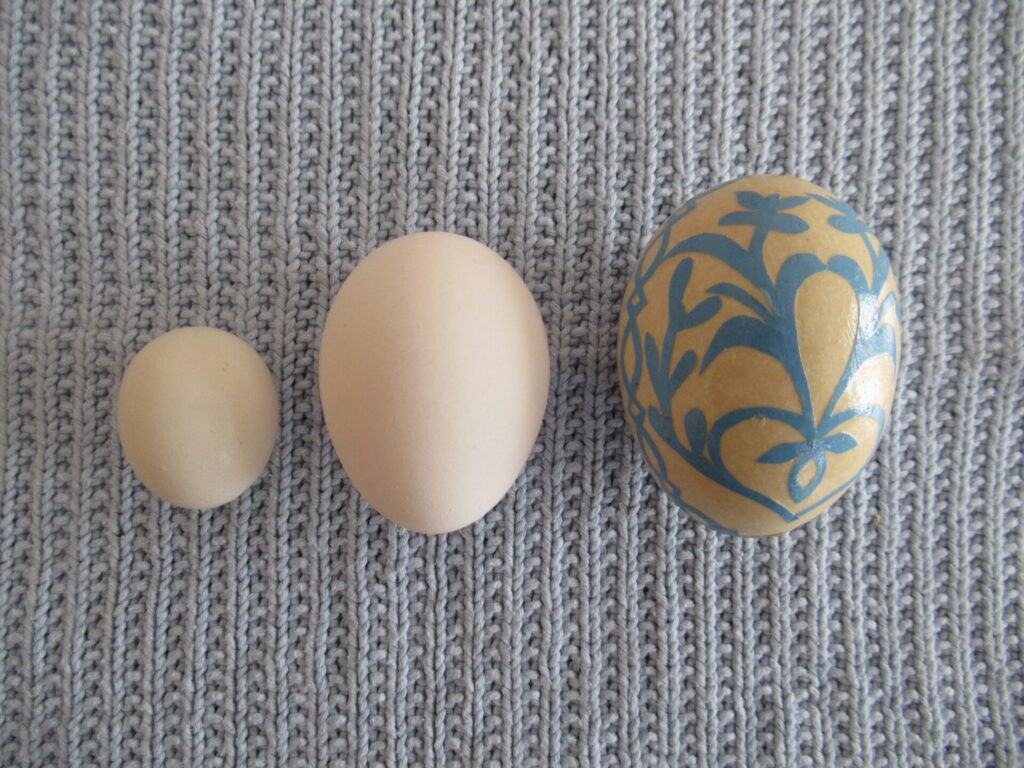
After their winter break, the chickens are providing us with plenty of eggs again. Usually, their eggs are slightly smaller than the average shop-bought egg, but recently they surprised us with two quail-sized ones.
We’re not as keen on hailstones as our chickens are, but wrapped up warmly we went for walks in a deserted town and a blissfully quiet wood. Also, it was ideal weather for snuggling up indoors, eating chocolate bunnies…
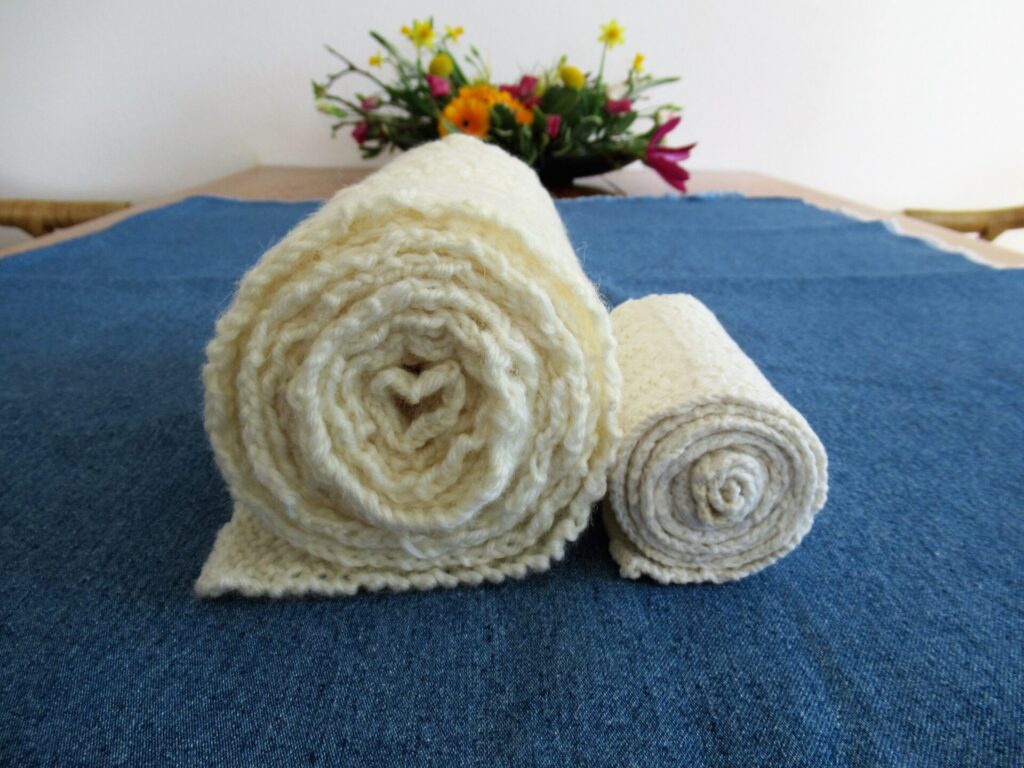
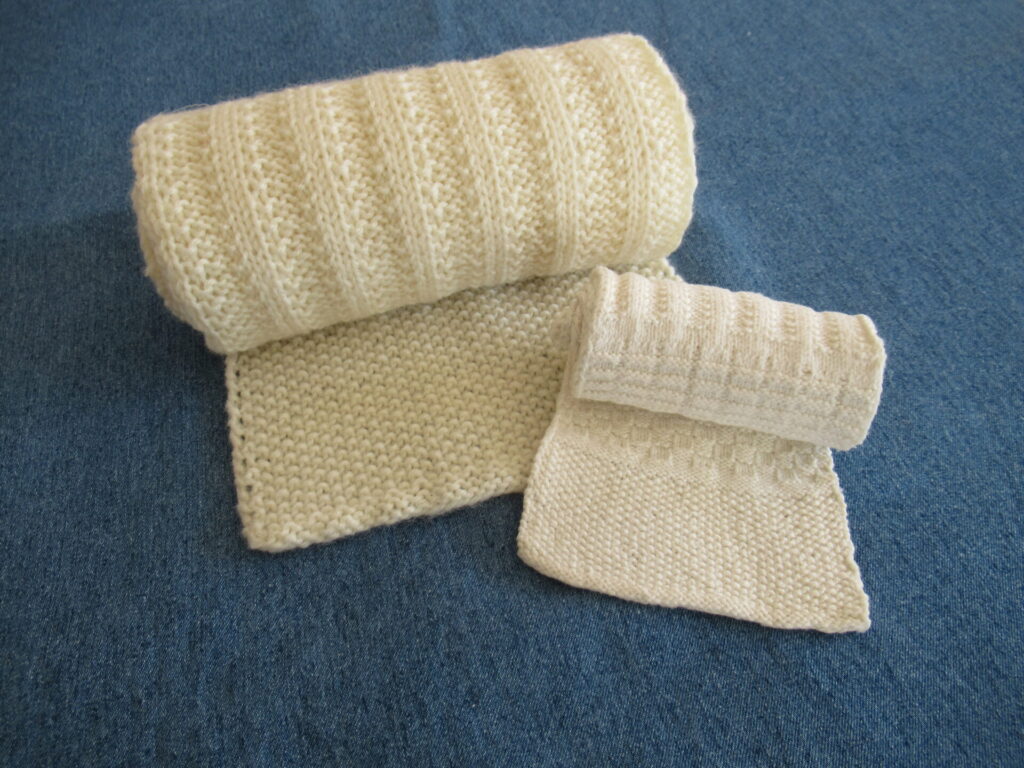
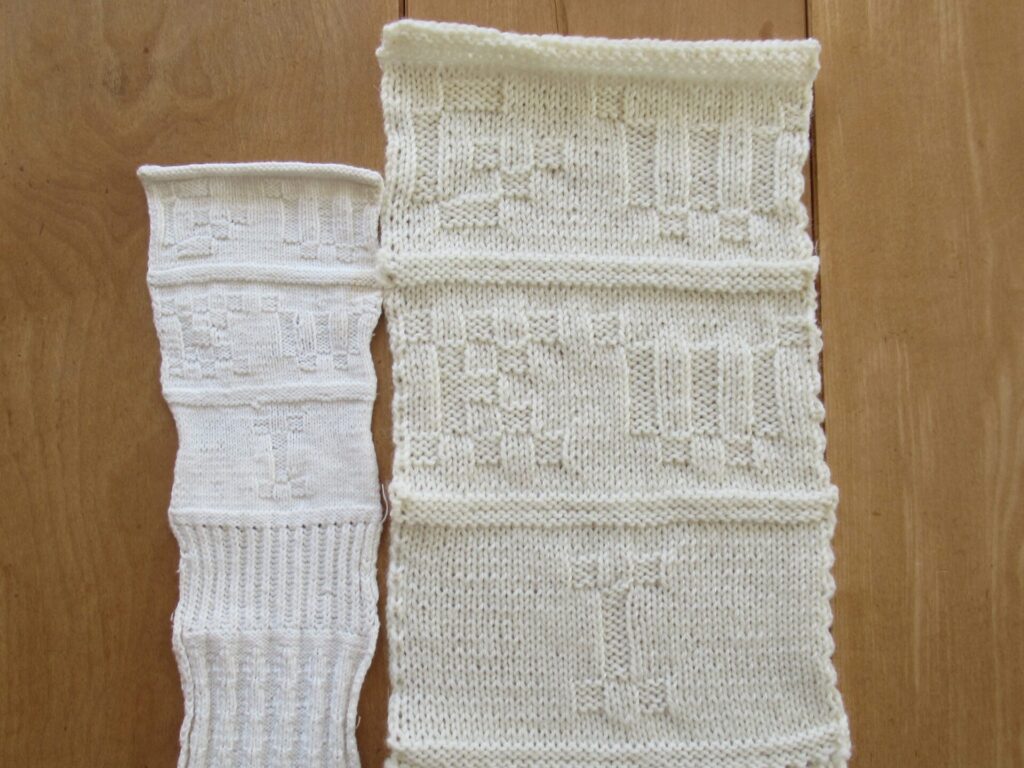
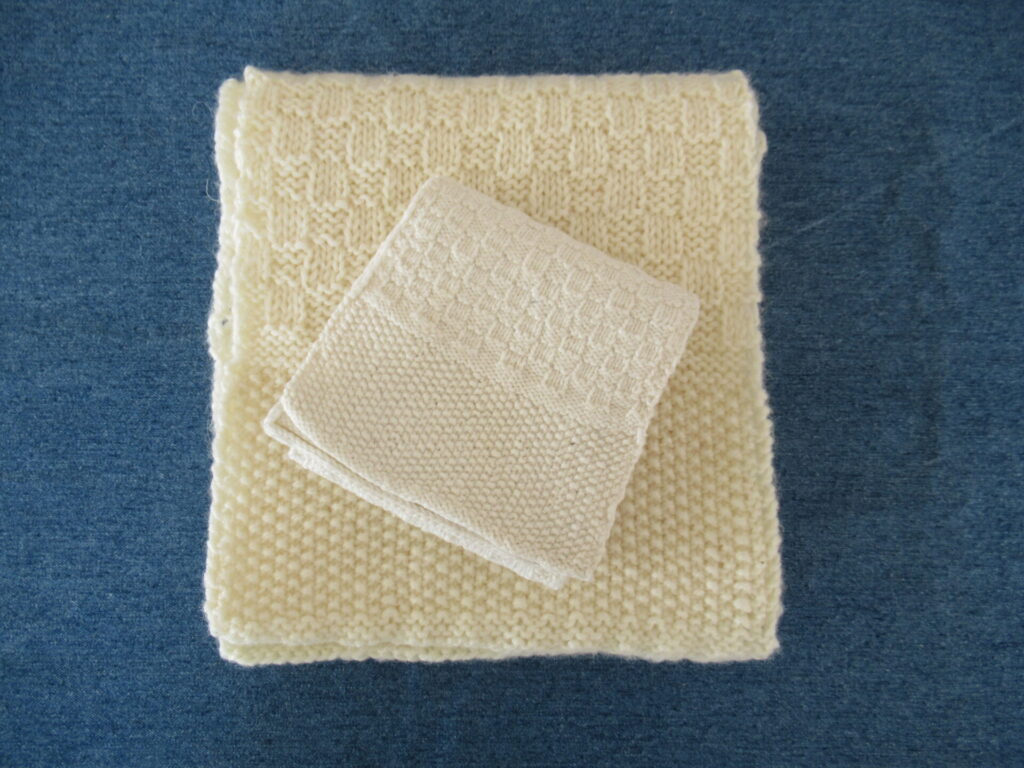
… and knitting. I have finished a reconstruction of a knitting sampler.
As you may know from a previous blog post, I’ve inherited a knitting sampler with 10 different knit-and-purl stitch patterns. I thought knitting a reconstruction would be a good way to get better acquainted with the stitch patterns and the sampler in general.
The original sampler was knit from cotton on small needles. Mine is knit from wool on 4.0 mm (US 6) needles. I omitted the edge stitches, but for the rest I tried to copy the original as closely as possible, casting on the same number of stitches and knitting the same number of rows for each stitch pattern.
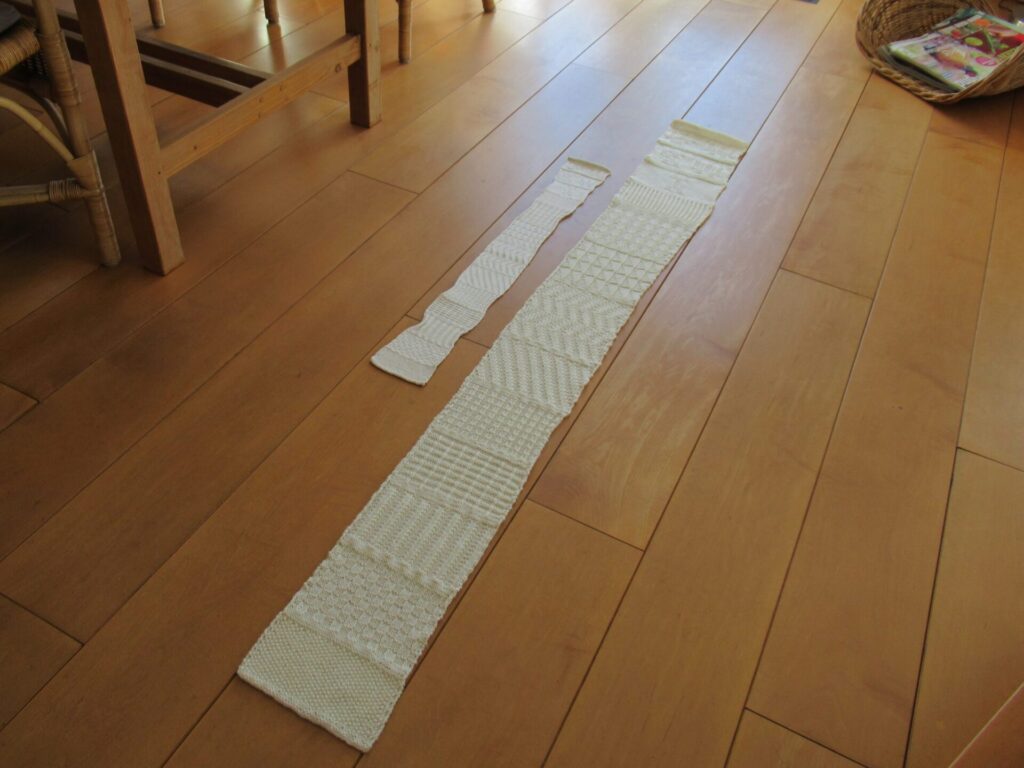
The original sampler is 90 cm (35.5”) long and 9-12 cm (3.5-4.75”) wide, and weighs 53 grams. My reconstruction is 188 cm (74”) long and 20 cm (8”) wide, and weighs 203 grams.
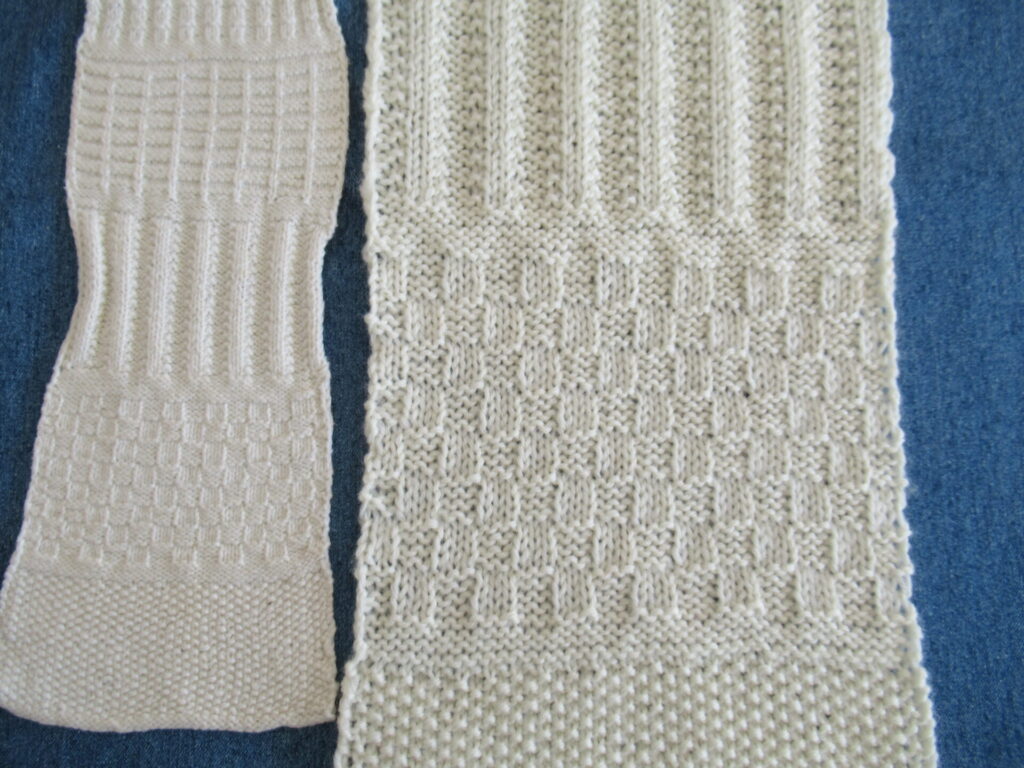
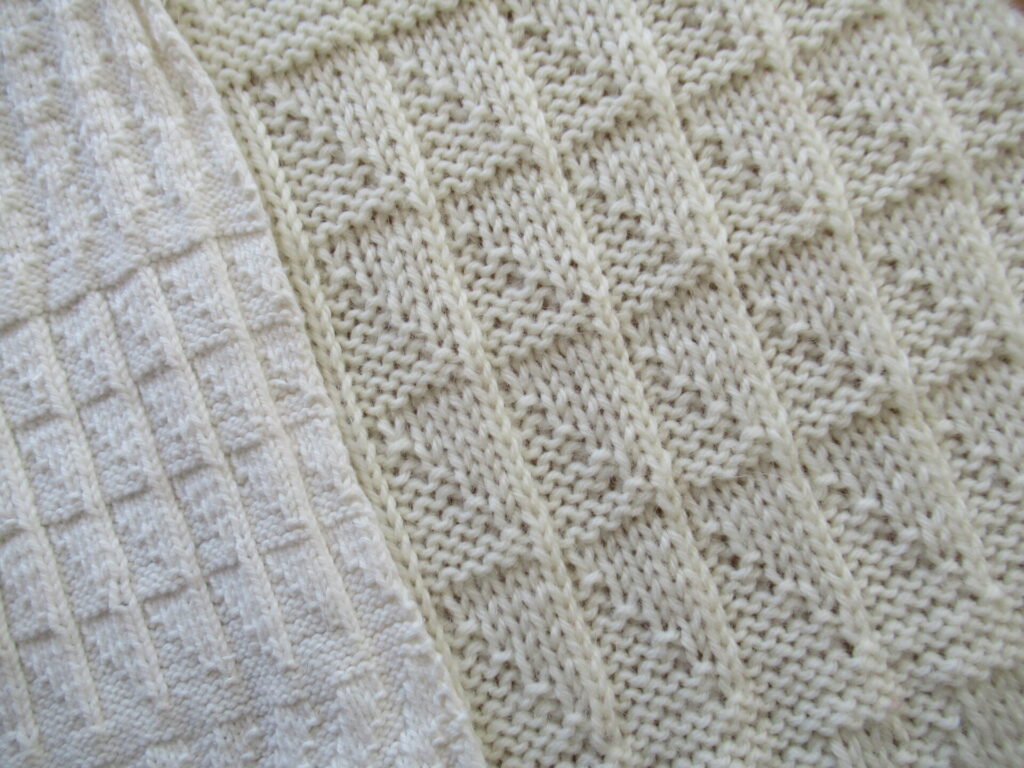
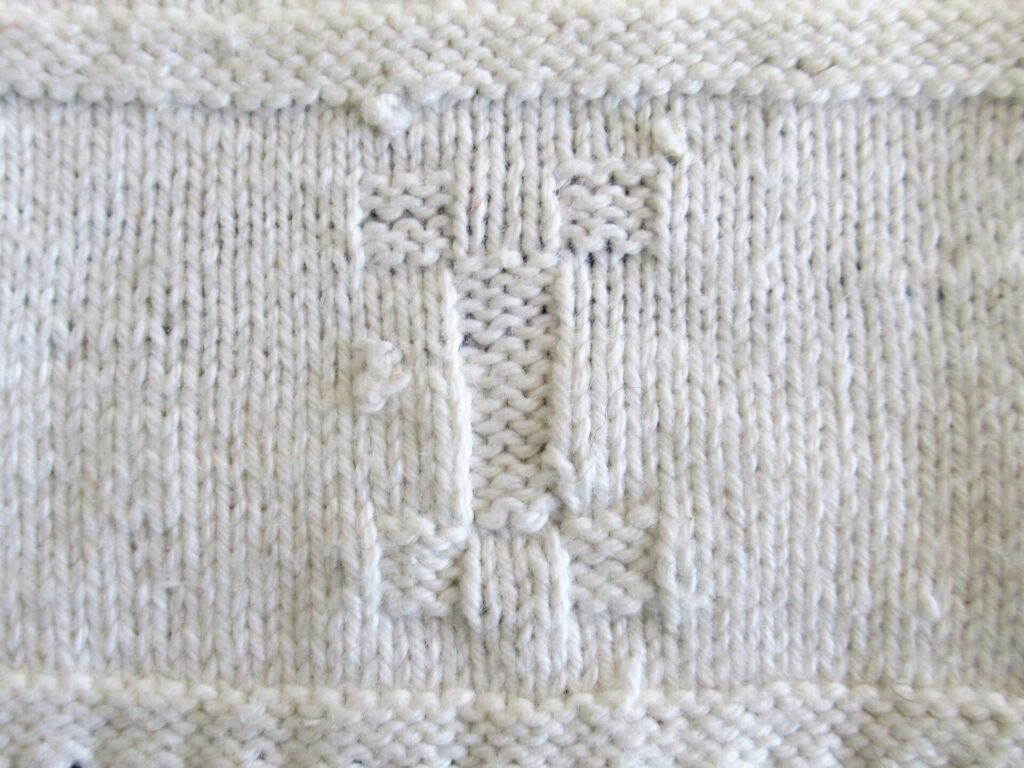
The stitch patterns include seed stitch, several kinds of ribbing and the mini blocks I used for my Monogrammed Guest Towel.
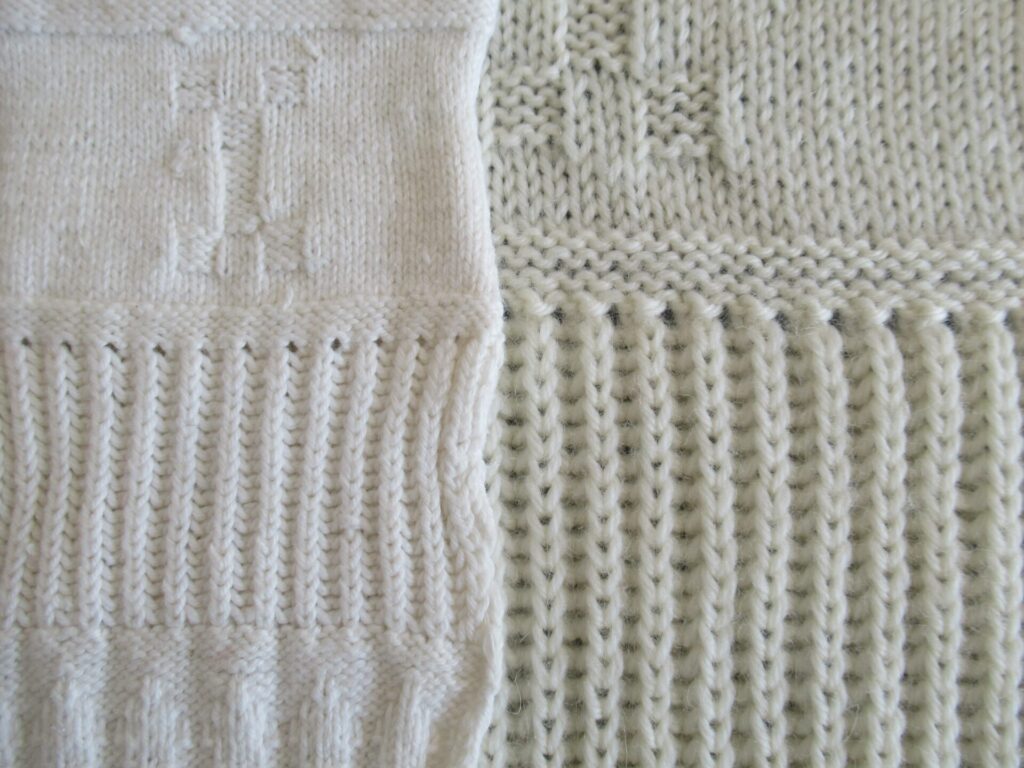
There is some brioche as well, and there are diagonals, zigzags, diamonds and triangles.
And also the initials I, EW and GW. As I wrote before, I think ‘I’ knit the sampler, and ‘EW’ and ‘GW’ were her parents.
Copying the knitted initials made me realize that they were, in fact, constructed of the same blocks used in the mini-block stitch pattern. Small blocks of 3 stitches by 4 rows, alternately showing the right and the wrong side of stocking stitch.
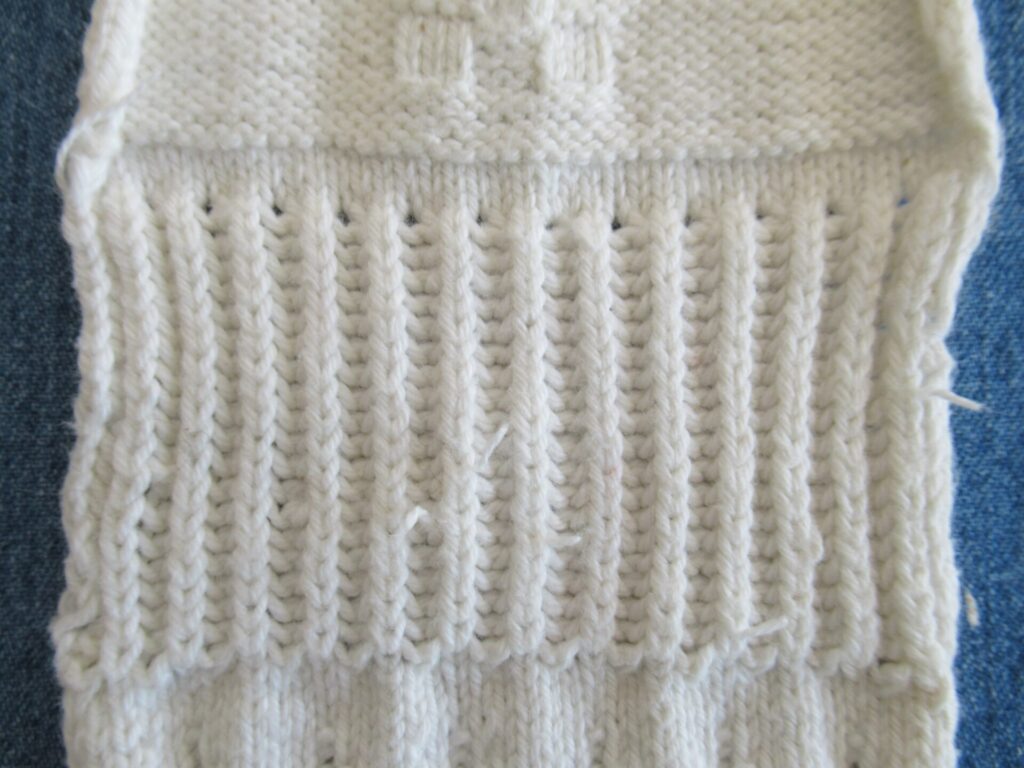
What was hardest for me to figure out, was the row of eyelets at the end of the brioche stitch section. It took me quite a few tries to get them exactly the same.
Although this is a small, fairly simple sampler, it must have taken ‘I’ many hours to knit. Did she enjoy it, or was it torture? Judging by the regularity of the stitches and the way all of the stitch patterns were finished to a balanced number of rows, I have the impression that she rather enjoyed the process. My guess is also that this was not her very first attempt at knitting.
Knitting this reconstruction, I have become convinced that the sampler really was a practice piece, and not made for decorative purposes. Although the knitting is neat, there are a few errors. And what’s more, there are strange, overplied yarn ends sticking out of the brioche section…
… and there are knots in several places around the letter ‘I’.
Did the knitter run out of yarn, so that she had to use up every last centimetre/inch available?
All in all, knitting this reconstruction was an interesting exercise. Although I haven’t found out yet who ‘I’ was, I have the feeling that I’ve got to know her a little better. I wonder if she used this sampler as an example for many items for herself and her family.
In spite of the simplicity of the sampler, I see endless possibilities. In the fingerless mitts I’m working on and hope to show here soon, I’ve combined 3 of the stitch patterns. I have a lot on my plate at the moment and may not have time to write a blog post about them (or anything else) next week. I’m not entirely sure how things will go, but I’ll be back as soon as I can.
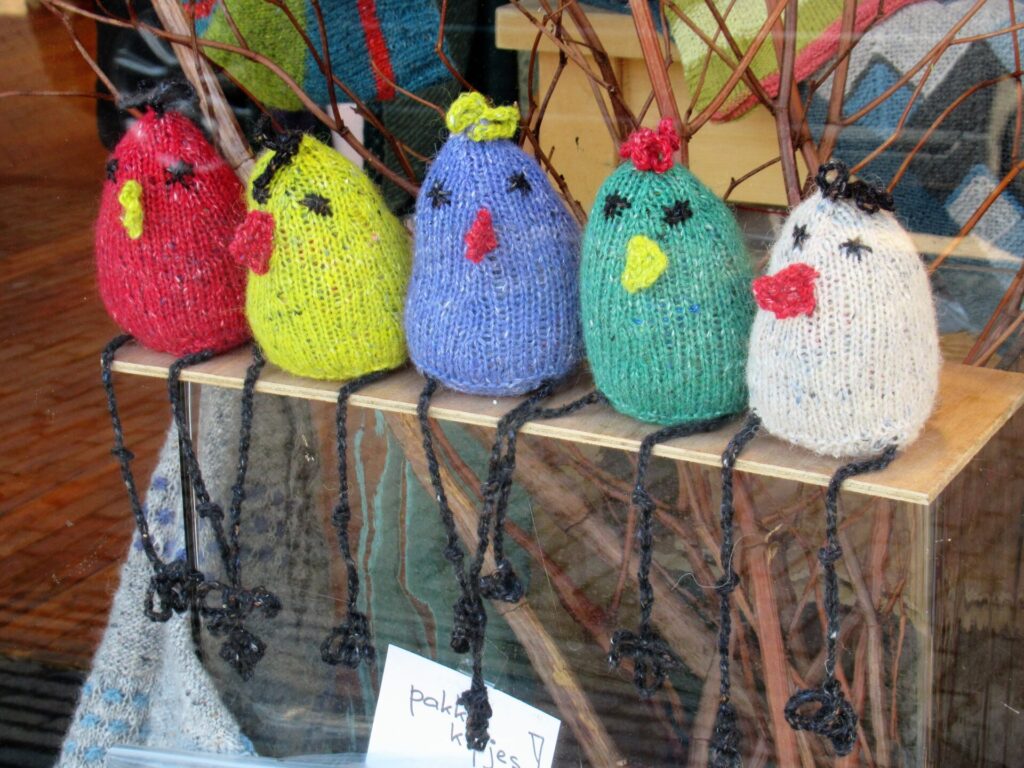
Fun, aren’t they, these colourful knitted chickens? They live in the shop window of ‘t Ryahuis, one of the oldest (or the oldest?) yarn shops in the country. It was founded in 1963 by current owner Liane’s Mum and named for a Swedish craft form called rya that was popular back then. I think it is some sort of rug hooking, but correct me if I’m wrong.
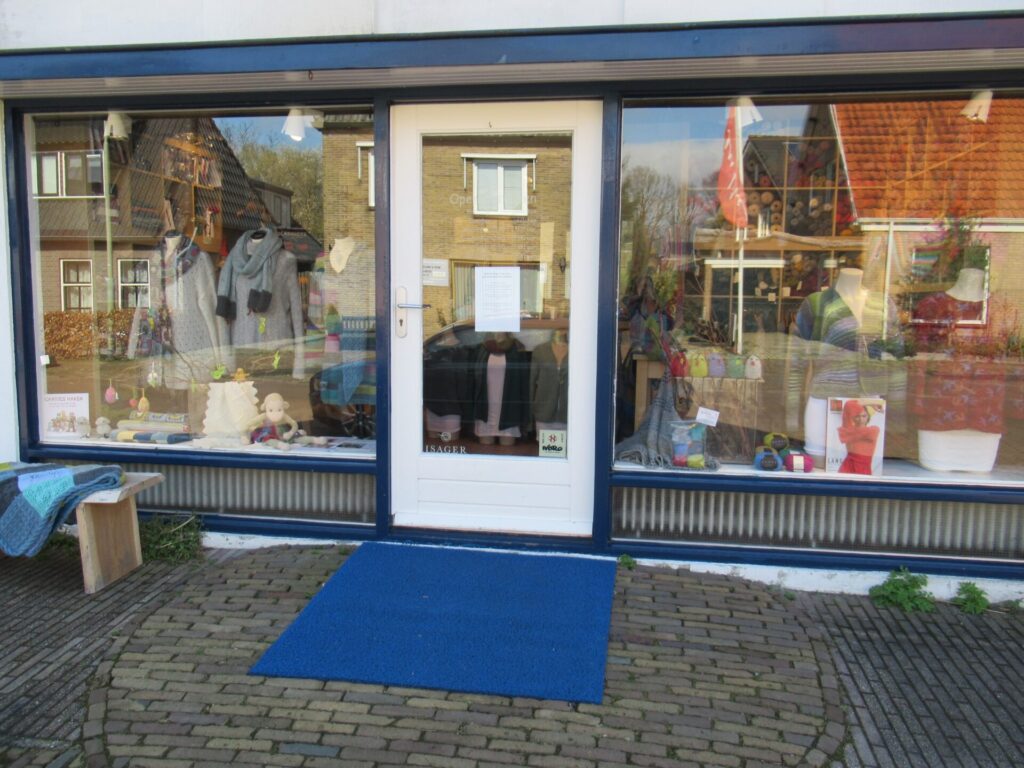
Today, hardly anybody knows what rya is anymore, but every knitter around here knows ‘t Ryahuis. This (below) isn’t the best of pictures, and it doesn’t do the lovely window display justice, but it gives an impression of the outside of the shop.
All non-essential shops have been closed here from mid-December. If I’d been on the committee deciding what an essential shop is things would have been different, but as it was ‘t Ryahuis had to close its doors too. Fortunately, we can now book a time slot at ‘non-essential’ shops. It has to be booked at least 4 hours in advance, there can be no more than 2 customers in a shop at any one time, and the time slot has to be for a minimum of 10 minutes.
When Liane e-mailed me that the yarn I’d ordered had arrived, I immediately booked a time slot. Fortunately it was a lot more generous than those 10 minutes and I had enough time to browse around and take loads of pictures to share with you.
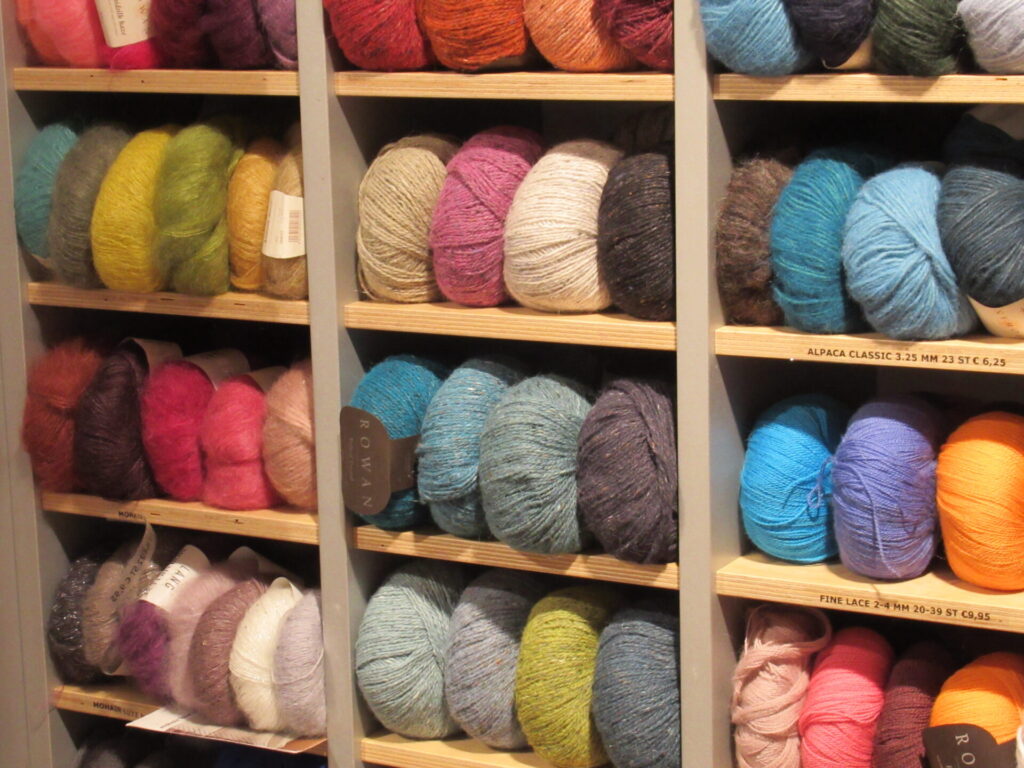
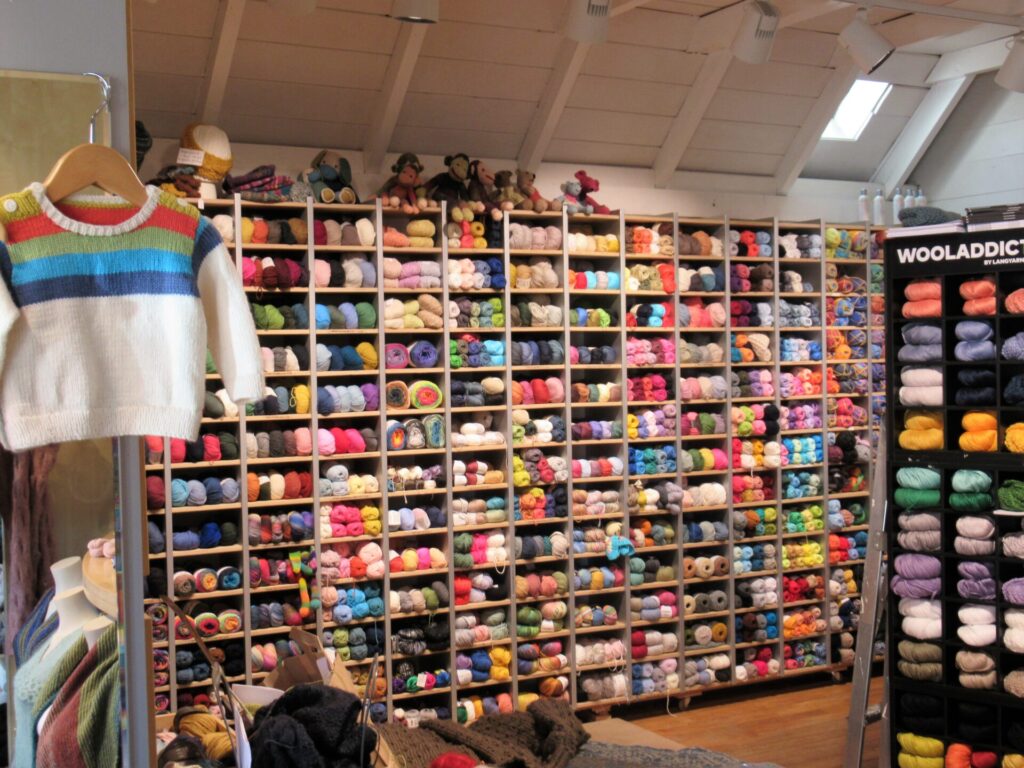
Let’s start with some yarn.
Ahhh, doesn’t it feel good just to look at… well, yarn? (I may be slightly deranged, but for me it feels so good to just look at all the colours and textures.) There’s some tweed there, some mohair, some alpaca and even a few sequins.
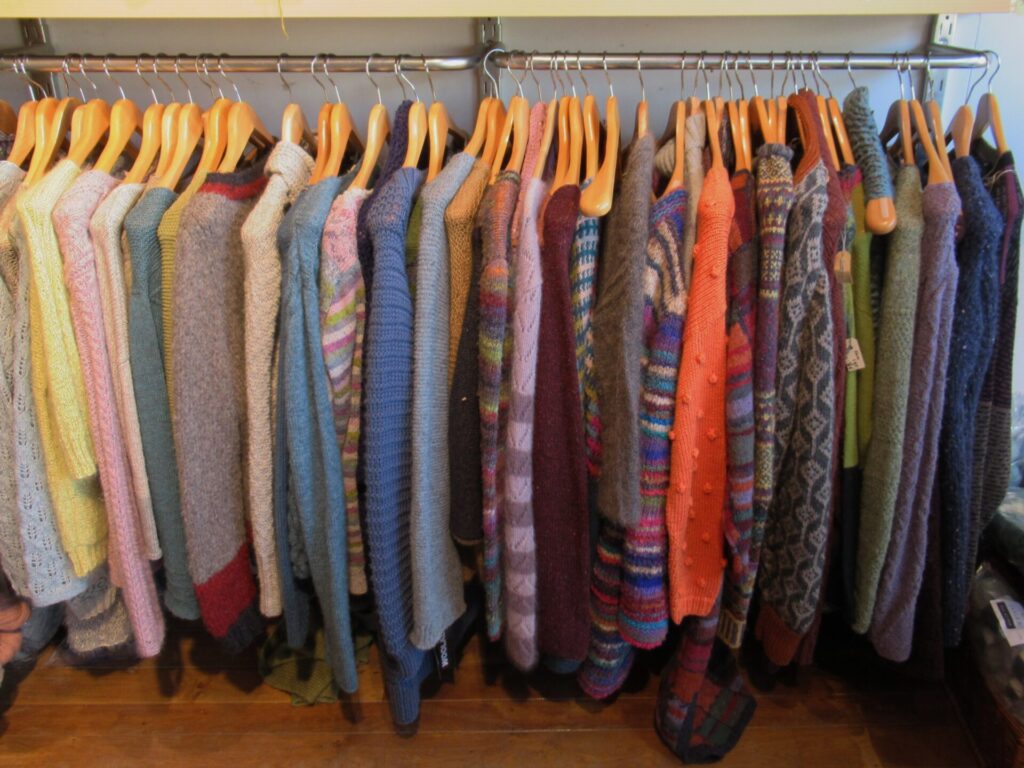
Every yarn shop has its own signature. One of the special things about ‘t Ryahuis is that they have many, many knitted shop samples to look at for inspiration or to try on.
There is this rack, and another one like it…
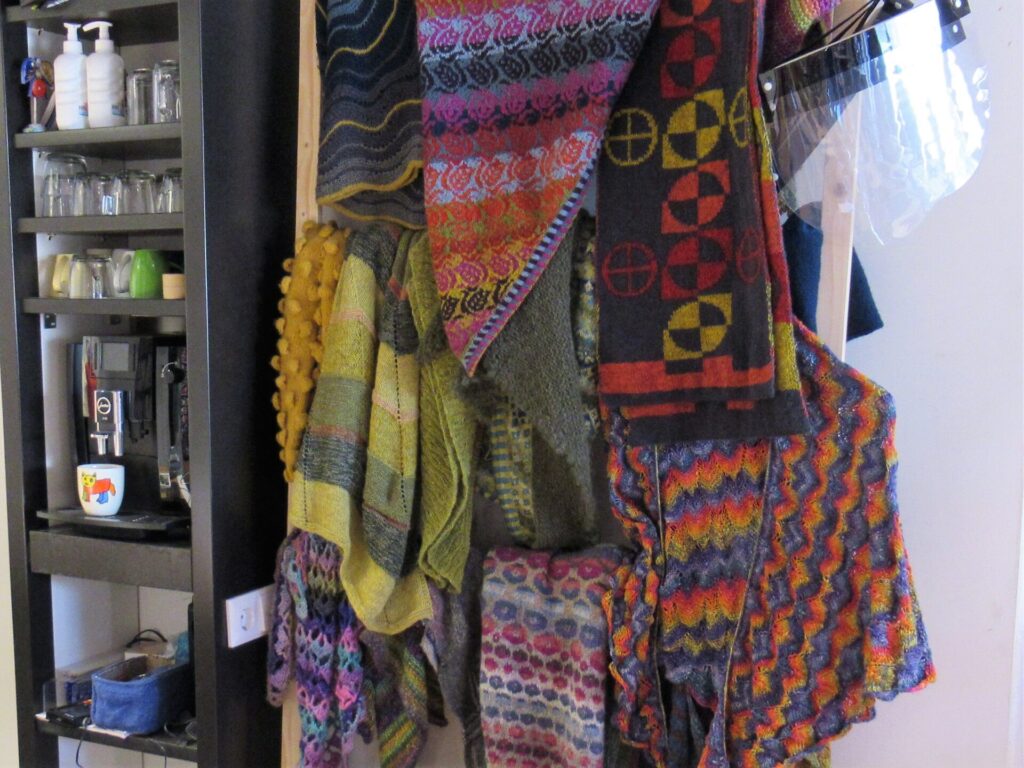
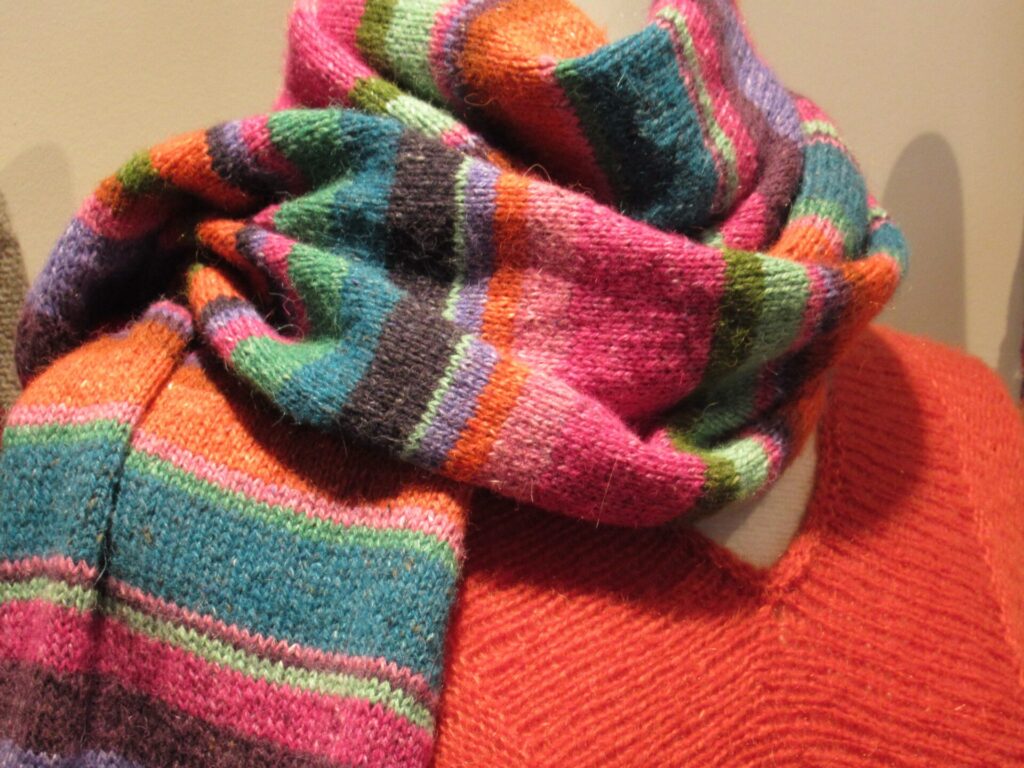
… shawls and scarves hanging or lying around everywhere…
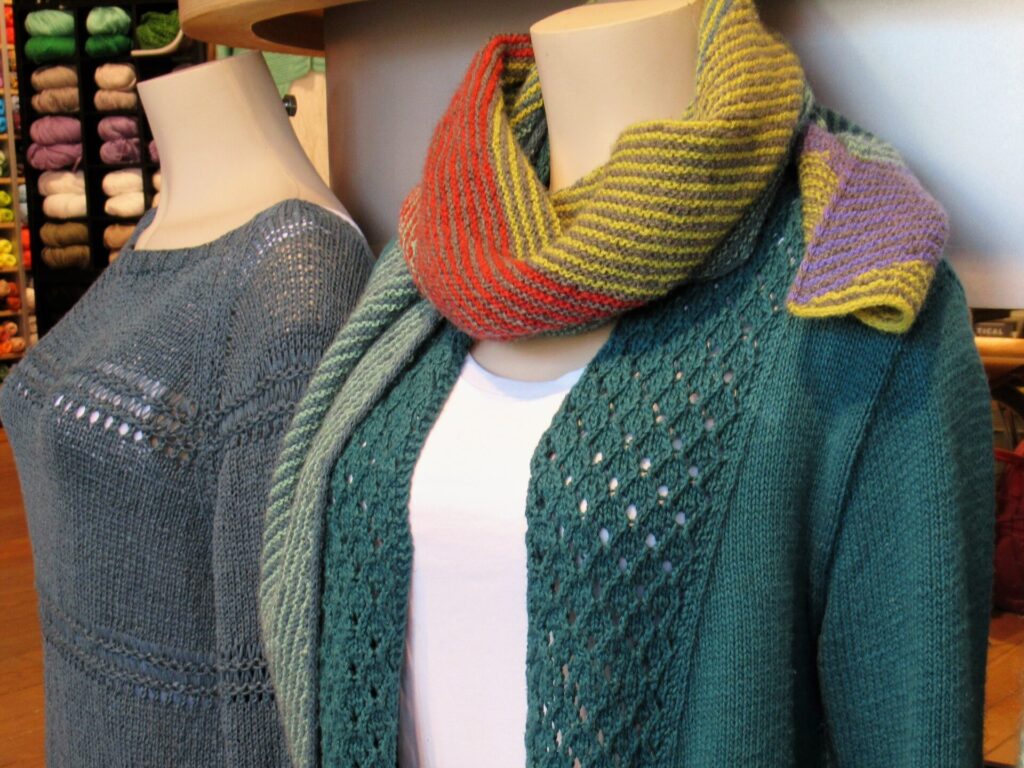
… and there are several torsos and mannequins showing off knitwear.
I don’t know what cardigan this lady is wearing, but the shawl is a Stephen West design. I’m not entirely sure, but I think it is Vertices Unite.
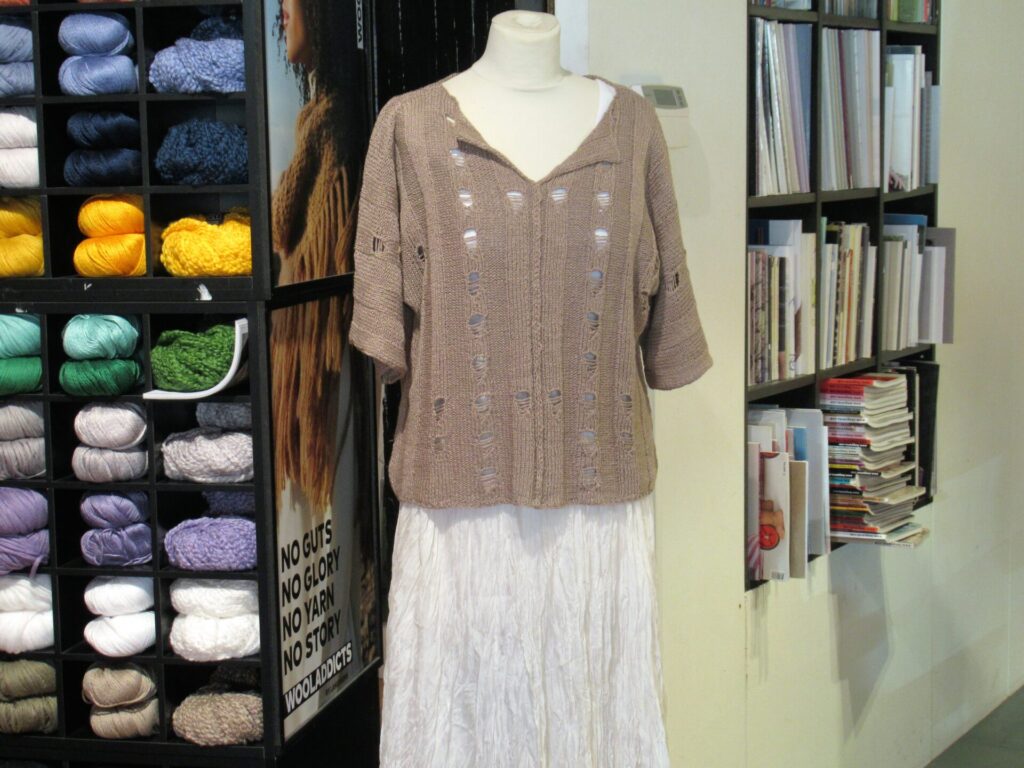
While I was browsing around, a parcel was delivered and I heard Liane exclaim, ‘Yay, it’s from our knitter! That was quick!’ The summer top in it was immediately put on one of the mannequins.
It is knit in a linen yarn and the pattern is from the latest issue of Lang Fatto a Mano.
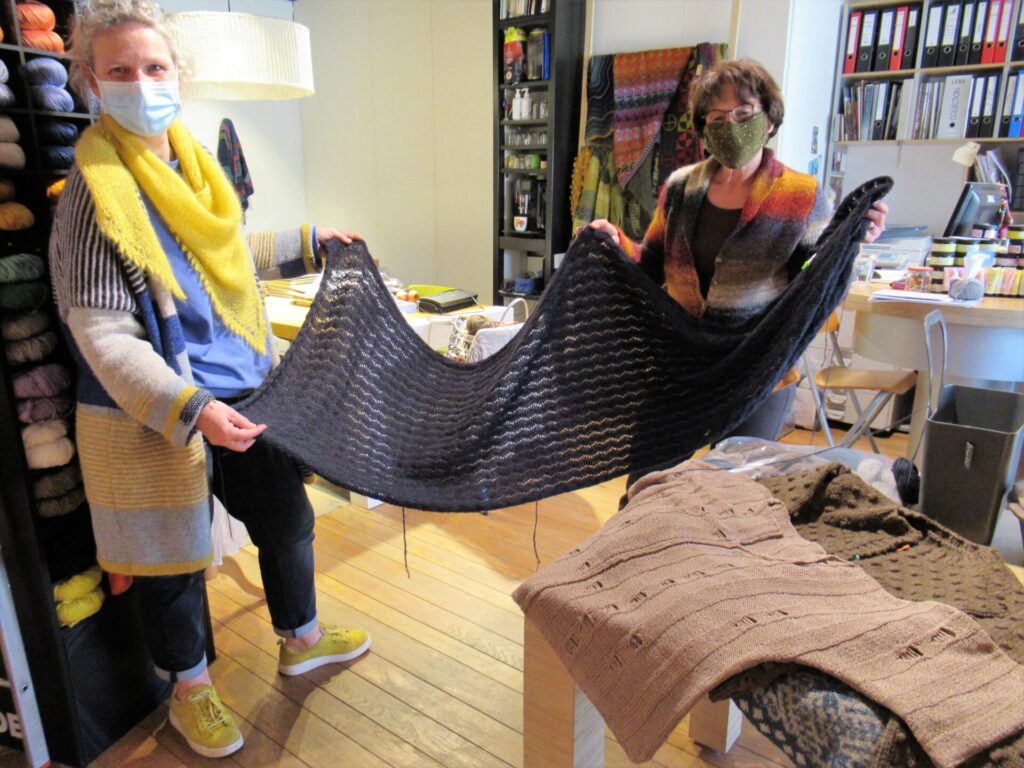
One other customer had booked a time slot at the same time. She needed some yarn and had a question about casting off a huge shawl (I think it was over 2 metres long) she was knitting for her daughter. While she (right) and Liane (left) were looking at it, I quickly snapped a picture (asking permission, of course).
It is a Rowan design, knit in their Alpaca Classic. And I can tell you, it doesn’t only look gorgeous, it is also unbelievably soft.
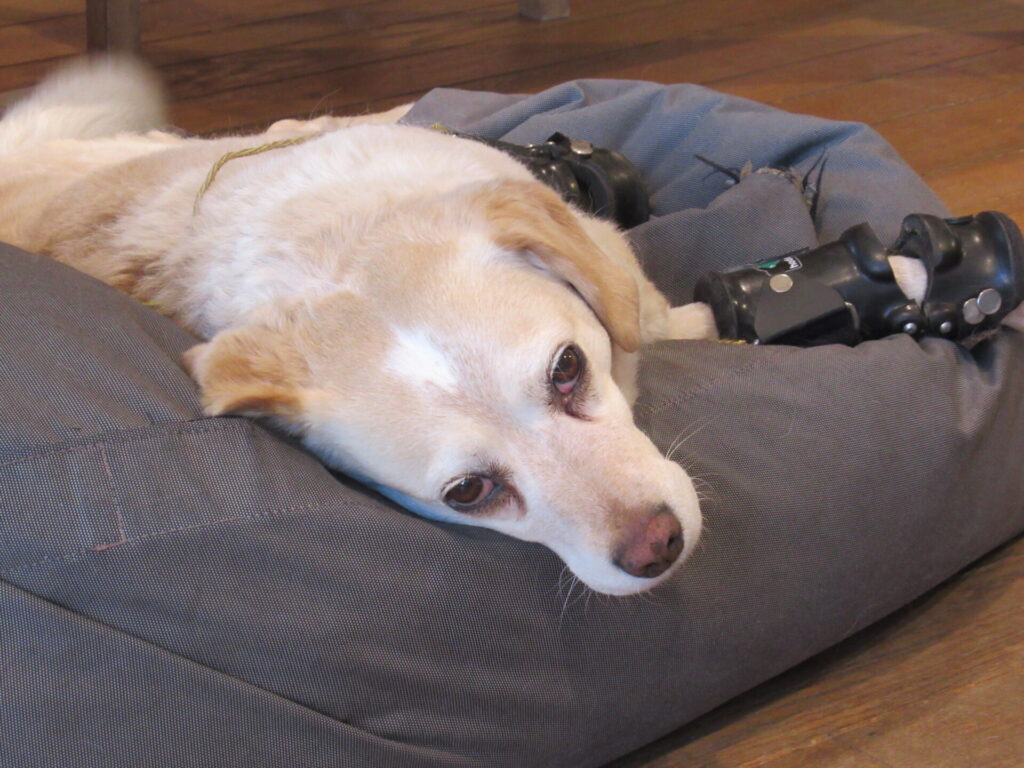
Apart from us, customers, and Liane, there was somebody else there as well – shop dog Ollie.
Sadly, Ollie met with an accident several years ago and will have to wear braces on two of his legs for the rest of his life. He is such a gentle and calming presence in the shop.
I don’t want to make this too long, because I want to show you a bit of the village, too, but there are a few more things I just have to show you.
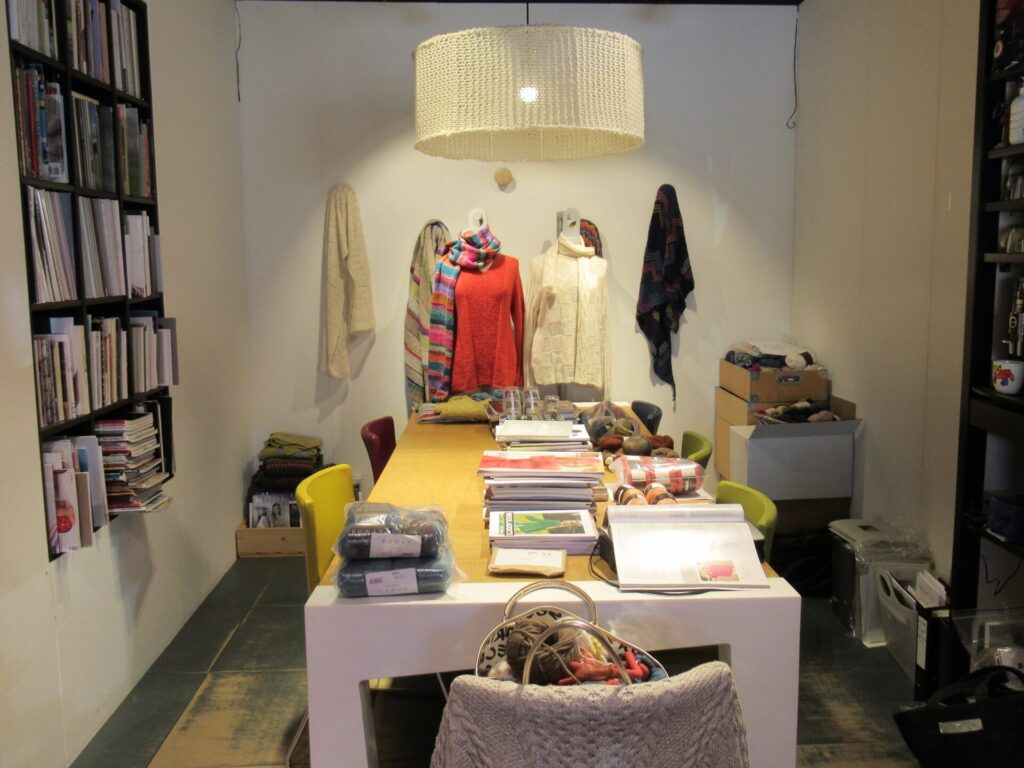
During normal times, the shop hosts lots of knitting workshops and knit-‘n-natter groups. People will be sat around this table now covered in knitting books and yarns.
Even the lamp has a knitted shade, and two mannequins wearing knitted items (what else?) are looking on.
One of them has a Kaffe Fasset scarf around her neck…
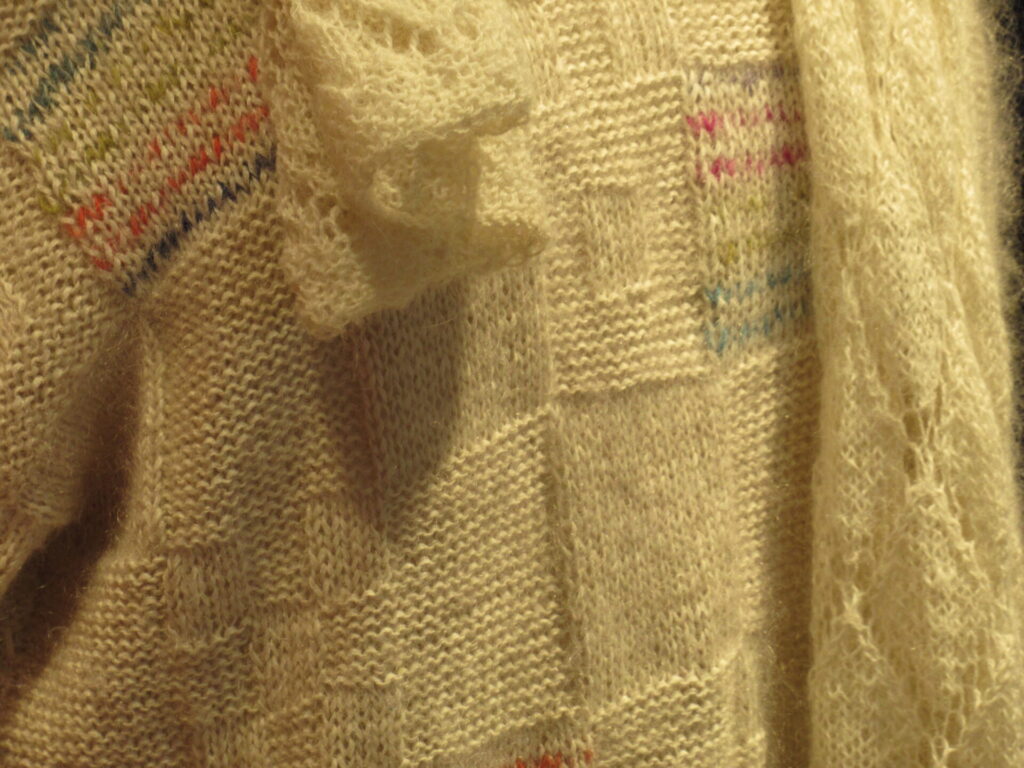
… and the other one is wearing a light and fluffy cream sweater with subtle colour details and a lace scarf.
I didn’t ask, but looking at it, I think that the sweater is a Marianne Isager design.
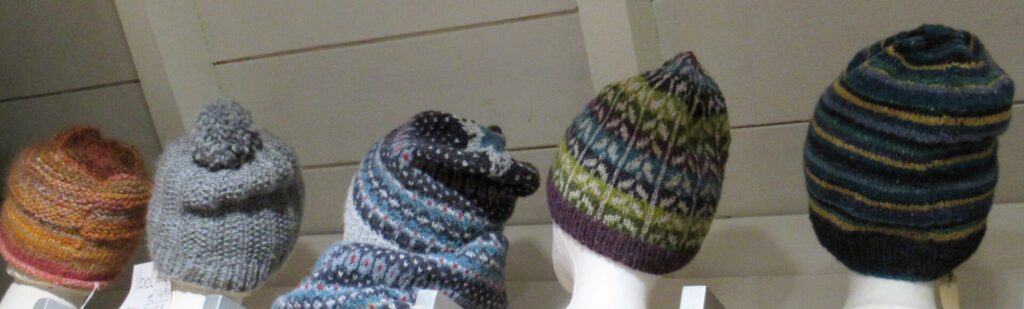
Finally, let’s take a look at what is tucked away on top of this wall of yarn.
Hidden just out of sight in the top left corner is a row of hats.
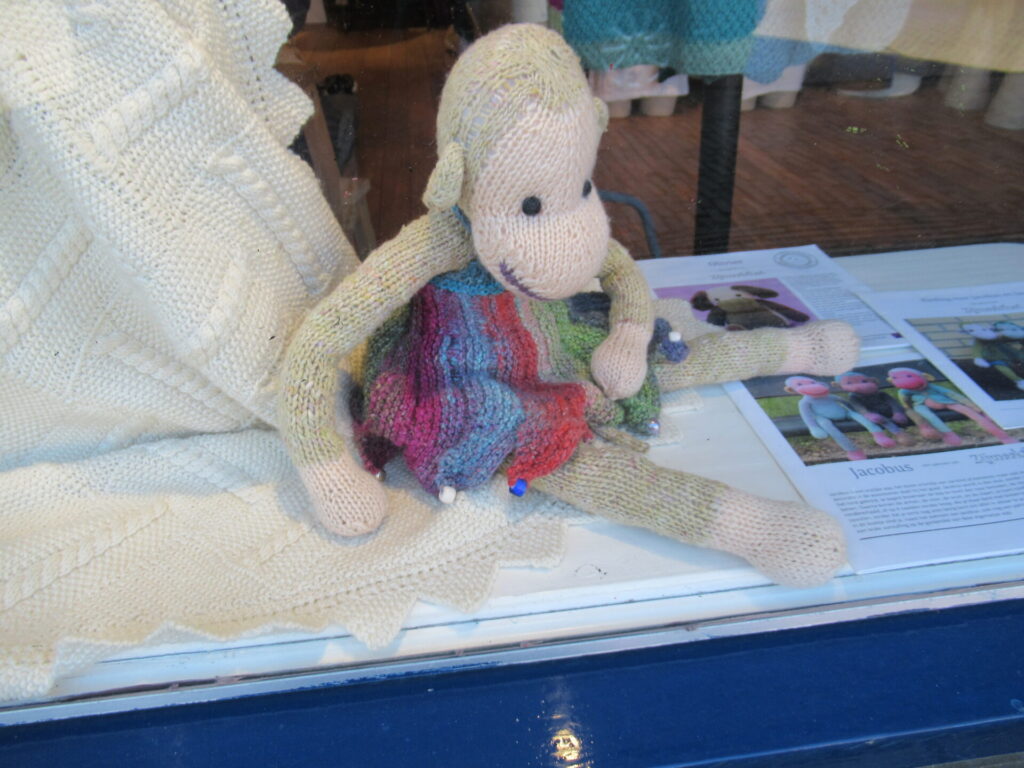
And next to them a collection of knitted monkeys, bears and mice designed by Anita from Zij Maakt Het. Another one of her monkeys, called Saar, is in the shop window looking out. Do check out Anita’s website. Her stuffed toys are adorable and very cleverly constructed.
Well, time’s up. For more information about ‘t Ryahuis, please visit their website. They don’t sell all of their yarns online, but they do have a webshop for Isager yarns, and another one for knitting kits.
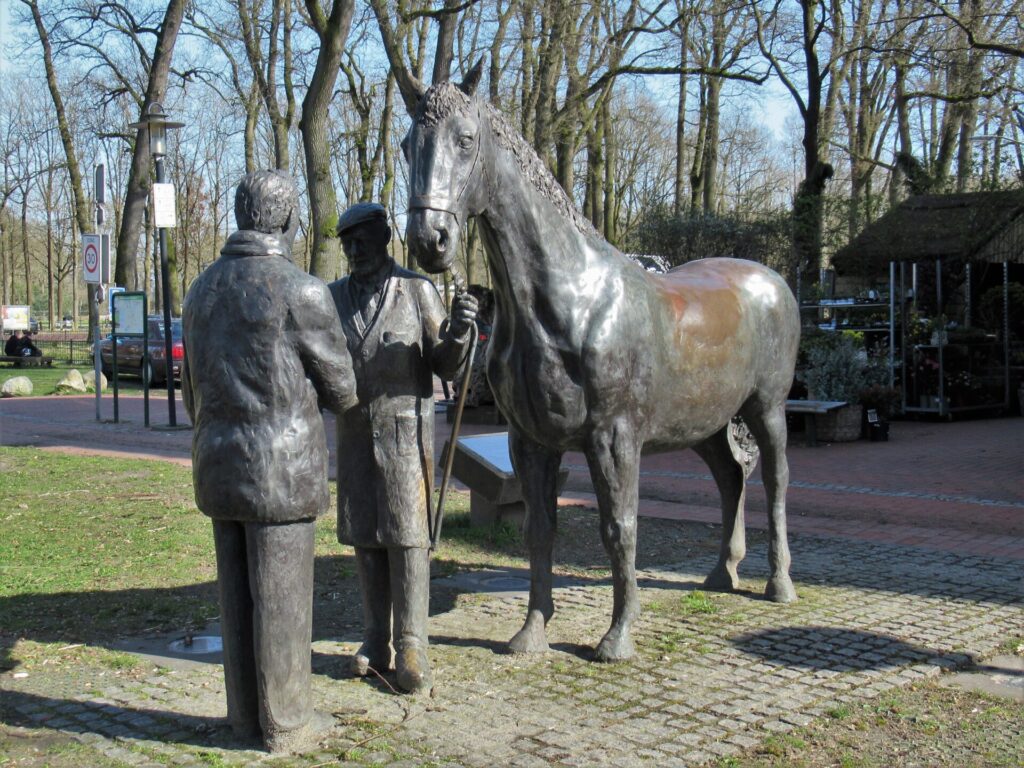
Because it was such mild and sunny weather and I had the entire afternoon to myself, I took a stroll through the village afterwards. The village of Zuidlaren is famous for its annual horse fair.
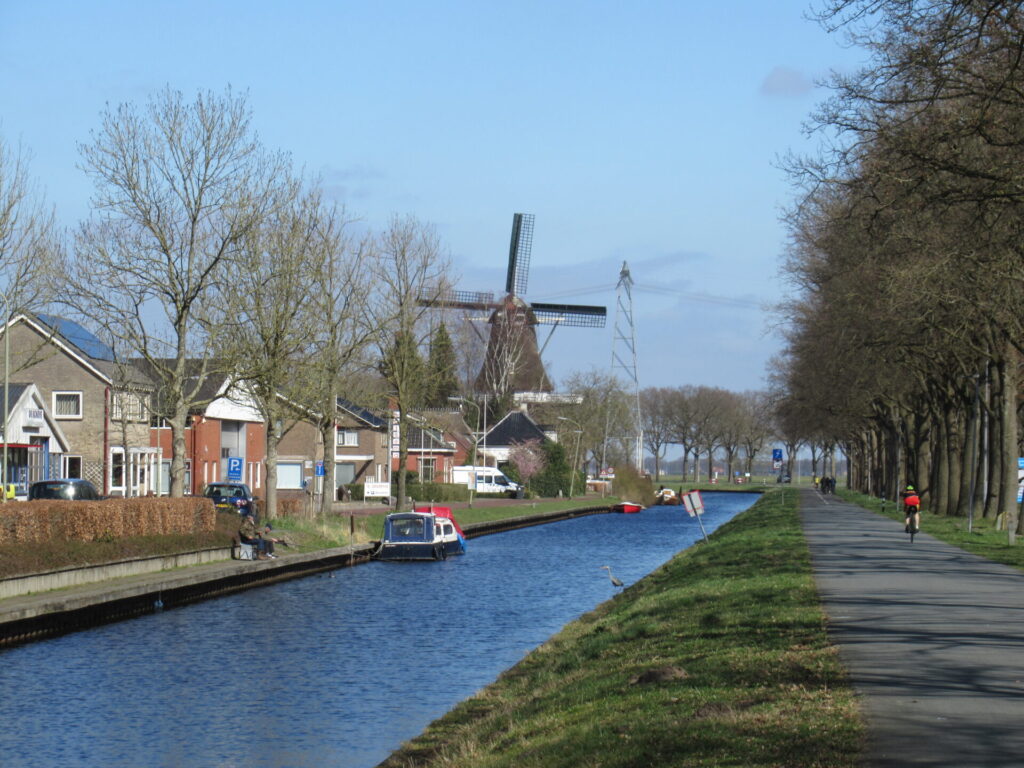
I walked to the small harbour at the end of the village…
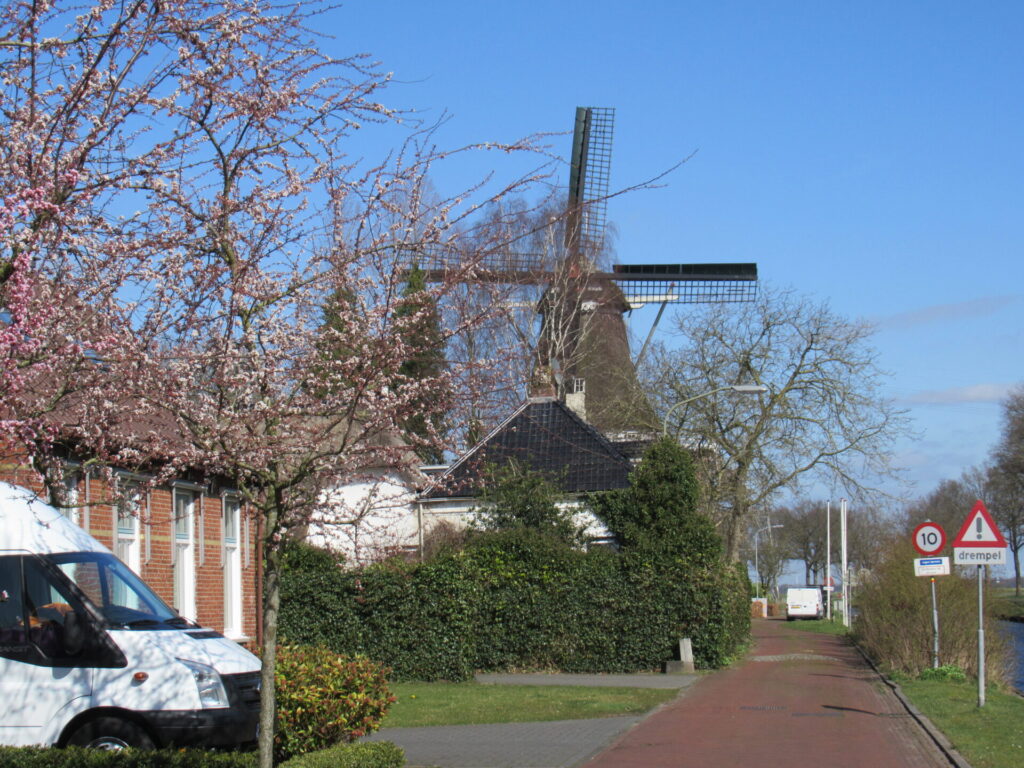
… because I wanted to take a look at the mill museum.
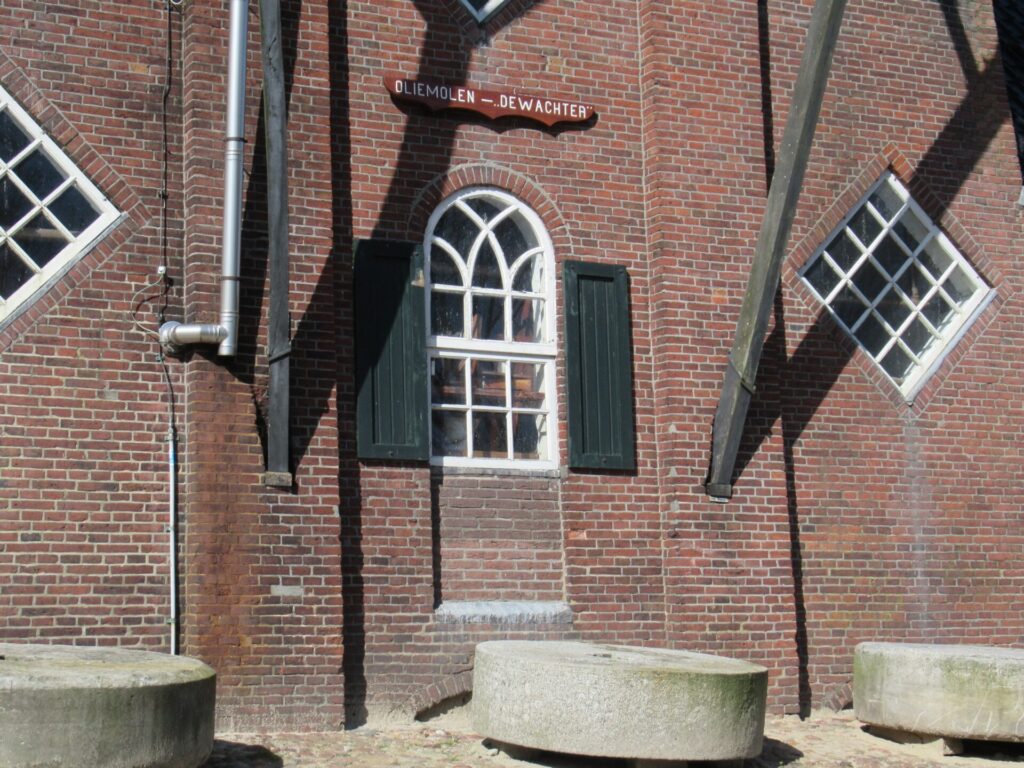
Like just about everything else, it was closed, but still nice to take a look at from the outside. The mill dates from 1851 and used to grind grain and spices, and press oil from flax seed.
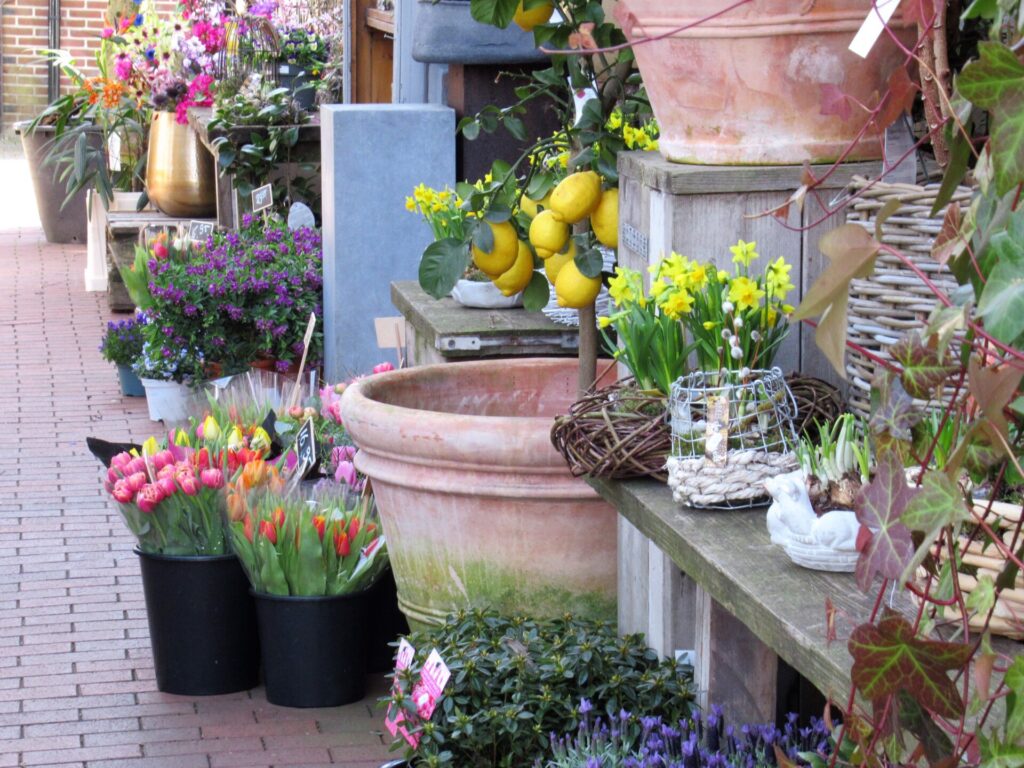
Walking back to the car, I passed a flower shop. Flower shops are the only shops considered ‘semi-essential’. Like most other shops, they are closed to customers inside (apart from time slots now), but they can sell their wares outside.
Those lemons can’t be real, surely?
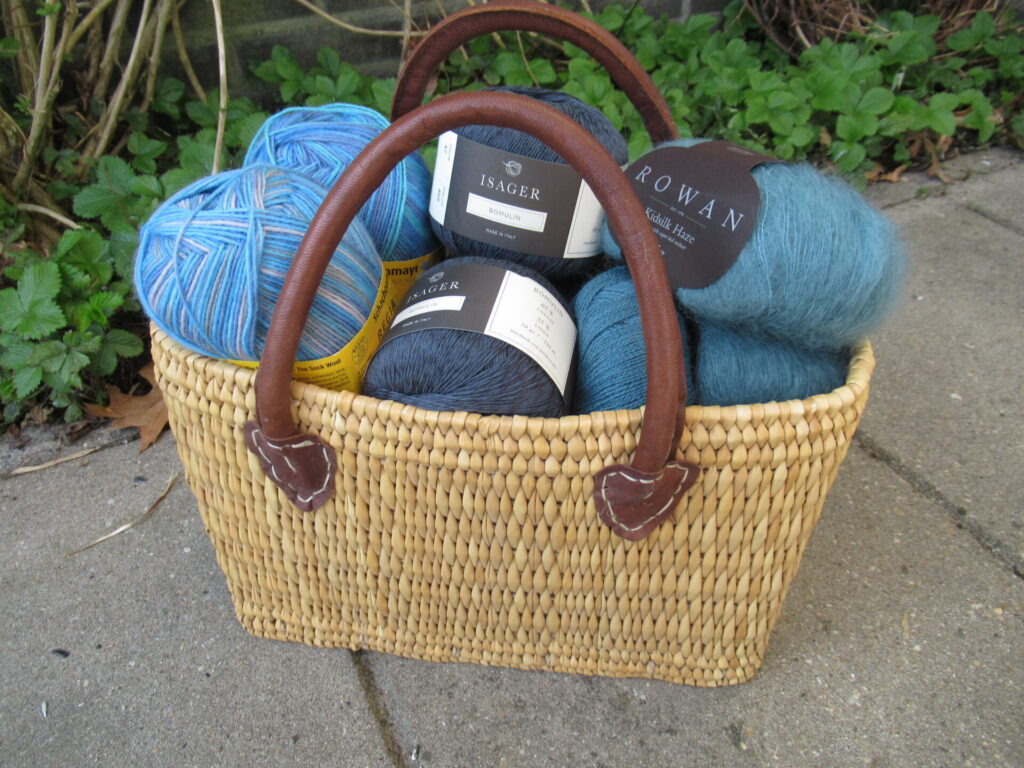
Well, I think that was a fabulous outing. I hope you’ve enjoyed it too. Oh, and here is my ‘loot’.
Rowan Kidsilk Haze and Fine Lace for a cardigan, Isager Bomulin for a summer top, and some Regia sock yarn. That should keep me busy for a while.
Wishing you a relaxed weekend. Don’t forget to take a snooze now and then! Xxx
Note: My blog isn’t sponsored. I just like writing about yarn and believe in supporting small and local businesses, especially during these difficult times.
Hello! And how are you all doing? It’s always slightly frustrating to me that a blog is mainly one-way traffic. I hear a little about some of you from your own blogs, through comments, or via other channels, but on the whole it’s well-nigh impossible to have a real two-way conversation here. I just want to let you know that it isn’t because I’m not interested.
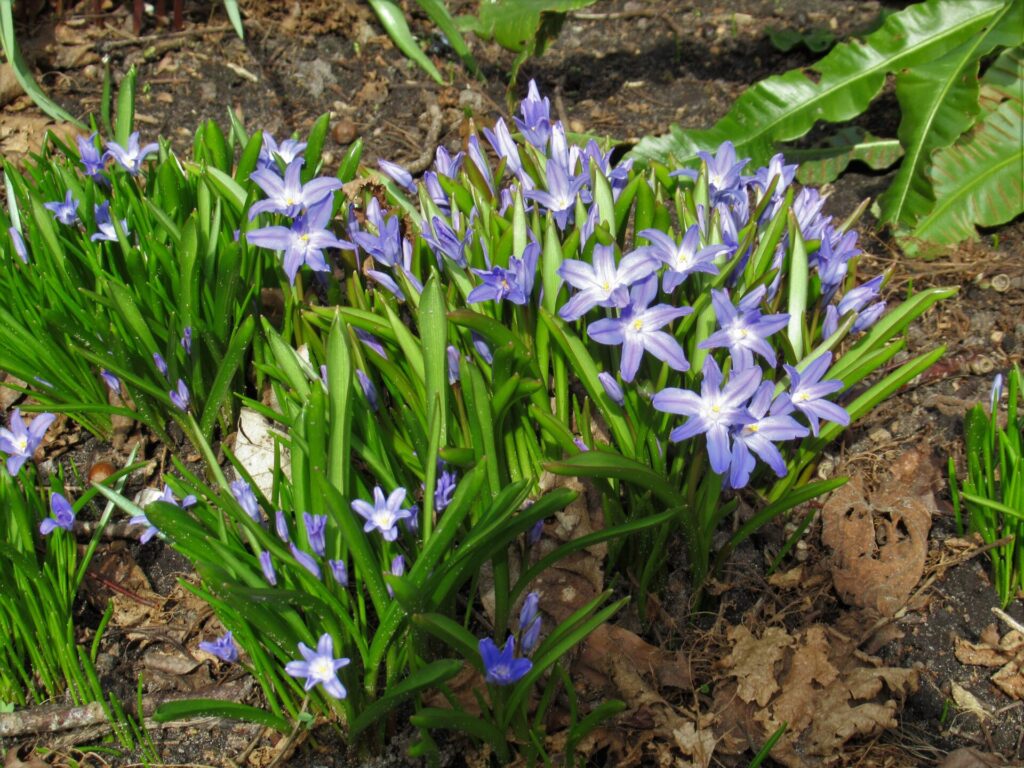
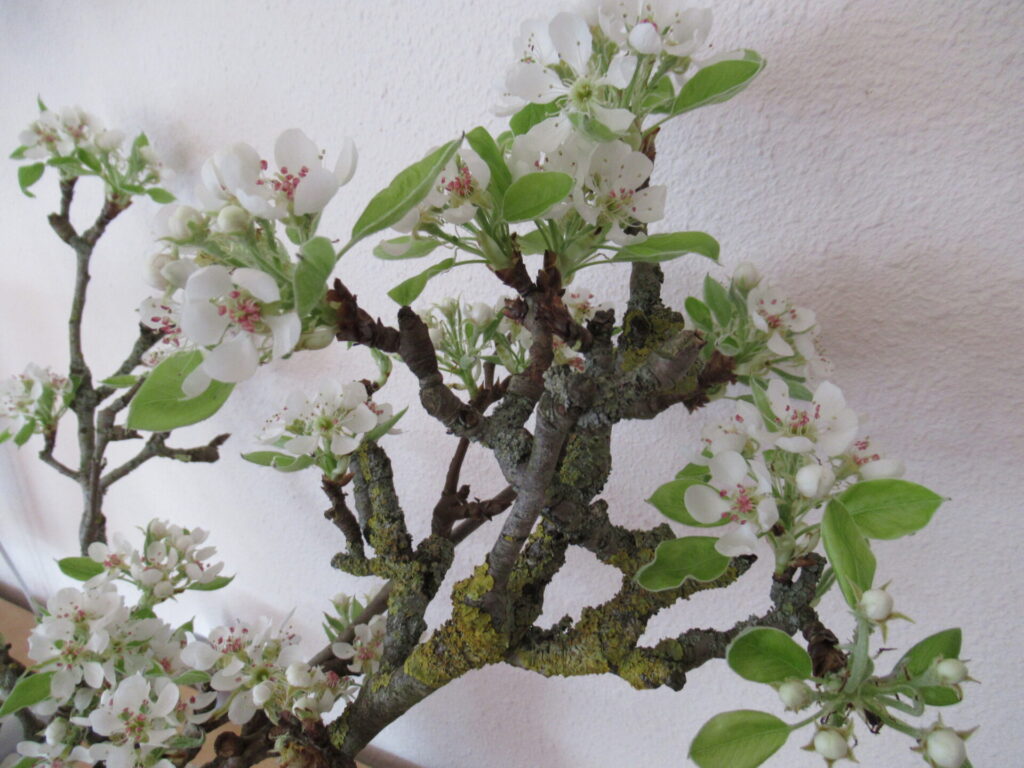
Over here, in the Netherlands, there are more and more signs of spring. The scillas in our garden are flowering profusely, and we only ever planted 1 single scilla bulb about two decades ago. The trees are still bare, but a few branches blown from our pear tree in a storm and brought indoors are delighting us with their delicate flowers.
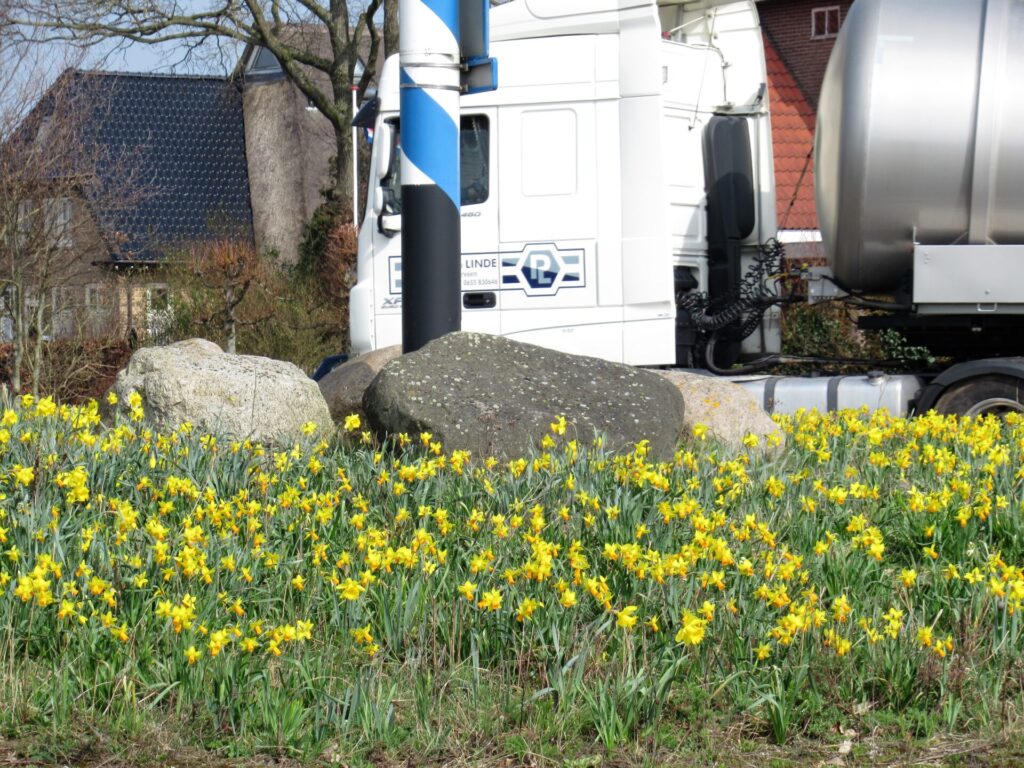
And the daffodils on a roundabout I often pass are a cheering sight.
On a different note, we’ve just had another press conference from our (outgoing) Prime Minister and our Minister of Health about the Covid situation, and the national elections are behind us. Both have left me worried. But I refuse to despair and, as always, am living by Elizabeth Zimmermann’s motto:
“Knit on, with confidence and hope, through all crises.” (Wool Gathering #10, 1974)
I am making good progress on the fingerless mittens I’m designing myself…
… and am hoping they’ll turn out the way they look in my mind’s eye. Designing something is exciting and fun, but for me also surrounded with doubt and uncertainty.
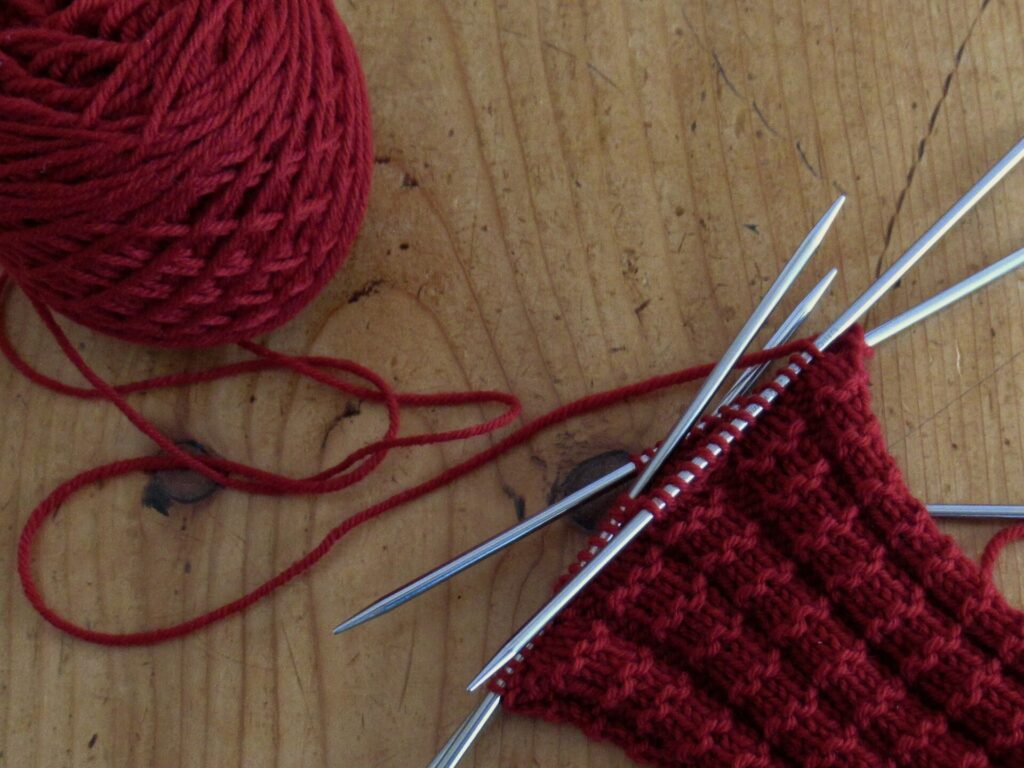
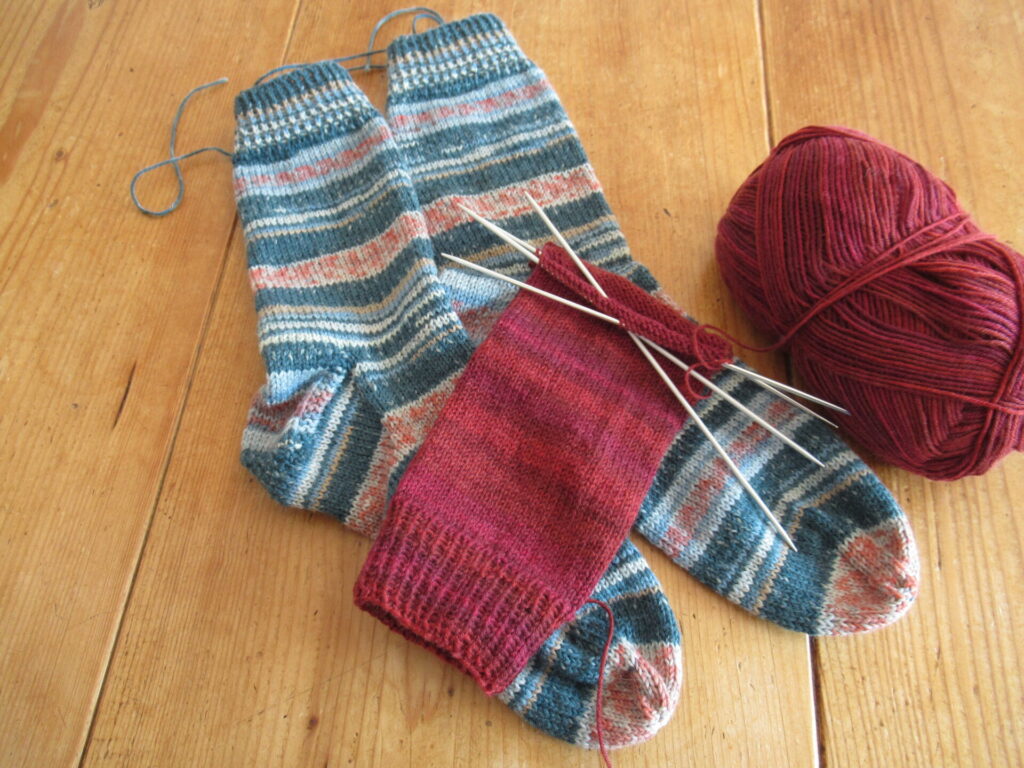
It’s different with sock knitting. After knitting innumerable pairs, I’m entirely confident that they’ll turn out right. I’ve just finished a pair in a stripe sequence designed by Arne and Carlos, and am now knitting a pair in a subtly striped yarn with cashmere in shades of red, pink and orange.
I’m keeping the Arne & Carlos socks. The luxurious red ones are for a friend.
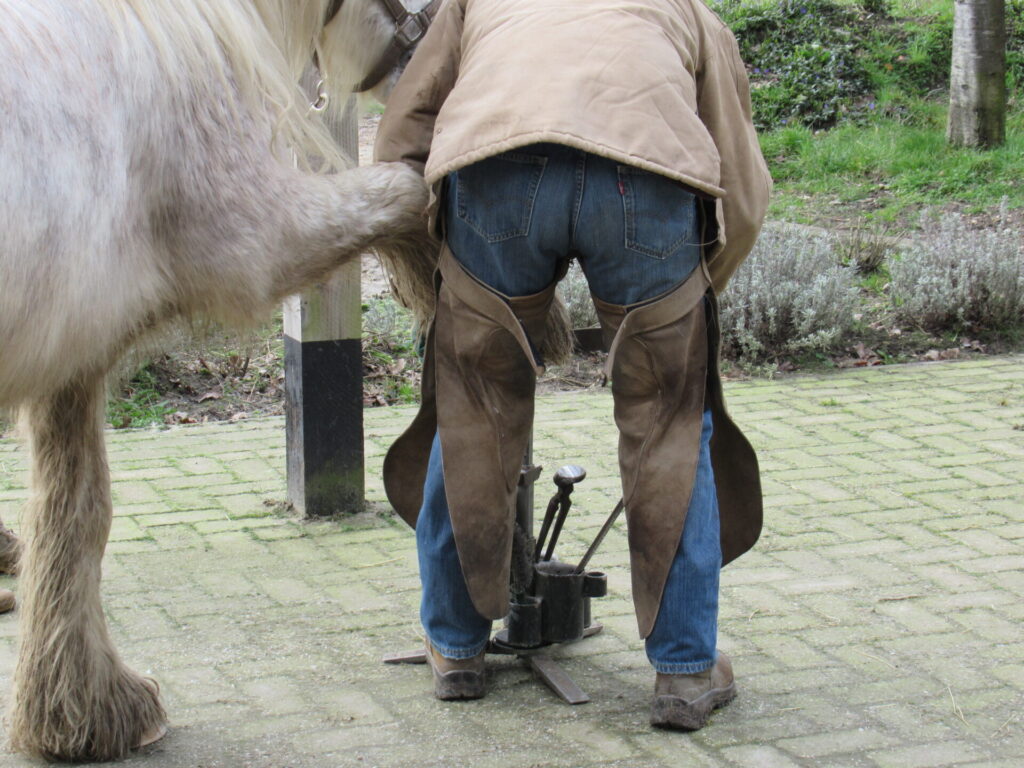
Speaking of socks and friends, I’ve been to see our daughter’s dear friend Silver. She has just moved to a new stables and was having a manicure while I visited.
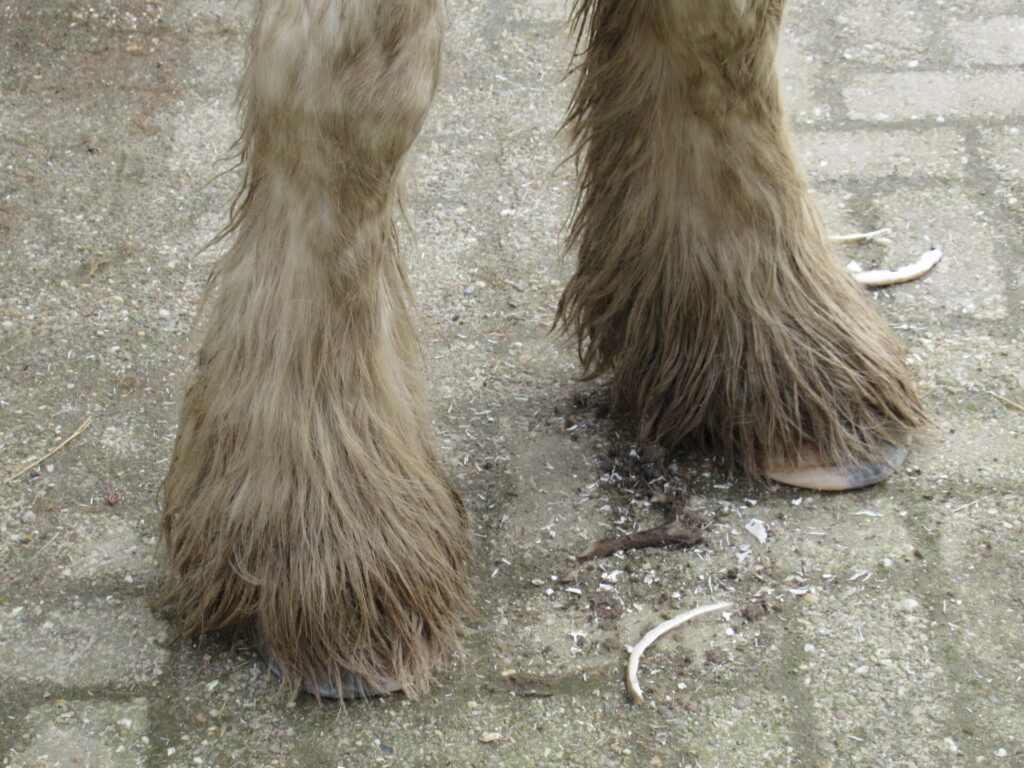
Silver has magnificent (if slightly dirty) socks.
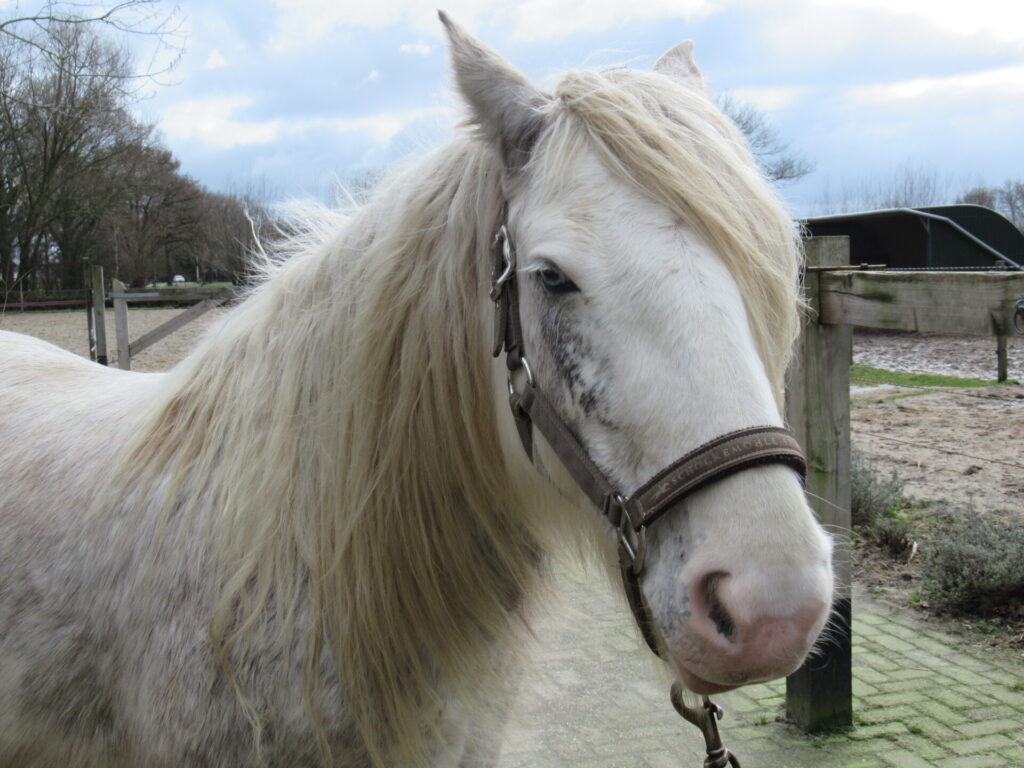
You may have met her in a blog post long ago, but if you haven’t, here she is:
Silver is whitish, has one blue and one brown eye, and hails from Ireland. She shares her new stables with black, brown and beige horses, with Norwegian, Arab, and I-don’t-know-what-kind-of roots. After a few initial bickerings, they have settled down peacefully together. Watching them makes me hum,
“Imagine all the people Livin’ life in peace Yoo, hoo, ooh-ooh You may say I’m a dreamer…”
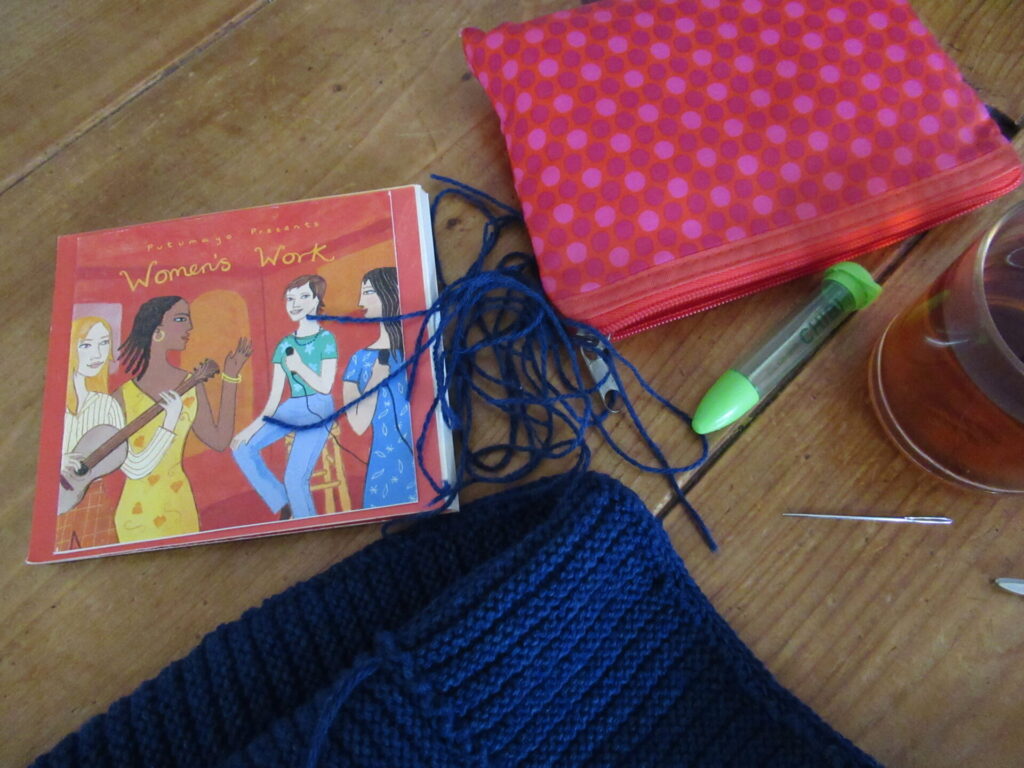
Well, back to knitting. It’s also time to start a few new projects. First of all, I dug out the yarn I bought at a crafts fair in February 2020.
This is going to be a new in-between-projects project – a huge wrap in linen stitch. I expect it’ll take me about two years to knit, and that’s exactly the idea. A project I can always pick up when I’ve finished something and am about to start something else, or just feel like knitting long rows of soothing simple stitches.
I’ve also ordered yarn for an oversized cardigan. Two different lace-weights in a tealy colour that will be held together, one a blend of alpaca and merino, the other mohair and silk.
I’m soooo looking forward to collecting the yarn from the shop and starting this.
That’s all about my knitting for now. I hope you have something on your needles to lift your spirits too, and I’d love to hear about it.
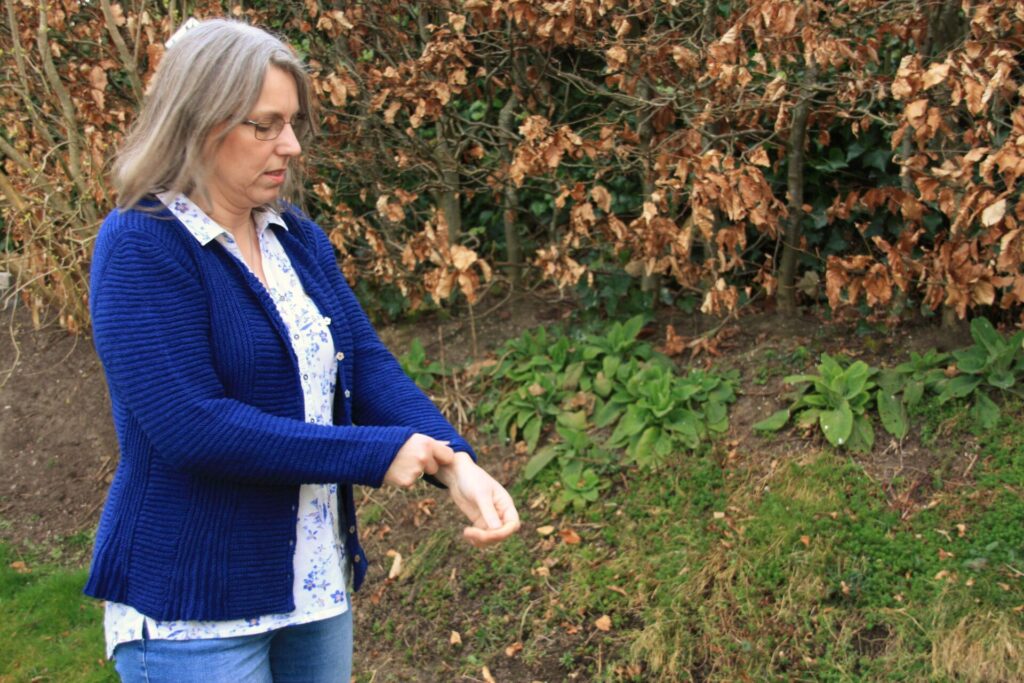
Phew, it’s finished! My Panel Debate cardigan, I mean. It took me about 8 months from start to finish. Well, I knit several other things in between, but on 2.75 mm (US 2) needles and with quite a few technical challenges, it wasn’t a quick knit.
It certainly was interesting, though, and I thought you might like to read about some of the special techniques (so much I-cord!) and what helped me finish it.
Panel Debate is a pattern by Danish designer Bente Geil, and can be found on Ravelry under its Danish name Paneldebat. I used one of the designer’s own yarns: Geilsk Bomuld og Uld – a light fingering weight blend of 55% wool and 45% cotton.
Reading through the pattern, I couldn’t make head nor tail of the instructions for the neckline. There seemed to be something wrong, so I e-mailed the designer. She said she’d look into it and sent me a new version of the pattern the very next day (during her Summer break!). Excellent service, I have to say.
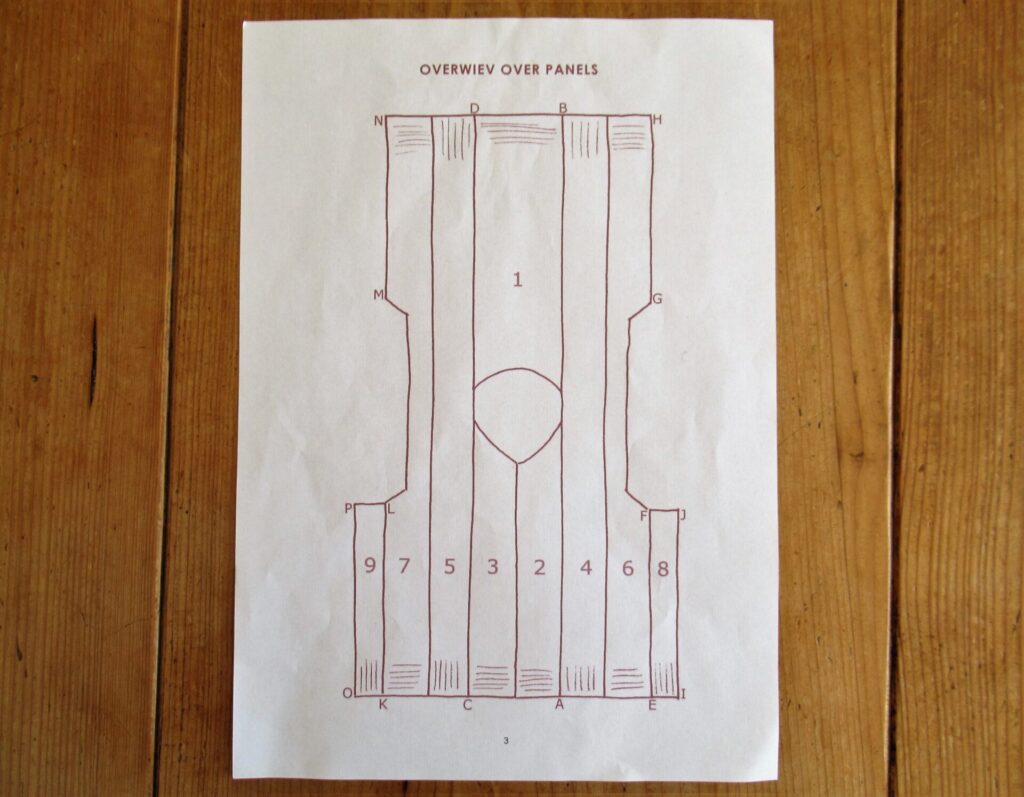
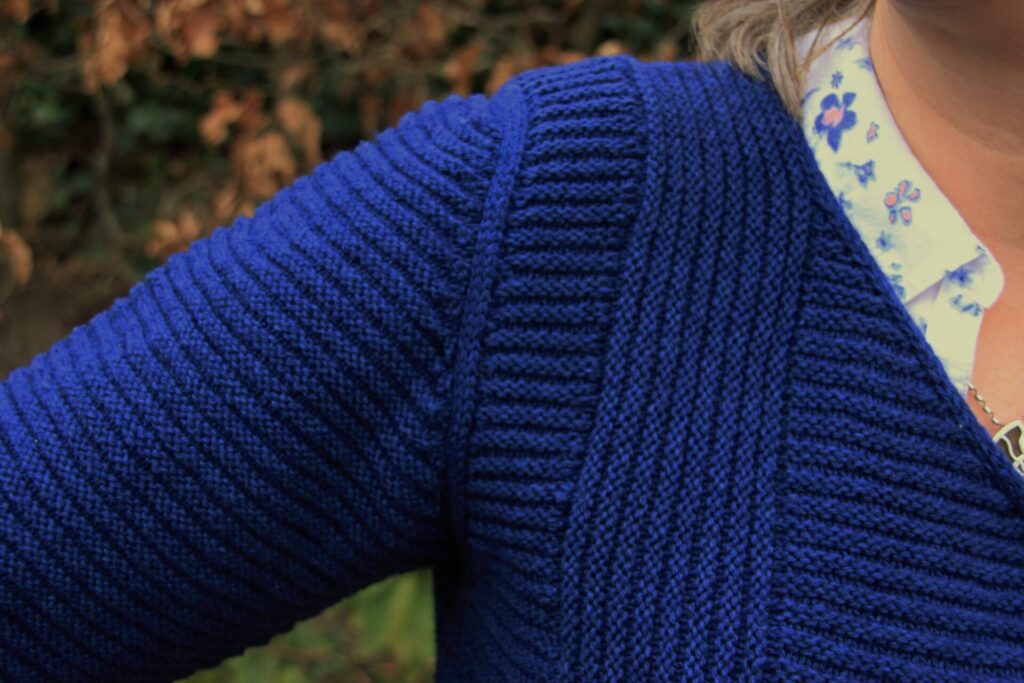
The design is modular and is made up of many panels (hence the name).
Each panel is knit onto the previous one, and the panels are alternately knit horizontally and vertically. The vertical strips end in fans made by knitting short rows.
What helped me knit the fans, was copying the instructions for them onto a separate page, with each step on a new line. I marked the row I was knitting with a sticky note and moved that down after each row. That way I was able to keep track of where I was.
I lengthened the body by 4 cm (approx. 1.6 inches). No problem at all – just added the required length to the first 3 panels and the rest took care of itself. I also enlarged the armholes because I’d heard from several other knitters that they’d turned out rather tight.
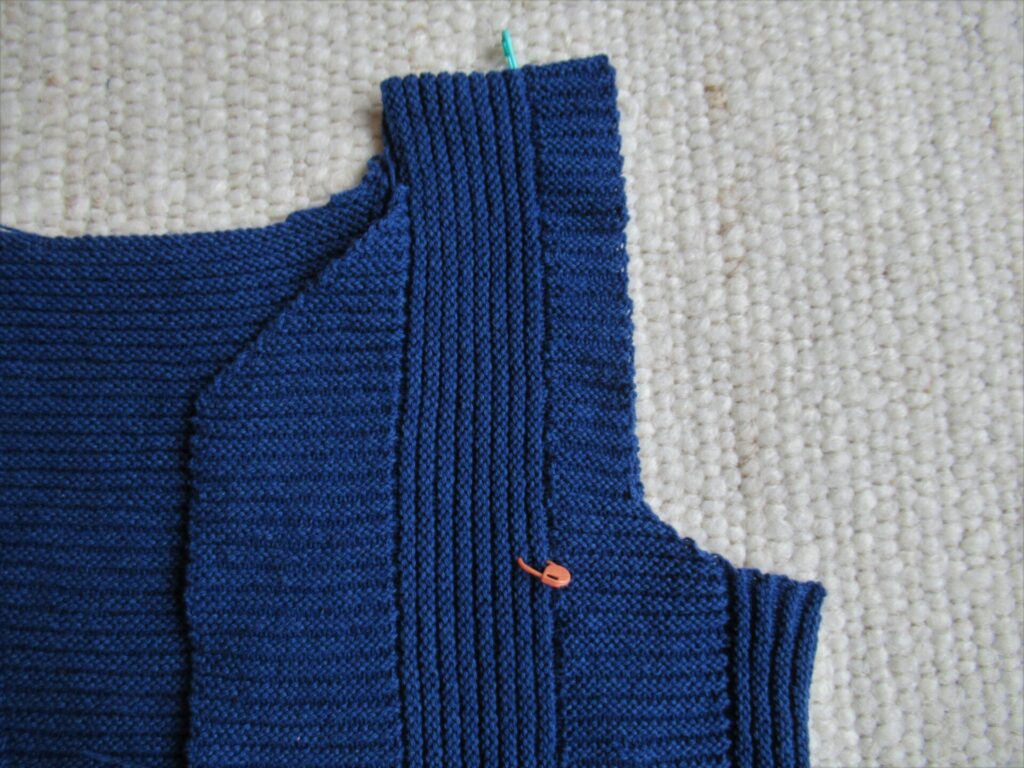
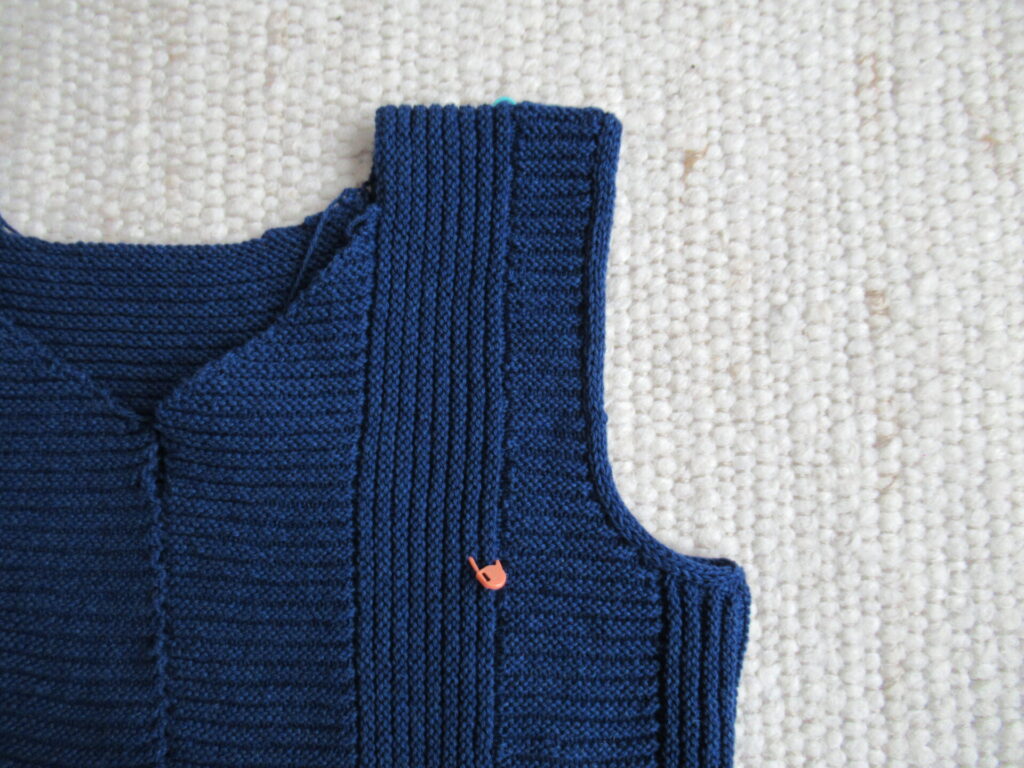
After the body was completed, the armholes were finished with attached I-cords.
Armhole before…
… and after attaching I-cord.
Then stitches for the sleeves needed to be picked up from the I-cord (the sleeves are knit from the top down). That really was a pain at first. But it went a lot better using a crochet hook and slipping the stitches from the hook onto the knitting needle.
Then I had to adapt the sleeve cap to the enlarged armhole. That was a bit of a puzzle, but after several tries I was happy. I used the magic loop method to knit the sleeves.
I’m not entirely happy with that, because it shows all along the middle of the sleeves. I hope the line will fade with washing and wearing. I haven’t had this problem before. Could it be because of the cotton content of the yarn? Or the reverse stocking stitch ridges?
The sleeves are finished with I-cord along the wrists as well.
Finally there was more I-cord to knit – all along the fronts and the neck. First I had to pick up a zillion stitches. Then I cast on 4 extra stitches for the I-cord.
I knit a few inches, saw that the I-cord ‘pulled’ on the front and frogged it. After repeating this several times, I finally found out how to solve it – by pulling the first stitch (on the outside of the I-cord) up a little longer than usual and holding it between my thumb and index finger while knitting the second stitch, to keep it from tightening.
This is the attached I-cord knitting process step by step:
1 – The 4 I-cord stitches are on the left needle, together with the picked-up stitches on the panel. At this stage, the yarn is hanging between the picked-up stitches on the garment and the 4 I-cord stitches. Now the yarn is passed behind the stitches to the first stitch on the right.
2 – Knit 3 stitches (knitting the 1st stitch very loosely and keeping it from tightening by holding it between thumb and index finger while knitting the 2nd stitch). Slip the 4th stitch knitwise, knit the first picked-up stitch along the panel and lift the slipped stitch over this stitch.
3 – Now slip the 4 I-cord stitches back onto the right needle.
Repeat these 3 steps for hours on end, until all of the picked up stitches along the fronts and neck have been used up, meanwhile making button holes along the right front.
Finally, ‘all’ I needed to do was weave in what seemed like an endless number of ends.
I put on some music, and several cups of tea later that was done, too.
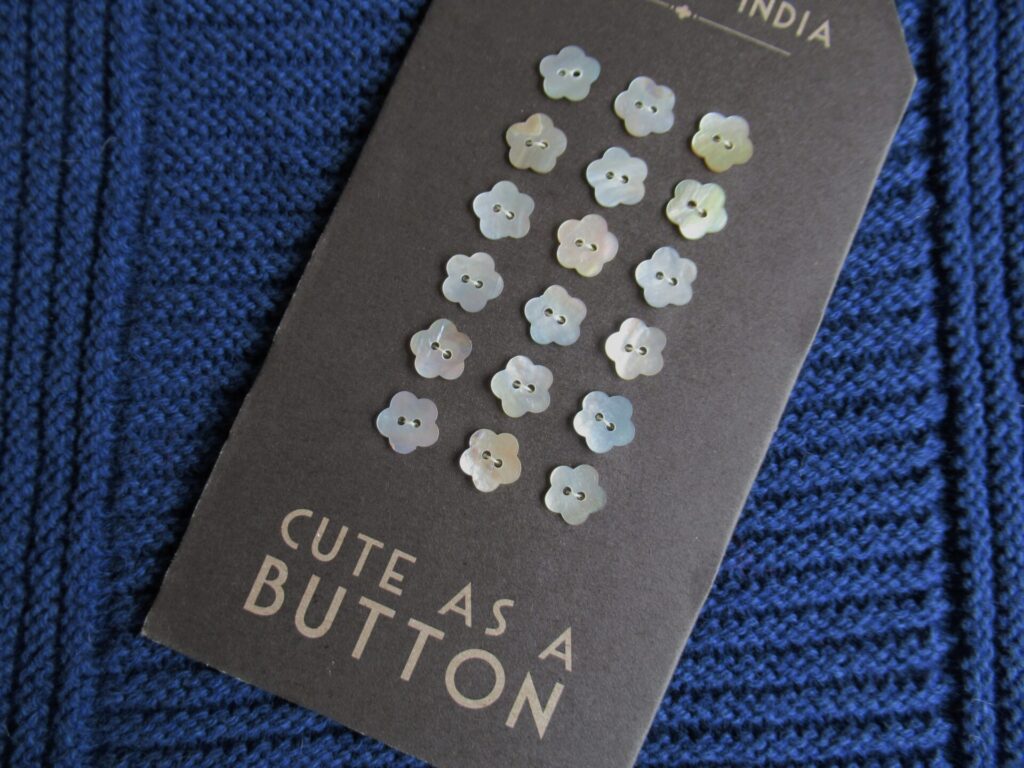
Oh, and let’s not forget the buttons! I happened to have just the right ones, bought long ago in a lovely little shop.
There, all finished!
Here is a close-up of the very special armhole.
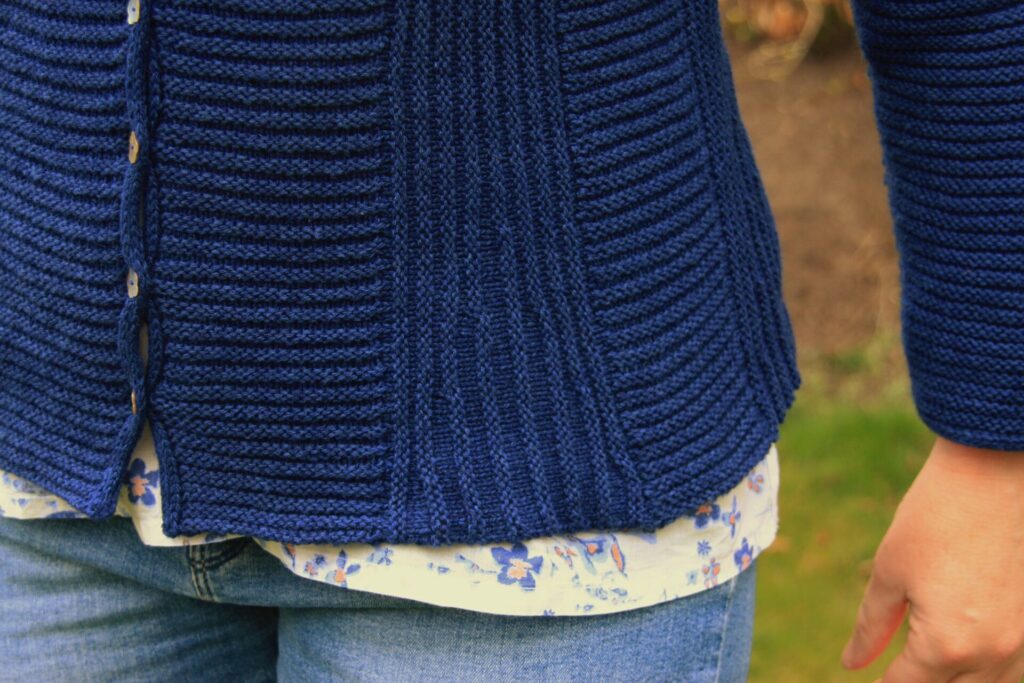
And this is what the cardi looks like from the back.
What helped me through the challenging parts of this knit was:
Finding moments in my week when my brain was up for a challenge (for me especially Saturday mornings)
Cutting the process up into smaller steps, taking a break after finishing a step and giving myself a figurative pat on the back
Using a crochet hook for picking up stitches
Copying difficult bits onto a separate page and keeping track of where I was by means of sticky notes
Relaxing and uplifting music in the background
Having good (day)light
Blogging about it
All in all, I’m happy with the process and happy with the result!
Well, that was a lot of technical detail. Sorry to the non-knitters among you (it’s a miracle you even got this far). If all goes according to plan, my next post will be of more general interest. Bye for now, and hope to see you again soon!