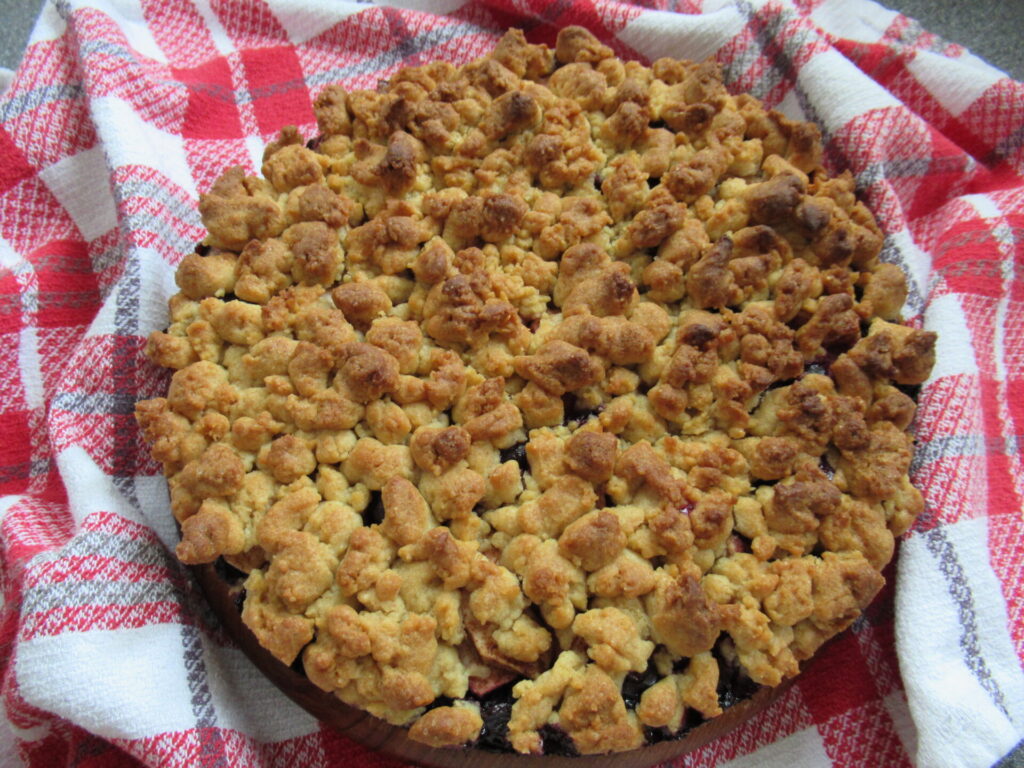
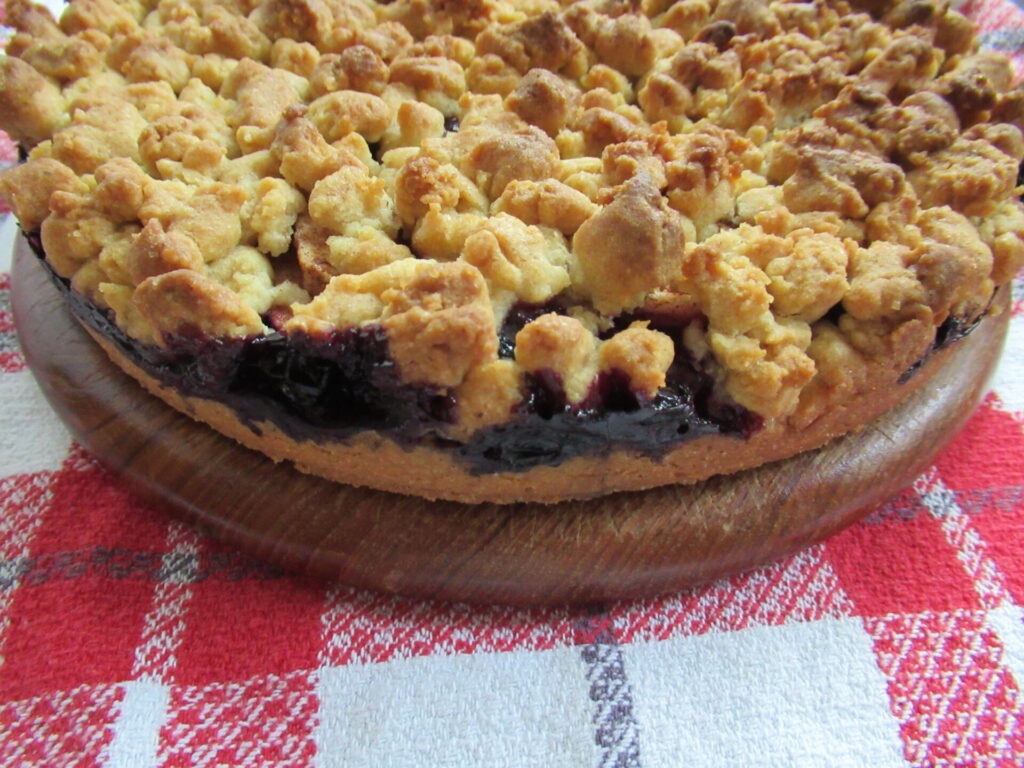
Several of you have asked me for the recipe of the apple-and-blueberry pie I baked at the start of our autumn break. Your wish is my command (sometimes), so here it is. (For those of you not interested in recipes, just scroll on for a ramble and a tiny bit of knitting.)
Apple-and-Blueberry Pie
For a 24 cm/9½” ø spring form cake tin Makes 8-12 slices
Ingredients
200 g unsalted butter
200 g sugar
1 medium egg
½ tsp vanilla extract
200 g plain flour
200 g wholewheat pastry flour
12 g baking powder*
A pinch of salt
2-3 apples (depending on size)
150 g blueberries**
1 level tsp cinnamon
* I like making my own half-and-half mixture. Instead of the two types of flour and baking powder you can use 400 g of ordinary or wholewheat self-raising flour. (Voor mijn Nederlandse lezers: ik gebruik een mengsel van gewone bloem, gebuild tarwemeel en wijnsteenbakpoeder i.p.v. zelfrijzend bakmeel) ** When using frozen blueberries, the pie may take a little longer to bake
Method
Preheat the oven to 200 ˚C/400 ˚F (180 ˚C/350 ˚F fan oven) and grease the cake tin
Cream the butter with 175 g of sugar
Mix in the egg and the vanilla extract
In a separate bowl mix the flours, salt and baking powder. Sieve these dry ingredients and gradually mix them into the butter, sugar and egg mixture to a slightly crumbly dough
Peel, core and slice the apples. Mix the apple slices with the blueberries, cinnamon and remaining sugar
Cover the base of the tin with two-thirds of the dough, pressing it in evenly
Pour in the apples and blueberries
Cover with the rest of the dough, crumbled coarsely
Bake the pie for about 40 minutes
Leave to cool completely before removing from the tin
Enjoy!
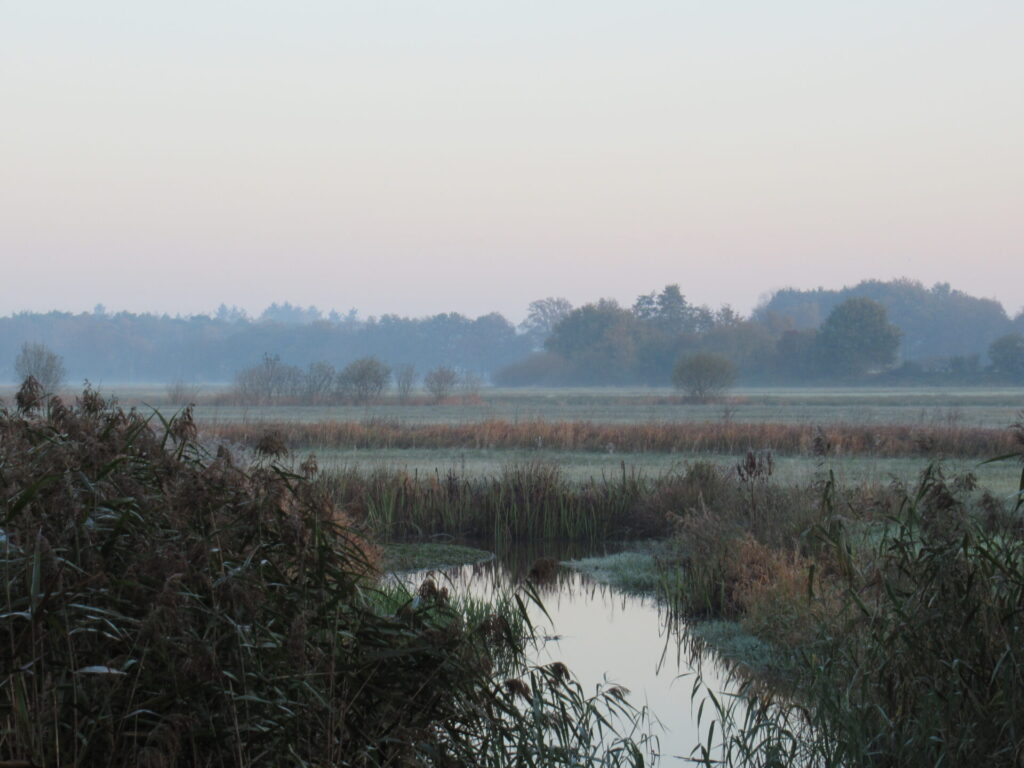
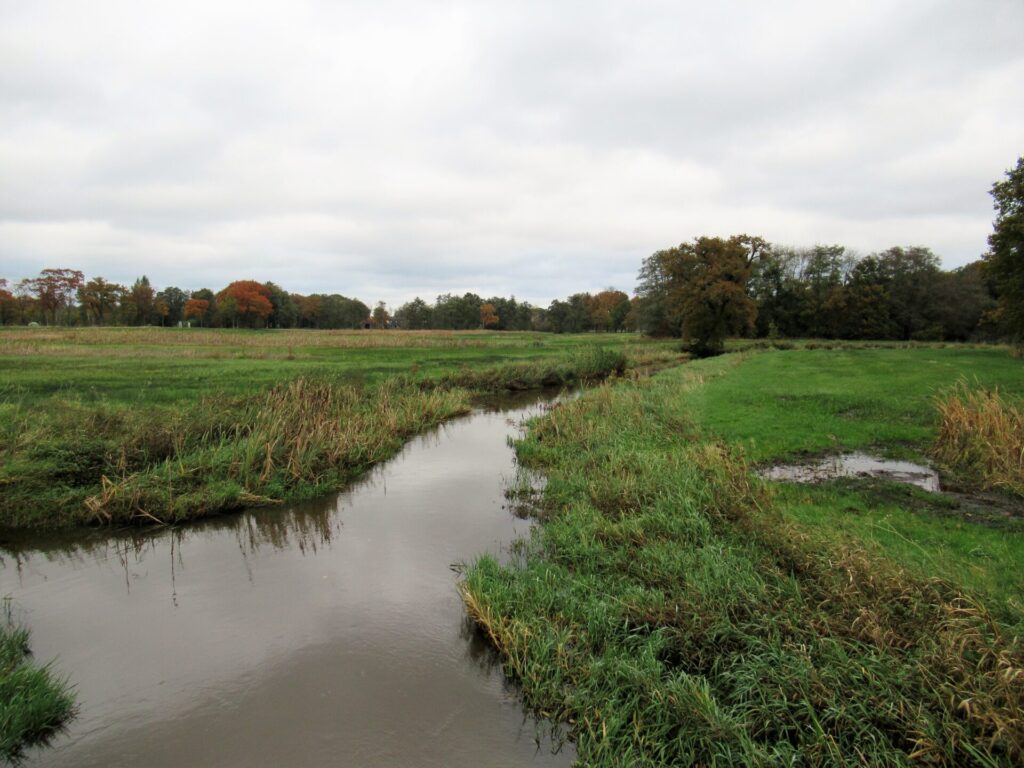
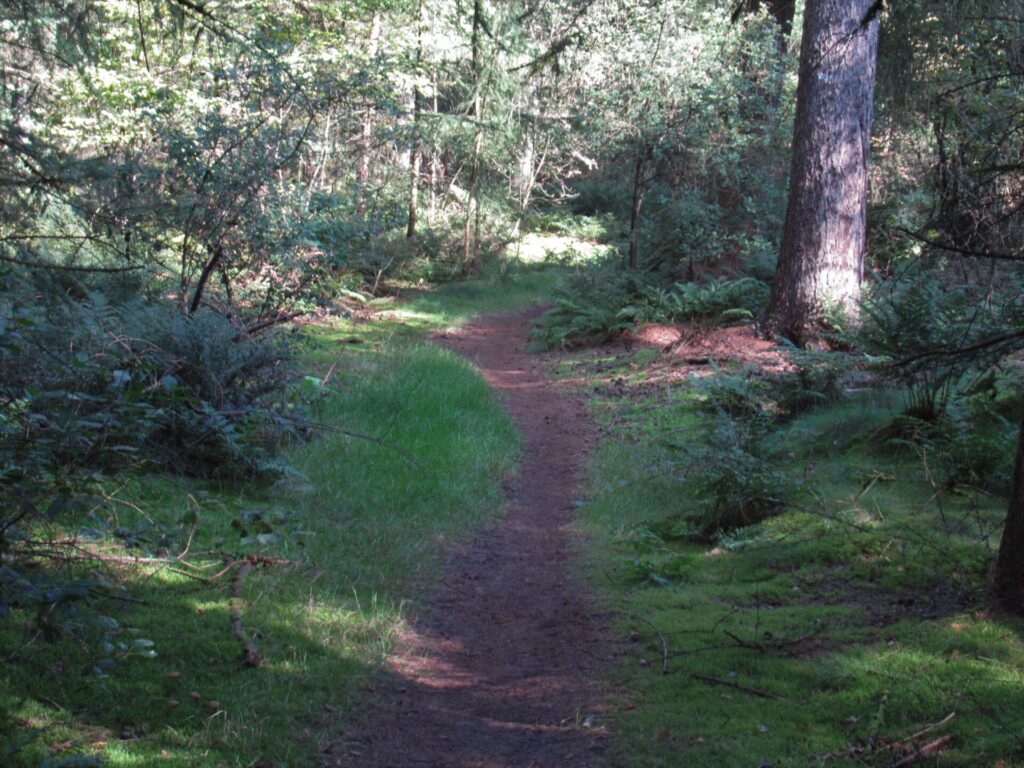
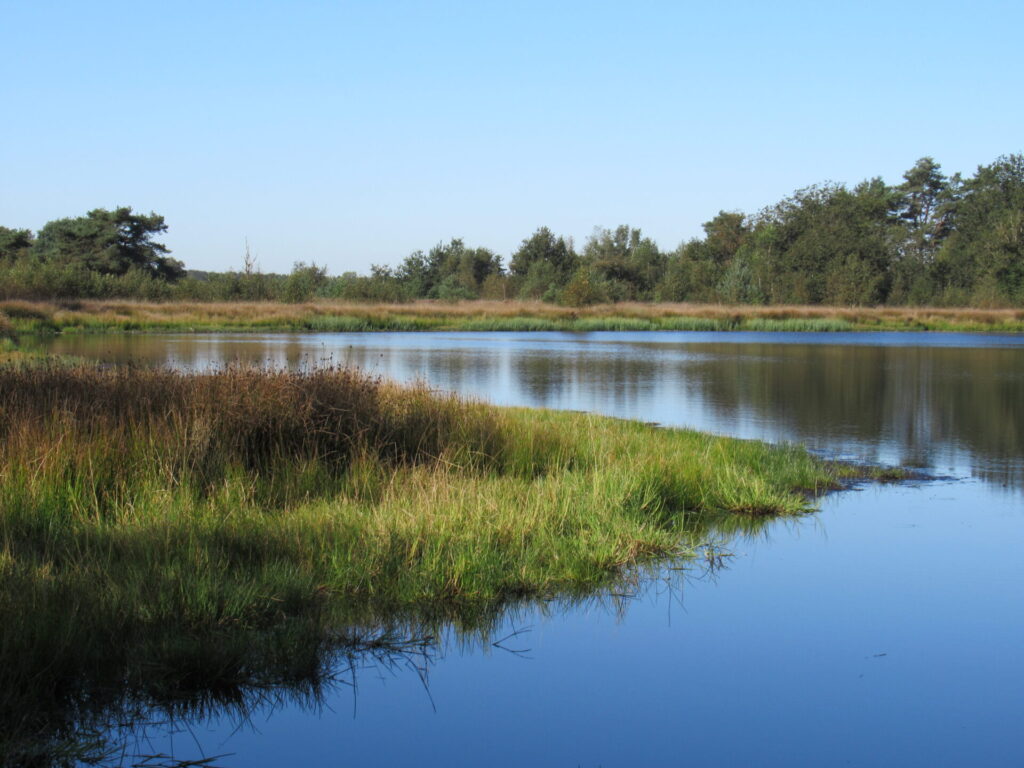
Now, let’s go for a ramble. It’s early Sunday morning in one of our favourite places. There has been a slight ground frost and the light is hazy.
This is a small-scale landscape with a meandering brook, some open marsh and farmland, and some woodland.
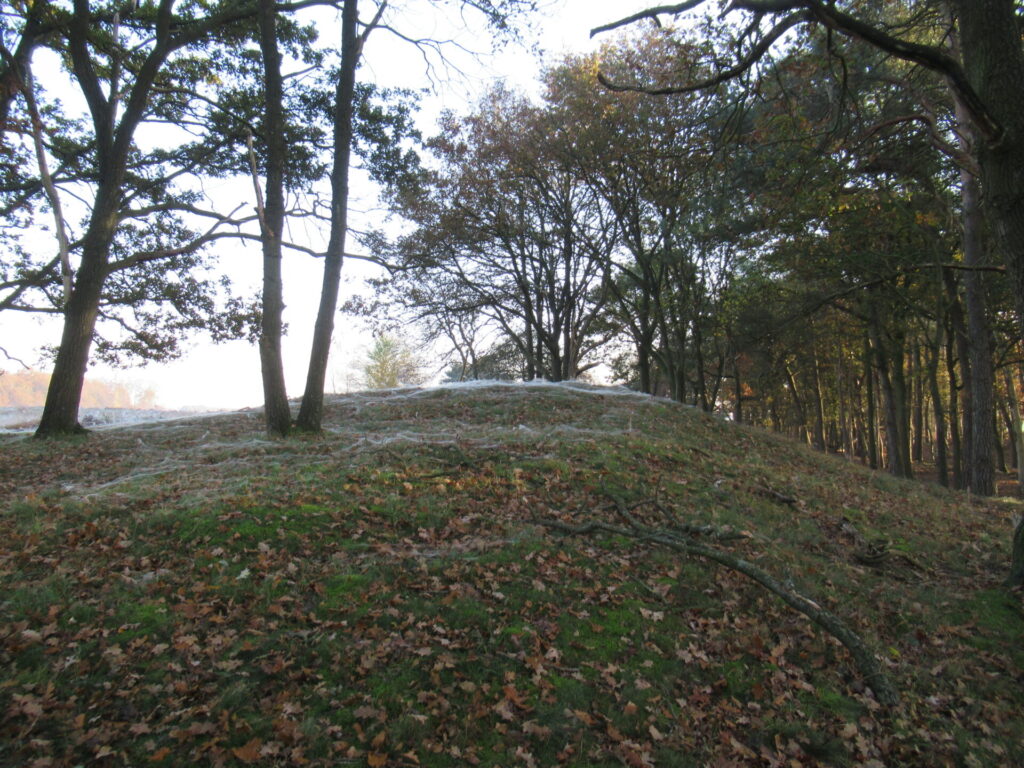
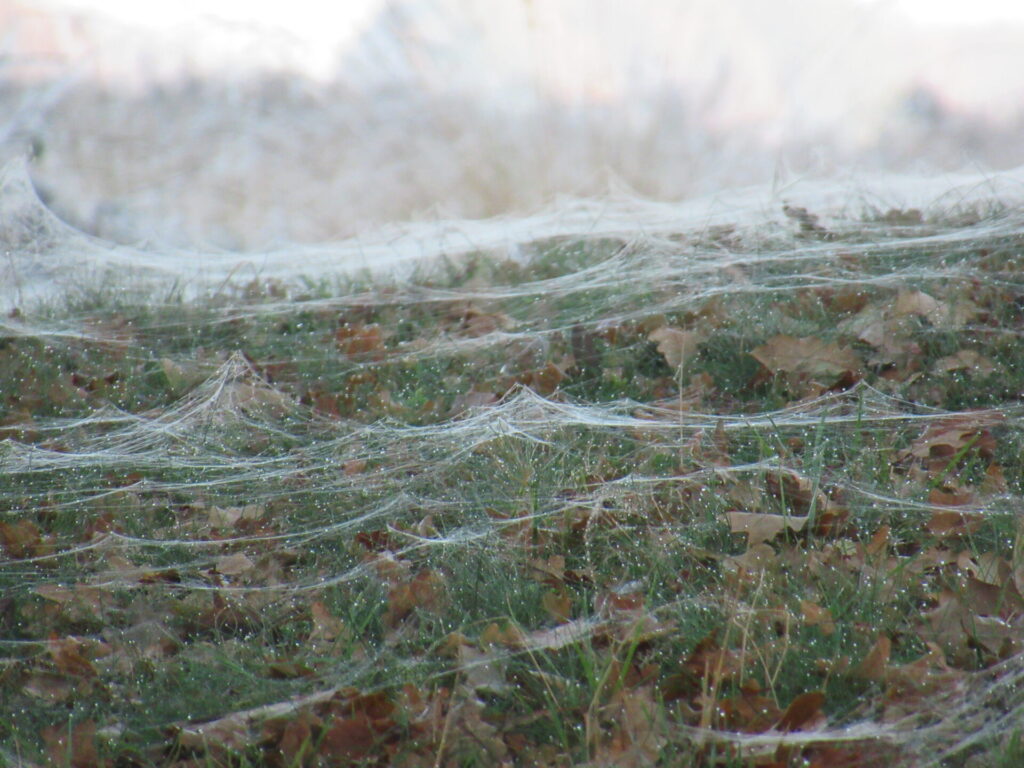
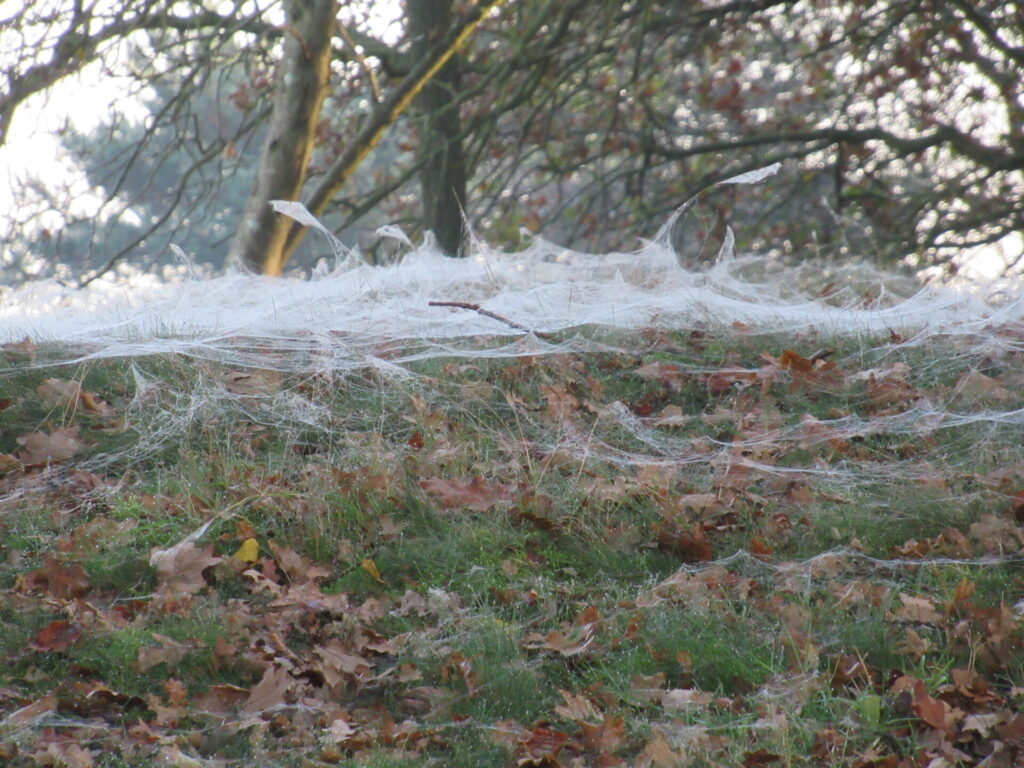
When it is getting a little lighter, the sun slants across a hillock, showing a strange sort of white veil on the top. What is it?
Zooming in it becomes clear that the grass and fallen oak leaves are covered in spiders’ webs.
A slightly eerie but beautiful blanket of spiders’ webs.
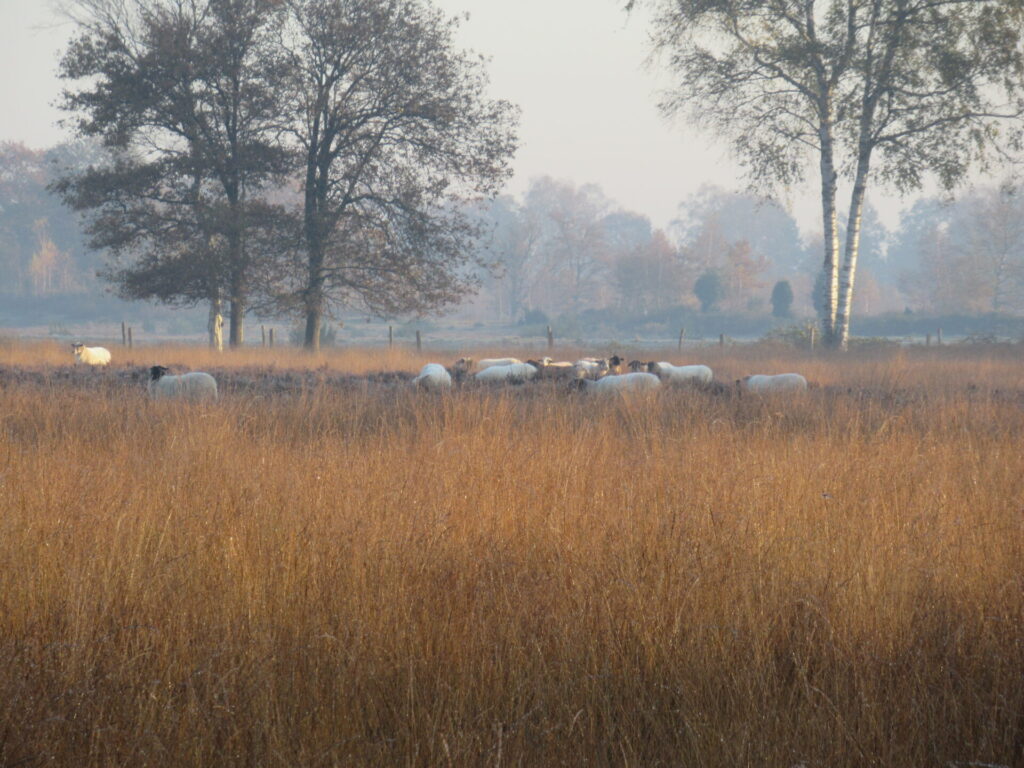
There is some heather as well, although it is partly overgrown with purple moor grass. A small group of sheep is grazing quietly. Not a sound to be heard. The highland cattle that also help keep the heathland open are nowhere to be seen today.
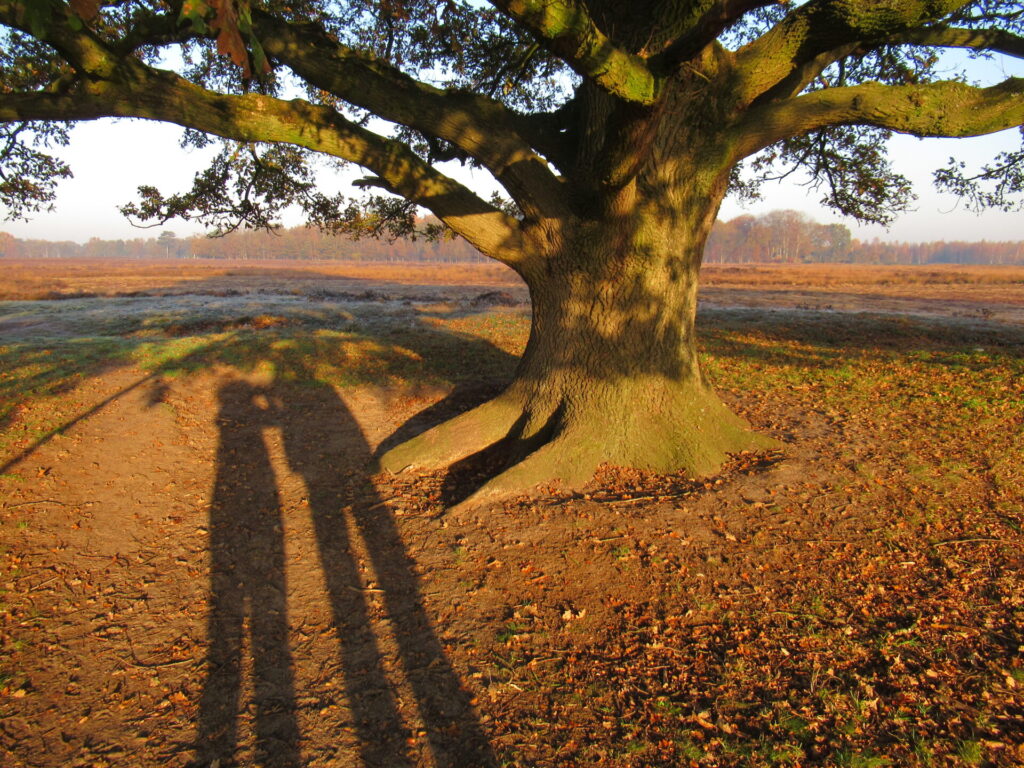
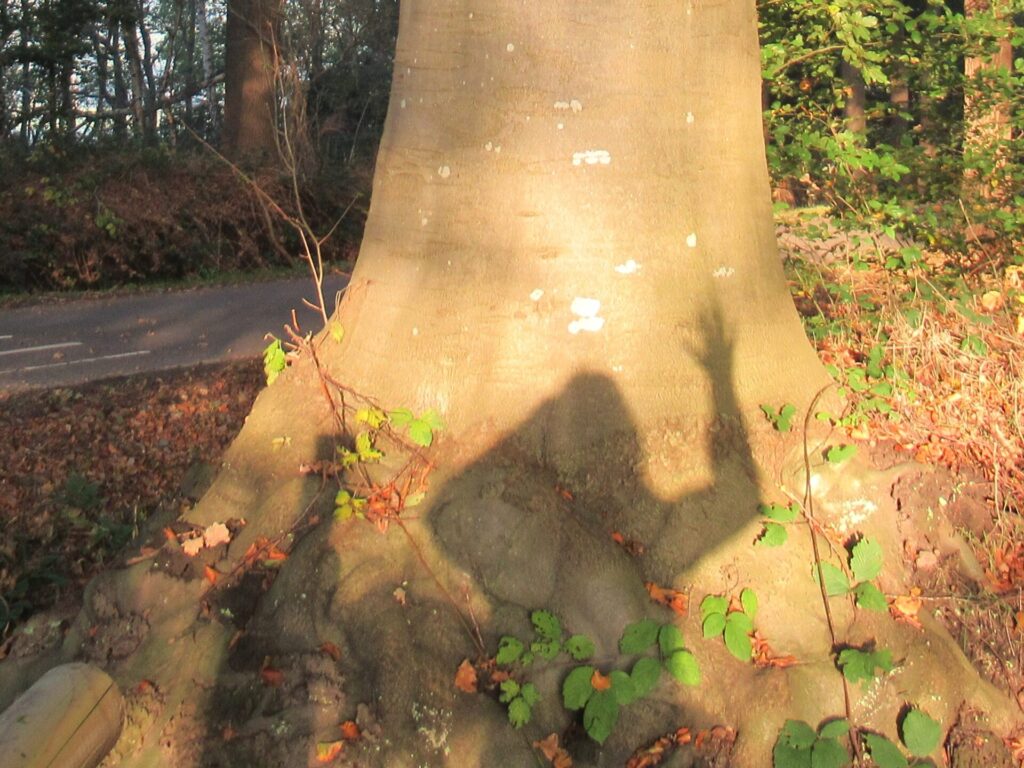
It is getting lighter, but the sun is still low, casting elongated shadows.
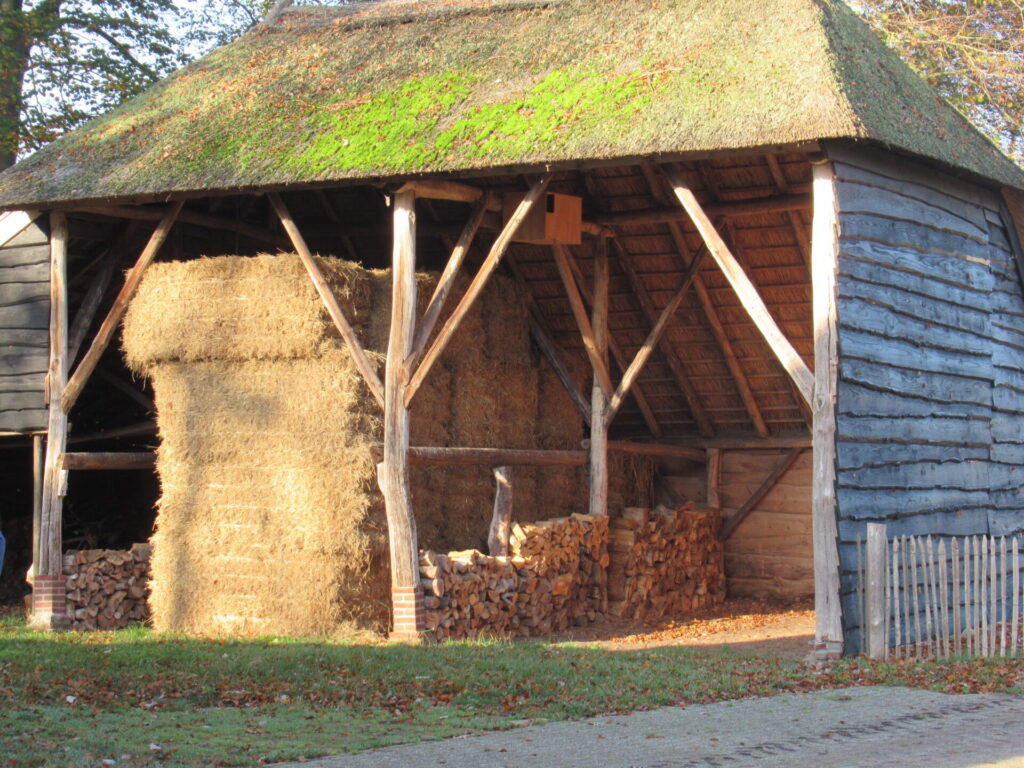
Towards the end of our ramble, the sun is fully out, giving the hay and wood in a barn a golden glow.
Time seems to stand still here.
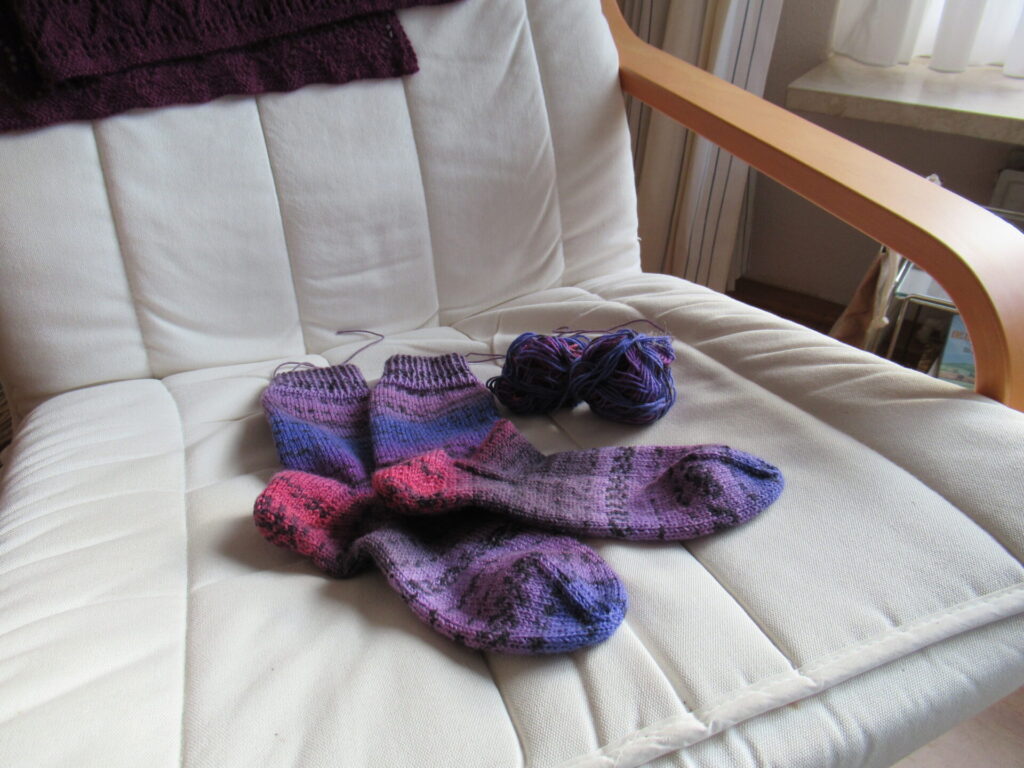
Not so at home. On the knitting front, I’m in the finishing stage of all kinds of things. I’ve just finished another pair of socks. Now there’s only the ends to weave in and then I can try out my new sock blockers.
And what’s that hanging over the back of my knitting chair…………?
Every time I start writing a blog post, I close my eyes and sit quietly for a while. To focus on what I want to show and say, but also thinking of you reading it. Sometimes it’s hard to find the right words.
Over the past two weeks I’ve been watching BBC’s Autumn Watch. At the start of this year’s series, presenter Chris Packham said that they hoped their nature images and stories would be like a warm and colourful blanket for viewers in these difficult and uncertain times. I don’t remember exactly how he phrased it, but that was the drift.
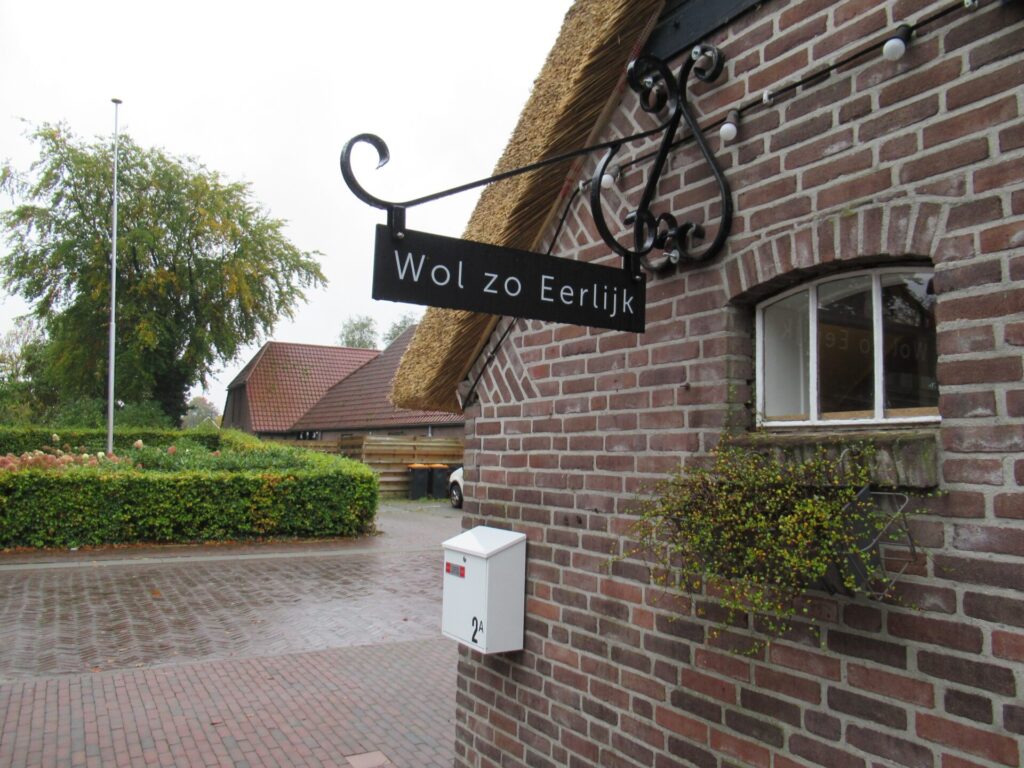
I hope that in my own modest way, I can do something like that here, too. I can’t offer you spectacular footage of badgers, seal pups or otters. What I can offer is a colourful and comforting story about a yarn shop. Do you remember the tiny yarn shop we visited in July? Well, it has grown. Look!
The yarn shop is housed in part of a former farm building. Until recently, the rest of the space was taken up by a bicycle shop. When that closed Saskia grabbed the opportunity to enlarge her premises. Originally her shop was only 15 m2, now it has almost tripled in size. It still isn’t huge, but it is not so tiny anymore either.
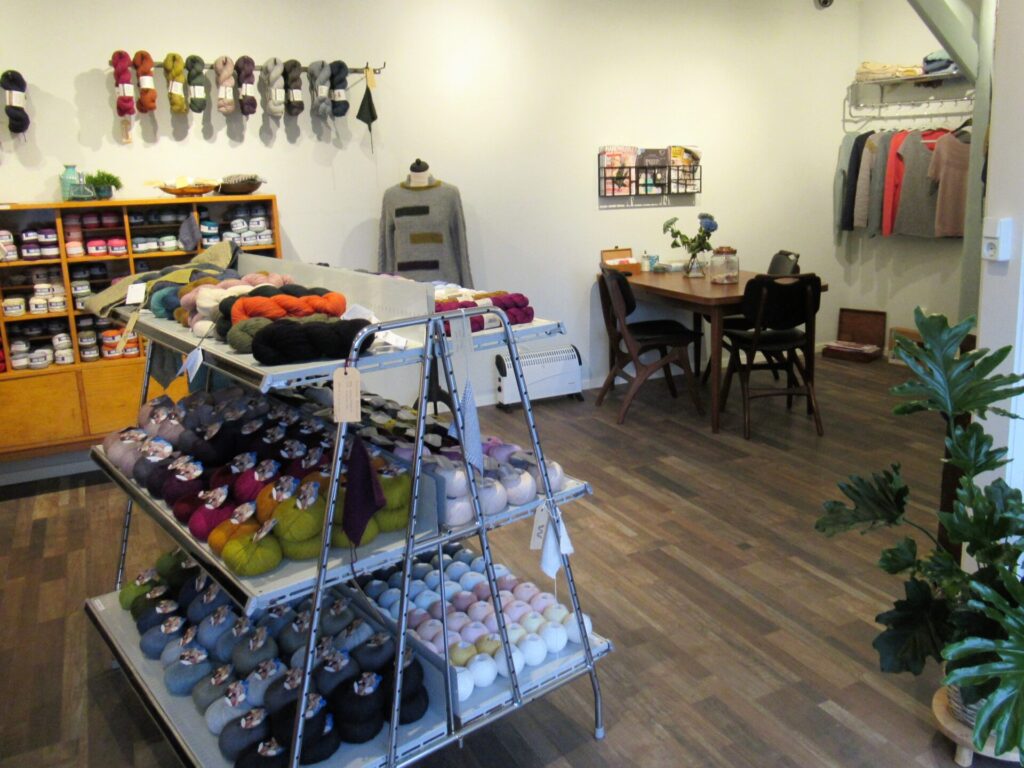
A few days before our Autumn Break, I was on the doorstep early in the morning, just before the shop opened, hoping for a quiet moment without other customers. I was lucky and had the shop to myself for a bit, so that I didn’t have to choose yarn in a hurry and also had the time to take pictures.
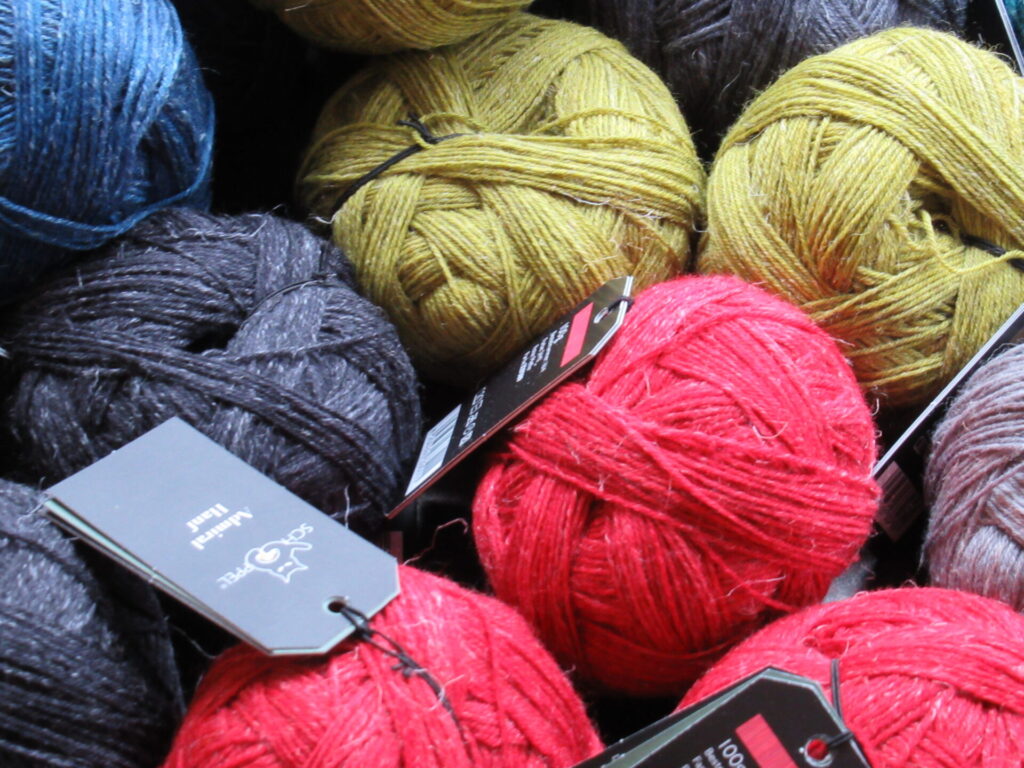
Wol zo Eerlijk still specializes in organic, sustainable and fair-trade yarns. The main components of these yarns are wool, cotton, linen or alpaca. But some contain more unusual fibres, such as yak, nettle or hemp. The sock yarn below is a blend of wool, biodegradable nylon (huh?!) and hemp.
The beautiful colours are a feast for the eyes – some really autumnal:
This is an organic wool-and-cotton yarn from Portugal.
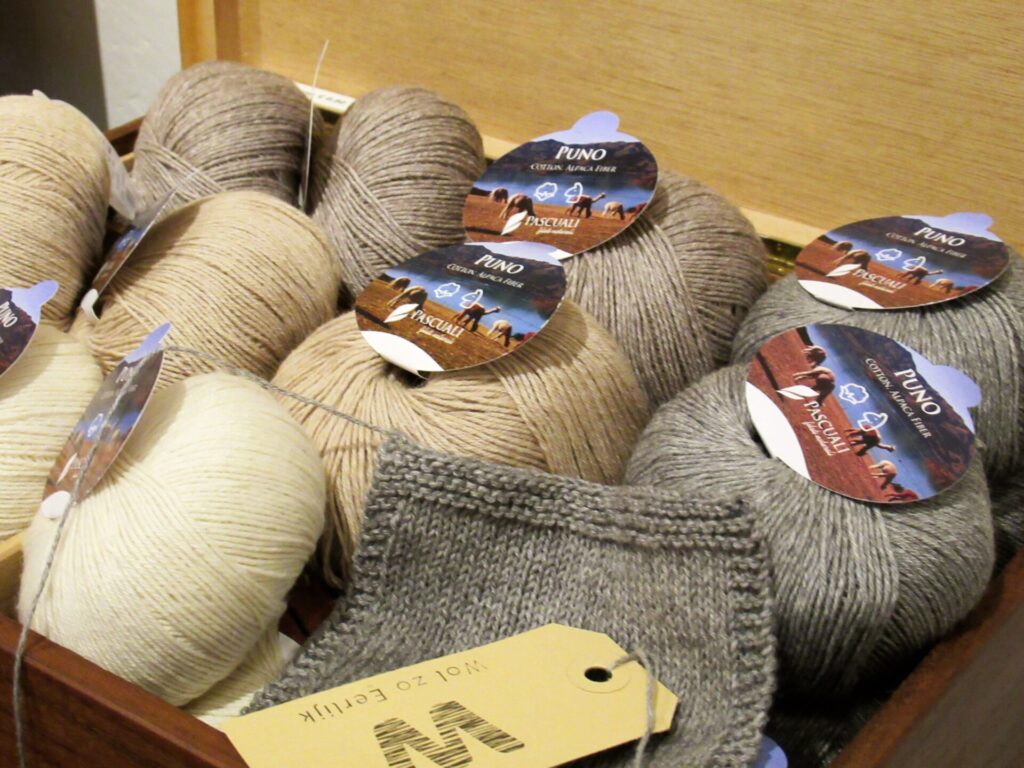
There are also many yarns in lovely neutrals. As my own colouring is becoming more and more ‘neutral’, I don’t wear these shades anymore. But that doesn’t mean that I don’t like them.
This is a very soft blend of organic cotton and alpaca:
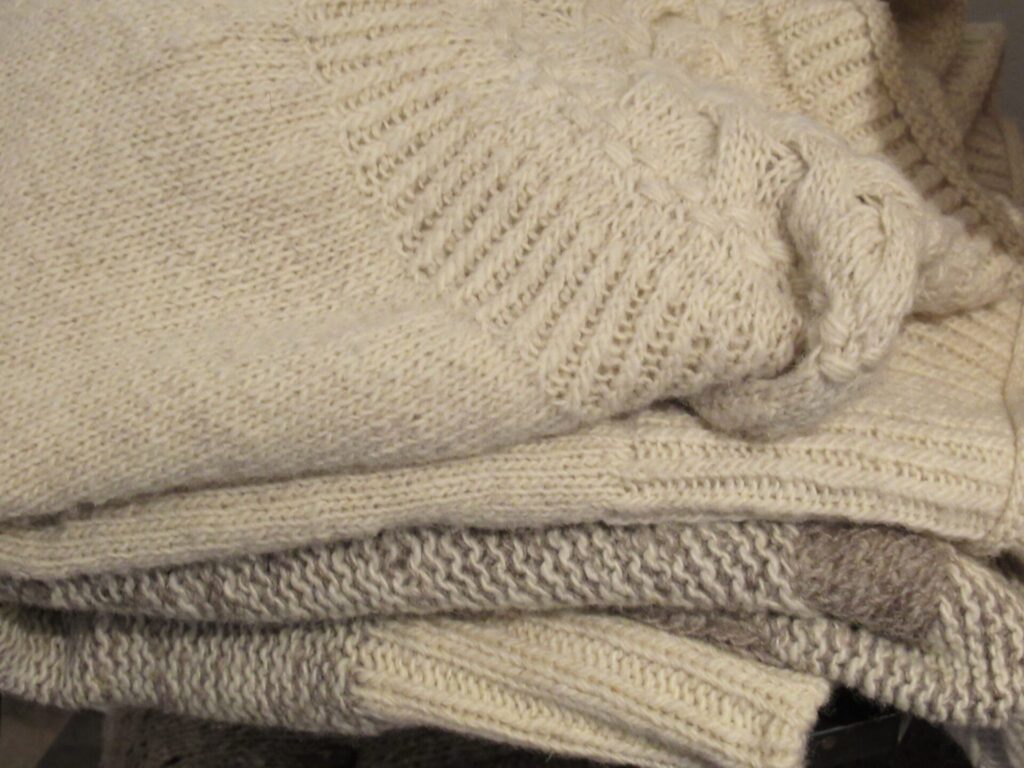
Among the shop samples, there is also a stack of sweaters in off-white and grey.
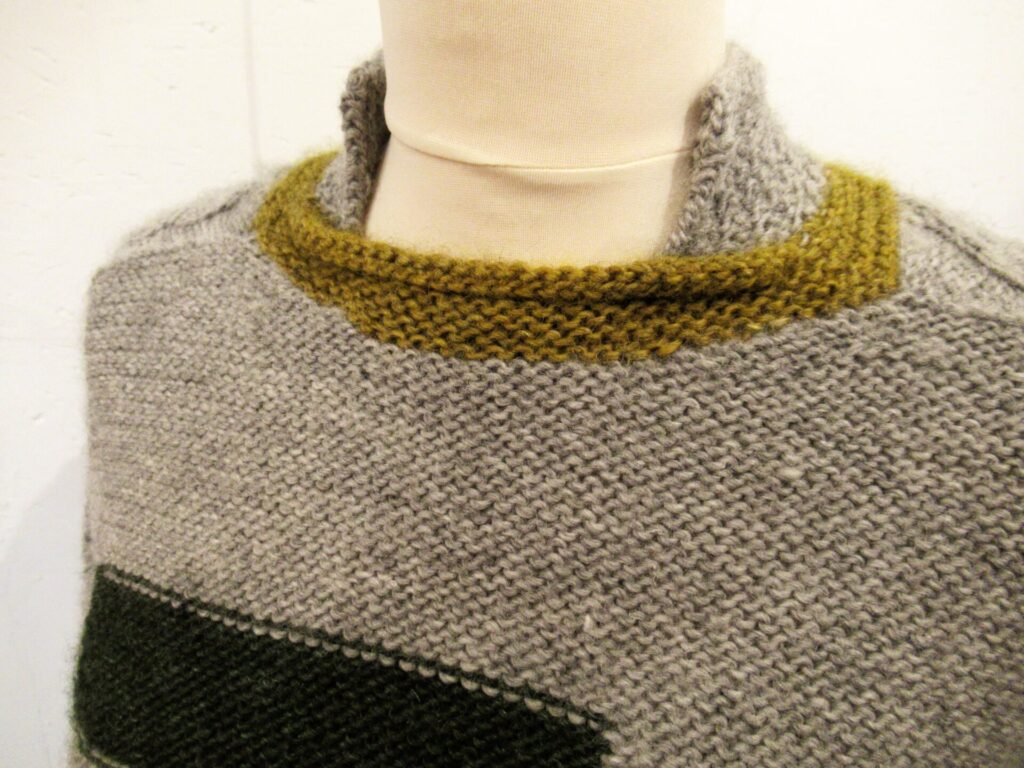
And next to that is a mannequin wearing a sweater with a very interesting neckline.
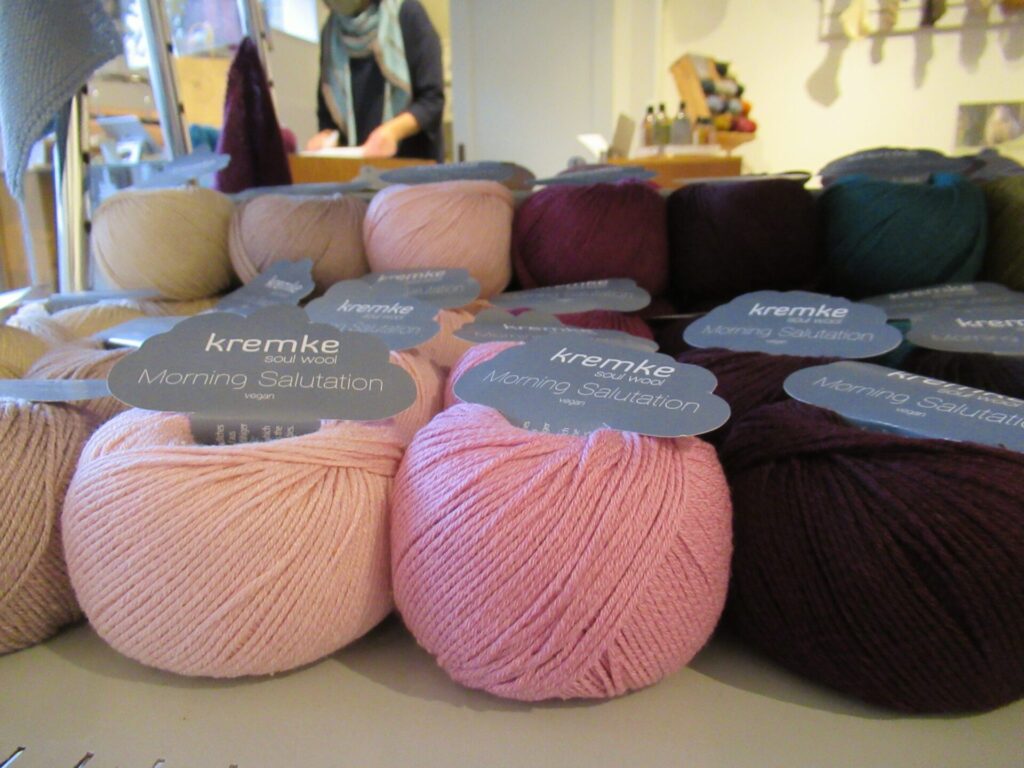
While I am browsing around the shop, Saskia is processing online orders. You can see her at work in the background, over the top of this vegan yarn composed of cotton and Lyocell.
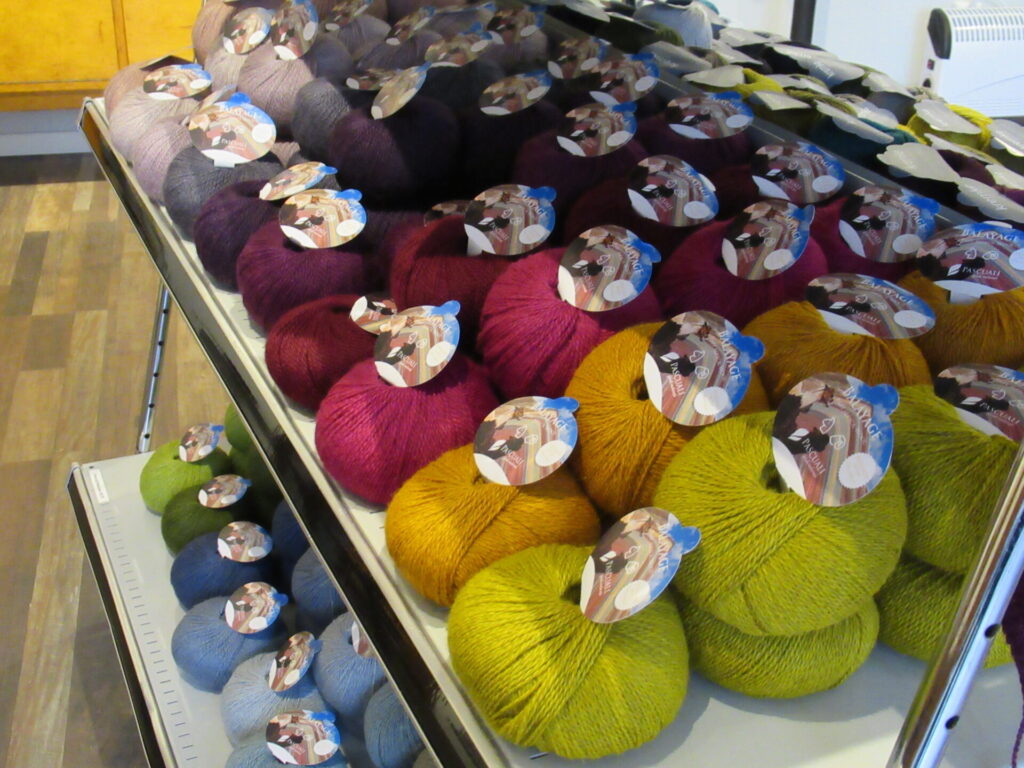
On the other side of the display is this rainbow of colours. It’s a new yarn called ‘Balayage’ – a very soft wool-and-alpaca blend and one of the reasons for my visit.
Beautiful, isn’t it? It’s so nice to be able to browse around, see the colours in person and have a chat. It feels surreal and uncomfortable that there is a plastic screen between us at the till and we are both wearing face masks. I don’t go out enough to get used to that, but if we can keep the virus from spreading this way and keep ‘non-essential’ shops like these open, you won’t hear me complaining.
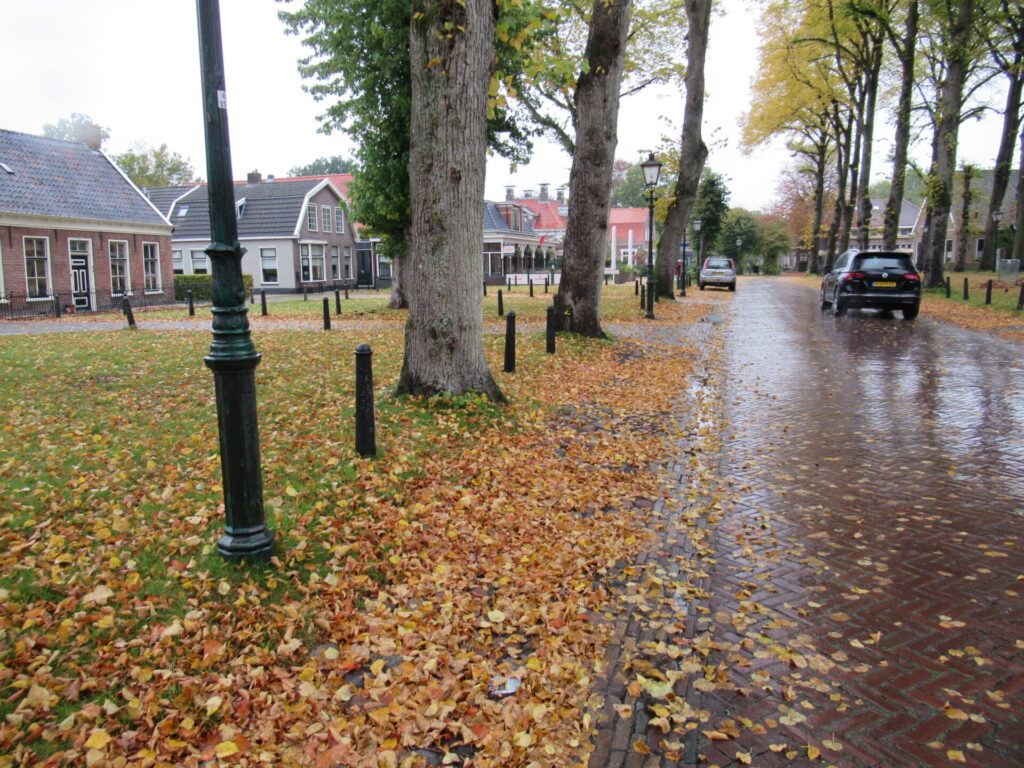
After my visit to the shop, I had a quick stroll through the old part of the village. (Is there such a thing as a quick stroll? It was quick because it was raining and I needed a loo. That can be a bit of a problem with all restaurants and cafés closed.)
Unlike some other villages, Vries still has a good range of shops, with two clothes shops, a supermarket, an antiques seller,
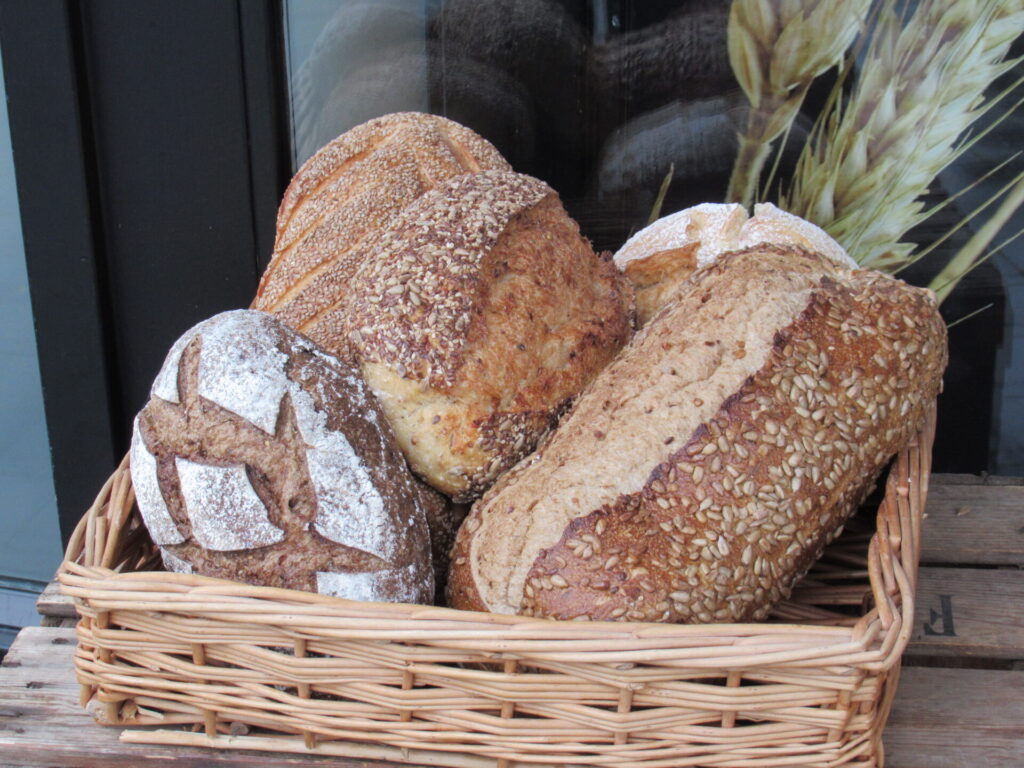
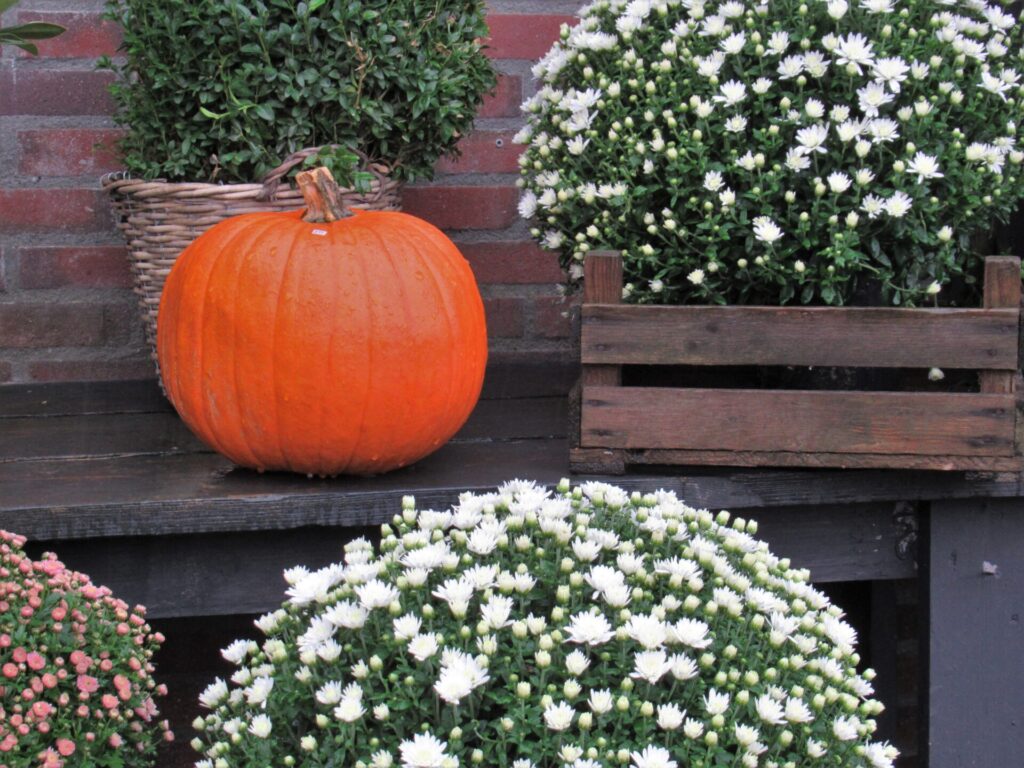
a butcher, a baker,
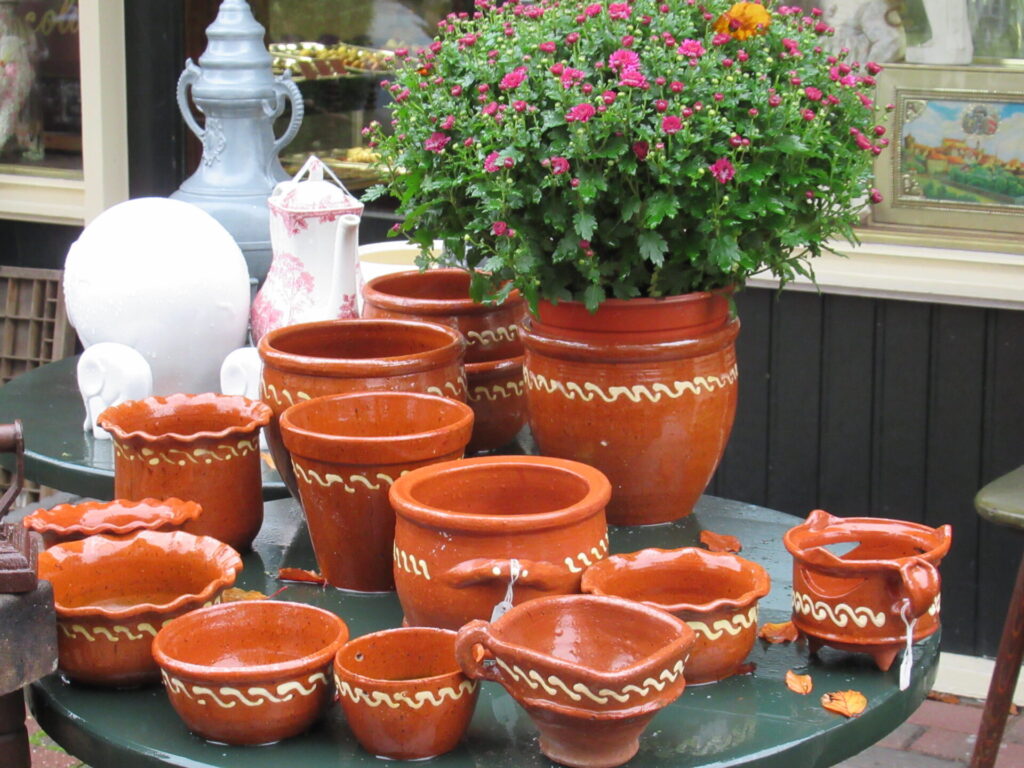
and a flower shop with a lovely display of crysanths and pumpkins outside.
And best of all a not-so-tiny-anymore yarn shop!
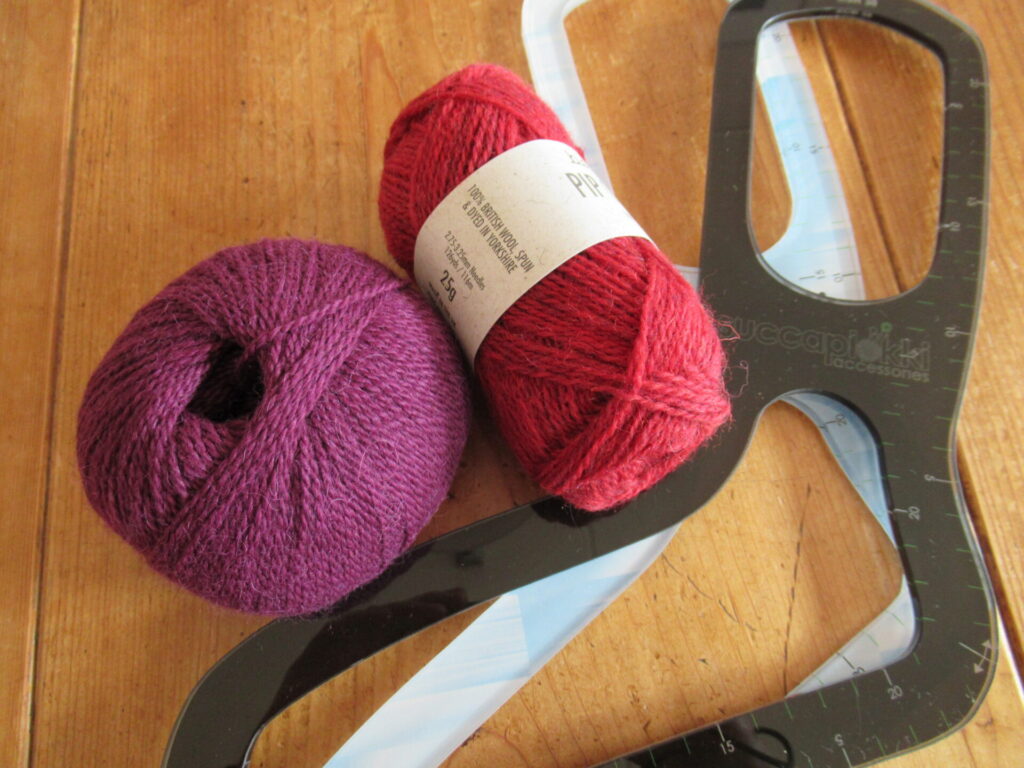
This is what I came home with:
Several balls of purple wool-and-alpaca yarn for a scarf that knits up quickly and is almost finished now.
Two 25-gram balls of red wool from Yorkshire for a project that is nothing but an idea yet.
Sock blockers in two different sizes that have been on my wish list for quite a while and will be tried out as soon as I finish my current pair of socks.
More about these over the coming weeks or months. All the best, stay safe, and see you again soon! xxx
This week, we’re having an autumn break and I’m greeting you from our holiday cottage. Well, it’s our own home, actually. But we’re acting as if, saying things to each other like, ‘It’s a lovely holiday cottage, isn’t it?’ ‘Yes, it is. Not as tidy as I would have liked it, but it’s reasonably clean and the bed is very comfortable.’
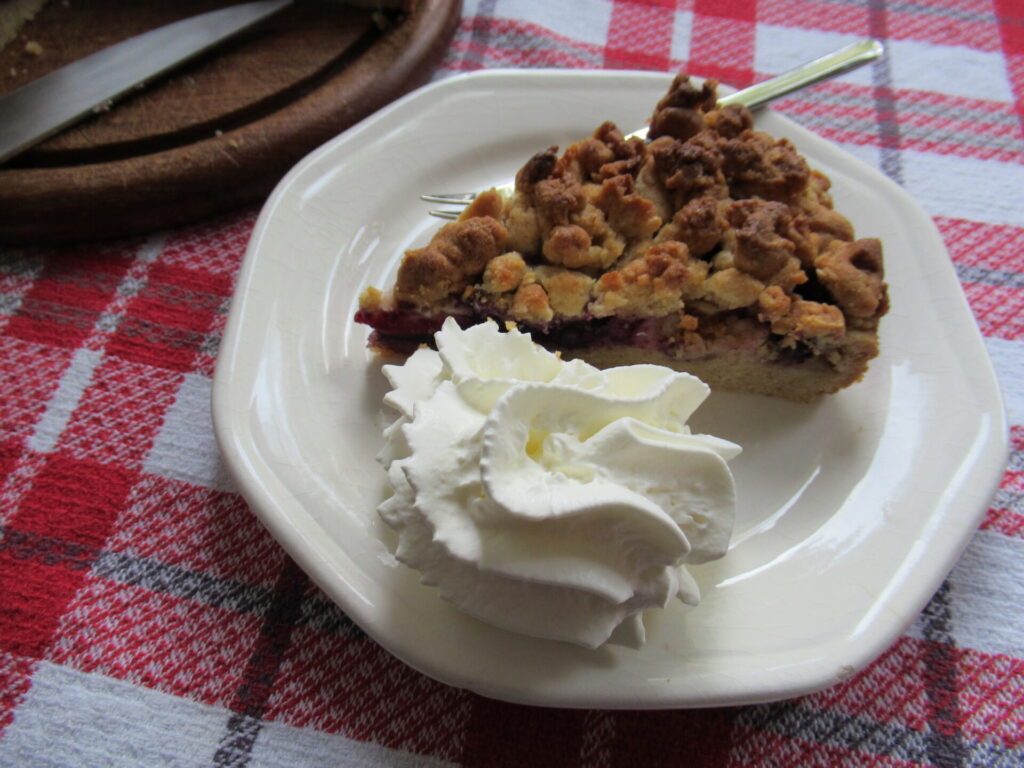
Other holidays usually involve a Konditorei or a Patisserie, but as we’re staying home and don’t have any of those around, I also play acted at being a pâtissier and baked an apple and blueberry crumble pie on our first day off.
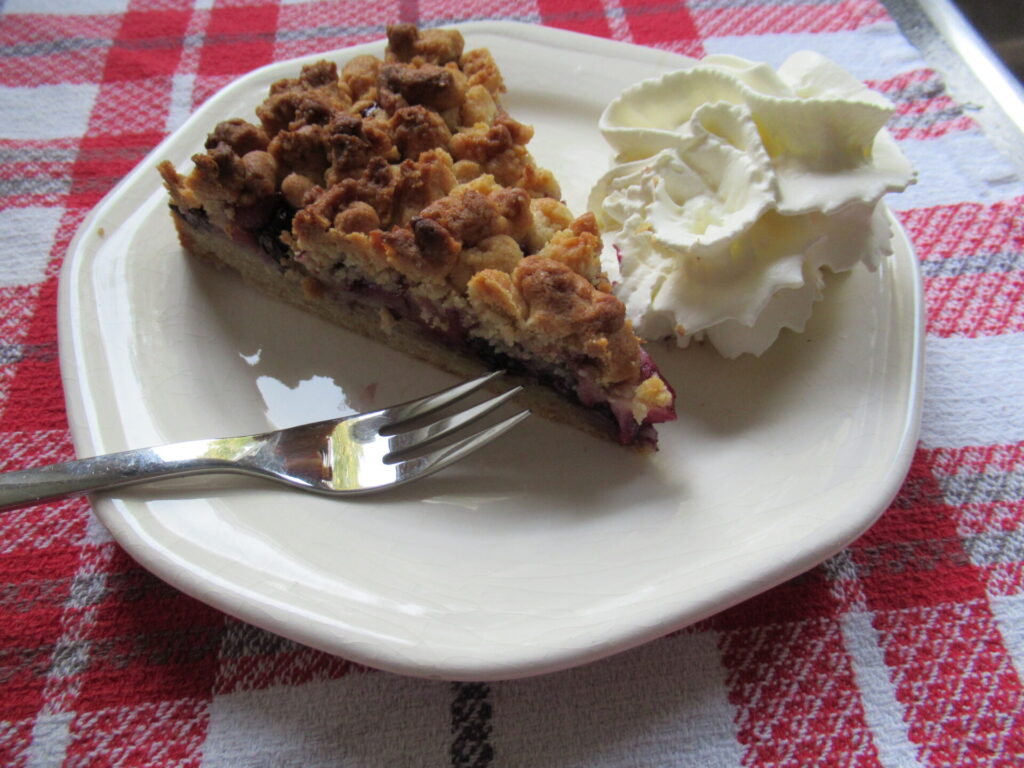
I’m sending you a virtual slice. Can you smell that sweet, warm, comforting apple and cinnamon aroma?
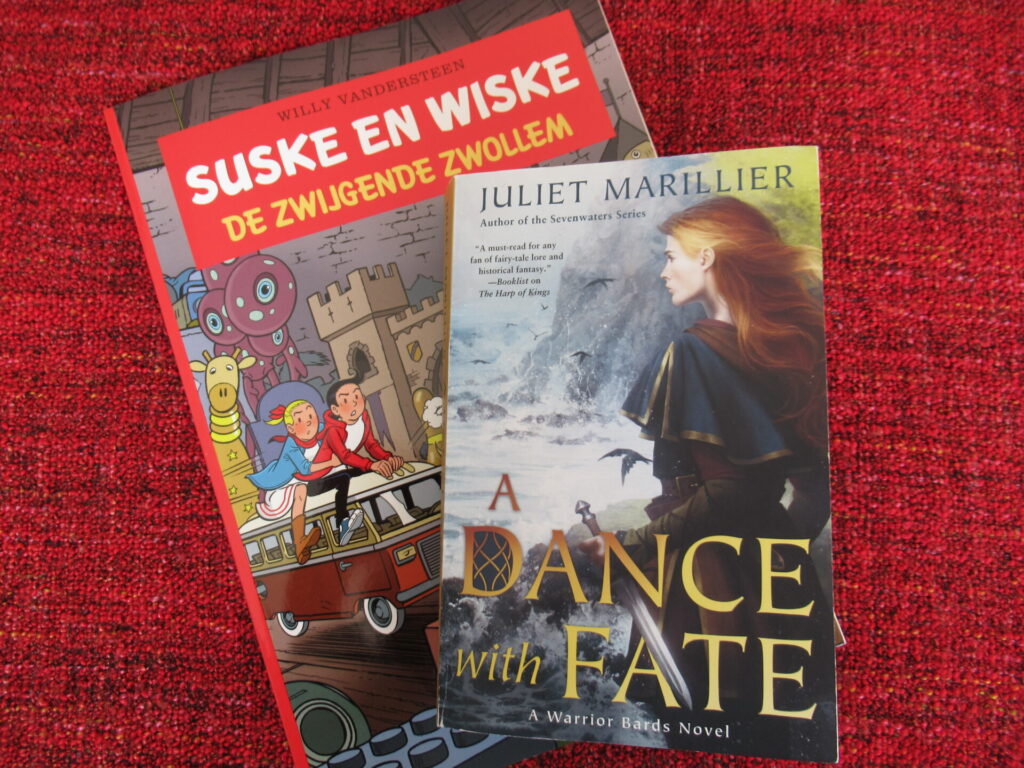
We’ve been working all through the summer, and the main aim of this week is to rest, relax and recharge. For us, some of the best ways of doing that (apart from eating apple pie) are going for walks, reading,
knitting (that’s just me),
and generally loafing around. My knitting is all purple this week – my umpteenth pair of socks and a scarf. More about those soon. Now I really want to share some of our walks with you. They are in some of my favourite places. But I don’t want to spend too much time at the computer, so I’ll mainly let the pictures speak for themselves.
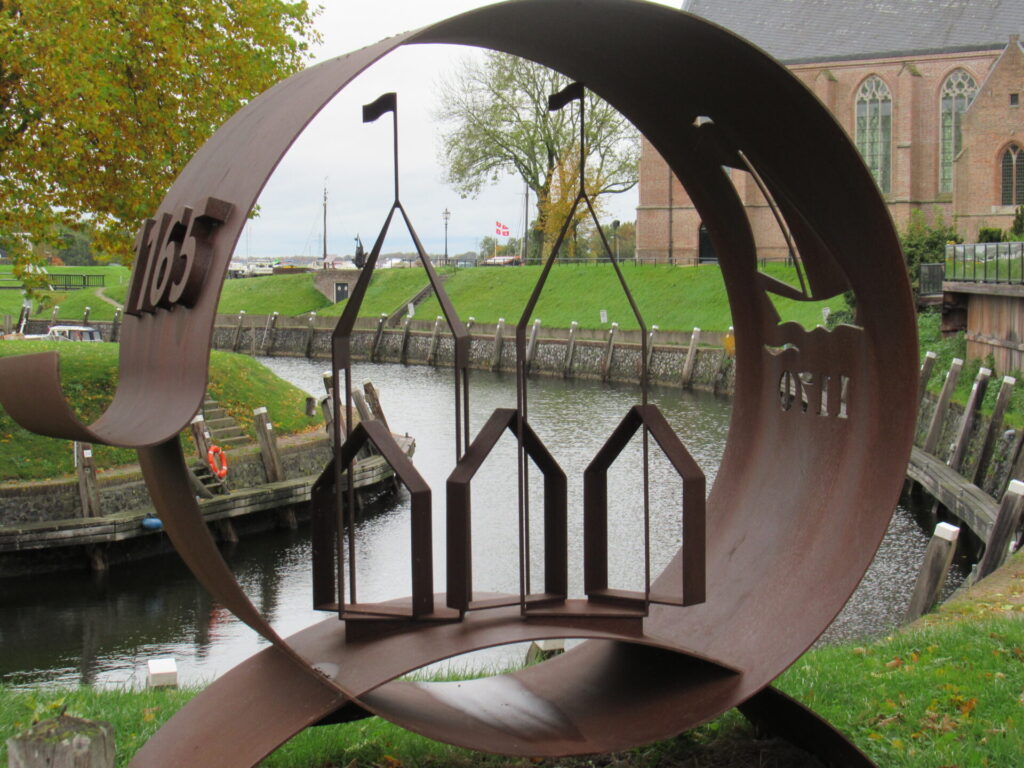
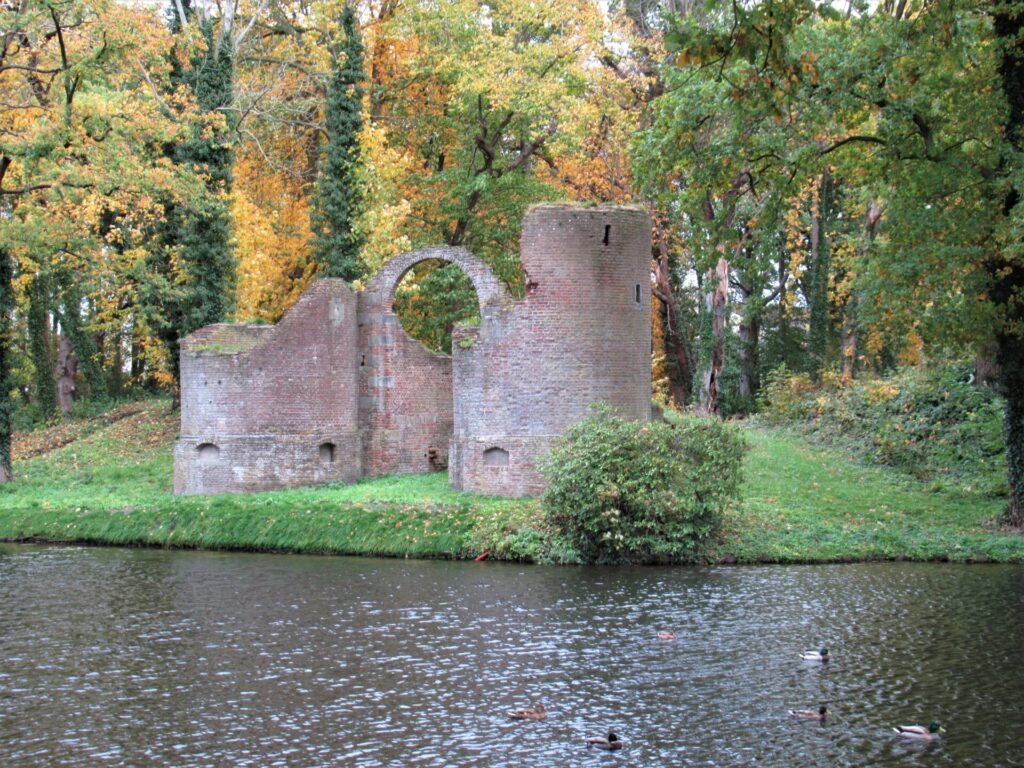
Our first walk takes us to Vollenhove, the lovely little town where I sometimes come to buy a pair of good, old-fashioned, sensible shoes. Vollenhove is a former seaside town now surrounded by land. There is still a small harbour for pleasure boats.
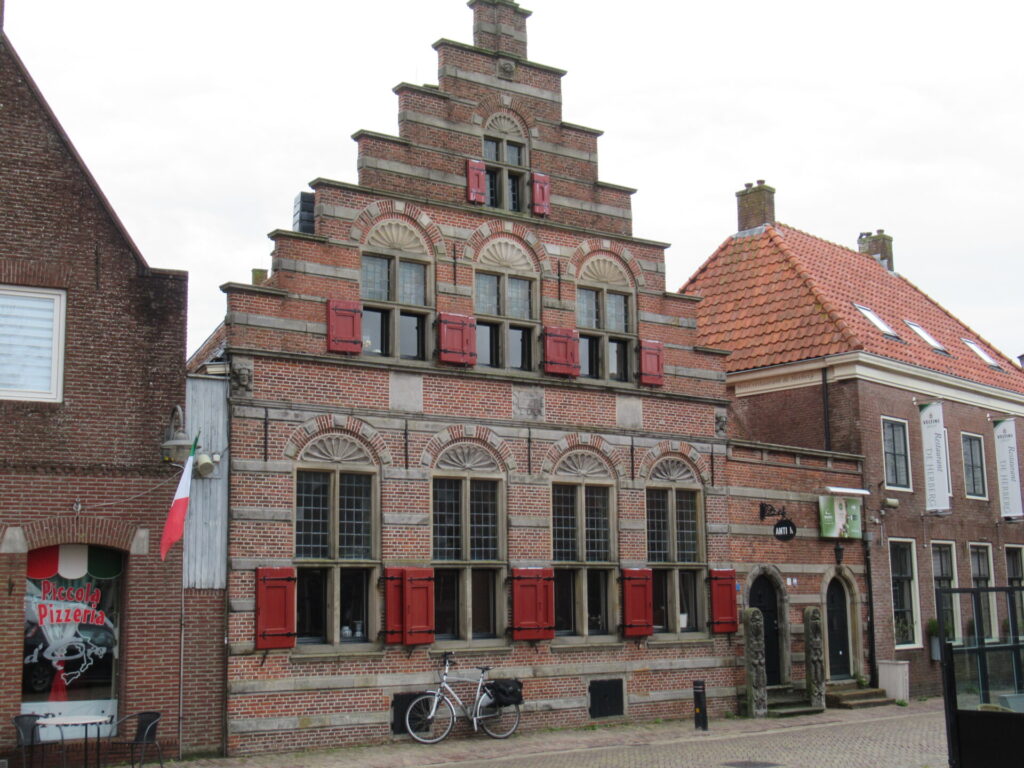
It has a rich history, with some old houses beautifully maintained…
… and others a little less well kept.
Vollenhove also has a really, really beautiful walled garden. Maybe we can come back and visit that in spring or summer next year.
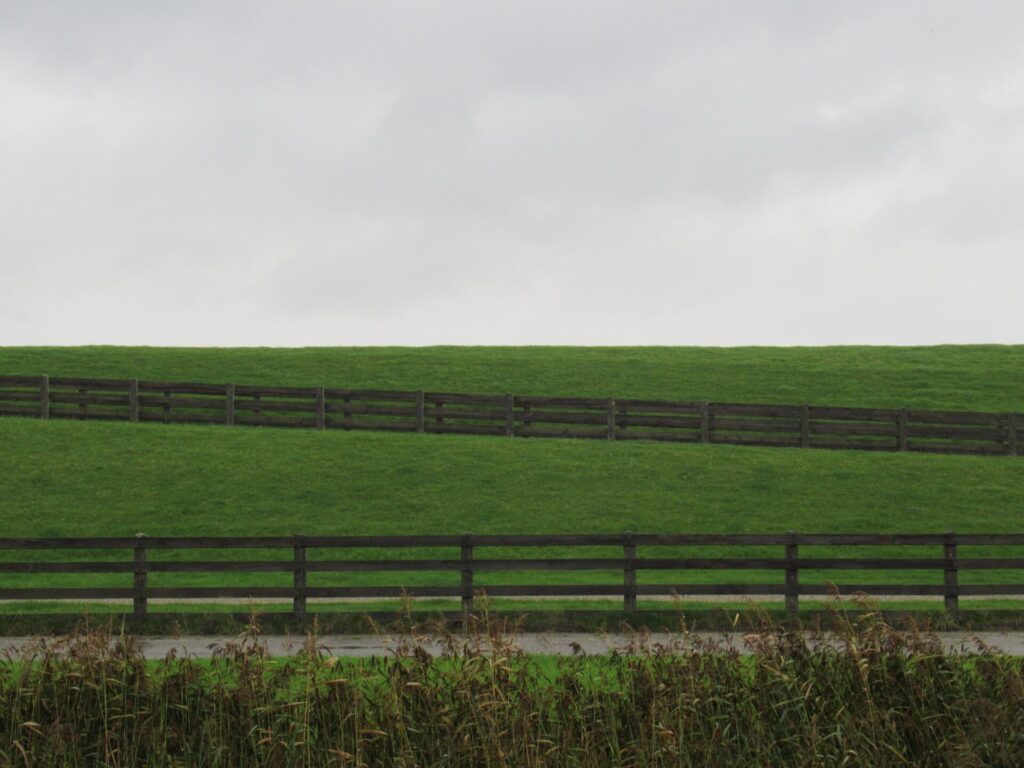
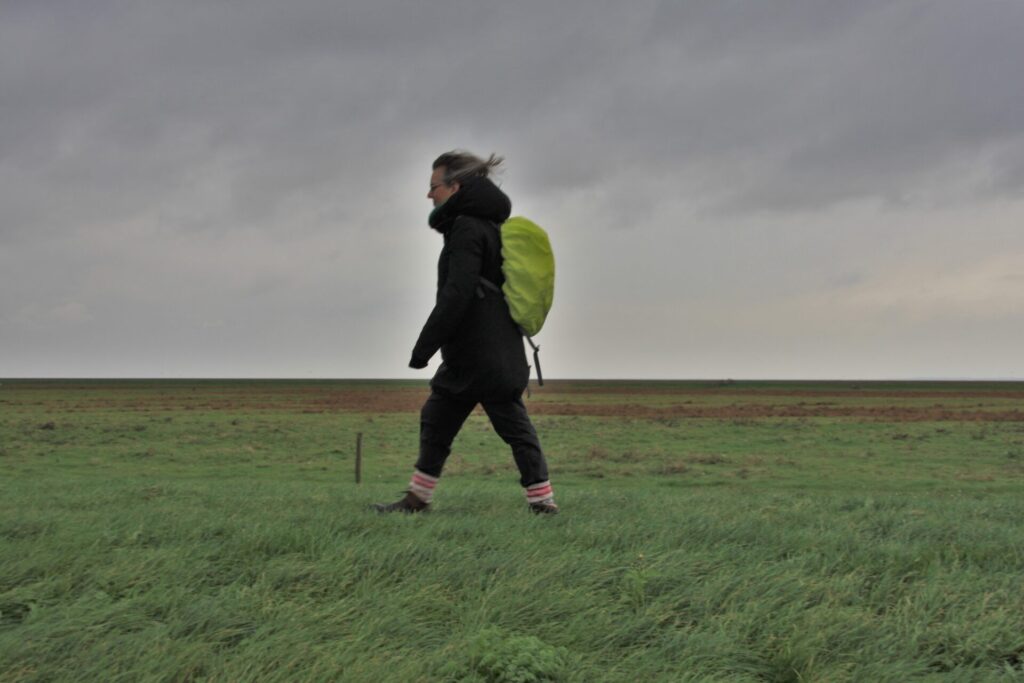
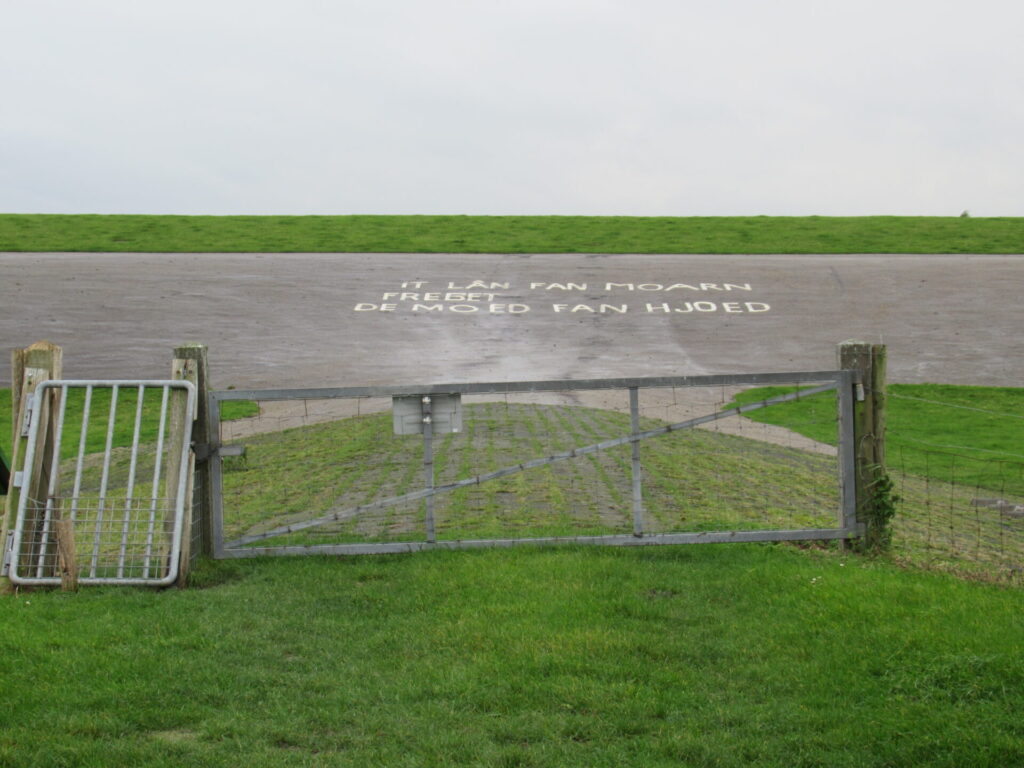
Our second walk is a walk down memory lane, outside the dyke on the Frisian coast.
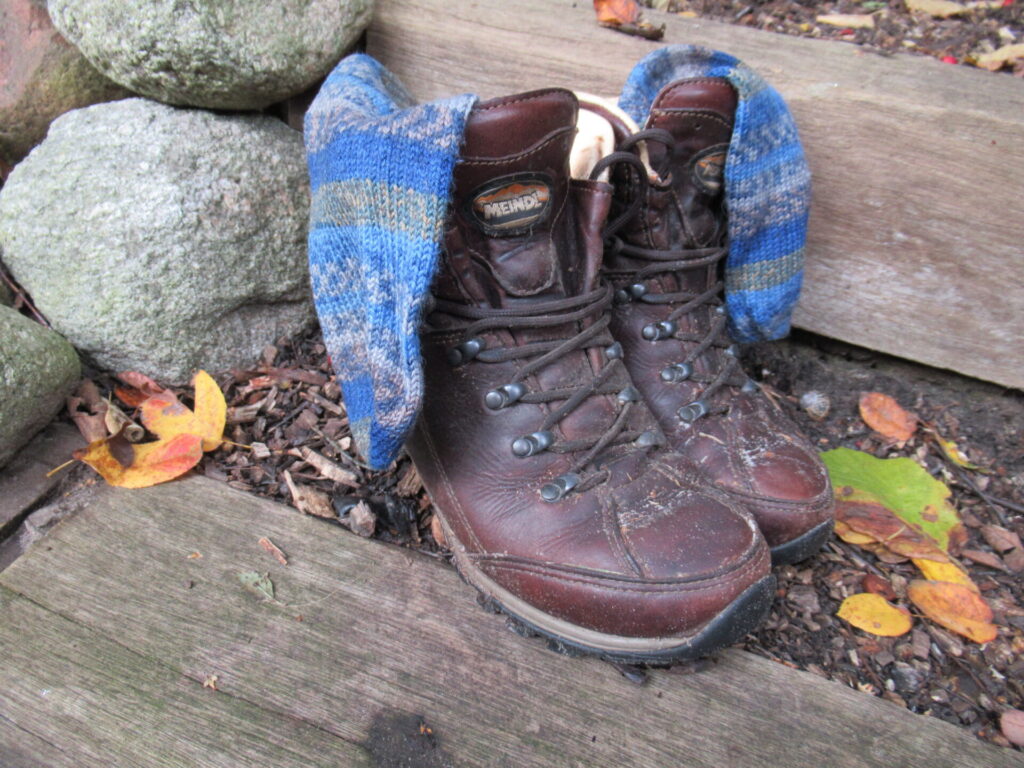
It’s cold, wet and windy and I’m so glad I’m wearing my warm winter coat.
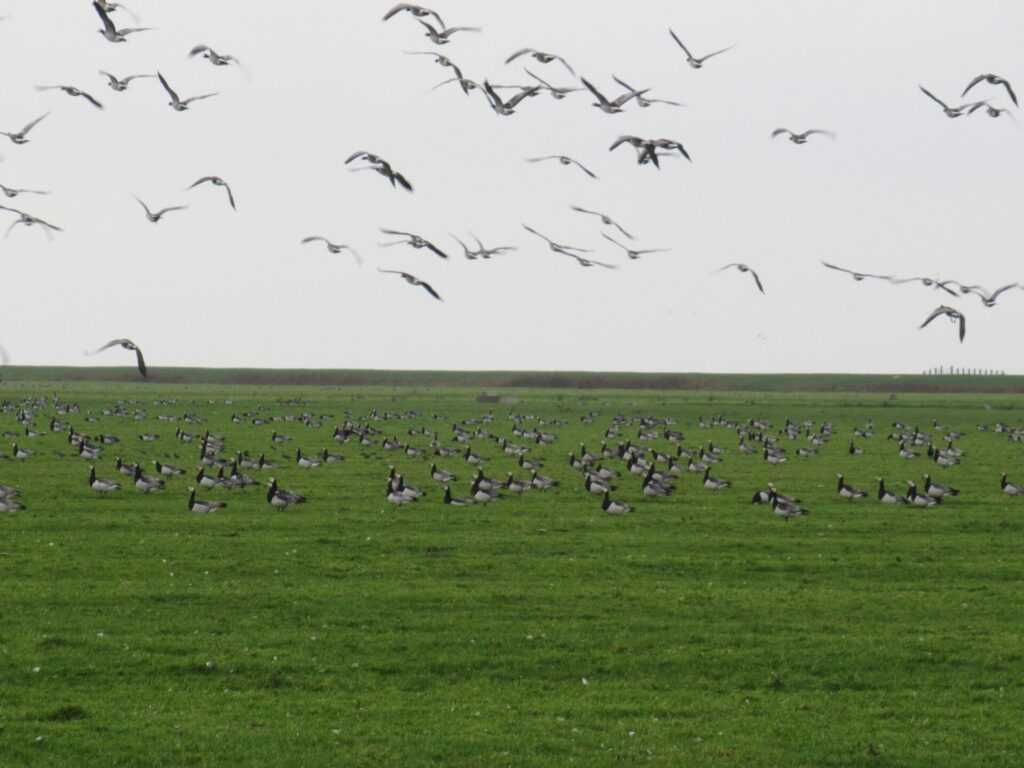
There is nobody around but us…
… and birds, many, many birds.
Ahhh, all that space, fresh air, invigorating wind. We’re outside the dyke here, a part of the country that gets flooded from time to time.
Looking back, you can see a church spire behind the dyke. That’s the village were we lived for 15 years when we were just married and where our daughter was born.
Somebody has painted words on the dyke.
In Frisian:
It lân fan moarn Freget De moed van hjoed
Translated:
Tomorrow’s country Needs Today’s courage
Hmmm, something to ponder.
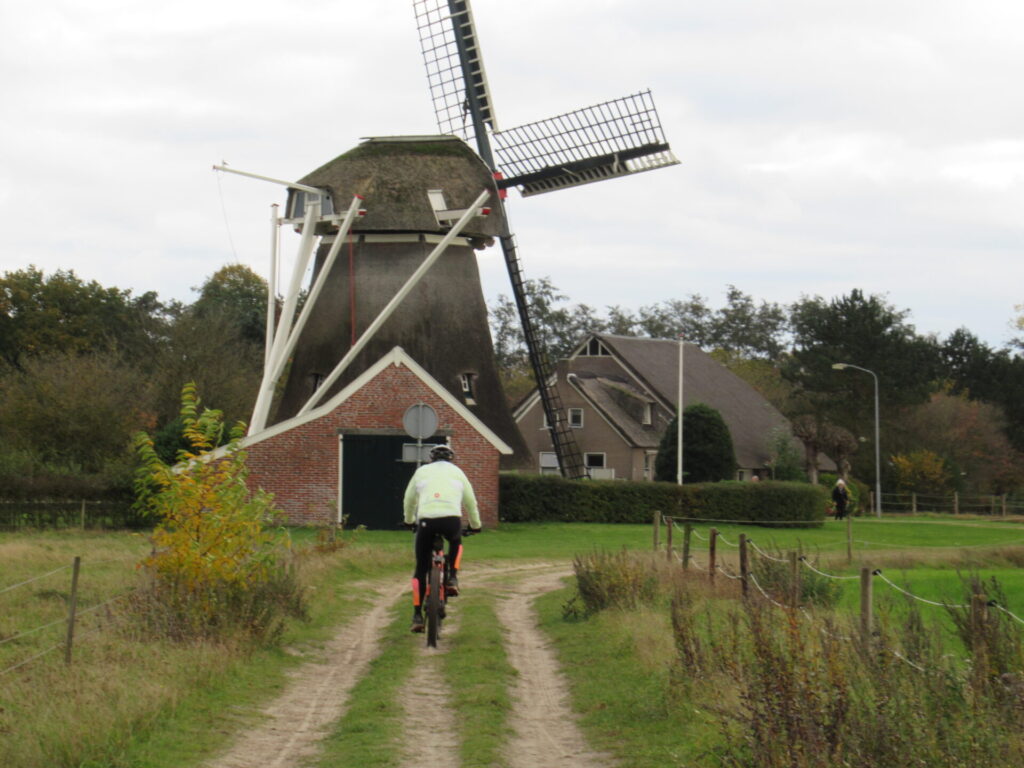
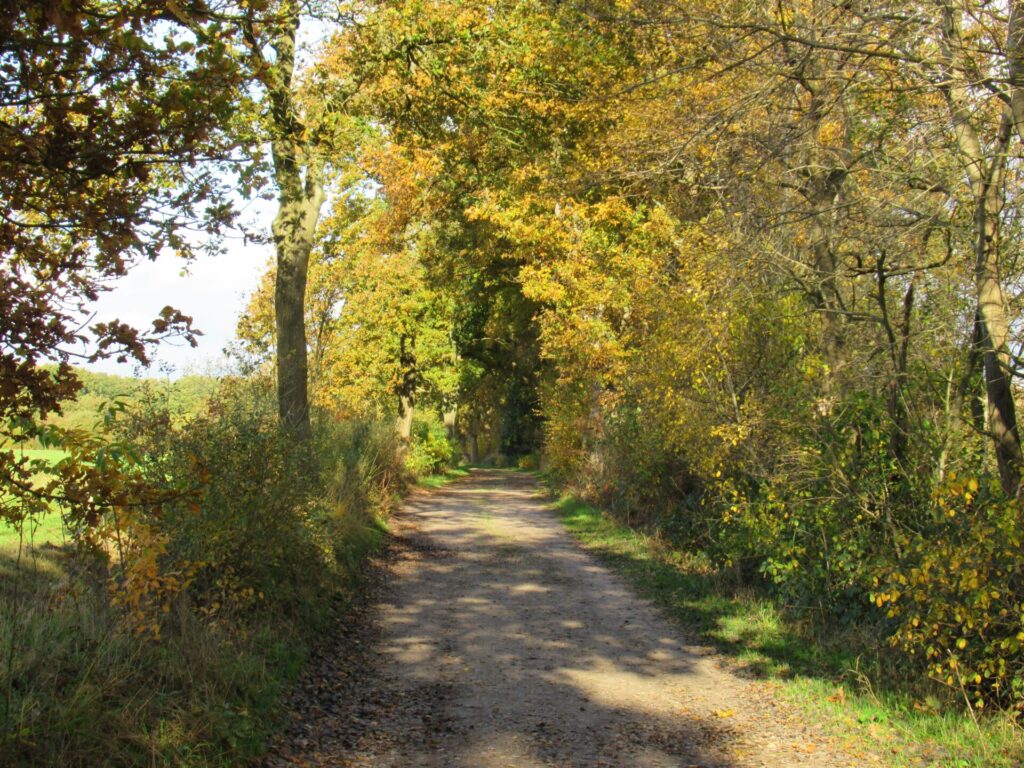
Now, on to our last walk. This is just outside the village with the Tiny yarn shop I wrote about a while ago. There is some news about that and I’ll come back to that soon. For now, here is an impression of the area.
Don’t you just love that golden autumn light?
Well, that’s all for today. I hope you’ve enjoyed this virtual autumn break. I’m going back to my knitting now and hope to see you here again next week for a yarn-filled post. Bye!
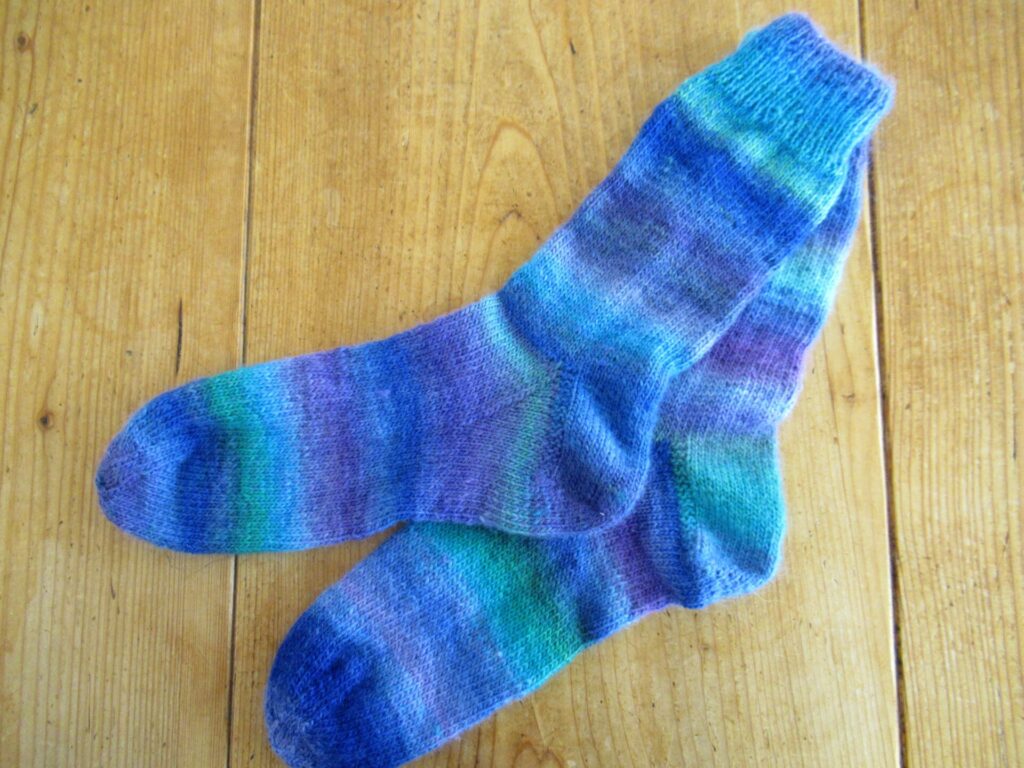
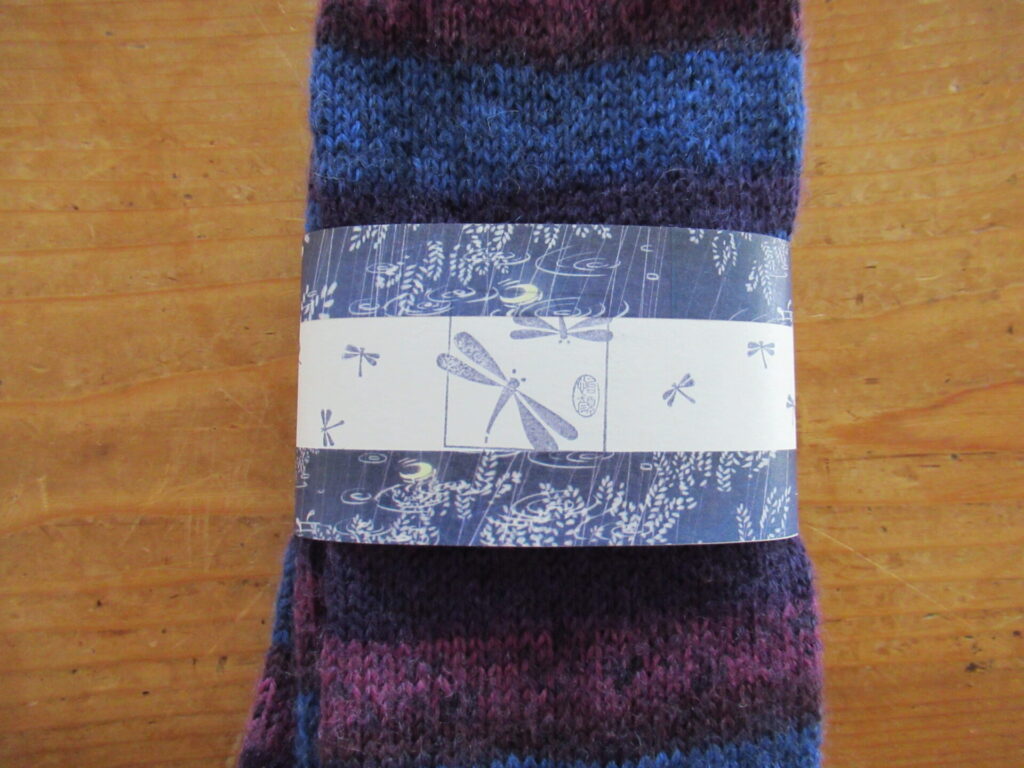
Do you remember our visit to a PYO flower garden about a month ago? And that I started knitting a pair of socks for a friend’s Birthday in early October? Well, I finished them in time.
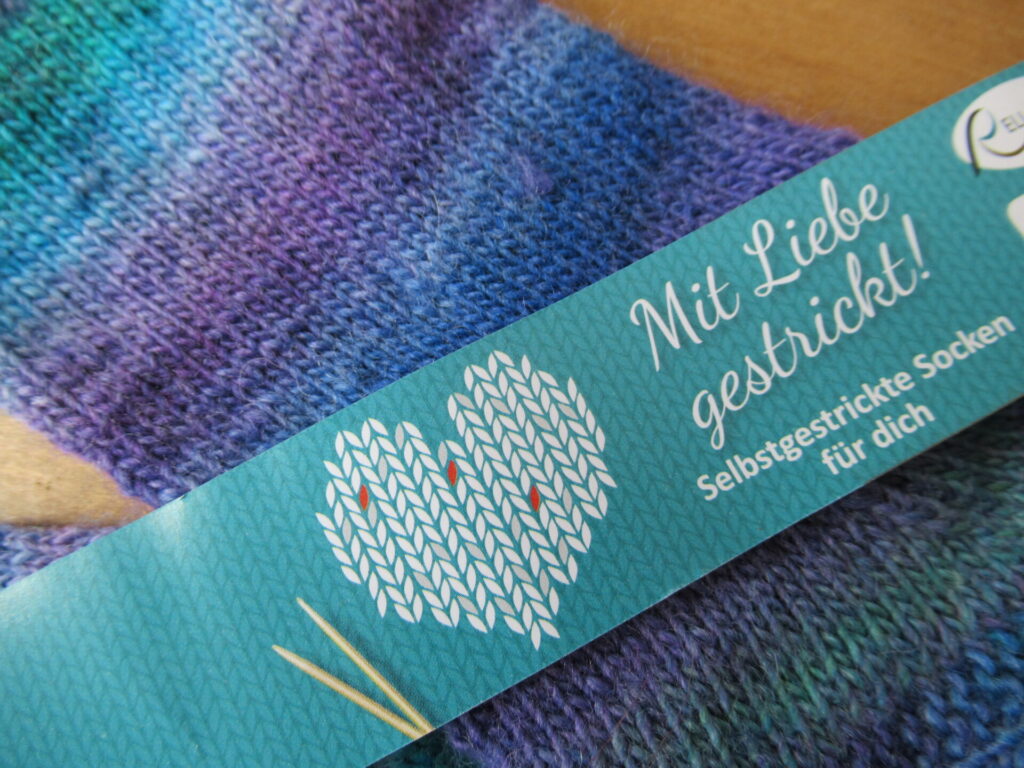
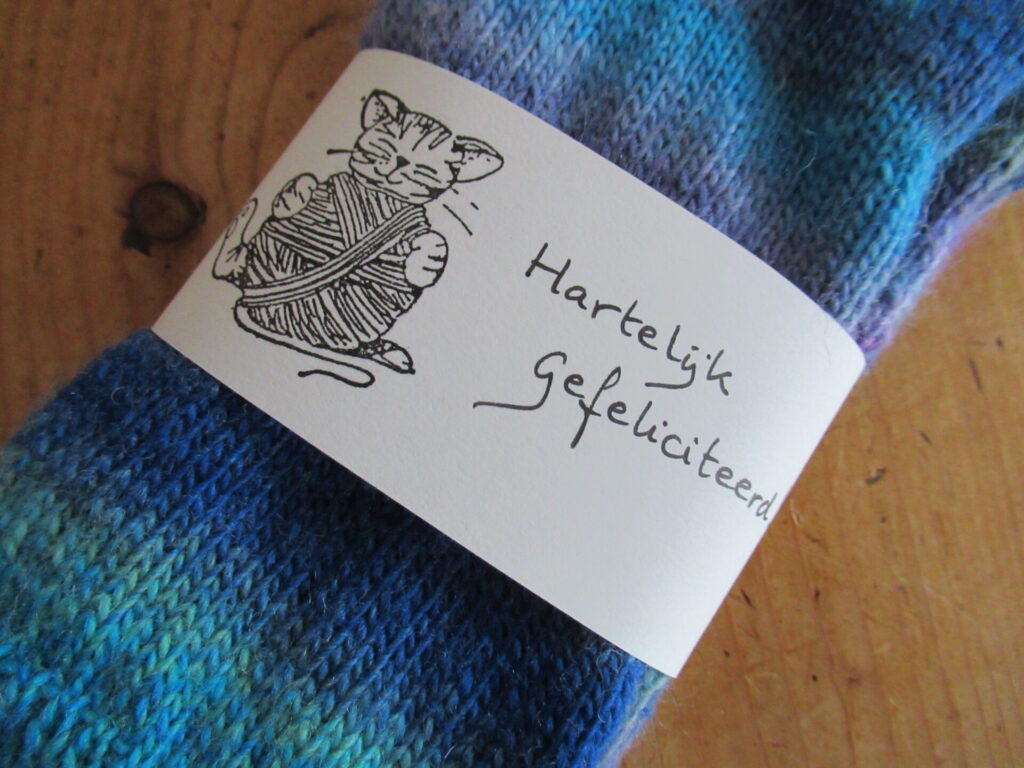
While I was knitting them, I studied the ball band for information about the composition of the yarn and noticed a circle with the text: ‘Geschenkverpackung auf der Rückseite!’ (It was a German yarn). Gift wrap on back – what could that be? Ah, the inside of the ball band was a gift label!
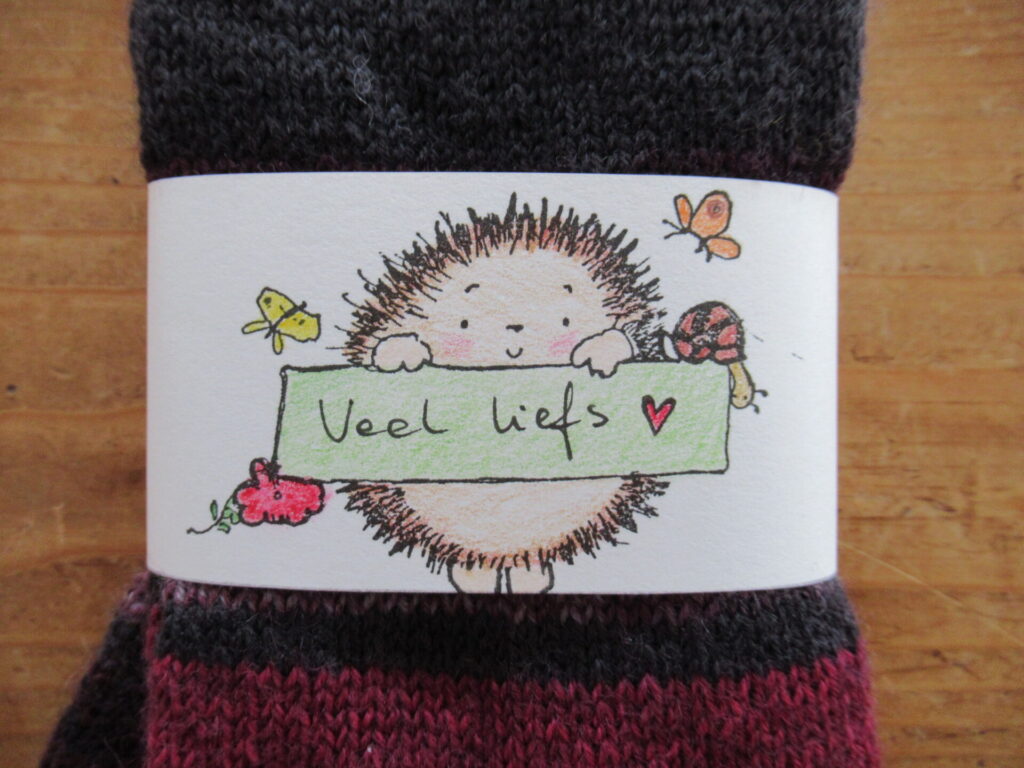
What a lovely idea! If we’d been speakers of German I would have used it straightaway. But we aren’t, and I’d rather have one in Dutch. So I decided to borrow the idea and make a personalized gift label for my cat-loving friend.
I gift-wrapped the socks, added a Birthday card and mailed them. I think socks are a perfect gift, especially now. What’s nicer than to give someone the gift of warm feet? Choosing the recipient’s favourite colours makes it even better. They fit into a letter box, are fairly lightweight and won’t break during transport.
I enjoyed this simple spot of crafting so much, that one dark and rainy afternoon I got my crafts supplies out again and made more. (If some photos look rather yellowish, it’s because of the lamp light.)
If you’d like to make some sock gift labels too, here’s what you’ll need:
Sock Gift Labels – List of Supplies
A pot of tea, mug of coffee or other comforting beverage
Calming and/or uplifting music, or blissful silence
Thick paper (1 A4-sheet will make 4 labels)
Pencil
Ruler
Clear tape
Scissors
A flat surface/something to protect your table
Any other crafts supplies you have, like: stamps, inkpads, washi tape, markers, felt tips, coloured crayons/pencils, stickers…
And one or more pairs of handknit socks, of course!
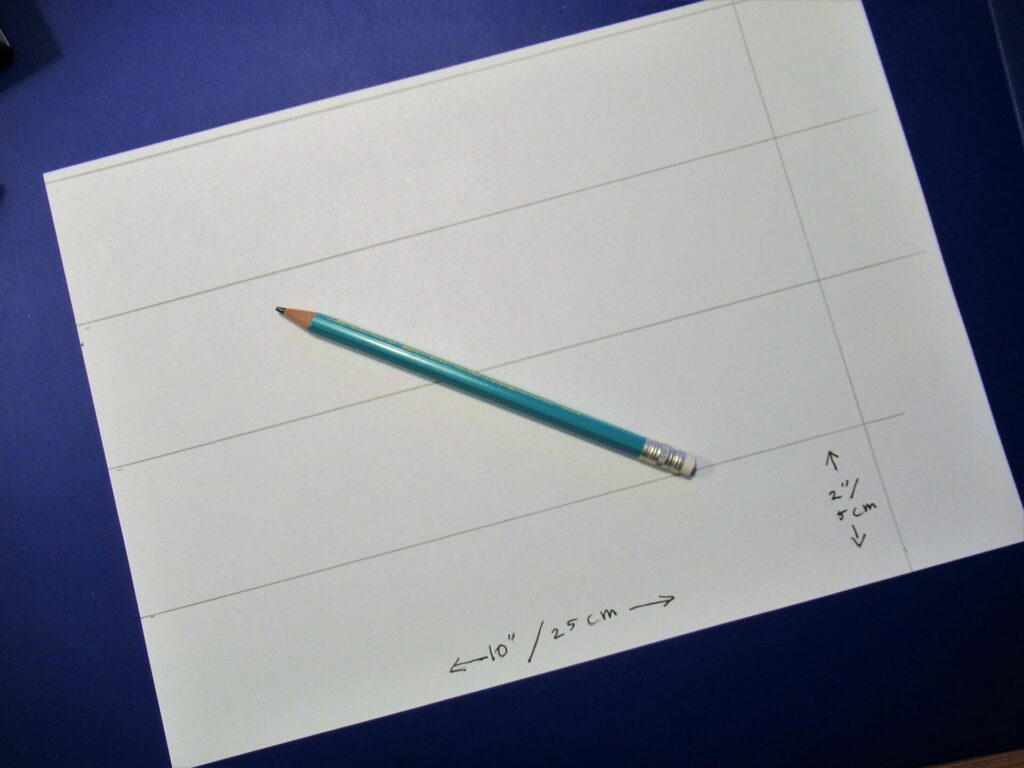
Start by marking off one or several 25cm (10”) x 5cm (2”) strips, using your pencil and ruler. Cut them out.
Now let your creativity flow! Here is some inspiration.
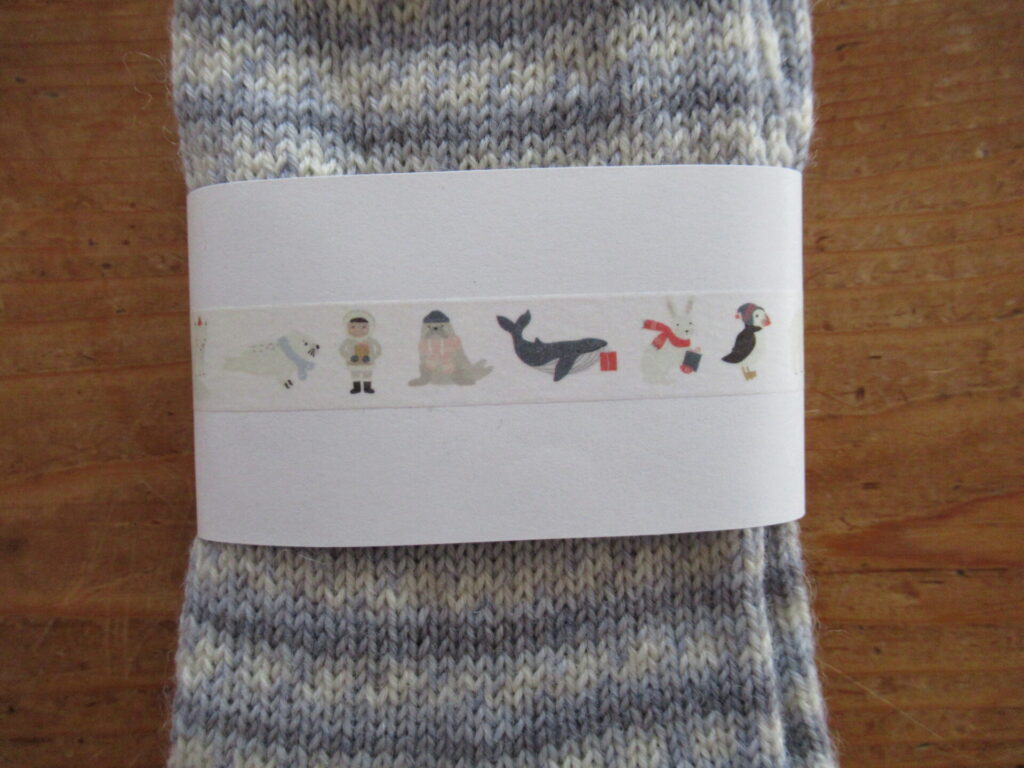
I started with some very simple ones, using just some washi tape.
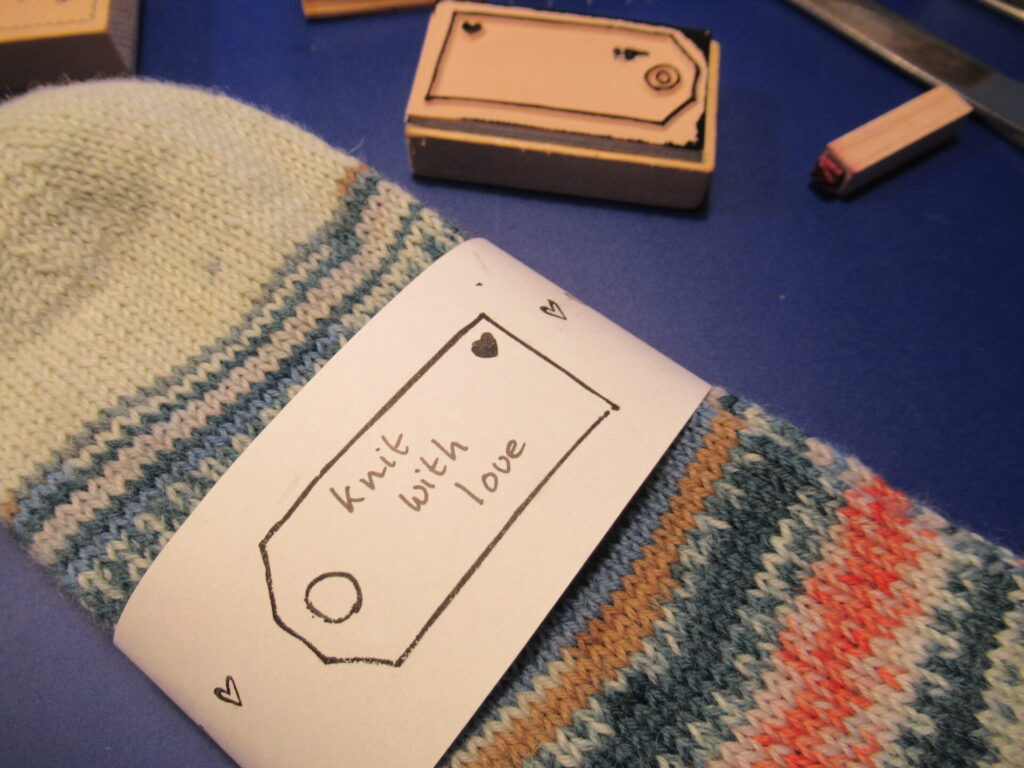
Then stamps and a marker in monochrome.
After that, I added in a little colour using washi tape and a coloured ink pad, matching the colours to the sock yarn.
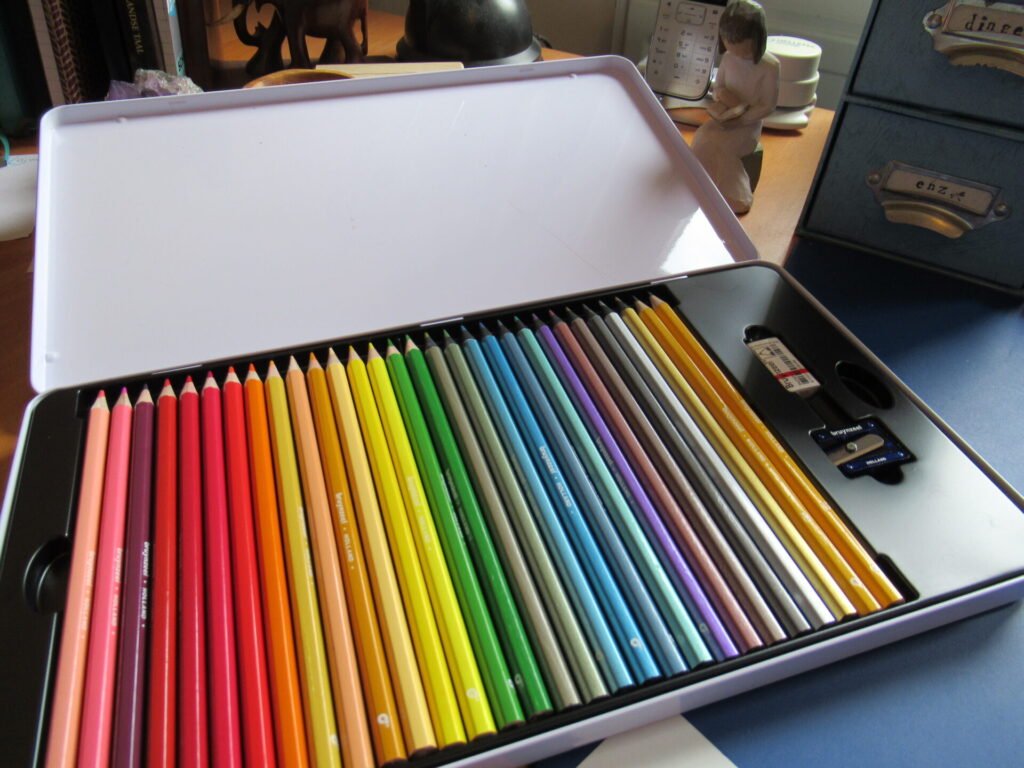
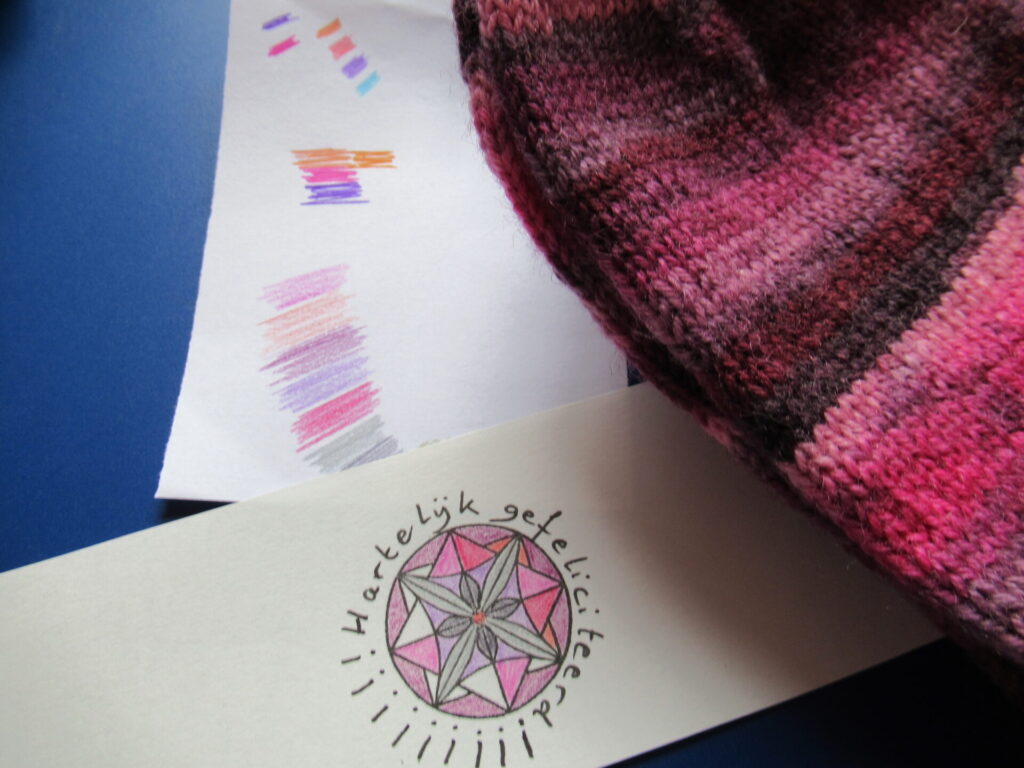
Several days later, I got out my brand new box of coloured pencils to add colour to a few more.
(A while ago, our local supermarket gave out coupons with which we could save up for lovely boxes of coloured pencils and sketchbooks. A nice change from the usual storage boxes and towels. It even has metallics like silver, gold and bronze!)
Adding colour to the stamped motifs was so much fun! On this one, I matched the colours to the sock yarn again.
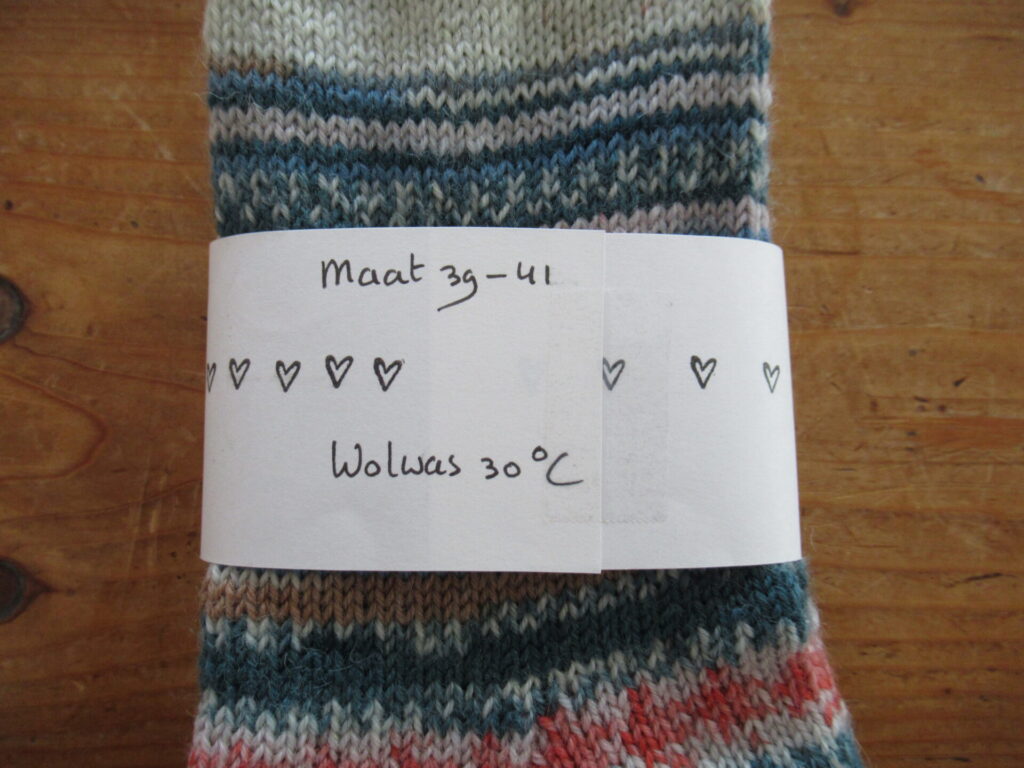
Sometimes I knit socks with a specific ‘victim’ in mind, and sometimes I just knit socks because I feel like it and will see who they’ll go to later. Adding washing instructions to the label is always a good idea. And in the latter case adding the size is useful, too.
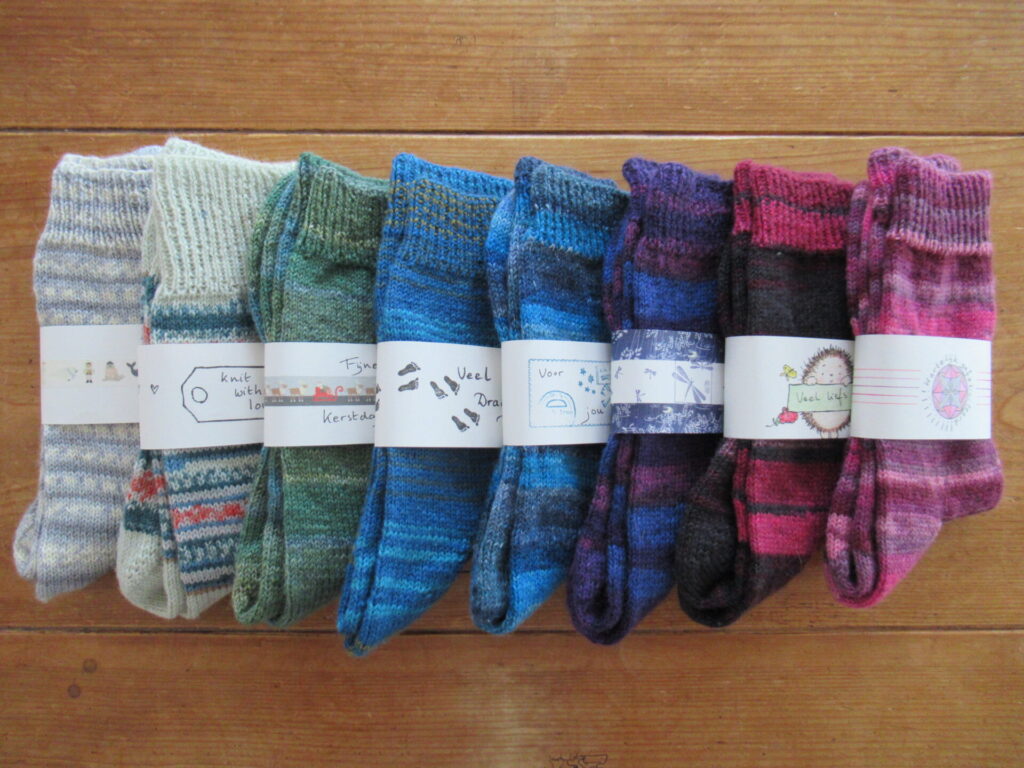
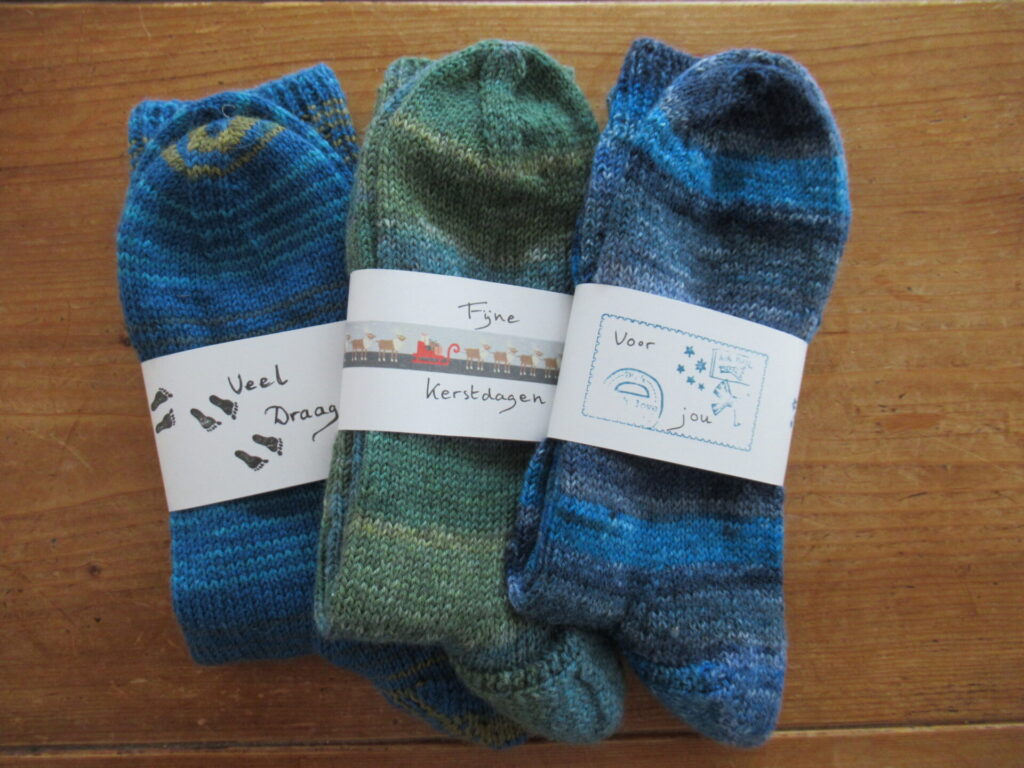
Here are 3 more pairs of socks in shades of blue and green, with labels decorated with stamps and washi tape.
I’ve really enjoyed playing around with my crafts supplies – I hadn’t used them for ages. They made me forget the time and all the woes of the world for a few hours. If you now feel inspired to make your own sock gift labels, I hope it’ll work like that for you, too. Have fun!
Hello! And how are things going in your part of the world?
Over here, not particularly well. From the day before yesterday, 10 pm, our country is more or less in a lockdown again. A ‘partial lockdown’ our Prime Minister calls it. The door is still slightly ajar, so to speak.
I’ve been feeling very angry about the whole situation. It isn’t the lockdown itself that bothers me – I can handle that and even think it’s a good idea. It’s the large number of hospital admissions that keeps me awake, the pressure on our care workers, the loneliness among vulnerable people… Again!
In spring the virus took us by surprise, but this time around we knew what we were dealing with. And yet, the numbers of cases have rocketed over the past month. We are now one of the countries with the highest numbers in the world! Why haven’t we been able to prevent this?
Anger isn’t going to help, I know that. But I’m having a hard time getting to grips with it. I’ve been pouring my anger out on paper, been mulling things over during sleepless nights, and been for walks around the village muttering to myself (well, not aloud, but inside). What I’ve come up with is a question, and an answer of sorts, too:
Q: What do I need in order to come to grips with my anger and be able to contribute to society in a positive way again? A: I think I need more of some things and less of others. Here is a quick list.
LESS news. Over the coming weeks I’ll just read the morning paper and watch the evening news. That’s MORE than enough.
MORE walks.
I need to breathe in MORE fresh air and listen MORE to the wind soughing through the tree tops.
LESS time gazing at screens.
MORE time gazing at the sky and the beauty of nature. (Fortunately we can still do that during our partial lockdown, as long as we don’t do it in groups.)
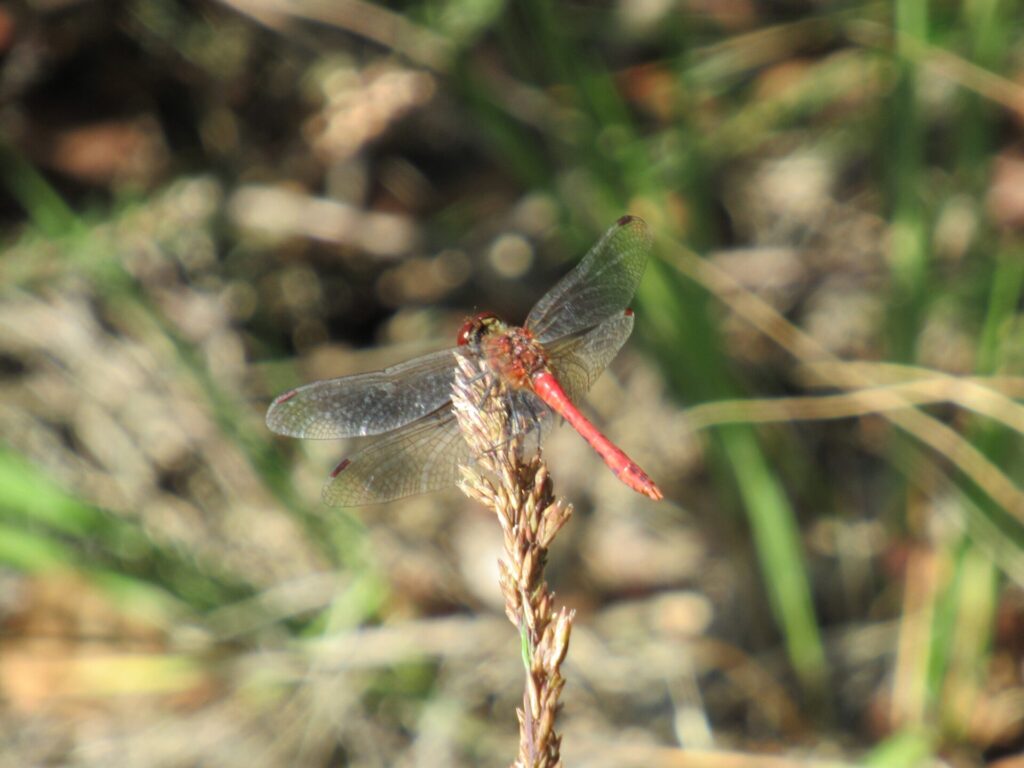
And MORE time to enjoy small natural wonders.
LESS fuming and ruminating.
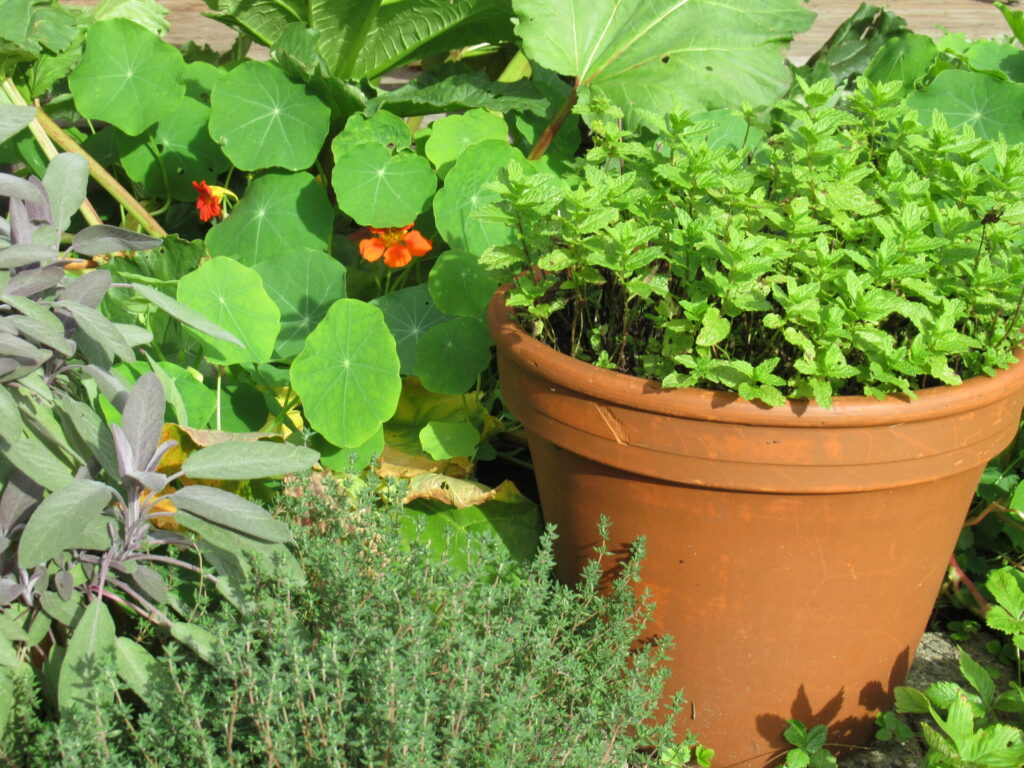
MORE pottering around the garden.
LESS worrying.
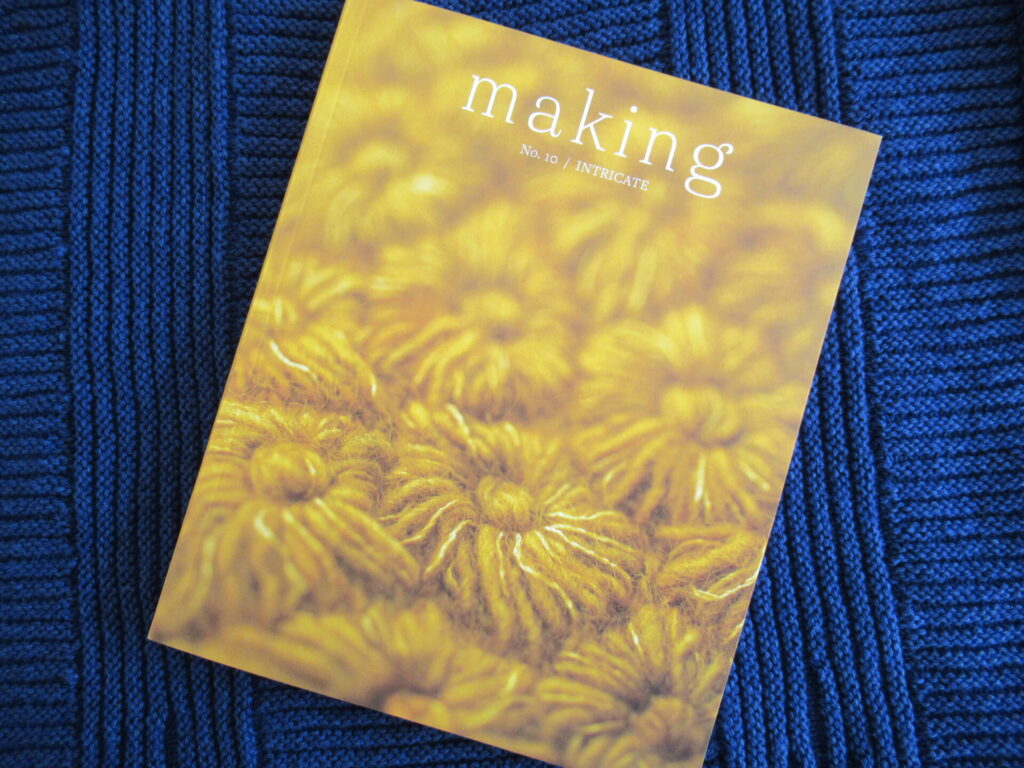
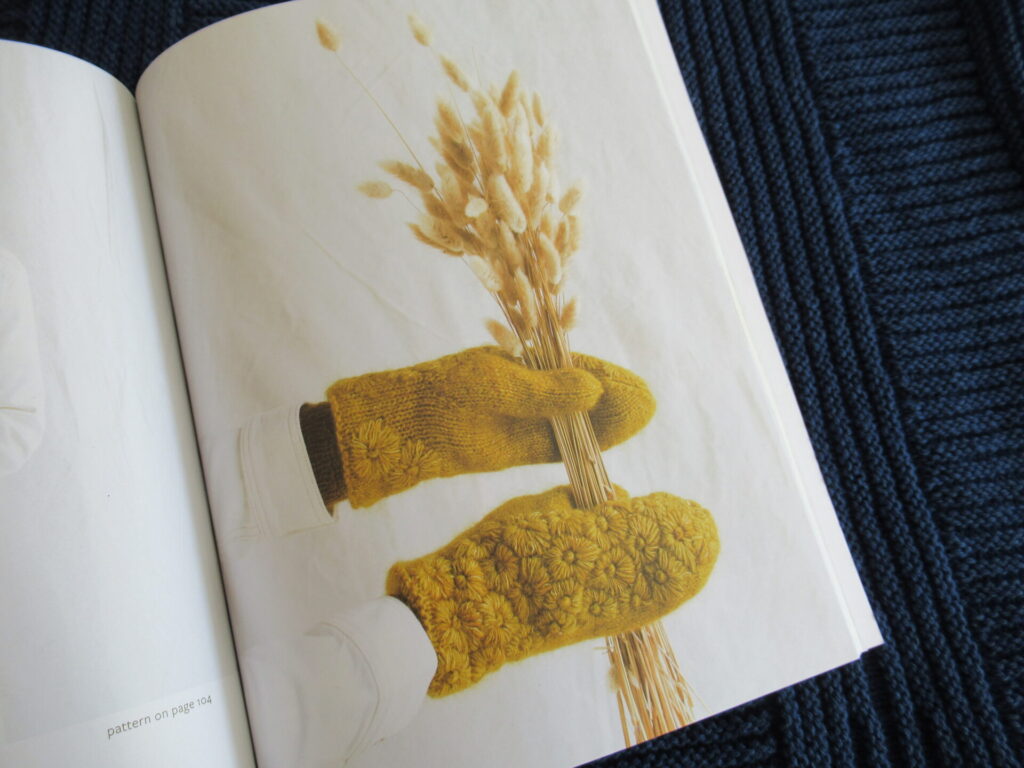
MORE making.
The latest issue of Making Magazine landed in our letter box on the very Wednesday the lockdown started. The cheerful, sunny picture on the front cover is a close-up of a pair of mittens inside.
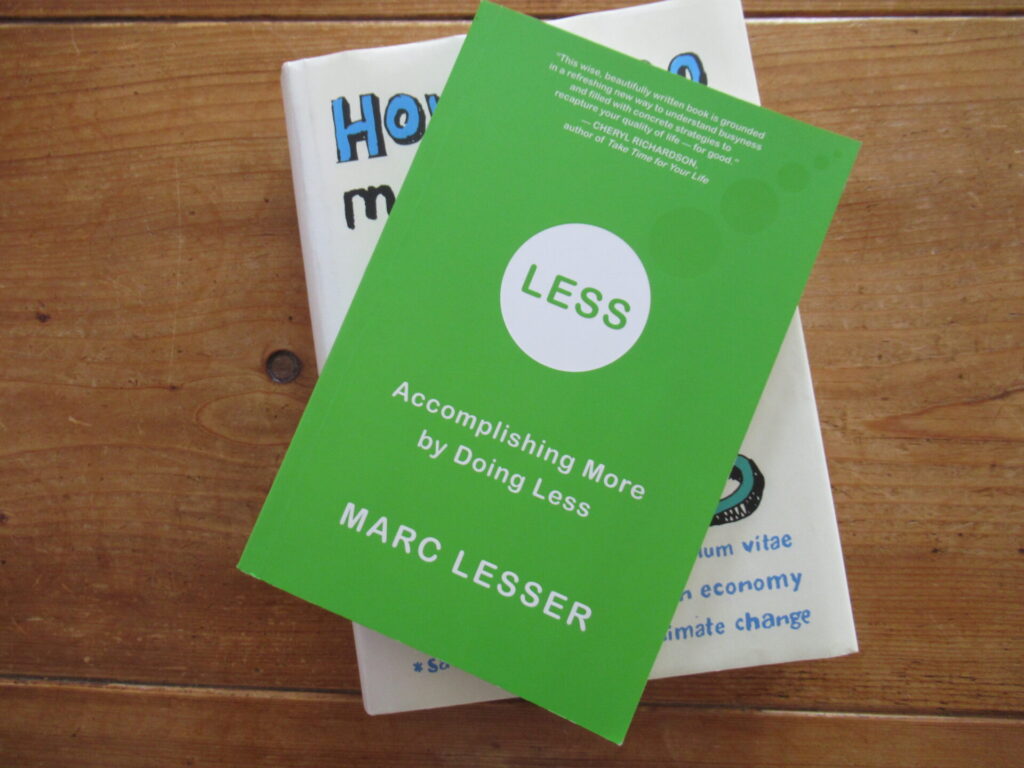
I also have two great books about MORE and LESS.
Less: Accomplishing More by doing Less was written by someone with the amazingly appropriate name Marc LESSER.
For me, this is a very helpful book, because I tend to get very (too) busy from time to time. The whole book is about that, and especially the last chapter, Busyness, or Finding the One Who is not Busy. But this time, I leafed to the chapter about resistance. It starts with a quote from Rilke:
Have patience with everything unresolved in your heart And try to love the questions themselves.
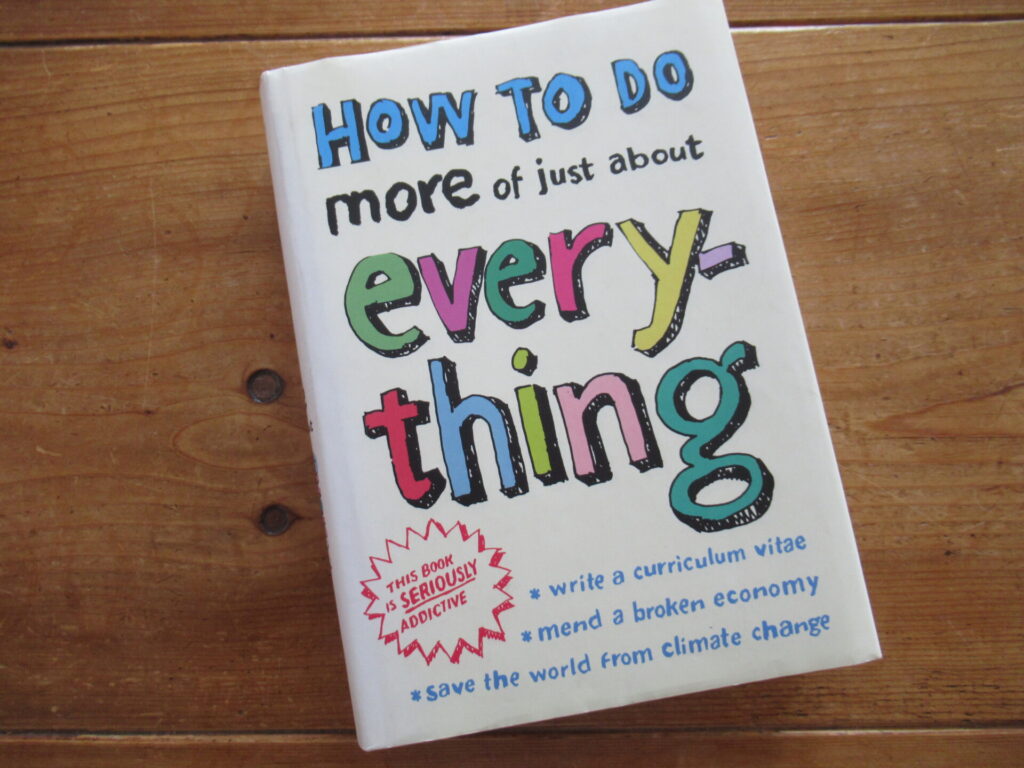
Finally, a very entertaining and also helpful book about MORE.
It tells us how to tell a good joke, conduct a Japanese tea ceremony, get custody of your pet in a divorce, mend a broken economy and save the world from climate change, just to name a few random examples. The book doesn’t tell us how to deal with a pandemic, but it does tell us how to cope with anger in 4 steps.
Leafing through this book has at least made me feel a little LESS irritable and MORE cheerful.
I fear that we’ll all be faced with partial or complete lockdowns for some time to come. We’ll have to find ways to keep our spirits up and help each other along. I hope you’re more or less okay, wherever you are in the world. What do you need more or less of?
A final remark about my need for MORE making: I’m working on a small project that I hope to share with you in my next post. It isn’t a knitting project, but it does have something to do with knitting. Hope to see you here again next week!
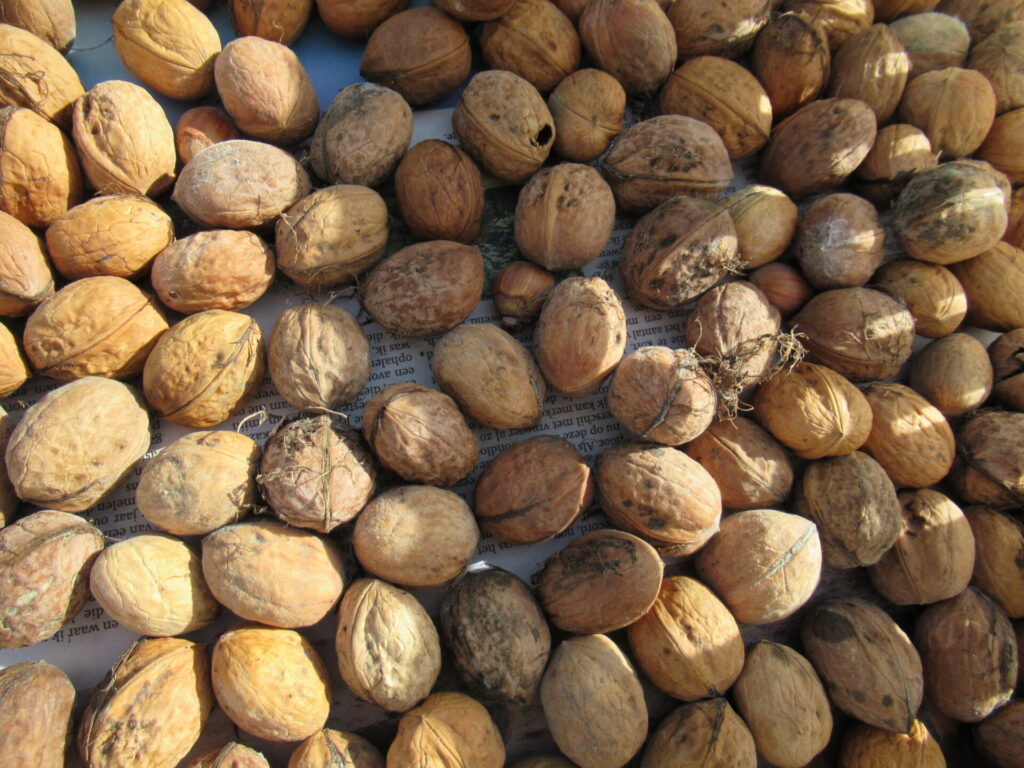
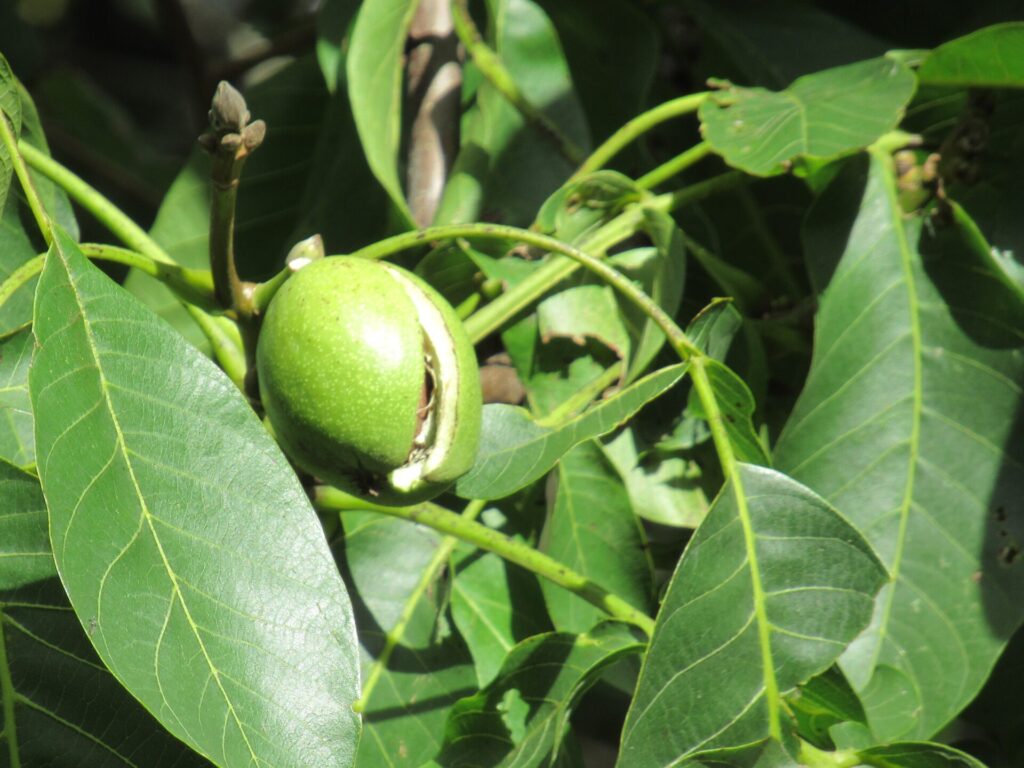
When we moved here 18 years ago, friends gave us a walnut tree. Or rather a tiny sapling that had sprung up in their garden. It has grown, and grown, and grown, and now provides a shady spot for lilies of the valley, ferns and wood anemones.
It also provides us with nuts. Last year, many were shrivelled up inside their shells. 2020 is a much better walnut year. Still, our harvest isn’t huge. It’s the magpies, you see. They love walnuts, and this year there is a large magpie family to feed. Fortunately they are generous enough to leave us a few, too.
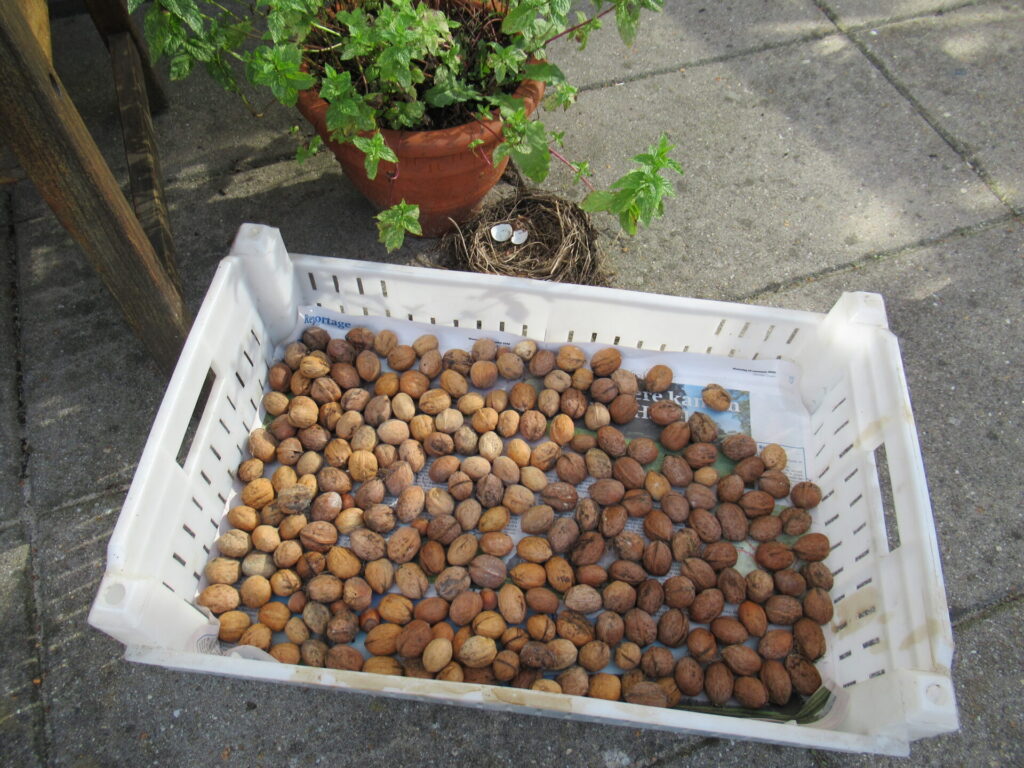
This is our share of the walnut harvest this year.
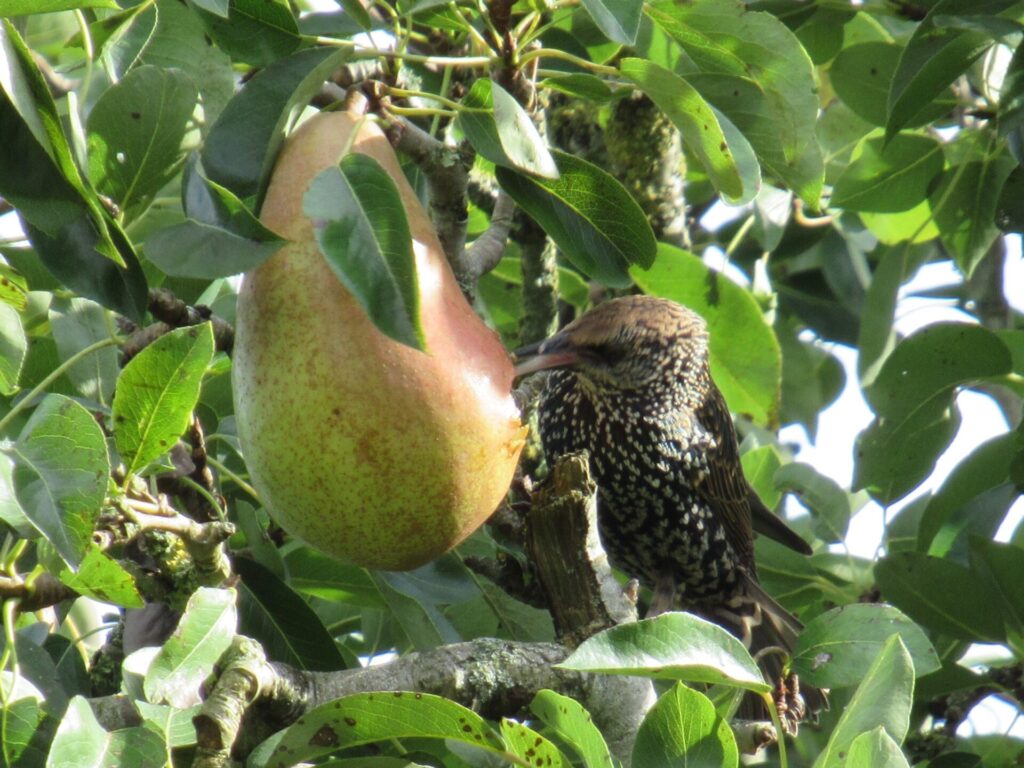
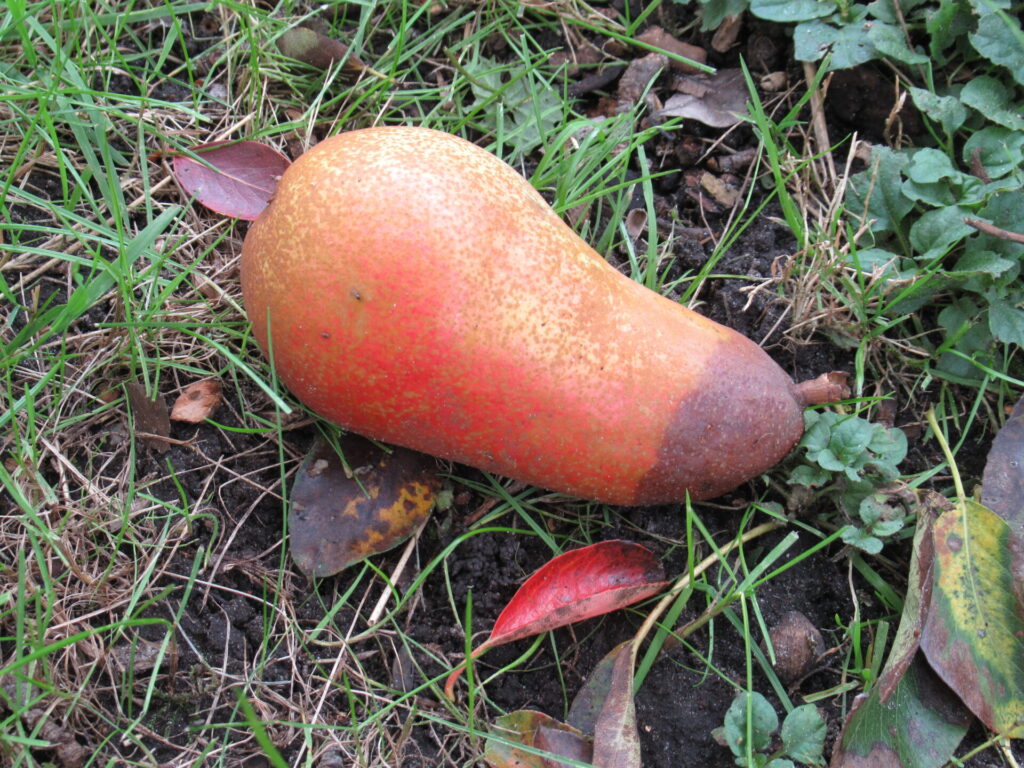
Our big old pear tree has also done very well. Last year, it didn’t give us a single pear, but this year it produced masses. So many, that we couldn’t possibly eat even a tenth of them. So one evening, I loaded wheelbarrow after wheelbarrow with pears to share with everybody in the neighbourhood who wanted some. A great opportunity to catch up on all the local news, too!
And then there were still many left on the tree to share with a big and noisy travelling band of starlings.
Now, the tree is dropping its last few pears…
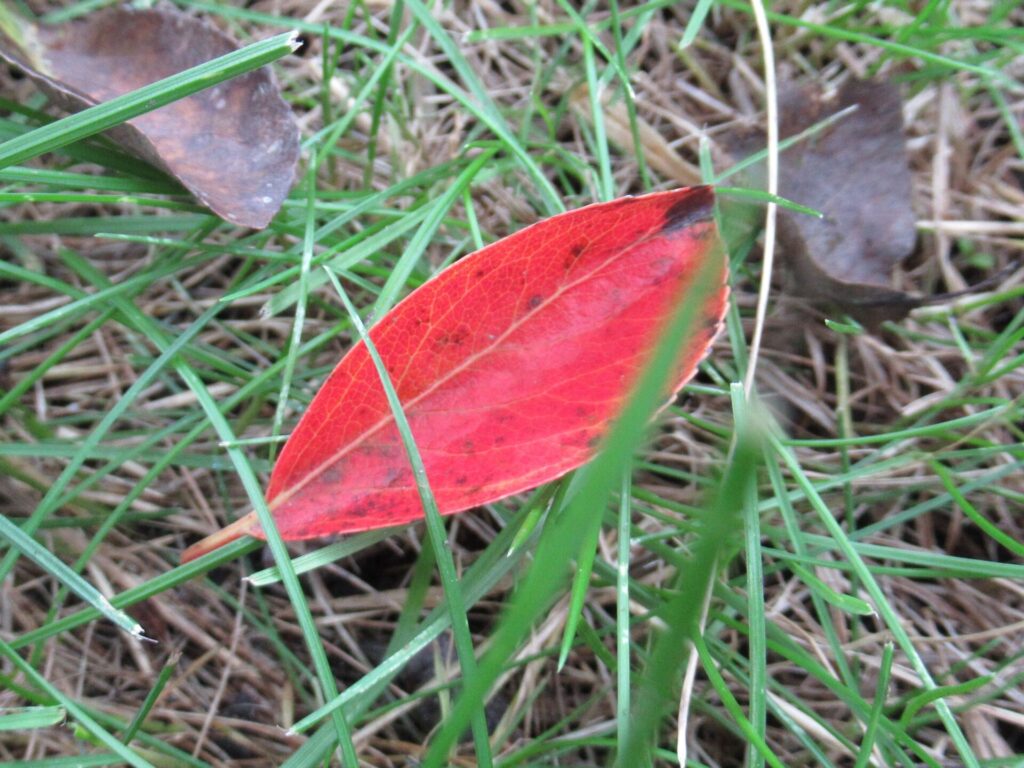
… and also starting to shed its leaves, now a dull brown. Among the pear leaves, there are some fiery red ones blown over from the Amelanchier, like chili peppers in the grass.
It is really starting to feel like autumn. The temperature is dropping, and it is getting dark soon after our evening meal. Although I knit all year round, for me this time of year always feels like the start of the ‘real’ knitting season.
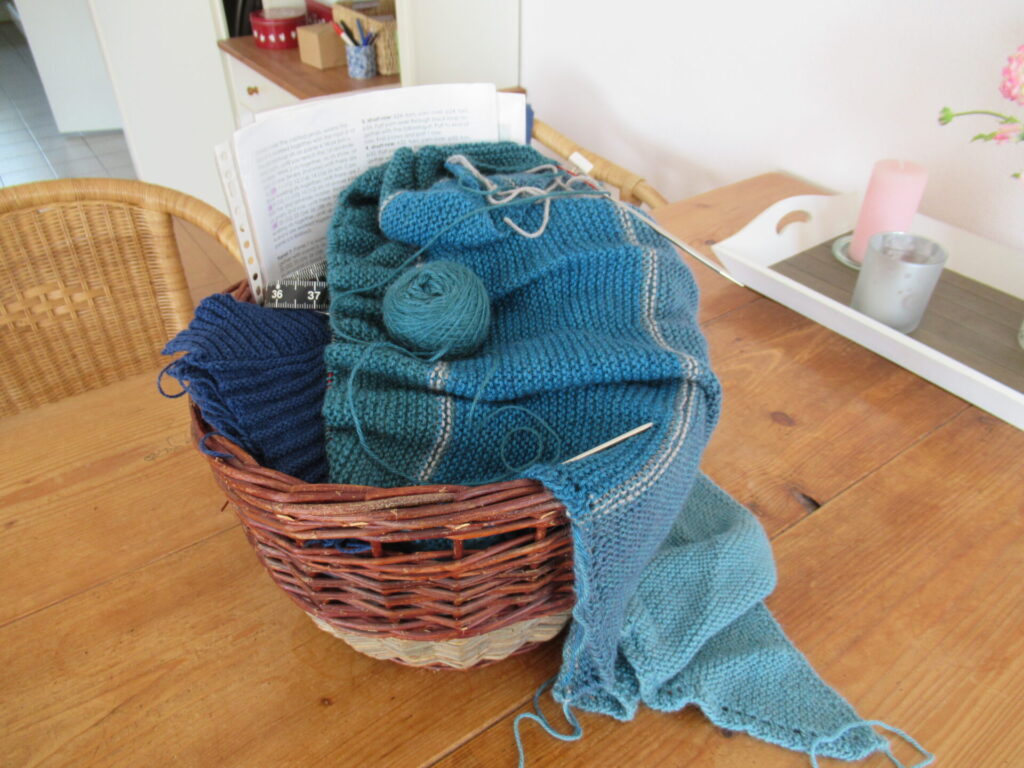
I realize that I tend to write about my knitting projects mostly when starting and finishing them – the most interesting moments. Now, for a change, here are two of my knitting projects in progress.
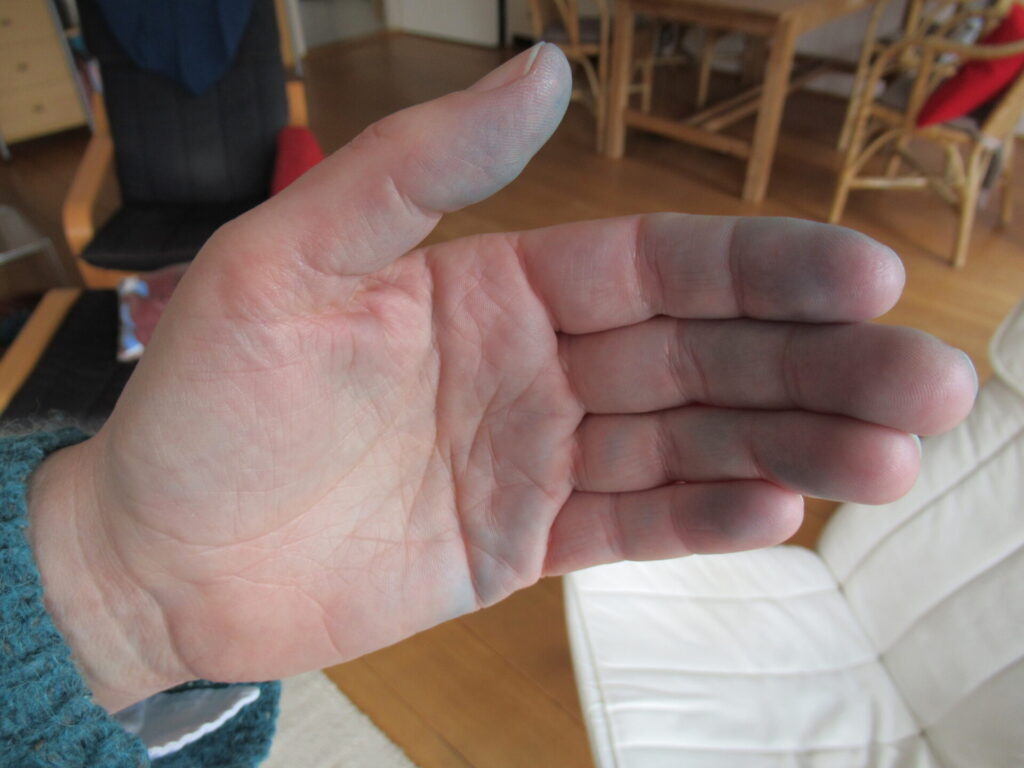
Here is my Indigo Sea Shawl on the needles.
I’ve thrown it into a corner taken a break from it, because one of the skeins was colouring my hands and the white blouse I was wearing blue. Aaaargh!
After a while I ripped the offending part out, washed the yarn, rinsed it, gave it a vinegar bath and rinsed it again and again, until it (almost) stopped bleeding.
Now I’ve picked up the needles again and have almost finished it. I’m thinking of a slightly more interesting edge than just an ordinary bind-off.
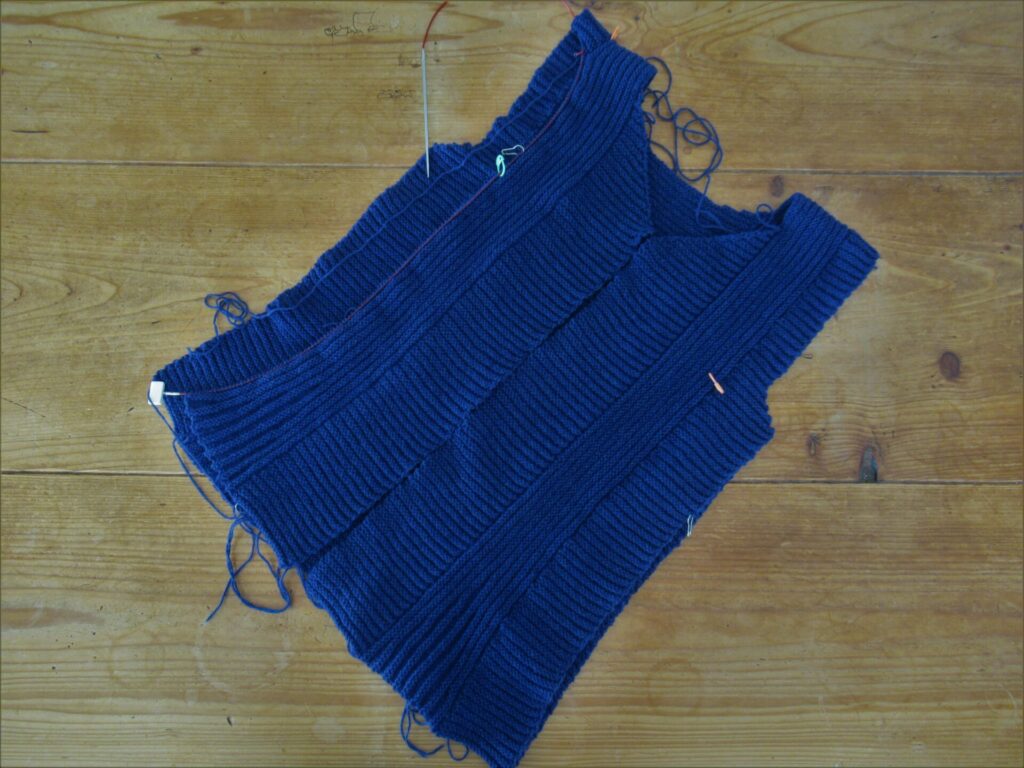
I’m also still knitting on my Panel Debate cardigan. Progress is slow. For one thing, yarn and needles are very fine. For another, I’ve been knitting socks and other small items in between.
I’m now determined to speed the process up because I want to wear it. And also because I feel like starting something new – something warm, cosy and woolly.
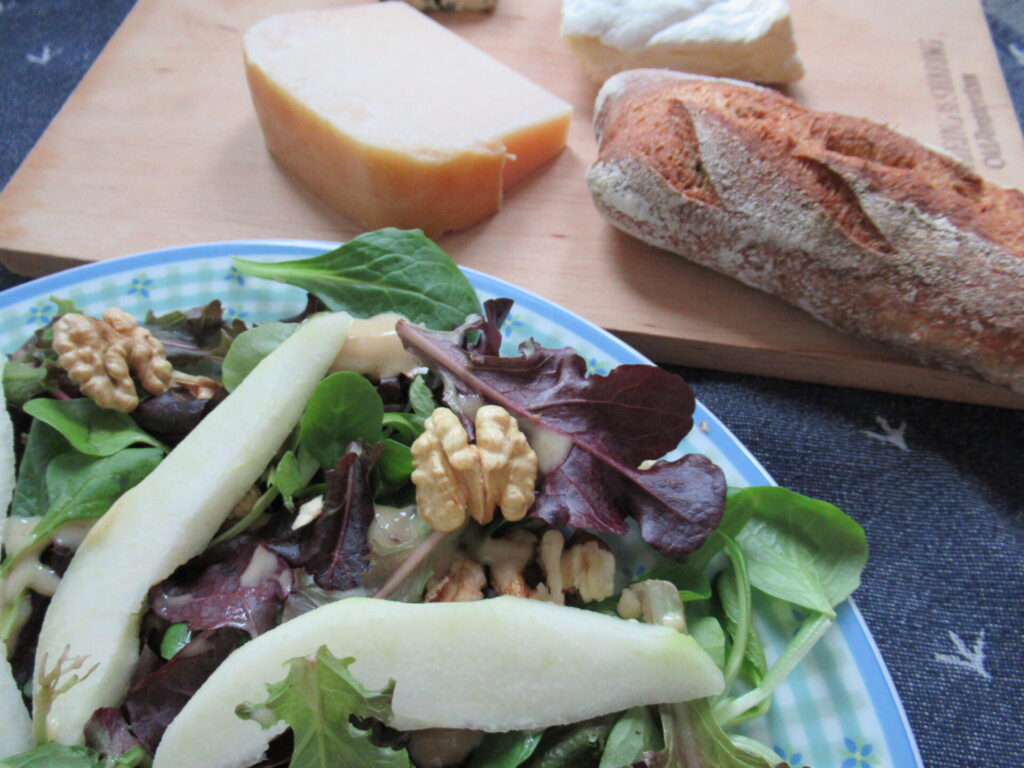
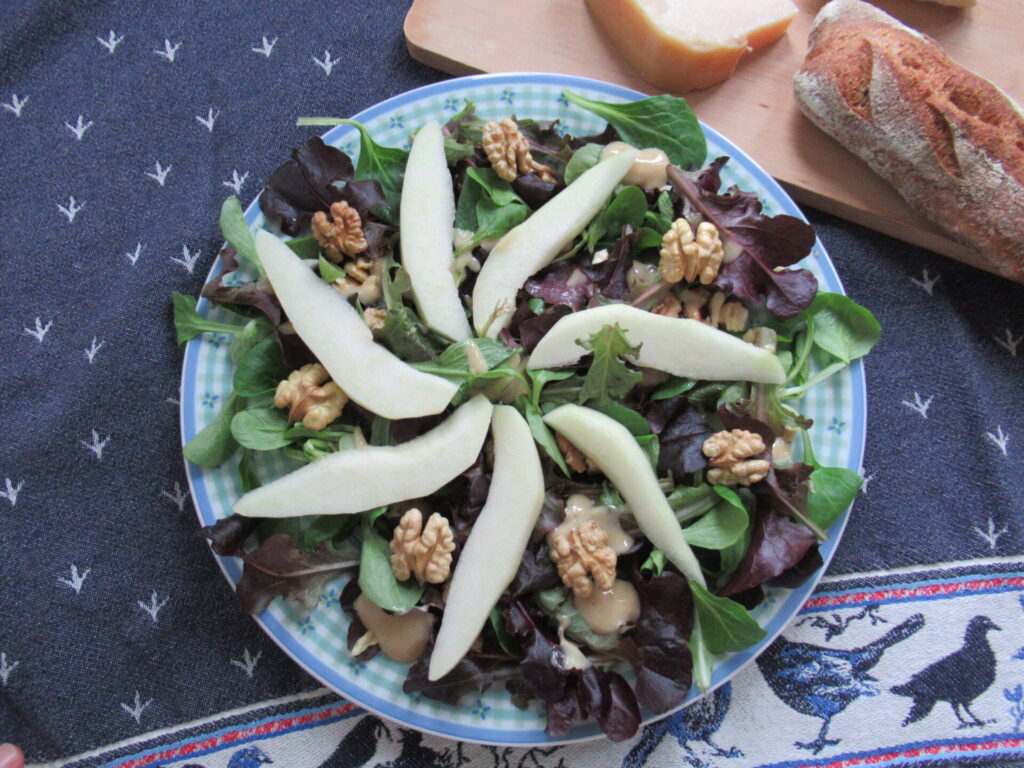
Unfortunately, I can’t literally share our nuts and pears with you here. But I can share a recipe using them. Here is my simple Pear & Walnut Salad recipe.
Pear & Walnut Salad
Serves 2 as a side dish or starter
Ingredients
50 g mixed salad leaves
8 walnuts
½ pear
For the dressing:
1½ tbsp (olive)oil
½ tbsp good white wine vinegar
¾ tbsp honey mustard
A pinch of sea salt
Some freshly milled black pepper
Method
Roast the walnuts in a dry frying pan and leave to cool
Rinse the salad leaves and gently pat dry with a clean tea towel
Halve the walnuts. Leave some halves whole and chop the rest coarsely
Whisk all the dressing ingredients together until they form a thick and smooth sauce
Mix the salad leaves with the chopped walnuts and arrange them on a plate. Distribute blobs of dressing over it
Peel and core the pear. Cut into thick slices and arrange on top of the salad leaves
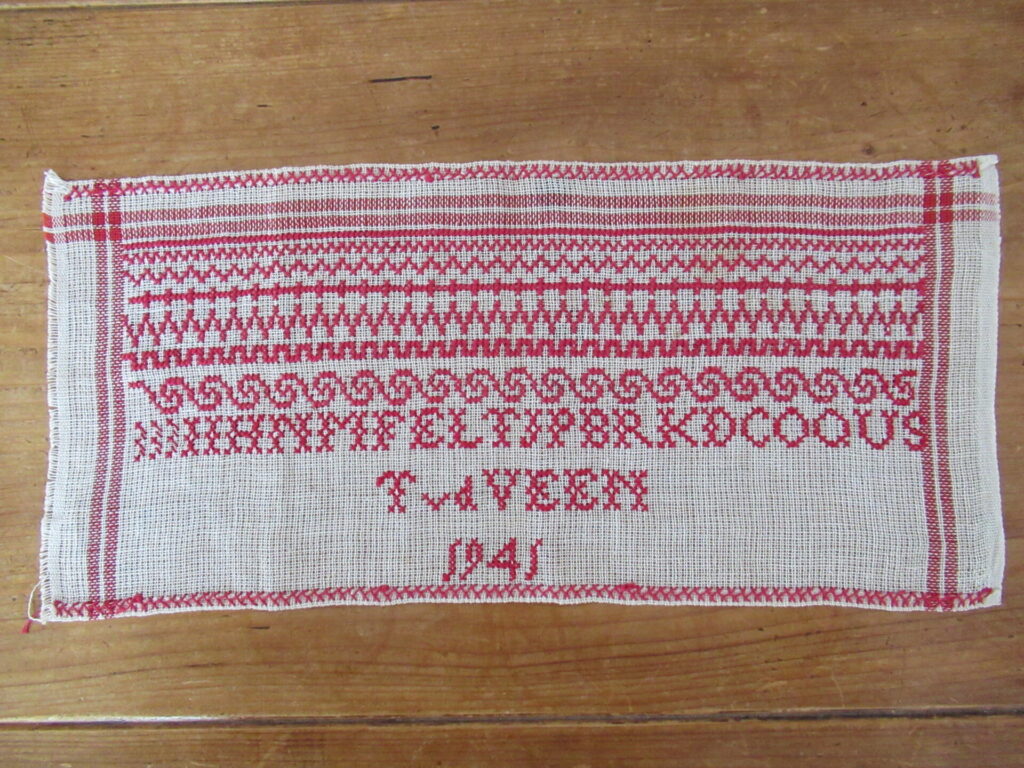
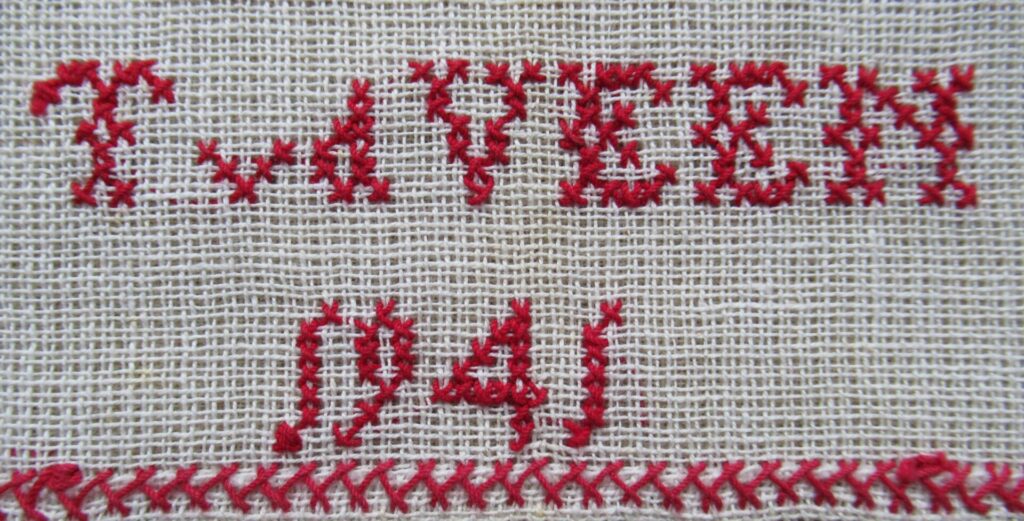
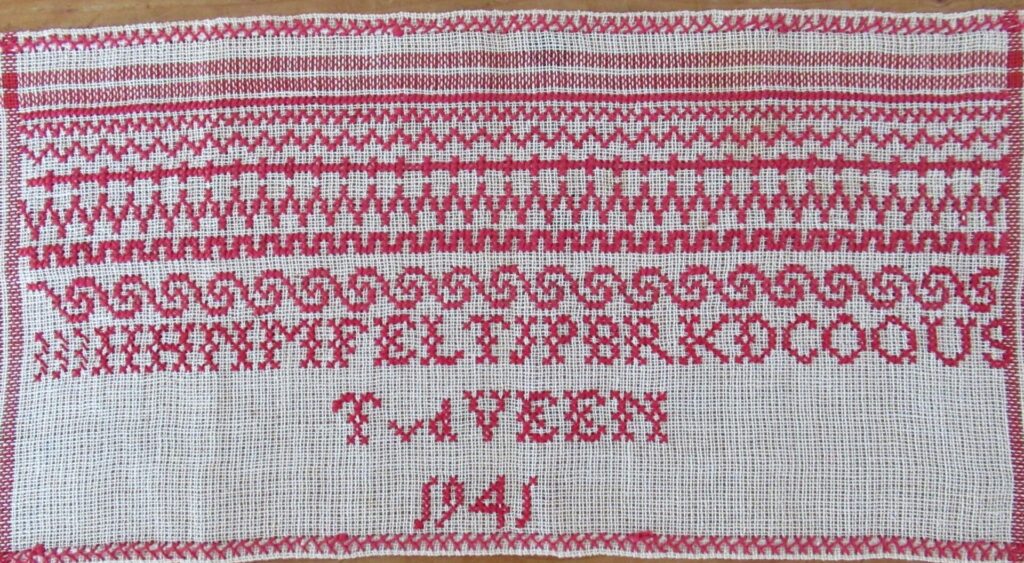
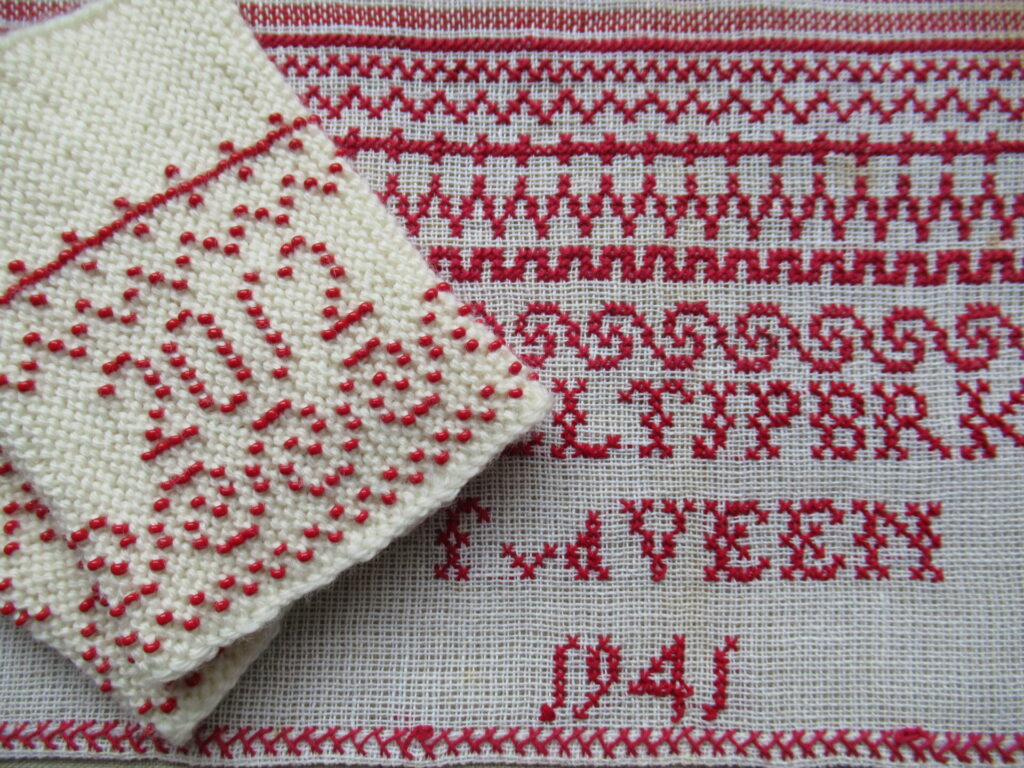
Here is the embroidery sampler I promised to show you. Like the knitting sampler I wrote about two weeks ago, this sampler isn’t spectacular or particularly beautiful. But unlike the knitting sampler, whose maker is unknown to me, I know with 100% certainty who made this embroidery sampler. It was my Mum.
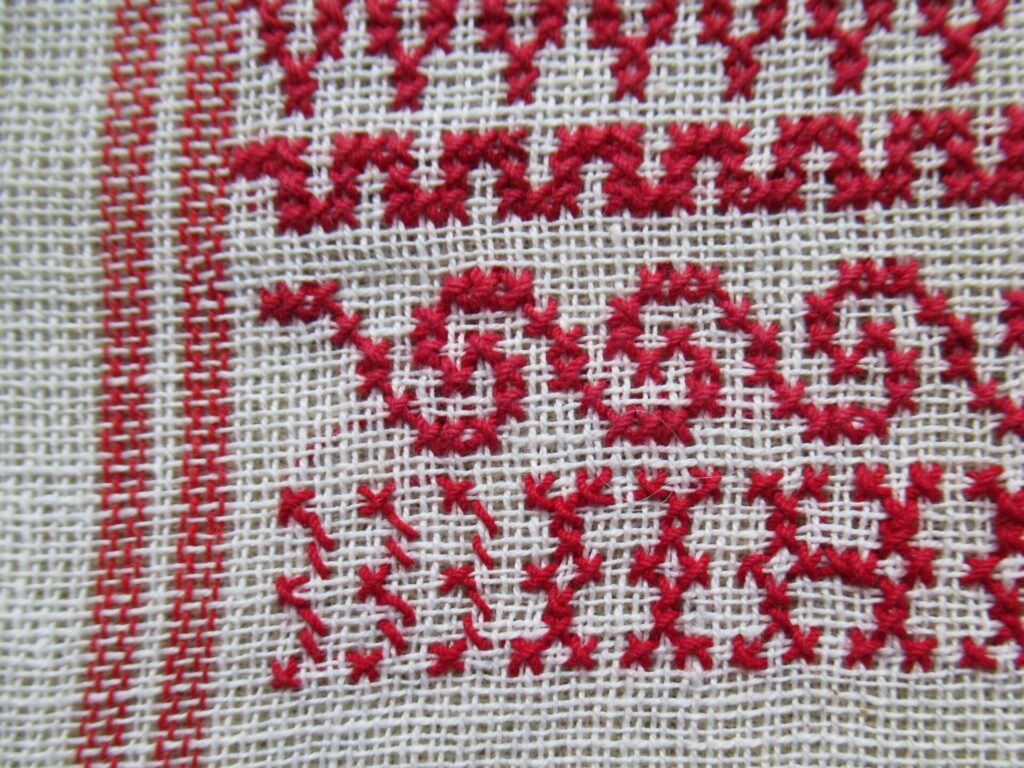
Not only did she show it to me, she also embroidered her name and the date on it.
My Mum made the sampler at school in 1941, when she was 8 or 9. It was the beginning of World War II and the family lived in Leeuwarden, the capital of Friesland. She didn’t talk about it very much, but I have heard stories of bombings and scarcity.
One story that has stayed with me, is that they sometimes had ‘guests’ staying at their house. At those times, she and her sisters shared one bed to free up their own beds. During a razzia, the children were woken up in the middle of the night. The visitors were hidden in a secret space, and the girls had to run around the house, so that the Germans couldn’t see who had been sleeping where. A strange and scary time to grow up in.
To some girls, making an embroidery sampler may have been a welcome distraction. I don’t think it was to my Mum.
I’ve seen similar samplers, and compared to those, hers has only a few decorative borders. The alphabet is incomplete and the letters are jumbled up.
To the left of the actual letters, there are 3 aborted attempts (photo below, bottom left). Or were those the place where she started, meant for practicing cross stitches?
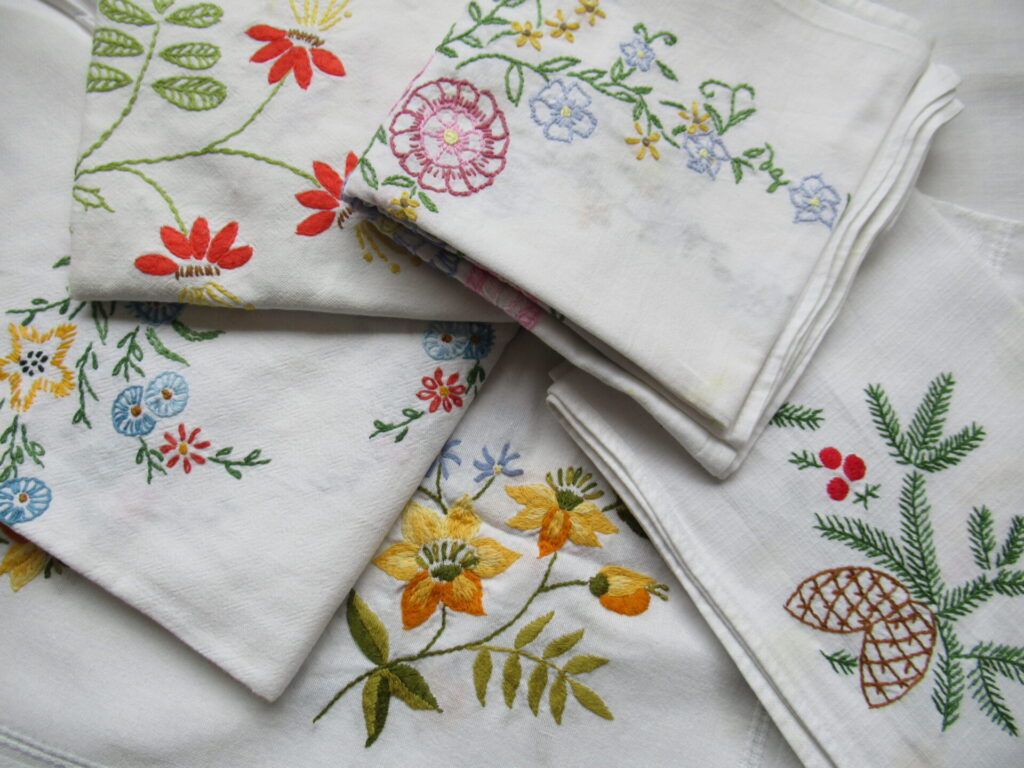
After this, she never did any counted cross stitch again. She did like embroidery, but of a different kind. She has made many, many colourful table cloths embroidering over pre-printed patterns.
Still, although Mum didn’t enjoy doing cross stitch, the sampler must have been special to her. After WWII, in the early 1950s, the family (minus one daughter who was already married) emigrated to Australia, hoping for a better life.
My Mum’s fiancé (later my Dad) came with them, but couldn’t acclimatize. And several years later my Mum and Dad came back to the Netherlands, with just one suitcase each holding all of their earthly possessions. The embroidery sampler must have been in her suitcase, travelling all the way to Australia and back again. An extraordinary story about an ordinary sampler.
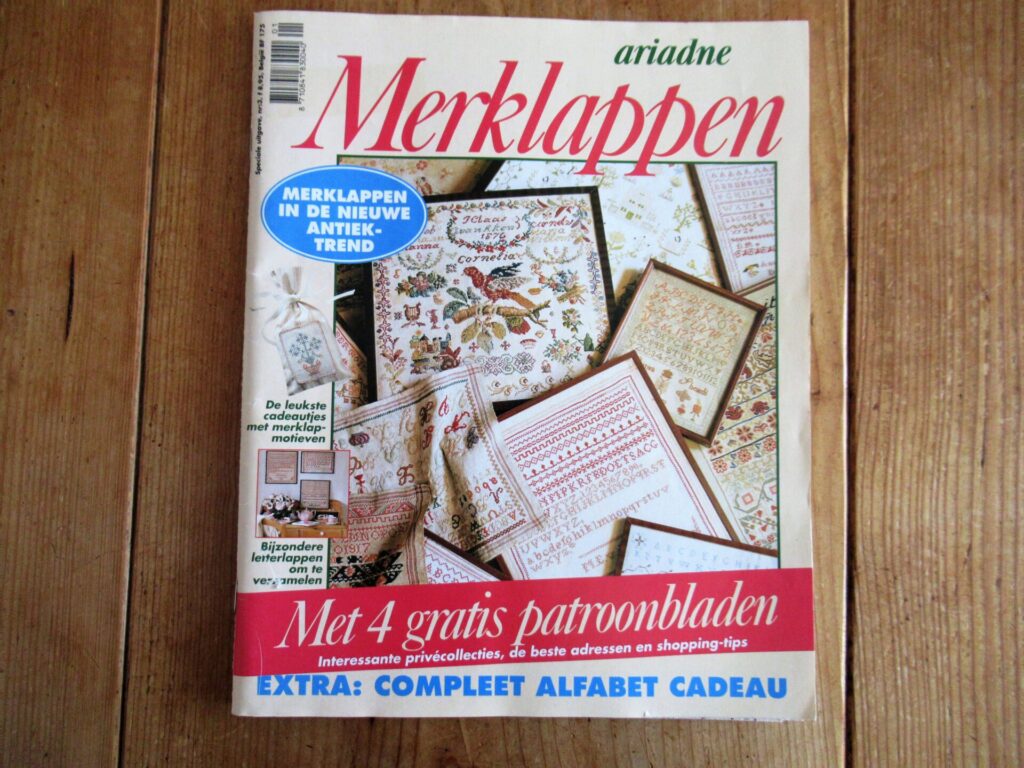
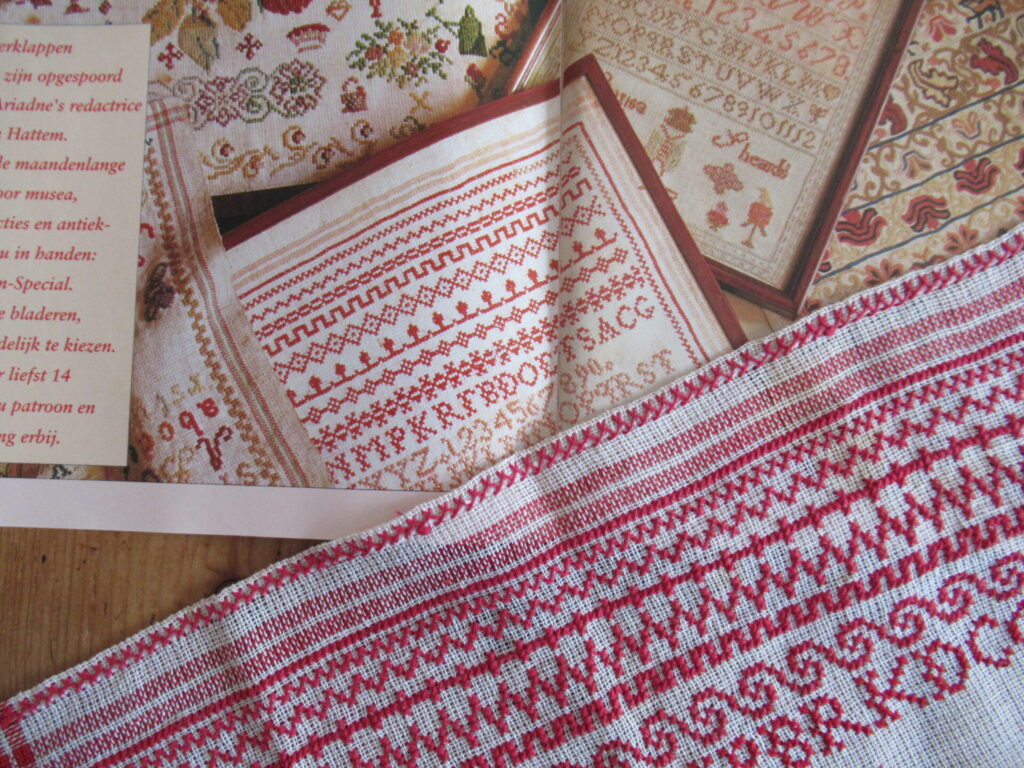
I have an old magazine packed with pictures and patterns of embroidery samplers.
There are many much more elaborate samplers in it, but also several school samplers. Here is Mum’s sampler next to one in the magazine. Same kind of letters, same kind of decorative borders.
And here are three similar ones framed on a wall. They are almost always embroidered just in red thread, with a few exceptions using blue as well as red.
I’m thinking of having Mum’s cleaned and framed now, too.
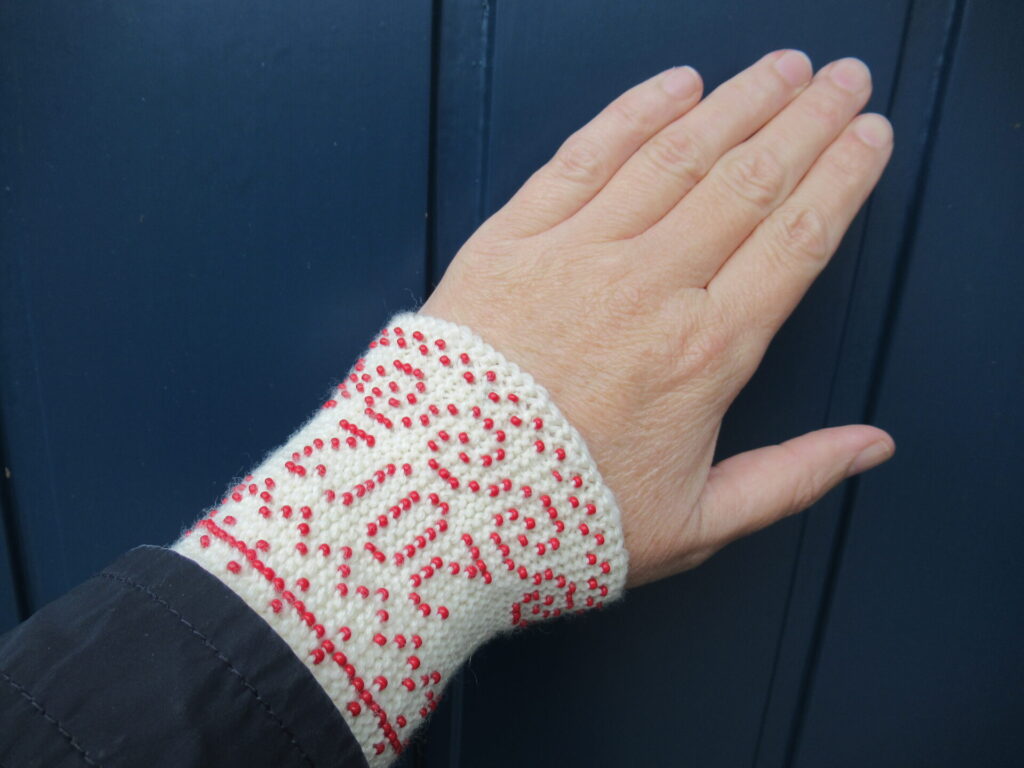
Years ago, I knit a series of beaded wrist warmers…
…including a pair inspired by the embroidery sampler. One of them with my initials, and the other with the year I made them on it.
They are nice accessories that keep the wind from blowing up my sleeves when I’m riding my bicycle.
I’m now working on a project incorporating elements from both the knitting sampler and the embroidery sampler. More about that in a few weeks’ time, I hope.
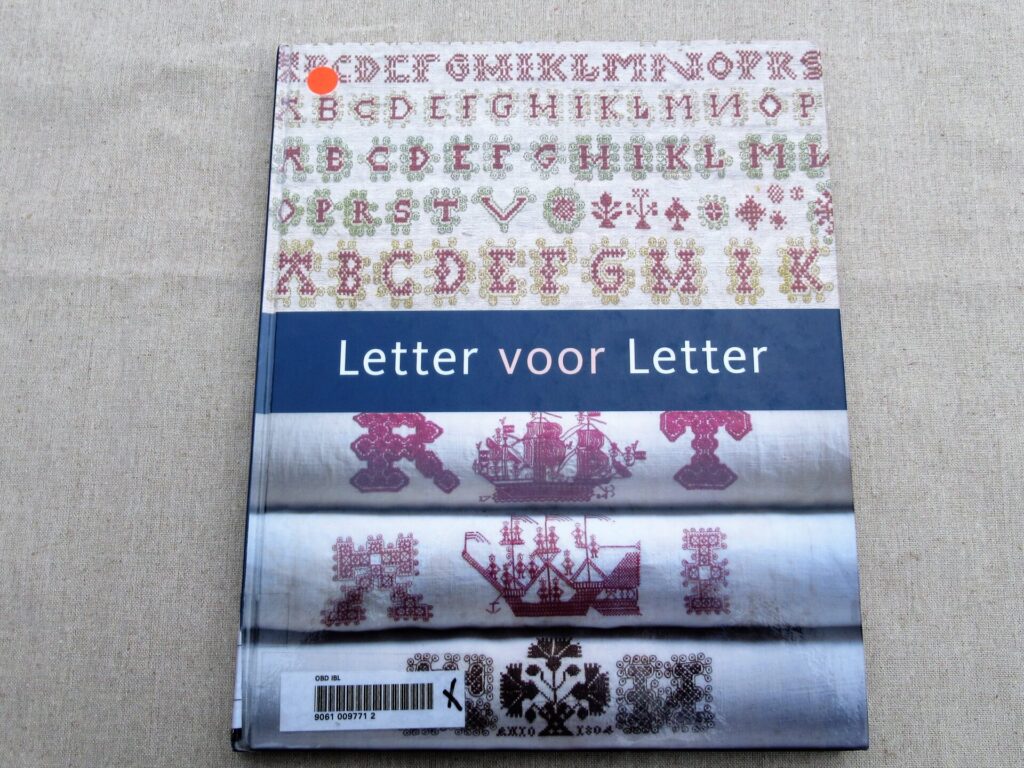
For those of you who’d like to know more, this is THE book on Frisian embroidery samplers:
Letter voor Letter was written by Gieneke Arnolli, the now-retired Fashion and Textiles curator of the Fries Museum in Leeuwarden, and Rosalie Sloof. It contains loads of information, many beautiful photographs, an English summary, and a complete fold-out pattern for a sampler. It is out of print, unfortunately, but there are some second-hand copies around, and it can still be borrowed from Dutch libraries.
The Fries Museum has a collection of over 600 samplers from the 17th to the 20th Century. A large part of the collection can be viewed on the website friesemerklappen.nl. A wonderful source of information and inspiration. Most examples of red school samplers like my Mum’s can be found on pages 6 and 7 of the website.
Click on the button ‘Alle merklappen’ for an overview. Zoom in on the samplers by holding the Ctrl key and scrolling simultaneously, or by holding the Ctrl key and using the + to zoom in and – to zoom out. Be amazed and have fun!
Following on from last week’s knitting sampler, I was going to show you my Mum’s embroidery sampler today. But I’m keeping that for later.
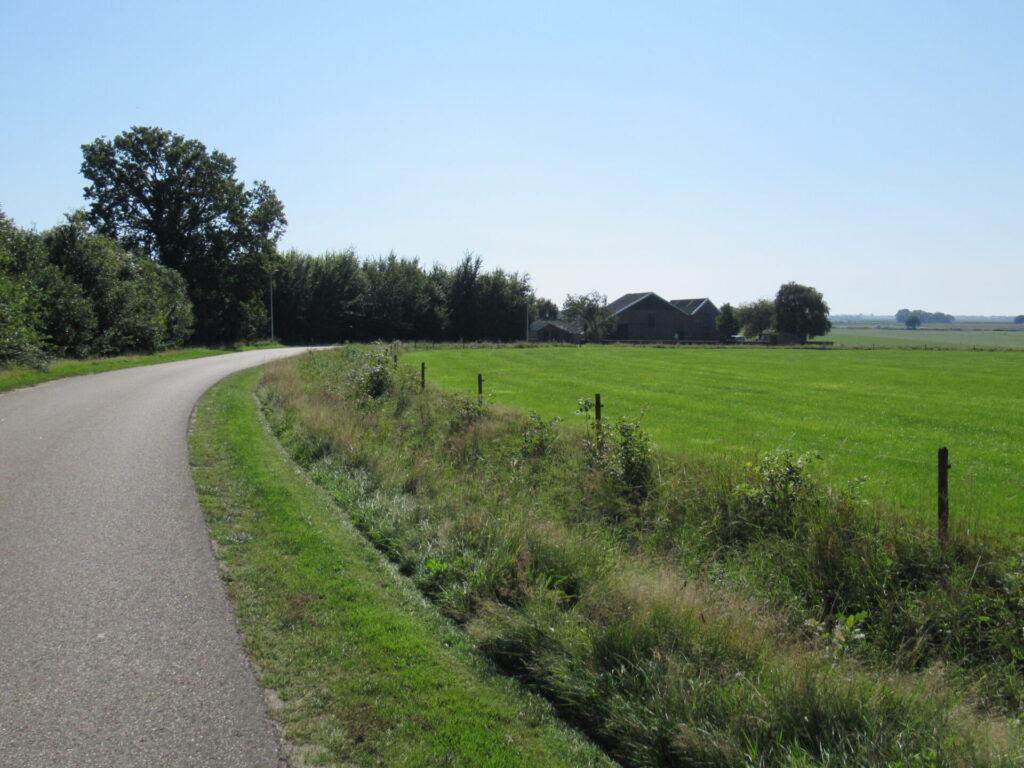
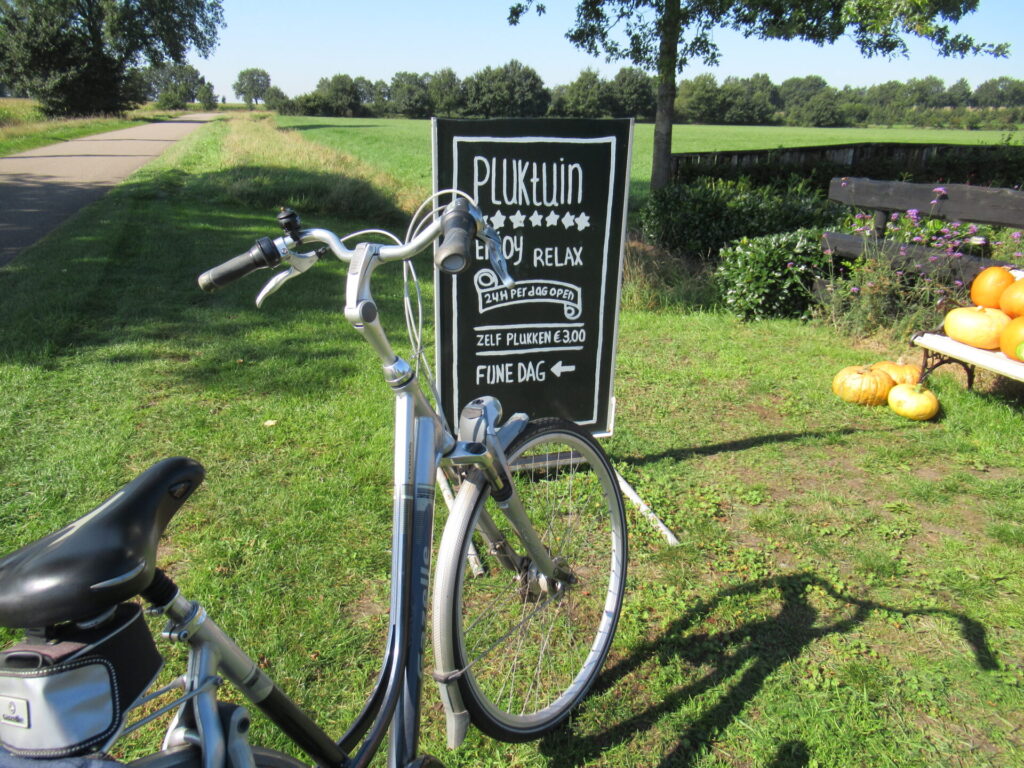
Instead, I’m taking you along to a Pick-Your-Own flower garden. It’s just outside our village – 10 minutes cycling at most. You can borrow a spare bicycle, if you like. All we need to do is adjust the saddle to your height and we’re good to go.
Through the tunnel underneath the ring road, left and left again and we’re in a lane leading past several farms.
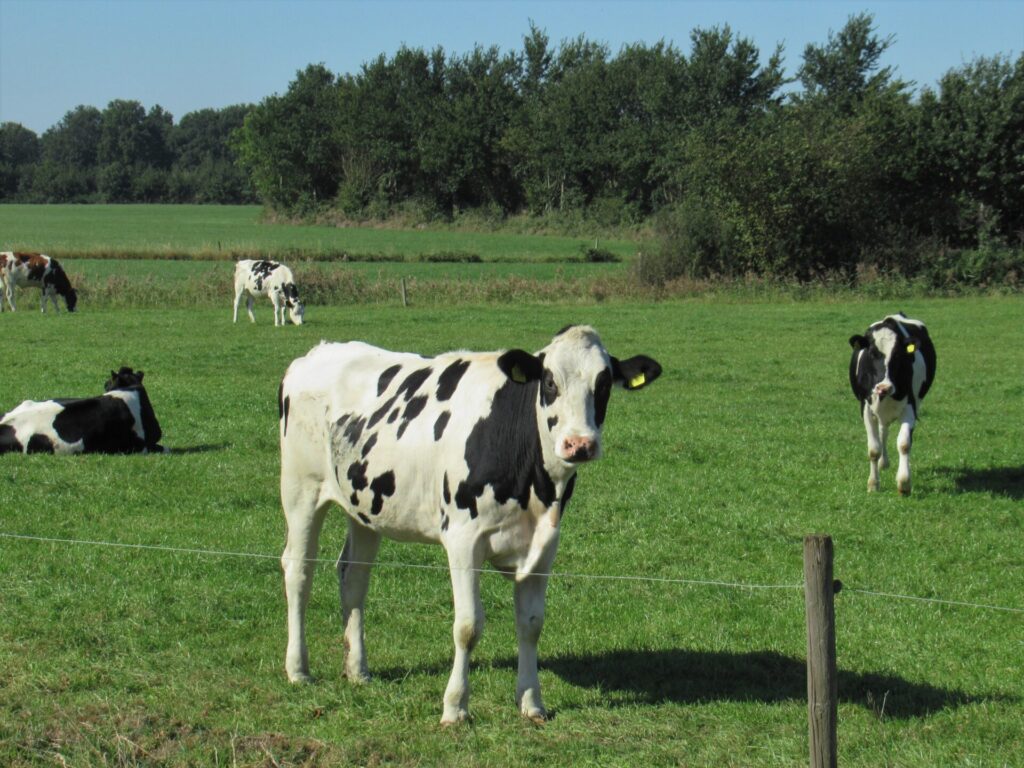
A short stop to say hello to a few grazing cows. Hello girls!
Hop on again, cycle two minutes more, and we’re there.
‘Have a nice day’, the sign says. ‘Open 24/7’. And ‘Relax’ and ‘Enjoy’, too. And that’s exactly what we’re here for – to just relax and enjoy this beautiful spot for a few moments.
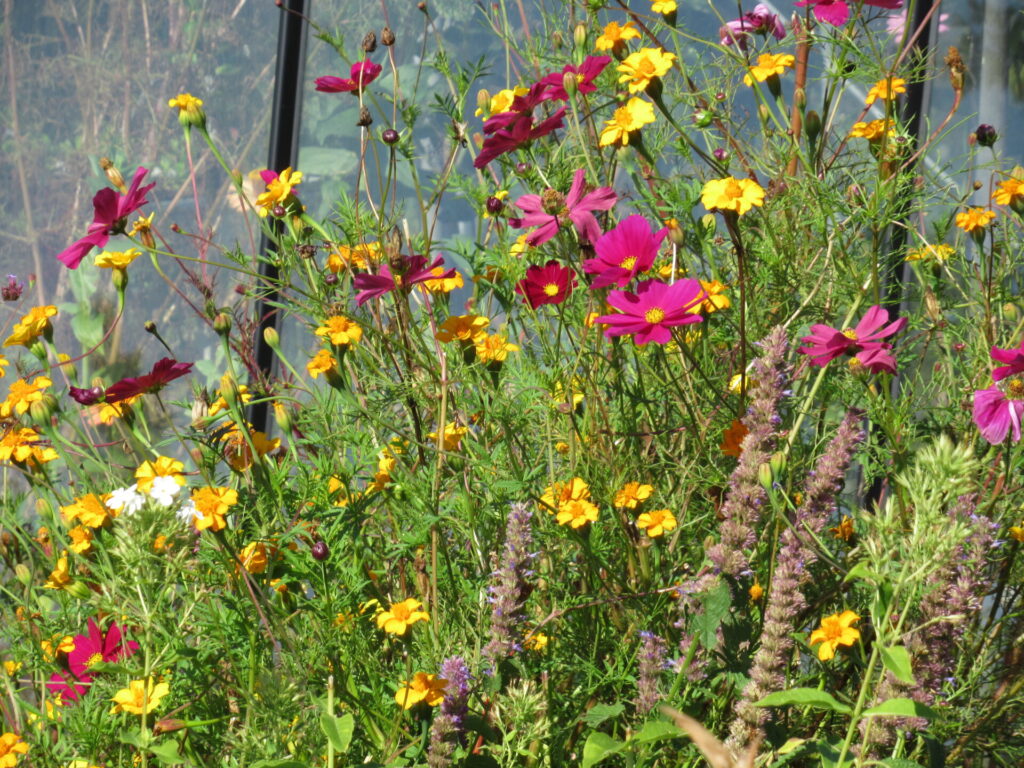
The owner comes up, apologizing that there isn’t very much to pick anymore at the end of Summer. I reassure her that it’s fine. We don’t need a huge bunch of flowers. Just being here is a treat in itself. And I can see that there are enough flowers left for a posy.
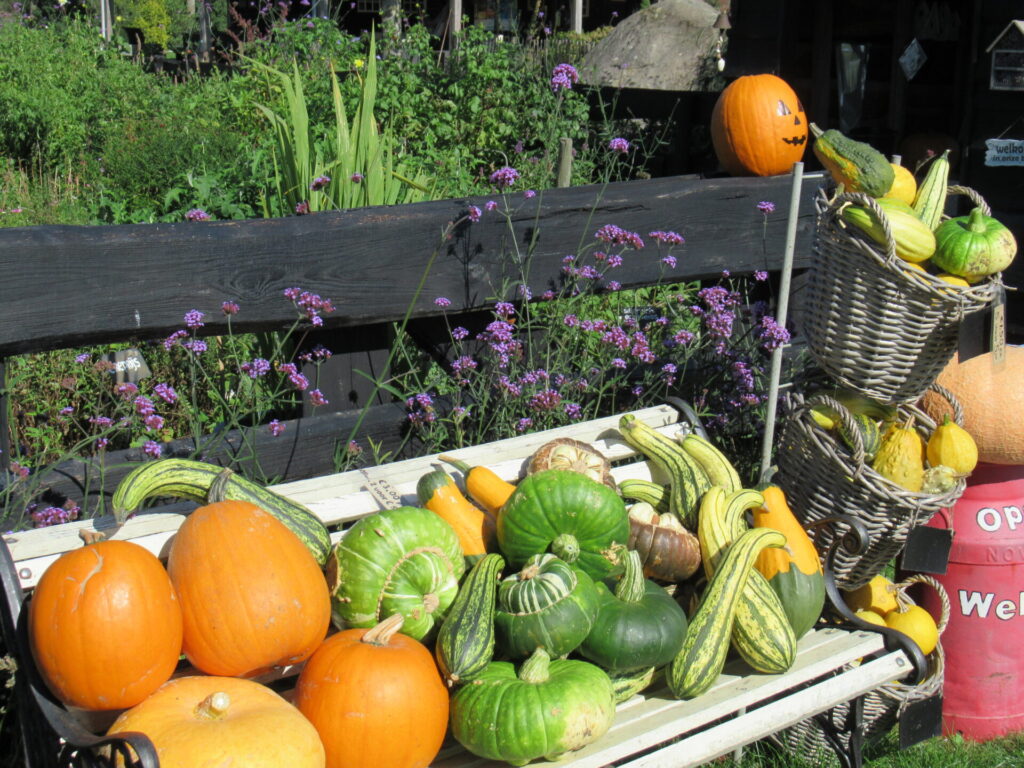
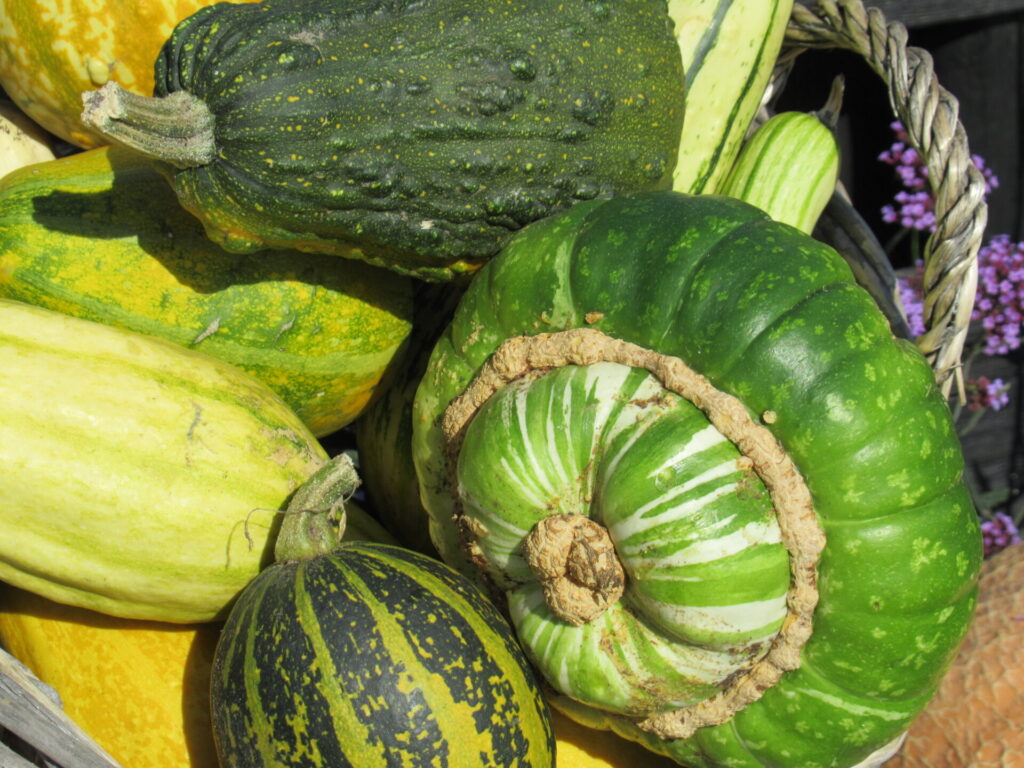
Besides, there are loads of ornamental gourds as well.
Displayed so attractively. And so many different shades, shapes and sizes.
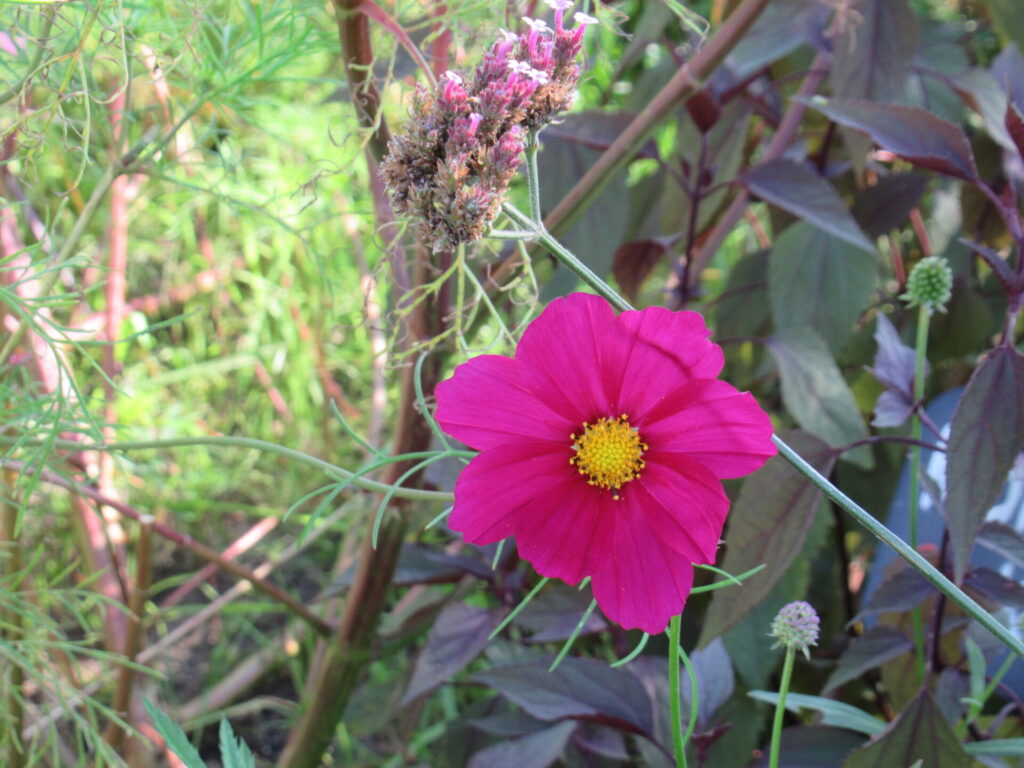
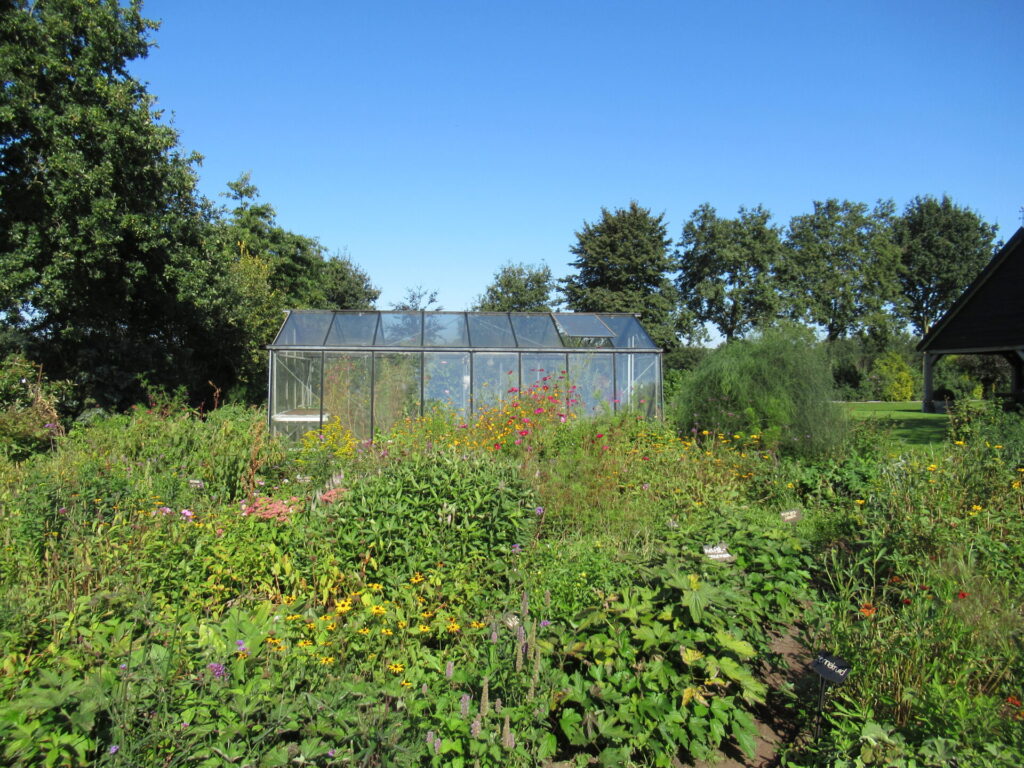
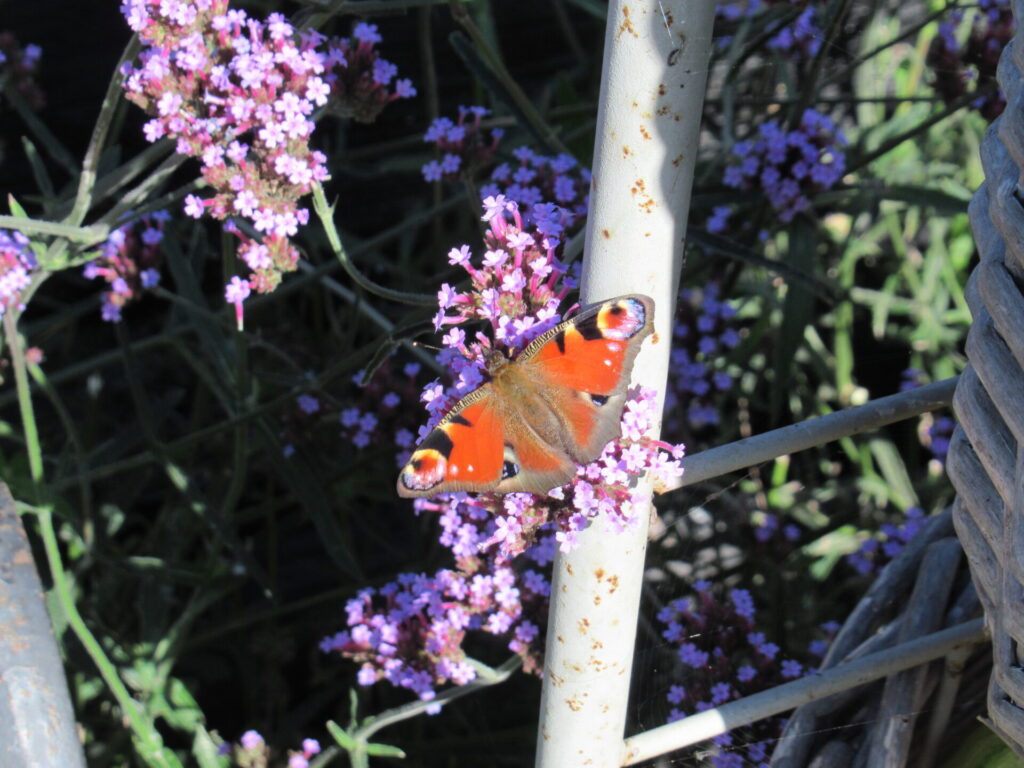
Basking in the sun, on the very last day of Summer, the garden is filled with butterflies…
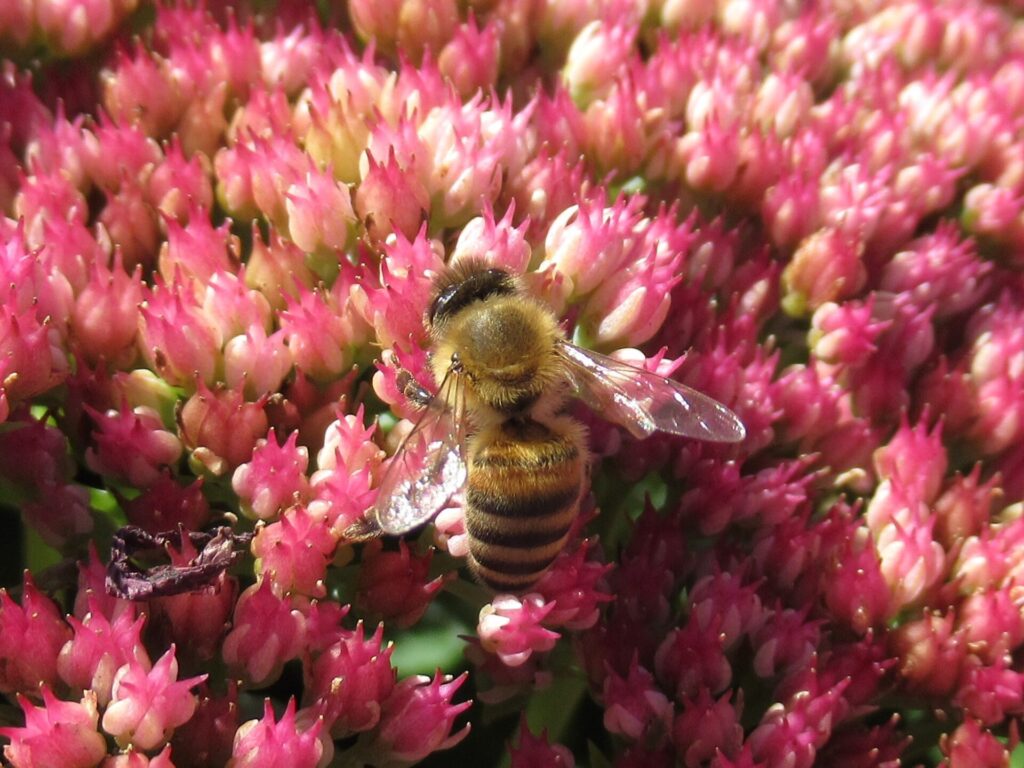
…bees and buzzing.
I can feel my heart-rate slowing down already – just what I need.
For me, it works like this: For a while I’m chugging along nicely. Then work/life gets busier, I speed up, am immensely productive for a while and think I’m doing great. But I start forgetting to take breaks, to exercise, and to relax intentionally in the evenings. And suddenly I’m not feeling so great anymore.
It’s an old familiar pattern. Nowadays, it usually isn’t too long before I recognize it, fortunately. And I’m better at thinking of ways to slow down again than I used to be.
So, that’s why we’re here in this PYO garden today. Let’s enjoy it a little more.
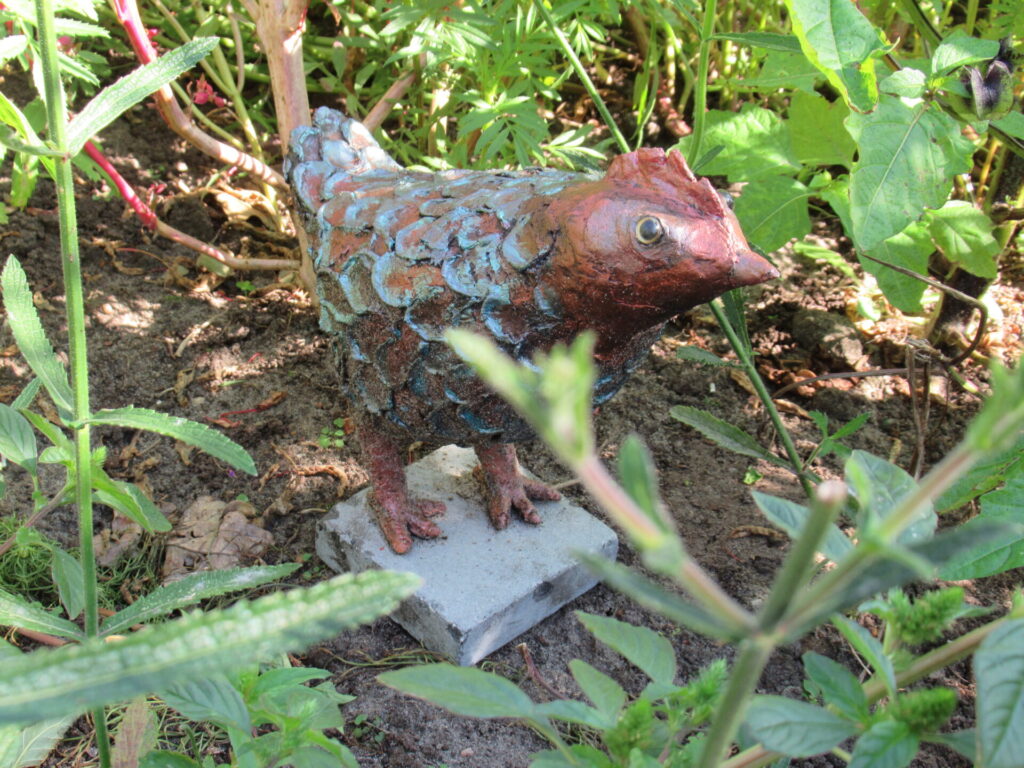
Everything shows that a lot of loving care and attention has gone into the garden. It’s not just the flowers and plants. Hidden between them are a few lovely surprises, too. Like this adorable chicken.
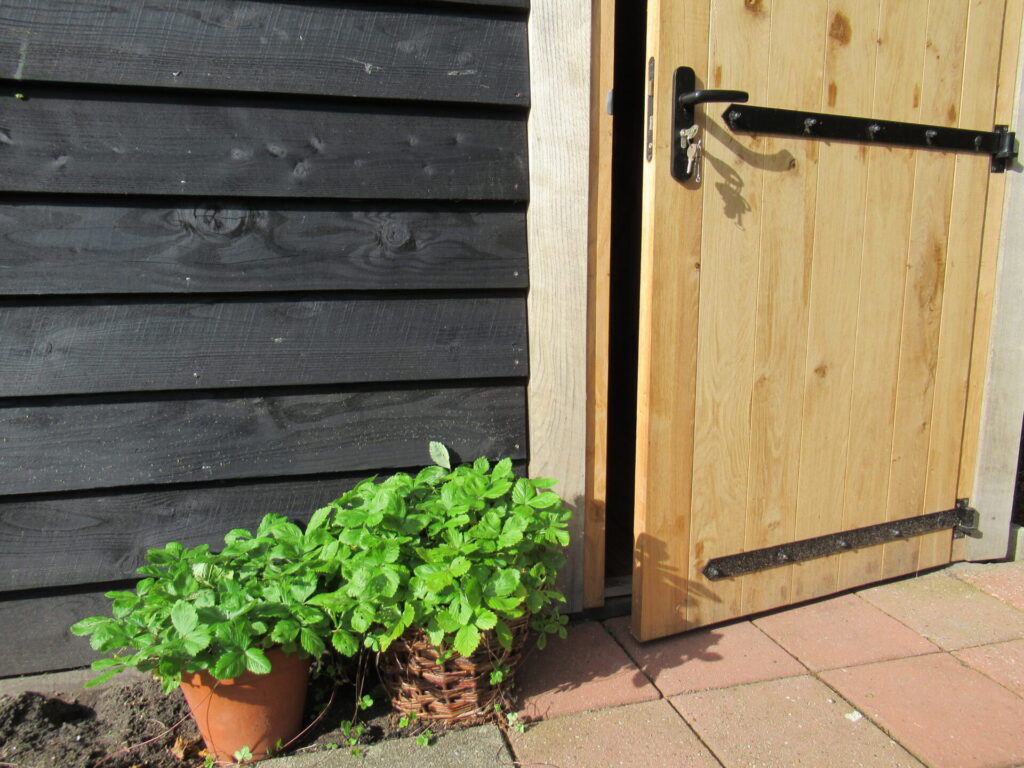
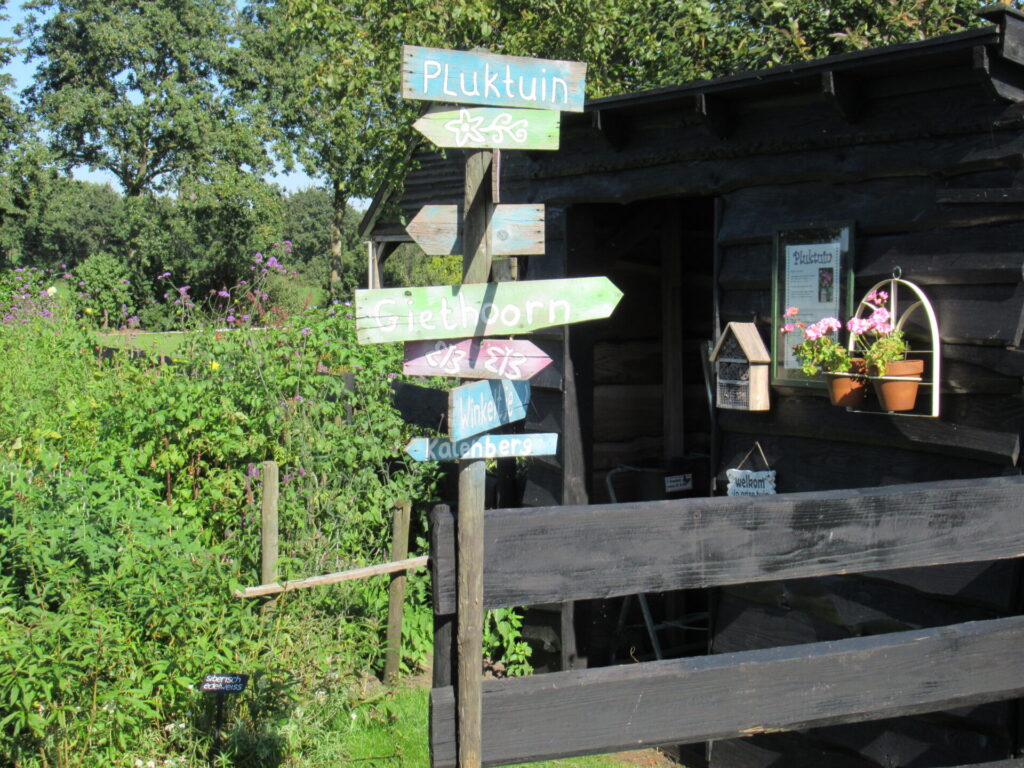
Well, it’s time to head for the wooden shed, where the secateurs, the guest book and the money tin are. It’s painted black as many traditional outbuildings around here are.
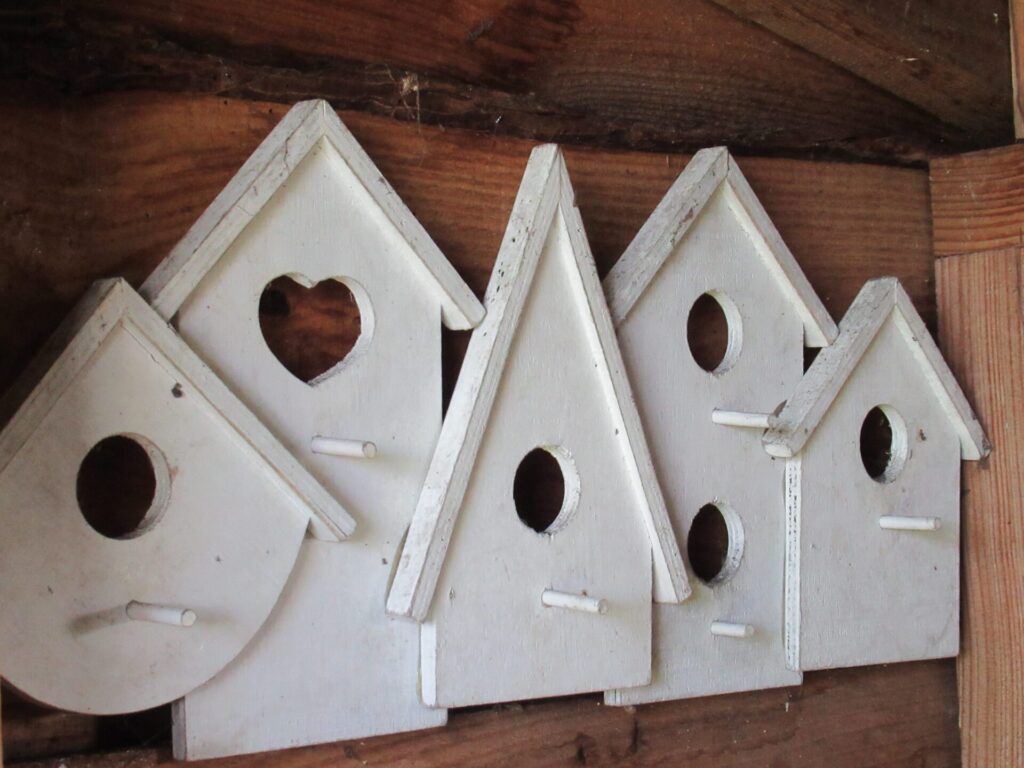
Inside, the same loving care as in the garden is apparent. It’s in the small, whimsical details.
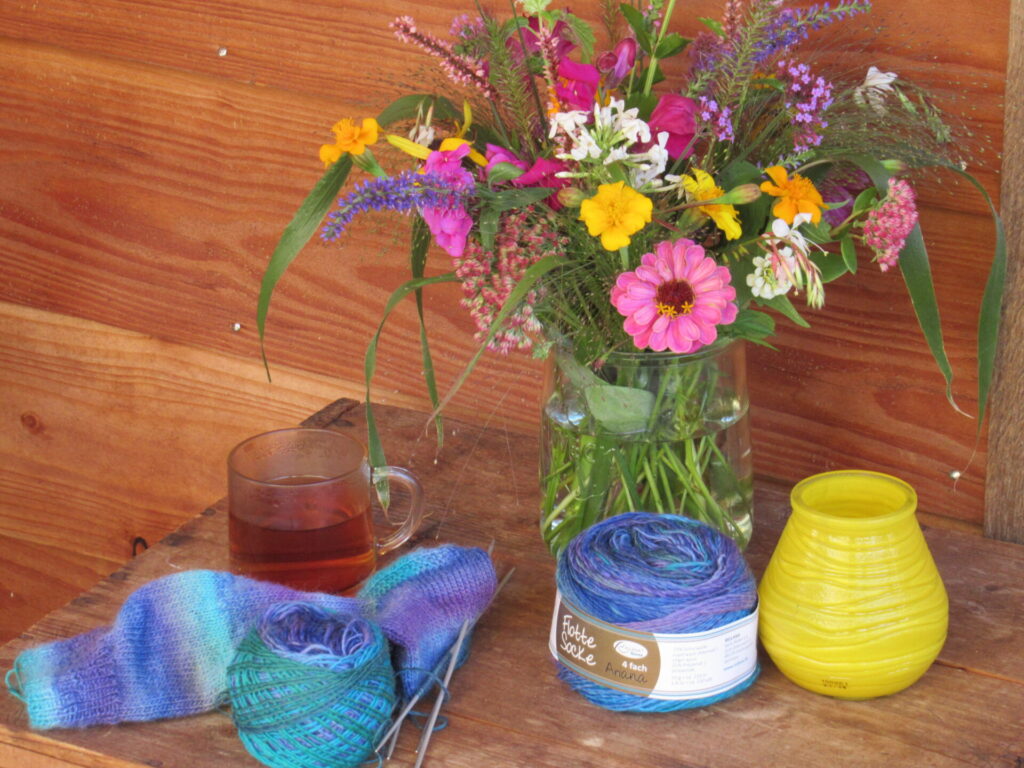
Now, let’s hurry home, before the flowers wilt. I’ll quickly put them in a vase and put the kettle on. I hope you have time for a cuppa? I’d like to show you something else I did to slow down and relax – I cast on a simple pair of socks.
For me, sock knitting is one of the most relaxing things to do, especially using self-striping yarn.
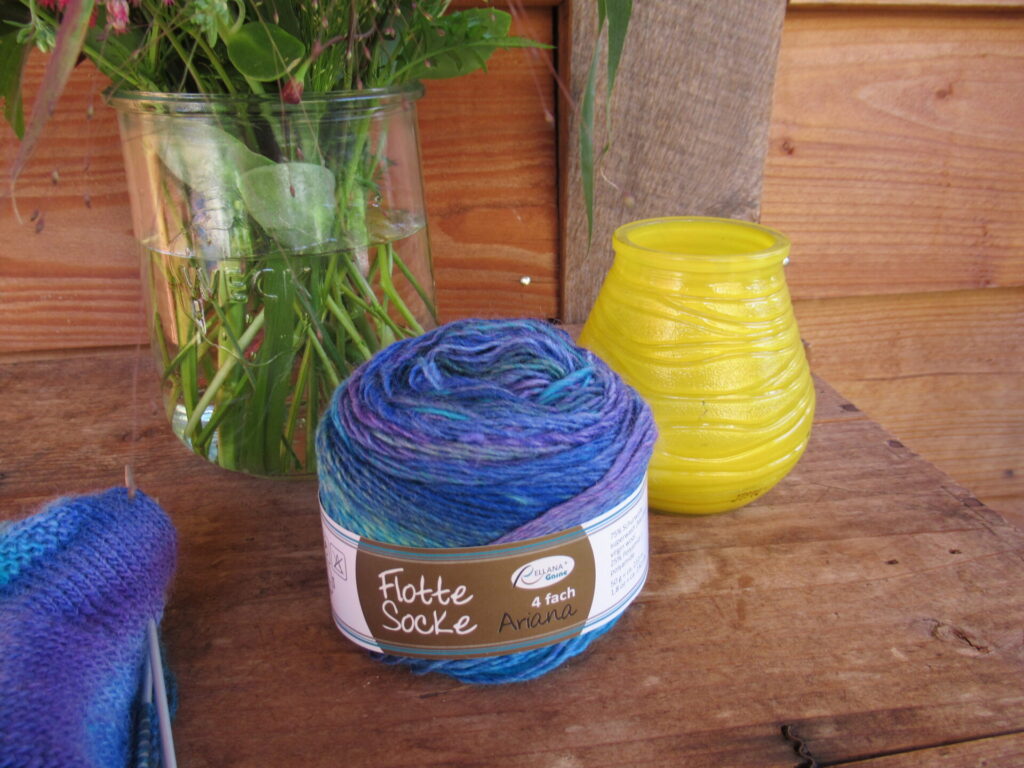
I’m making these for a friend’s Birthday in early October. I haven’t knit with this yarn before and am not entirely convinced it’s suitable for socks, although it is sold as sock yarn. It’s Rellana Flotte Socke ‘Ariana’ – a single ply yarn with ticker and thinner (some really, really thin) bits here and there. Very soft and slightly fuzzy.
I’m giving it a try because of the beautiful colours. Time will tell if it’s a wise decision. My friend won’t mind being a guinea pig, I’m sure. If the socks shrink and felt, I’ll knit her another pair (or two).
Well, that’s all for today. Thank you for visiting. And with everything that’s happening in the world right now and alongside everything else you’re doing, please remember to rest, relax, knit (if you’re a knitter), and look for things to enjoy.
Last week, my musings about knitting traditions ended with a remark about something I found in my parents’ attic. Well, here it is – a knitting sampler. I found it in 1999, after my Mum suddenly and unexpectedly died from a brain aneurysm, aged 66.
During the decade or so before she died, my Mum worked as a housecleaner. She left other people’s houses sparkling and immaculate, but didn’t always have much time or energy left for her own home. The Christmas before she died, she told me that it bothered her that the house was so messy, and I promised to help her sort things out in the New Year. But then she died in January.
In memory of my Mum and for my Dad’s sake, I tackled the tidying after all. It was a difficult and hectic time. I was grieving over my Mum, my Dad was developing Alzheimer’s, I had a young daughter and a job. So when I found the knitting sampler, I just stored it away safely in a box in my own home and forgot about it.
It wasn’t until earlier this year that I remembered it. Now, I’m at a stage in my life where I can give it the attention it deserves.
Who knit it? And when? I have no idea. The strange thing is that my Mum never mentioned it or showed it to me. That is strange because I did know about her embroidery sampler.
At one end, it has knitted-in initials:
GW EW I
I know from embroidery samplers that girls often included their own initials as well as those of their parents. In this case, that would mean that the knitter’s name started with an I, and her parents were EW and GW.
That wasn’t my Mum. Her name started with a T. And it wasn’t my maternal or paternal grandmother either. Can it be older? I don’t know anything about my family further back than that.
Or perhaps it was knit by somebody else entirely. Perhaps it was given to her when she helped one or other of her friends clean out their parents’ homes after they died. I really have no idea and don’t know how to find out.
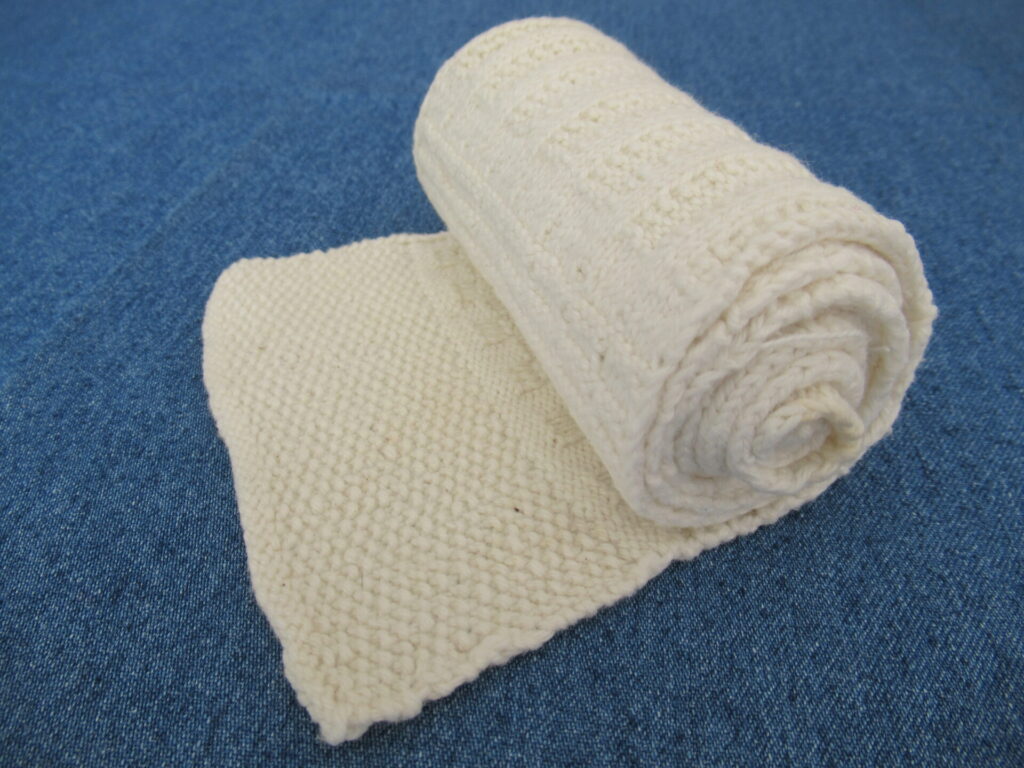
Well, a little more about the sampler itself.
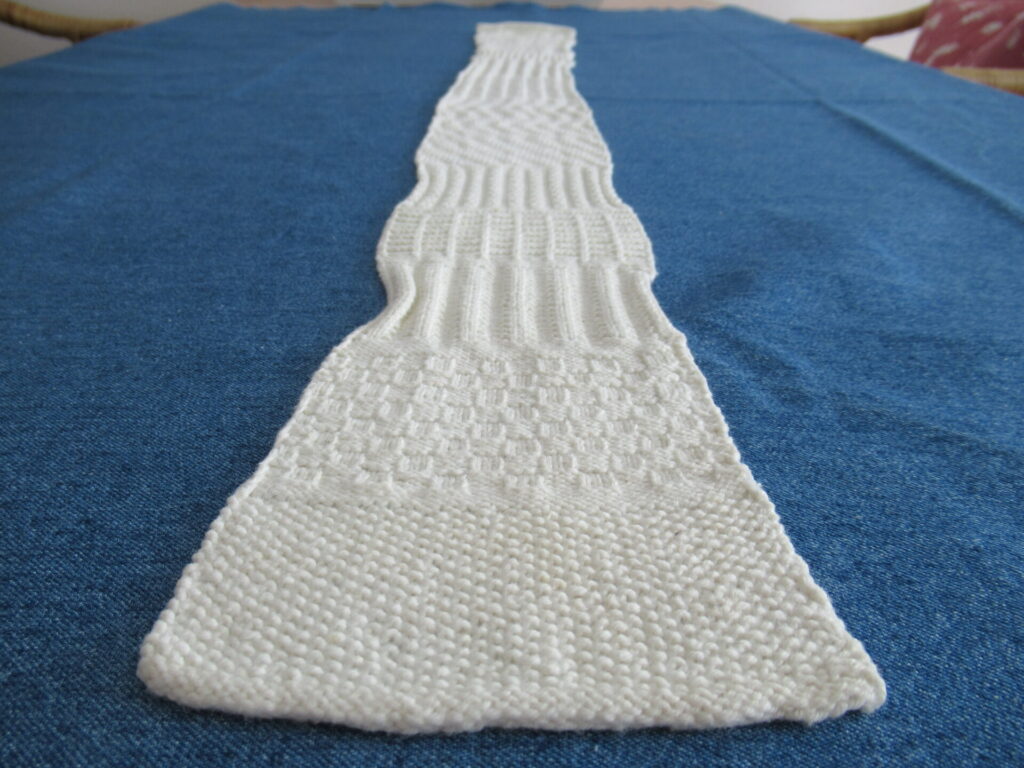
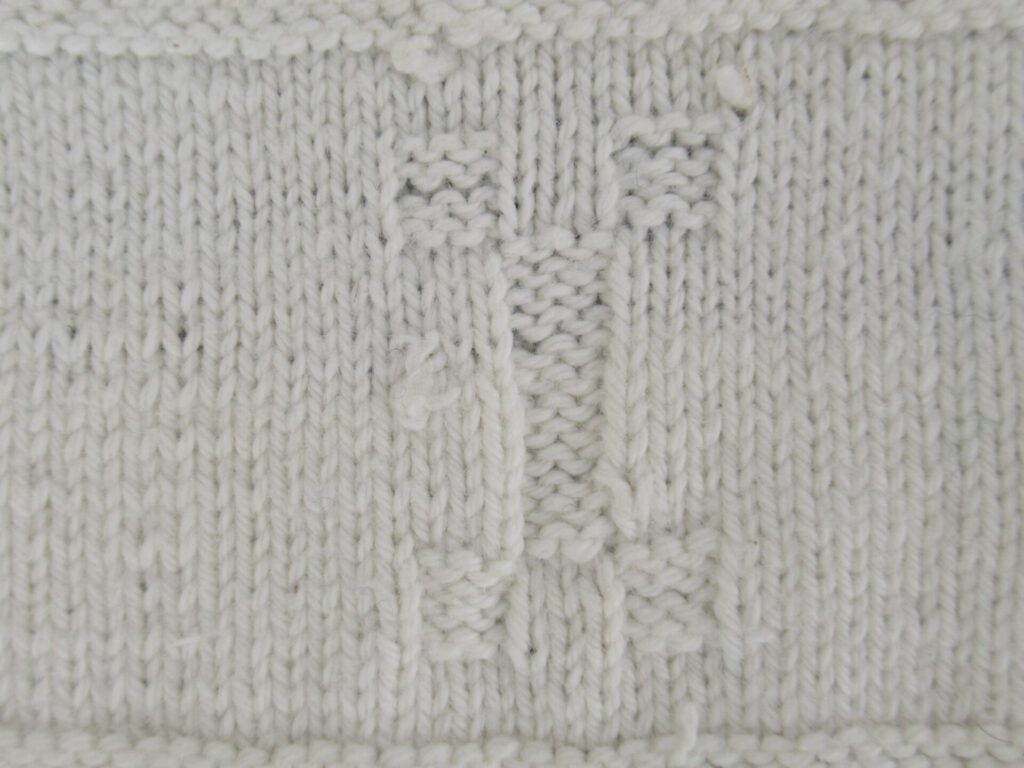
It is 0.90 m/35½” long and 9-12 cm/3½”-4¾” wide, depending on the stitch pattern.
It isn’t a particularly beautiful or elaborate sampler. I’ve looked around on the internet a bit and saw some much longer ones with many more different stitch patterns, including lace.
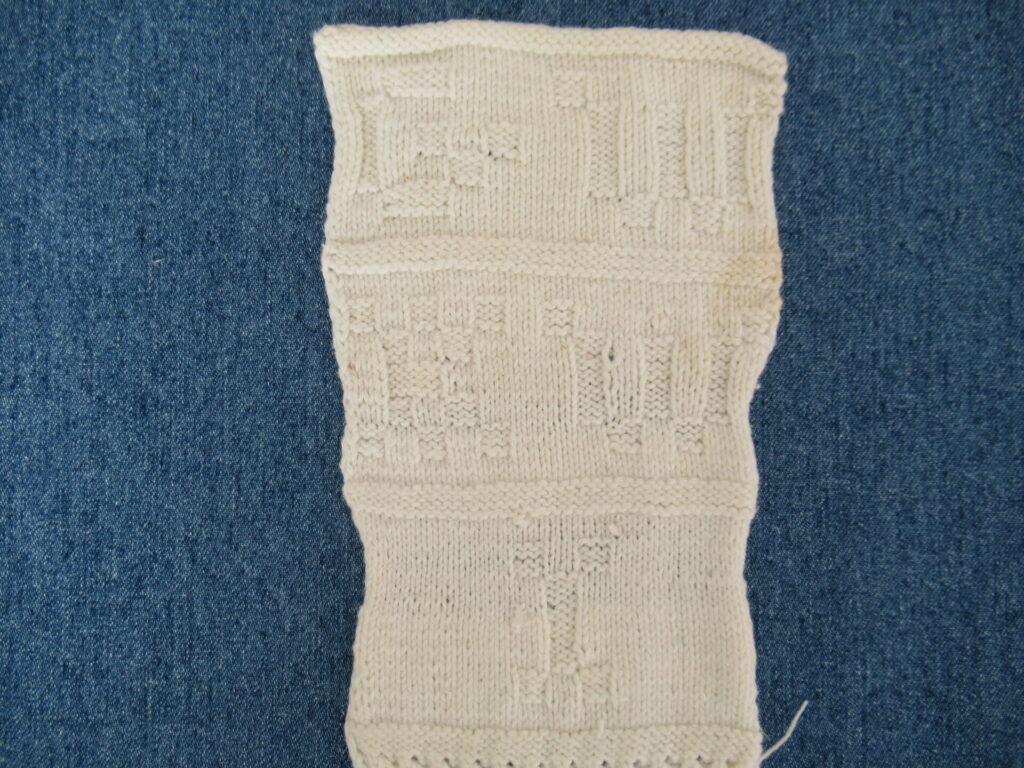
Mine has only 10 different stitch patterns, separated by several rows of stocking stitch. And all of them are simple knit-and-purl combinations.
The yarn used is a whitish cotton. Was it knit in unbleached cotton and bleached afterwards? Or was it knit in white cotton that has yellowed a bit?
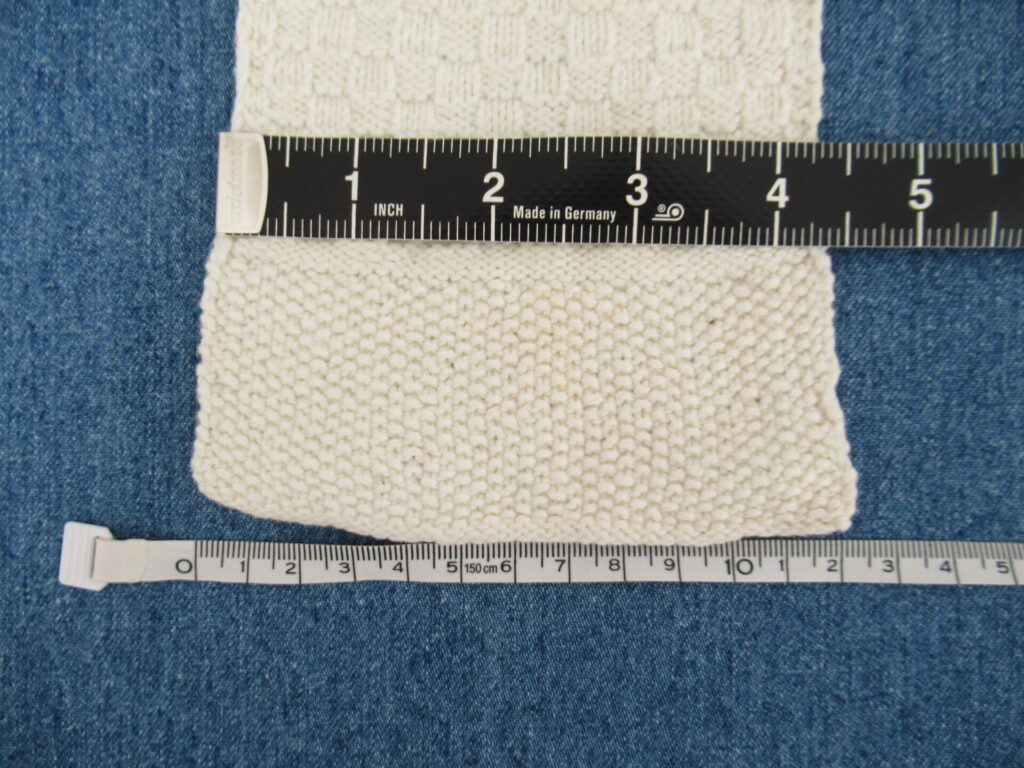
The knitting is rather stiff, at around 40 stitches to 10 cm/4”. Was the girl a tight knitter? Or did the knitting shrink due to washing at a high temperature?
Was it knit by a beginner? There are errors here and there, but the knitting looks quite regular. And then there are several knots in the yarn around the I. Why didn’t she choose a tidier solution?
I’d love to know more about my simple sampler (and knitting samplers in general) and would be very grateful for any ideas about where to look for information. Have you inherited a knitting sampler, by any chance? Do you know who knit it or when?
I’ve been thinking about what to do with it. I suppose knitting samplers were originally not only meant to teach a girl to knit, but also to provide her with inspiration for further knitting. Useful things for her home and her family in all probability.
I like the idea of adopting ‘my’ sampler in this spirit. To use it as a starting point for some knitting projects. I’m already working on one and will show you when it’s finished.
Today, I’d like to talk a bit about knitting traditions. I’m not an expert or a researcher, but I am a great lover of traditional knitting techniques and patterns. There are many beautiful and interesting books about traditional knitting, and I’ve built up quite a nice library over the years. These books, as well as various museum collections, have always inspired me tremendously in my own knitting. But lately I’ve been thinking…
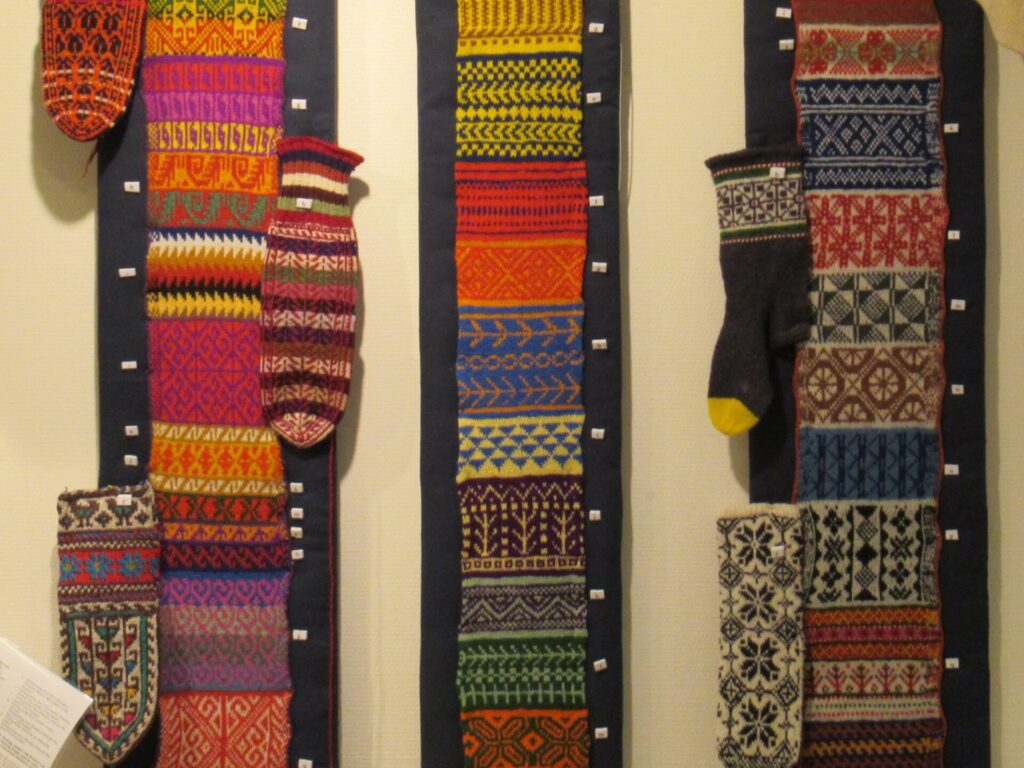
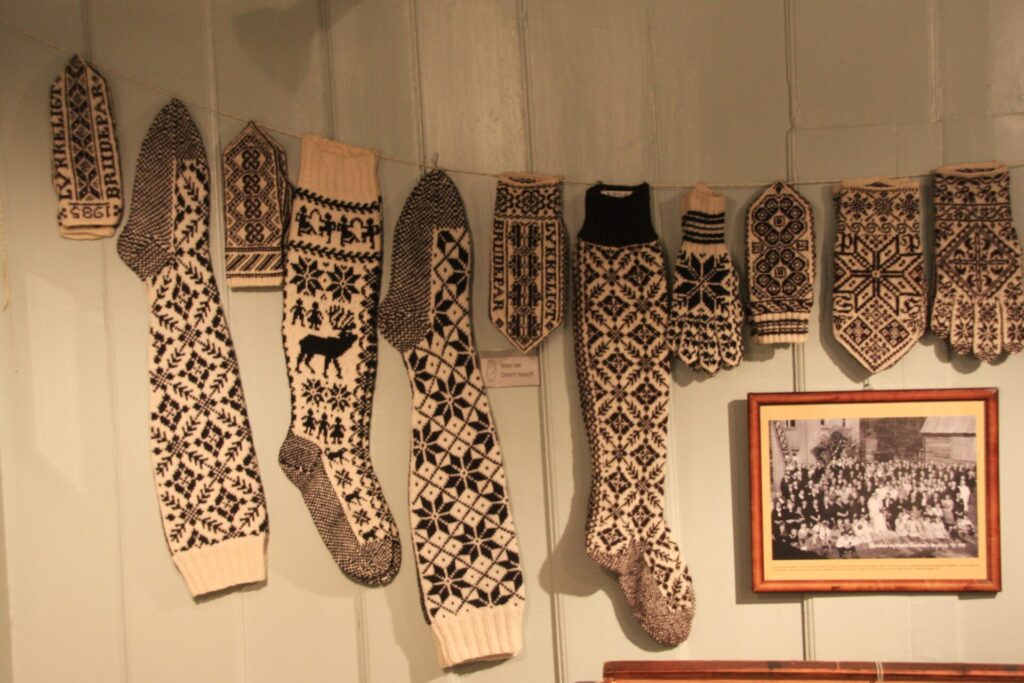
It started with a visit to a stunning sock exhibition last November. I was particularly inspired by three samplers with patterns taken from socks from all over the world (photo above), and thought it would be a great idea to borrow from them for all kinds of other projects.
Later, doubts crept in. Can we just borrow freely from other knitting traditions? Anything? From any tradition? When does borrowing become stealing? Or even cultural appropriation? What if a pattern has a special religious or spiritual meaning for the culture we borrow it from of which we may not be aware?
I don’t have the answers. These are just some of the questions that popped into my head.
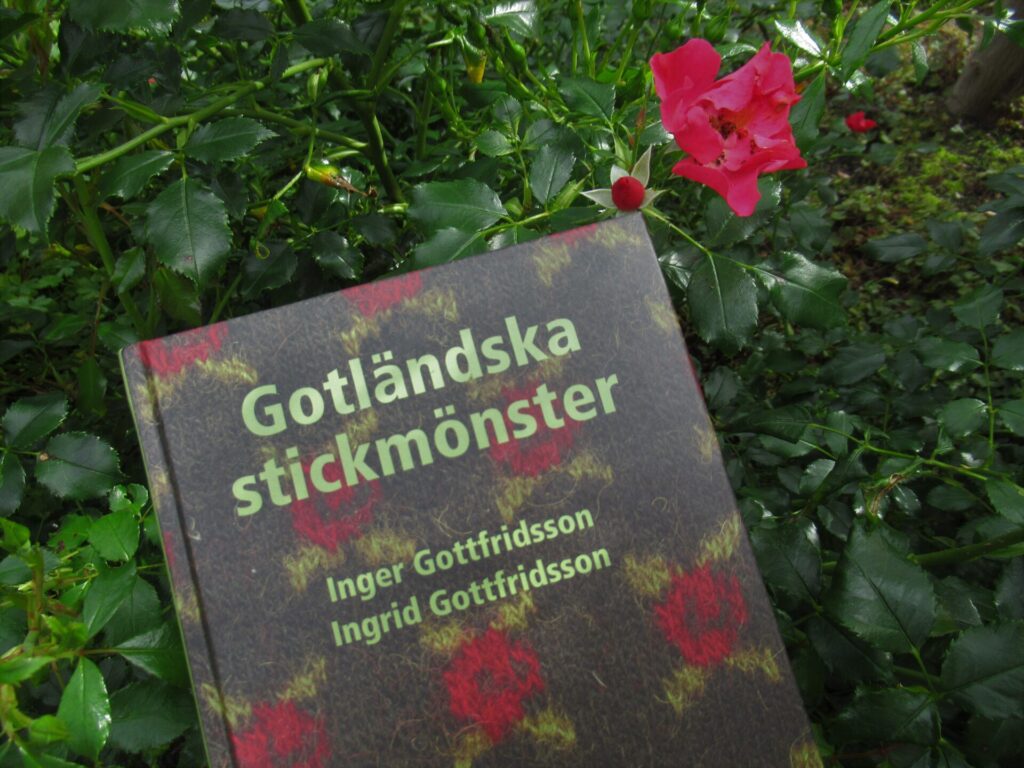
Well, back to my knitting book library. Sometimes people generously and thoughtfully give me books to add to it. My sister-in-law brought back this lovely booklet from a holiday in the island of Gotland, Sweden, a couple of years ago.
It is filled with patterns for mittens, some with tiny roses, some with blueberries, and many with geometrical motifs.
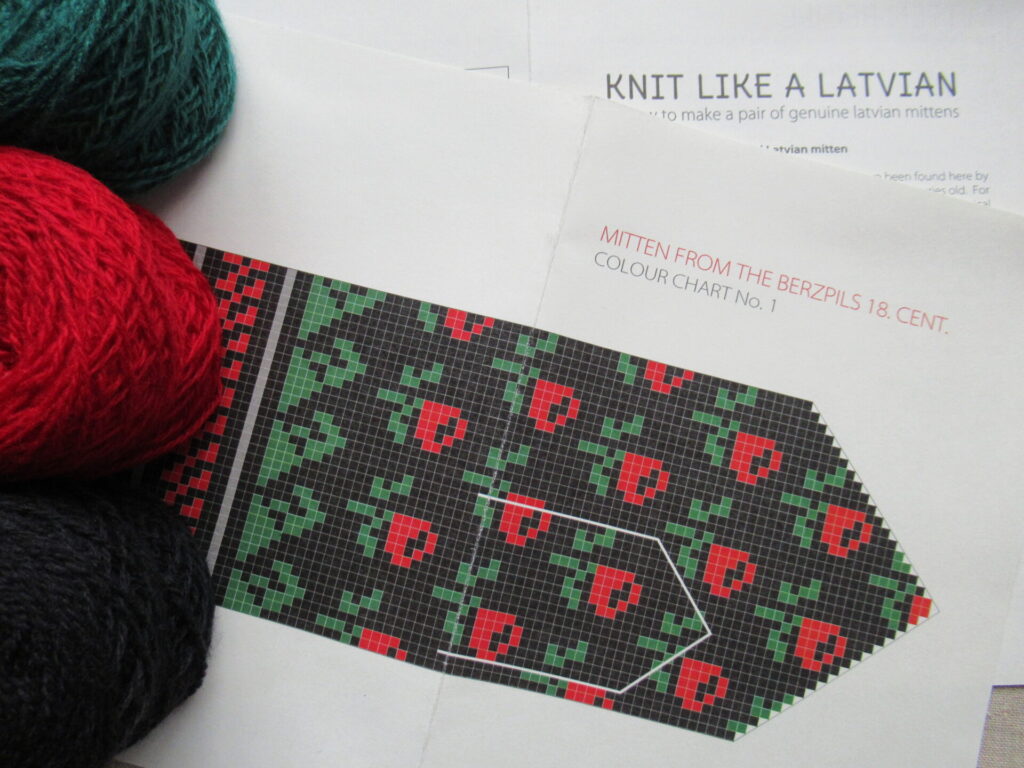
All of them are beautiful, but are they unique to Gotland? They have a lot in common with Norwegian mittens I’ve seen, and the ones with the roses on the front cover look very much like some Latvian ones.
And here is a picture taken during our visit to the knitting museum in Selbu, Norway.
The 8-pointed star, prominent in the 3rd stocking from the left, is also known as Selburose and has been used a lot in that area. Does that mean that it was invented by the people of Selbu and belongs to them? Do they have a sort of copyright?
No, of course it isn’t as black and white as that. The same kind of pattern appears in textiles from many other countries and cultures.
Take, for instance, these hand-knit mittens I bought during a holiday in Shetland. There is a ‘Selburose’ on the back of the hand, but it looks slightly different knit in colour.
It’s only to be expected that the same kind of patterns and motifs occur in different regions and countries. Some motifs, like the 8-pointed star, flow more or less automatically from the nature of the knit stitch itself. Besides, Shetland isn’t all that far from Norway and there has always been a lot of trading and traffic between them.
Both have great knitting traditions, and there are similarities. But still, Shetland knitting isn’t the same as Norwegian knitting. They both have colourwork, but it’s different. Shetland has a fabulous tradition of lace knitting that Norway doesn’t have. Norway has thick mittens, while Shetland mainly has finer gloves. And Shetland has hap shawls, while Norway doesn’t. Why? Another question I can’t answer. I can only guess that it’s something to do with the materials available and the climate, as well as with local tastes.
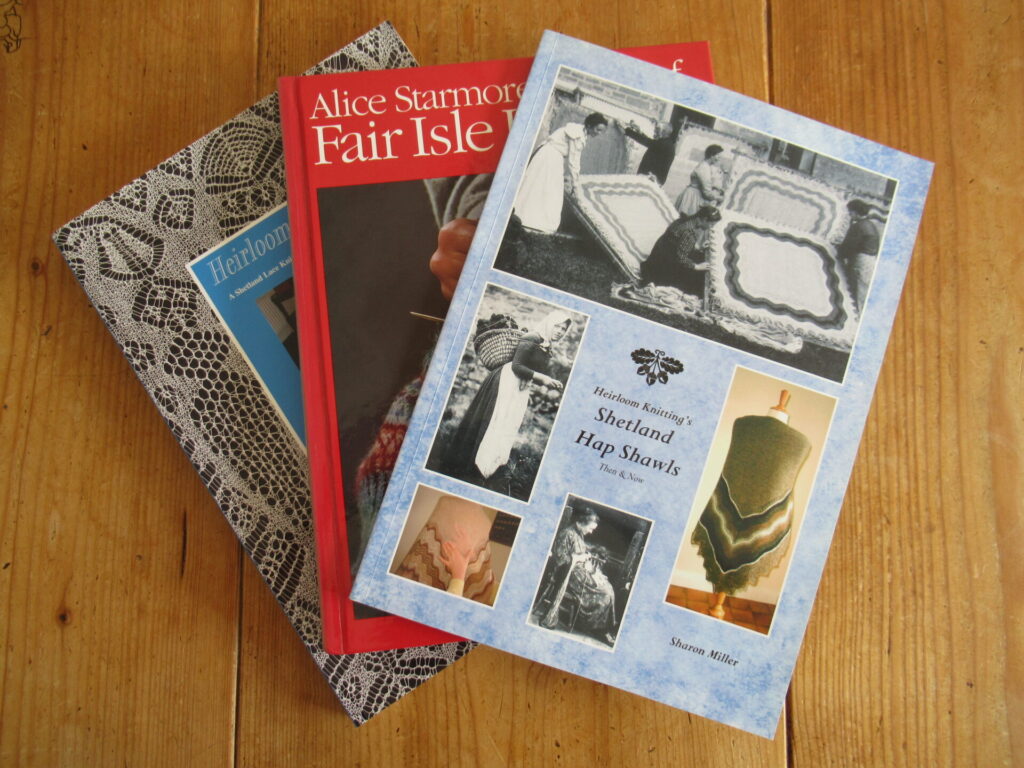
Here are 3 of my favourite books about Shetland knitting: Heirloom Knitting (about Shetland lace), Fair Isle Knitting and Shetland Hap Shawls Then & Now.
Classics on the subject, but none of them written by authors from Shetland. Fair Isle Knitting was written by Alice Starmore from the Hebrides, and the other two by Sharon Miller from Devon. What do knitters in Shetland think of that?
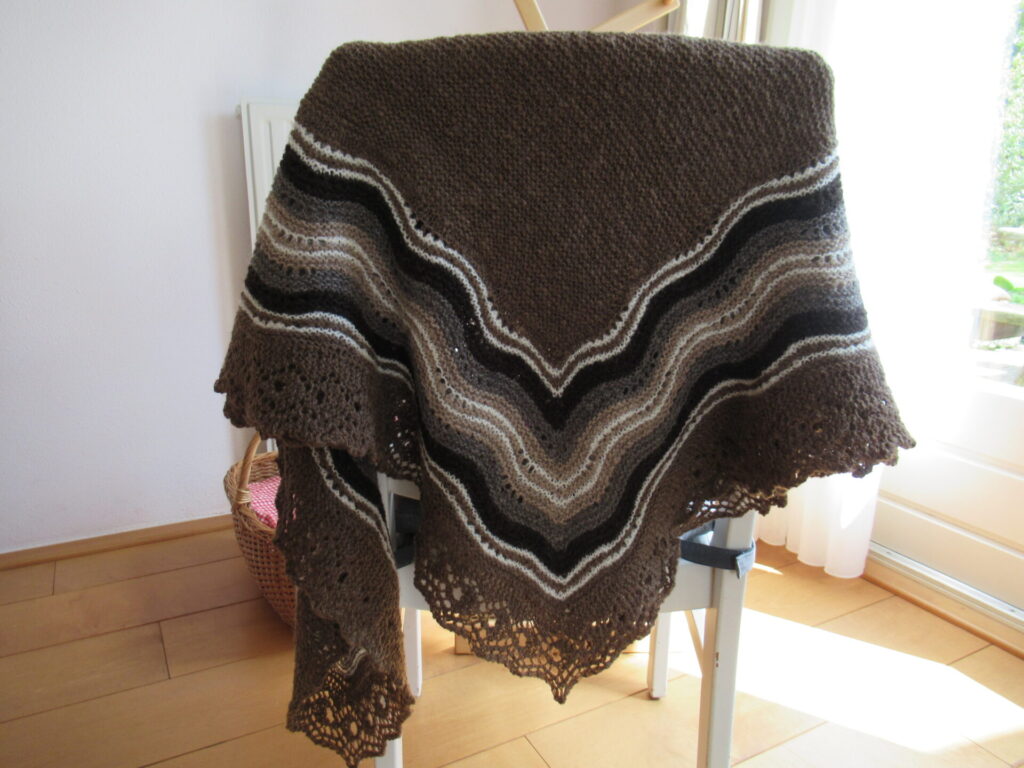
I once knit a ‘Shetland’ hap shawl. I am placing Shetland between parentheses here, because it isn’t very authentic.
The wool is from genuine Shetland sheep, bought in Shetland. But, for one thing, I am not from Shetland and I spun the yarn at home in the Netherlands. For another, I used a pattern called Quill by American designer Jared Flood. It’s a hodgepodge. Is that okay? Or should we aim for more authenticity? And what exactly is authenticity?
I don’t think I’d be bothered about these questions so much if I lived in a place with a great knitting tradition, like Shetland or one of the Scandinavian countries.
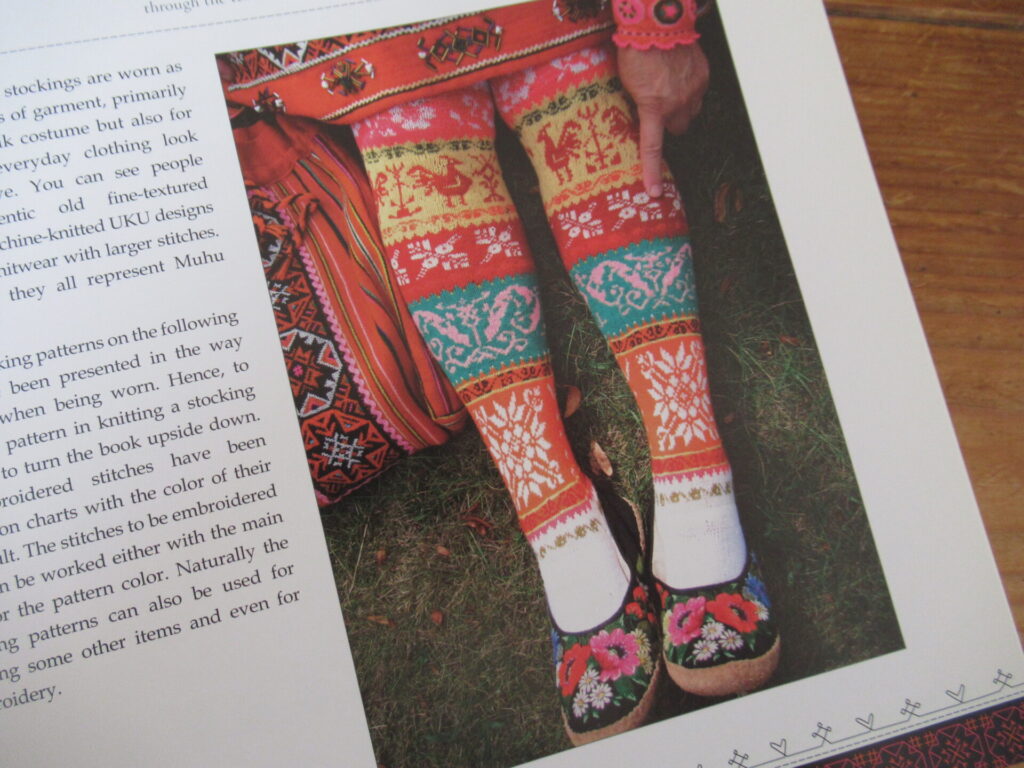
And if I had grown up in a fabulous and colourful knitting tradition as that of Muhu Island in Estonia…
… I think I would be content with that, knitting within my own tradition happily ever after. (Photograph in Designs and Patterns from Muhu Island, by Anu Kabur, Anu Pink and Mai Meriste, p. 45).
But what if you live in a country without such a great knitting tradition? And at that my thoughts turned closer to home. Do we have a knitting tradition at all in the Netherlands? What kind of knitting did I grow up with?
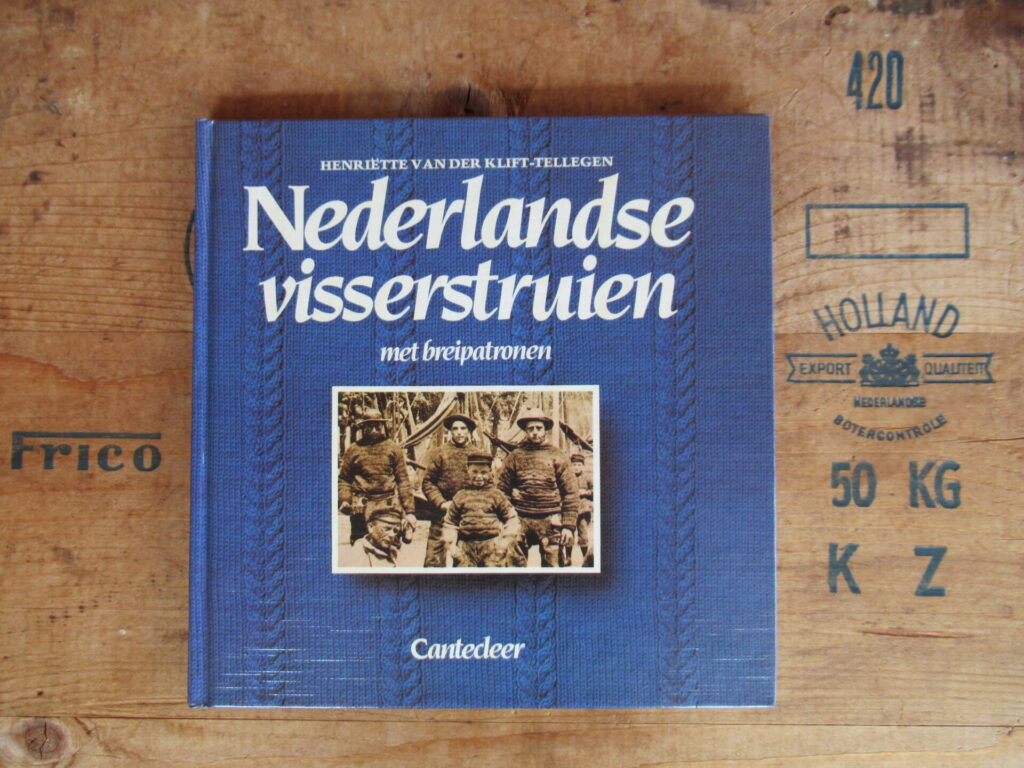
To start with, I remembered a lot of acrylic, in orange, brown, purple and fluorescent green. But thinking about it a little more, I realized that even though our knitting tradition is not as impressive and extensive as that of some other countries, we do have a few things. There’s the Dutch heel for socks, for a start. We also have knitted lace caps for traditional costumes in some areas. And we have traditional ganseys (sharing many elements with English ganseys).
We also have Grolsche wanten – mittens with Norwegian-looking star patterns. Not bad, really. What else do we have? And then I suddenly thought of what I found in my parents’ attic.