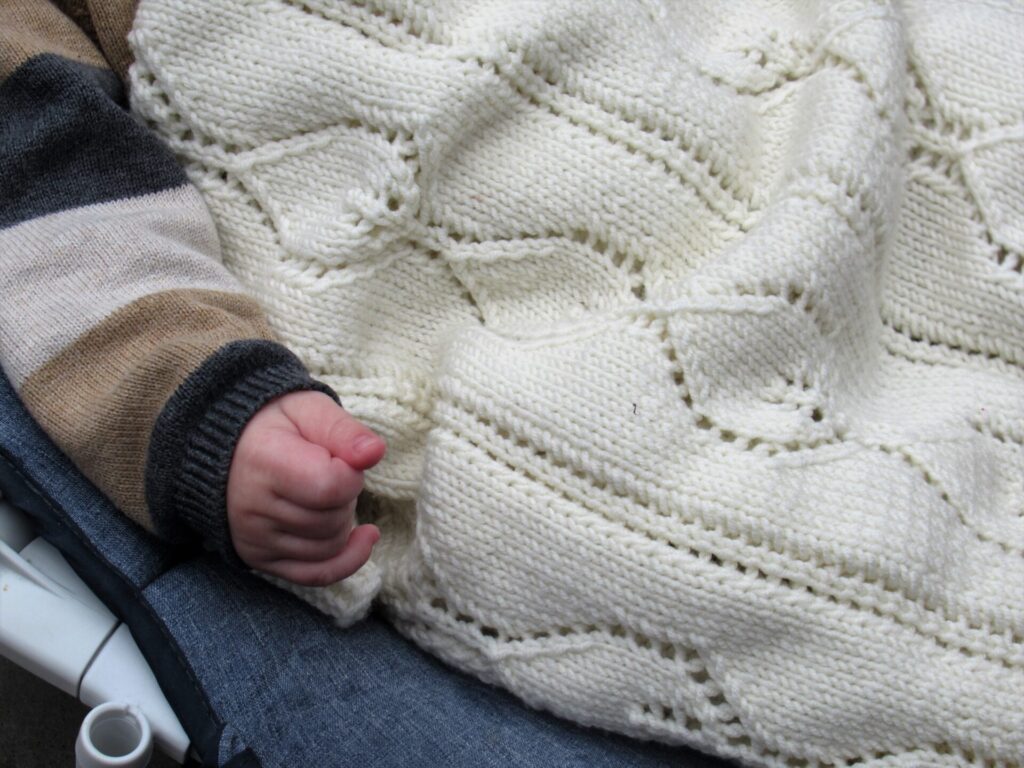
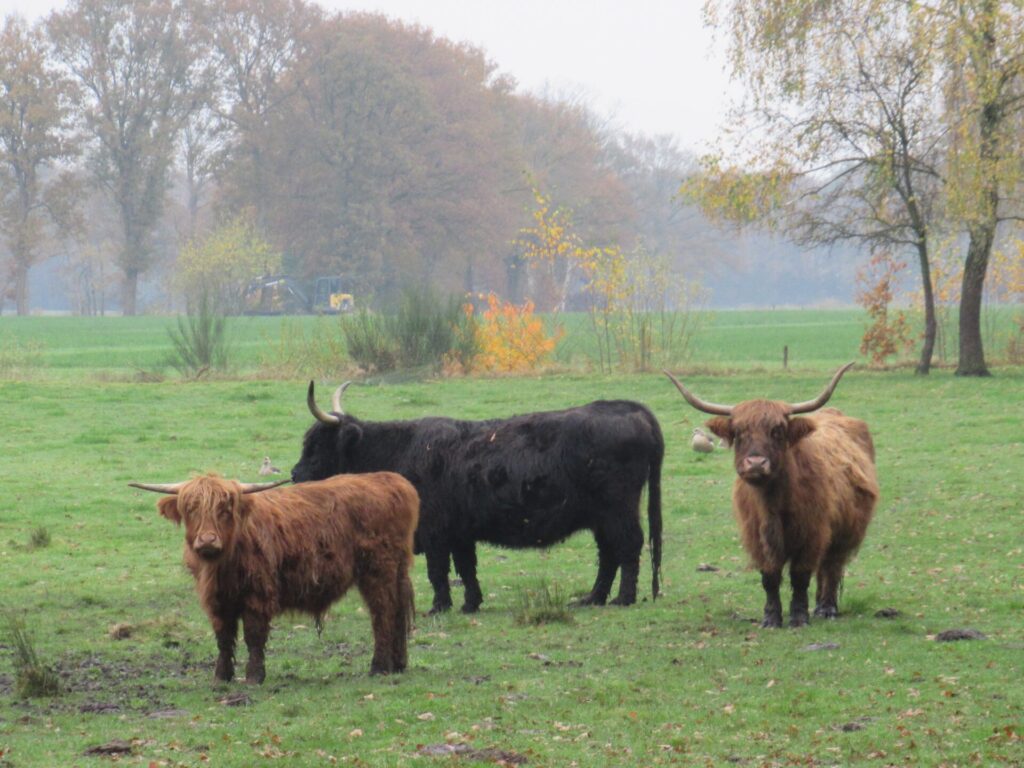
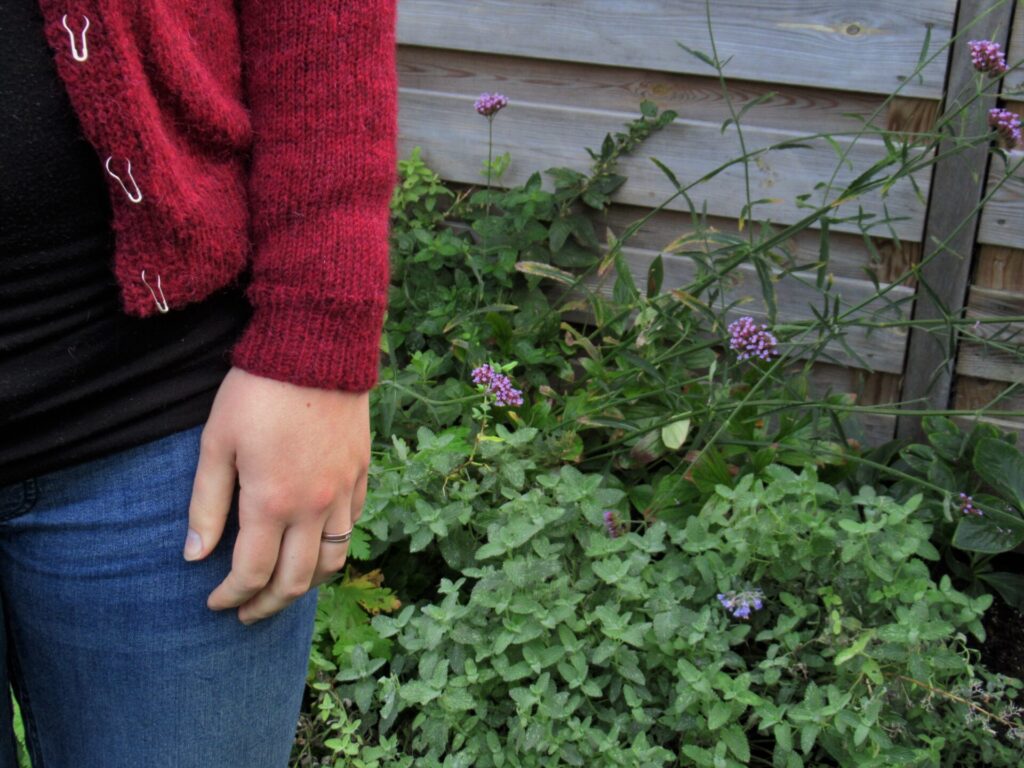
Our grandson is 6 months old now. He cries from time to time to indicate that he needs something, of course, but on the whole he is a cheerful little chap. He is growing fast and it will not be long before he has outgrown his pram.
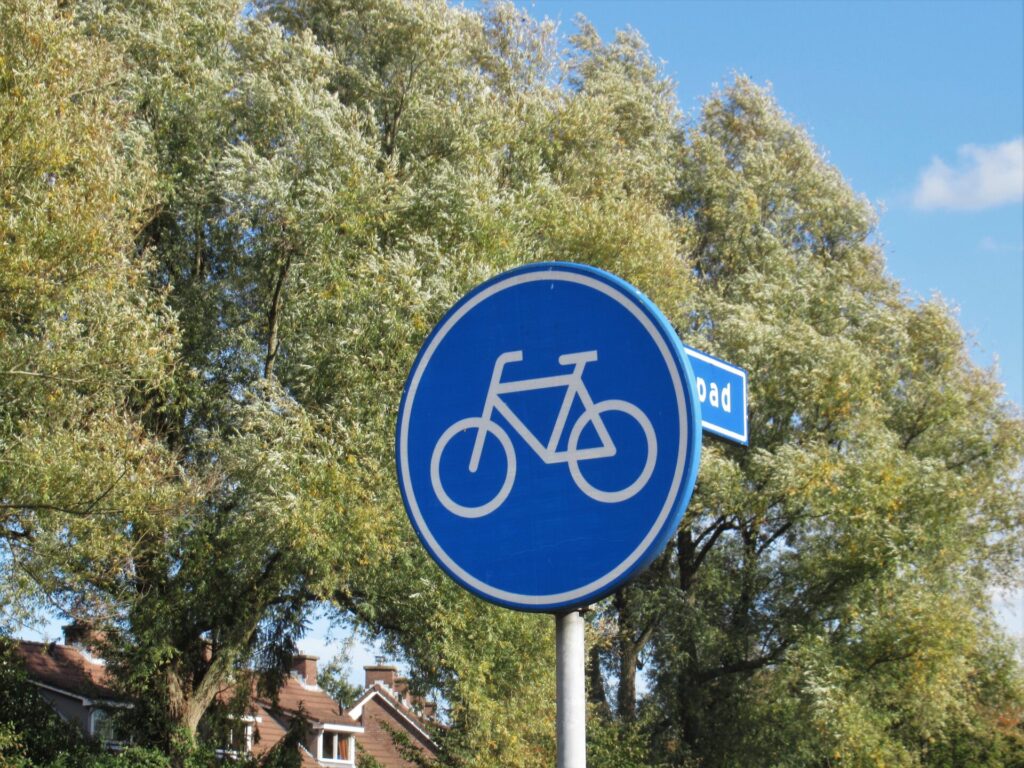
He lives in a quiet neighbourhood with lots of green space. The bicycle tracks meandering through it are perfect for pram walks.
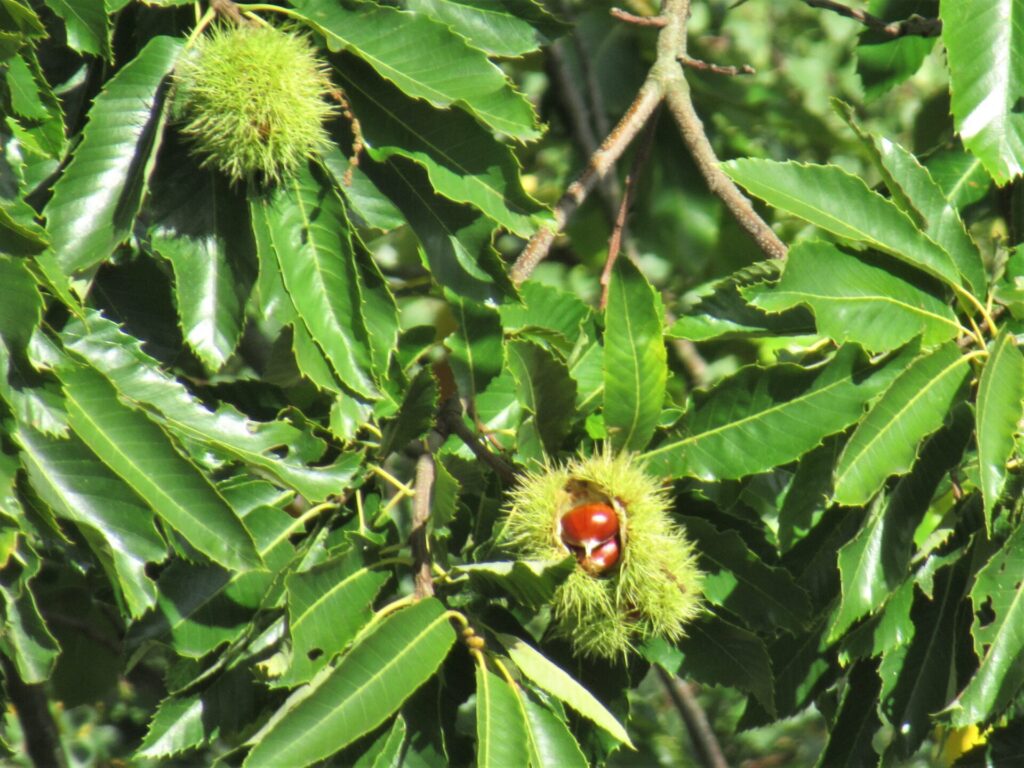
Often he falls asleep as soon as we set off, but when he lies awake, I can see him looking at the sky, and listening to the singing of birds and the rustling of leaves.
I wonder if he is also aware of that special scent of autumn in the air.
How fortunate we are to be able to enjoy our strolls in this peaceful part of the world.
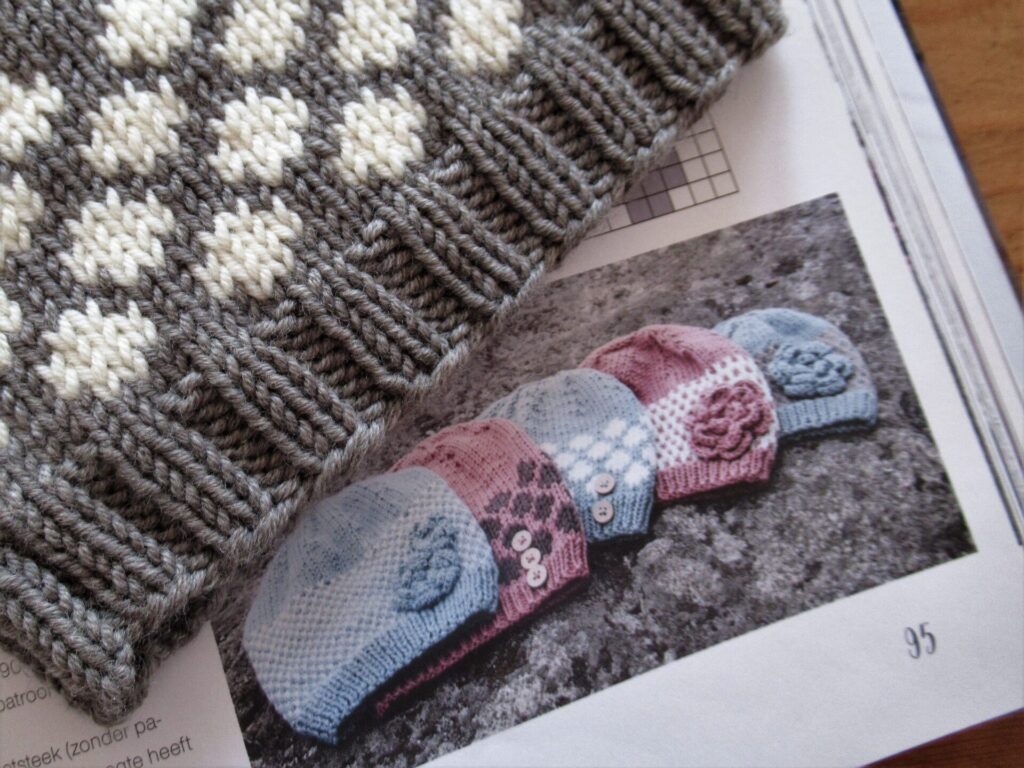
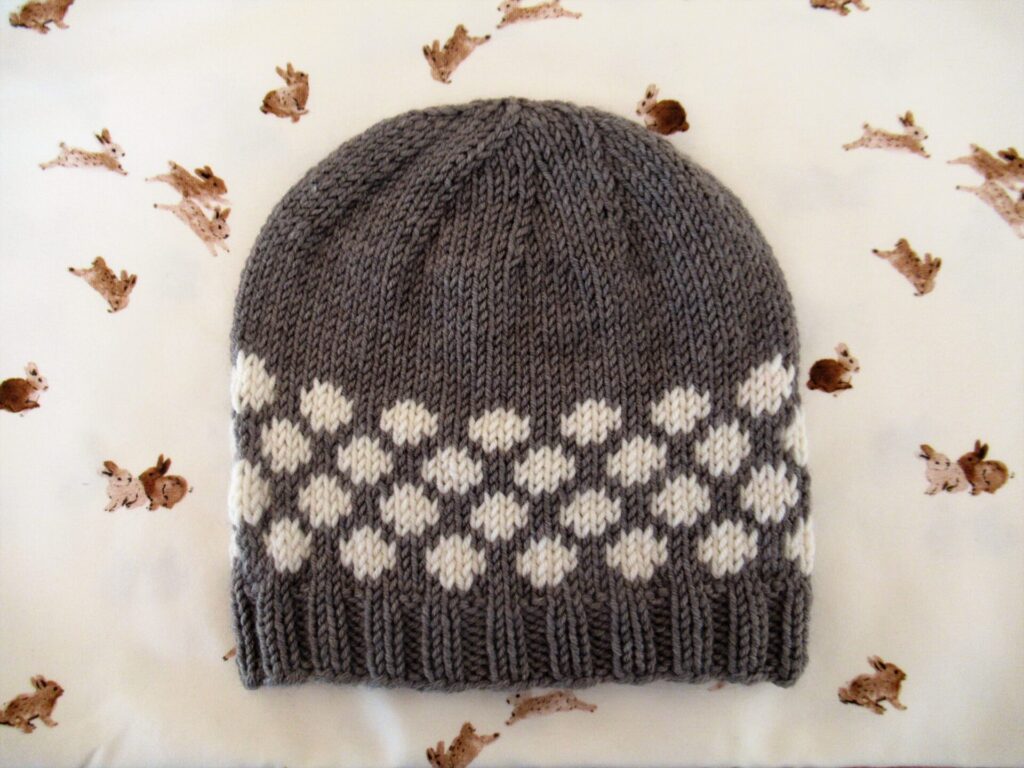
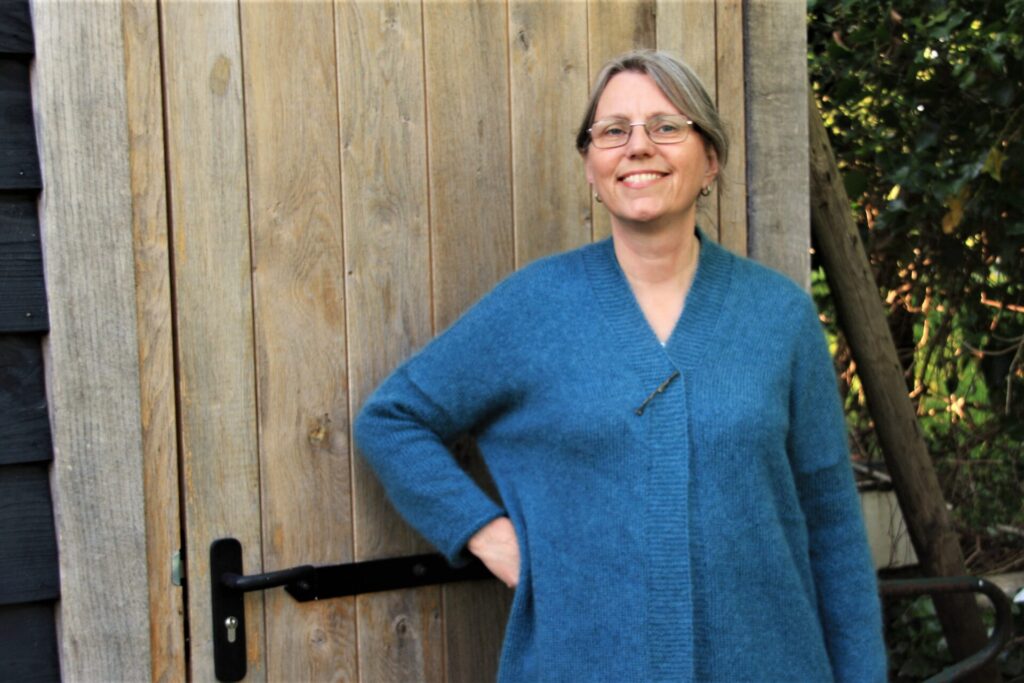
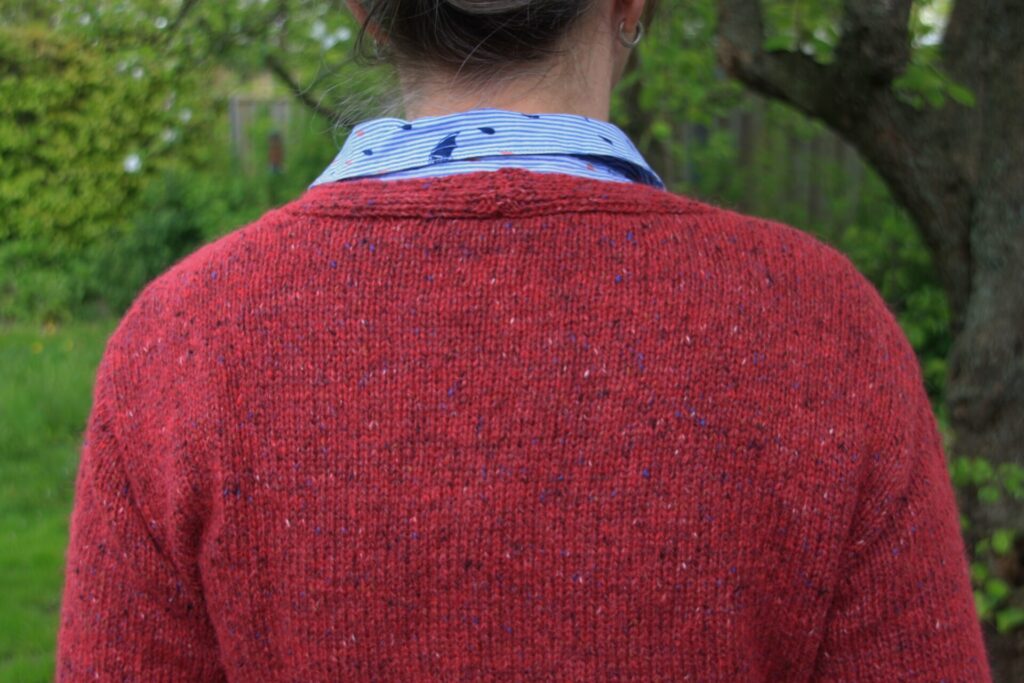
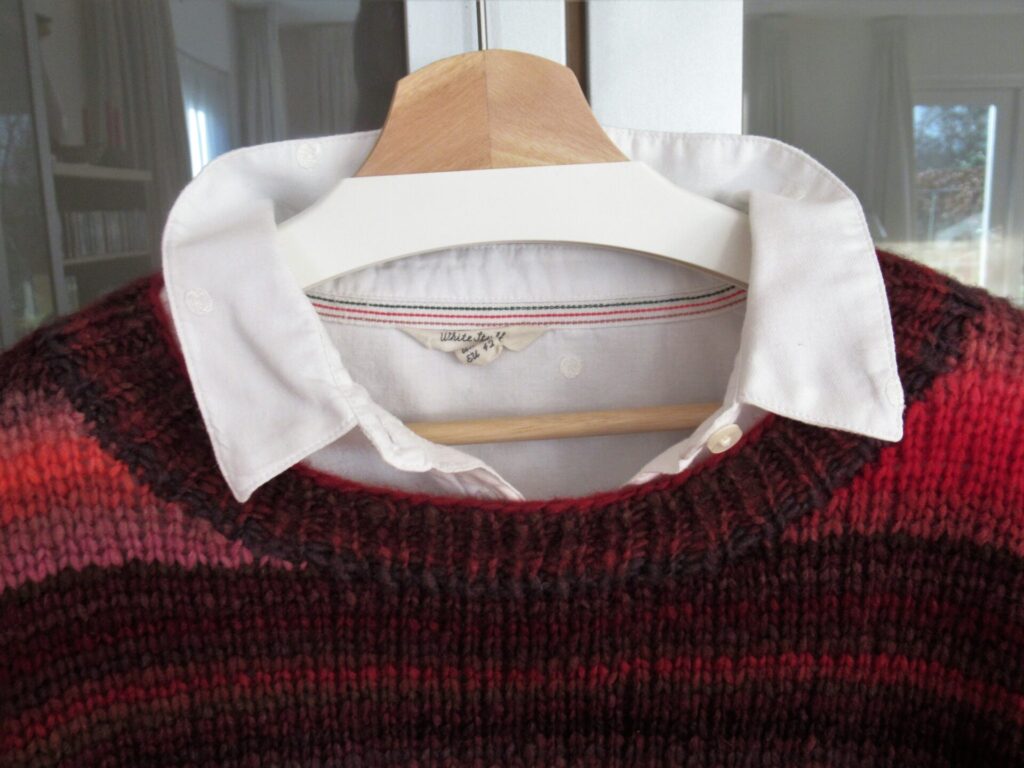
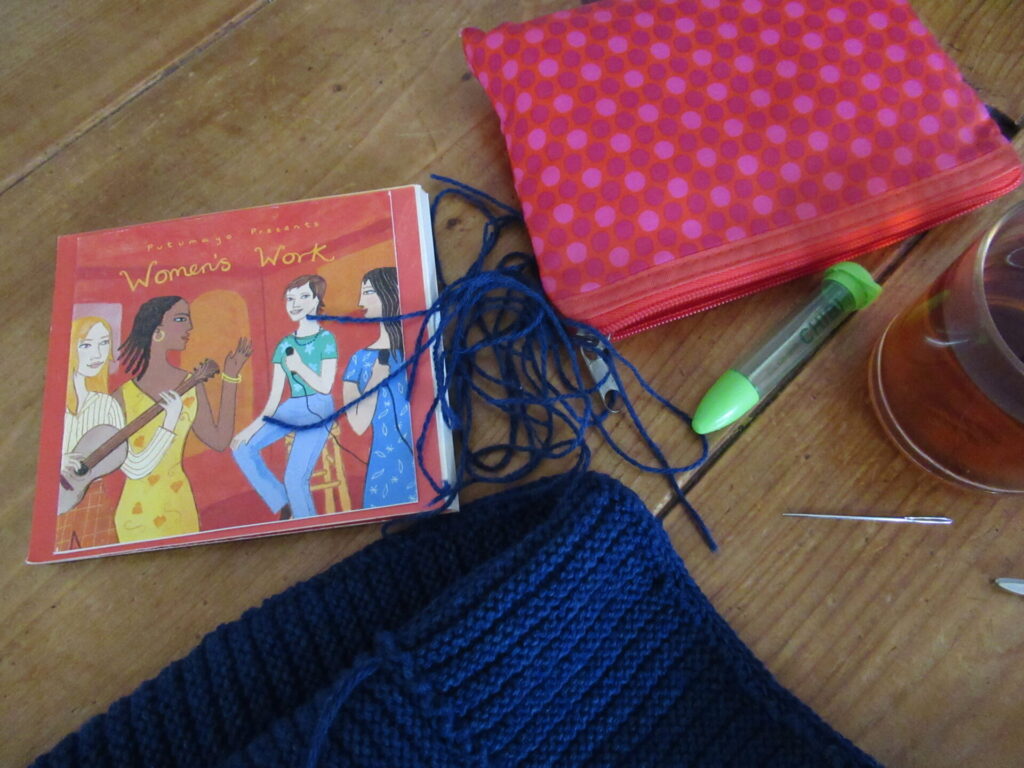
He has suddenly outgrown all of the hats I knit for him, too. So I quickly knit up two new ones, both from patterns in the first Klømpelømpe book.
The first baby cardigan I knit from this book was not a success – the instructions were unclear, the stitch pattern didn’t match up around the raglan armholes, and it turned out far too small. So, I ripped it out and put the book aside disappointed and frustrated.
A visit to a dear cousin of mine made me pick it up again, though. She is mother to 7 and grandmother to the same number, and the proud owner of a stack of Klømpelømpe books. She has knit many items from them for her grandchildren and is very enthusiastic about them.
Her enthusiasm was infectious, so I got the book out again, dug up the yarn left over from a jacket I knit for our grandson, and made the Henry hat.
I was still a bit puzzled by the instructions, but was able to work things out. Based on my earlier experience I made the size for 1-2 years and it fits perfectly.
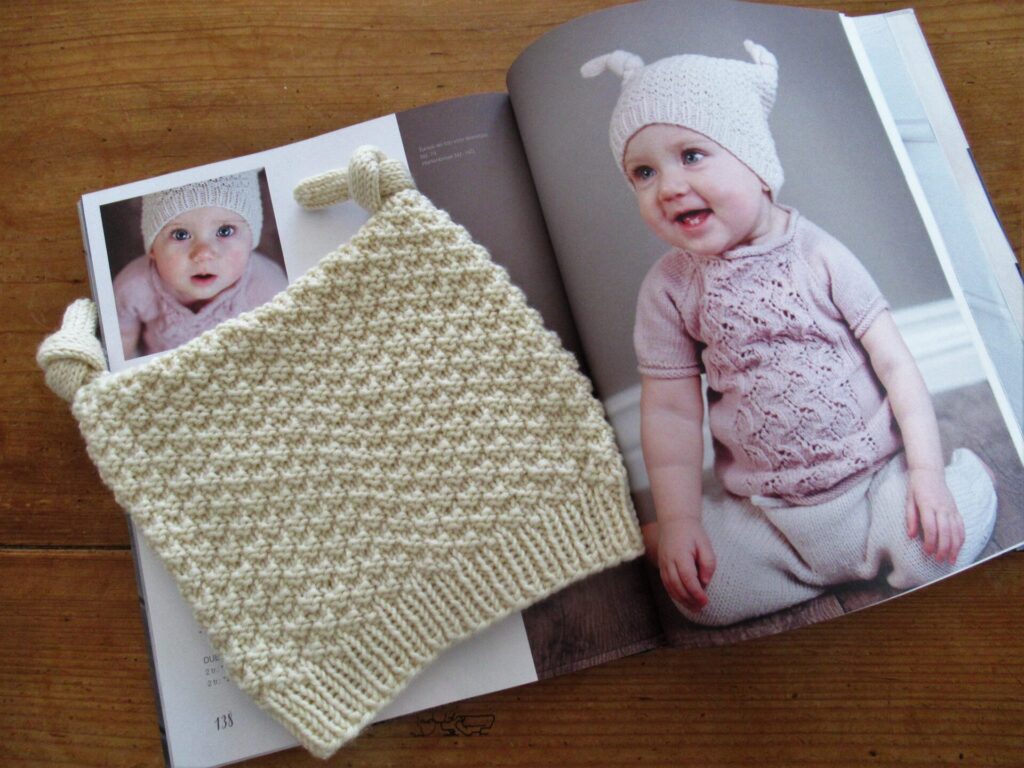
I also had lots of yarn left over from the Pyrus Blanket I designed myself.
Some of that became the dots in the Henry hat and I had more than enough left for the Knot hat. The Knot hat has two weird antennae knit on to the top that are transformed into an adorable set of knots.
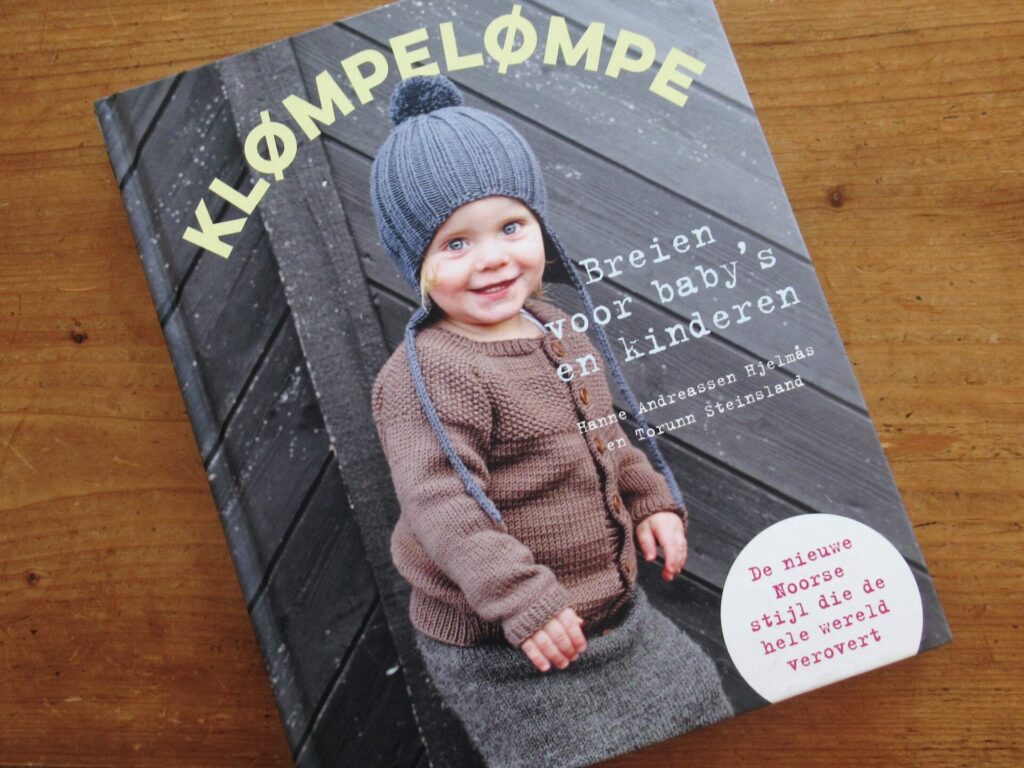
For anyone who hasn’t heard of the Klømpelømpe books yet, they are a series of knitting books from Norway that have been translated into many languages. According to the website Booksfromnorway ‘Klømpelømpe is a Norwegian dialect word from the Western region where the authors come from, and simply is an expression for describing a sweet, little child – a sweetheart.’
The book I’ve knit the hats from has ‘knitting for babies and children’ as its subtitle, and most of the patterns in it are for this age group. But it also contains a few simple accessories for adults as well.
I’m glad these hats turned out well, because everything in the Klømpelømpe books looks incredibly attractive and I’d like to make more from them.
Useful info:
The authors’ website can be found here in Norwegian. And a complete list of all the books in Norwegian here. (There is an English website, too, but it’s very limited.)
If you’re looking for translations of the books in your own language – the English translations all have ‘Knitting for Little Sweethearts’ in their titles, while most other translations retain the word Klømpelømpe or Klompelompe somewhere in the title.
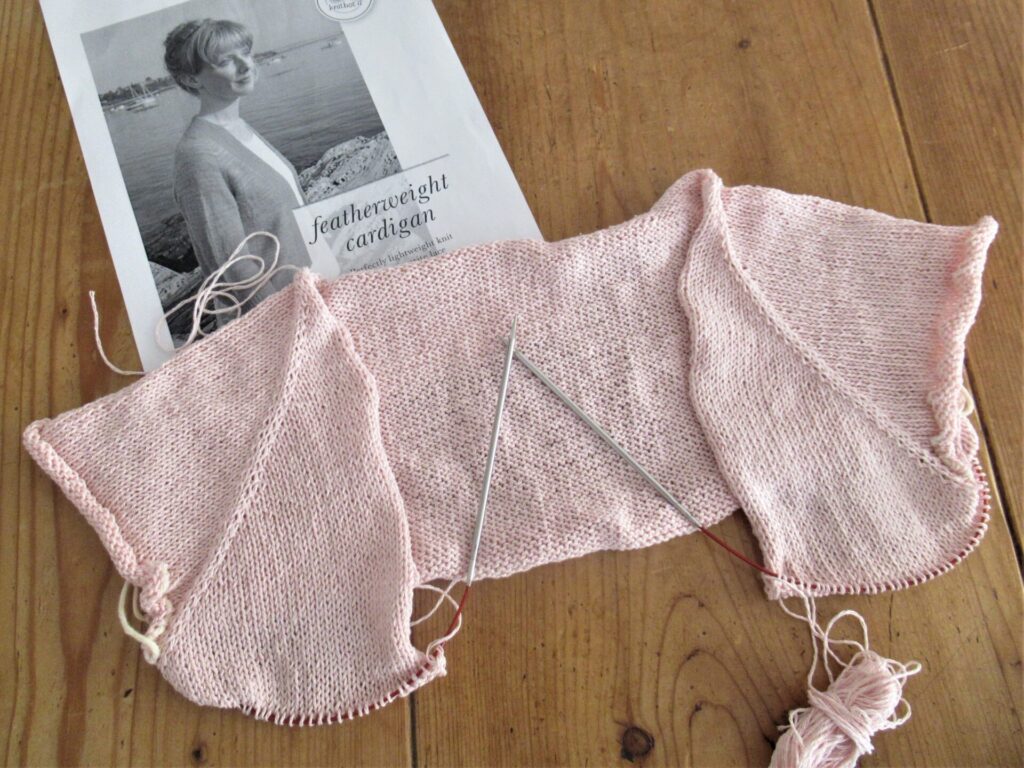
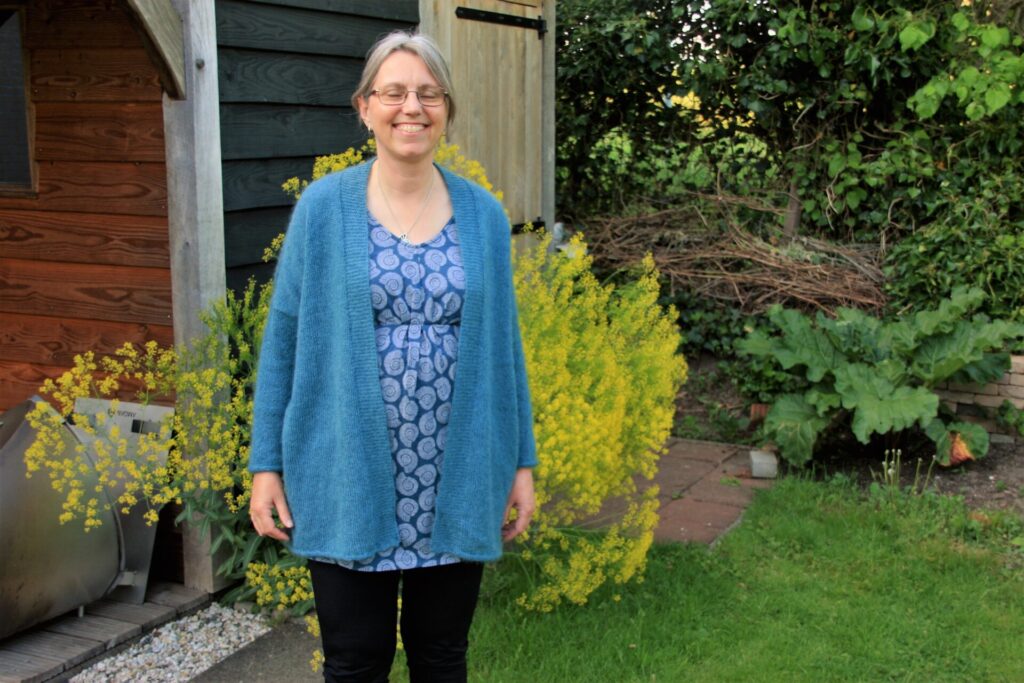
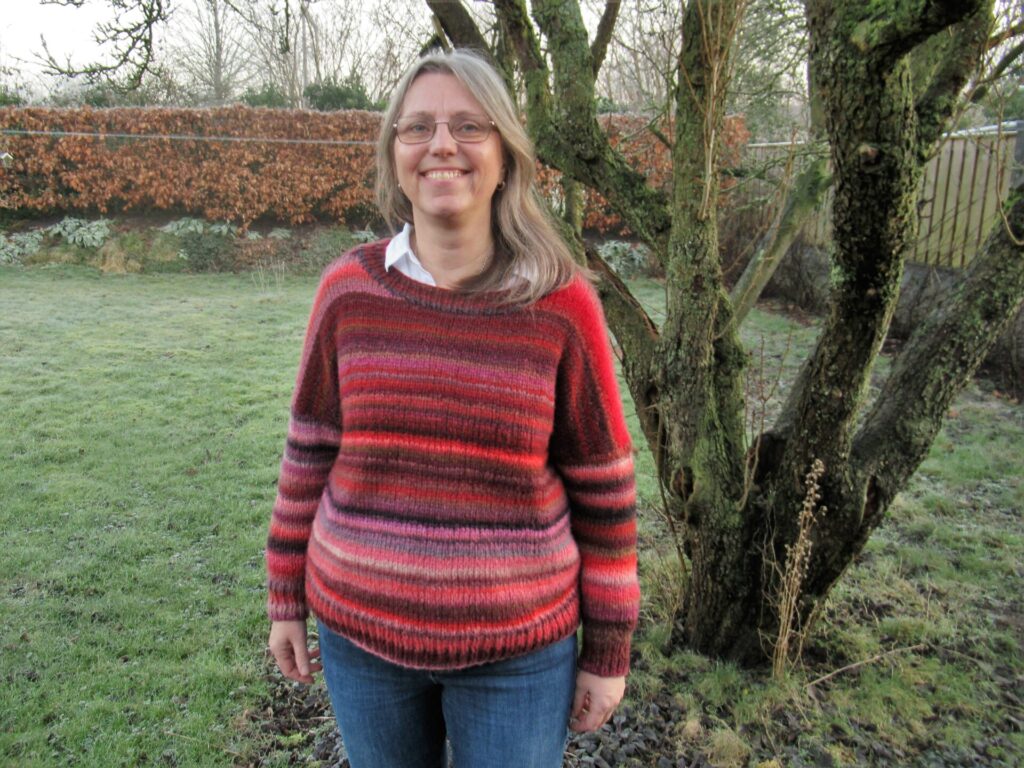
Autumn has well and truly arrived here, and with it the need for warm and woolly sweaters, scarves, socks etcetera. And I’ve just finished a light and airy summer cardi! I don’t know how other people do it. I mean, summer is the time for knitting with cool and summery yarns, but that means that summer knits are always finished after the season you’d want to wear them.
The summer cardi I’m talking about is the famous Featherweight Cardigan, designed by Hannah Fettig. It is knit from the top down.
I am the ten-thousand-two-hundred-and-fifty-first knitter to post her Featherweight on Ravelry. And there probably are thousands more who knit it. That’s mind-boggling. Why is it so popular? I can’t speak for others, but for me it’s the elegant silhouette and the use of fine yarn. And most of all the utter simplicity, which makes knitting it into a wonderfully meditative experience.
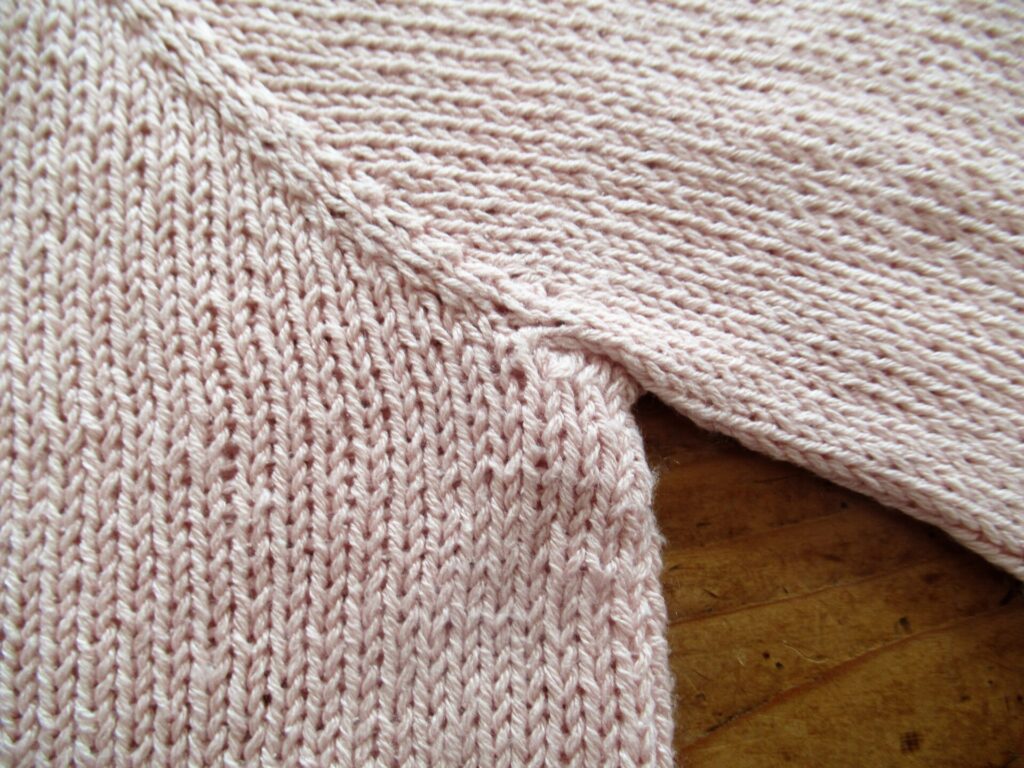
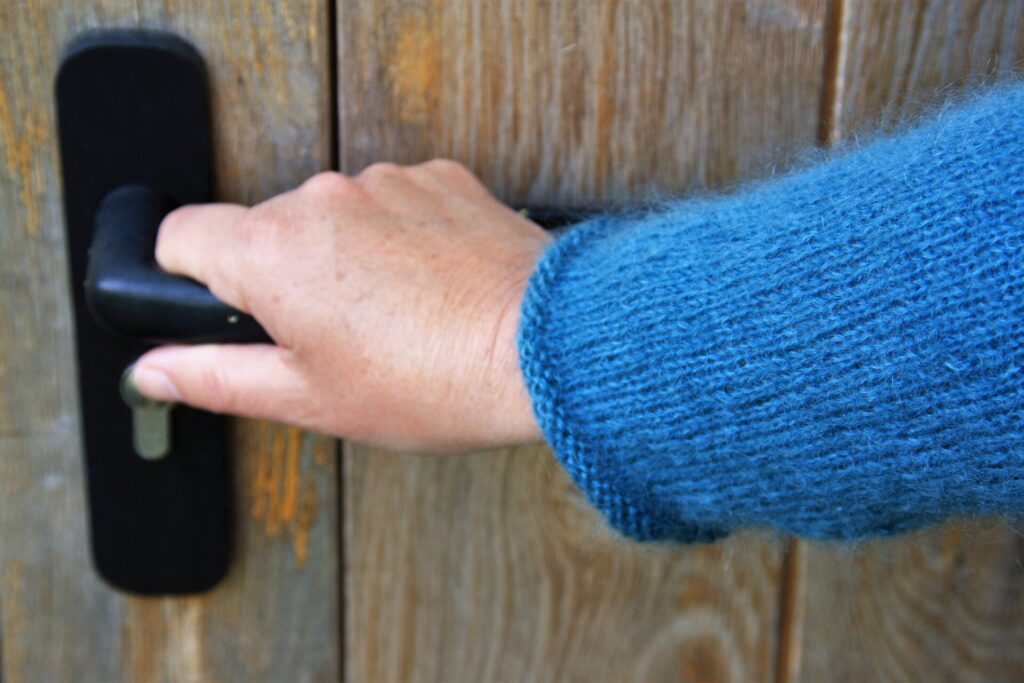
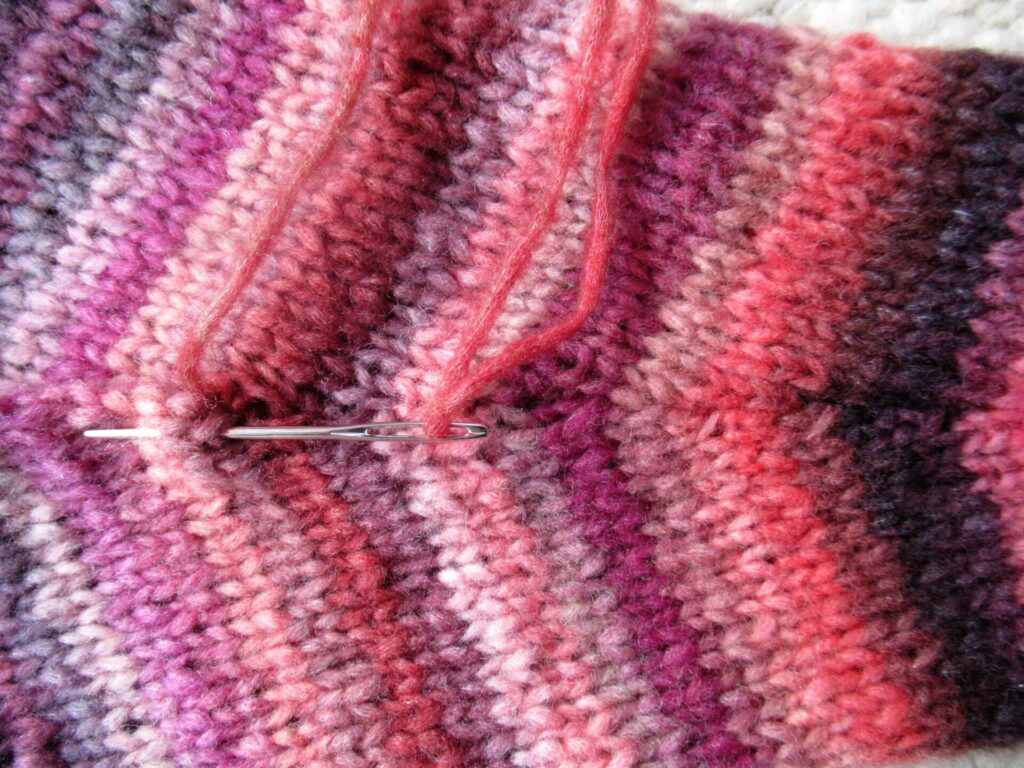
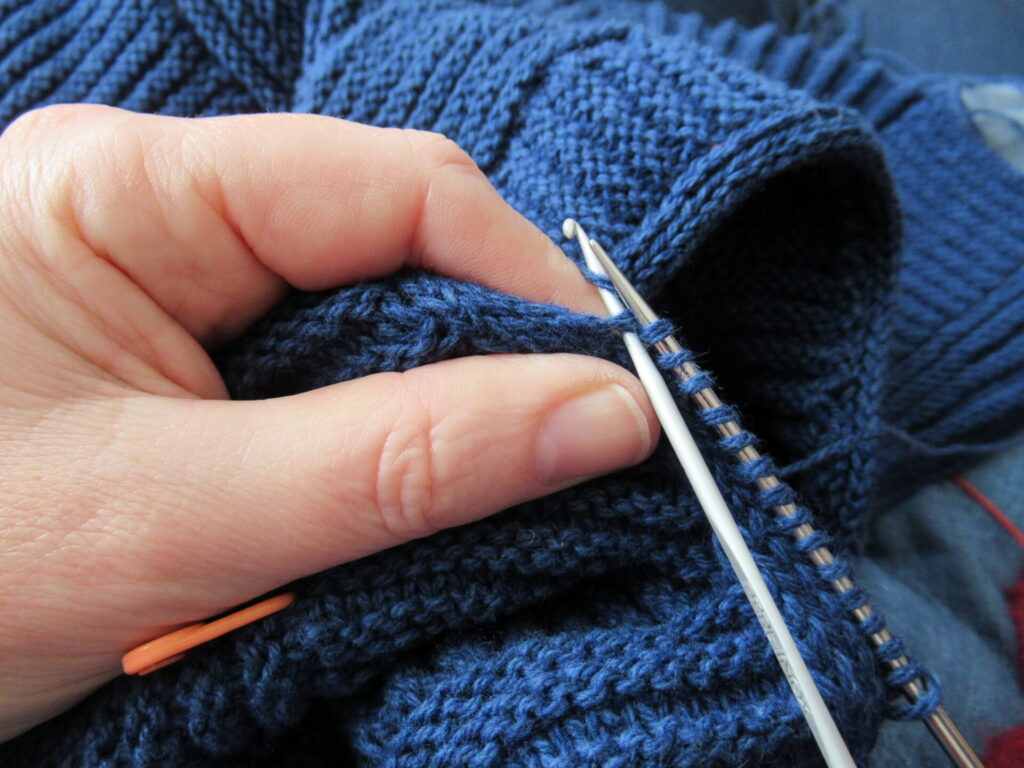
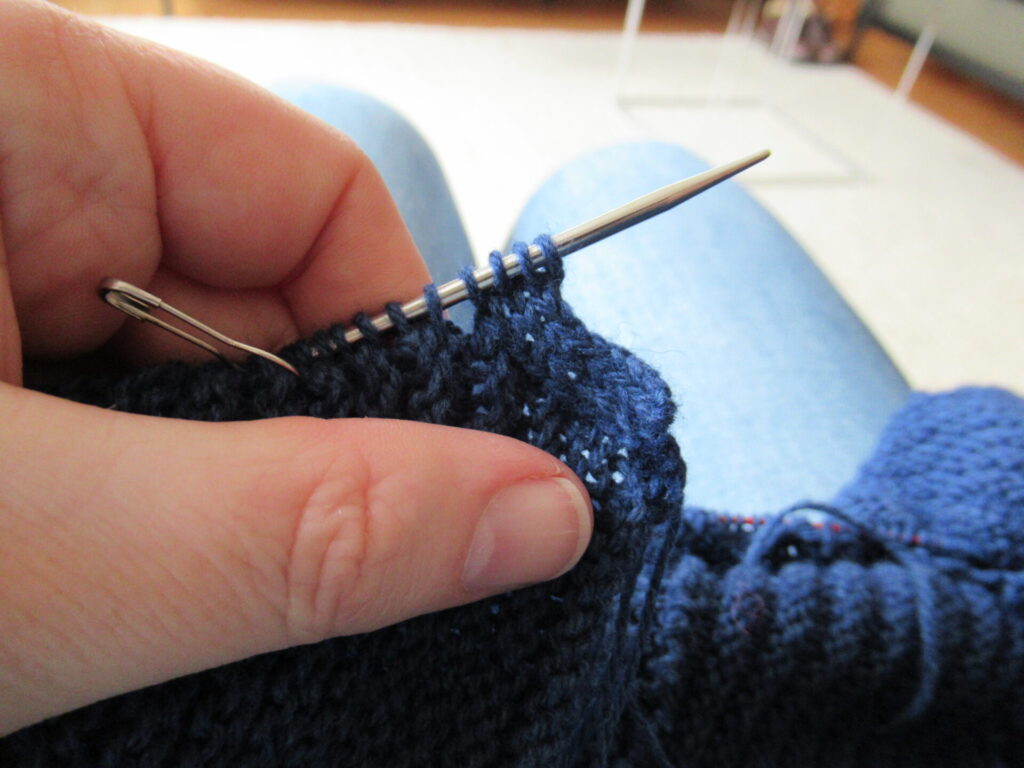
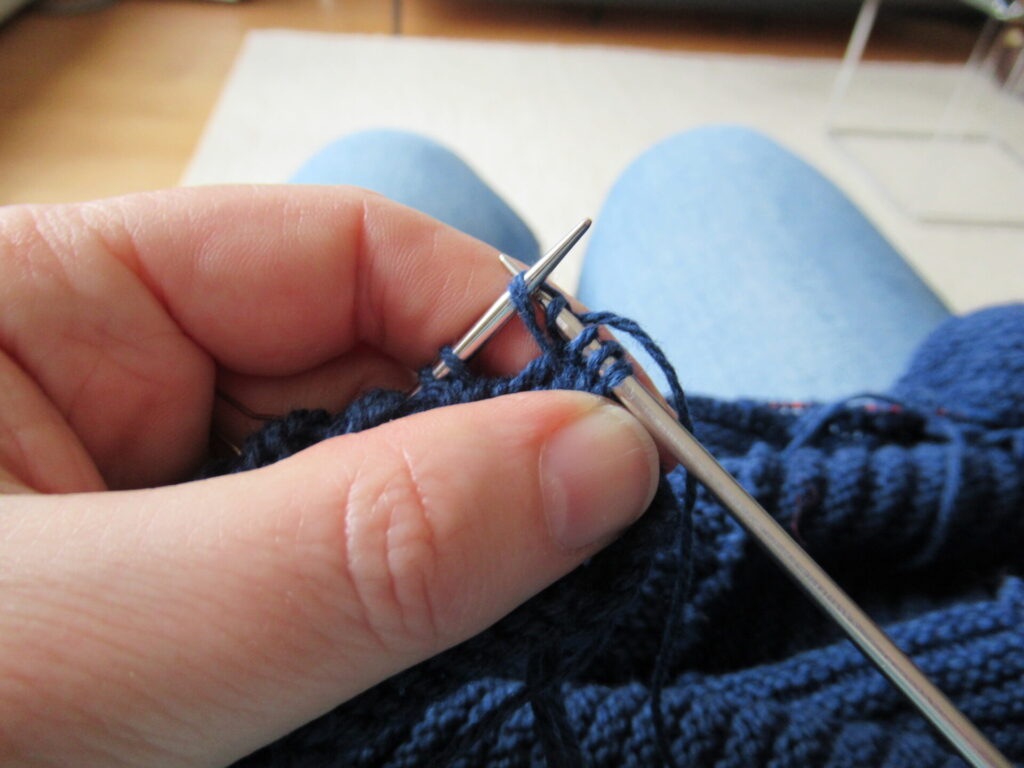
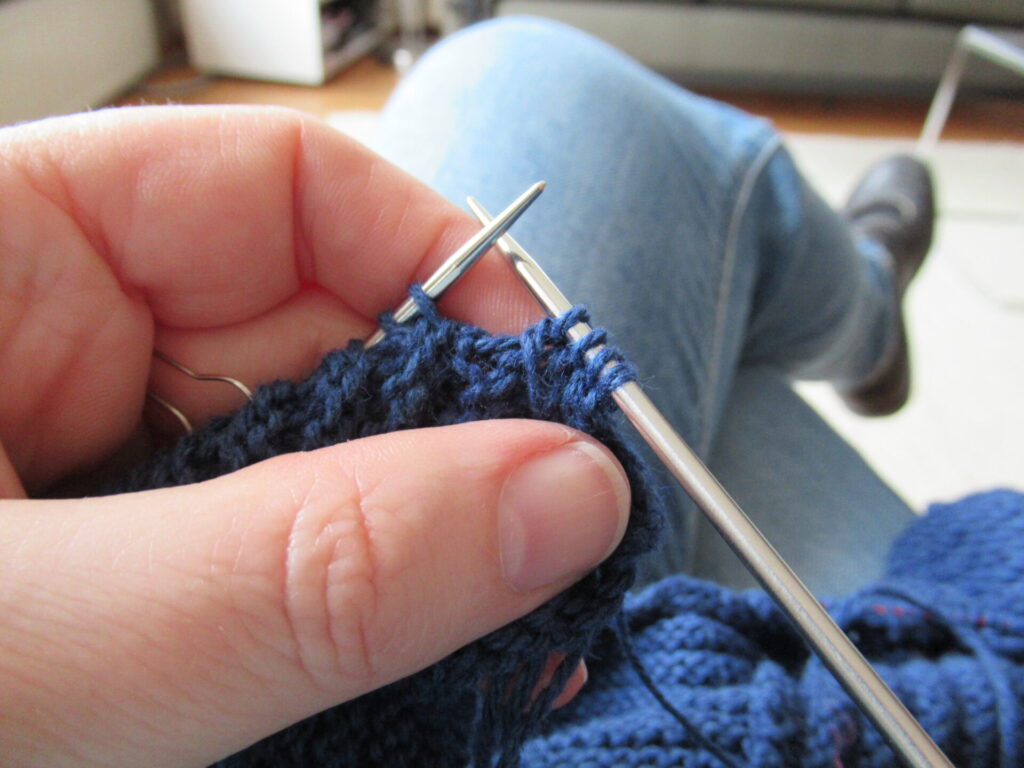
The only slightly tricky part of Featherweight is picking up the underarm stitches. To prevent large holes, I used the technique explained clearly by The Chilly Dog in this YouTube video. Here is a close-up of the end result – pretty neat, isn’t it?
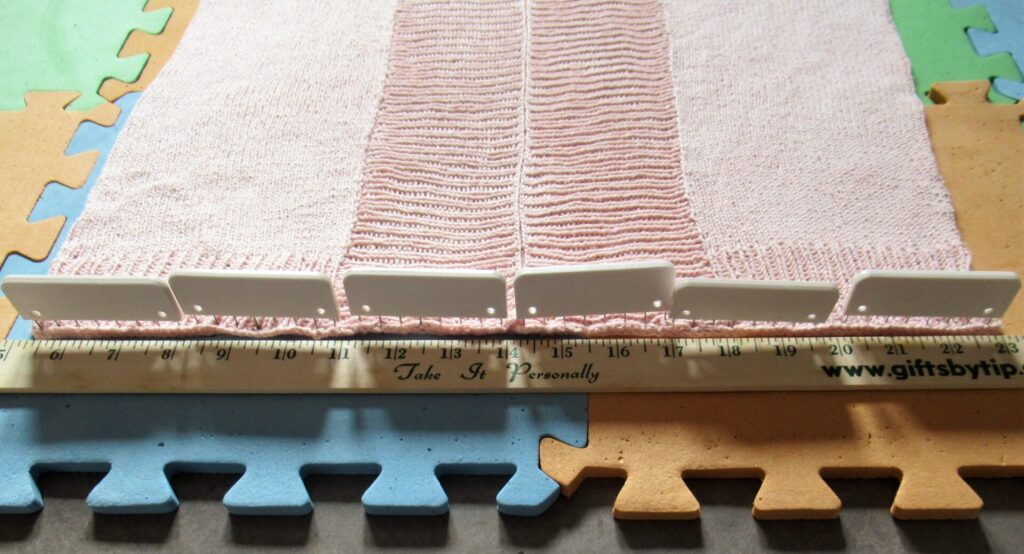
After I’d finished knitting it, my Featherweight looked terribly frumpy. I was especially worried about the bottom edges of the front bands. So, I soaked it in a non-rinse detergent, laid it out flat on blocking mats, pinned the front bands into place using multi-pronged KnitBlockers, and left it to dry.
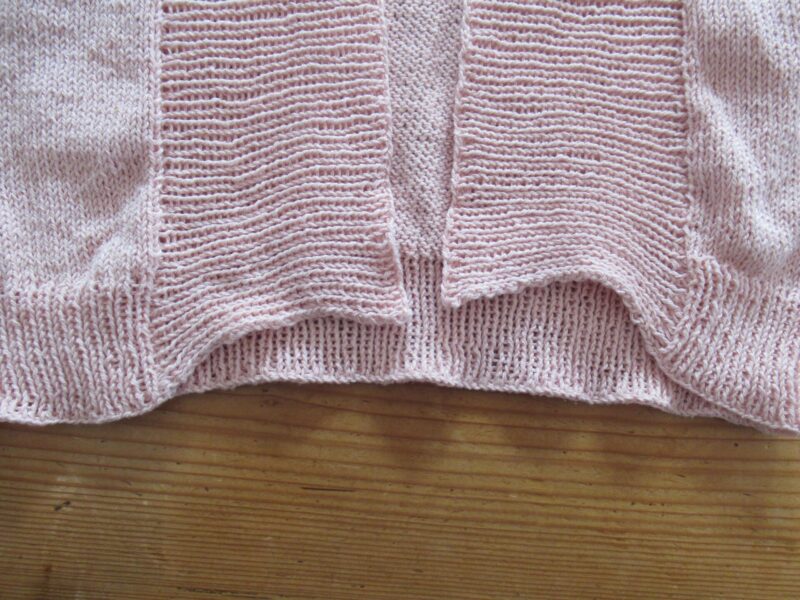
That did the trick as you can see on these before-and-after pictures (click on them to enlarge), although the edges are not quite as neat as I would have liked them:
Before blocking
After blocking
How could I make them neater next time?
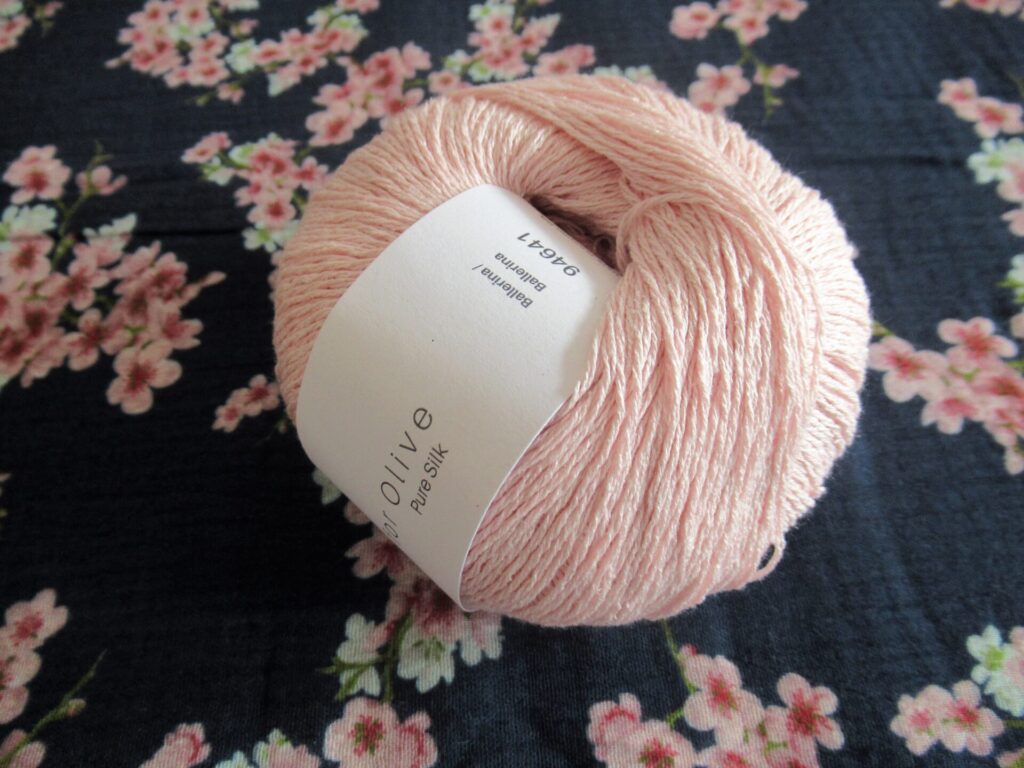
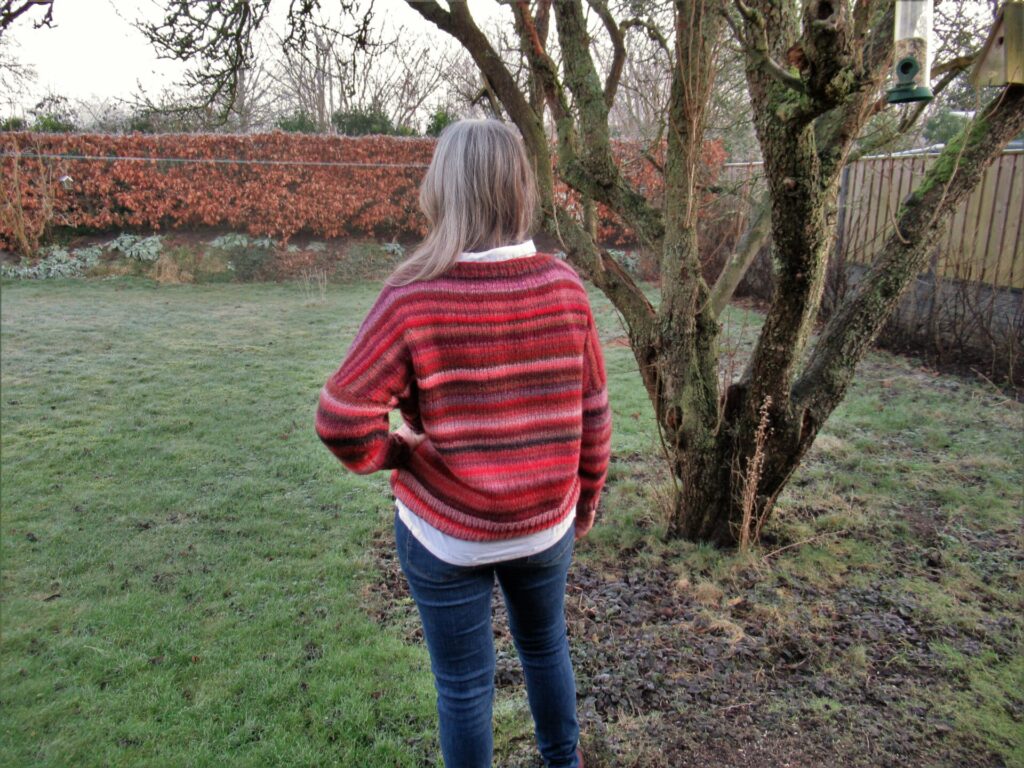
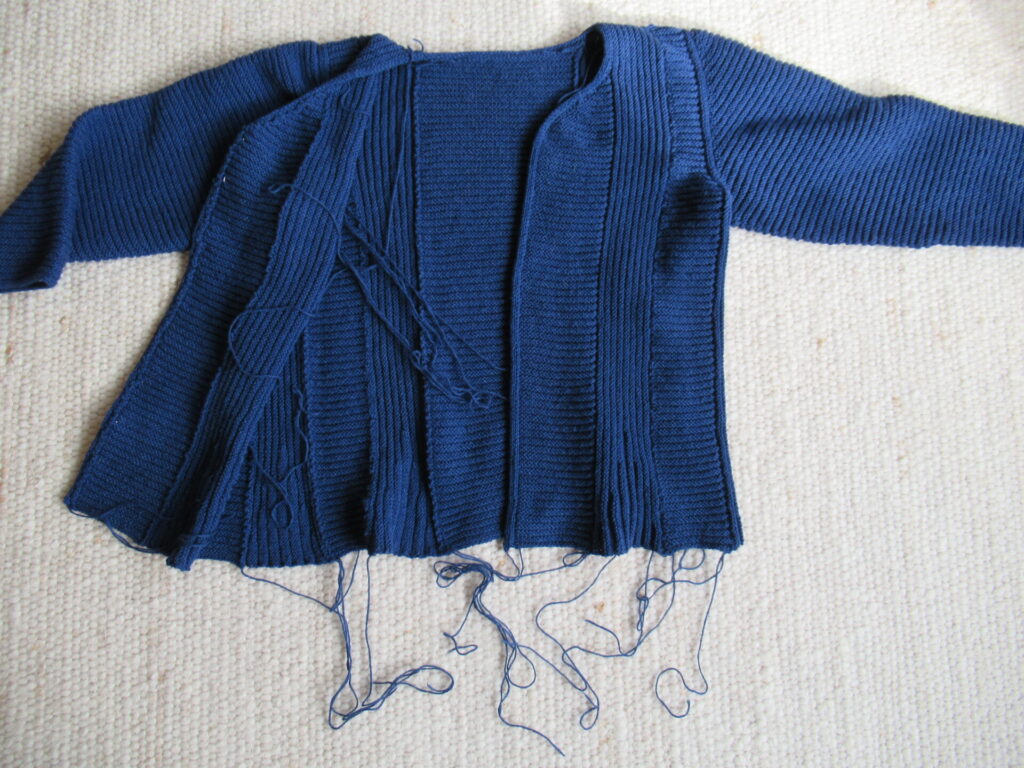
The original is very short, almost like a bolero. I lengthened the body by 11.5 cm/4.5” and made the sleeves a little longer, too. Knit in a fine fingering-weight yarn on 3.5 mm/US 4 needles, the knitted fabric is slightly transparent. Here is my Featherweight all finished:
The yarn I used is Knitting for Olive ‘Pure Silk’ in a shade called Ballerina. It is a 100% Bourette Silk (raw silk) yarn with a meterage/yardage of 250 m/273 yds to a 50 gram skein. A big plus is that it’s a butterfly-friendly yarn – the fibres are collected after the silk moths have left the cocoons.
It isn’t the sleek and slithery kind of silk, but matte with a cottony feel. The thread is composed of three very loosely plied strands and is rather splitty. I love the look and feel of this yarn, but its splitty-ness makes it a little harder to knit with.
My cardi isn’t exactly featherweight, but at 203 g it is pretty lightweight. All in all, I’m very happy with it. Only if I were to knit this again, I’d make the armholes slightly larger and try to do something about the edges of the ribbing. Or I’d use a different stitch pattern instead of the ribbing. Perhaps a pretty lace pattern?
I was also going to sew a summer dress to go with it, from the cherry blossom fabric I photographed the skein of yarn on, but, alas, I didn’t get round to it. A sensible person might sew it now, so that it would be finished in time for next summer, but I don’t know if I’m sensible enough for that.
I do know that I feel a sudden urge to knit lots of warm and woolly sweaters, scarves, socks etcetera, etcetera, etcetera. I’ll keep you posted about those. Bye for now! xxx
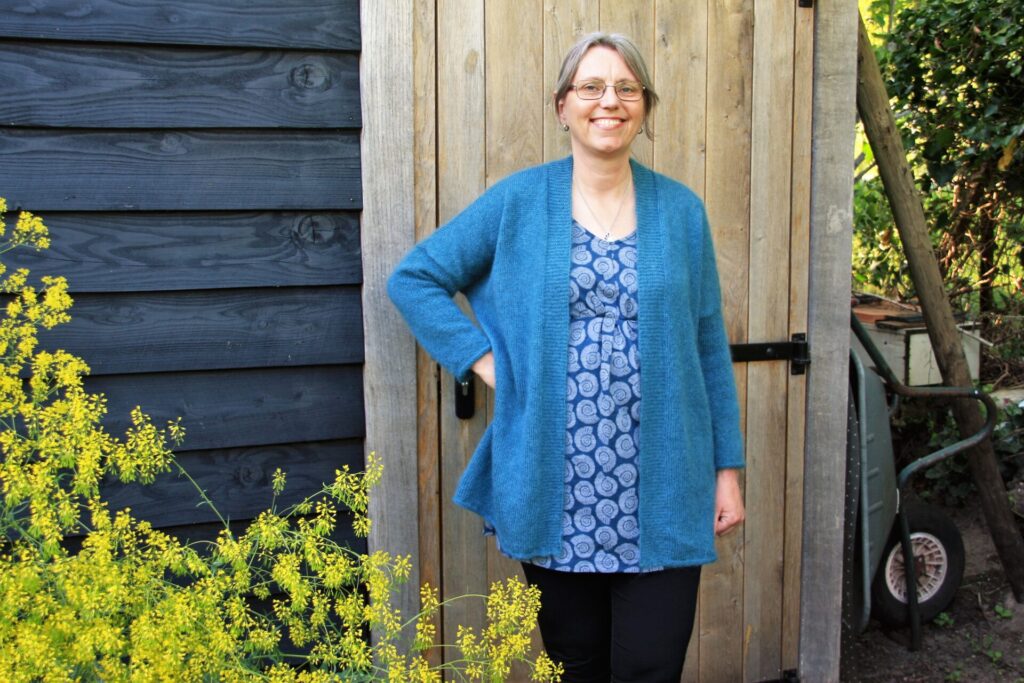
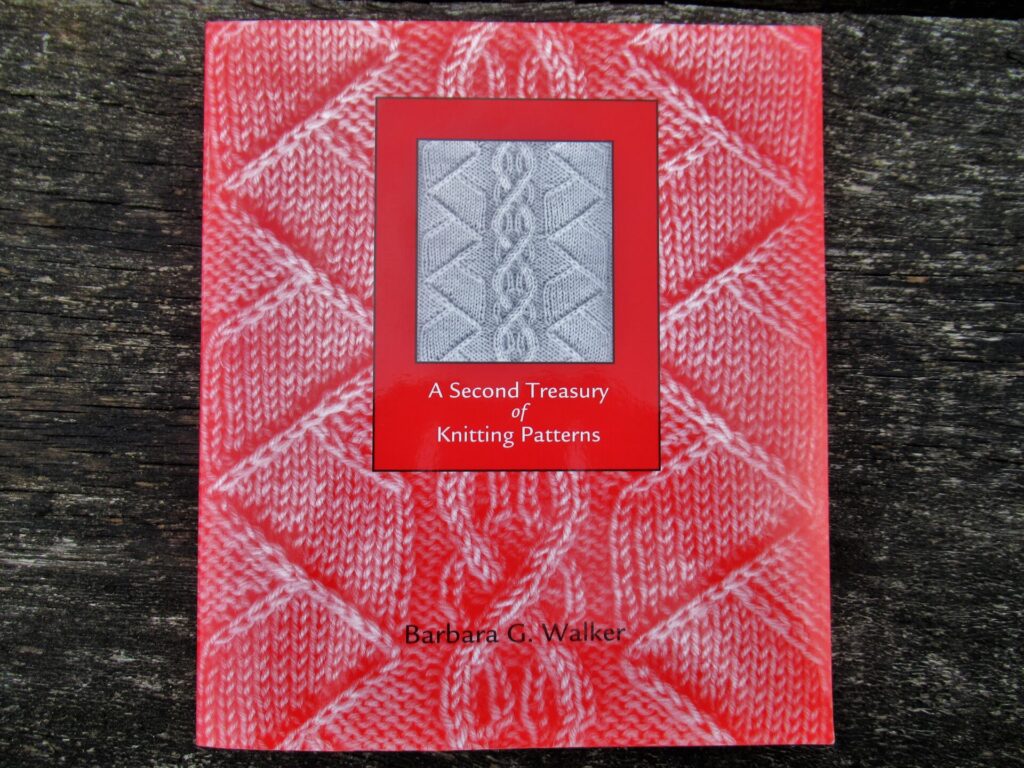
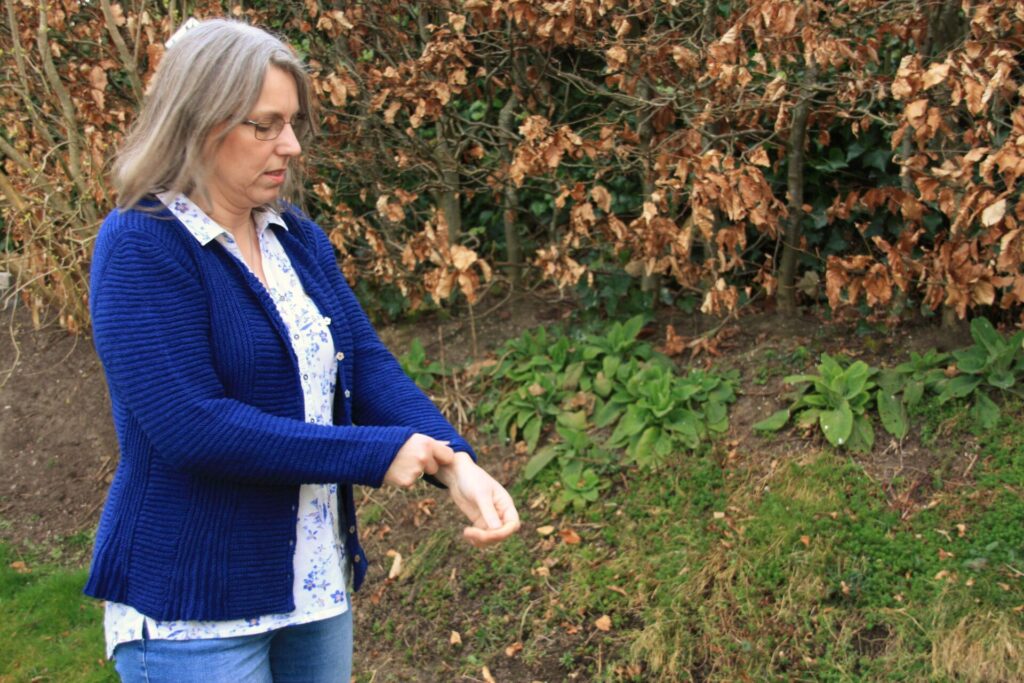
After the red tweedy stocking stitch cardigan I wrote about two weeks ago, I’ve finished another cardigan, again in stocking stitch (stockinette stitch in the US). The design is called Modern Wrapper Fine. According to Barbara G. Walker it is all wrong.
In the introduction to A Second Treasury of Knitting Patterns she writes:
“All-over plain stockinette stitch is dull to look at and boring to work, even for the beginner. Though it may be done entirely by hand, it lacks the inimitable flavor of hand-knitting. A machine can make it very nicely, but the hand-knitter is not a machine and should not try to imitate one.”
“This being so, there is no reason to spend the time and care of hand-knitting on a garment of stockinette stitch. It is a waste of both. The finished garment, which ought to display the knitter’s taste and skill, displays nothing but poverty of invention.” (p. xx)
Oh dear! Was my cardigan a waste of time? Does it display a lack of taste and skill? Let’s take a closer look.
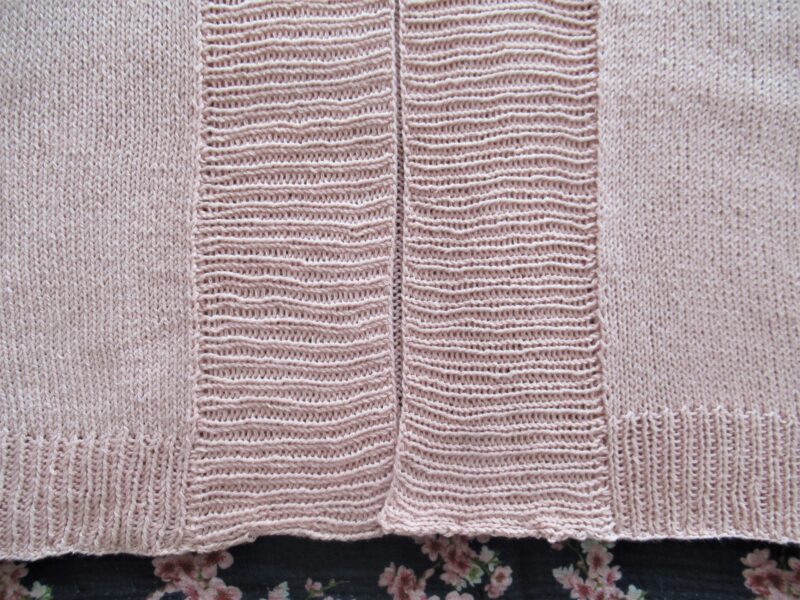
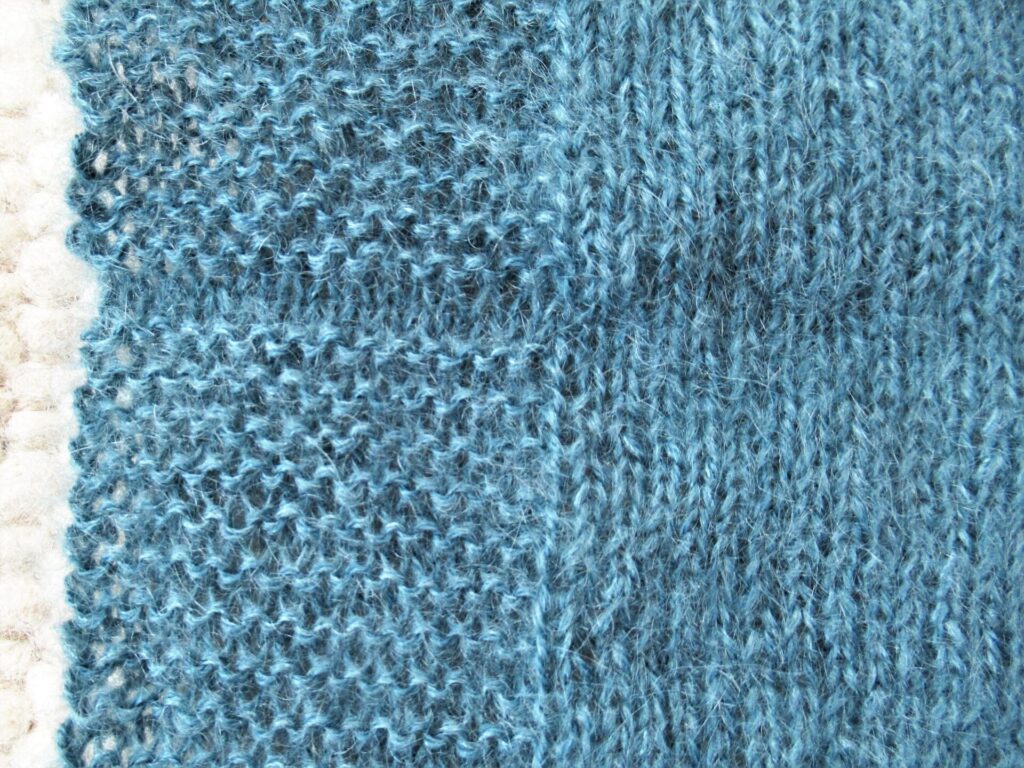
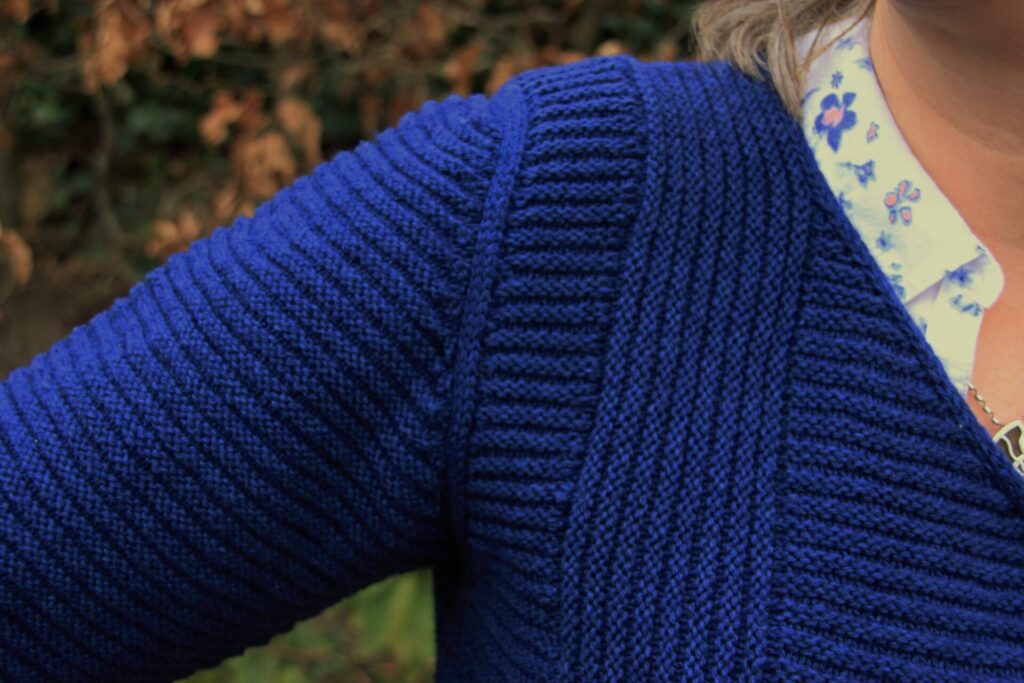
The Modern Wrapper Fine is worked completely in stocking/stockinette stitch, apart from the wide front bands in garter stitch. Back and fronts are knit from the bottom up. It does not have buttons and can be worn open or closed with a nice pin.
It is oversized, with sloping shoulders that are joined with a 3-needle bind-off. Instead of armholes that curve inwards, the fronts and back taper outwards at the top. This means that the sleeves hang very low. In my case they start halfway on the upper arm.
The sleeves are knit from the top to the cuff, from stitches picked up at the ‘armholes’. Sleeve and side seams are closed with mattress stitch. The hems and the sleeve cuff have a small band of reverse stocking stitch.
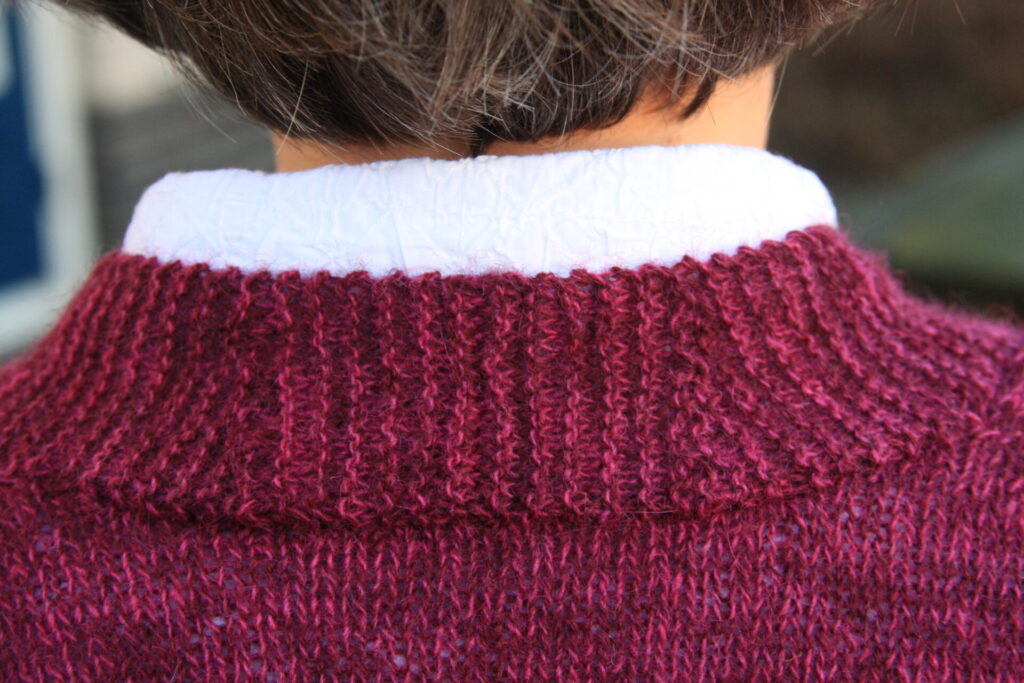
The best feature of the Modern Wrapper Fine, in my opinion, is hidden at the back of the neck. There are a few clever short rows there that make the neck band sit perfectly. It doesn’t show very well in the fuzzy yarn I’ve used this time, so here is a picture of the MWF I knit years ago in a different yarn combo.
The details:
Pattern: Modern Wrapper Fine (here on Ravelry). It is a finer variation on the original Modern Wrapper, which is even more oversized (here on Ravelry).
Size made: XS/S. I usually wear size M or L. This garment is really, really oversized. The finished bust in this size is 137 cm/64”. For me that means it has 46 cm/18” of positive ease.
Yarn: 7 balls of Rowan Kidsilk Haze (shade 582 ‘Trance’) and 4 balls of Rowan Fine Lace (shade 933 ‘Aged’) held together. There was quite a bit of yarn left over; my MWF weighs approx. 300 grams.
Needles: 3.25 mm (US 3) and 3.75 mm (US 5)
This project took me over a year from start to finish. Not because it was so time-consuming, but for the silly reason that I made a mistake in the front band and didn’t notice it until I’d finished the entire front.
Kidsilk Haze is notoriously difficult to unravel, and it took me a long time to pluck up the courage to fix the mistake. In the end, the combo of these two yarns wasn’t hard to unravel at all.
So, was this project a waste of time? All I’ll say is that for me, knitting big panels of stocking stitch in these two lightweight yarns was like meditating. For the rest I’ll let the pictures speak.
Now that I’m taking up sewing again and am looking for suitable projects to make, I find descriptions on other maker’s blogs very helpful. And also pictures of the finished items worn by ordinary people (not photo models.) I hope my descriptions and pictures will be helpful in the same way.
The yellow-flowering plant in the background is woad, the dye plant I grew as part of a community project. I was going to write about it, too, today, but on second thoughts I’ve wittered on long enough already and it really deserves a post of its own. I hope to come back to it soon.
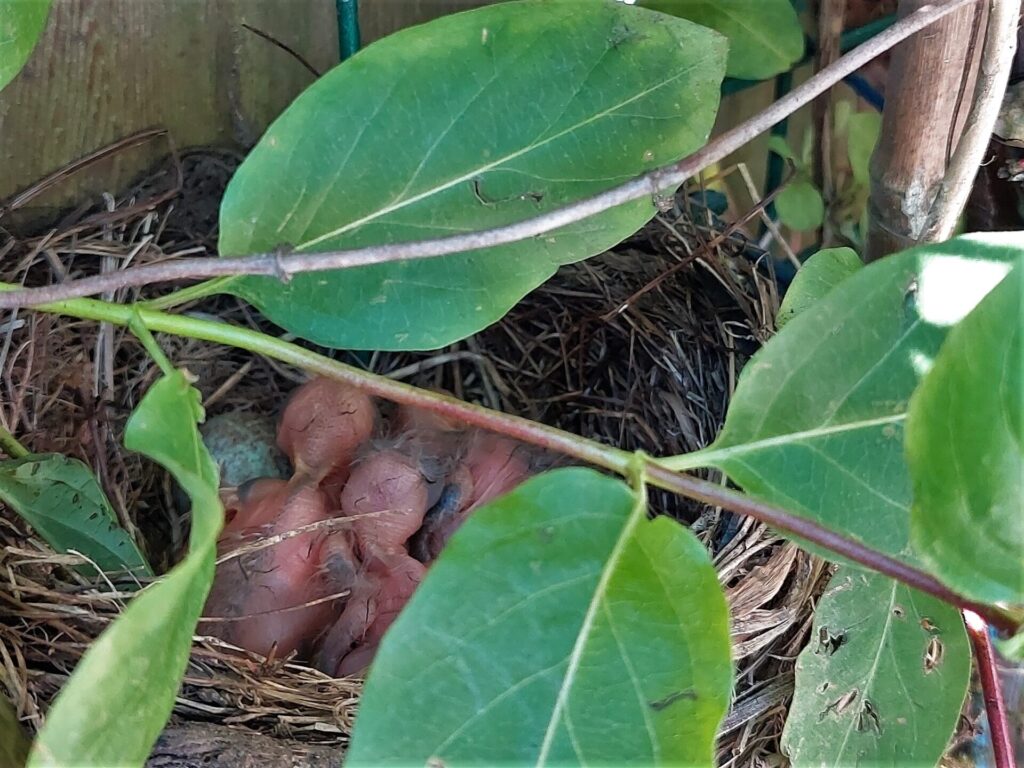
My knitting is out of sync with the seasons – again. The garden is bursting into flower and the blackbirds’ eggs have hatched.
Don’t those naked little chicks look vulnerable? I hope they’re going to make it. Their nest isn’t very well hidden and there are magpies about.
With spring well on its way and warmer weather around the corner, I’m finishing some warm and woolly knits. It has happened before, my knitting being out of sync with the seasons, but this time I have a very good excuse: Several months ago I dropped everything else to knit baby things. Now our grandson has more than enough to keep him warm for the time being, and there’s finally time to finish other projects.
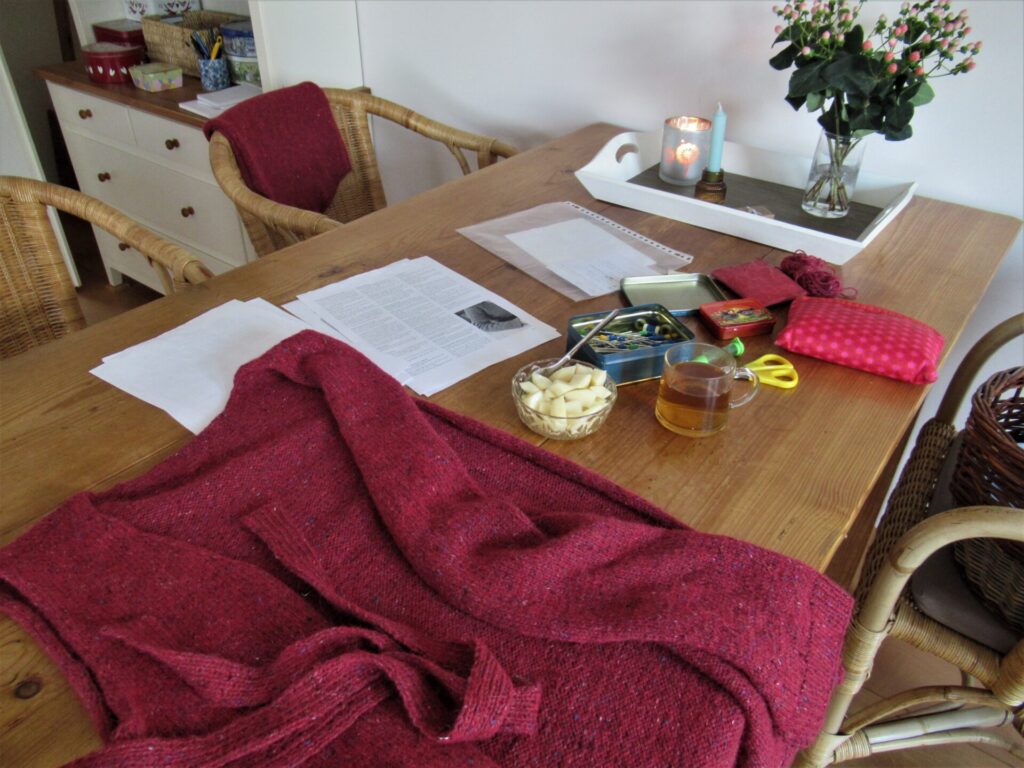
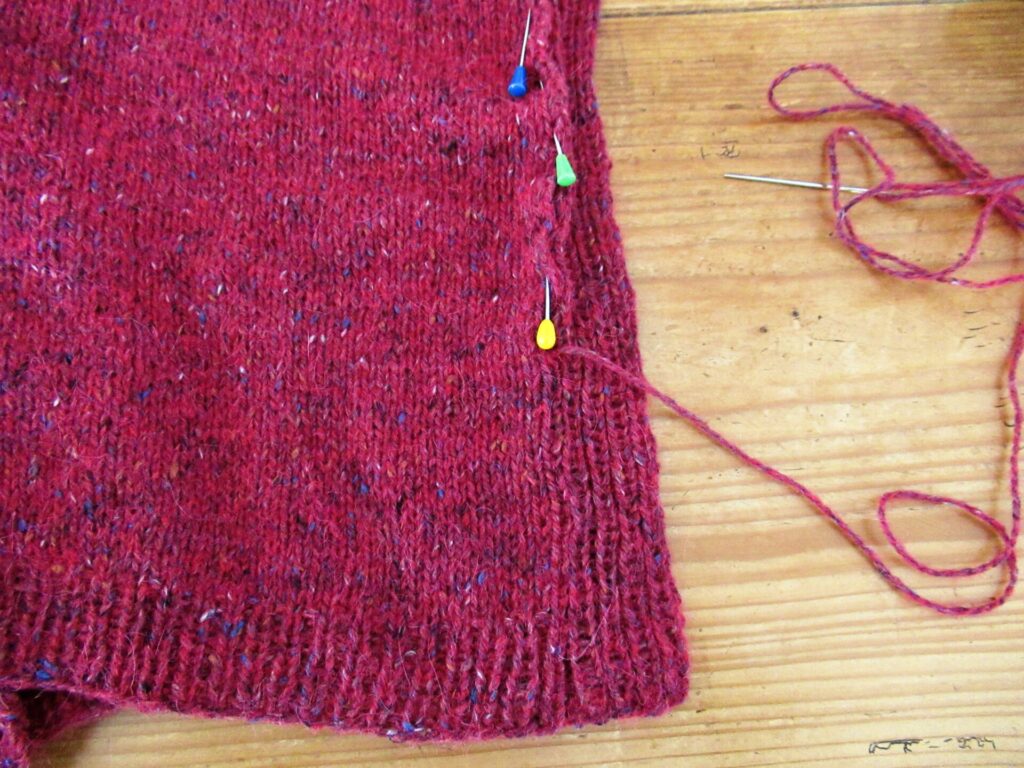
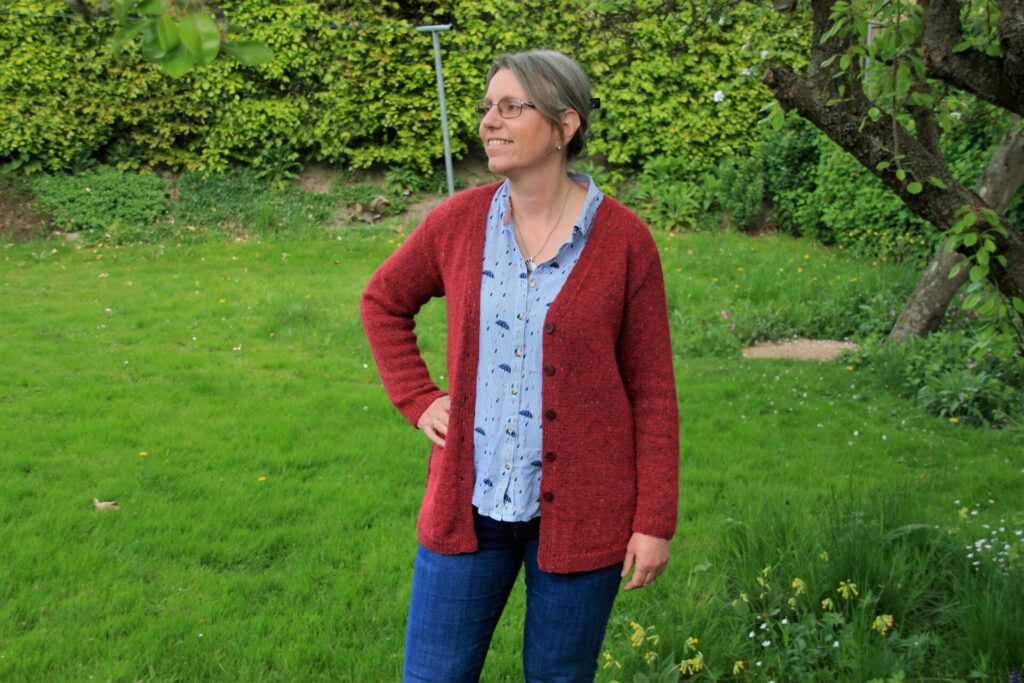
The first one I’m tackling is a red tweedy cardigan. All parts are knit separately, including the button bands. That means a LOT of seaming, and I’ve done it in stages. Before I started the actual seaming, I pressed the individual parts, covered by a damp tea towel.
As I hope you can see in this picture the edges of the stocking stitch fabric roll inwards terribly. Pressing them flattens them out and makes seaming easier and neater.
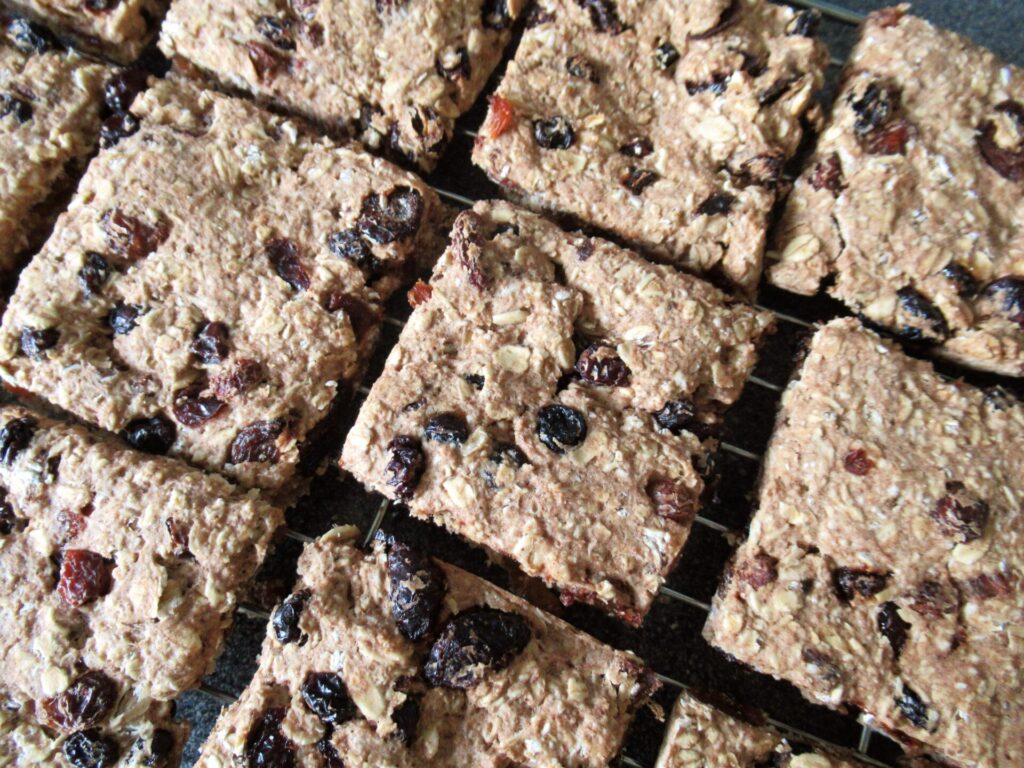
As you can probably also see in this picture, there is something in the oven. It’s a batch of my Very Healthy Oat Squares (recipe in this older post; please scroll down).
Over the course of several days, I meticulously sewed on the button bands using mattress stitch. It’s a time-consuming job and I did a little every day.
Then I realized that it was going to take ages this way. So on a day when I had a to-do-list from here to Tokyo, I decided to take a different approach and alternate my chores with bursts of seaming. It looked something like this:
Clean bathroom and sink, sew right sleeve cap. Replace light bulb, empty wastepaper baskets, water plants, fold laundry, sew left sleeve cap.
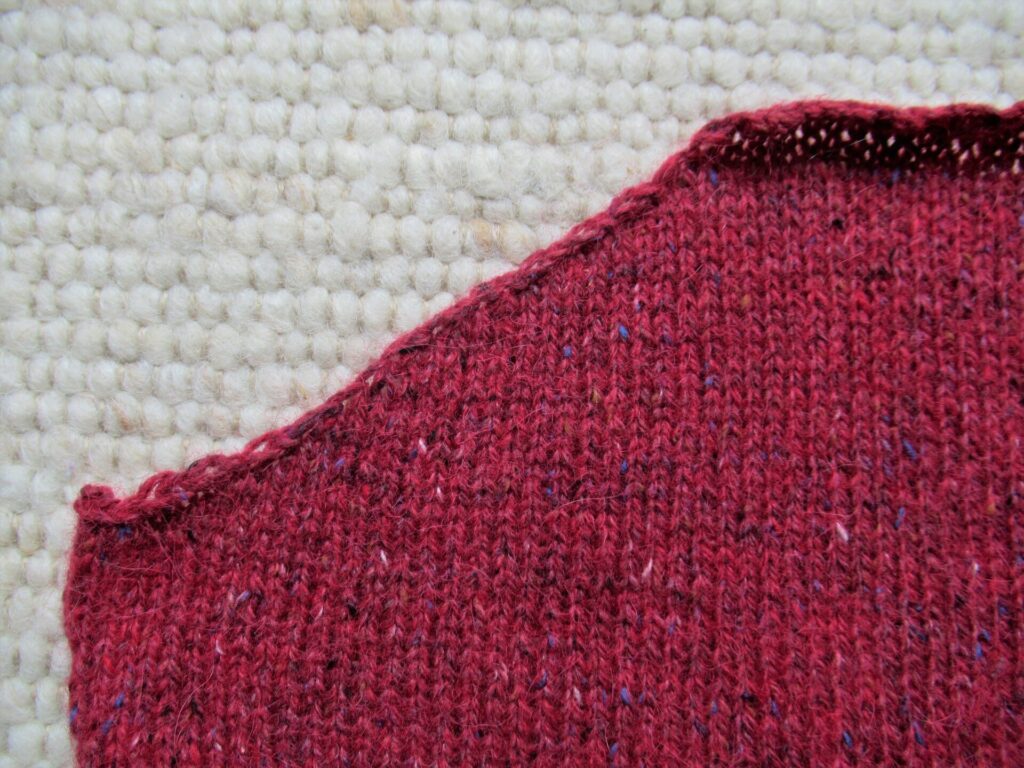
For a knitting connoisseur, the sleeve caps are lovely, by the way. Due to a special way of binding off using slipped stitches, the slope isn’t stepped as usual, but nice and smooth.
Dust and hoover downstairs, sew right underarm seam. Catch up with e-mails and admin, sew right side seam, etc.
Granted, it wasn’t the most exciting day of my life, but at the end of it I had tackled many items on my list and finished the seaming of the entire cardigan. Time for a bubble bath…
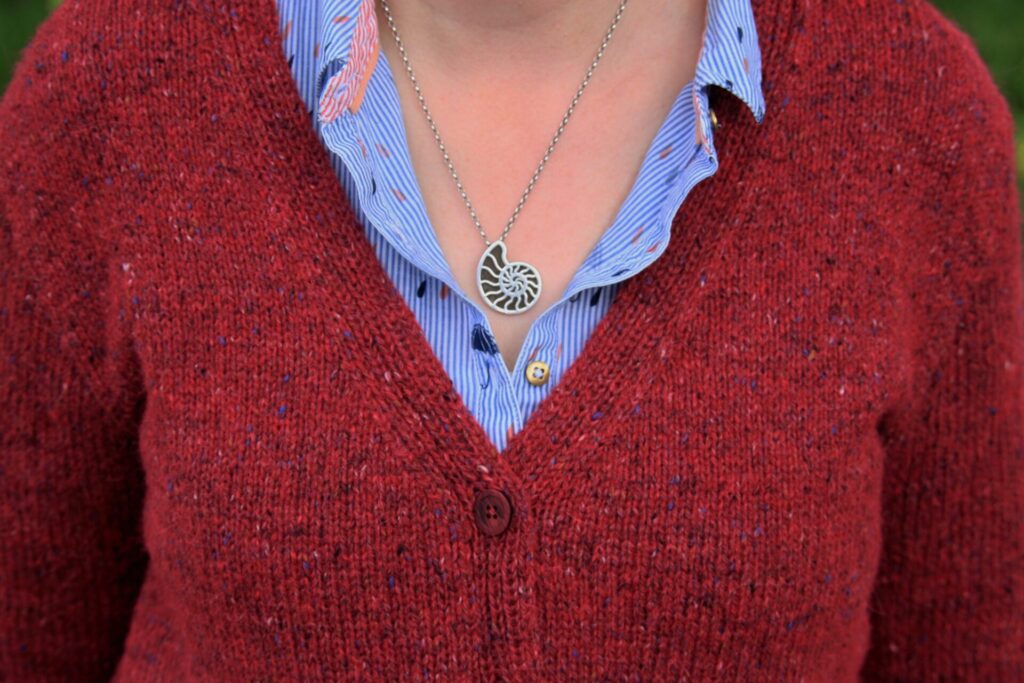
… for the cardigan. (Should have taken one myself, too, instead of a quick shower.) And then, after drying flat, the final touch: buttons. And here it is, my simple but sophisticated tweedy cardi:
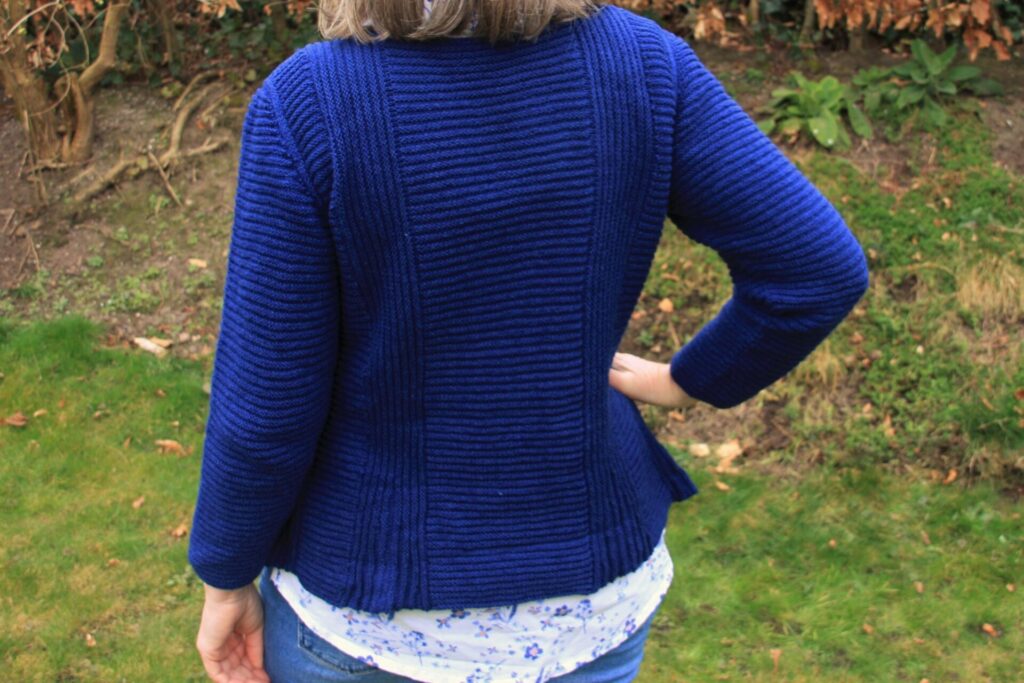
Entirely in stocking stitch, it looks very simple. What makes it sophisticated is the attention to detail: A-line shaping, sloping shoulder seams moved a little forward, smooth sleeve cap, customized sleeve length, side vents, a few short rows above the hem so that the cardigan ‘hangs’ better, and the careful finishing, of course. The cardigan is also knit at a looser gauge than normal for the yarn, which gives it a nice drape.
I’m particularly happy with the neatly sewn on button bands.
And also with the perfect sleeve length and the way the cardi fits around the shoulders.
The pattern’s name Go-To Cardigan is well chosen – it really is a cardigan to wear every day. Because of the A-line shaping, it is particularly flattering for pear-shaped people like me. The pattern can be found here on Ravelry and here on the designer’s website. The yarn I’ve used is Rowan Felted Tweed, shade 150 Rage. The pattern range goes from XS to XL. I’ve made size S, while my usual clothes size is M/L, EU 40/42 (UK 12/14).
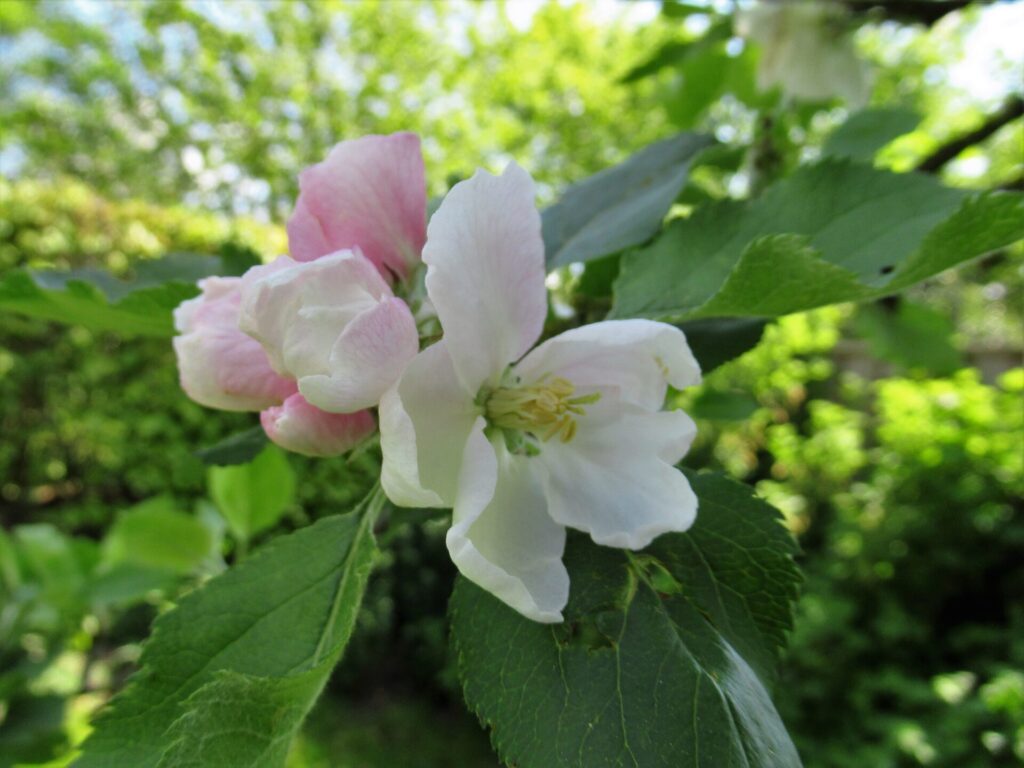
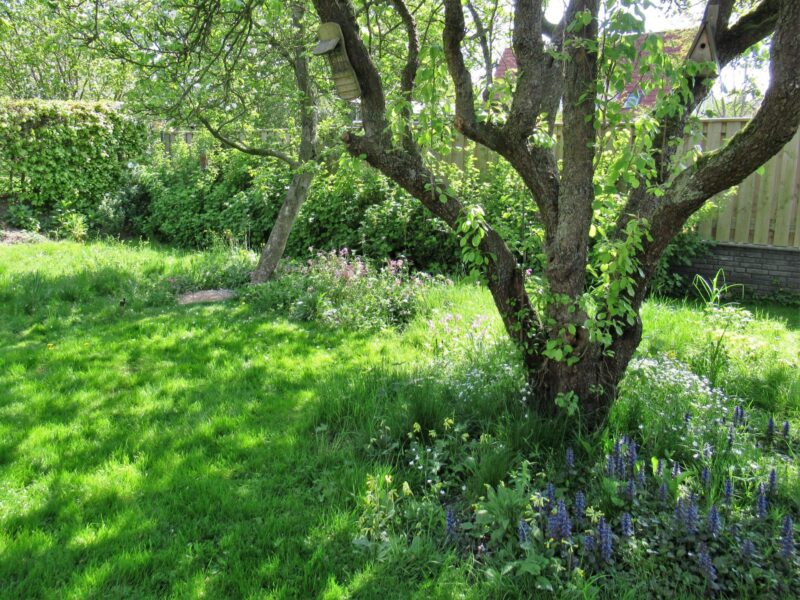
To close off, I’d like to show you our ‘orchard’, where these pictures were taken. It hardly deserves to be called an orchard, with just one apple and one pear tree, but it sounds nice. The pear blossomed early in spring and we’re now enjoying the apple blossoms.
Under the fruit trees in our tiny orchard, we’ve created a wildflower meadow with native plant species. Our meadow is also tiny (just a few square metres), but from spring into autumn there is always something flowering. This is what it looks like at the moment (click on images to enlarge):
Enjoy your weekend and hope to see you again next week! I don’t know if I’ll have another project finished by then, but we’ll see.
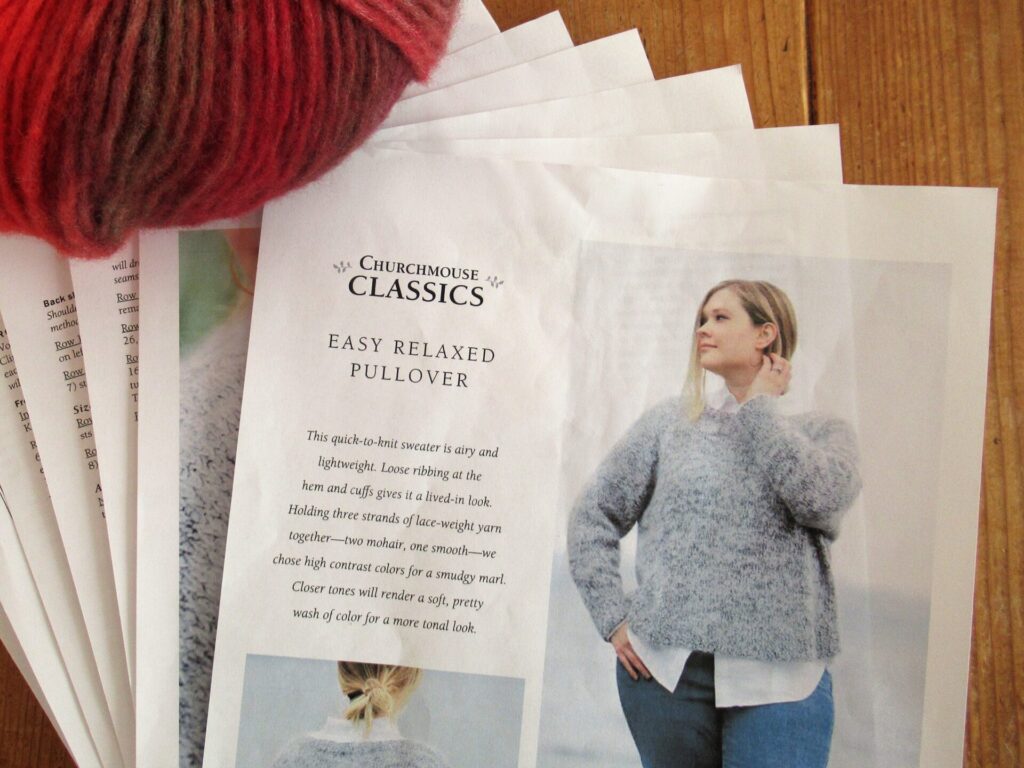
Easy and relaxed – doesn’t that sound like music to your ears? Life would be boring without any excitement or puzzles to be solved, of course. But as someone who tends to overcomplicate things and is far from laid-back, I often yearn for things to be easy and relaxed. So, how could I resist a pattern called Easy Relaxed Pullover?
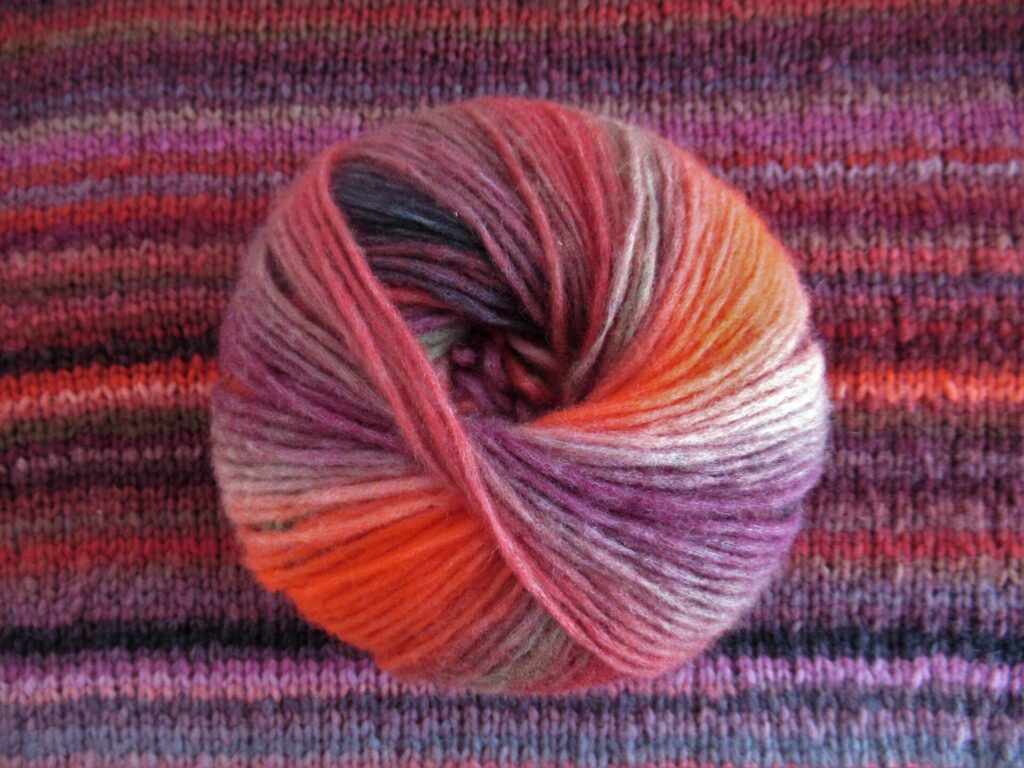
The original version is knit with 3 lace-weight yarns held together. I knit mine with one strand of a colourful bulky yarn.
It is Cloud from Lang Yarns, and is one of those new light-weight ‘blown’ yarns. One of the balls had a couple of knots in it, but on the whole, I am happy with the quality. I considered cutting the neon pink and bright orangey-red bits out, but I’m glad I didn’t.
It was a quick, fun, light-hearted project. The pullover is knit from the bottom up. The shoulders are joined with a 3-needle bind-off. Stitches are picked up for the sleeves, and those are knit from the shoulder down.
I seamed the side and sleeve seams using mattress stitch, worked from the outside. The stripes do not match up at the sides of the body at all, and that’s fine by me. But I did match up the stripes neatly on the sleeves.
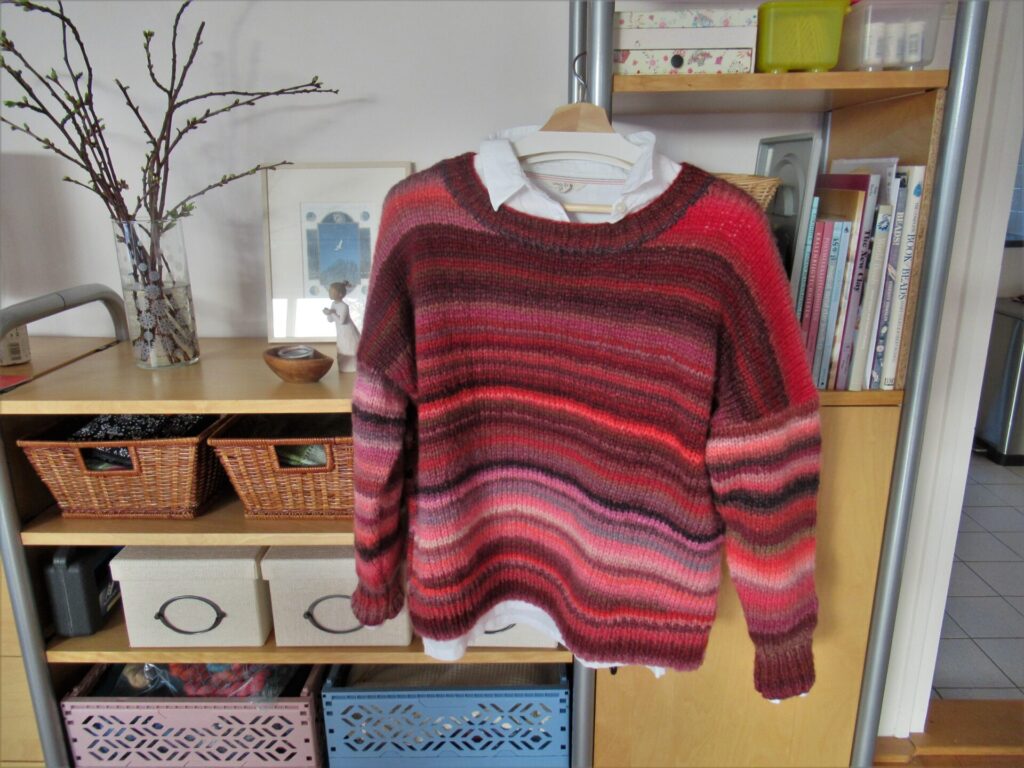
At first I thought I’d take the easy way out and just show you the pullover on it’s own. But how will you know how it fits without seeing me wearing it? So here we go, first the front:
And then the back:
As you can see, it has a very relaxed fit, with arm’holes’ tapering out, which is why the sleeves start halfway on the upper arm. So, that explains the ‘relaxed’ part of the pattern’s name. As for the ‘easy part’, this is a very easy knit. Because of the short rows at the hem and the shoulders not very-first-knit-ever easy, but easy enough for a knitter with a little experience.
‘Work from home unless it’s absolutely necessary to attend in person’ is still the norm here. Some people seem to thrive on working from home while others struggle. I’ve worked from home for most of my adult life, and think I’m somewhere in between. I know all about the pros as well as the cons, and if there is one piece of advice I can give, it is this:
Go for a walk every single day!
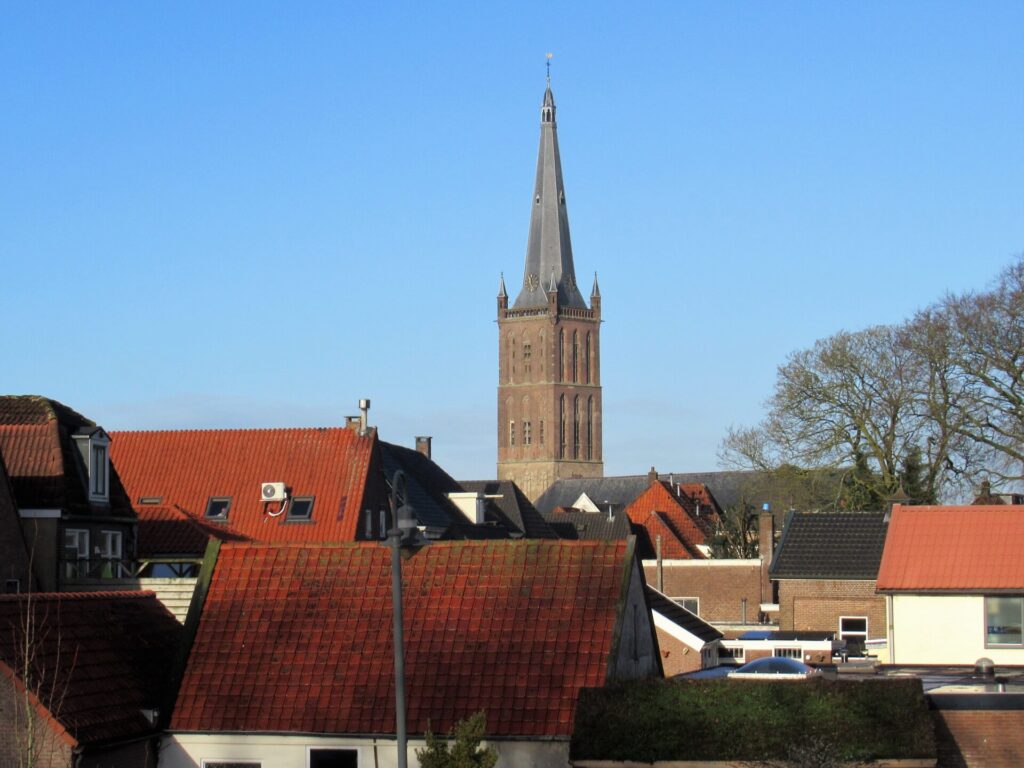
For some variation in my daily walks, I combined an errand in the town of Steenwijk with a walk and brought my camera. For anything but basic groceries we cycle to Steenwijk, and we can see its church steeple in the distance on most days.
Steenwijk is also the town of the historic house of last-week’s pop-up card. I passed by its art nouveau entrance gate.
This is by no means an easy and relaxed time for many. First of all, I’m thinking of everybody who is ill or has a loved one in hospital, and our hard-worked care-workers. Other groups that are hit hard are those working in cafés and restaurants, and shopkeepers.
Like just about everything else, all non-essential shops have been closed again since the mid-December.
Blessed is the country that considers flower shops essential.
It’s strange to walk through the quiet streets. I notice different things, too. This shop is my first port of call when I need new clothes:
A funny detail I’ve never noticed before is that the building used to belong to the Salvation Army.
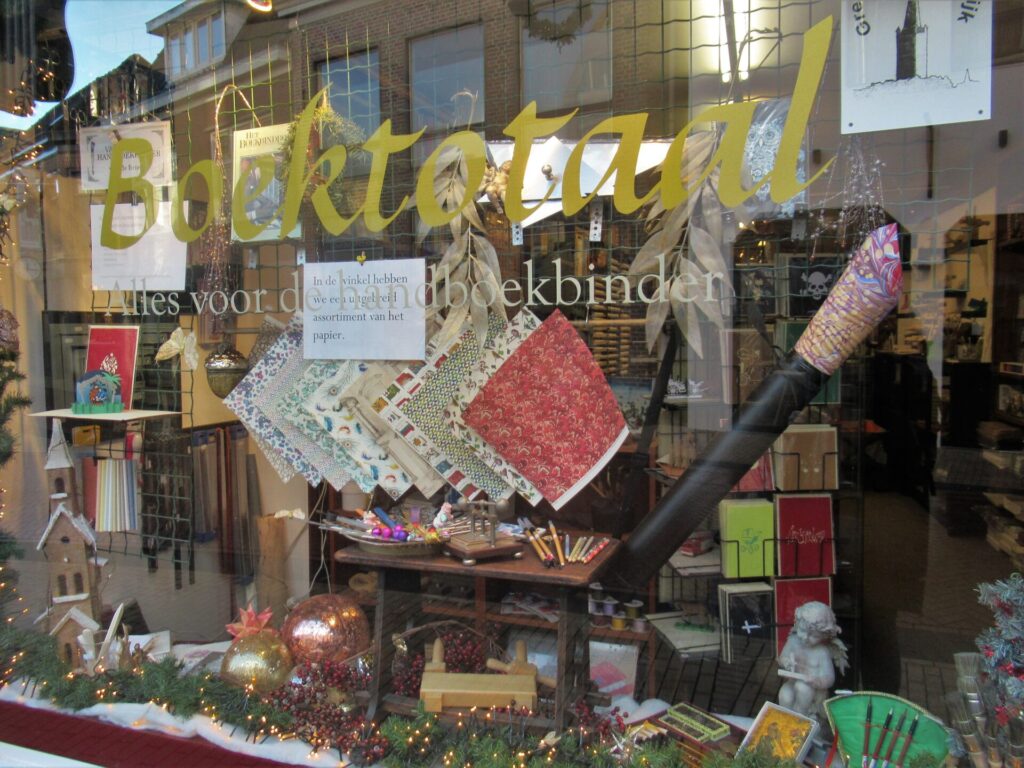
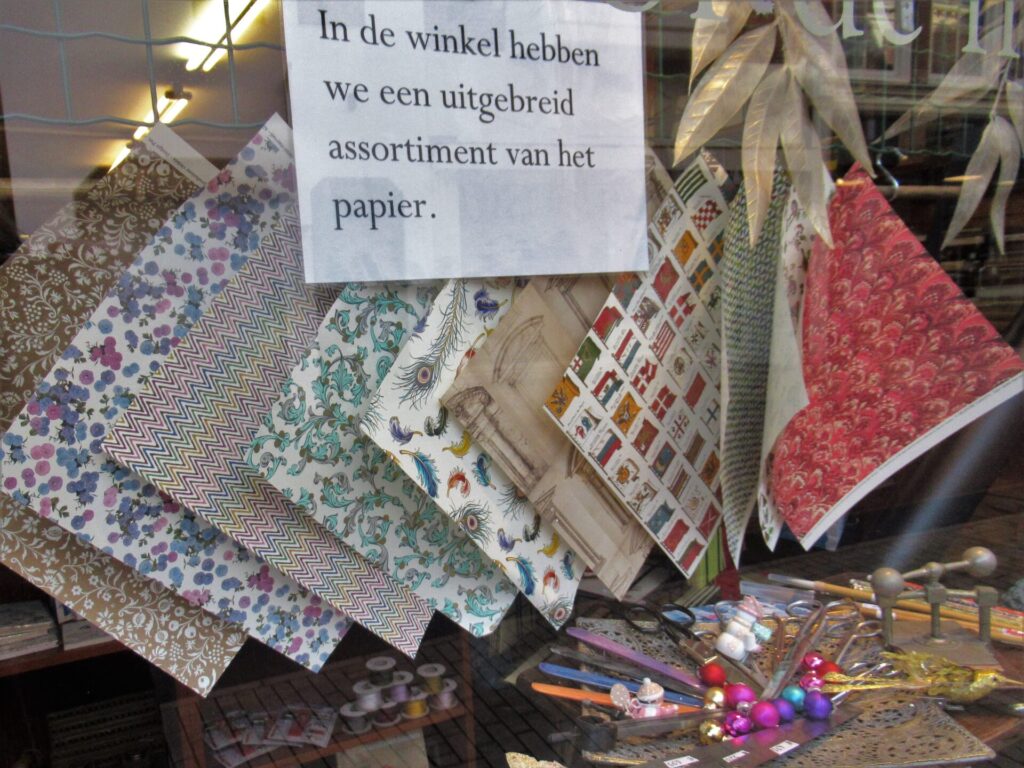
And here is something that I know will interest at least one of you reading this:
This little shop no longer sells second-hand books, but is now focusing completely on bookbinding materials and tools. I try to support our local shops as much as I can. And one of the small ways I can do that is by giving you a link to this shop’s website. Do pay it a visit if you’re interested in bookbinding or beautiful papers. There is a little flag at the top of their website for an English or German version.
I’m hoping for some good light this weekend to photograph the swatches I’ve been knitting. If all goes well, I’ll write about those next week. Hope to see you again then!
We’ve had a lot of rather gloomy days here lately. I don’t mean gloomy because of the current coronavirus situation, although there is that too, but literally so gloomy that we need to keep the lights on all day.
We haven’t actually had a lot of rain. It’s just that on many days it’s been cloudy and grey.
I don’t really mind, and even enjoy the quiet atmosphere of some of these days. For me, the problem is that there often isn’t enough light to take pictures indoors, while the table on the patio is too wet to spread my knitting out on.
But last Sunday suddenly the sun came out.
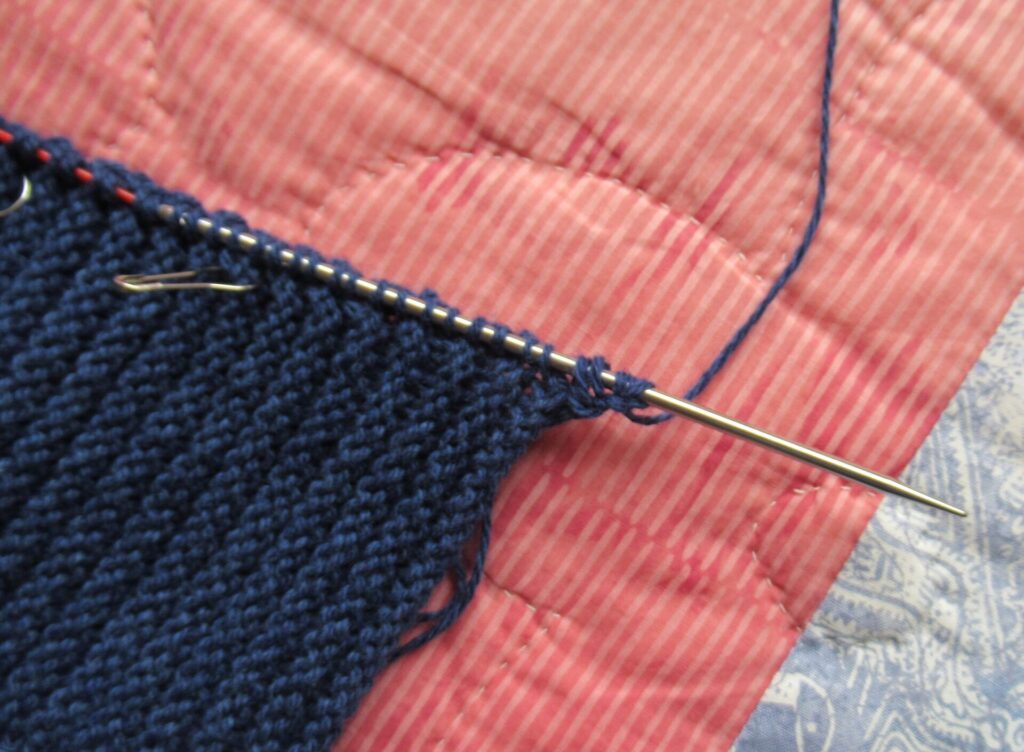
I quickly set to work, because I wanted to show you how to make a twisted fringe. I’d finished knitting my Striped Linen Stitch Wrap. In this project, every row starts and ends with a yarn tail. In the basic pattern these are knotted into a fringe, but a later adaptation has a twisted fringe and that was what I wanted to try.
The yarn I used was Rowan’s Felted Tweed, a blend of lightly felted wool, viscose and alpaca. Because I wasn’t sure if the technique would work for this combination of fibres, I tried it out on a swatch first, and yes, it worked! This is how it’s done step by step.
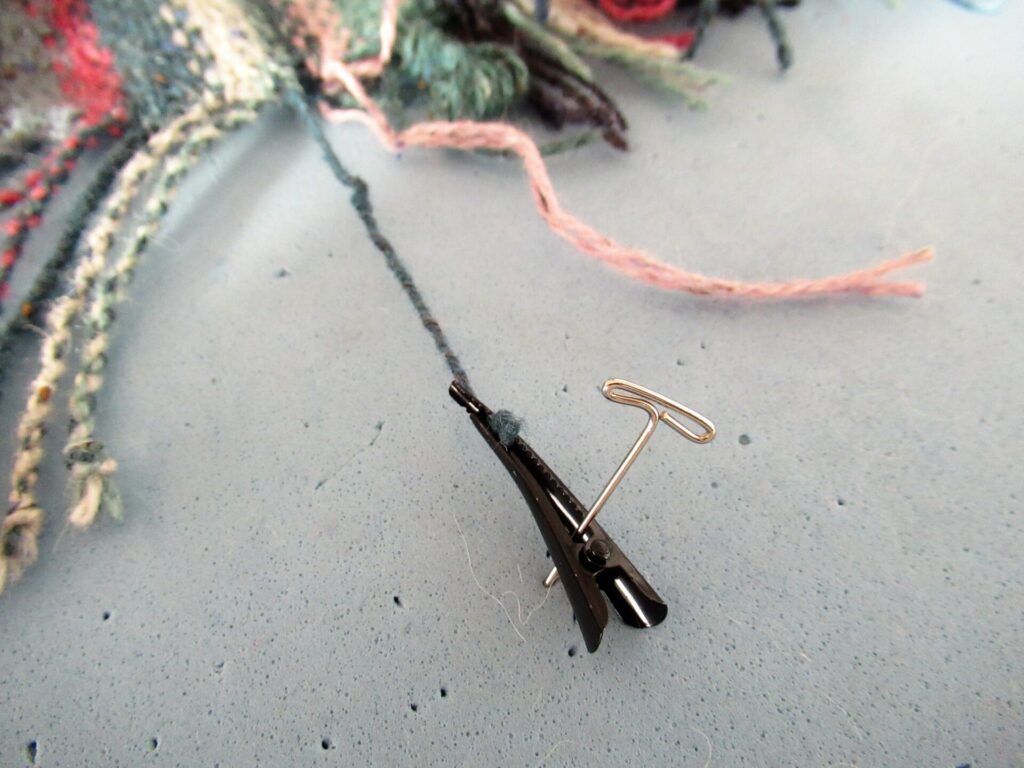
1) Pin the end of the wrap to blocking mats.
The yarn ends were tied into bundles during the knitting. These are now undone one by one.
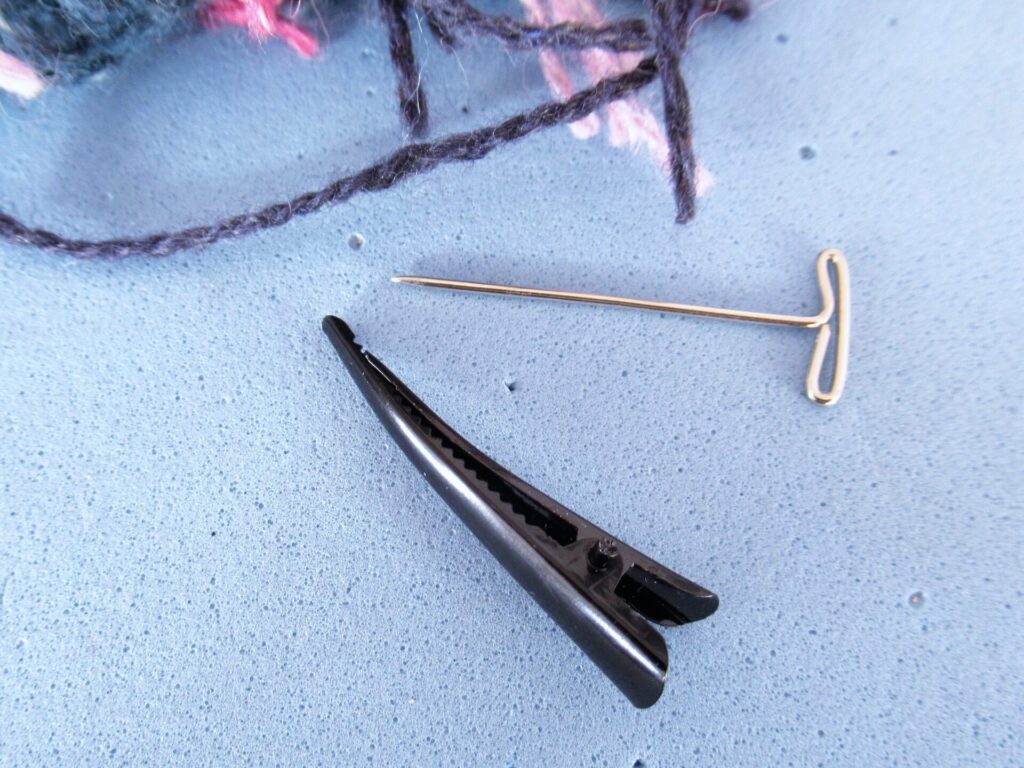
While twisting the ends, they need to be kept in place. The pattern uses a binder clip for this, but as I didn’t have any of those, I used a hair clip and a T-pin.
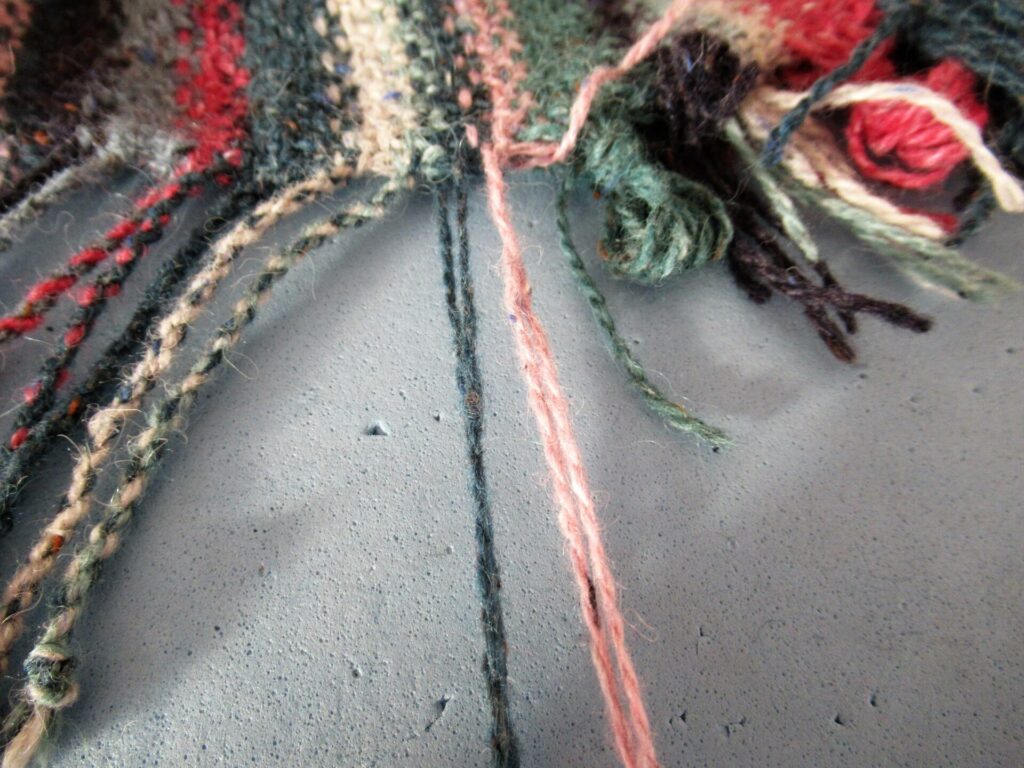
2) Undo a fringe bundle. Find the next 4 tails (they should be twisted in the order they were knitted).
3) Twist the first 2 tails together in the same direction as the twist of the yarn (i.e. to the right). Continue until they are slightly overtwisted.
4) Secure with a clip and pin onto the blocking mat with a T-pin.
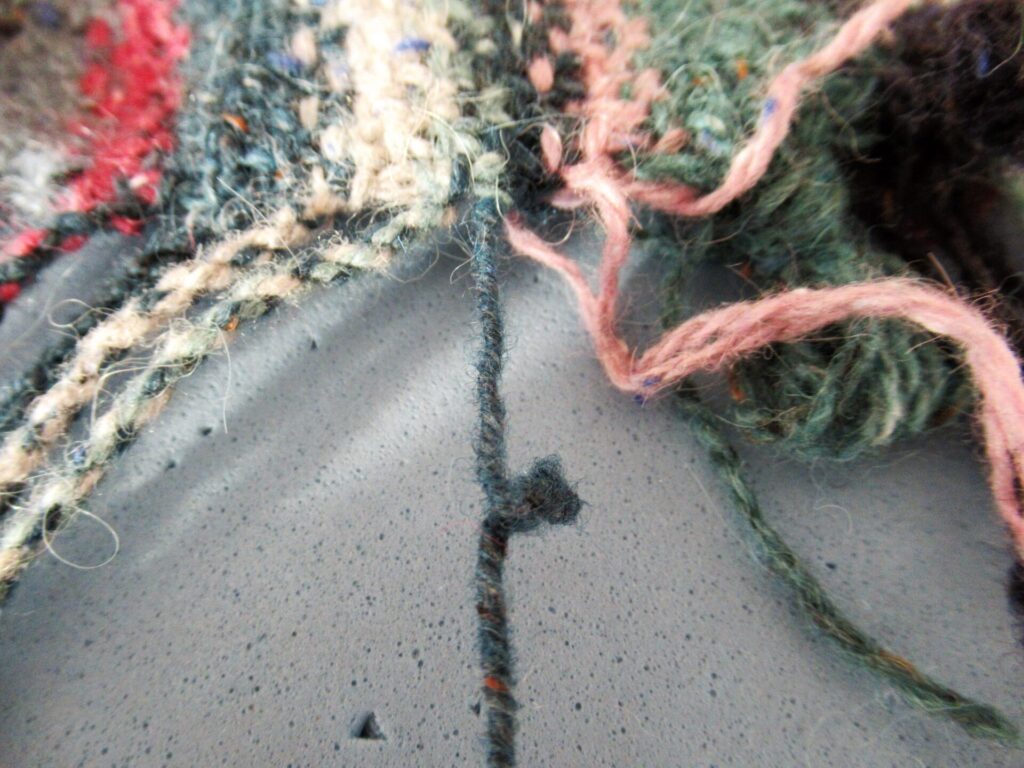
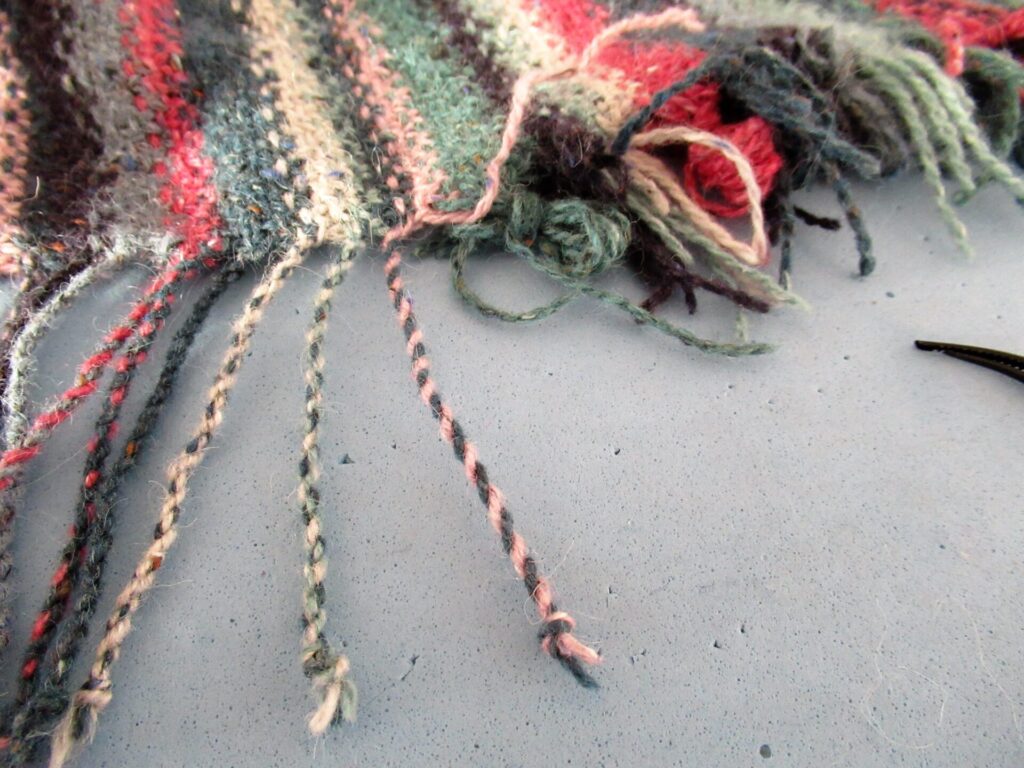
5) Twist the next 2 tails in the same way and hold. Unclip the first 2 twisted tails. Tie both sets of tails together with an overhand knot as close to the ends as possible and let go. They will now twist together. Smooth this twist by passing it between thumb and forefinger several times.
Continue like this until all yarn tails have been twisted. Then repeat steps 1-5 for the other end of the wrap. Remove the wrap from the blocking mats and place it on an ironing board. Comb out the ends so that they are straight and not crossing each other.
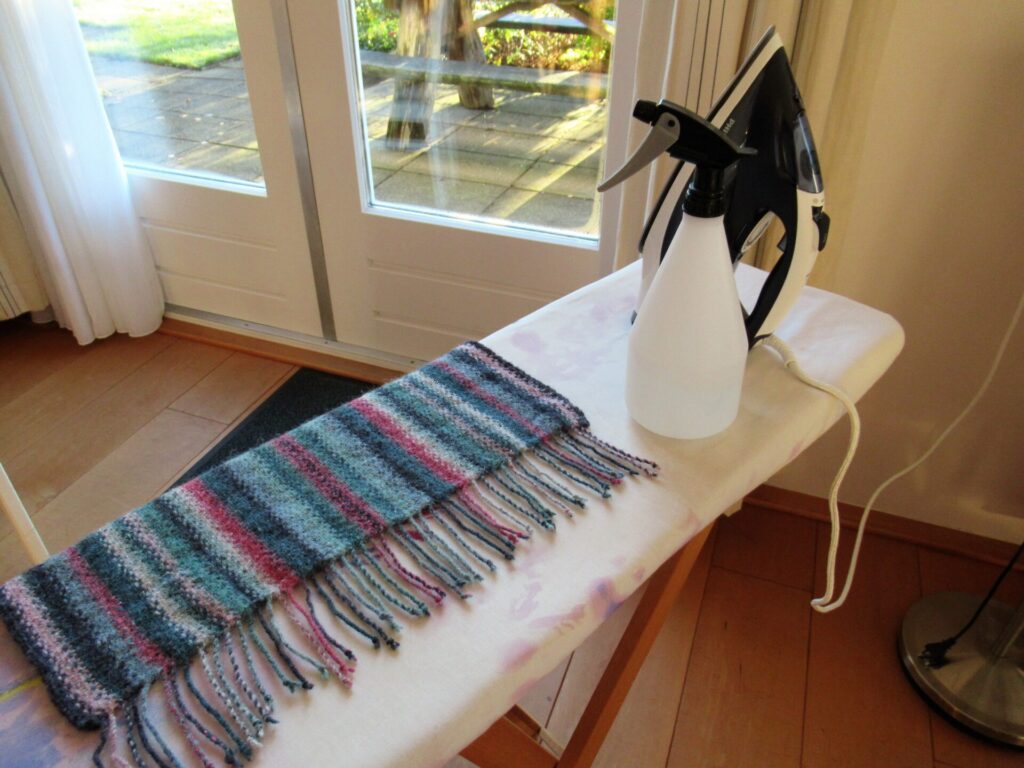
6) Spray the fringe with a plant mister.
7) Cover it with a clean, moist tea towel. (Make sure it’s an old one that won’t give off any colour.)
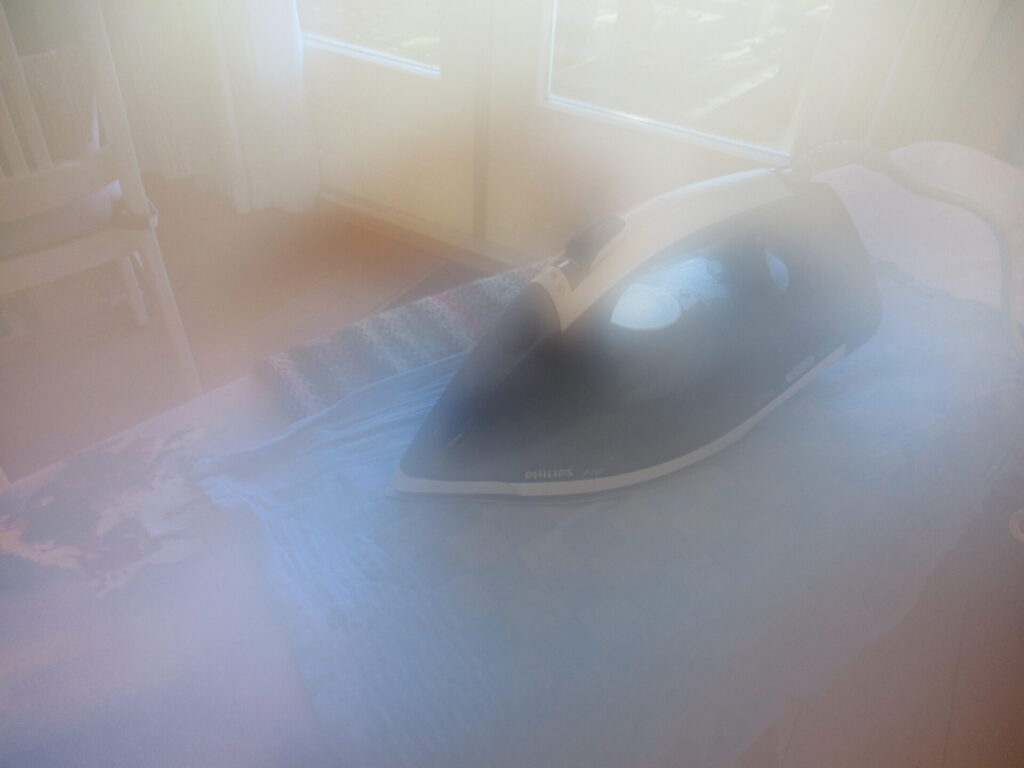
8) Then, with the iron on the wool and steam setting, press the fringe with lots of STEAM.
Repeat for the other end of the wrap and leave to dry thoroughly. The tails should now be slightly felted, preventing them from untwisting.
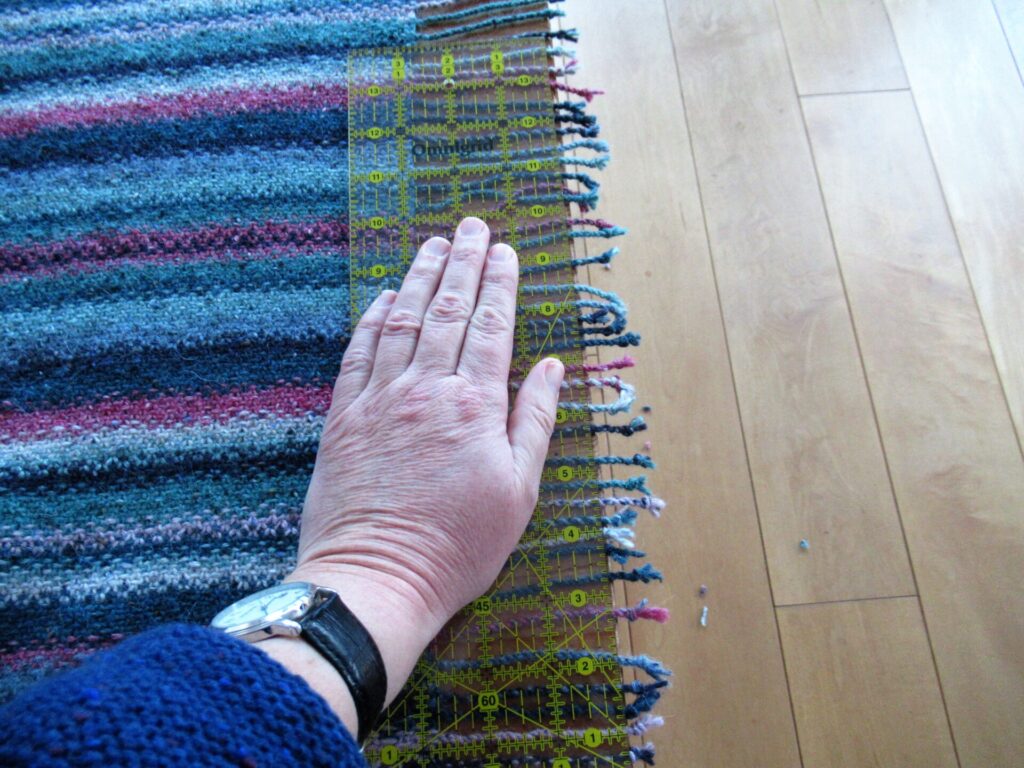
9) Place the wrap with one fringe on the end of a table top. Make sure that the wrap is placed straight and straighten out the tails. Then cut off the knots at the length of the shortest tail.
I used a quilting ruler to make sure I cut the tails off straight.
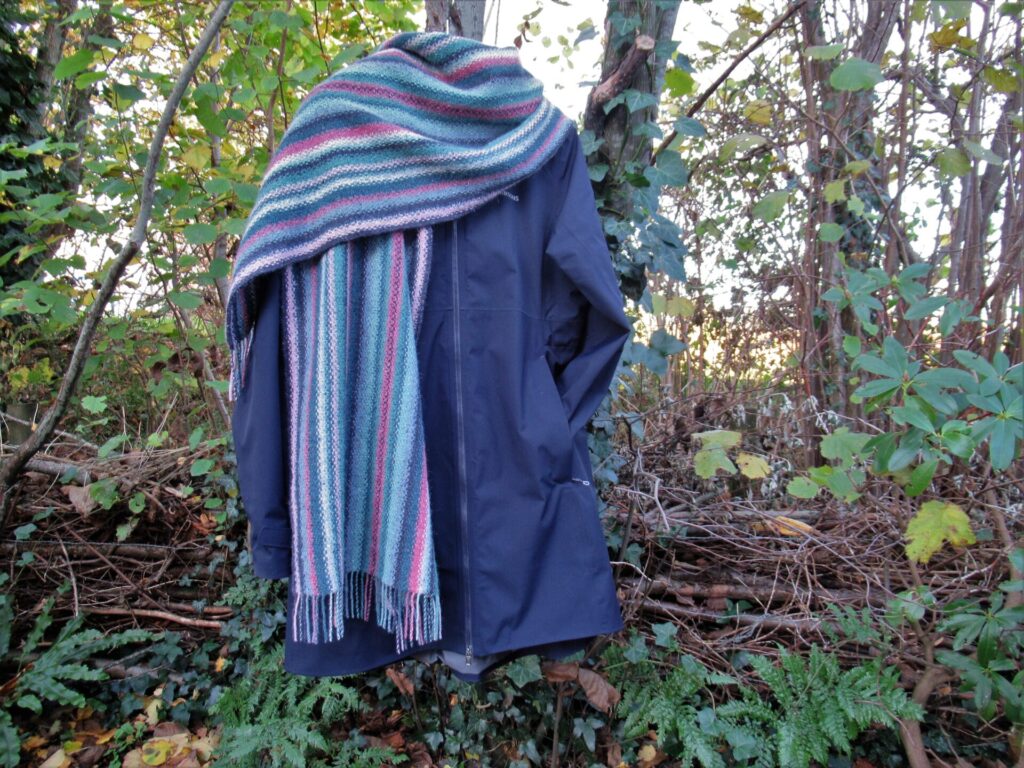
There, all done! This is a great finish for a scarf or wrap. It’s really lovely to see the colours combined differently in each tiny barber-pole tail.
I’m really happy with this wrap and at the same time slightly sad that it’s finished. Many of the things I knit are for others, but I’m keeping this one. I’ve loved working on it and will miss the soothing rhythm of slipping and knitting, slipping and knitting many, many stitches.
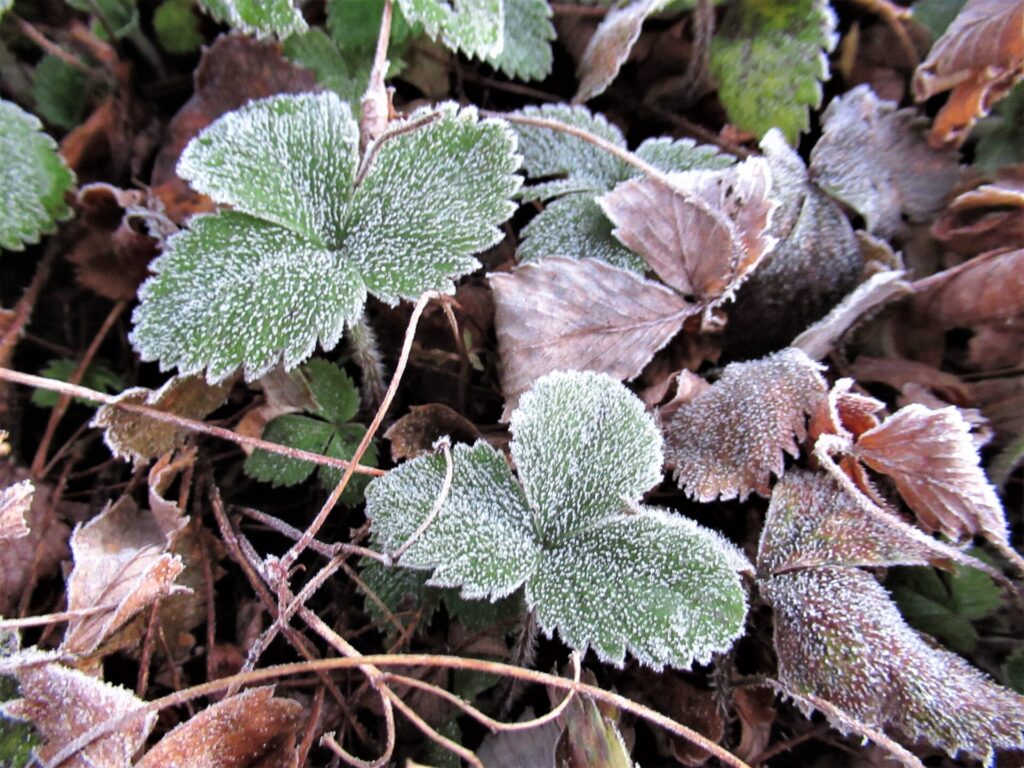
Now I’m hoping for colder weather so that I can wear it. It’s a strange autumn. The pelargoniums and lobelias in our outdoor pots are still flowering and it’s the end of November! Still, we’ve had some night frost…
… and more wintry weather is expected for this weekend.
In case you’d like to knit a wrap like this, the pattern is called Striped Linen Stitch Wrap & Scarf (there is also a smaller scarf version) and can be found here on the designer’s website and here on Ravelry. The free adaptation for the twisted fringe can be found here.
Well, I hope that just looking at this warm wrap with its colourful fringe has warmed and lifted your heart a little. Take care! xxx
Thank you for your kind comments about last week’s autumn walk. Today it’s all about knitting again. Looking through my photos I have a feeling it may become a longish post, so why not make yourself a nice cup of tea or coffee before diving in?
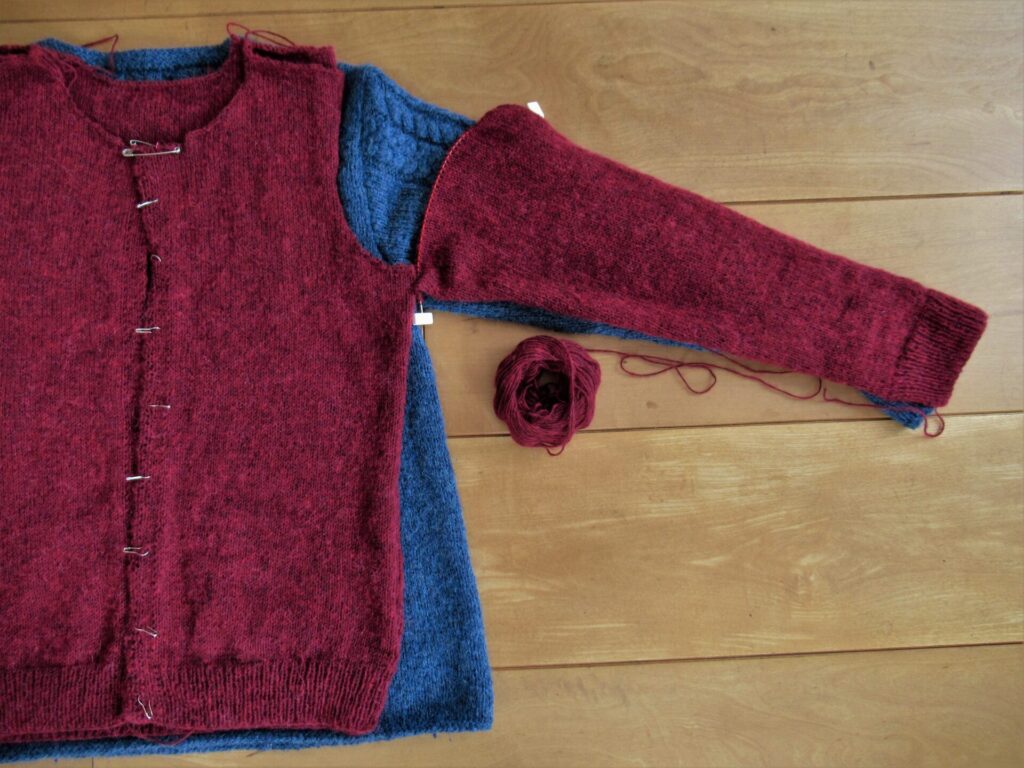
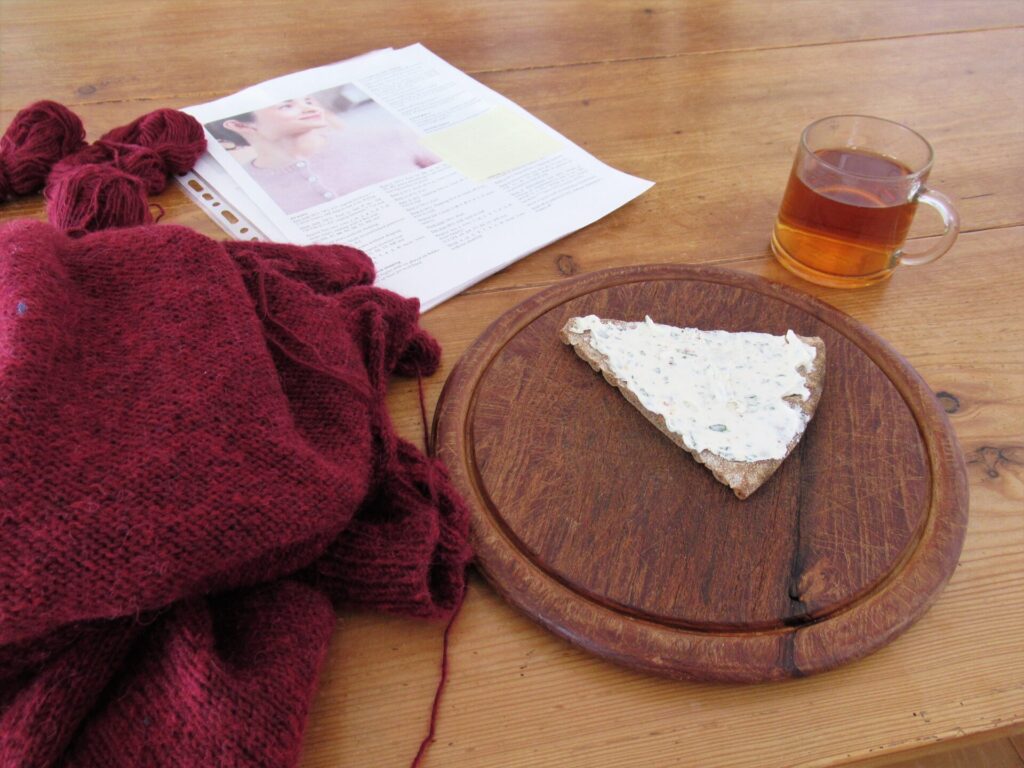
I’ve just finished a cardigan for our daughter and thought I’d talk about that for a bit. It’s the cardi I had to unravel the front of because I hadn’t read the pattern properly. Well, that was quickly remedied and it was soon time to check the sleeve length.
I didn’t have our daughter or any of her clothes at hand to measure the length, but I found an old sweater of mine she often borrows that I thought had exactly the right sleeve length.
It’s a different shape and size, but that didn’t matter. As long as the measurements across the chest and along the underarm were the same it would be all right (I hoped). Measured by the old sweater, the sleeve had reached the arm hole and the starting point of the sleeve cap. The sleeves were soon finished and it was time to go looking for buttons.
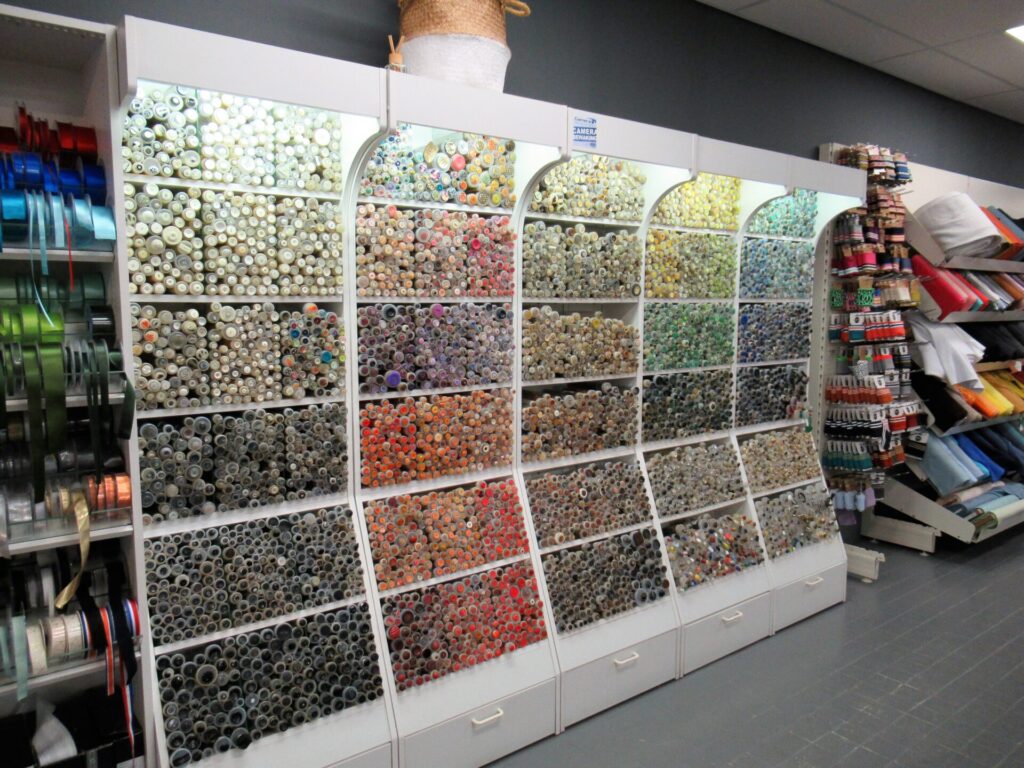
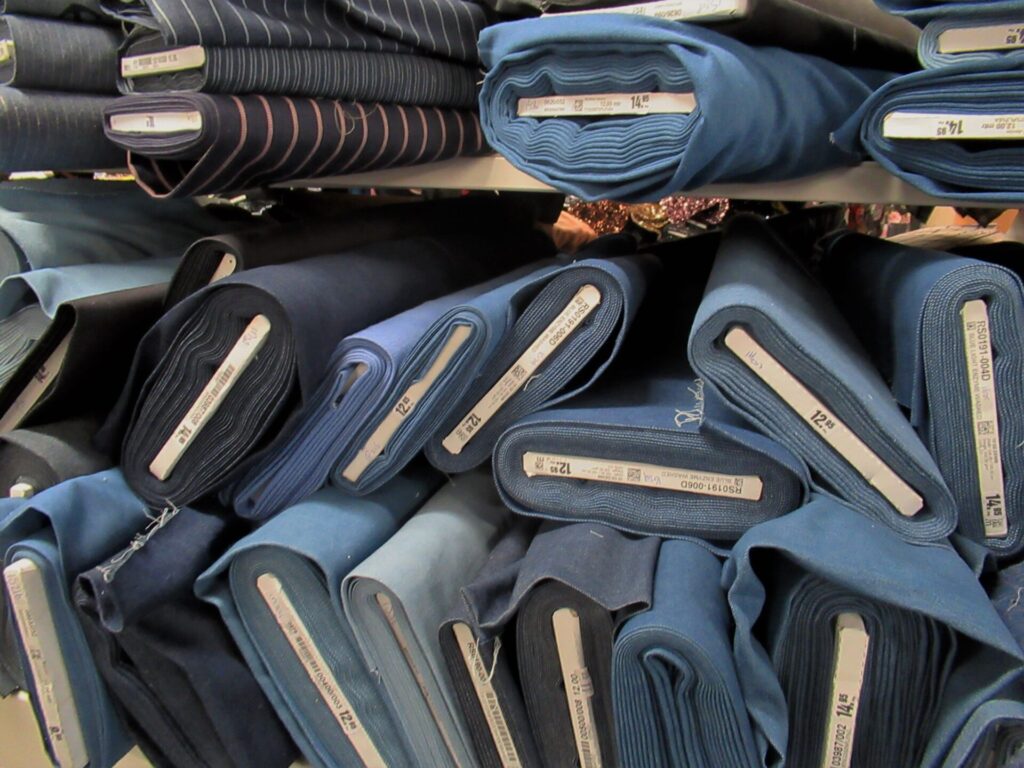
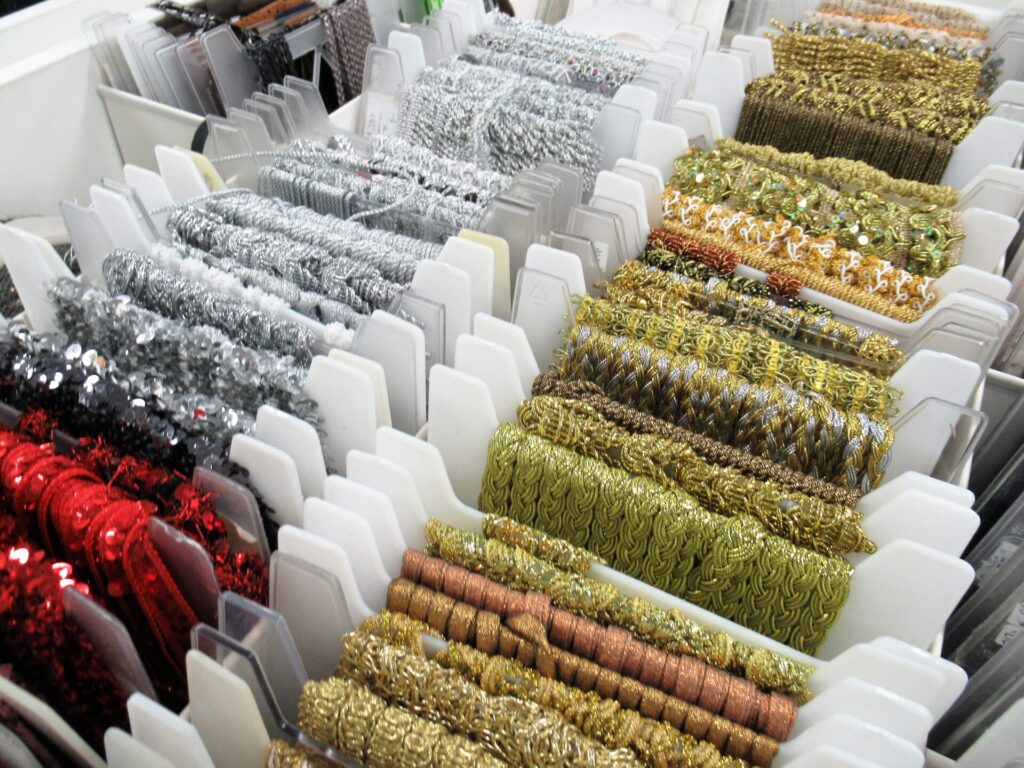
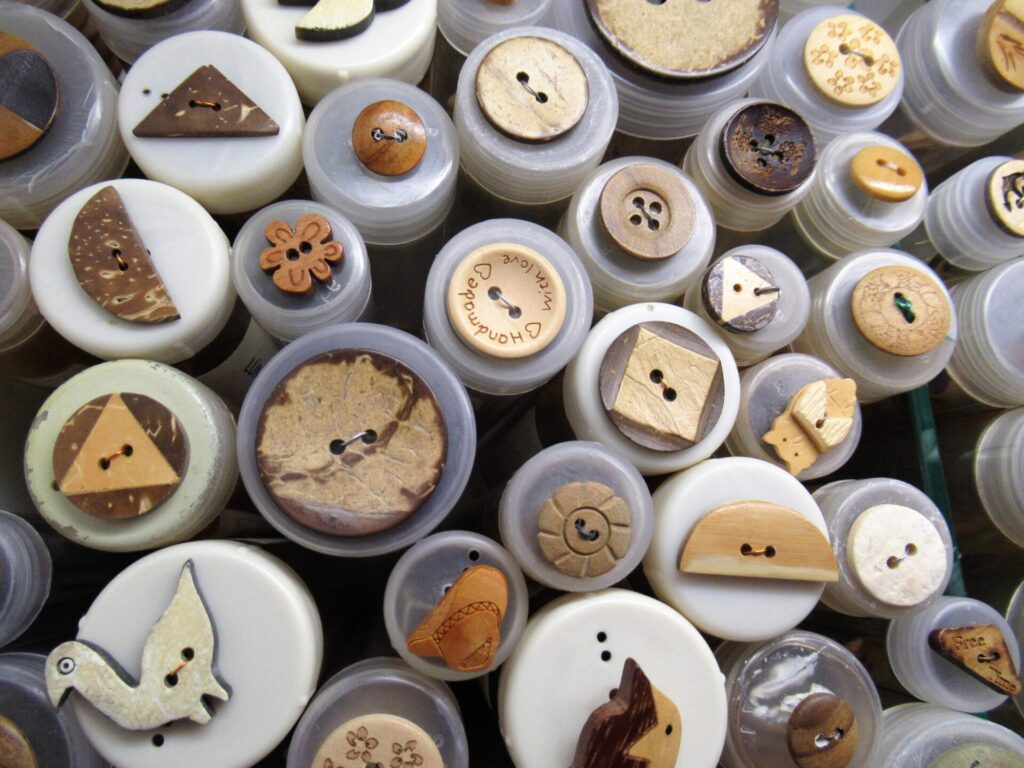
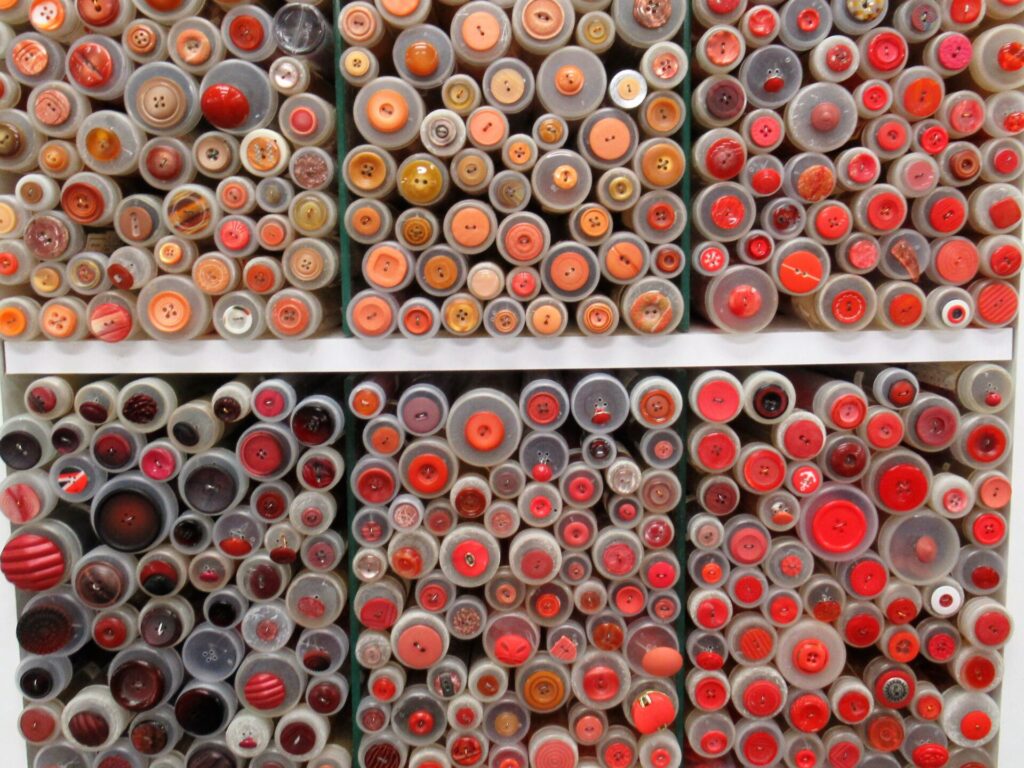
I popped into a large fabric store while we were on our way to visit our daughter and was greeted by a colourful wall of buttons. (For those of you in the Netherlands, it is just outside Deventer. There is nothing on their website but the address and opening hours, but as there are so few fabric stores left, I thought I’d include a link here anyway.)
I tried to be quick because my husband was waiting outside. He is always patient, but I didn’t want to keep him waiting too long or arrive too late. I got briefly distracted, though, by the displays of satin ribbons…
… denim fabrics…
… and bling-bling.
‘Come on, just focus on the buttons, you can do it,’ I told myself. I looked at the wooden buttons…
… as well as the red ones.
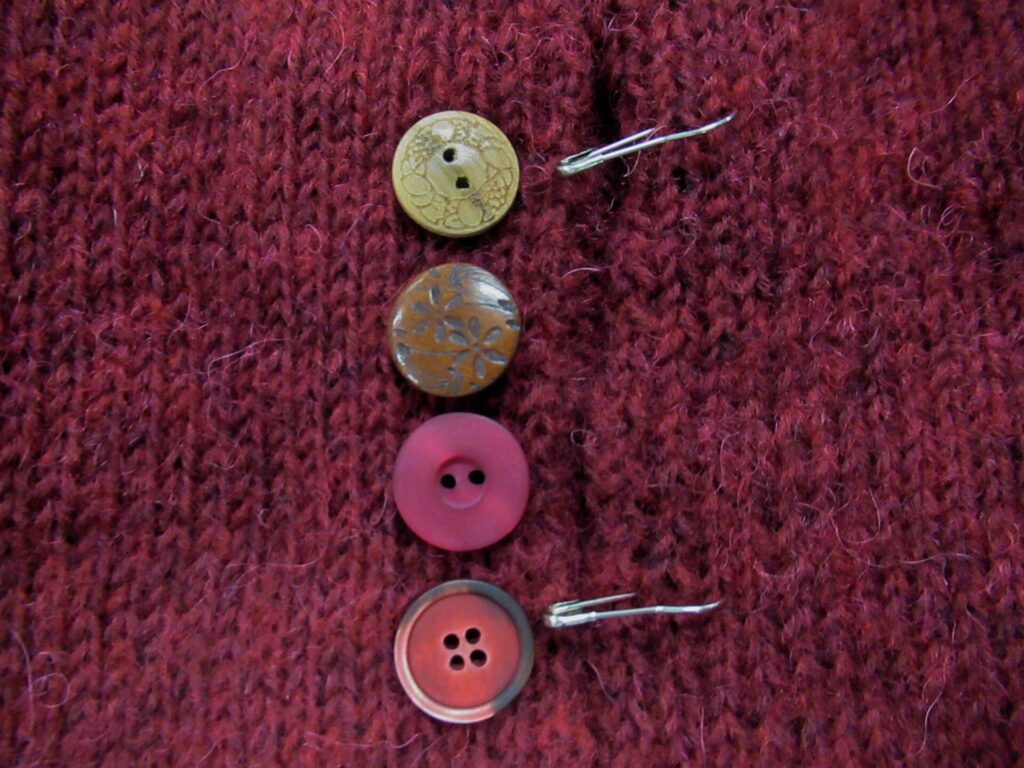
So much choice! These 4 seemed most suitable.
In the end I chose the colour that matched the yarn best, the bottom one.
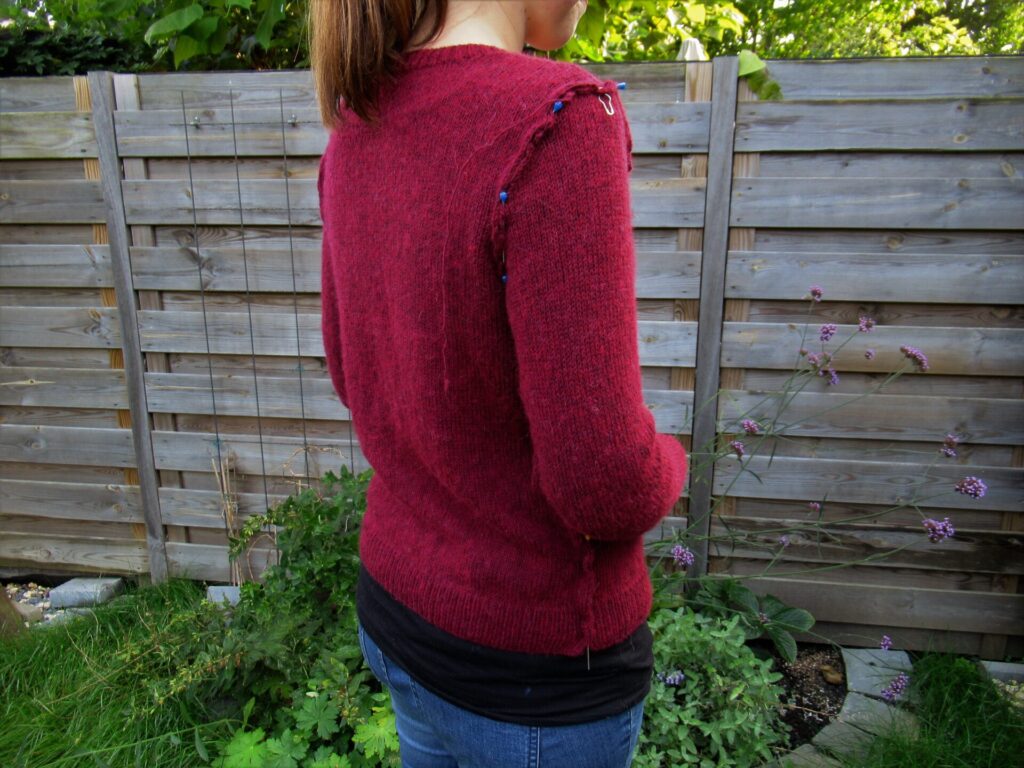
Time to see if the cardi fit and the sleeves were the right length. I pinned it together on the outside to make it easier to try on.
Yes, perfect! And the sleeves were the right length too.
Now all that was left to do was seam everything together.
My waistbands are getting a little tight and I don’t think it is because my clothes have shrunk. I’ll really need to watch what I eat for a while.
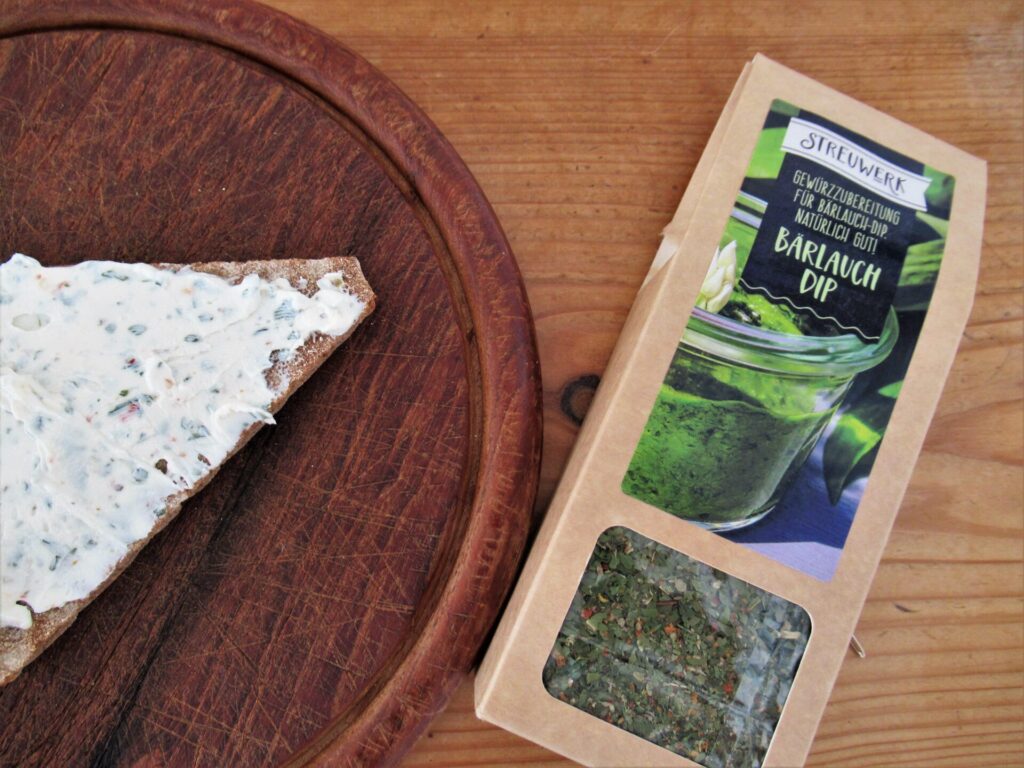
For a low-calory, high-protein spread, I emptied a tub of no-fat fromage frais into a sieve lined with a piece of moist cheesecloth, placed the sieve on a mixing bowl and left it in the fridge overnight. The next morning it had a nice spreadable consistency and I mixed in a couple of tea spoons of dried herbs and some sea salt.
I used a tasty German mixture with wild garlic and chili flakes that we got as a gift, but almost any fresh or dried herbs will do.
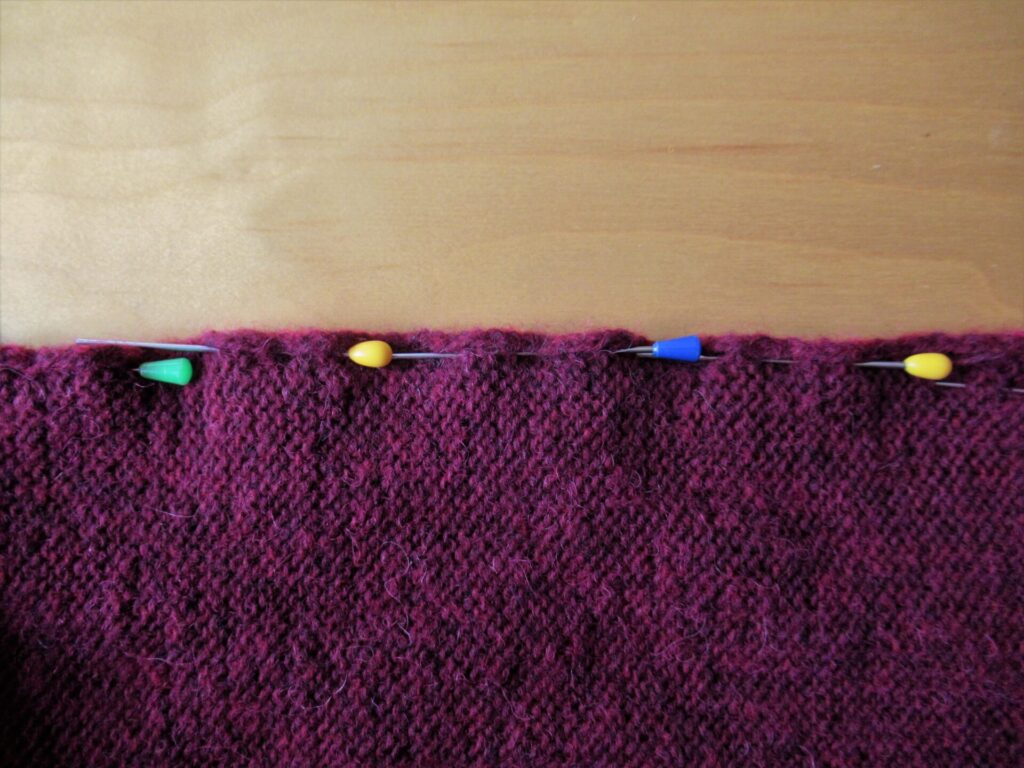
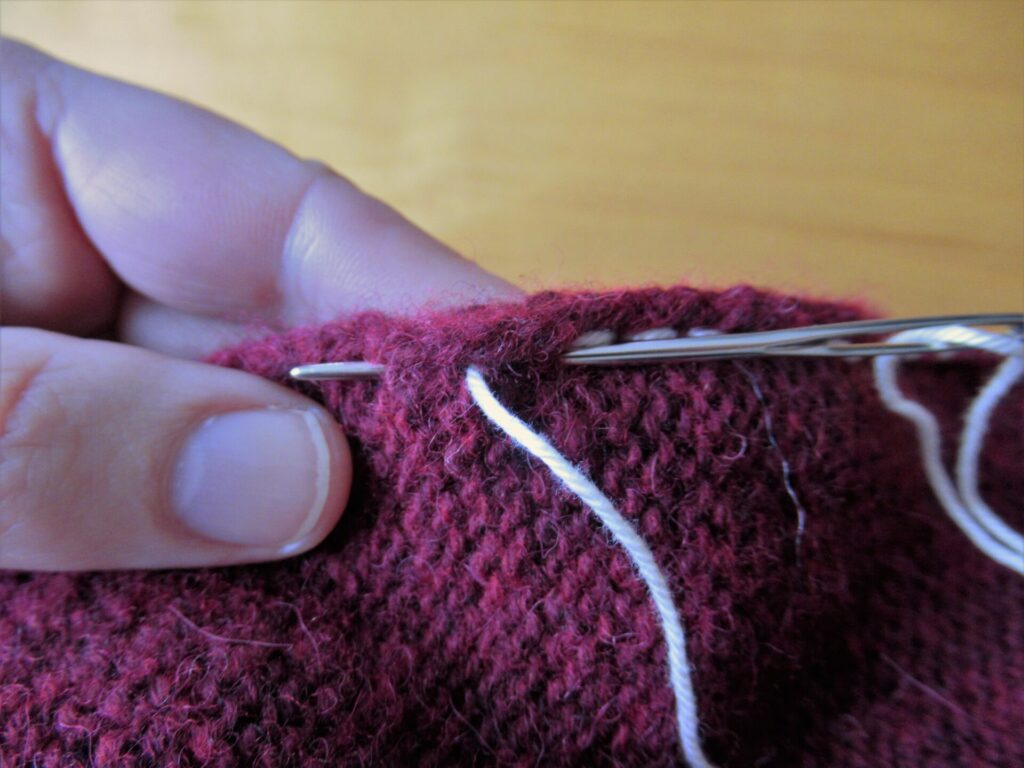
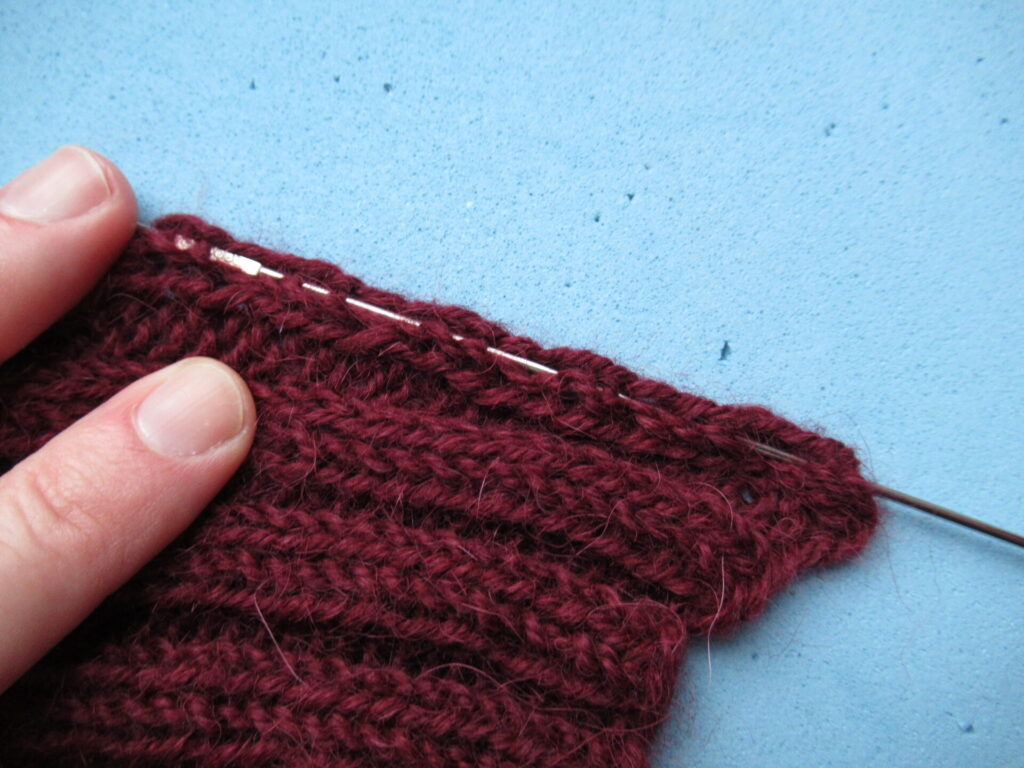
Well, back to the cardigan. To sew everything together I used the ordinary back stitch. At least I thought it was ordinary. But a while ago I talked with someone who always used mattress stitch and didn’t know how to do the back stitch. For her, and others who have never back stitched their knitting together, I’ve sewn a part of the side seam with a contrasting thread and taken pictures.
Mattress stitch is worked from the outside. It is very precise and best for very delicate knitting and for matching up stripes. Back stitch is much faster and works well for anything else. It is worked on the wrong side of the knitted fabric. First everything is pinned together with the right sides together.
(My pins come from the chemist’s and are meant for fastening old-fashioned hair rollers.)
It’s very simple, really, but not so easy to put into words. I hope the picture below is clear enough.
Back stitch is worked from right to left, holding the edges of the fabrics up. What you do is, basically:
Insert your needle from nearside to far side about 0.5 cm/¼ inch to the right from where the thread came up,
*Insert the needle from far side to near side about twice the distance to the left.
Pull the yarn through and insert the needle from near side to far side again through the same hole where the yarn originally came up* (where the vertical white thread is in the picture)
Repeat from * to *.
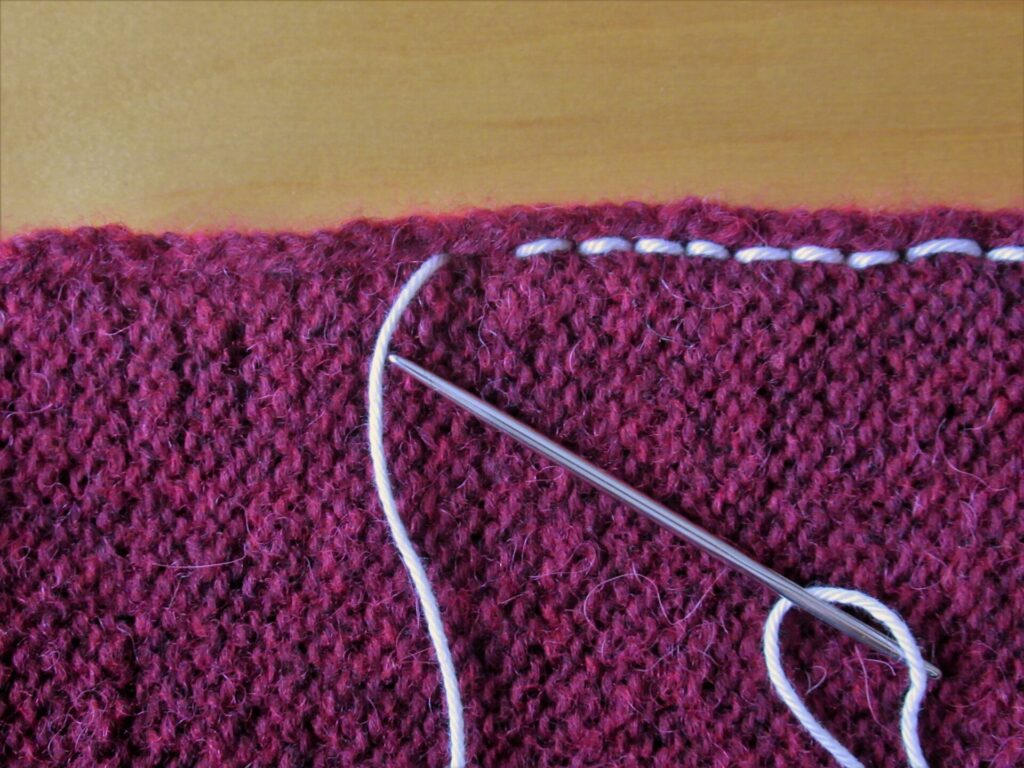
It gives a neat seam on the outside and looks like this on the inside:
I hope this is clear. If not, there is a good video here on YouTube.
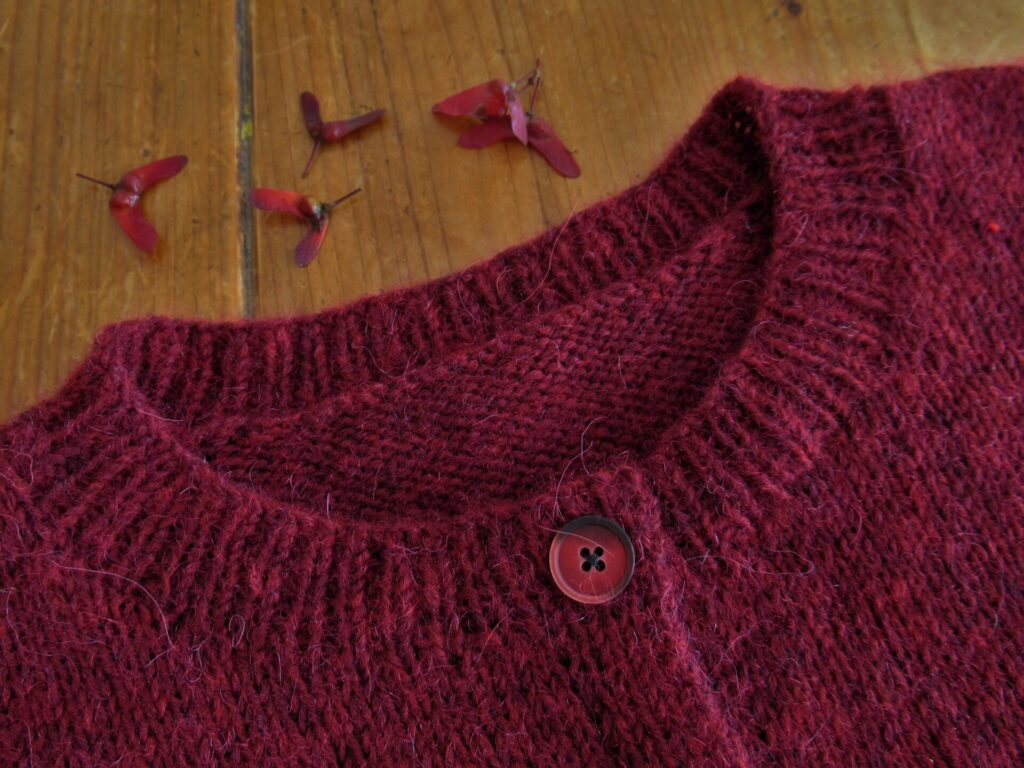
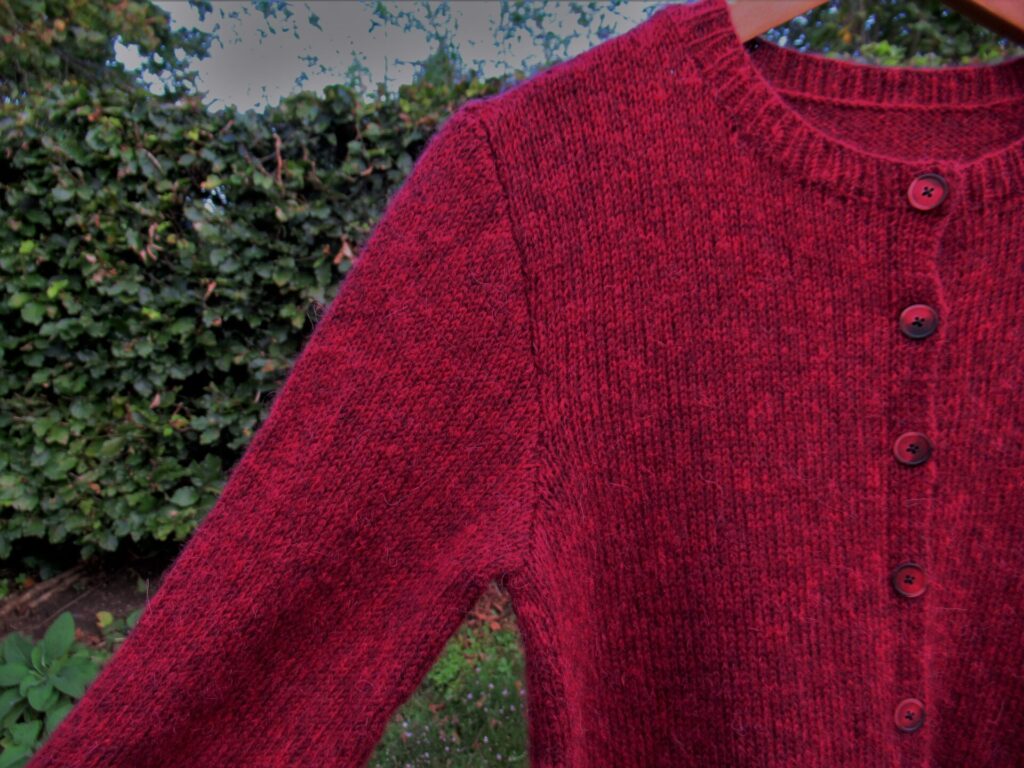
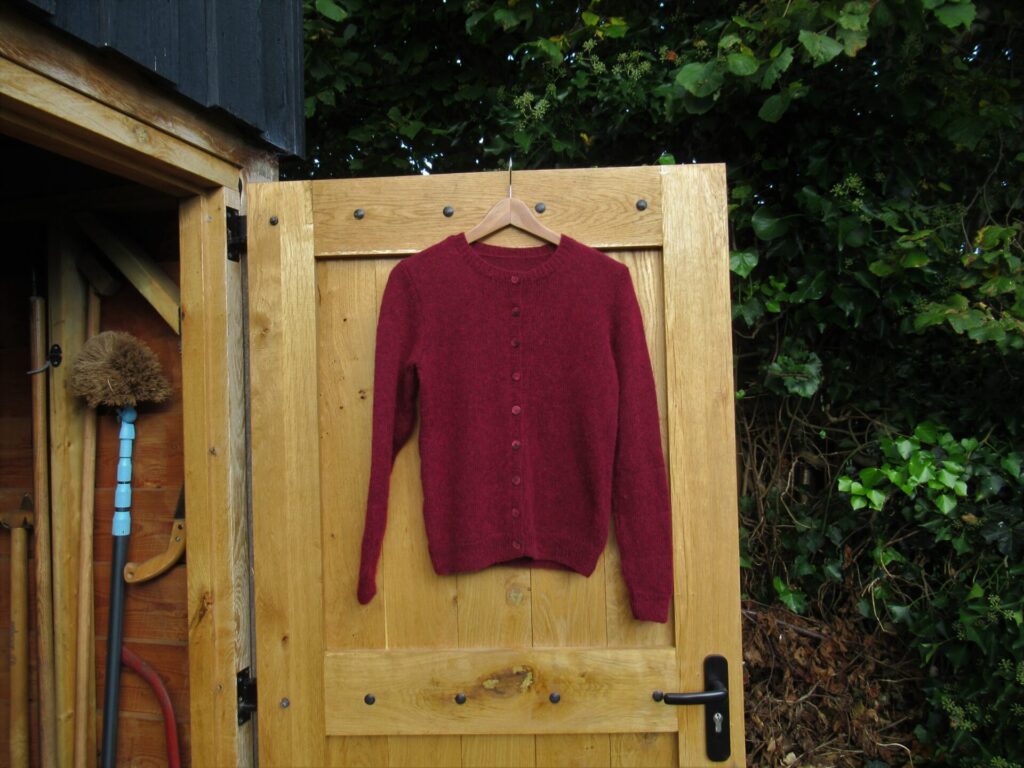
After sewing on the buttons the cardigan is all finished. The pattern I used is the Quintessential Cardigan by the Churchmouse design team – a simple, classic cardi with great attention to detail. An elegant neckline, neat button bands, a few short rows at the hem, nicely sloping shoulders and well-fitting armholes.
The yarn I used is Lana Grossa ‘EcoPuno’. It looks warm and woolly, but actually is 72% cotton. The other 28 percent is a mixture of merino and alpaca. It does not stand up very well to unravelling, but other than that it was a nice enough yarn to knit with. The ‘Eco’ suggests that it is (partly) organic, but the ball band or the manufacturer’s website do not say anything about that.
It is an airy, lightweight yarn and the entire cardi in the size I made (finished bust size 99 cm/39”) weighs only 270 grams. Here it is in its entirety:
It was a lovely cardi to knit and I can see myself making more of these in different colours and yarns.
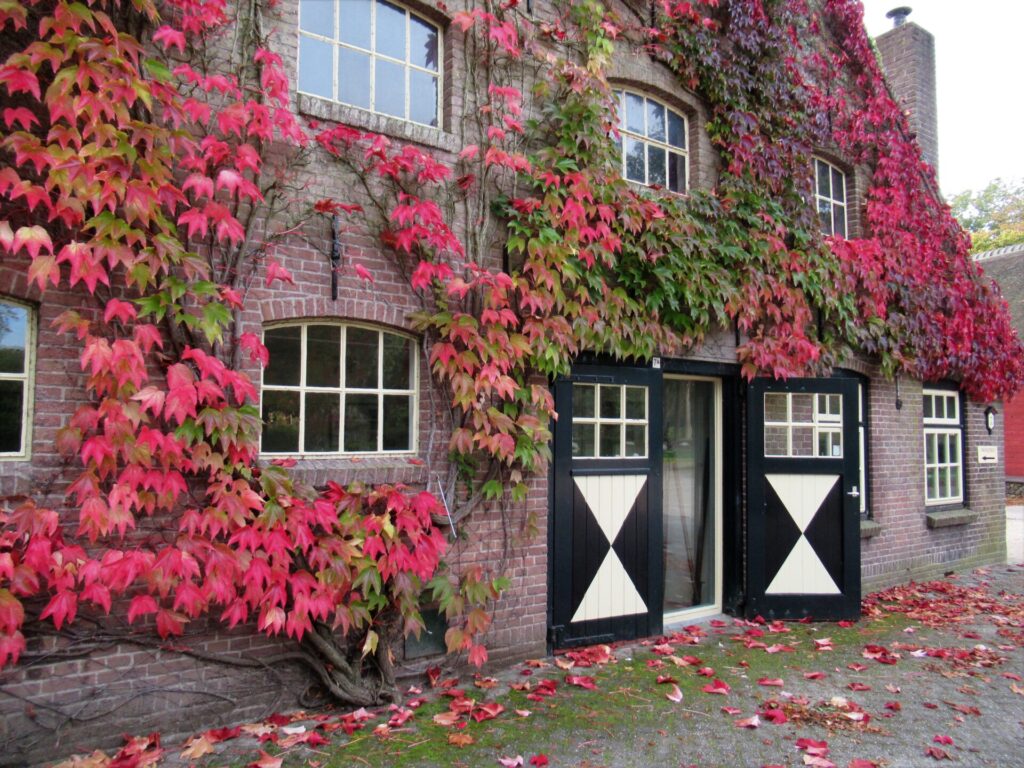
I had great difficulty capturing the colour in my photos. In some it looked purple, in others almost fuchsia. In real life it is the colour of the darkest leaves on this farm building that we often pass on our walks.
A beautiful deep burgundy.
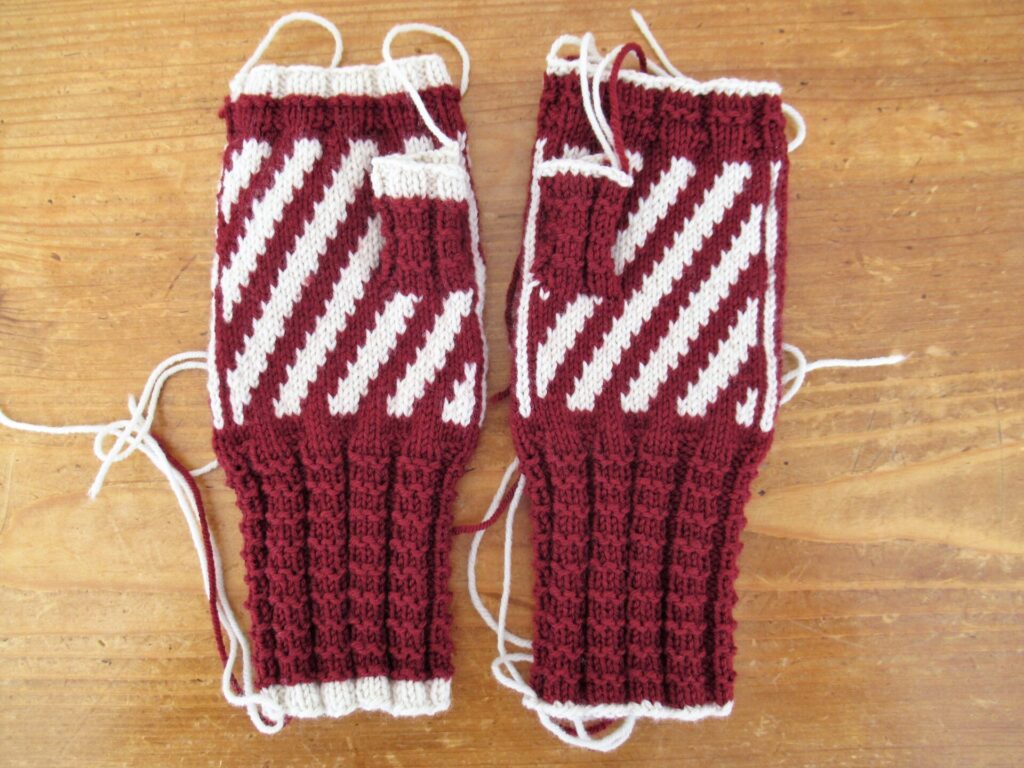
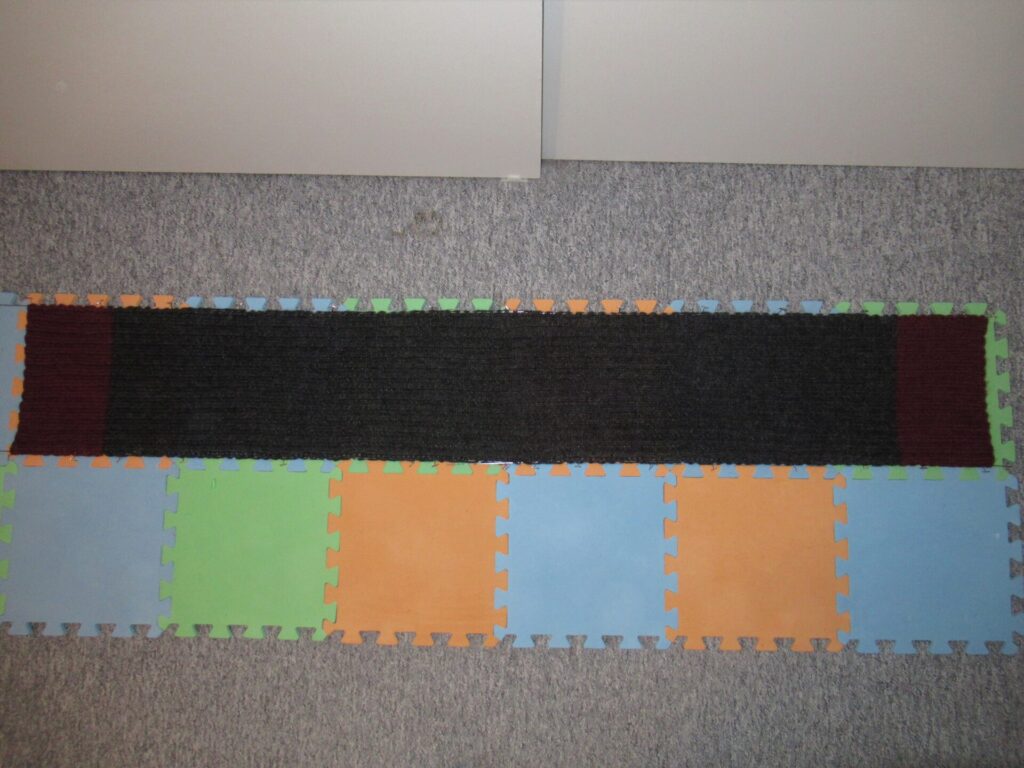
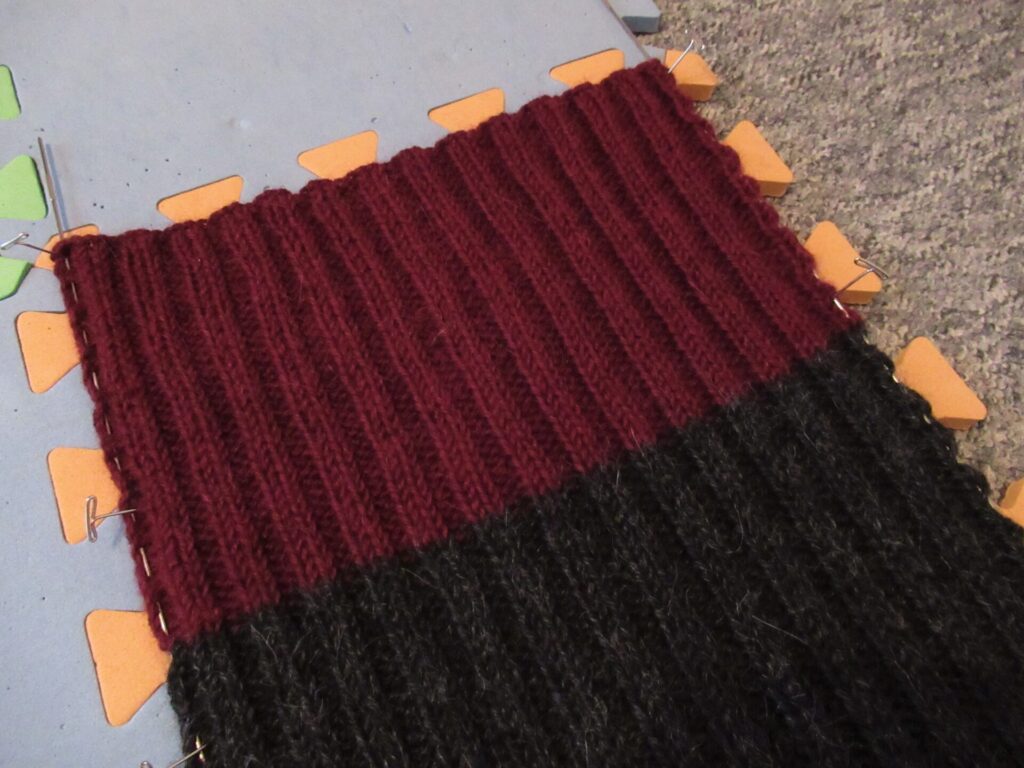
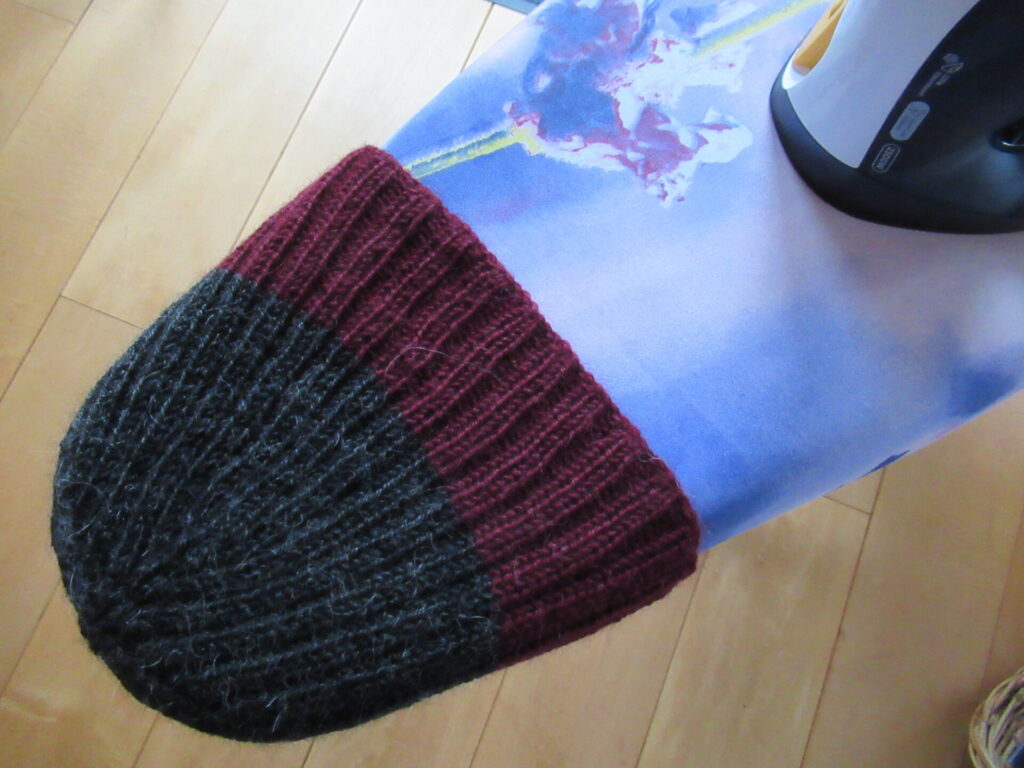
Talking about this burgundy colour reminds me of something else – an unmatched pair of Gazelle Mitts. I knit many of these mitts before I was completely satisfied with the design.
The one on the left is the final version, before I knit the ones that ended up in the pattern. The one on the right is a discarded version that is ever so slightly different. Can you spot the differences?
I think I’ll unravel that and reknit it to make a matching pair. They’ll make a nice December gift.
With that we’ve come to the end of today’s looooong blog post. As always, thank you for reading and have a lovely weekend!
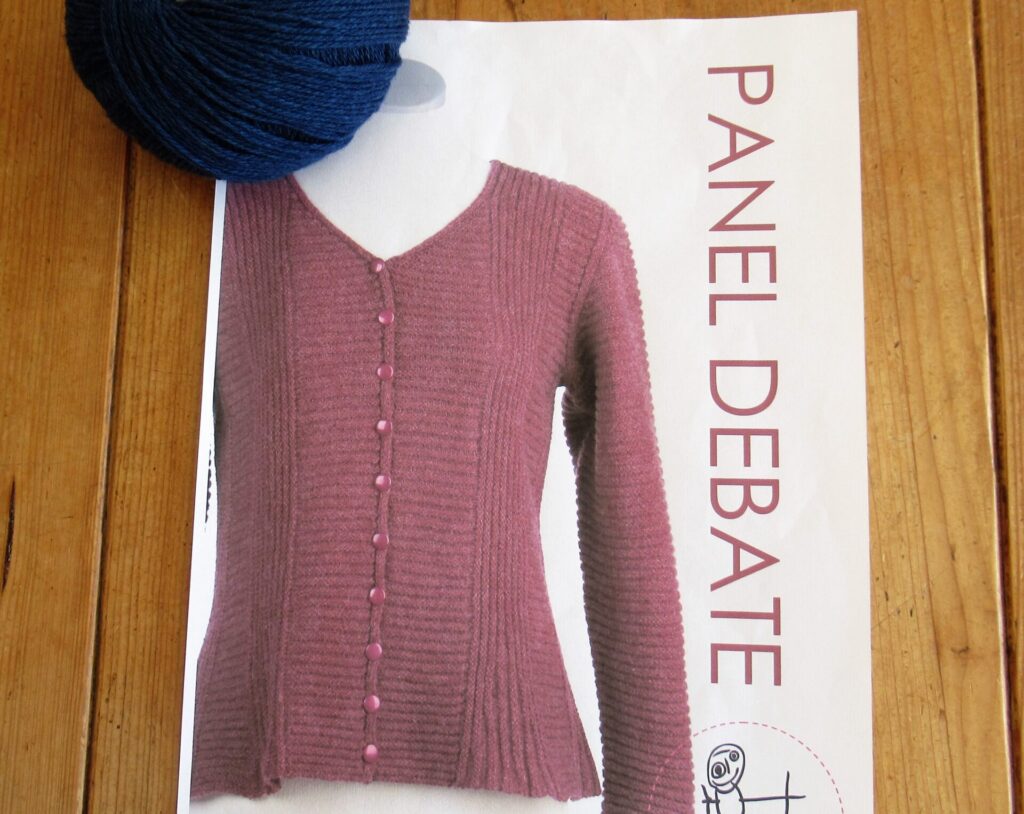
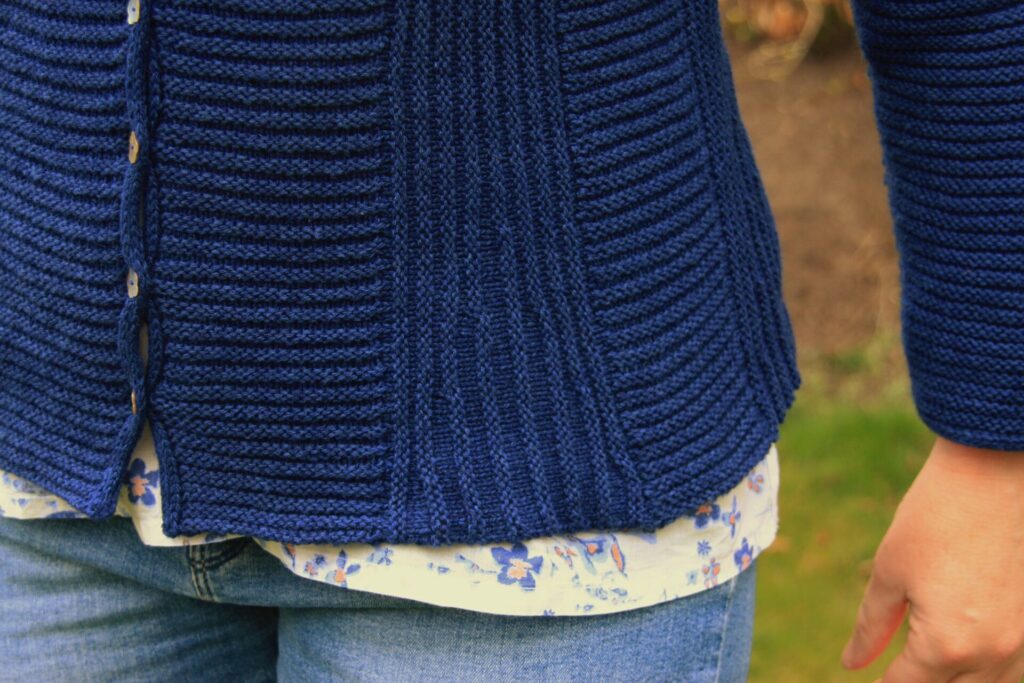
Phew, it’s finished! My Panel Debate cardigan, I mean. It took me about 8 months from start to finish. Well, I knit several other things in between, but on 2.75 mm (US 2) needles and with quite a few technical challenges, it wasn’t a quick knit.
It certainly was interesting, though, and I thought you might like to read about some of the special techniques (so much I-cord!) and what helped me finish it.
Panel Debate is a pattern by Danish designer Bente Geil, and can be found on Ravelry under its Danish name Paneldebat. I used one of the designer’s own yarns: Geilsk Bomuld og Uld – a light fingering weight blend of 55% wool and 45% cotton.
Reading through the pattern, I couldn’t make head nor tail of the instructions for the neckline. There seemed to be something wrong, so I e-mailed the designer. She said she’d look into it and sent me a new version of the pattern the very next day (during her Summer break!). Excellent service, I have to say.
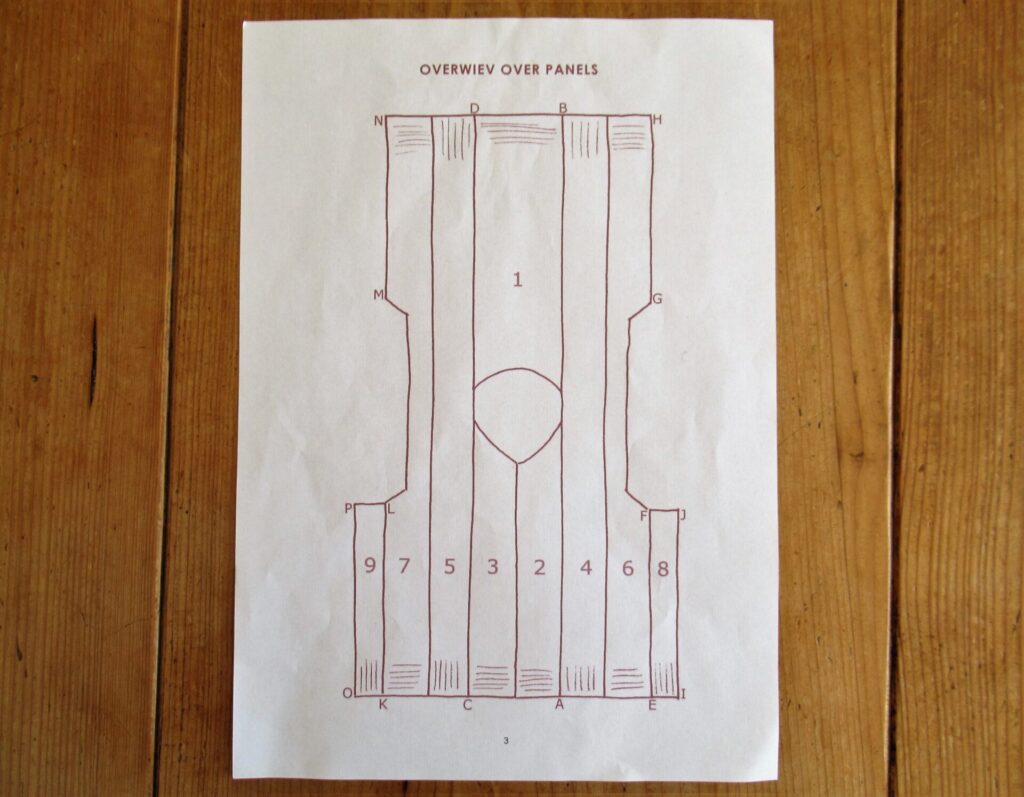
The design is modular and is made up of many panels (hence the name).
Each panel is knit onto the previous one, and the panels are alternately knit horizontally and vertically. The vertical strips end in fans made by knitting short rows.
What helped me knit the fans, was copying the instructions for them onto a separate page, with each step on a new line. I marked the row I was knitting with a sticky note and moved that down after each row. That way I was able to keep track of where I was.
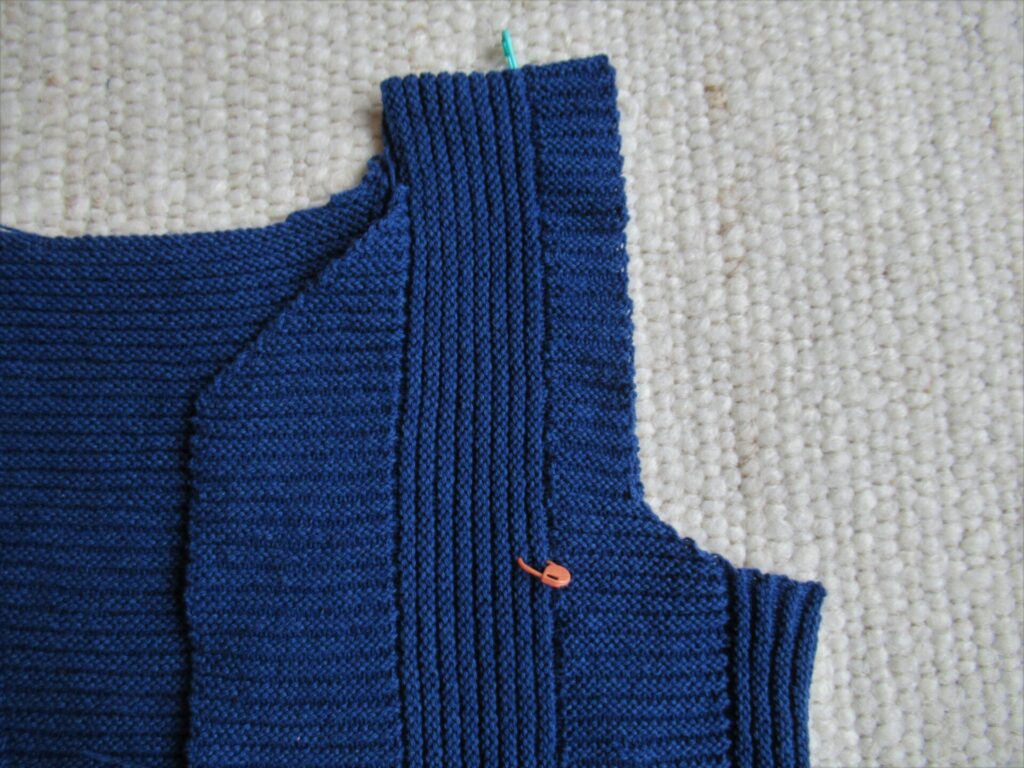
I lengthened the body by 4 cm (approx. 1.6 inches). No problem at all – just added the required length to the first 3 panels and the rest took care of itself. I also enlarged the armholes because I’d heard from several other knitters that they’d turned out rather tight.
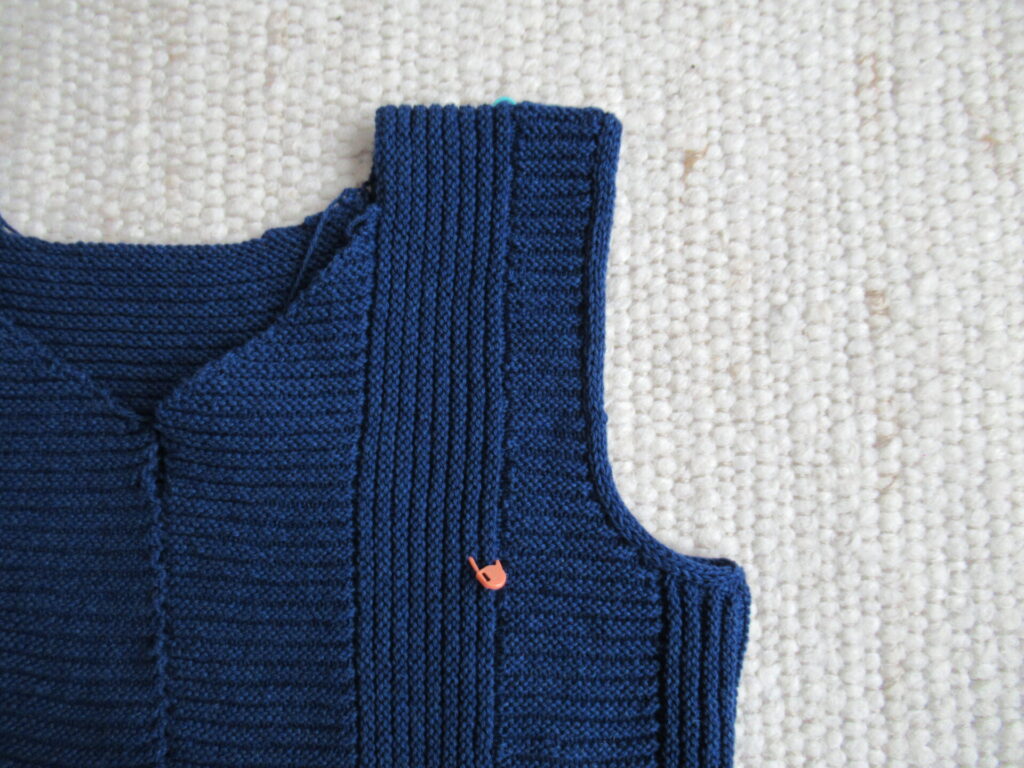
After the body was completed, the armholes were finished with attached I-cords.
Armhole before…
… and after attaching I-cord.
Then stitches for the sleeves needed to be picked up from the I-cord (the sleeves are knit from the top down). That really was a pain at first. But it went a lot better using a crochet hook and slipping the stitches from the hook onto the knitting needle.
Then I had to adapt the sleeve cap to the enlarged armhole. That was a bit of a puzzle, but after several tries I was happy. I used the magic loop method to knit the sleeves.
I’m not entirely happy with that, because it shows all along the middle of the sleeves. I hope the line will fade with washing and wearing. I haven’t had this problem before. Could it be because of the cotton content of the yarn? Or the reverse stocking stitch ridges?
The sleeves are finished with I-cord along the wrists as well.
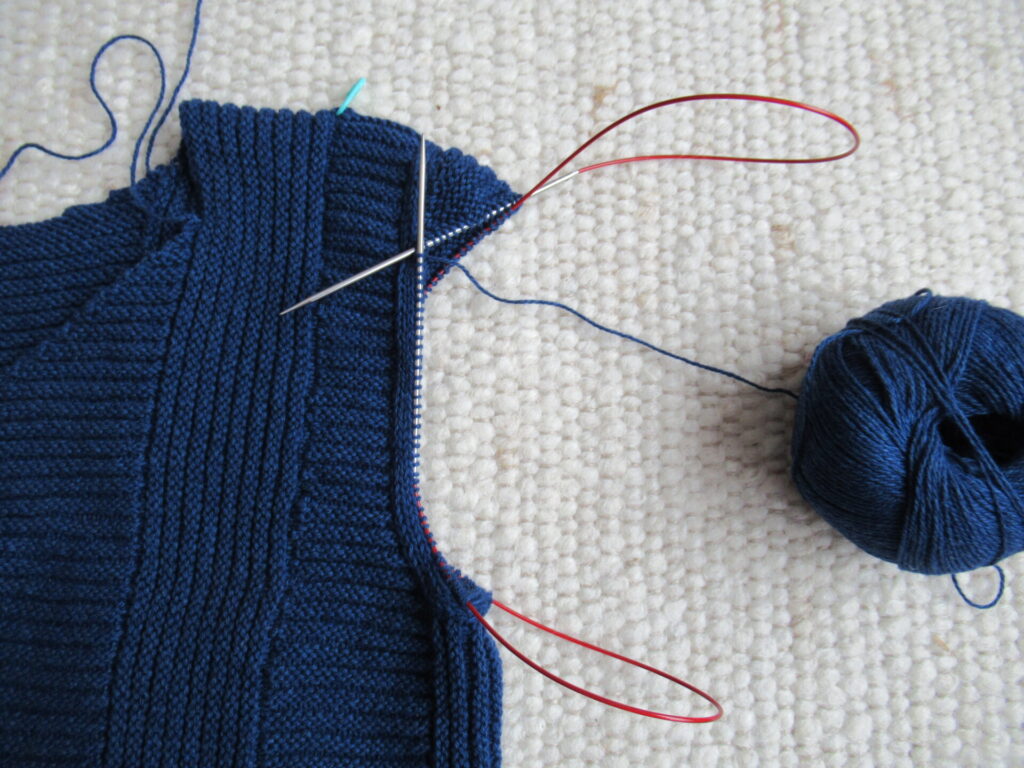
Finally there was more I-cord to knit – all along the fronts and the neck. First I had to pick up a zillion stitches. Then I cast on 4 extra stitches for the I-cord.
I knit a few inches, saw that the I-cord ‘pulled’ on the front and frogged it. After repeating this several times, I finally found out how to solve it – by pulling the first stitch (on the outside of the I-cord) up a little longer than usual and holding it between my thumb and index finger while knitting the second stitch, to keep it from tightening.
This is the attached I-cord knitting process step by step:
1 – The 4 I-cord stitches are on the left needle, together with the picked-up stitches on the panel. At this stage, the yarn is hanging between the picked-up stitches on the garment and the 4 I-cord stitches. Now the yarn is passed behind the stitches to the first stitch on the right.
2 – Knit 3 stitches (knitting the 1st stitch very loosely and keeping it from tightening by holding it between thumb and index finger while knitting the 2nd stitch). Slip the 4th stitch knitwise, knit the first picked-up stitch along the panel and lift the slipped stitch over this stitch.
3 – Now slip the 4 I-cord stitches back onto the right needle.
Repeat these 3 steps for hours on end, until all of the picked up stitches along the fronts and neck have been used up, meanwhile making button holes along the right front.
Finally, ‘all’ I needed to do was weave in what seemed like an endless number of ends.
I put on some music, and several cups of tea later that was done, too.
Oh, and let’s not forget the buttons! I happened to have just the right ones, bought long ago in a lovely little shop.
There, all finished!
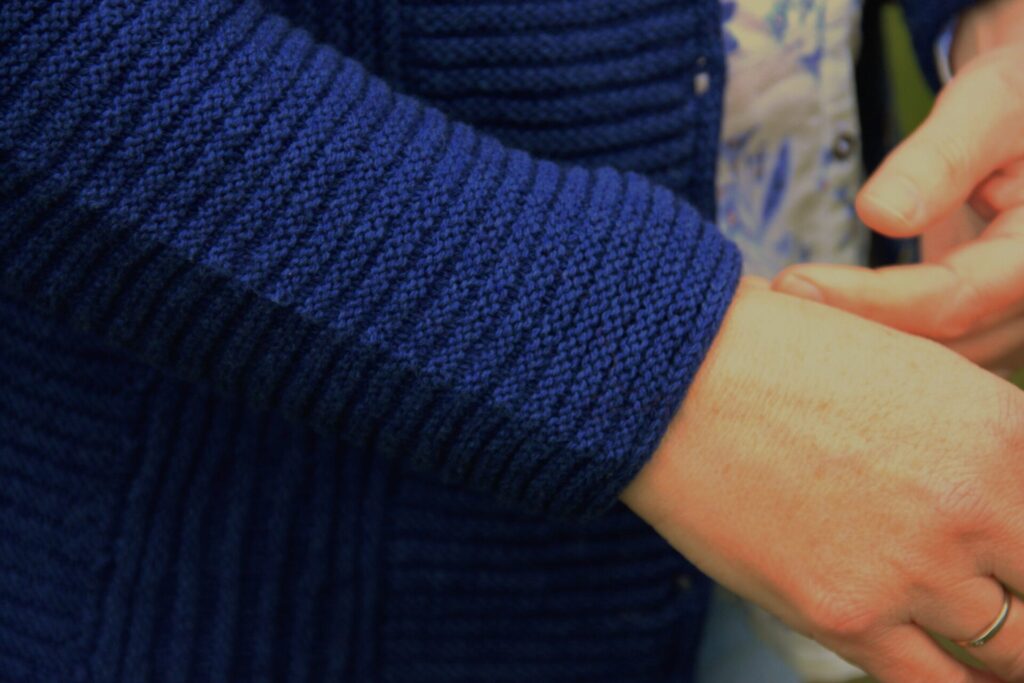
Here is a close-up of the very special armhole.
And this is what the cardi looks like from the back.
What helped me through the challenging parts of this knit was:
Finding moments in my week when my brain was up for a challenge (for me especially Saturday mornings)
Cutting the process up into smaller steps, taking a break after finishing a step and giving myself a figurative pat on the back
Using a crochet hook for picking up stitches
Copying difficult bits onto a separate page and keeping track of where I was by means of sticky notes
Relaxing and uplifting music in the background
Having good (day)light
Blogging about it
All in all, I’m happy with the process and happy with the result!
Well, that was a lot of technical detail. Sorry to the non-knitters among you (it’s a miracle you even got this far). If all goes according to plan, my next post will be of more general interest. Bye for now, and hope to see you again soon!
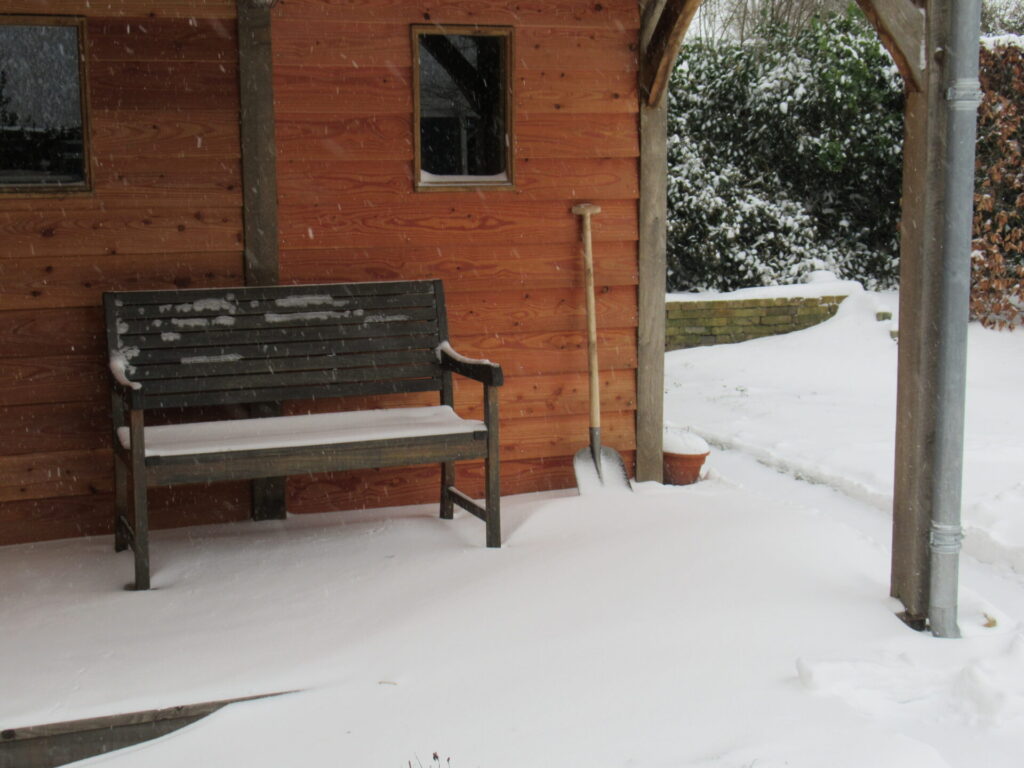
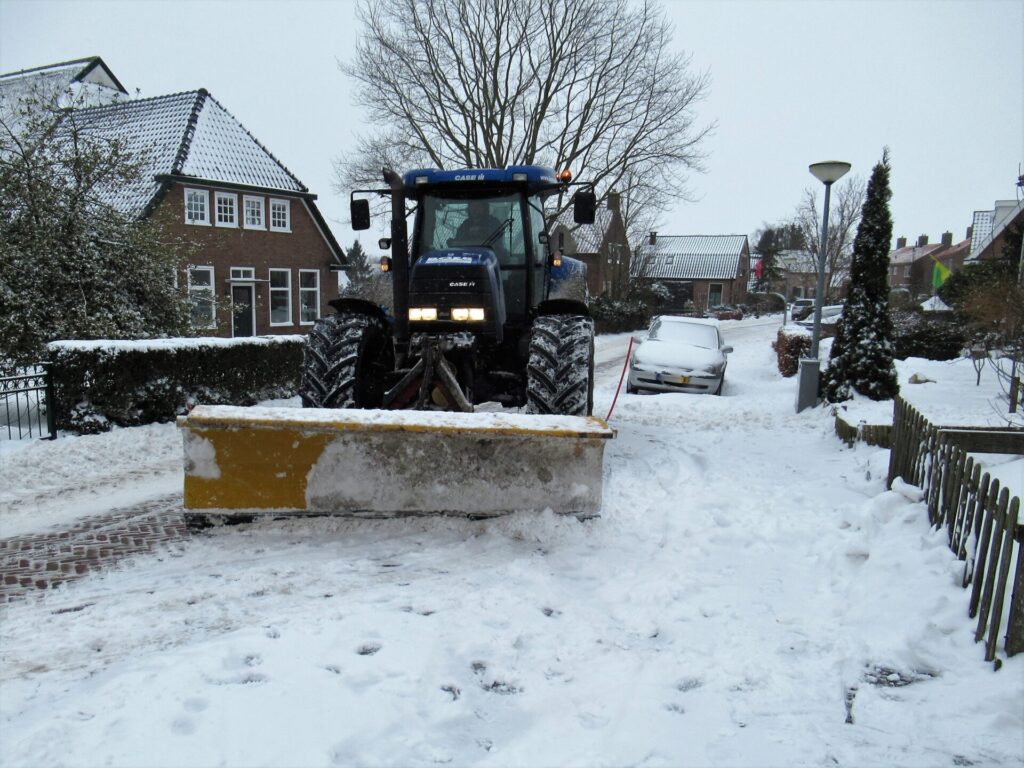
Hello! This week I’m writing from a white and frosty village. We’re not entirely snowed in, but last Sunday we were treated to a beautiful thick blanket of snow, blown up into dunes here and there by strong gusts of icy wind. And because it’s stayed (far) below freezing even during the daytime, the snow is still here. A rarity nowadays and utterly lovely!
Before anything else, I need to show you this. The snow-shovel guy reversed and drove up several times specially so that I would be able to take a good picture for my blog.
Thank you Mister Snow Shoveler! Enjoy your moment of fame 😊!
It’s tempting to natter on about the snow, but I have made quite a bit of progress on the knitting front, and I’d like to talk about that, too. So let’s do that first, and have a few more snow pictures afterwards.
Recently, I wrote a very long post about my possible need for a little more focus. I don’t know if you’ve been able to plough through it all, but one of the insights I gained from a book I read on the topic was: ‘Different (knitting) tasks use different parts of the brain’. I realized that for certain aspects of my knitting projects, I needed to find moments during the week when the active thinking part of my brain would be fresh.
Saturday seemed like a good time, especially Saturday mornings. So I thought about what I would like to accomplish and noted it in my planner. The first thing I wanted to focus on was the sleeve cap of my Panel Debate cardigan. A puzzle because I’d enlarged the armhole and could no longer follow the pattern – how could I make a sleeve cap that would fit into the armhole and around my shoulder?
Spending several hours tinkering with it with a well-rested brain really worked.
I finished the sleeve cap. And using the parts of my brain that do the more automatic tasks, I was able to almost finish the rest of the sleeve in the evenings. Yes, progress!
The next task I wanted to tackle was finishing one of my UFOs (UnFinished knitting Objects that have been lying around for a long time). I chose a scarf and wrote that down in my planner for the next Saturday.
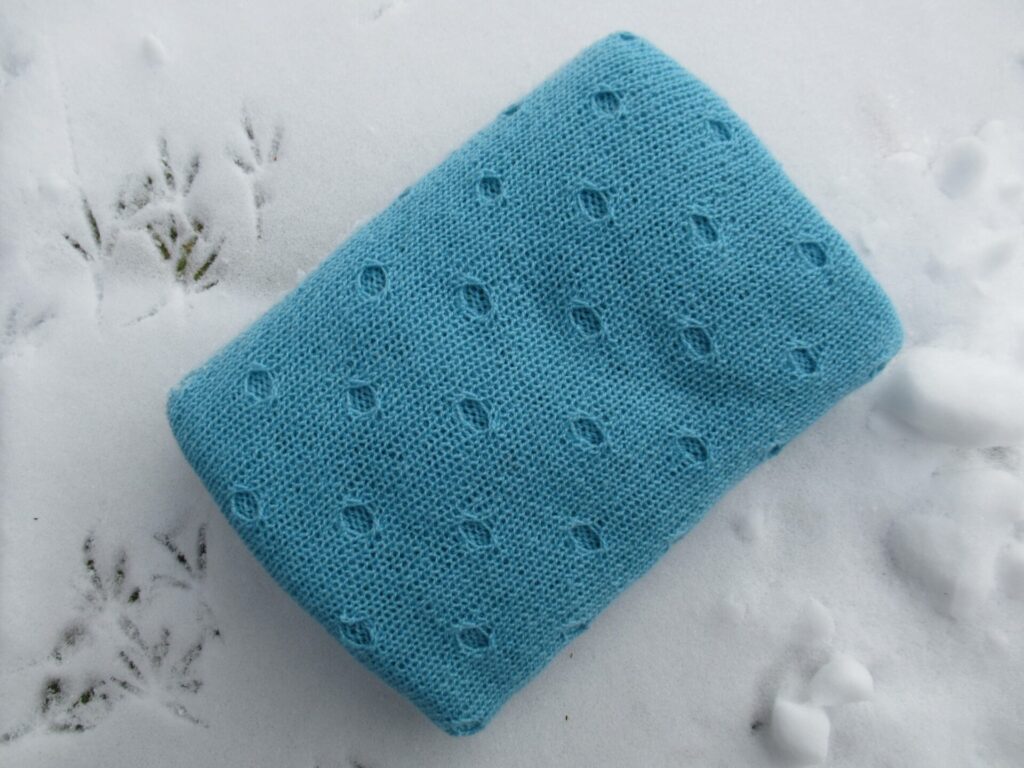
All I needed to do was weave in the ends and give it a Spa Treatment. Here it is, doing a stretching exercise after its bubble bath.
As always, the transformation was magical – the lacey holes opened up nicely, and the rest of the knitted fabric did too.
Before blocking
After blocking
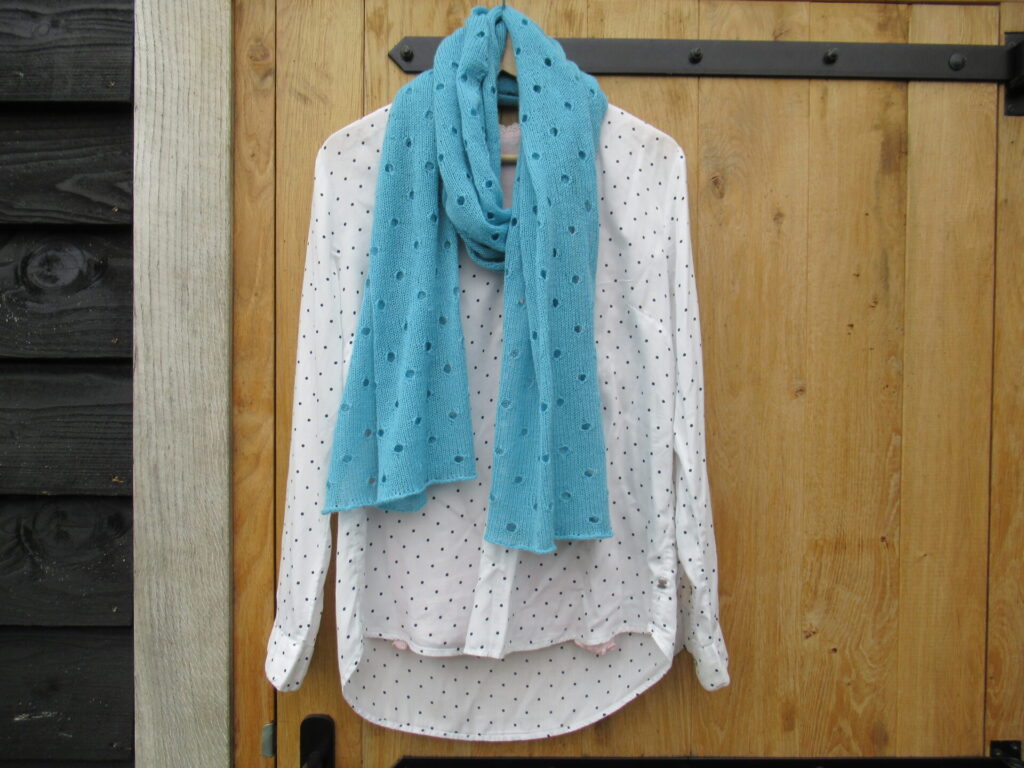
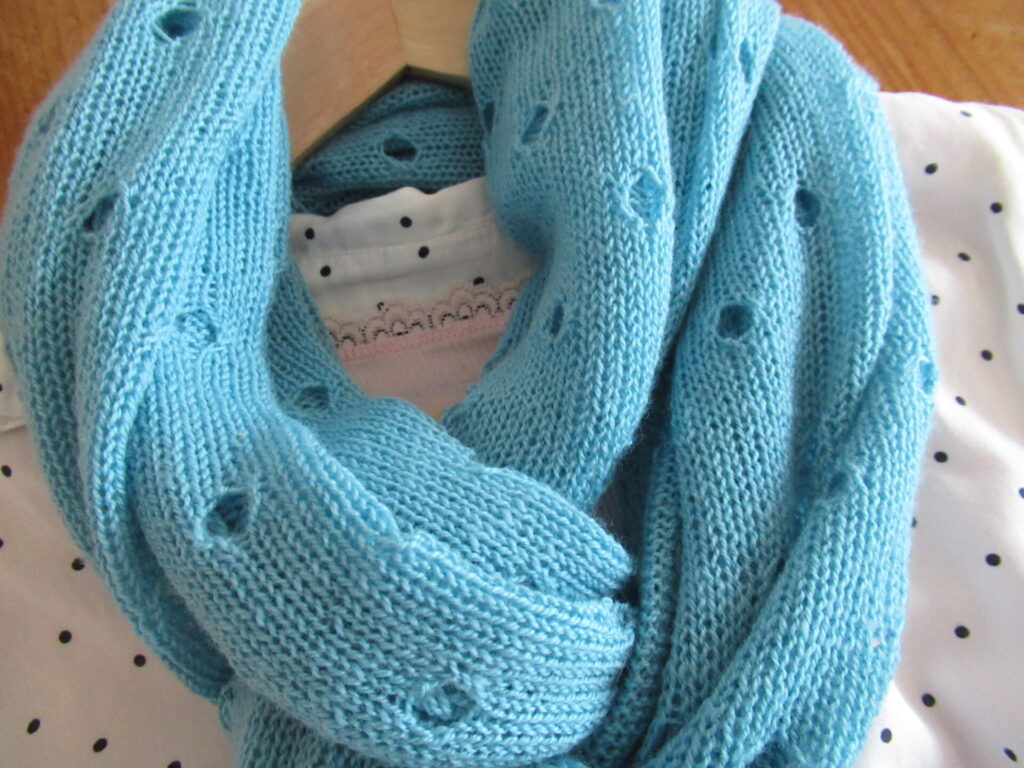
This is what the scarf looks like when ‘worn’.
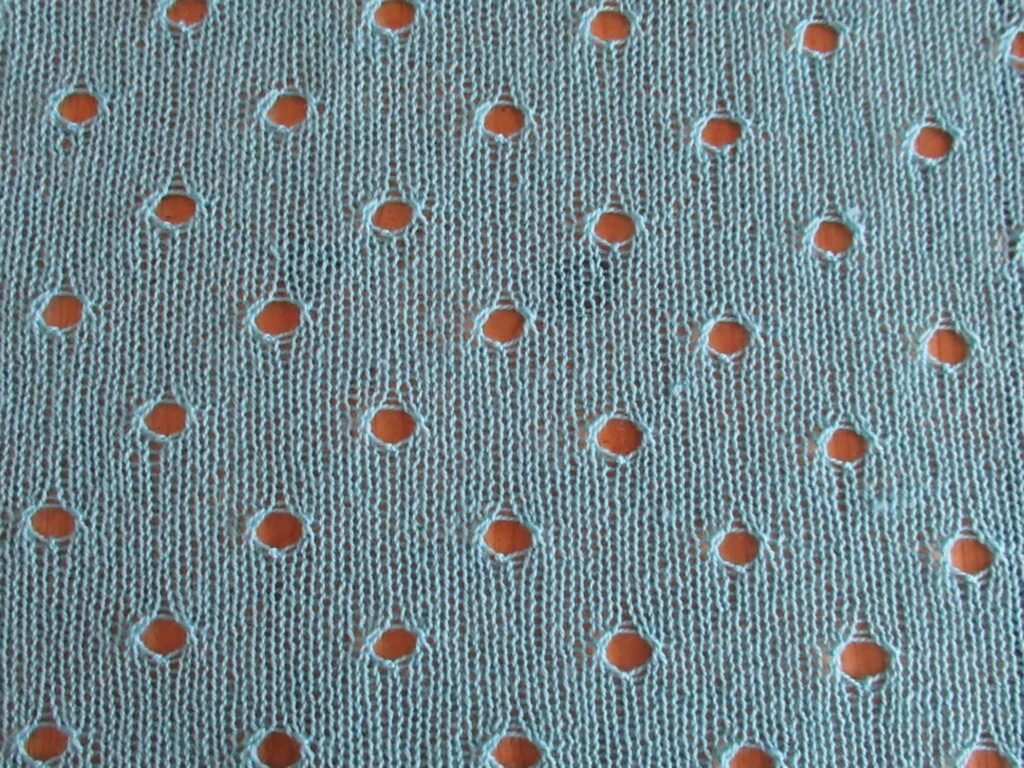
It is the Polka Dot Scarf by the Churchmouse design team. The pattern describes two sizes and I made the larger one. The yarn I used is Debbie Bliss ‘Rialto lace’, a very soft merino.
For a long time I disliked polka dots. I think it was because of that horrible sixties song about the Itsy Bitsy Teenie Weenie Yellow Polka Dot Bikini. Do you know it? But these subtle ‘dots’ made me overcome that.
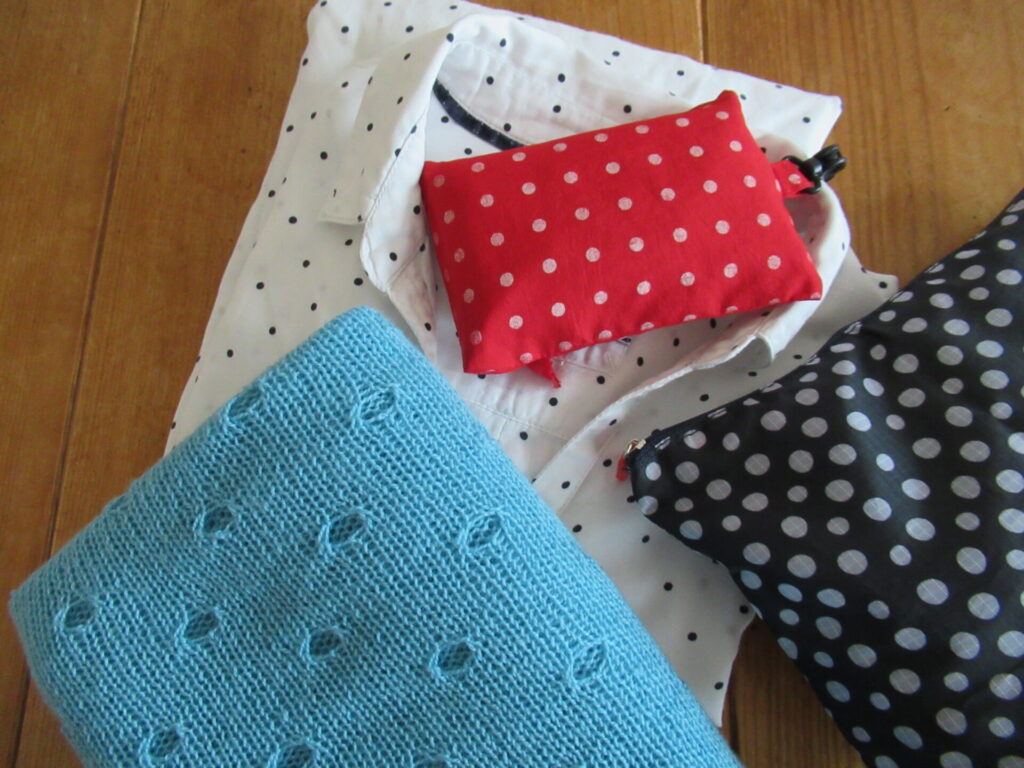
Looking around for matching things for pictures of the scarf, I discovered that I actually have several other items with polka and other dots.
All in all this has become a generous airy shawl that will make a lovely gift for someone. Happy with it.
I’m also happy with my new Saturday knitting plan. Being able to make considerable progress with such a small adjustment to my life, has really given me a positive boost. In addition to these two projects, I have even made some progress on a new design of my own.
Until now, this winter I have felt sort of lost on Saturdays, with nowhere to go and no one to visit. This focused Saturday knitting has also solved that. I don’t know if I’ll be able to keep it up once we get back to a more ‘normal’ life and the gardening season starts again. But I won’t look too far ahead.
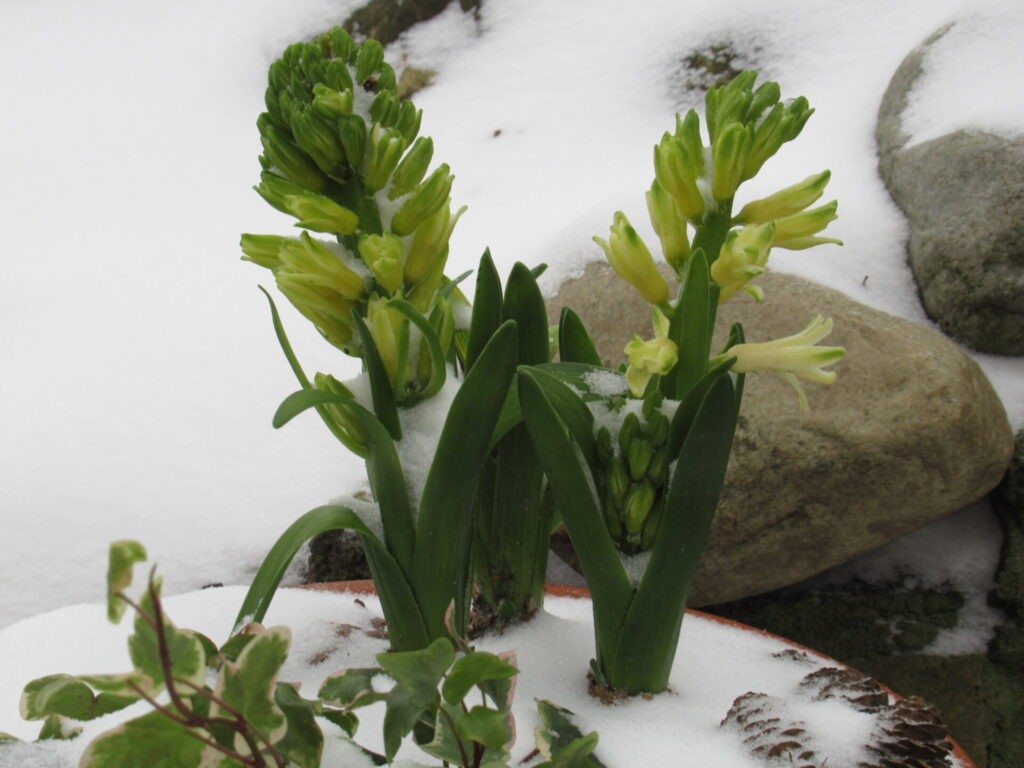
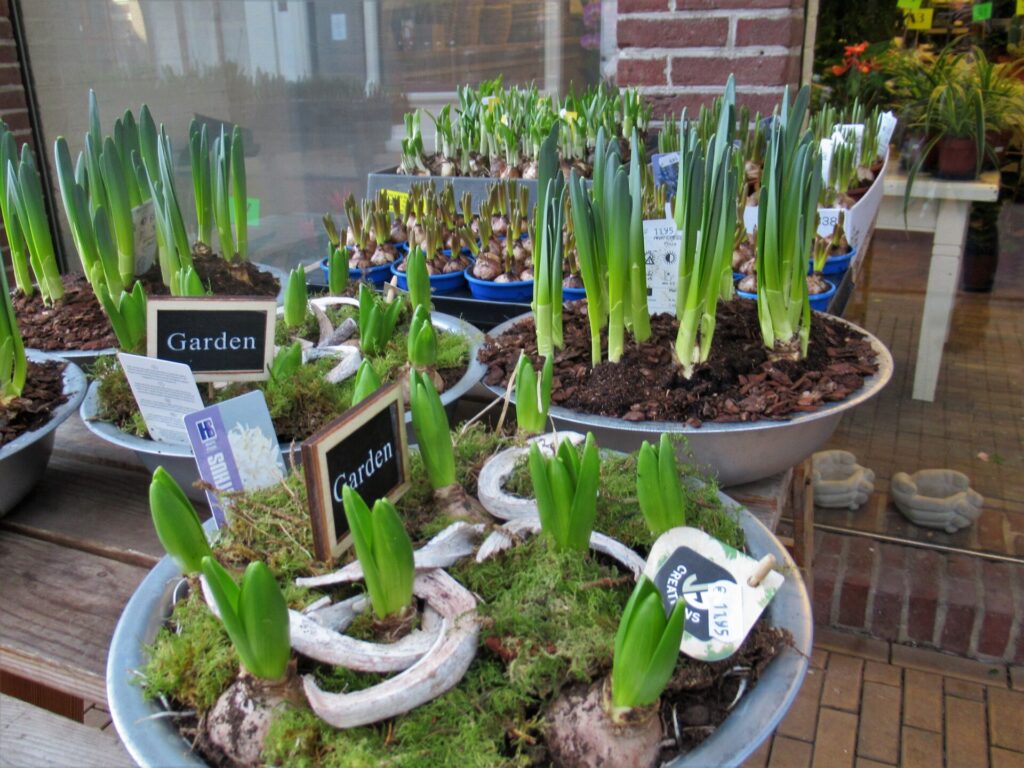
For the time being the garden doesn’t need anything doing to it. All I need to do at the moment is admire the hyacinths I planted in pots in November…
… enjoy looking at snow-covered shapes, like the dead flower heads of the Marjoram…
… and feed and talk to the birds.
I hope you’re all snug and safe, wherever you are. Bye for now, and ‘see’ you again soon!
OK, complete focus on knitting today – no tangents or digressions. Maybe this is all old hat to you, but I thought I’d show you what happens to my knitwork after the actual knitting is finished and the ends have been darned in.
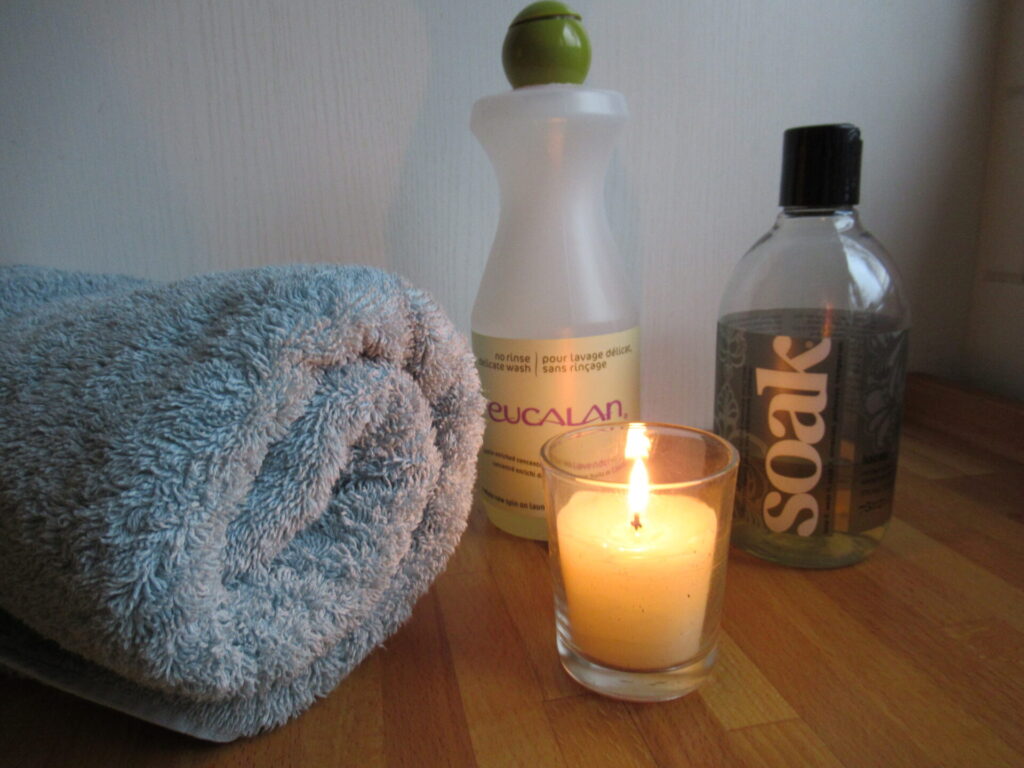
Last week I said the hat and scarf I made for my brother needed some TLC to relax. Well, they got more than just some TLC – they received a full 4-star spa treatment!
It all started with a bubble bath.
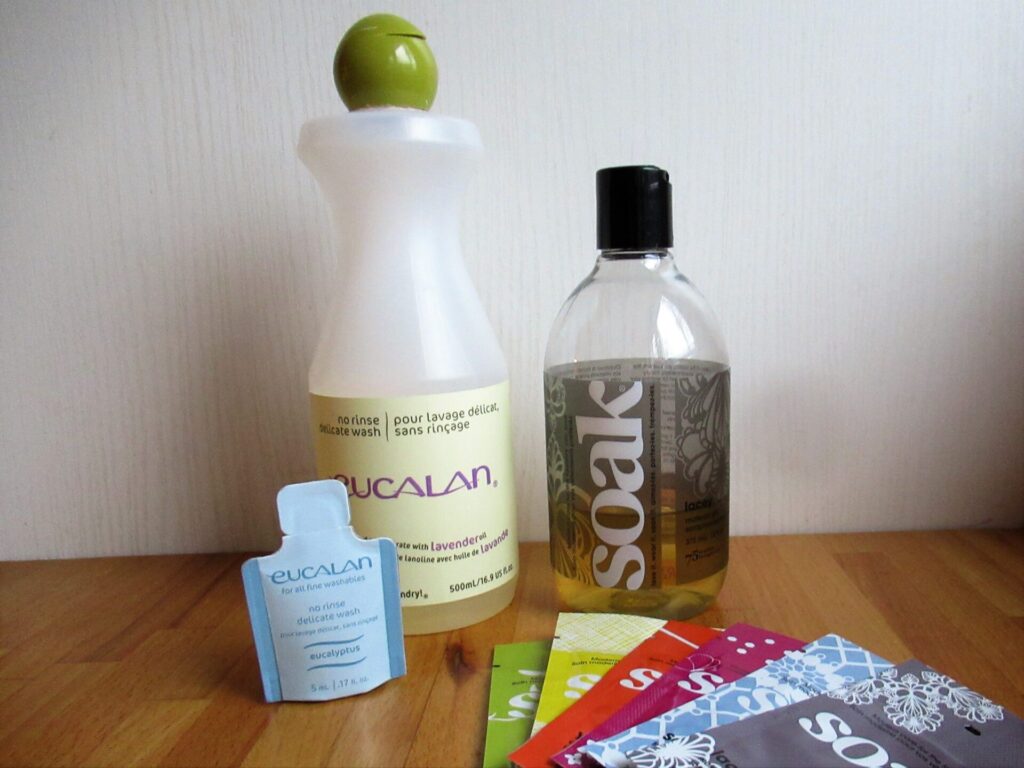
Aaaaah, so relaxing, especially when combined with aromatherapy. To make the bubbles, I use a no-rinse detergent for delicate fabrics – Eucalan or Soak. There may be other brands, but these are the only two I know.
I can’t say that I prefer one to the other. Eucalan is sort of syrupy and yellowish, whereas Soak is thinner and clear. Both are available in various lovely scents. The Eucalan I have has a very mild lavender scent. My Soak favourite is Lacey, a subtle flowery scent that is harder to pinpoint.
Only a teaspoon of detergent is needed, so a bottle lasts forever. Both also come in small trial packages, that are ideal not only to try out the products, but also to tuck in with a knitted gift.
As their name says, no-rinse detergents do not need to be rinsed out. After a bubble bath of about 30 minutes, I first gently squeeze out most of the moisture. After that I’d roll a more fragile knit in a towel to squeeze out more water, but robust knits like these I put in the spin dryer.
Now, still slightly moist, the scarf and the hat get different wellness treatments, tailored to their specific needs. I thought the scarf would benefit from acupuncture, while some steam would be best for the hat.
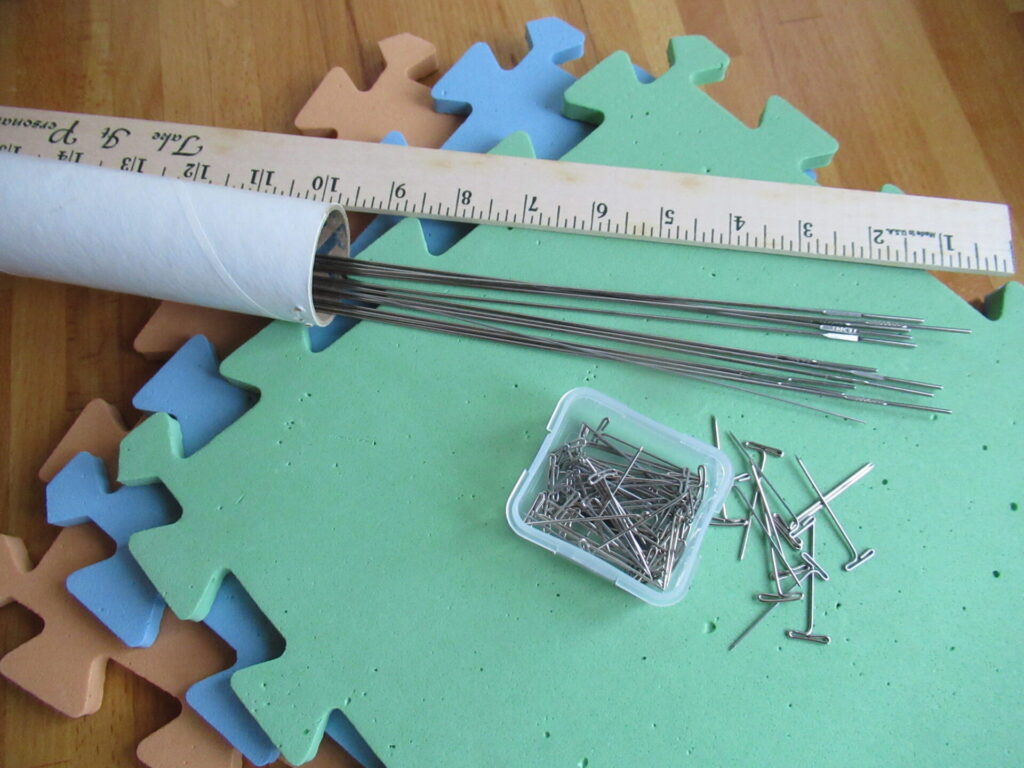
First the scarf. These are my acupuncture (in knitting terms also known as blocking) tools.
Foam blocking mats, blocking wires (that come with a wooden ruler), and T-pins (stainless steel pins in the shape of a capital T). At first I used this kit only for lace knits, but now I’m using it for many other projects, too.
I threaded wires along the long sides of the scarf, between the edge stitch and the next, going up and down every other row.
Then I pinned it onto the blocking mats, smoothing the scarf out along its length and pulling firmly widthwise. (Never do this on a wooden table or floor – the T-pins may prick through the mats and damage the surface underneath.)
And here is a close-up. I hope you can see the wires and T-pins.
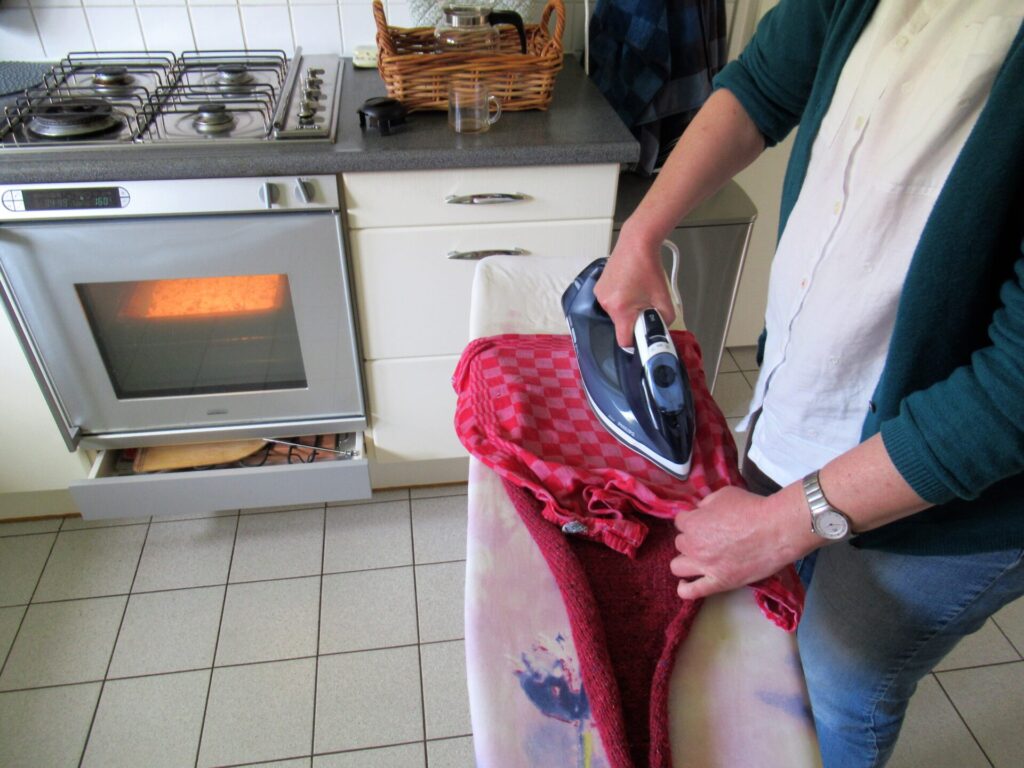
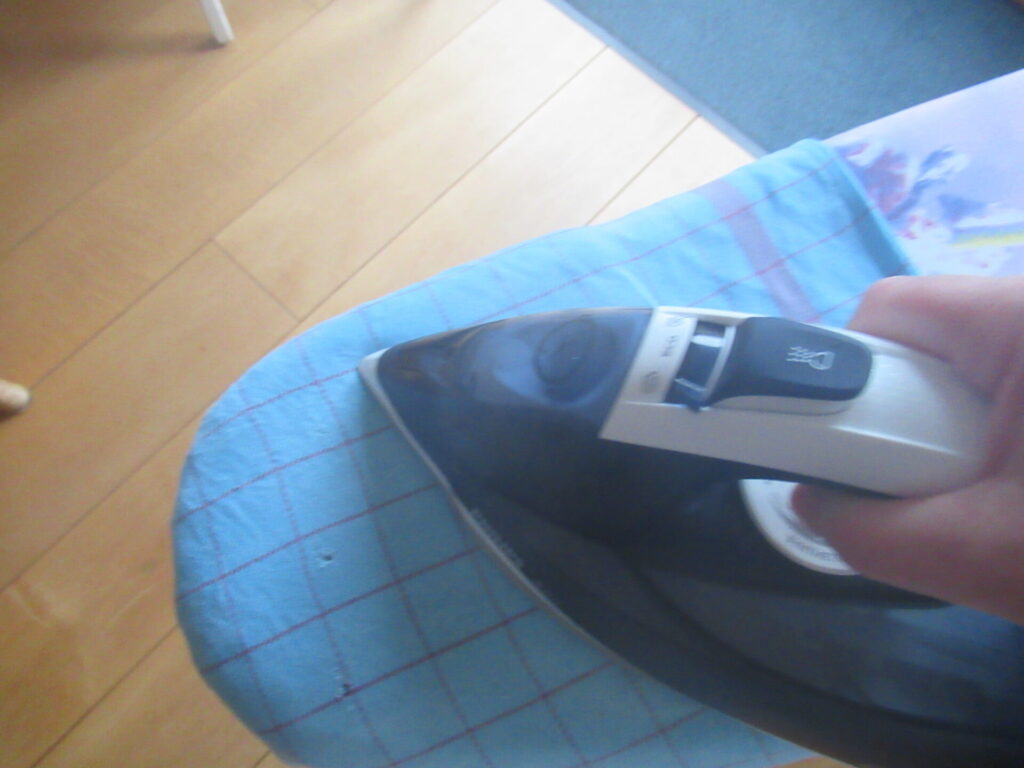
Now, let’s leave that to dry and continue with its mate. The still moist hat is pulled around the end of the ironing board.
Then it is covered with a moist press cloth (i.e. an old tea towel that doesn’t give off colour) and steam-pressed. I used the lowest setting that will give steam (silk/wool). If the picture looks slightly blurry, that’s the steam.
I tried all this out on a swatch first, to make sure nothing terrible (like felting) happened to my ‘clients’ and they would benefit from their treatments.
After pressing the hat was still slightly wet and I placed it on the blocking mats with the scarf. Twenty-four hours later everything was dry and I unpinned the scarf.
A lot of work for a simple hat and scarf. Is it really worth all the effort? I think it is – very much so. I took before and after pictures, but unfortunately they are not very clear because of the dark yarn colour and the dark weather.
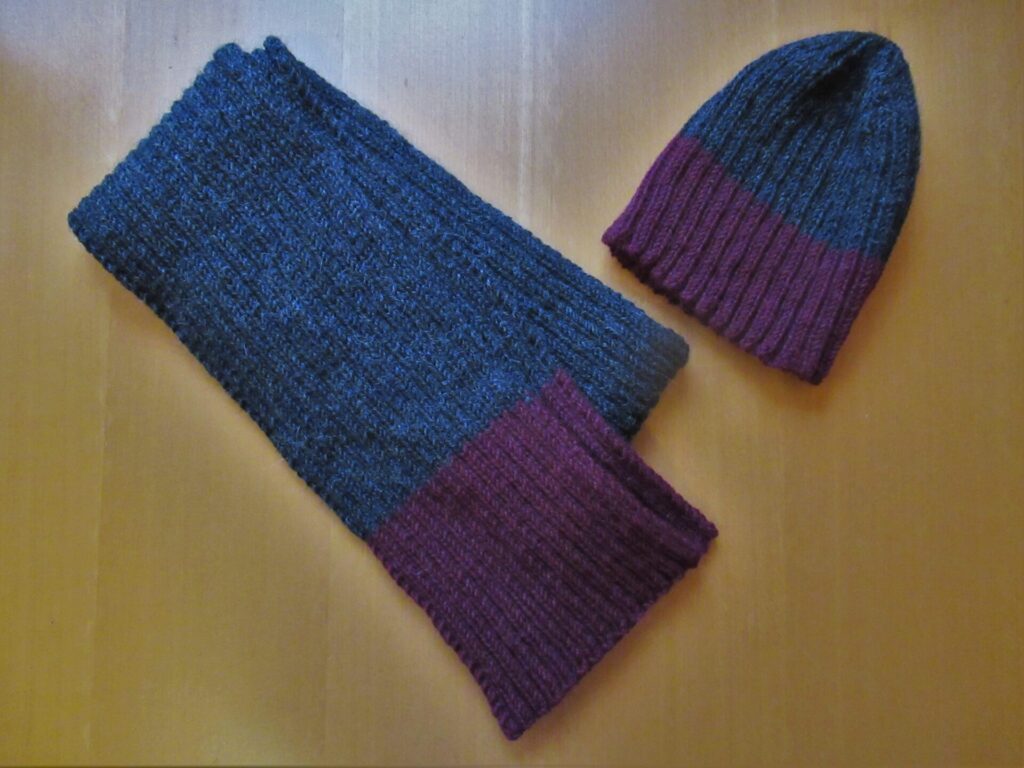
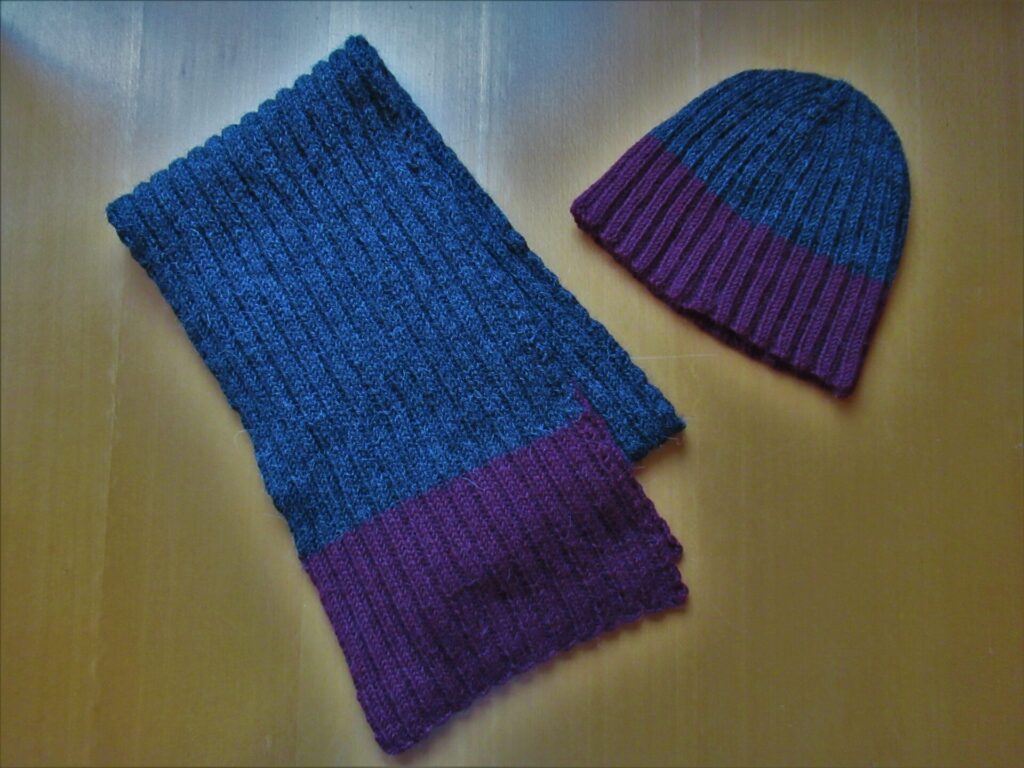
Here are the hat and scarf (before on the left and after on the right):
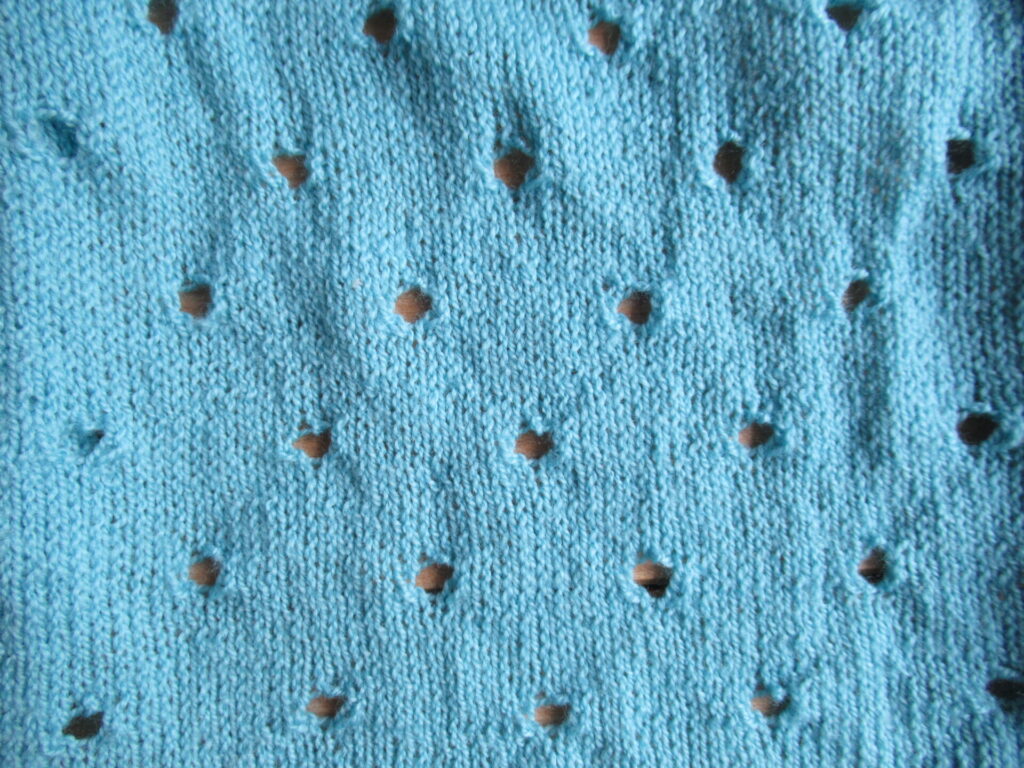
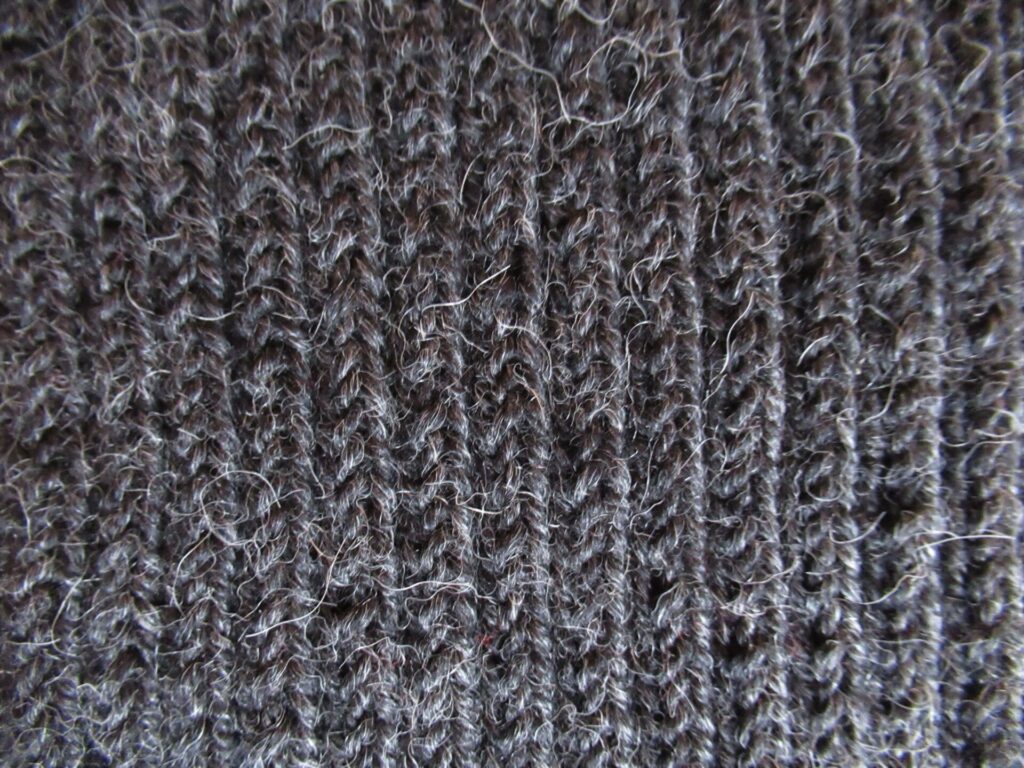
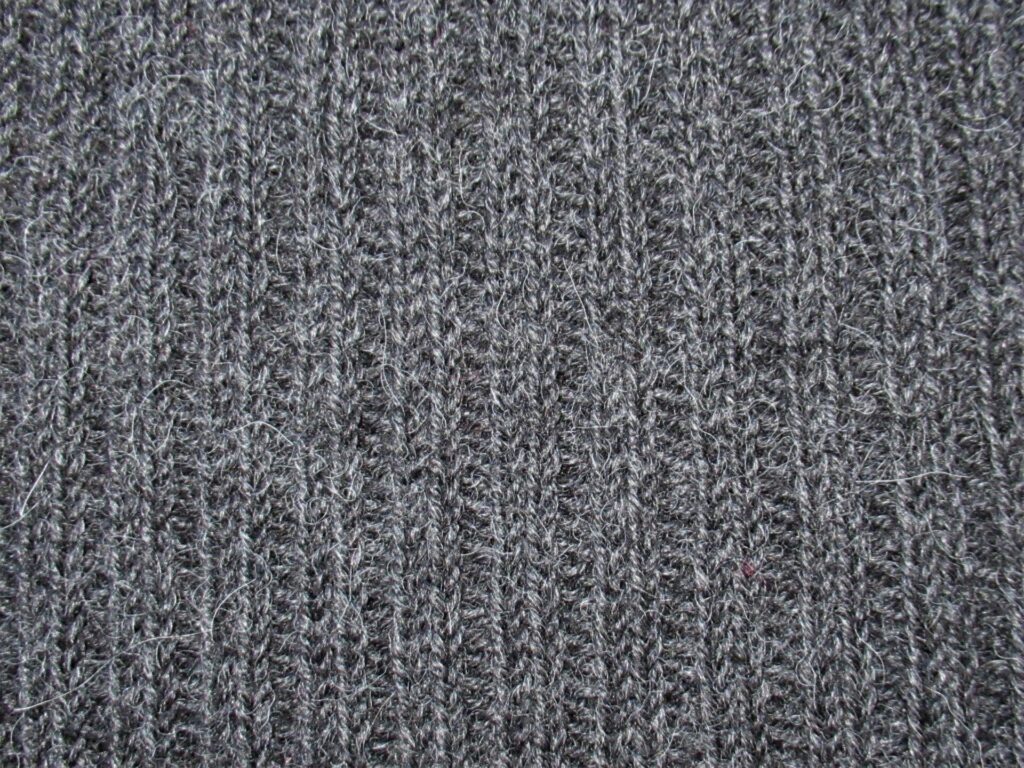
And here is a close-up of the k2, p2 rib pattern (again before left and after right):
Can you see the difference? Before blocking the knitting was irregular, and the purl stitches disappeared between the knit stitches. After blocking the knitting evened out and the purl stitches became visible. And before blocking the scarf was 1.5 m x 14 cm, so stiff that it could almost stand up on its own, and slightly scratchy. After blocking it was 1.6 m x 25 cm, with a lovely drape and nice and soft.
Now all that’s left to do is gift-wrap the set, put it in a box, add a few Dutch treats and send it off to Germany, in time for my ‘little’ brother’s Birthday.
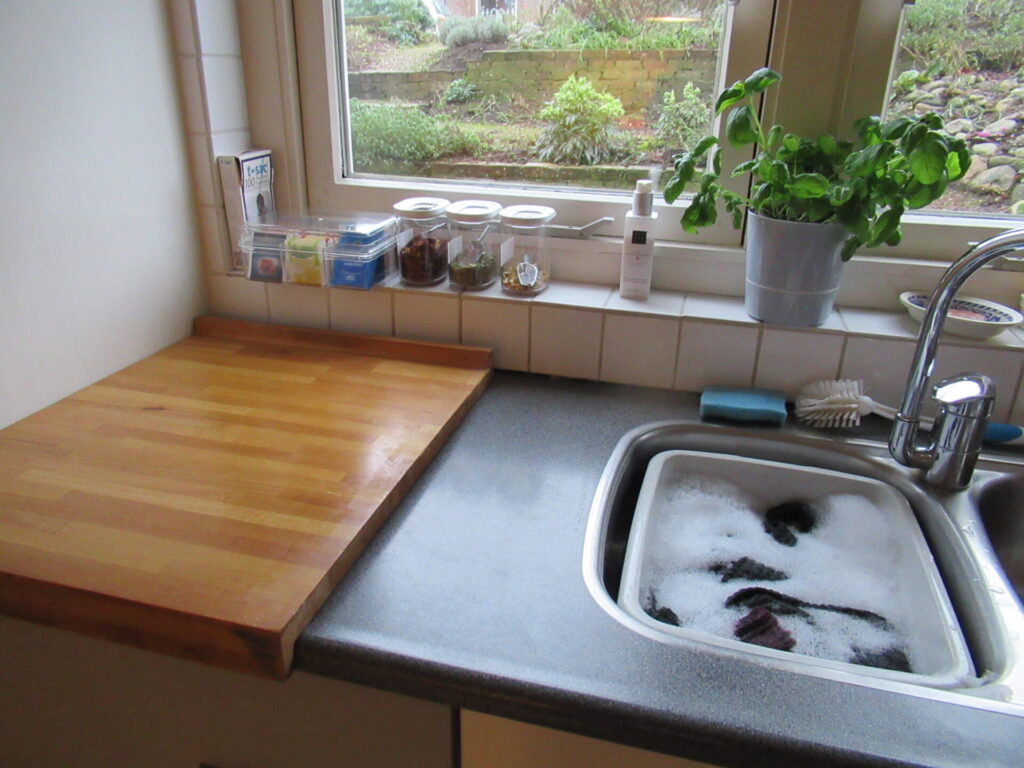
Here is a behind-the-scenes picture of the ‘Knitting Spa’ photo shoot.
The kitchen counter was the lightest place in the house on a dark day, and the bread kneading board made a nice natural surface for photographing the tools and detergents. A perfect Knitting Spa with everything to hand: hot & cold water, a bath tub, teas & tisanes, and a nice view of the front garden.