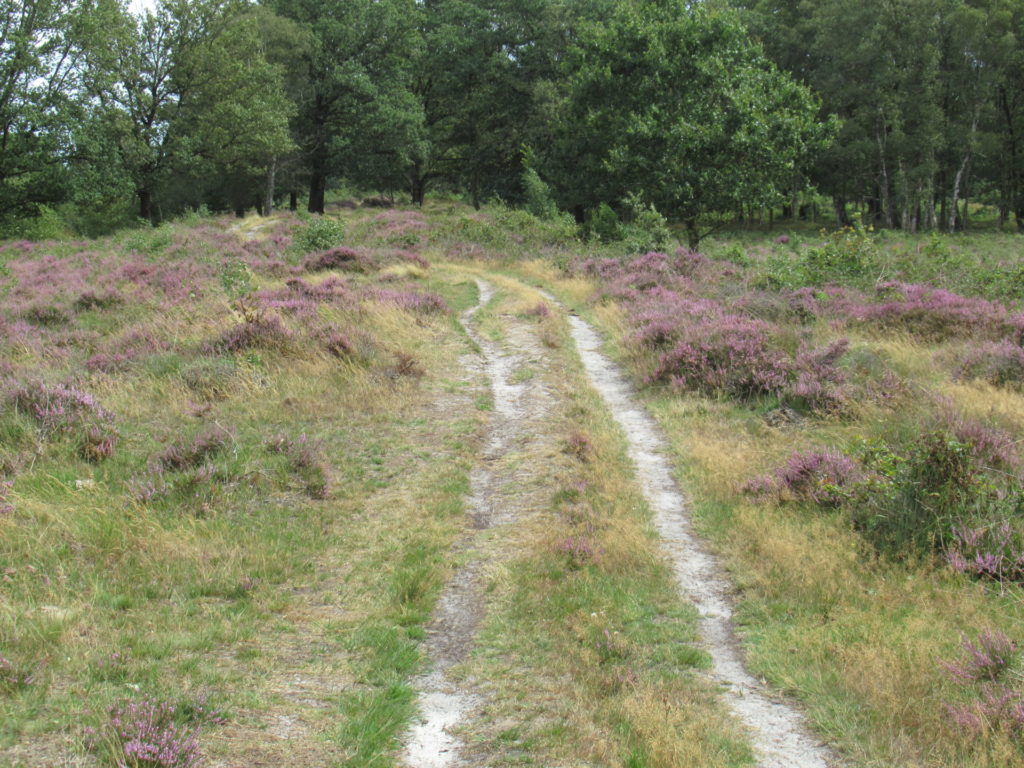
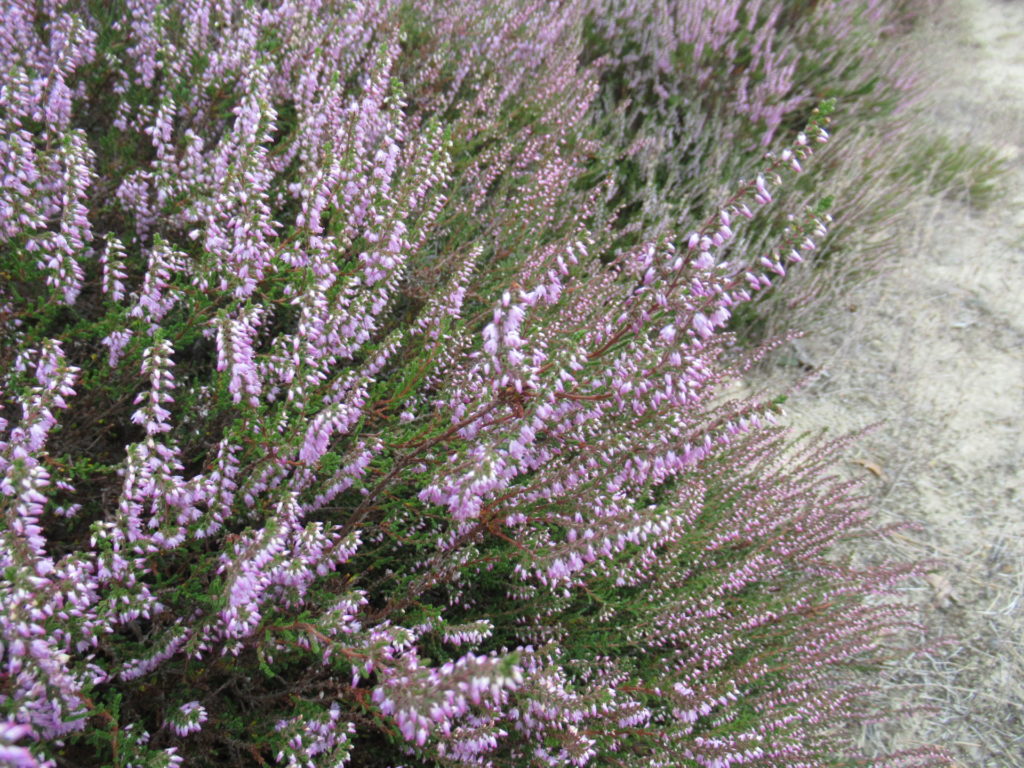
For me, one of the best ways to relax is walking. Fortunately I have a husband who feels the same way, so we spent large parts of our Summer Holiday this year (and any other year) taking long walks. Woodland walks, coastal walks, riverside walks, city walks, but most of all heathland walks. The heather is in bloom this time of the year and it’s glorious!
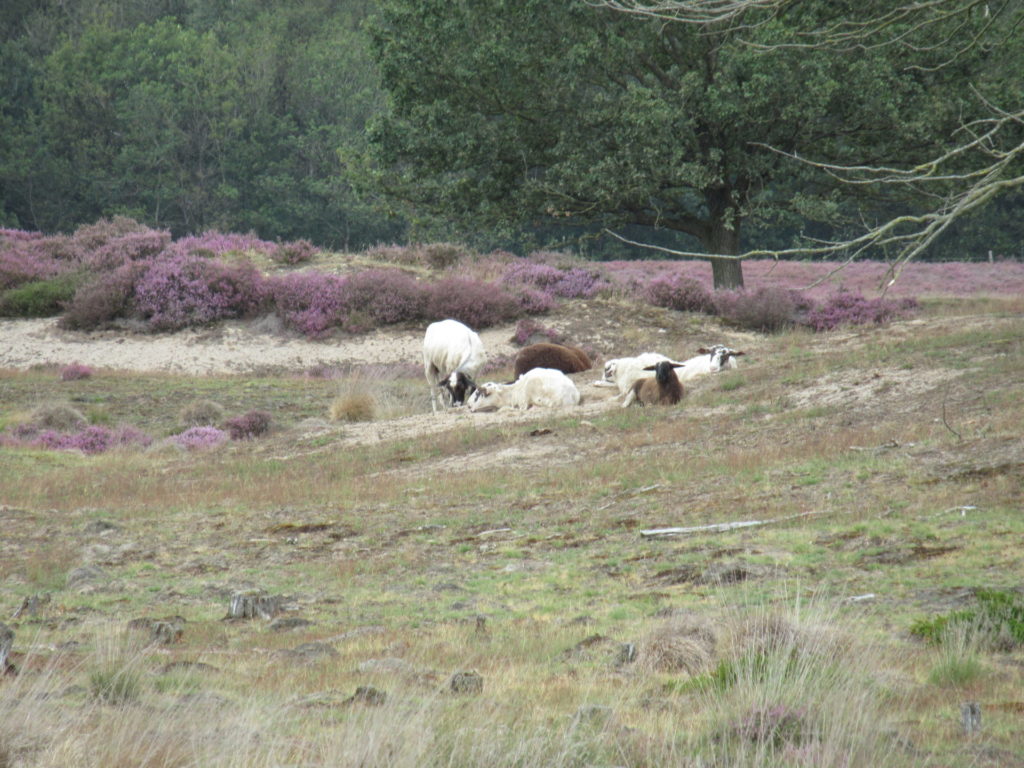
As I wrote in a previous post, heathland needs to be grazed. Otherwise it would be overgrown with trees in no time and disappear within a few years. Usually this is done by sheep, whose cropping and munching is a peaceful sight.
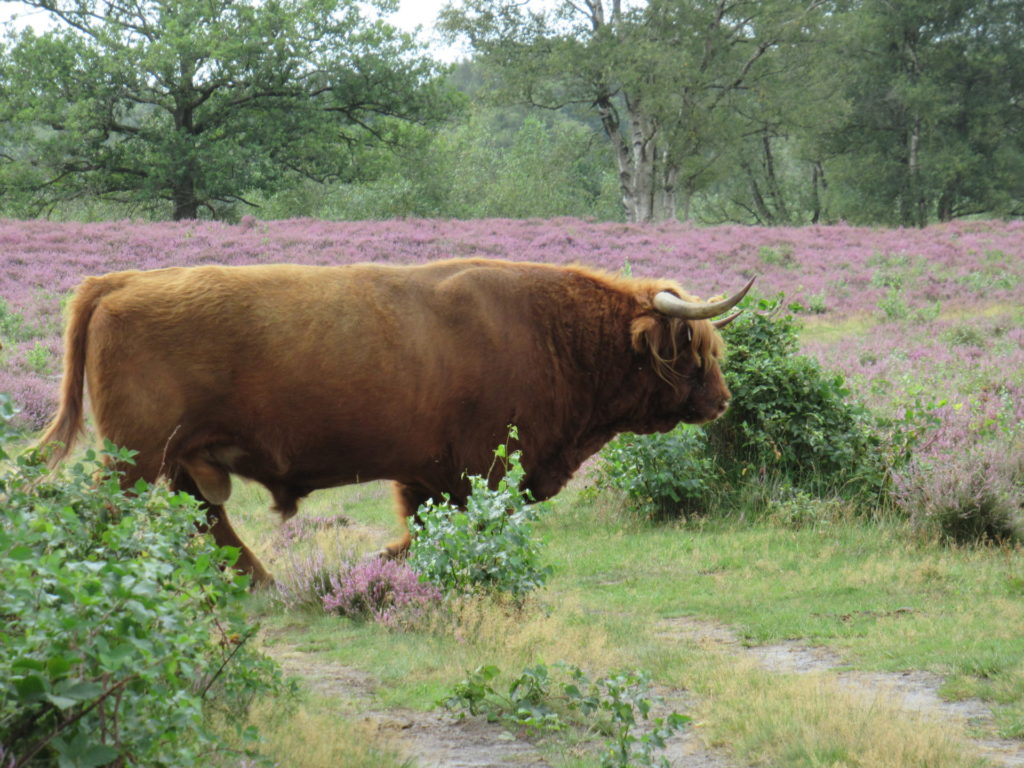
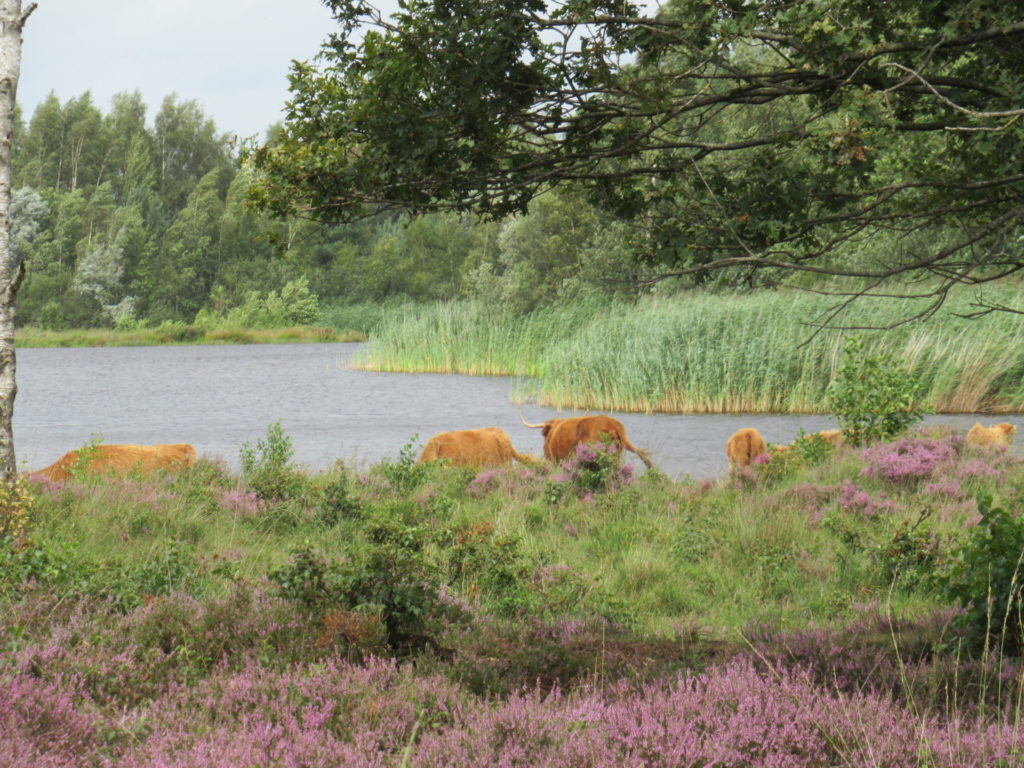
But sometimes cows are recruited to do the job, especially highland cattle. I think they are beautiful, with their big horns and their shaggy red coats.
I prefer to keep a respectful distance, but during one of our walks other walkers and their dog didn’t give the cattle a second glance and just barged on, right between a bull and his harem with their calves. This seemed to agitate the bull, and instead of continuing to graze, it suddenly charged across our path.
I held my breath, but nothing happened. As it turned out, the entire highland family was just as peaceful as sheep. All they wanted to do was go for a swim together.
We live in a small country, and our nature reserves are comparatively small, too. This means that long walks are hardly ever exclusively nature walks. They almost always cross some farmland as well. I don’t mind, really. I even like it. Some less intensively farmed land can be very beautiful to walk across.
Besides, I love looking at farmhouses and their outbuildings.
They often have lovely flower and vegetable gardens. The vegetable garden of one of the farms we passed was a riot of colour.
So, so lovely.
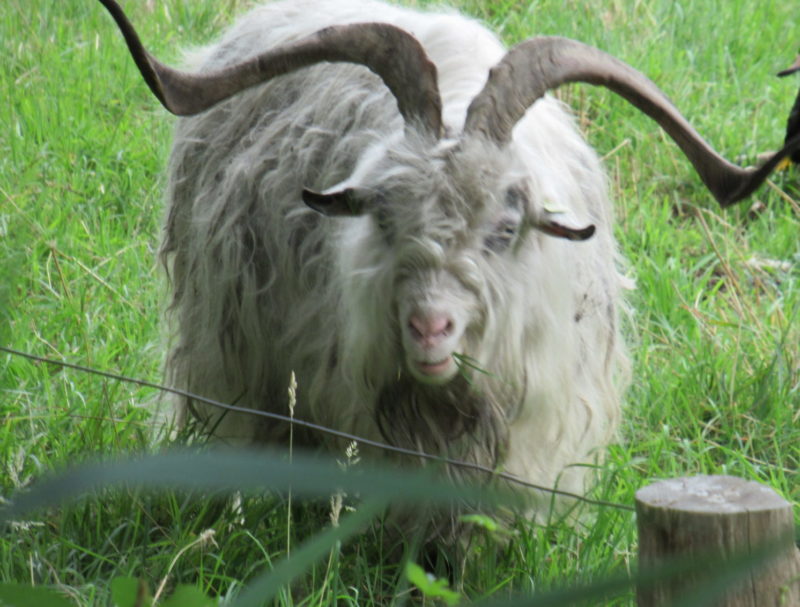
And on some farms, there are animals to admire as well. On one farm we saw some magnificent long-haired Dutch Landrace Goats.
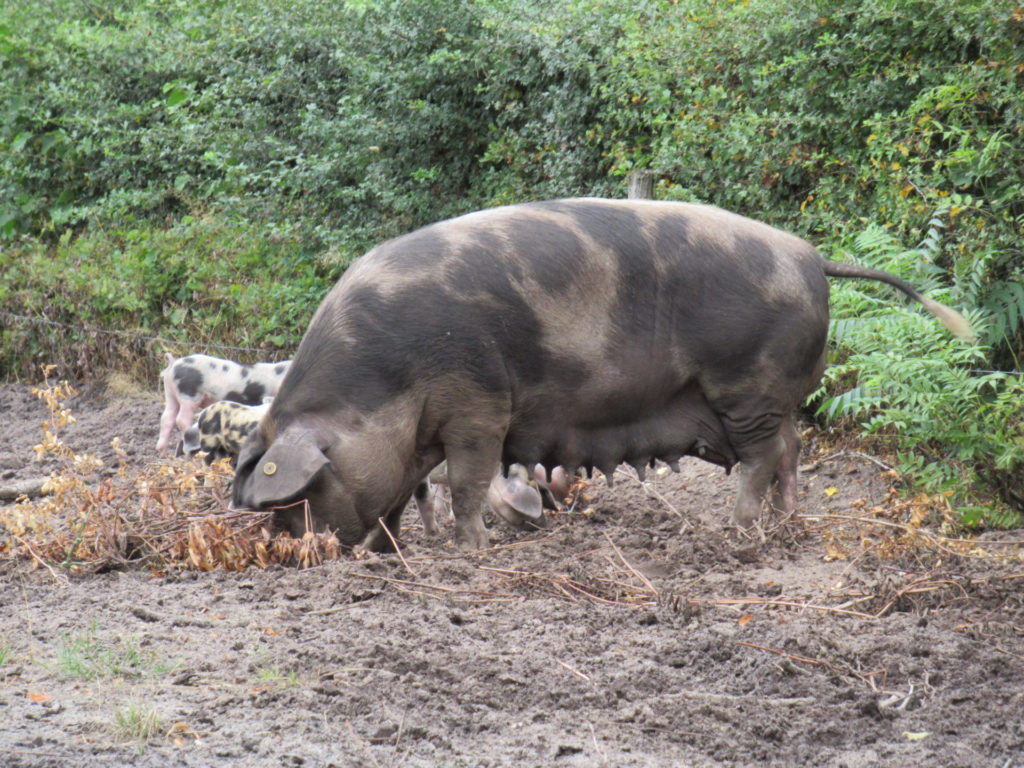
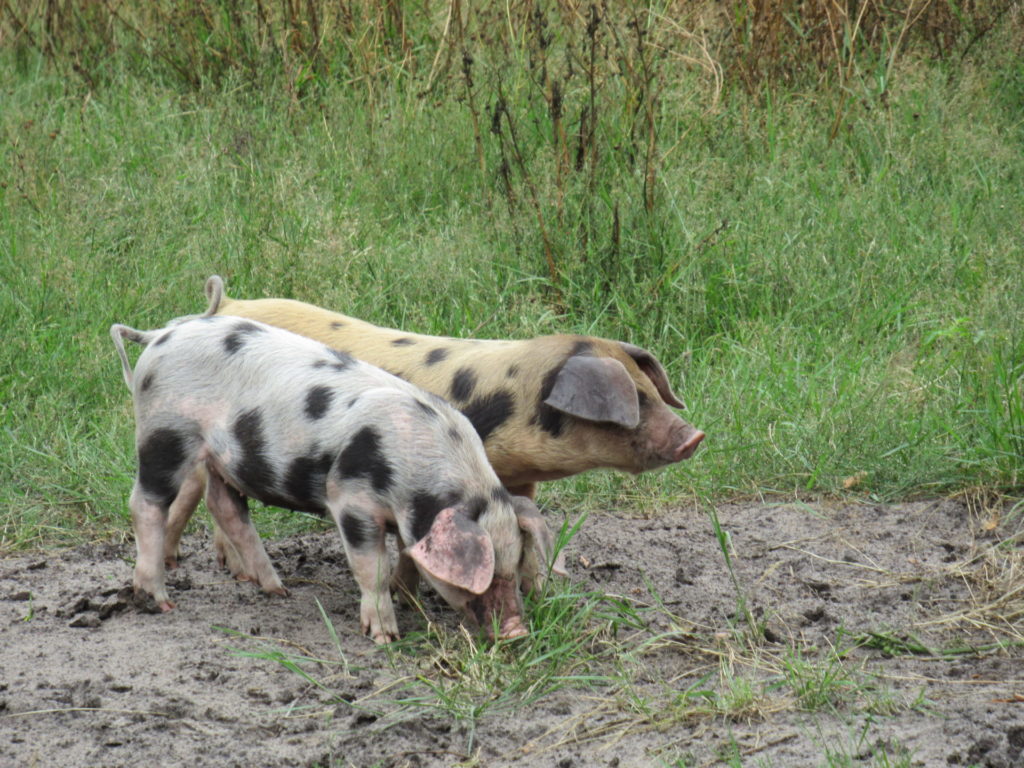
And on another a big, big spotted sow with a litter of piglets.
It’s so good to see them rooting about outside, with lots of space and freedom. The piglets were incredibly lively, inquisitive and cute.
Taking photographs for my blog makes me look at the world with different eyes, and appreciate my surroundings even more. Sometimes my camera seems to see more than I do, and I don’t really realize what I’ve seen until I look through my photos at home.
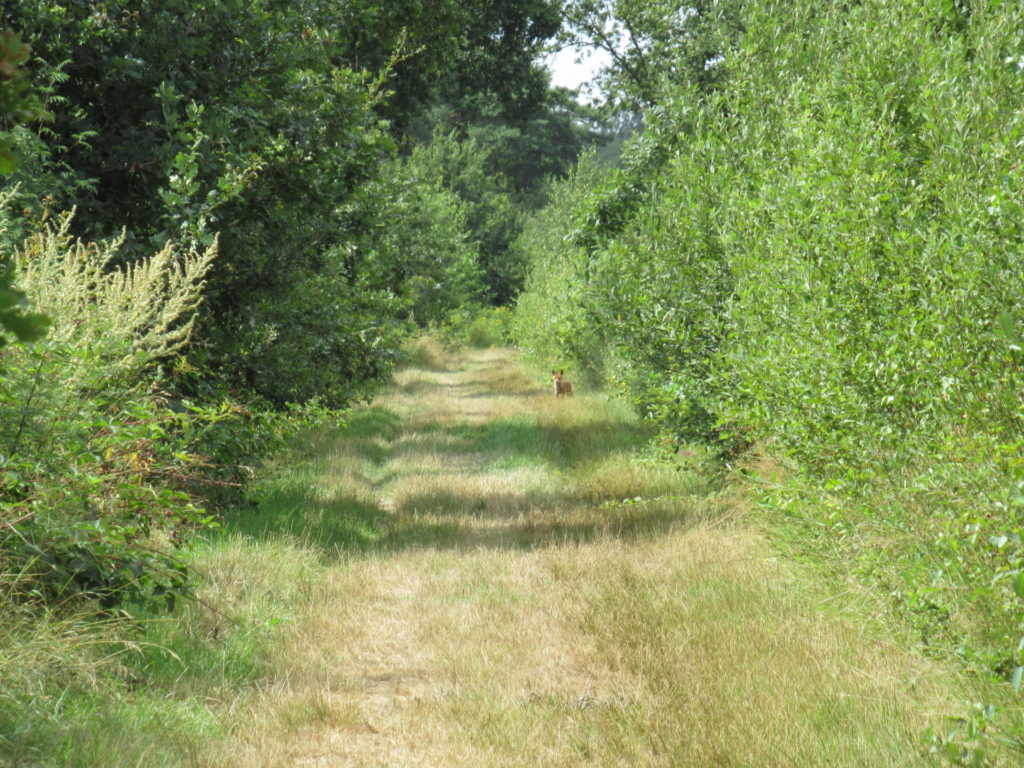
Take the photo below, for instance. We were walking along a grassy path when I spied something in the distance, very far away. Judging by the colour and the shape of the ears, I thought it was a roe deer. Roe deer are not an uncommon sight, but still worth taking a picure of.
When we came a little closer, the animal got up and raced away. At the time I thought, strange how small a roe deer can look from a distance, and how short its legs look in the grass, but didn’t give it much thought.
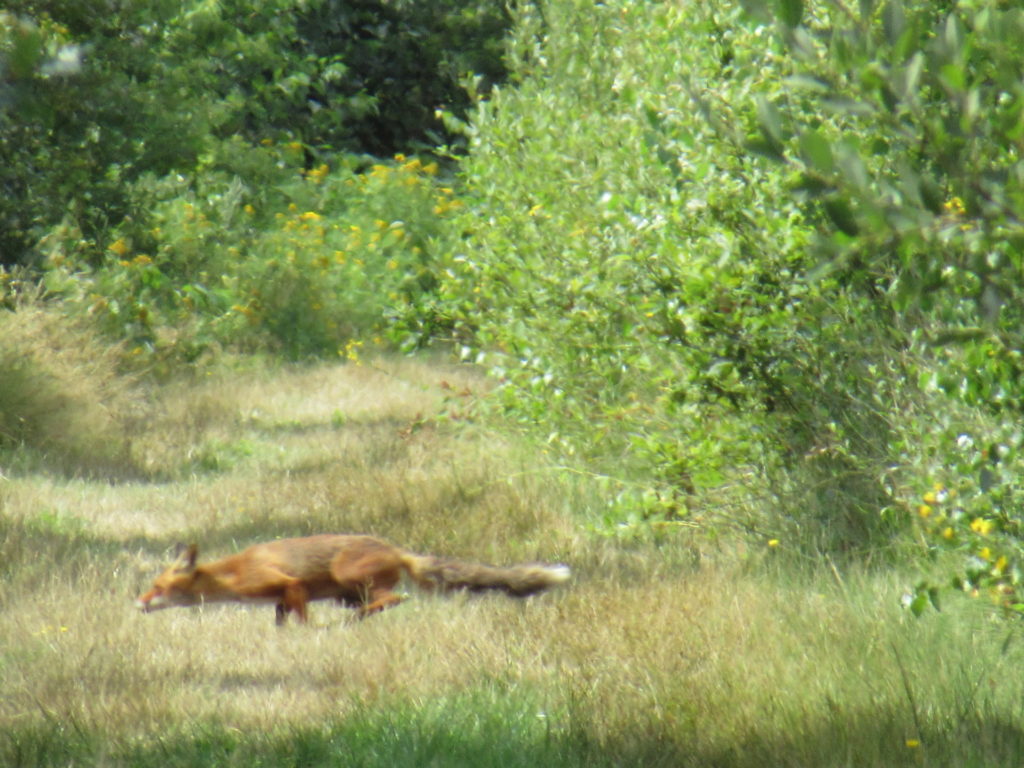
Looking through my photos at home, I realized that it wasn’t a roe deer at all, but a fox!
We know that there are foxes around here. It’s something we know all too well, from the massacres they’ve caused among our hens. Twice! (Our chicken coop is now completely fox-proof). But we very, very rarely get to see them. In spite of what they did to our hens, I love foxes. I don’t know why, really. Is it the shape of their face, their big bushy tail or their speed and agility?
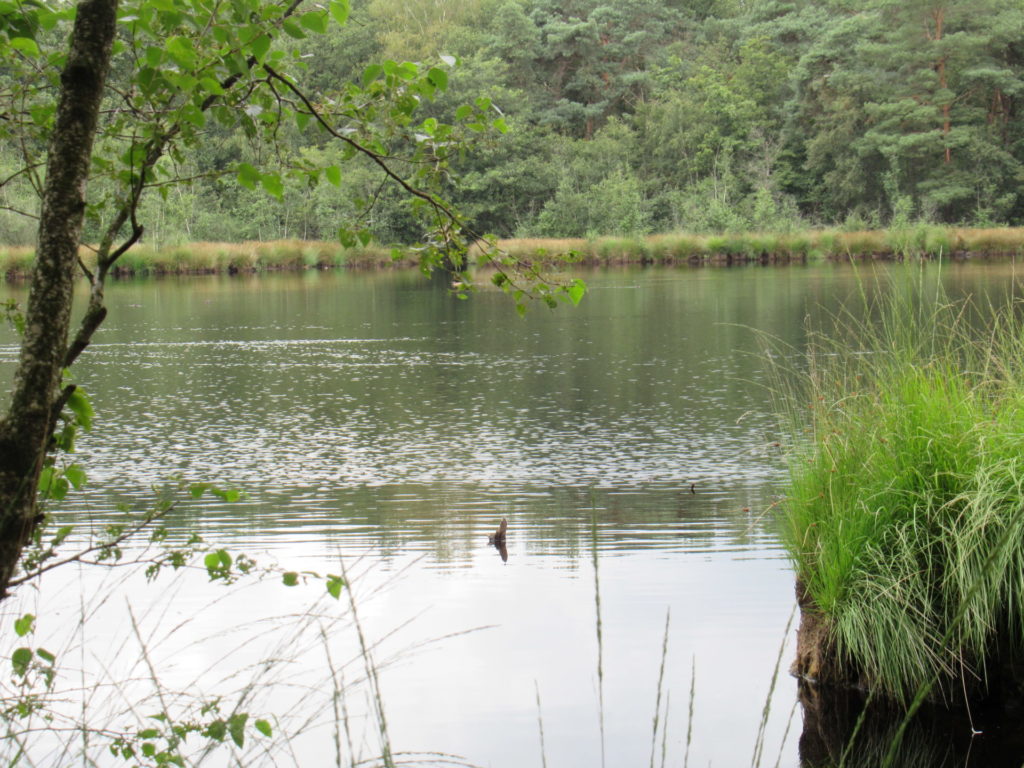
One of the best things about walking is taking breaks at spots that you can’t reach in any other way. Quiet, out-of-the-way spots. This was one of the best spots for taking a break that we passed on this walk. A pool surrounded by trees and tall grasses, with the wind cooling our skin and sending ripples out across the water.
The water birds in the distance looked like ducks, but they made curious sounds, not like our ordinary, everyday mallards. I couldn’t see what species they were with my naked eye, so I zoomed in on them with my camera. Maybe I could enlarge them at home and find out which duck-like bird it was that made such soft un-duck-like noises. But no such luck.
I’m not a very good photographer, and I don’t have any fancy photo equipment. So, I ended up with some very blurry pictures, and one that was sharp, but had a beheaded duck on it. As far as duck pictures go, these photos were a total failure.
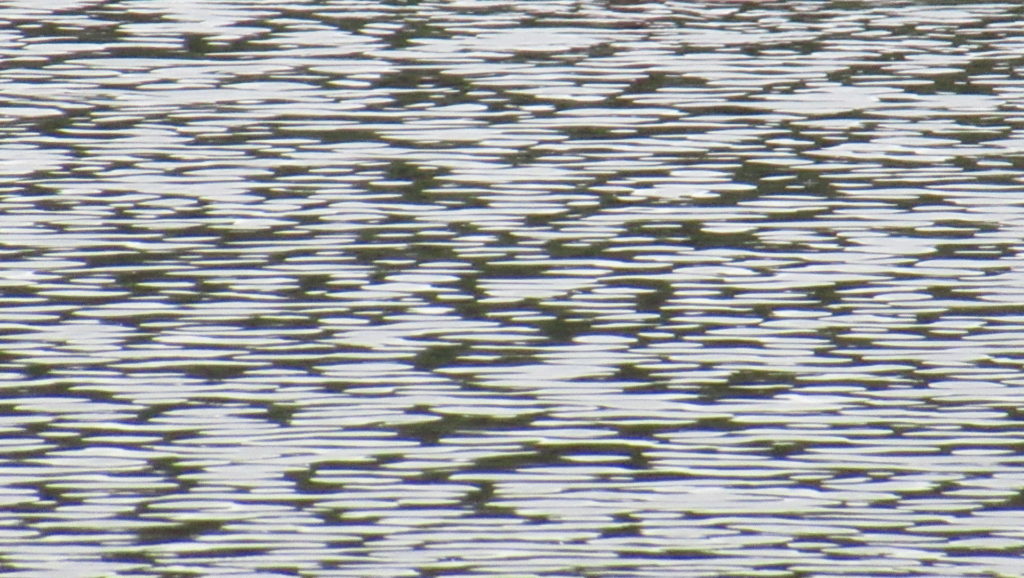
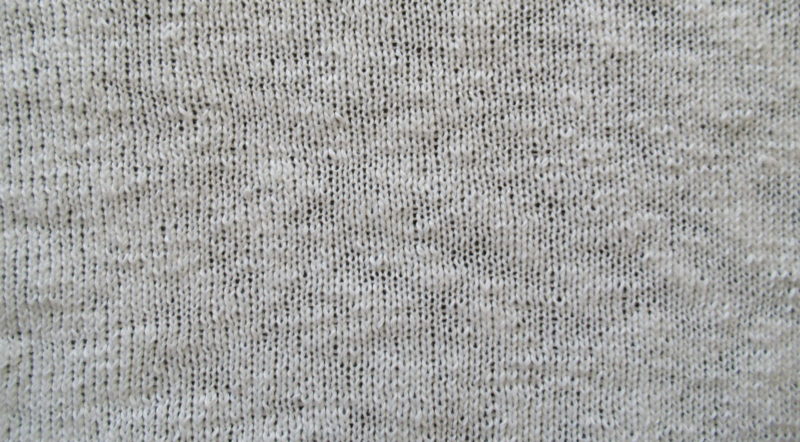
But then I looked at the rippling water and thought, wow, look at that!
The ripples on the water look just like the texture of my knitted fabric!
This is a close-up of the Sideways Tee that I’m knitting.
When we’re on holiday, we often spend the evenings exploring the immediate surroundings of our holiday cottage or campsite. During our ‘staycation’ there was no need for that. We already knew the surroundings of our ‘holiday home’ through and through, so that I could spend almost every evening, all evening, knitting, reading or working on my crochet project.
I’ve made a lot of progress, but haven’t actually finished anything yet. I need a little more time to finish things up, organize my notes and take pictures before I can show you more.
I hope you don’t mind if I take you along on another walk next time. I’d like to show you a very different part of our country, and some crafty things I came across there, before I get back to some in-depth writing about knitting.
This post is looooong overdue. It’s the third instalment in a series of posts about ‘Stay Soft’, a shawl design by Veera Välimäki. I’d intended to write a step-by-step description of my knitting process way back in June, but… On the one hand, I got caught up in all kinds of new projects. And on the other, I felt unsure. Would people really be interested in reading about my knitting projects in so much detail?
But then two members of my knitting group asked: ‘How is your shawl coming along? You know, the one we helped you choose the pattern for?’ And I also started getting questions from readers, along the lines of: ‘Please explain how you knit the last part of Stay Soft, because I’m stuck.’ Apparently people do want to read about it, so here we go. (There’s a list of useful links at the bottom of this post).
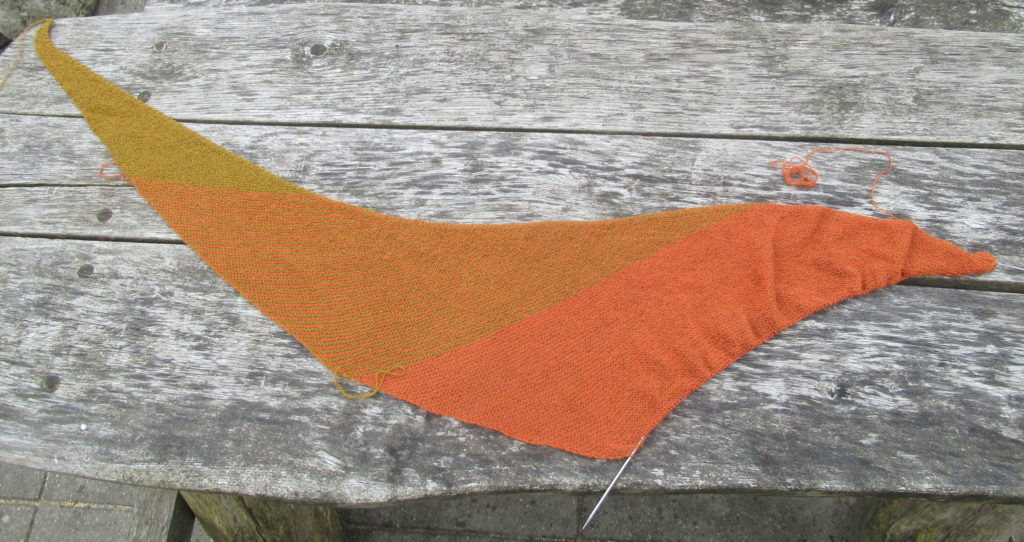
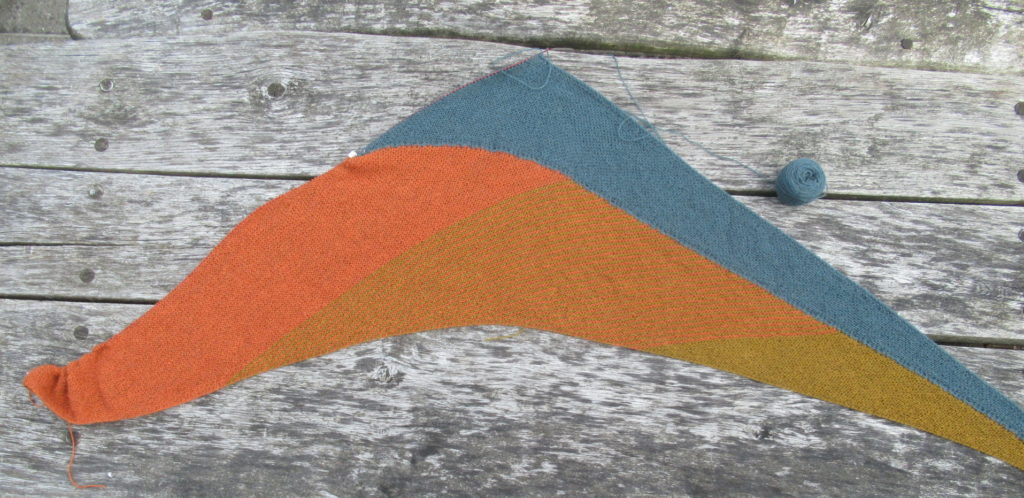
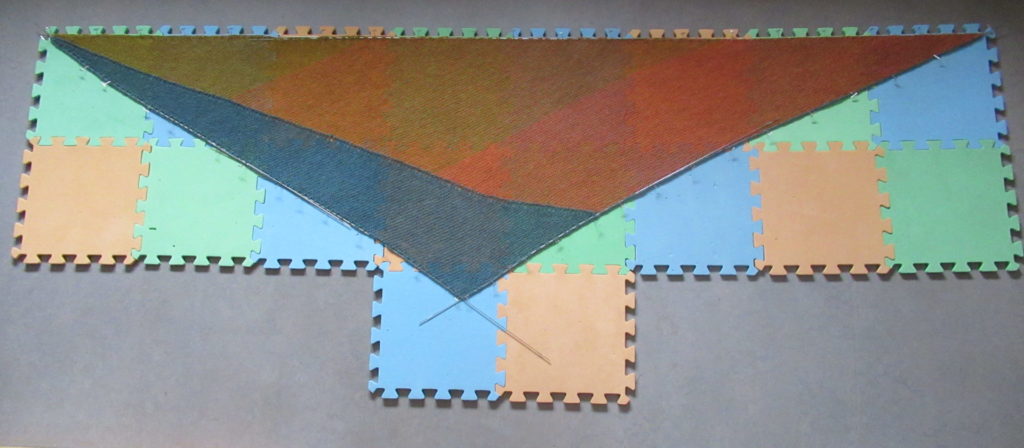
The previous instalment ended after the third part, called ‘Coral Part’ in the pattern. This is what the shawl looked like at that point:
These first 3 parts are fairly straightforward. Now we get to the hardest part of Stay Soft, the part starting with the heading ‘Yellow Speckled Part’. Although there aren’t any mistakes in the pattern, and all the information is there, I still had some trouble figuring out exactly what to do.
First a note about the colours, though. To avoid confusion, these are the colours used by the designer and the ones I used:
Pattern: MC white speckled; CC1 coral-pink; CC2 yellow speckled
My version: MC yellow; CC1 orange; CC2 grey
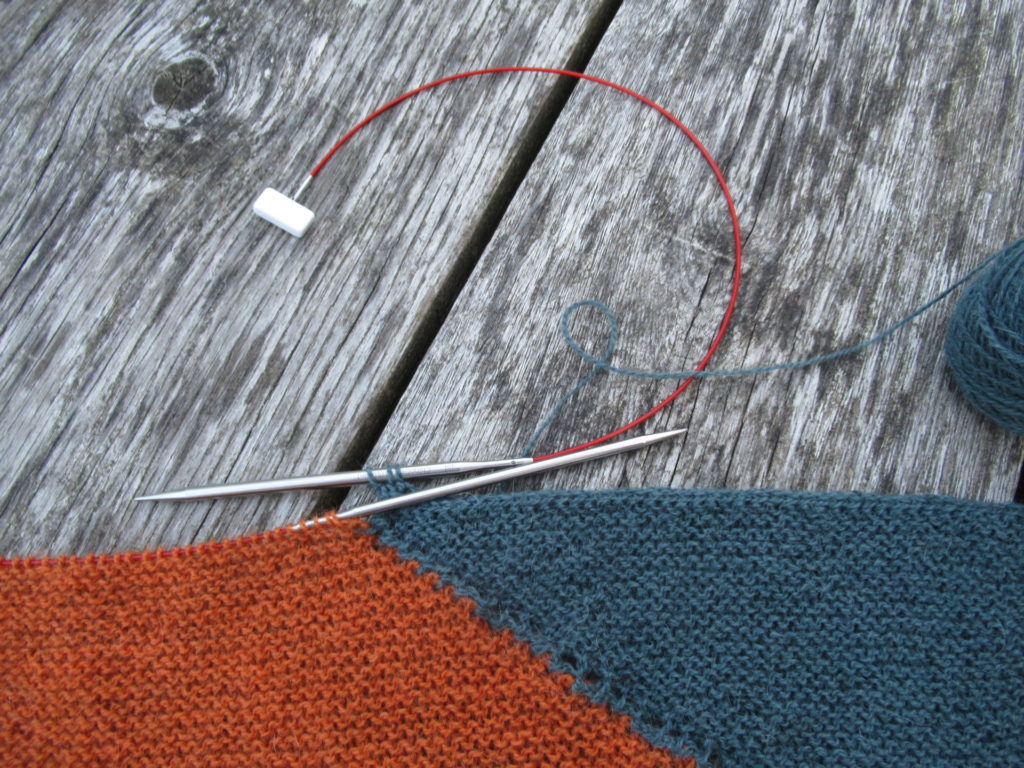
After the first three sections (called ‘Main Color Part’, ‘Stripes’ and ‘Coral Part’ in the pattern), stitches need to be picked up in the second contrast colour (CC2). The pattern says: ‘Use the same needle and CC2’, but I used a different needle, as suggested later on in the pattern. To my mind, this makes it so much easier.
I used interchangeable circular needles. This means that I unscrewed the tips from the cables, screwed them onto another cable, and screwed end stoppers (the rectangular white things in the picture below) on the cable with my orange live stitches. At this point I cut CC1.
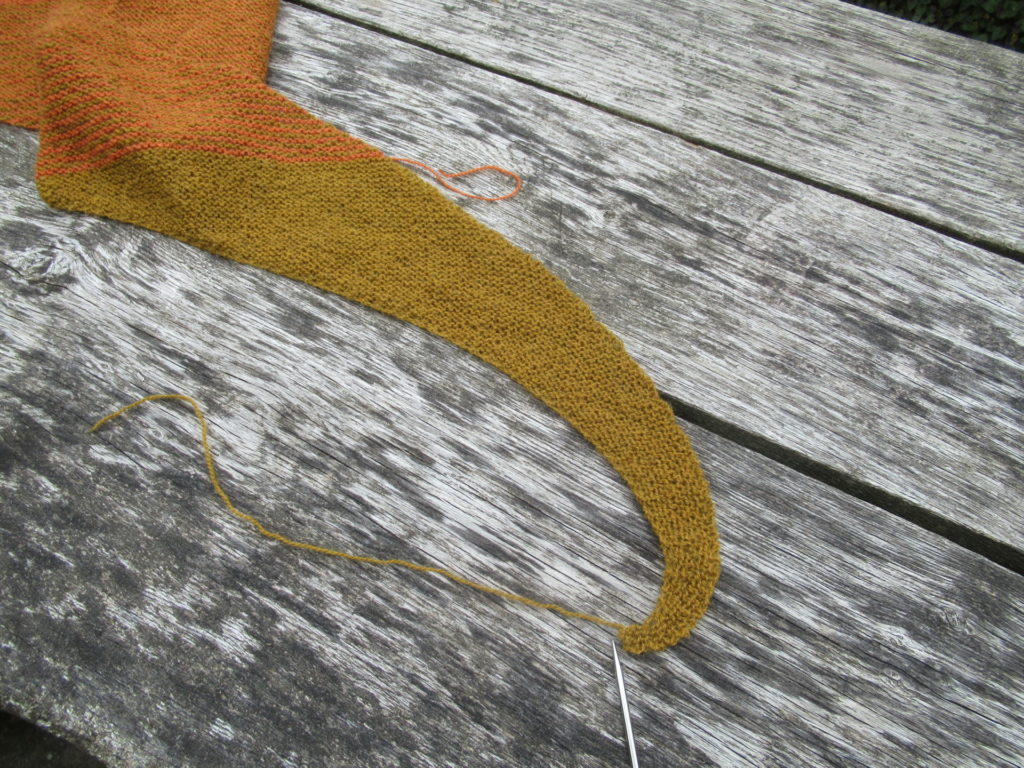
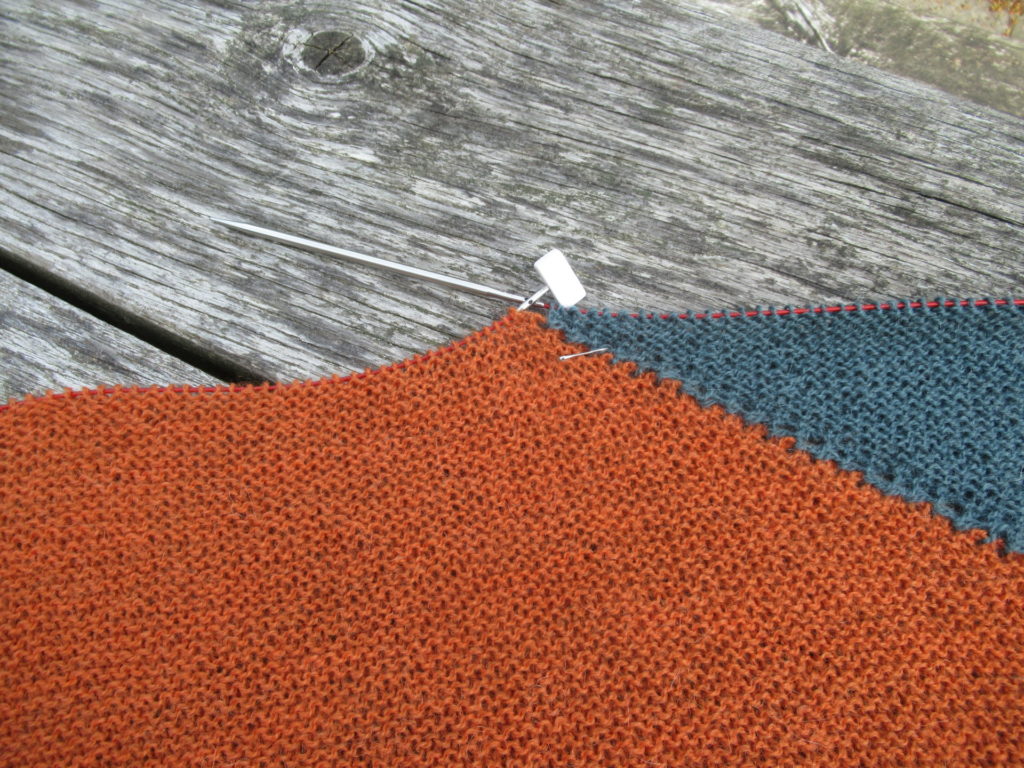
Then the pattern says: ‘pick up and knit 5 stitches starting from the cast-on corner of the shawl.’ And here it gets tricky. Where and how do we pick up these stitches?
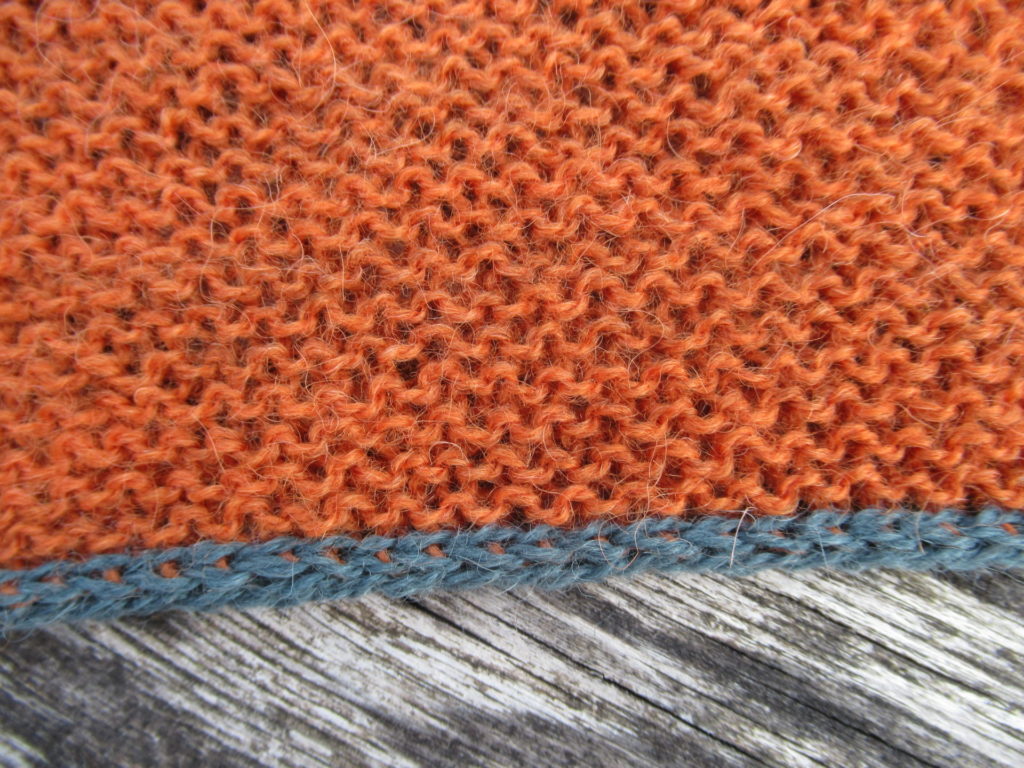
After taking a good look I found out where to start picking up stitches. It’s at the tip the knitting needle below is pointing at – the very first stitches knit in the first colour (MC). And the stitches should be picked up on the right-hand side.
So, with CC2 and another needle the same size, and with the right side (RS) of the shawl facing, I picked up and knit 5 stitches, starting from the point indicated above. After a few tries, I picked up a stitch EVERY row (not in every ridge, which would be every other row), because otherwise the corner pulled and curled up.
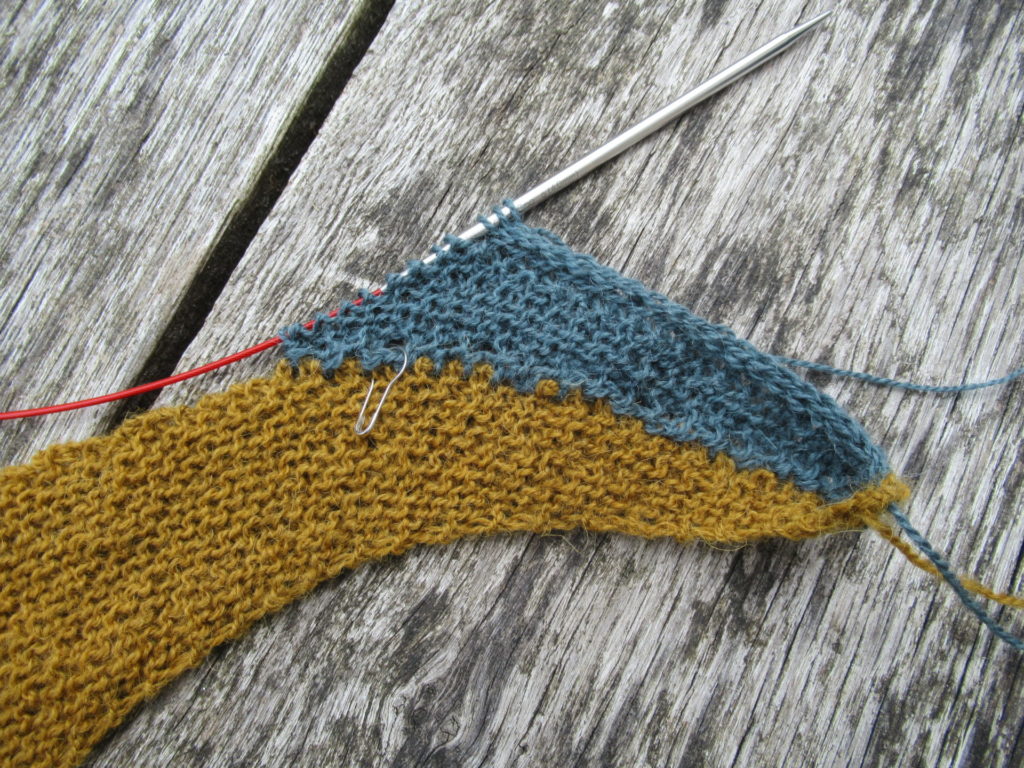
For the next row (WS), the pattern says. ‘Knit the first two stitches, and slide the remaining 3 stitches onto right-hand needle as if to purl’. This made me scratch my head again – should the yarn be held in front or in back? As it turns out, the yarn should be held in front. So: After picking up 5 stitches, turn your work, knit the first 2 stitches, bring yarn to the front, and slip the next 3 stitches purlwise (as if you were going to purl them, but without actually purling them) with the yarn held in front of your work. Then turn your work and knit rows 11 – 18.
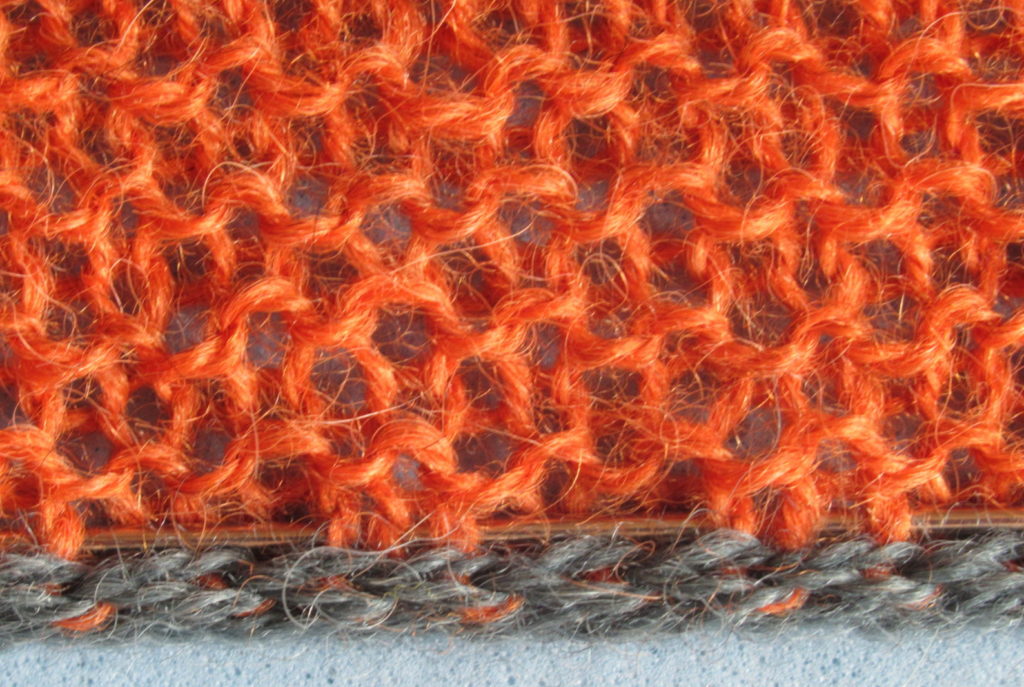
Slipping the last 3 stitches with the yarn held in front gives a sort of I-cord edge. When you’re just starting this edge it doesn’t look very nice or neat, as you can see in the picture below. But it will get better as you continue.
After that, rows 13 – 18 are repeated until the corner is reached, where the live stitches of the ‘coral part’ are waiting.
In this section, 1 stitch is increased in all right side (RS) rows by knitting 1fb, but this is neutralized by knitting 2 sts together in the same row. Only in row 17 it says k1fbf (instead of k1fb), so only in this row 1 stitch is increased. It is important to keep track of this, but I found it impossible to see where I had increased a stitch. To keep track of the increases, I placed a locking stitch marker immediately after I’d knit a ‘row 17’. And as soon as I came to the next increase row, I moved the stitch marker there.
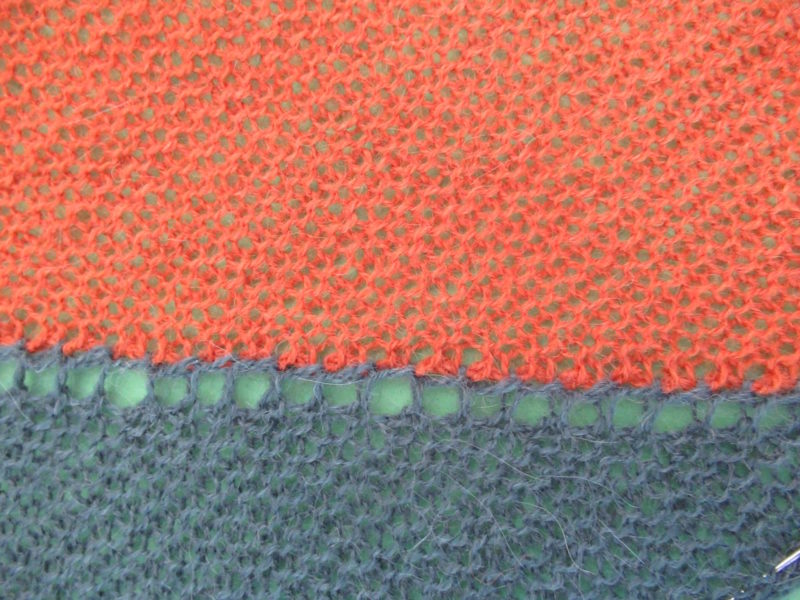
Knitting on like this, a knitted on I-cord edge is formed on the ‘outside’, and a row of holes along the body of the shawl. At first it doesn’t look very attractive, but after a while the edge becomes really neat, and it becomes visible how the part in CC2 brings everything nicely together.
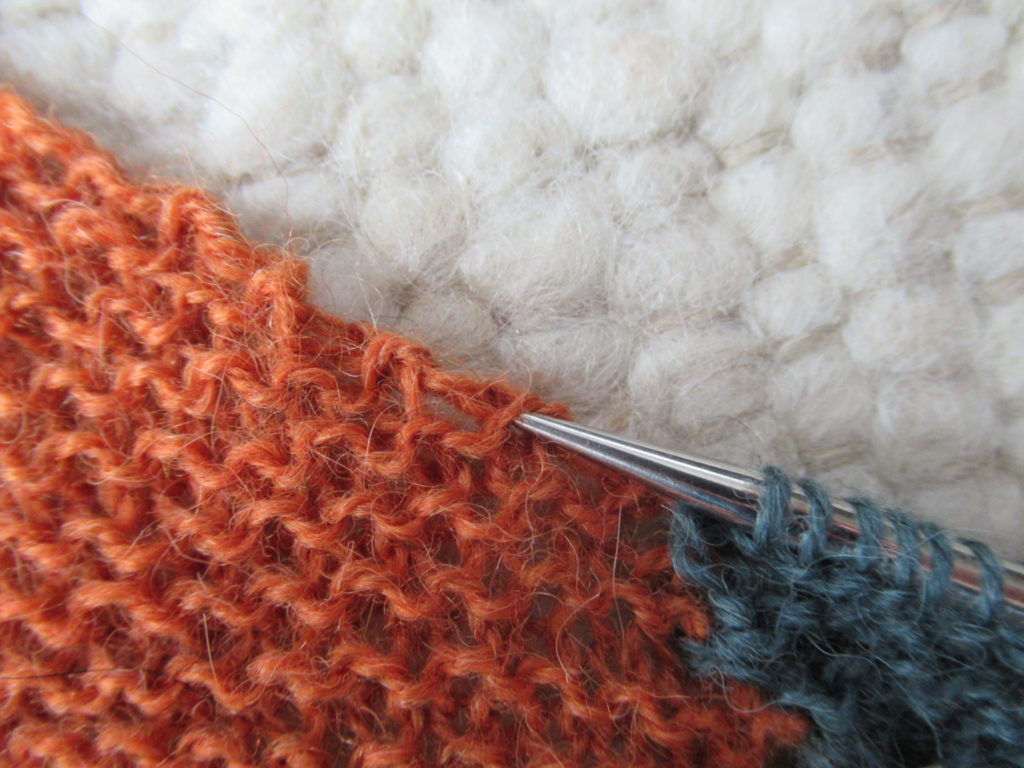
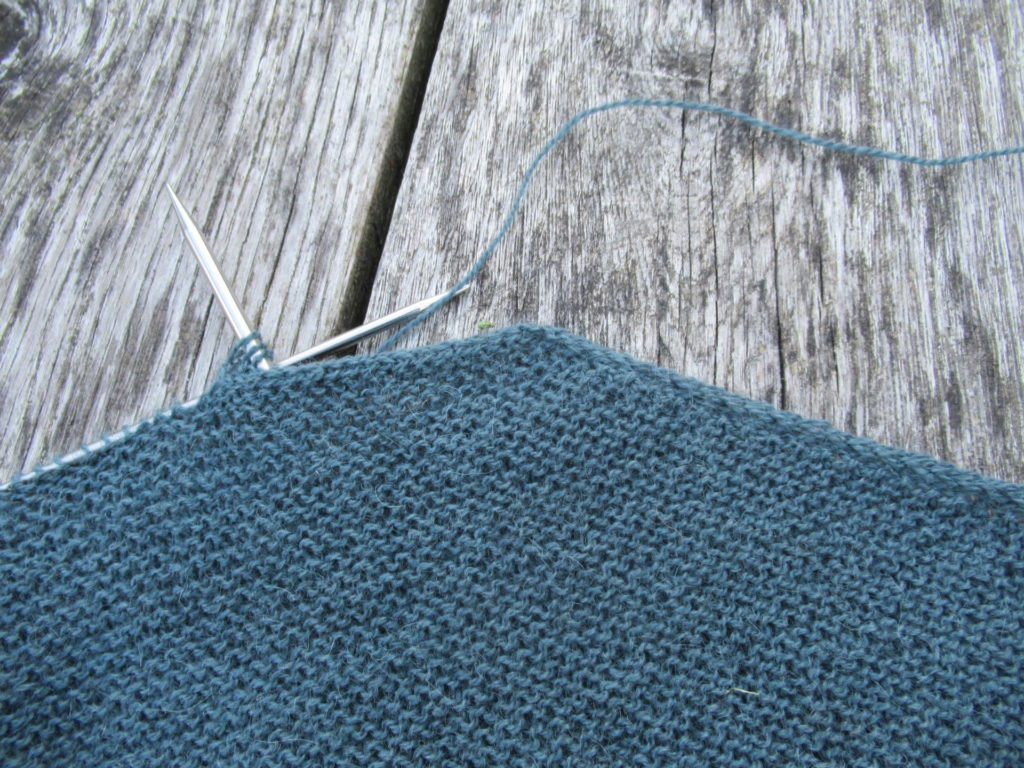
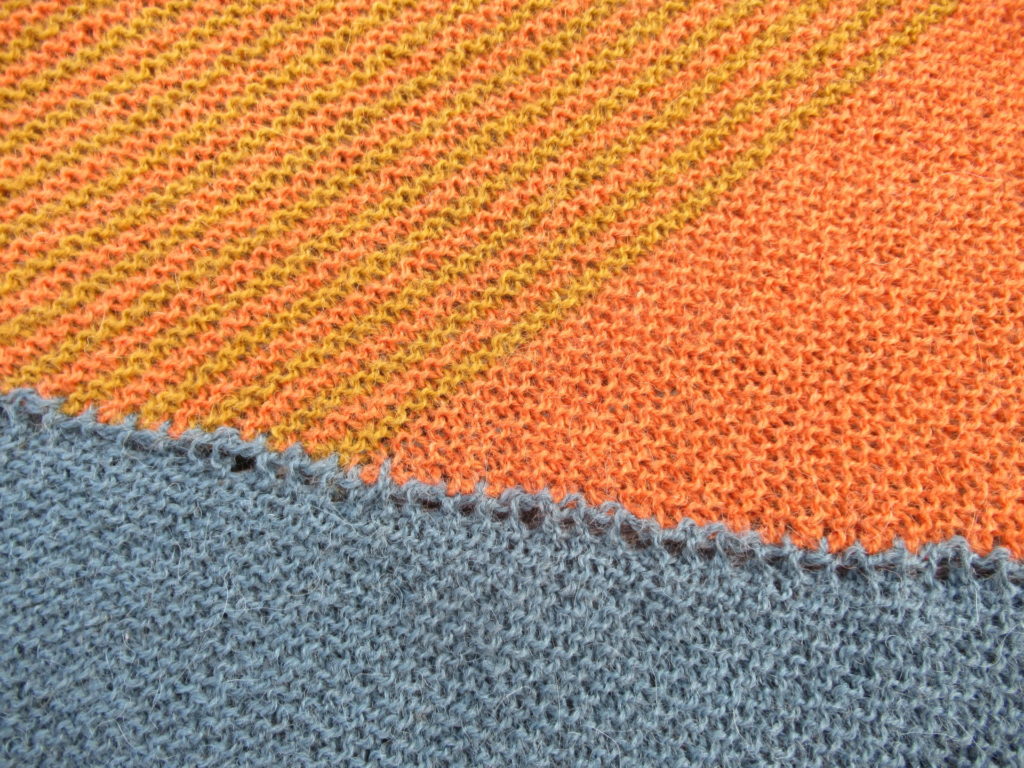
The next picture shows where exactly I picked up the stitches in the RS rows – just below the ‘curve’ or ‘bridge’ of the last knit stitch.
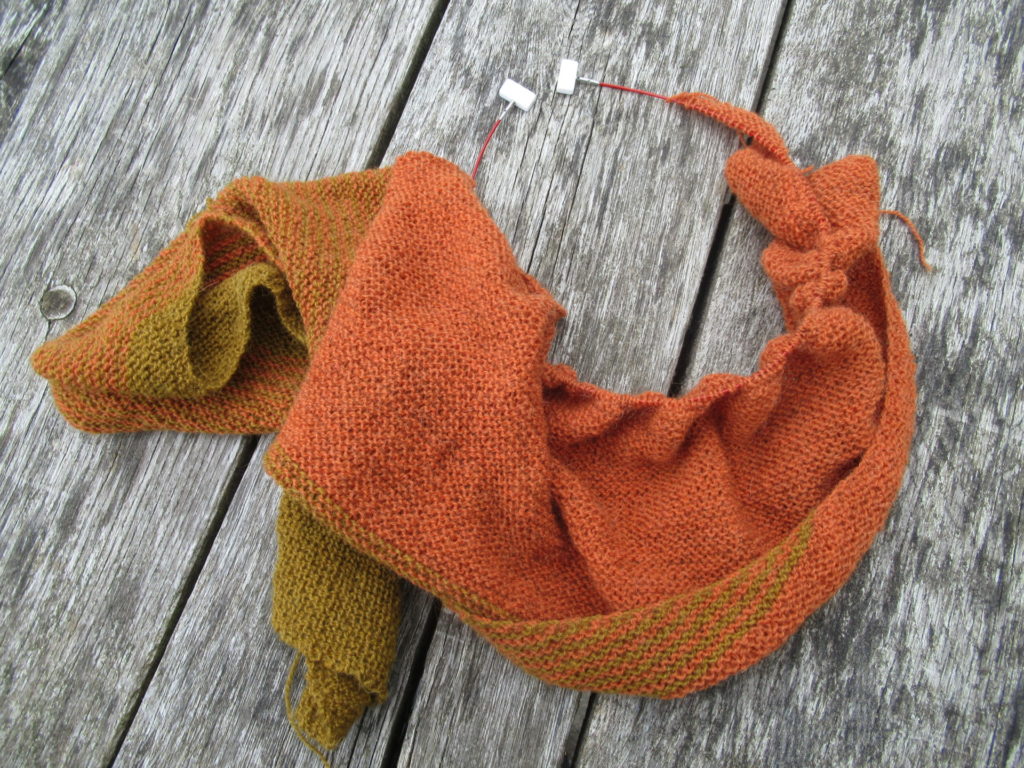
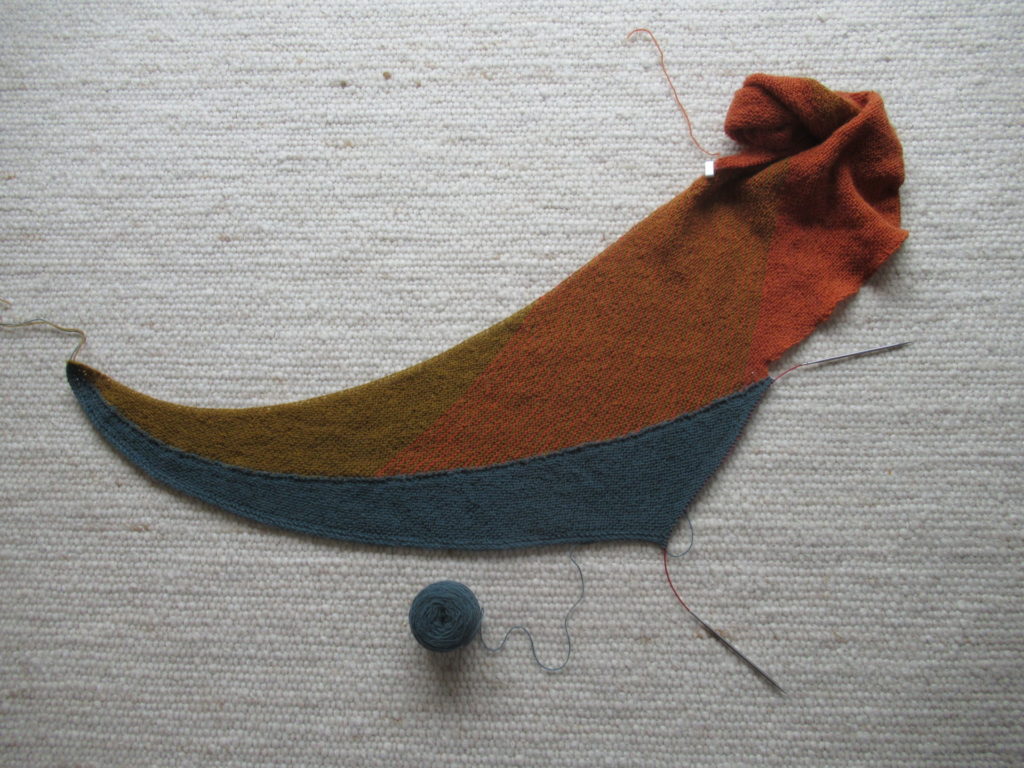
After knitting everything described on page 4 of the pattern, the shawl looks like this:
The needle in the grey part meets the end stopper on the cable in the orange part:
Time to start the I-cord bind-off along the end of the grey section. After about 10 cm/4 inches I noticed that this I-cord was much tighter than the knitted-on I-cord along the side of the grey section. I unraveled it carefully and started again with a thicker needle tip (5.0 mm instead of the 4.0 mm needle I used so far). Yes! Now both I-cords were similar.
Upon arriving at the orange section, I changed the end stopper for a thicker needle tip (in my case 5.0 mm) and continued the I-cord bind-off.
The knitted-on I-cord is just a small detail, but just look at it. It changes Stay Soft from an OK shawl into a fabulous shawl, don’t you think?
After the knitting is completed, it’s time to block the shawl. I think blocking is essential – it makes all the difference. After soaking the shawl in a non-rinse wool detergent (I used Soak, but Eucalan or any other brand works just as well) I spread it out on blocking mats. I threaded blocking wires through the knitted fabric along the edges.
I threaded the blocking wires through the stitches inside the I-cord edges:
While I was knitting I was a bit worried about the row of holes between the body of the shawl and the knitted-on part. They looked terribly irregular. Fortunately that was solved by blocking, too.
What a difference!
Before blocking
After blocking
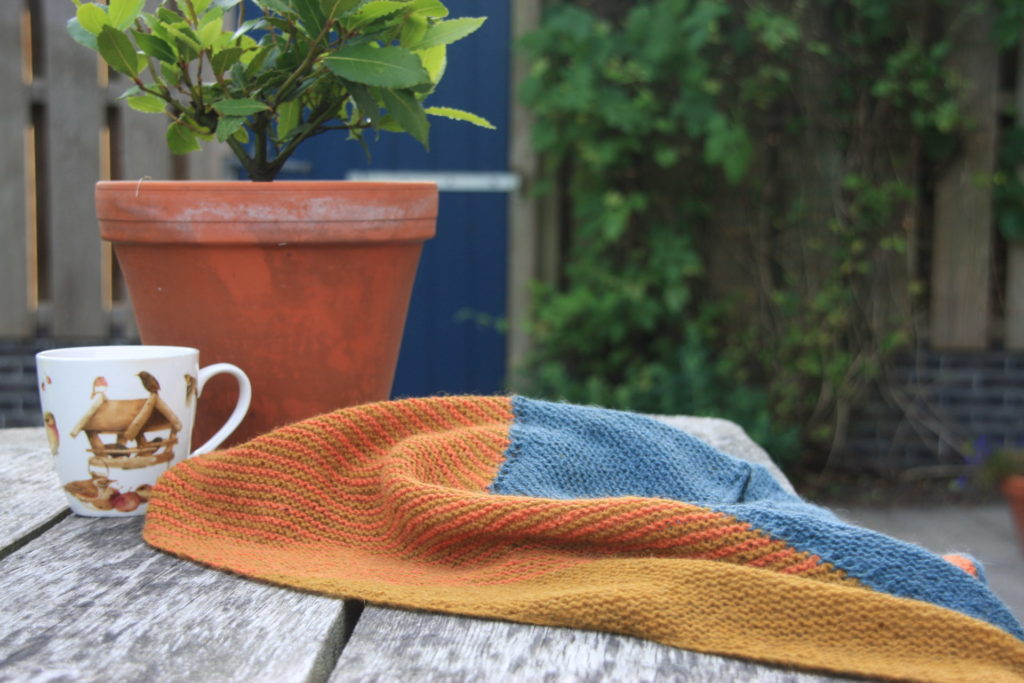
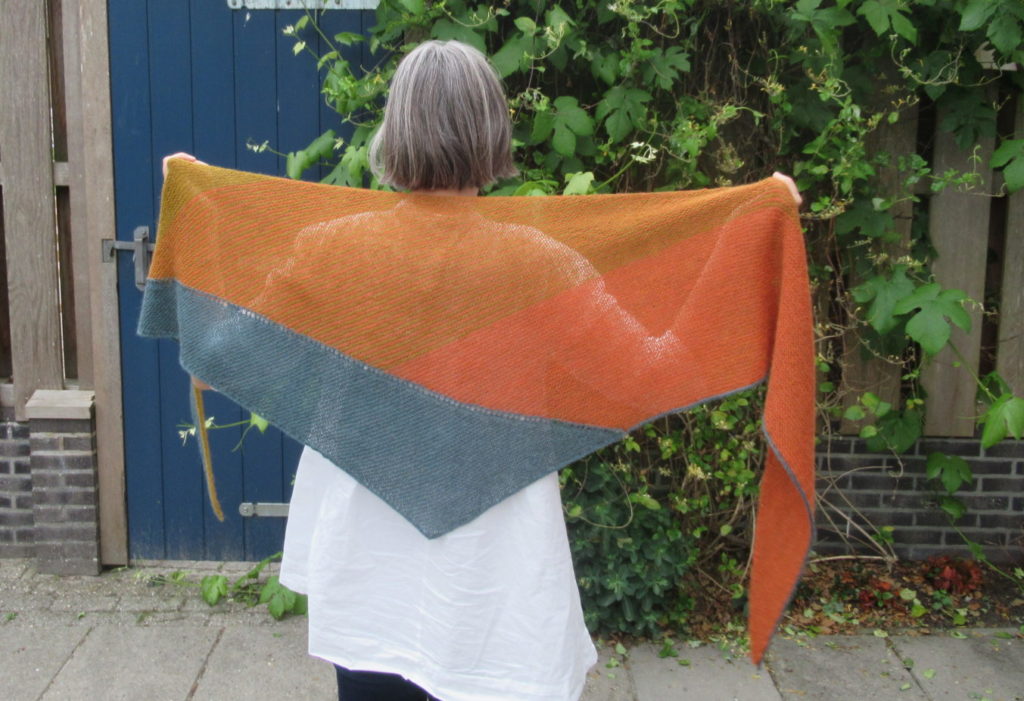
And that’s it – the shawl’s all done!
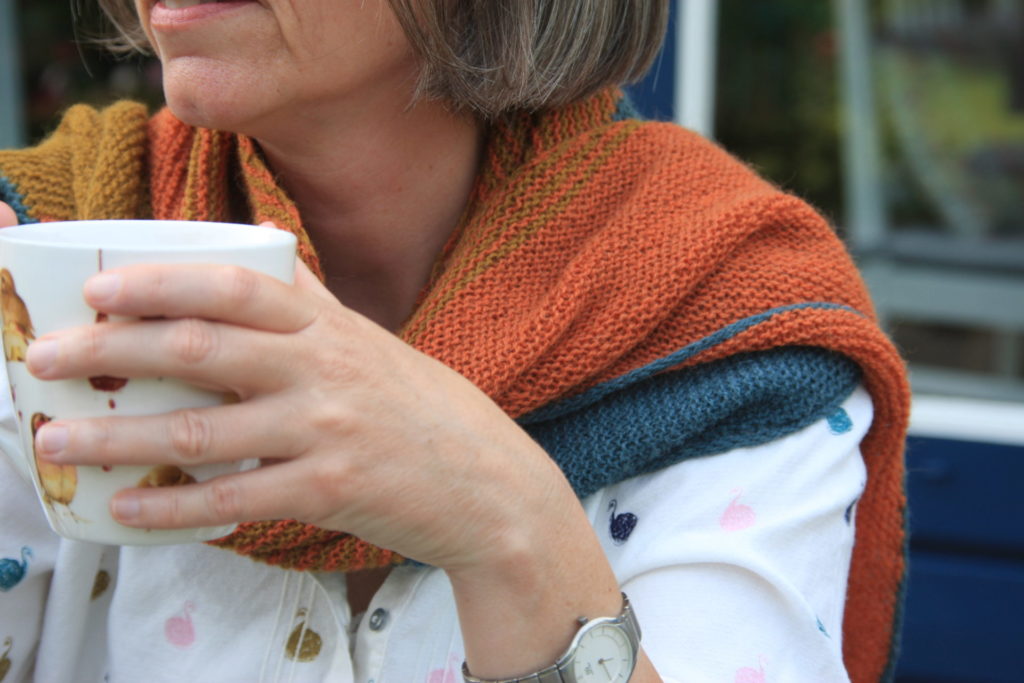
I used a thinner yarn than indicated in the pattern (fine fingering instead of ordinary fingering), which gives a nice and airy shawl. When the light falls through it, it looks slightly transparent.
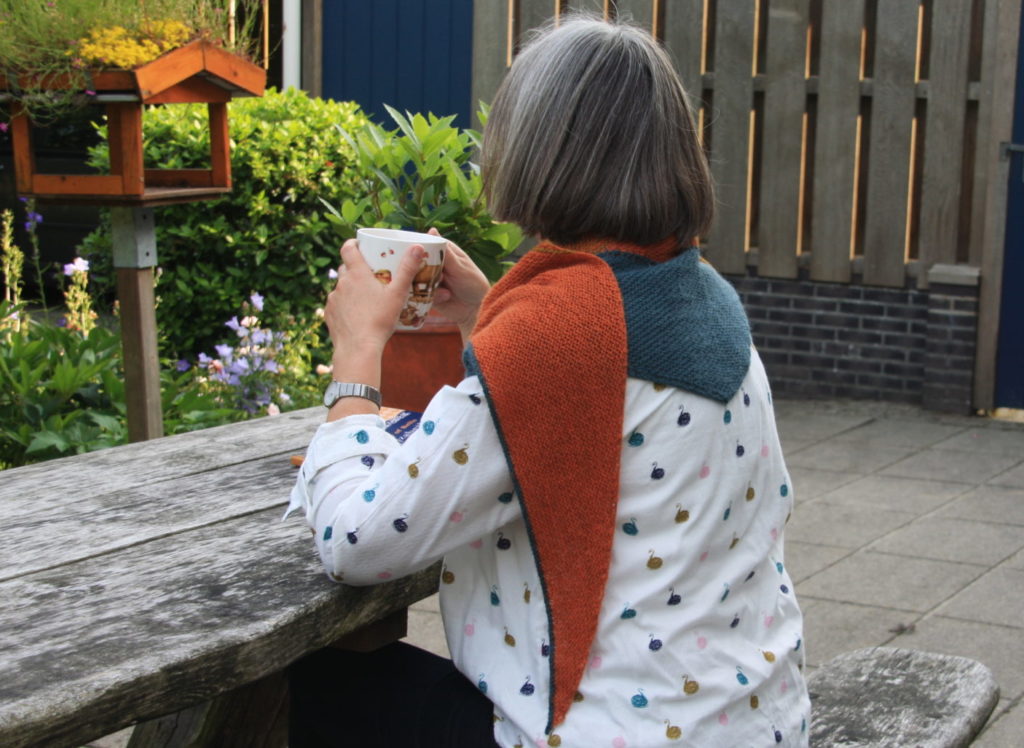
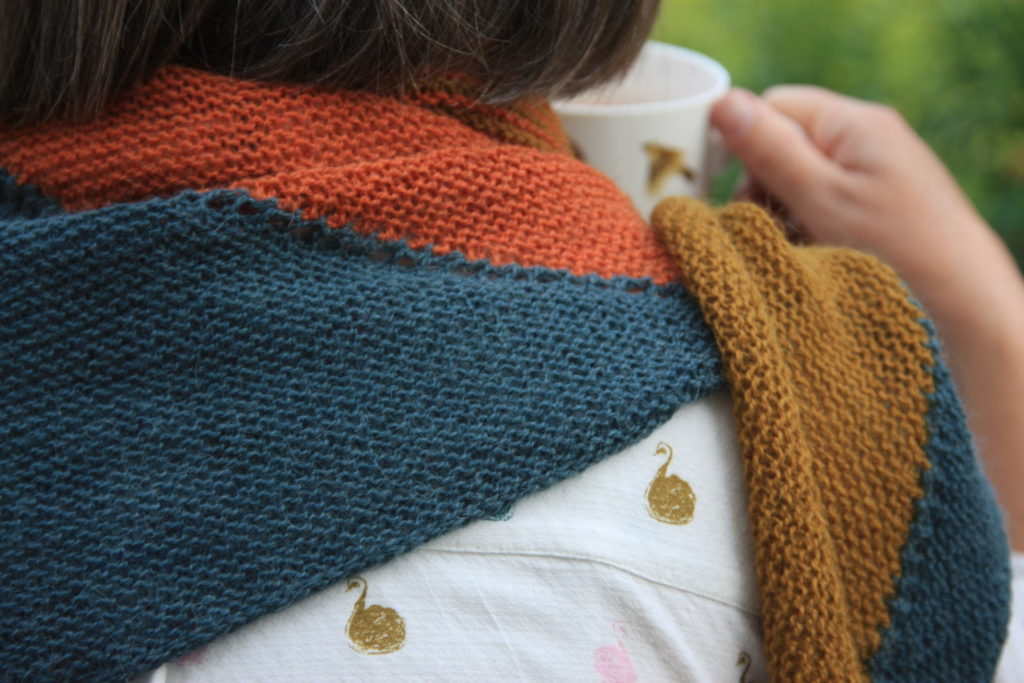
But wrapped around the neck, it is really cosy. Below you can see how the I-cord in a contrasting colour gives a nice crisp edge.
Needles: 4 mm/US 6 and 5 mm/US 8 (the thicker needle only for last stretch of I-cord)
Finished size after blocking: Wingspan 213 cm/84 in; Middle to tip: 57 cm/22.5 in
I think it’s a very wearable, good size shawl from just over 100 grams of yarn. For me, Stay Soft was a really, really enjoyable pattern to knit, in spite of (or perhaps rather because of) all the frogging and puzzling out how to get it right.
Phew! This may very well be my longest blog post to date. At least it was the most complicated one to compile. Thank you dear knitting friends and readers for giving me the motivation to do it.
I hope everything makes sense. If there’s anything that isn’t clear, or if you have any other questions, please leave a comment. I’ll try to answer as best as I can.
Hello, I’m back! Well, I haven’t really been away. Just away from my computer and my blog for a while.
We’ve had a really, really nice and relaxing ‘staycation’, with lots of lovely walks, visits to some old towns, cities and museums, and plenty of time to read, knit and crochet in between.
I’d like to tell and show you more, but I don’t know how just yet. I need to chew on everything we’ve seen and done for a bit first. In that sense I am like a cow. I don’t have four stomachs, but I also need to ruminate on things to digest them.
We met this beauty during our summer holiday, by the way. She lives on an organic farm that we passed on one of our walks:
The farmer doesn’t only take good care of his cattle, but also of the occasional passer-by. Between the barn with the red pelargoniums and the hay barn, where you can see a green parasol peeking around the corner, there’s a wonderful cupboard built into the barn wall. It’s filled with coffee, tea, biscuits and all kinds of other snacks. Just help yourself and leave some money in the box. There’s even a bowl of water for dogs!
Oh, there I go again, getting off course. It happens so often – one thing leads to another, and before I know it I’ve strayed completely from where I was going. Well, at least now you’ve had a tiny glimpse of our holiday at home.
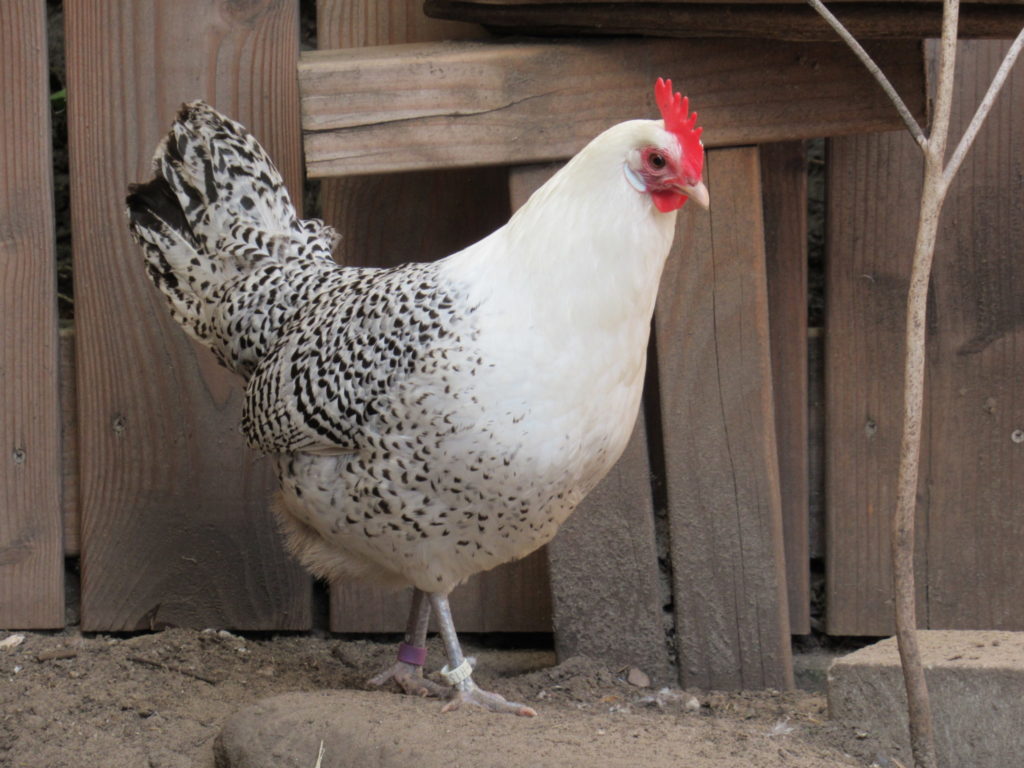
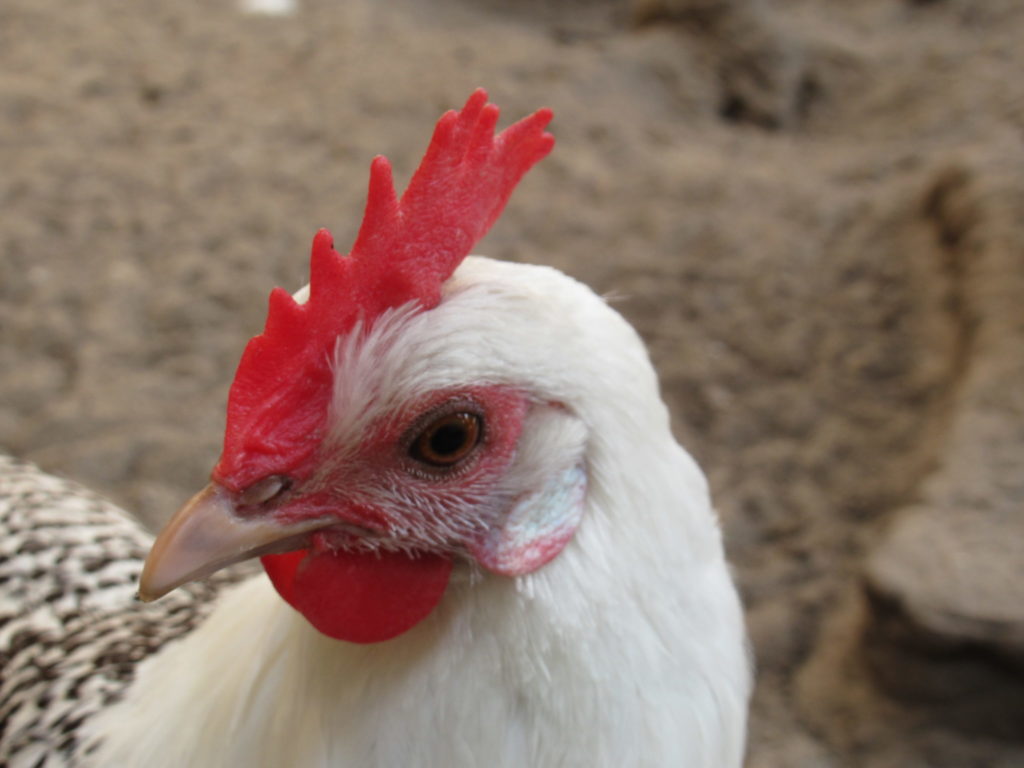
What I had planned to do today, was give you a recipe. I may have told you before that we have a flock of hens – 8 hens and a cock to be precise. They are Frisians, and their colourway bears the poetic name ‘silver-pencilled’, which looks like this:
Our hens love tomatoes, corn, worms and taking dust baths. Apart from worms, we try to give them everything they wish for. In return, they provide us with more eggs than we can eat. We give lots of eggs away to relatives, friends and neighbours. And we’re always trying to think up new ways of using eggs ourselves.
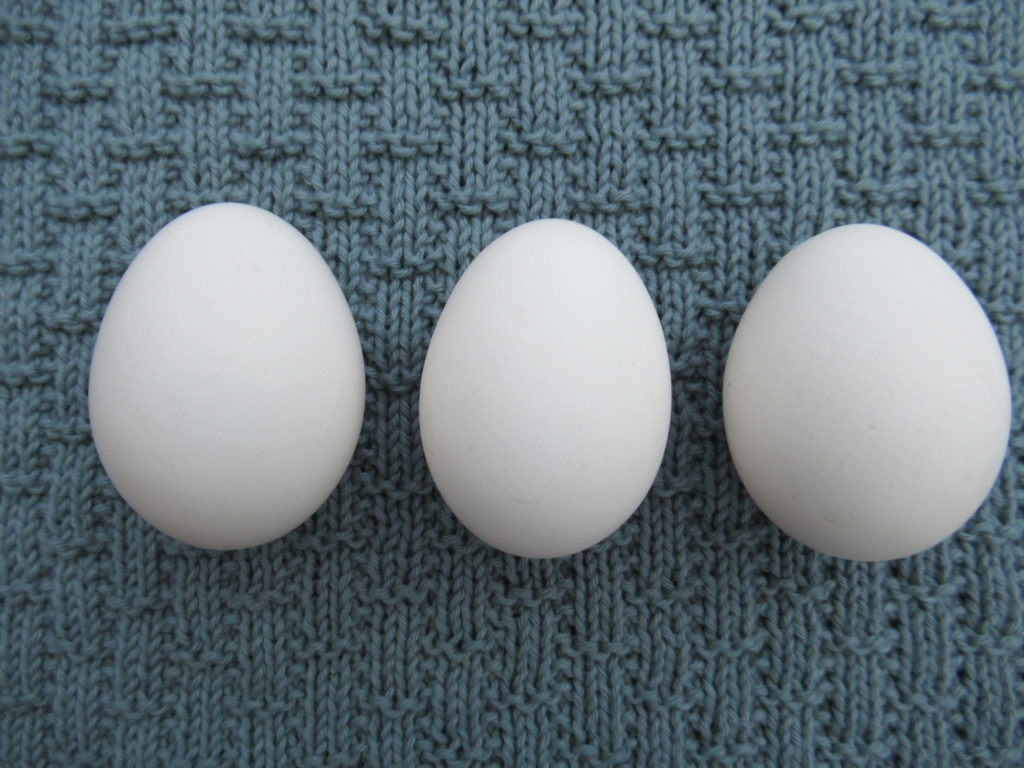
The eggs are pure white and fairly small. I use 3 of these for 2 medium shop-bought ones. Some are oval and pointy, while others have a more rounded shape:
(I photographed the eggs on one of the dishcloths I’ve been knitting. More about those in another blog post soon. Or perhaps not so soon. There are so many ideas for posts whirling about in my mind that I don’t know where to start.)
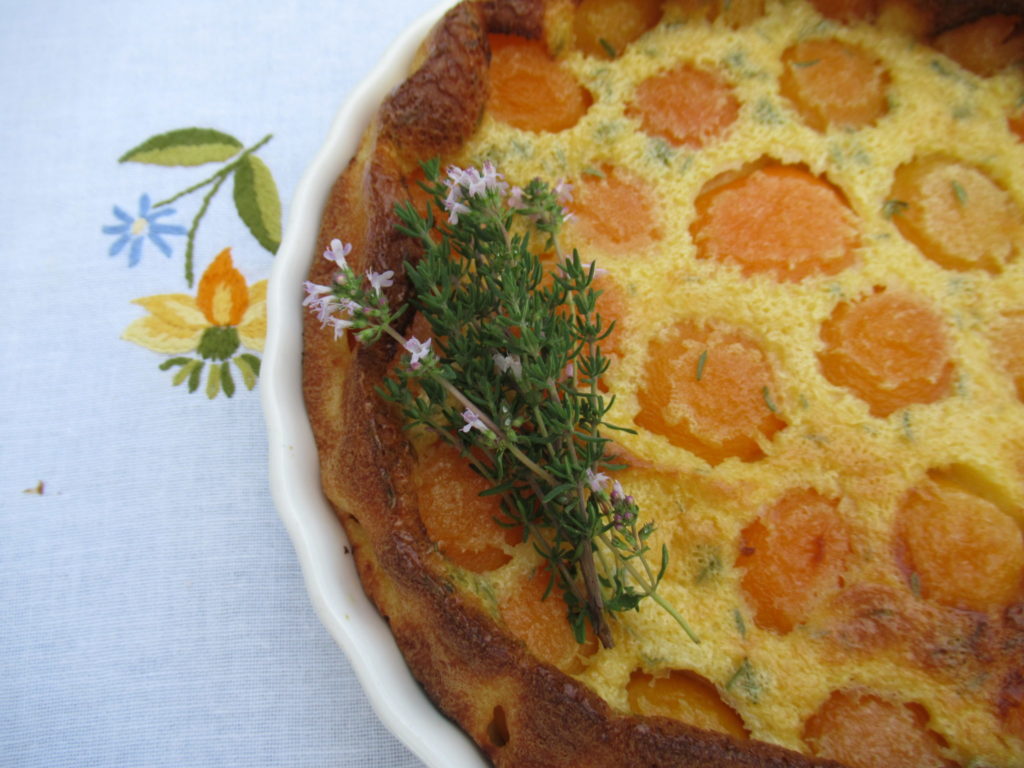
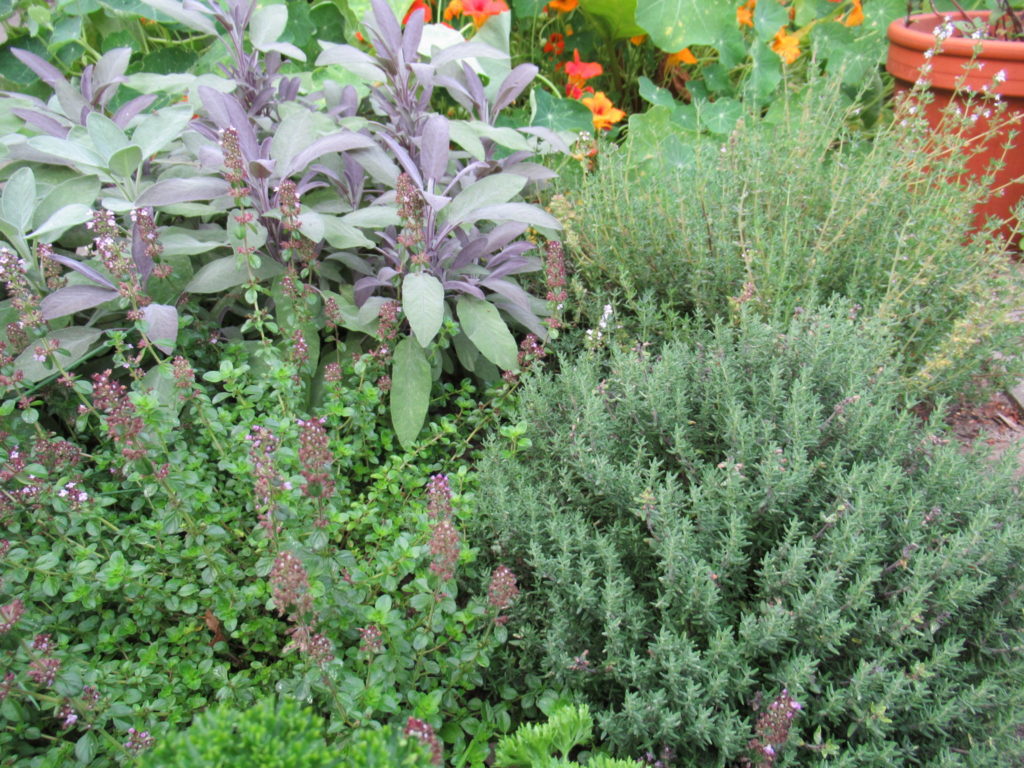
Besides eggs, we’re also trying to use as many herbs in our cooking as we can too. This time I’m using thyme. We have three different varieties in our herb patch. Use any thyme you like – dried thyme from a jar is fine, too. Don’t use too much, though. It can be overpowering in combination with fruit.
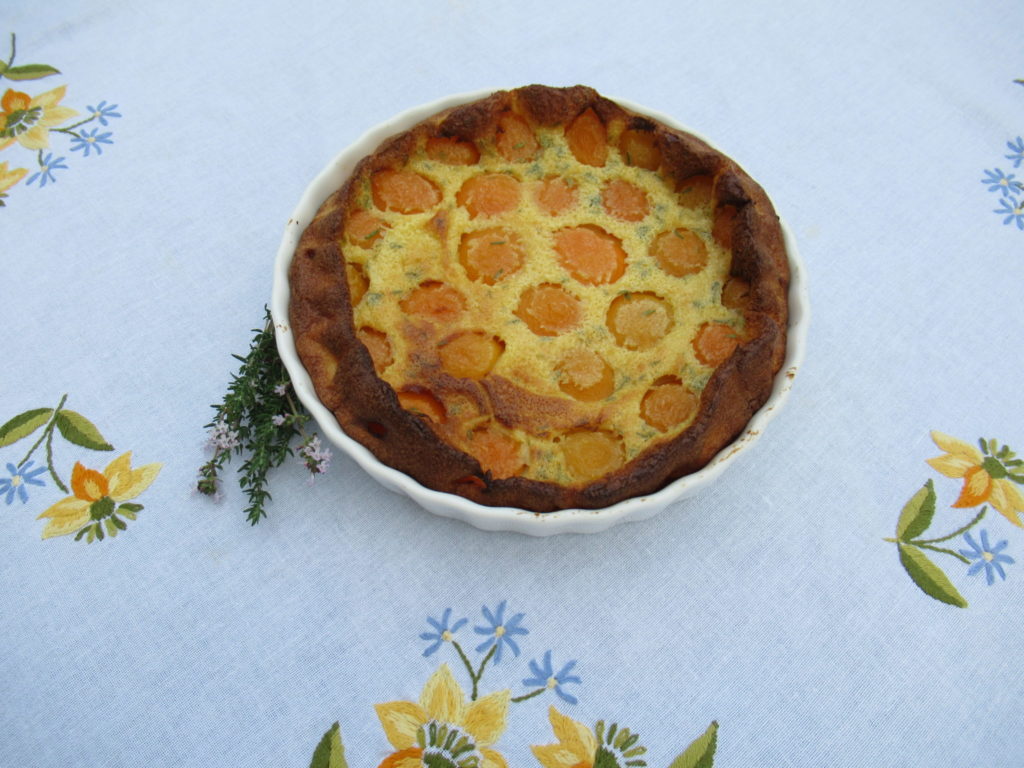
The recipe below is for a Clafoutis – a French dessert that is usually made with cherries, but can also be made with plums or other fruit. I chose apricots because I thought they would work well with thyme. (I used canned apricots, because we can hardly ever get any fresh ones, and when we can they are often dry and not very tasty.) Here’s my recipe:
Apricot and Thyme Clafoutis
For a Ø 22 cm pie dish, serves 4
Ingredients
3 small Frisian eggs (or 2 medium shop-bought eggs)
150 ml milk
50 g flour
270 g tinned apricot halves (drained weight)
a few sprigs of fresh thyme (or ¼ tsp dried thyme)
1 tbsp butter + extra for greasing
50 g sugar
pinch of salt
icing sugar for dusting
Method
Preheat the oven to 200 °C (fan oven 180 °C).
Grease the pie dish
Sieve the flour together with the salt and sugar.
In a separate bowl, loosely whisk the eggs with half of the milk. Stir the egg-and-milk mixture into the flour little by little to a smooth batter. Melt the butter. Whisk the rest of the milk and the butter into the batter.
Distribute the apricot halves over the pie dish (hollow sides down). Pour over the batter and bake in the oven for 30 minutes.
Eat warm or cold, dusted with icing sugar.
Enjoy!
The table cloth underneath the oven dish was embroidered by my late Mum. She was a great knitter, too, but she loved embroidering these colourful pre-printed table cloths most of all. For me, there are many good memories attached to it.
Well, I hope you’ve enjoyed my ramblings and my recipe. And I hope to get back to some serious knitting in my next post, because I’ve received some urgent questions from readers that I need to look into…