This post is looooong overdue. It’s the third instalment in a series of posts about ‘Stay Soft’, a shawl design by Veera Välimäki. I’d intended to write a step-by-step description of my knitting process way back in June, but… On the one hand, I got caught up in all kinds of new projects. And on the other, I felt unsure. Would people really be interested in reading about my knitting projects in so much detail?
But then two members of my knitting group asked: ‘How is your shawl coming along? You know, the one we helped you choose the pattern for?’ And I also started getting questions from readers, along the lines of: ‘Please explain how you knit the last part of Stay Soft, because I’m stuck.’ Apparently people do want to read about it, so here we go. (There’s a list of useful links at the bottom of this post).
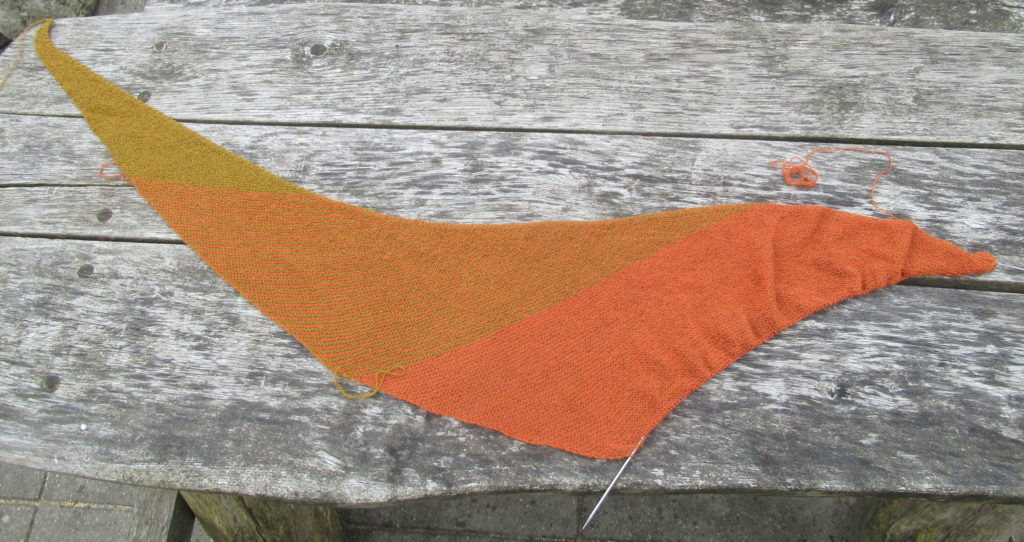
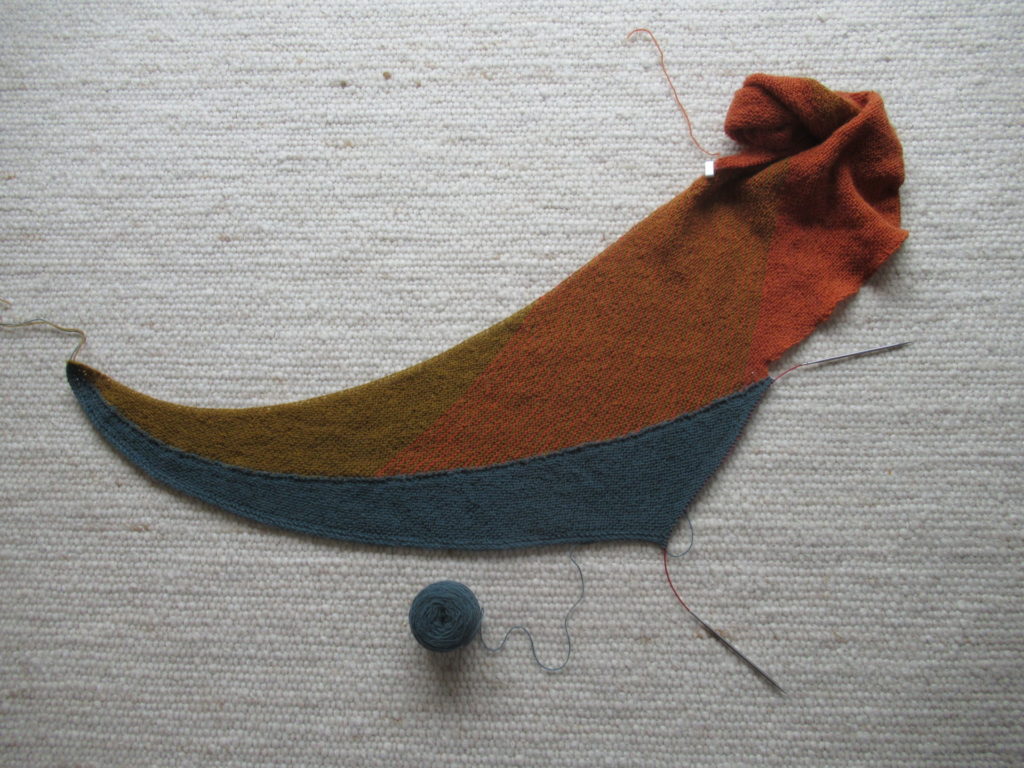
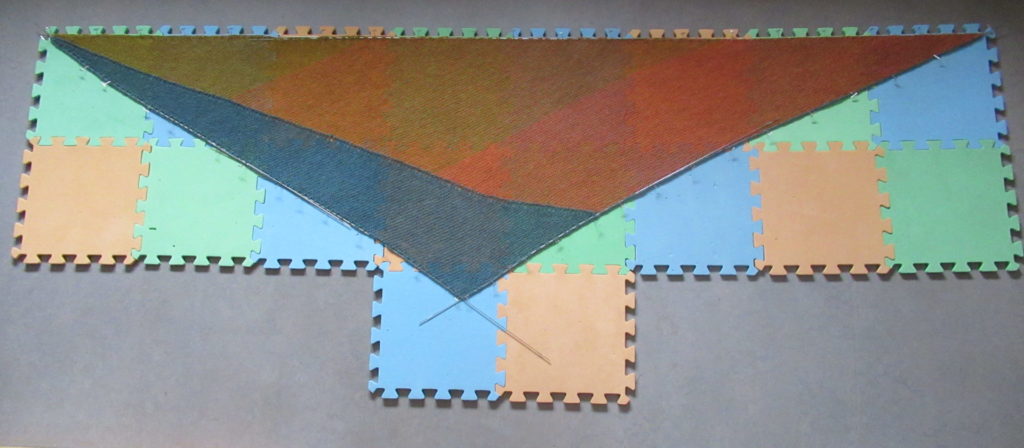
The previous instalment ended after the third part, called ‘Coral Part’ in the pattern. This is what the shawl looked like at that point:
These first 3 parts are fairly straightforward. Now we get to the hardest part of Stay Soft, the part starting with the heading ‘Yellow Speckled Part’. Although there aren’t any mistakes in the pattern, and all the information is there, I still had some trouble figuring out exactly what to do.
First a note about the colours, though. To avoid confusion, these are the colours used by the designer and the ones I used:
Pattern: MC white speckled; CC1 coral-pink; CC2 yellow speckled
My version: MC yellow; CC1 orange; CC2 grey
After the first three sections (called ‘Main Color Part’, ‘Stripes’ and ‘Coral Part’ in the pattern), stitches need to be picked up in the second contrast colour (CC2). The pattern says: ‘Use the same needle and CC2’, but I used a different needle, as suggested later on in the pattern. To my mind, this makes it so much easier.
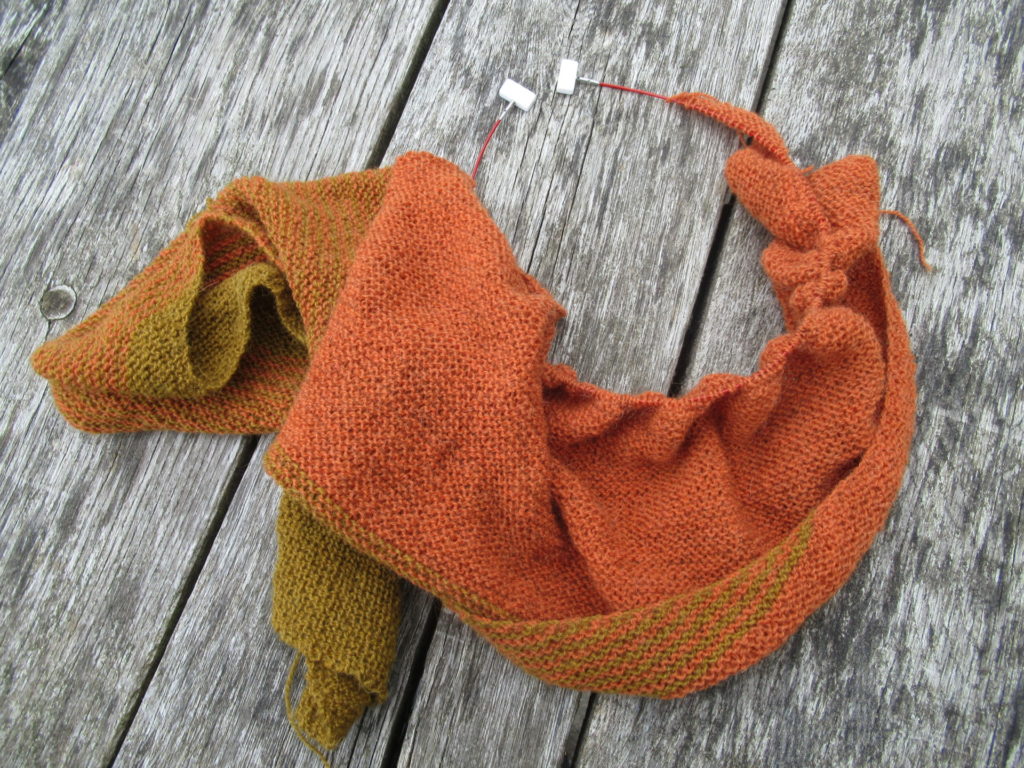
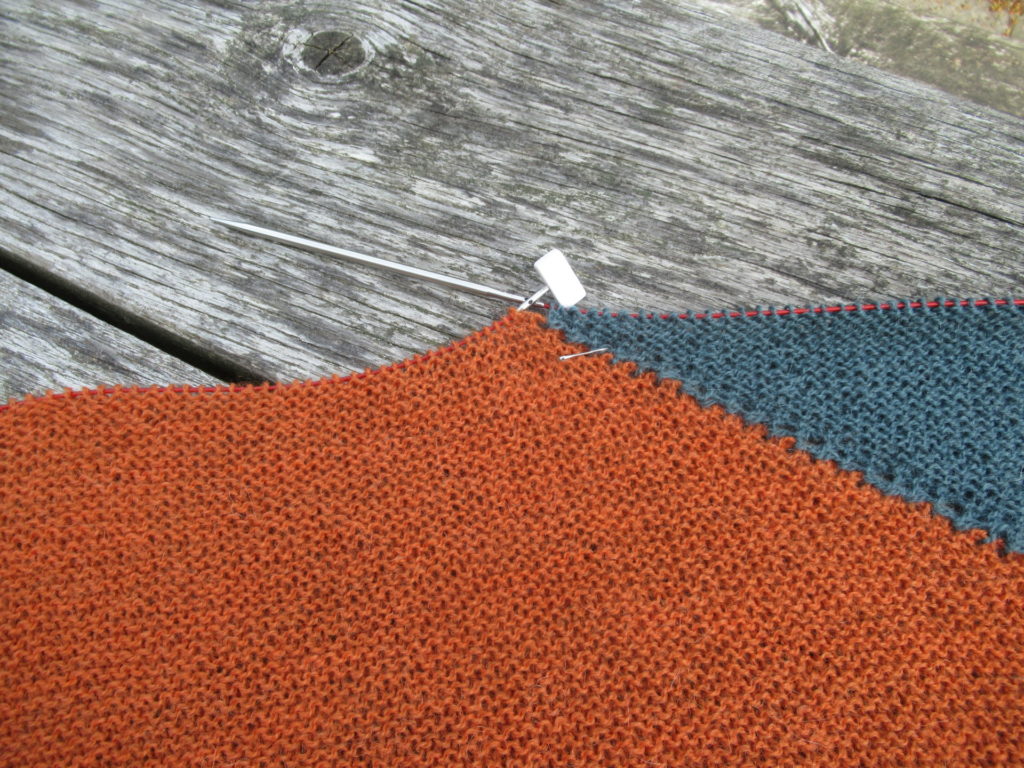
I used interchangeable circular needles. This means that I unscrewed the tips from the cables, screwed them onto another cable, and screwed end stoppers (the rectangular white things in the picture below) on the cable with my orange live stitches. At this point I cut CC1.
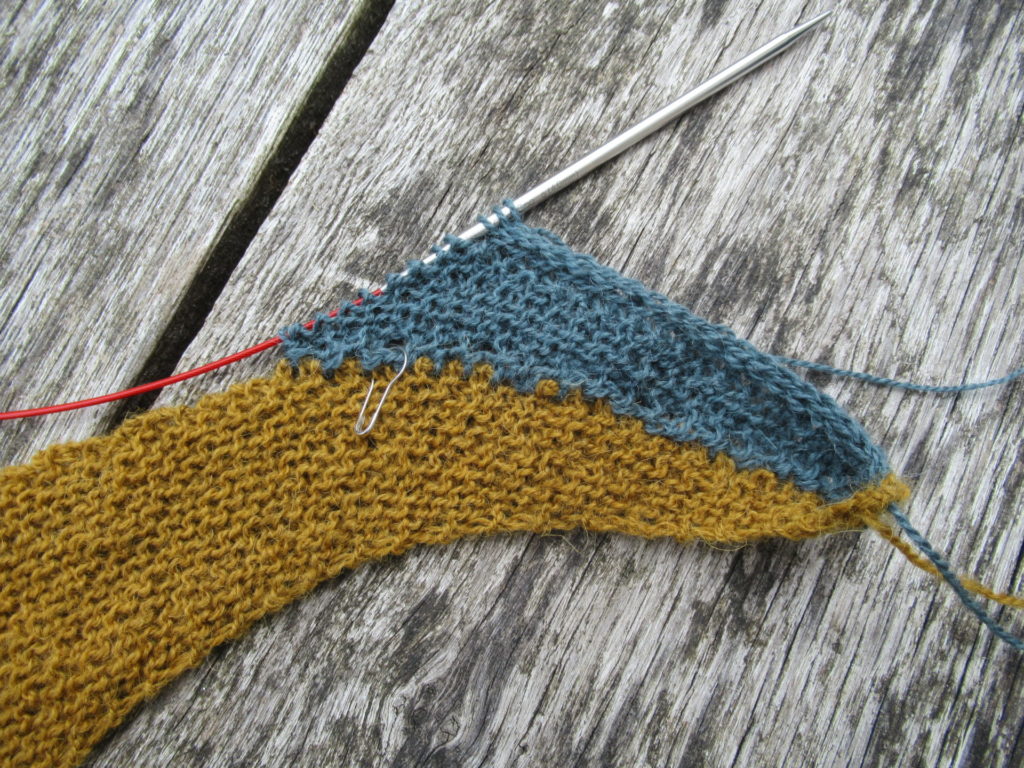
Then the pattern says: ‘pick up and knit 5 stitches starting from the cast-on corner of the shawl.’ And here it gets tricky. Where and how do we pick up these stitches?
After taking a good look I found out where to start picking up stitches. It’s at the tip the knitting needle below is pointing at – the very first stitches knit in the first colour (MC). And the stitches should be picked up on the right-hand side.
So, with CC2 and another needle the same size, and with the right side (RS) of the shawl facing, I picked up and knit 5 stitches, starting from the point indicated above. After a few tries, I picked up a stitch EVERY row (not in every ridge, which would be every other row), because otherwise the corner pulled and curled up.
For the next row (WS), the pattern says. ‘Knit the first two stitches, and slide the remaining 3 stitches onto right-hand needle as if to purl’. This made me scratch my head again – should the yarn be held in front or in back? As it turns out, the yarn should be held in front. So: After picking up 5 stitches, turn your work, knit the first 2 stitches, bring yarn to the front, and slip the next 3 stitches purlwise (as if you were going to purl them, but without actually purling them) with the yarn held in front of your work. Then turn your work and knit rows 11 – 18.
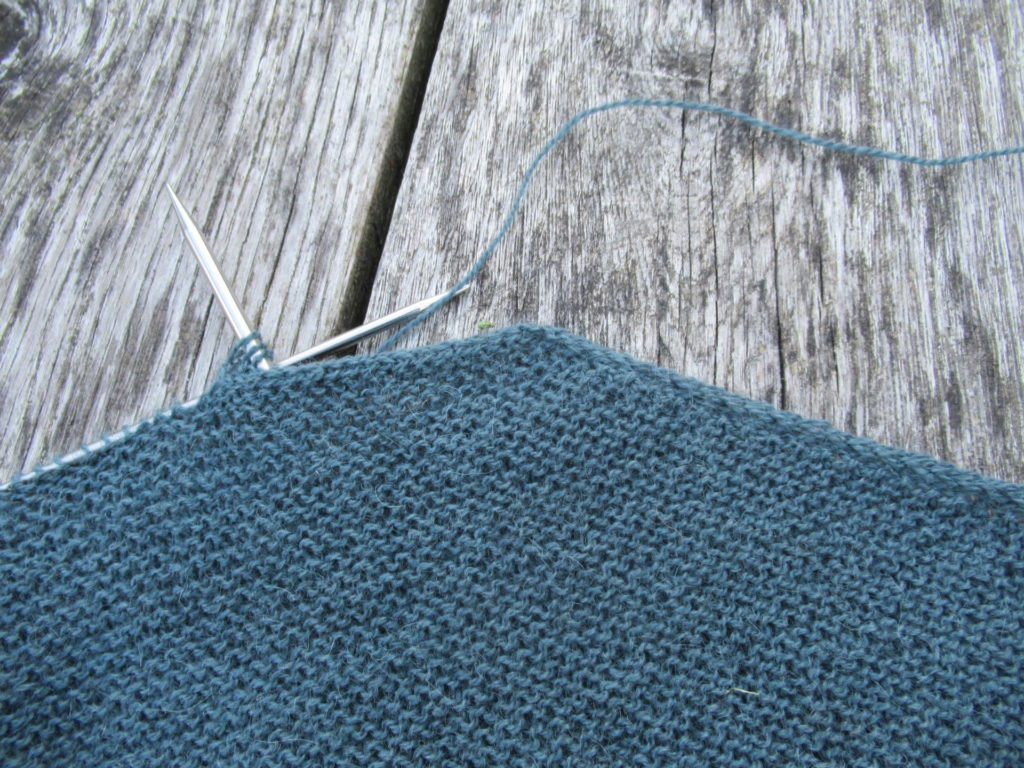
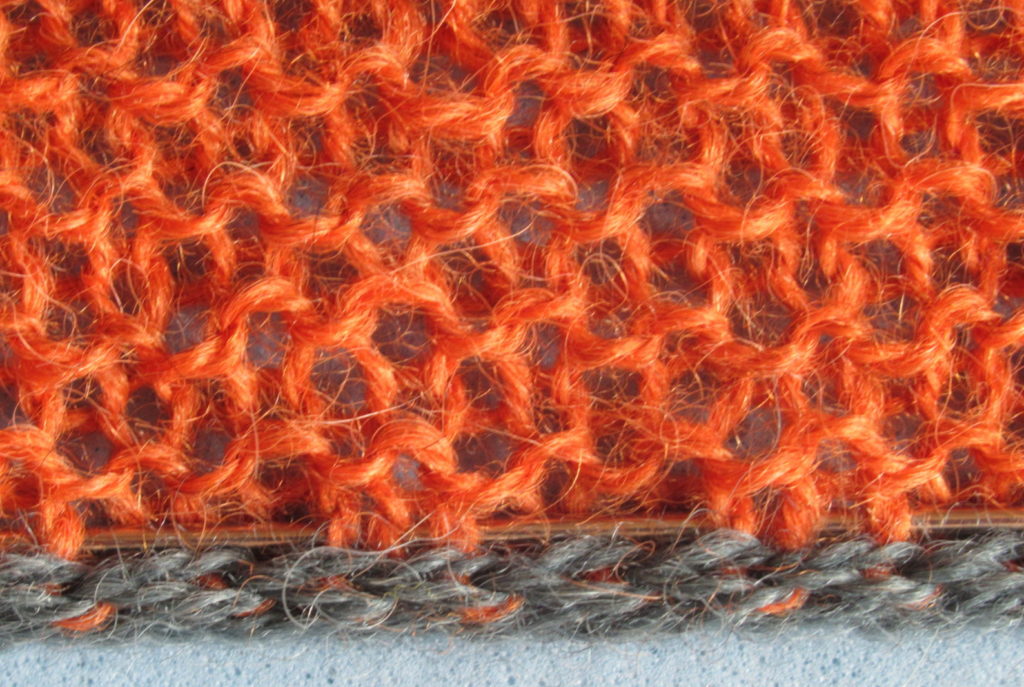
Slipping the last 3 stitches with the yarn held in front gives a sort of I-cord edge. When you’re just starting this edge it doesn’t look very nice or neat, as you can see in the picture below. But it will get better as you continue.
After that, rows 13 – 18 are repeated until the corner is reached, where the live stitches of the ‘coral part’ are waiting.
In this section, 1 stitch is increased in all right side (RS) rows by knitting 1fb, but this is neutralized by knitting 2 sts together in the same row. Only in row 17 it says k1fbf (instead of k1fb), so only in this row 1 stitch is increased. It is important to keep track of this, but I found it impossible to see where I had increased a stitch. To keep track of the increases, I placed a locking stitch marker immediately after I’d knit a ‘row 17’. And as soon as I came to the next increase row, I moved the stitch marker there.
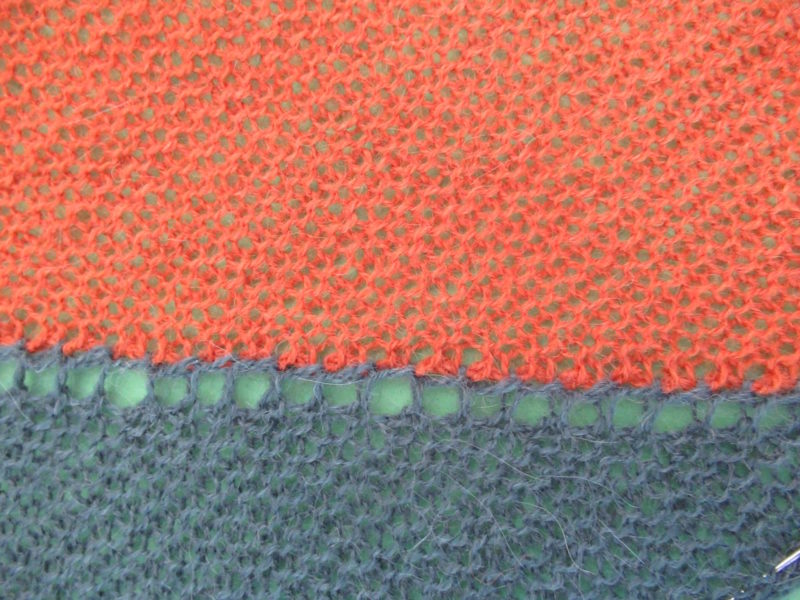
Knitting on like this, a knitted on I-cord edge is formed on the ‘outside’, and a row of holes along the body of the shawl. At first it doesn’t look very attractive, but after a while the edge becomes really neat, and it becomes visible how the part in CC2 brings everything nicely together.
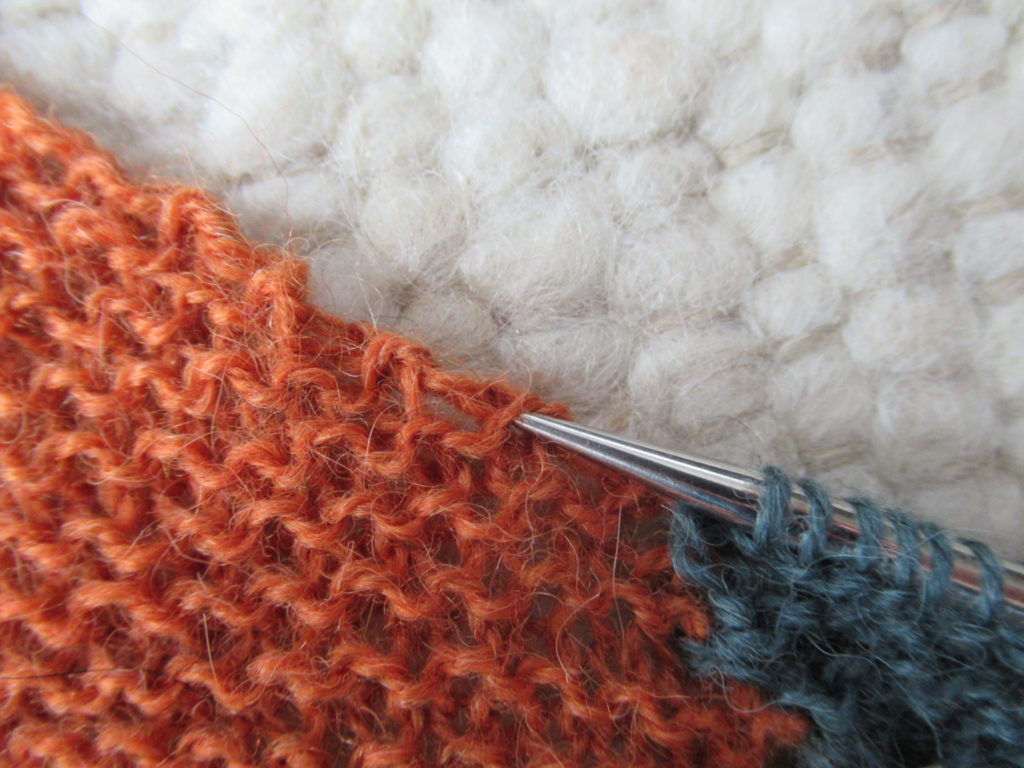
The next picture shows where exactly I picked up the stitches in the RS rows – just below the ‘curve’ or ‘bridge’ of the last knit stitch.
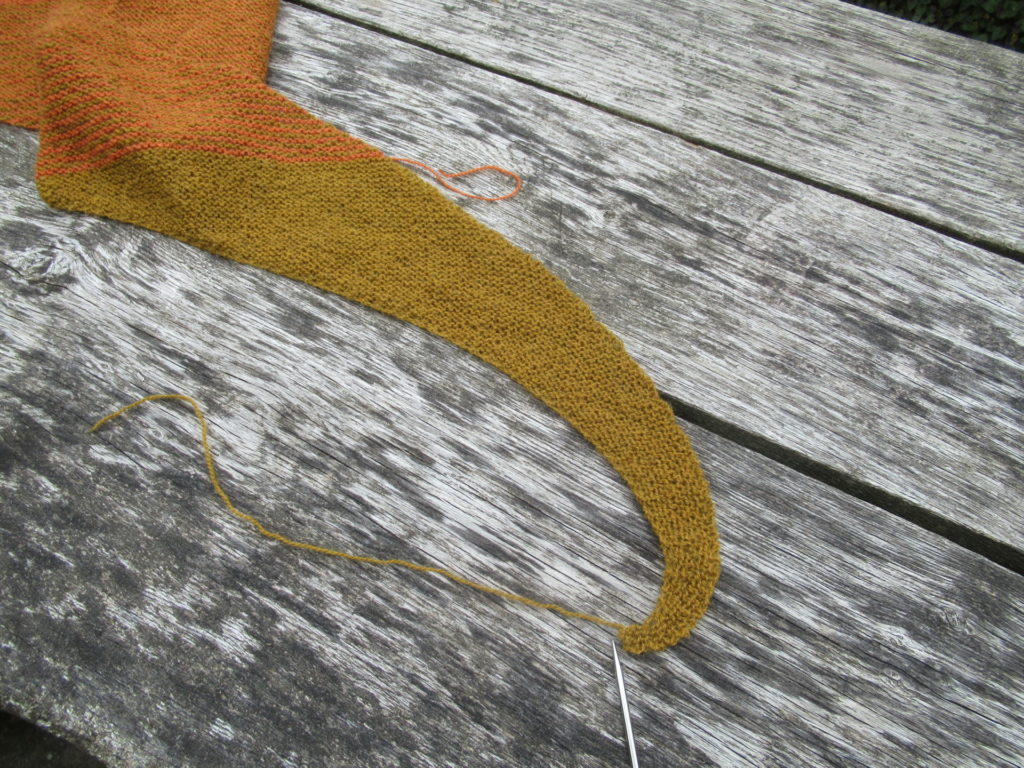
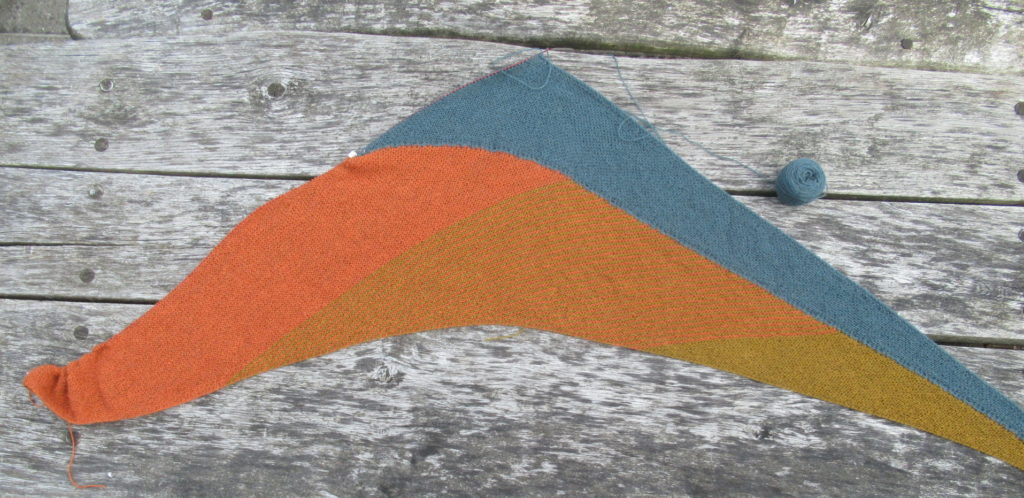
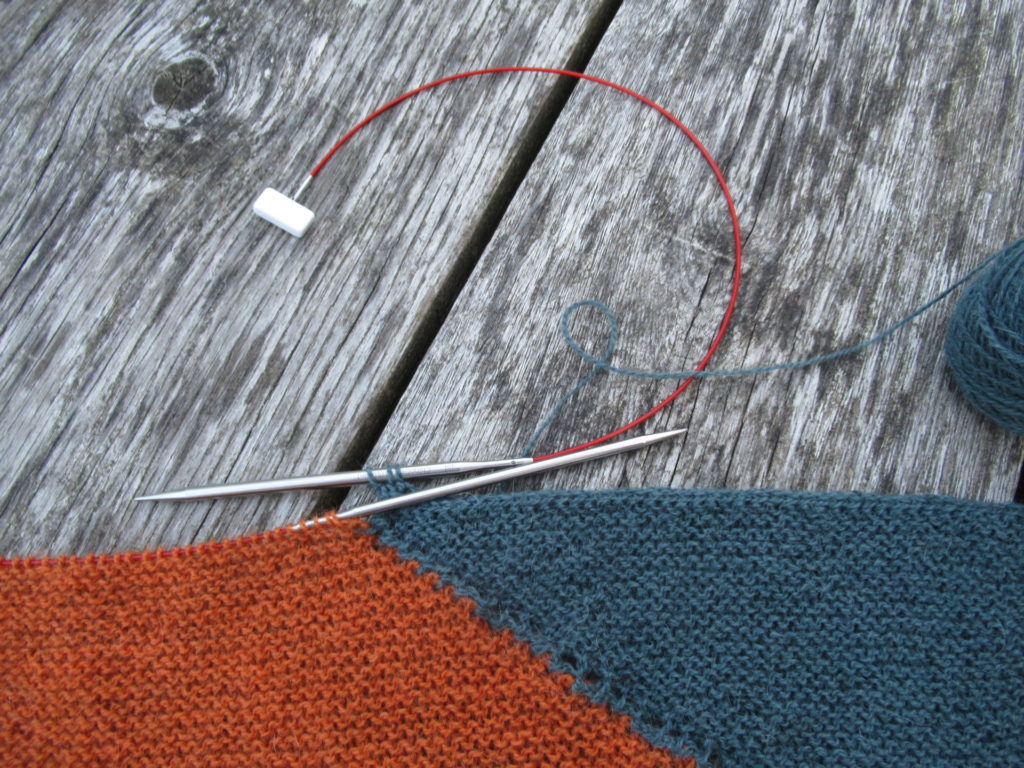
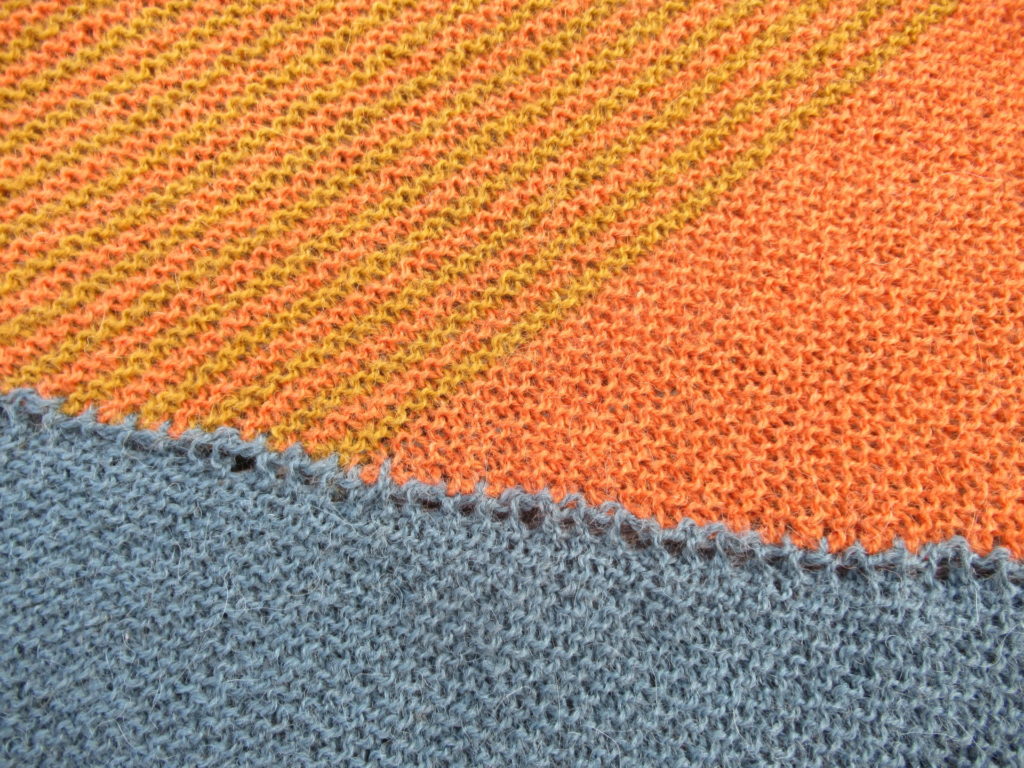
After knitting everything described on page 4 of the pattern, the shawl looks like this:
The needle in the grey part meets the end stopper on the cable in the orange part:
Time to start the I-cord bind-off along the end of the grey section. After about 10 cm/4 inches I noticed that this I-cord was much tighter than the knitted-on I-cord along the side of the grey section. I unraveled it carefully and started again with a thicker needle tip (5.0 mm instead of the 4.0 mm needle I used so far). Yes! Now both I-cords were similar.
Upon arriving at the orange section, I changed the end stopper for a thicker needle tip (in my case 5.0 mm) and continued the I-cord bind-off.
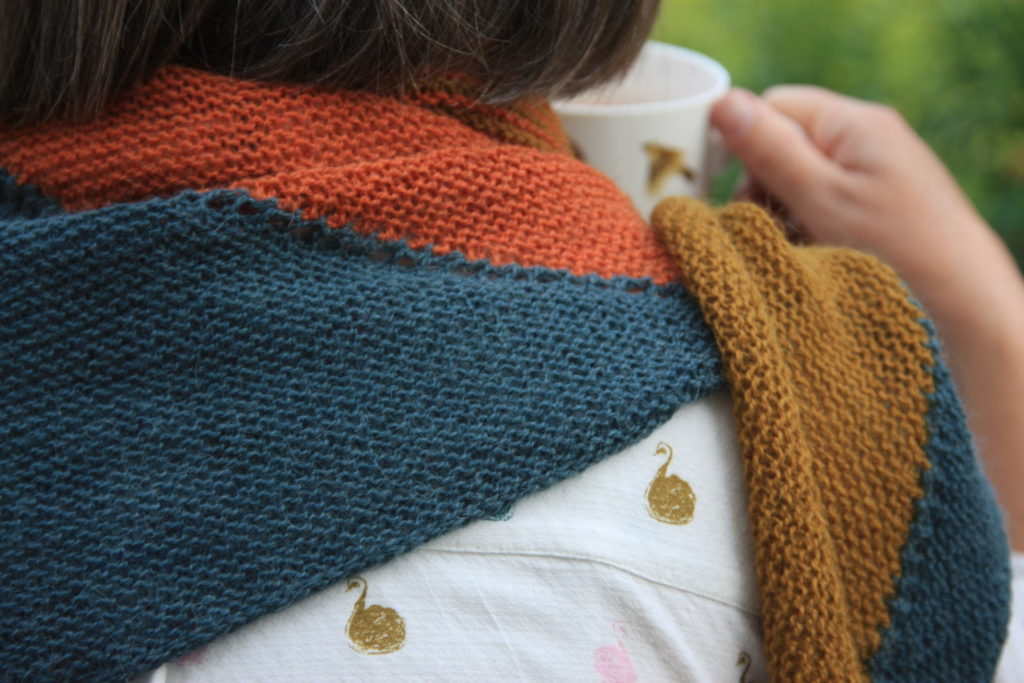
The knitted-on I-cord is just a small detail, but just look at it. It changes Stay Soft from an OK shawl into a fabulous shawl, don’t you think?
After the knitting is completed, it’s time to block the shawl. I think blocking is essential – it makes all the difference. After soaking the shawl in a non-rinse wool detergent (I used Soak, but Eucalan or any other brand works just as well) I spread it out on blocking mats. I threaded blocking wires through the knitted fabric along the edges.
I threaded the blocking wires through the stitches inside the I-cord edges:
While I was knitting I was a bit worried about the row of holes between the body of the shawl and the knitted-on part. They looked terribly irregular. Fortunately that was solved by blocking, too.
What a difference!
Before blocking
After blocking
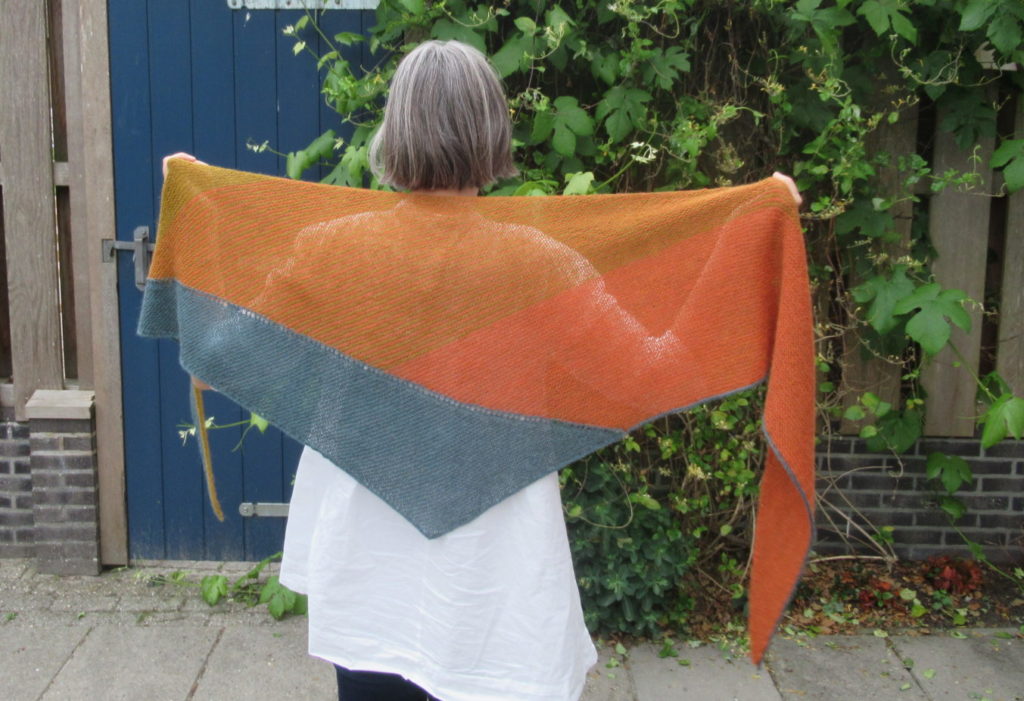
And that’s it – the shawl’s all done!
I used a thinner yarn than indicated in the pattern (fine fingering instead of ordinary fingering), which gives a nice and airy shawl. When the light falls through it, it looks slightly transparent.
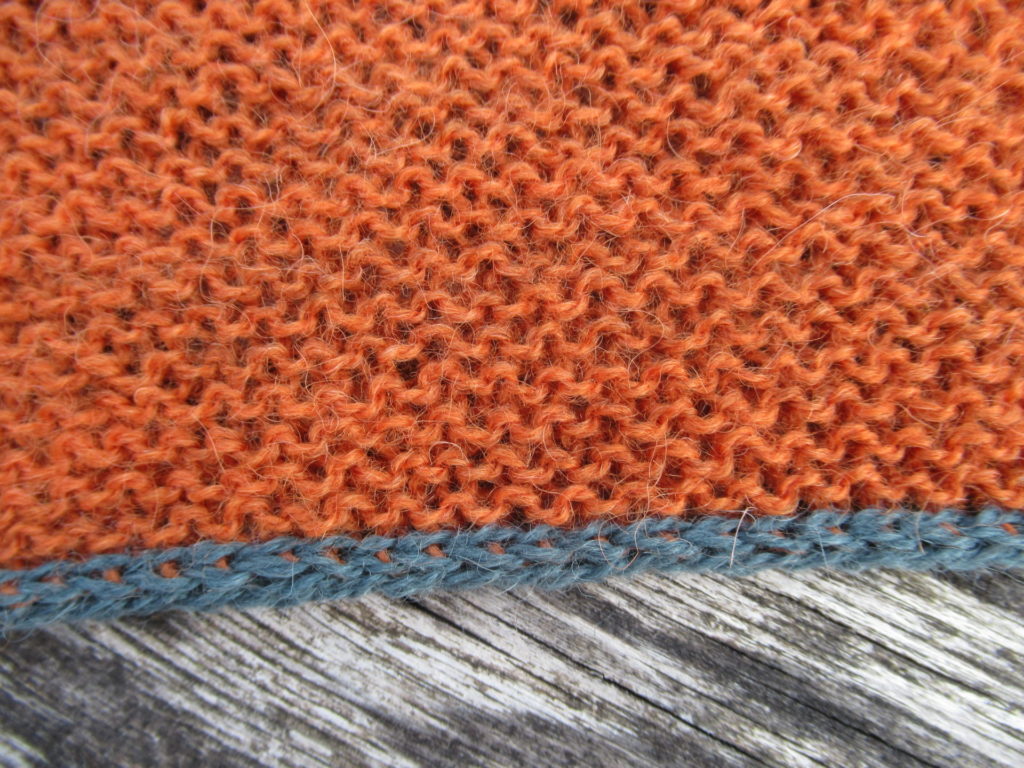
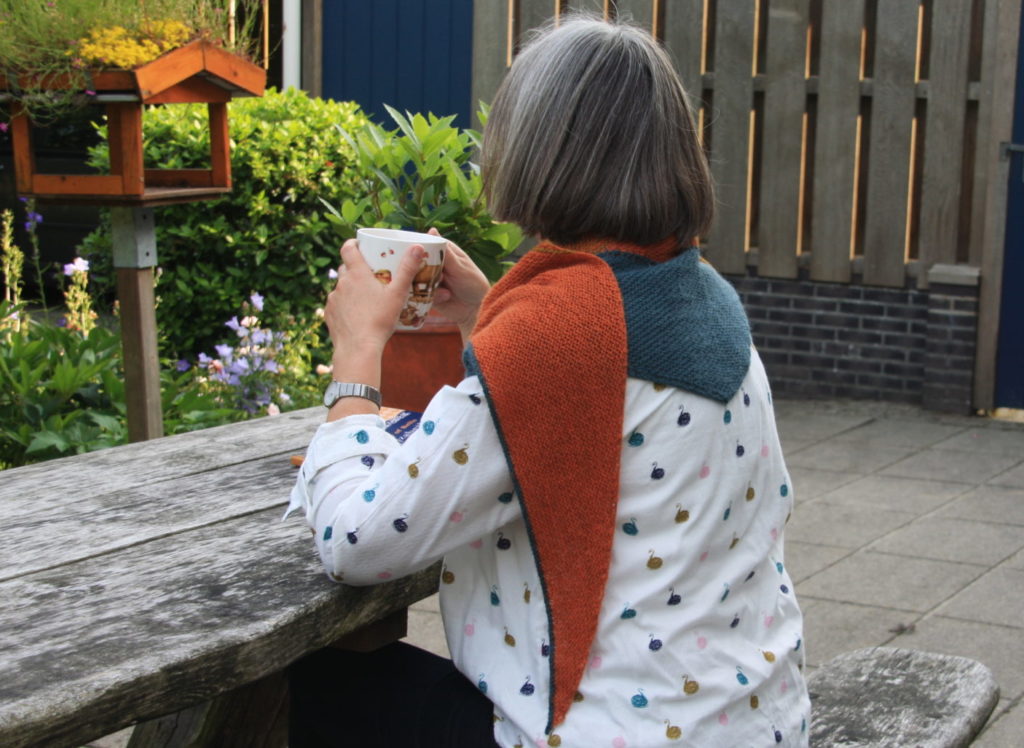
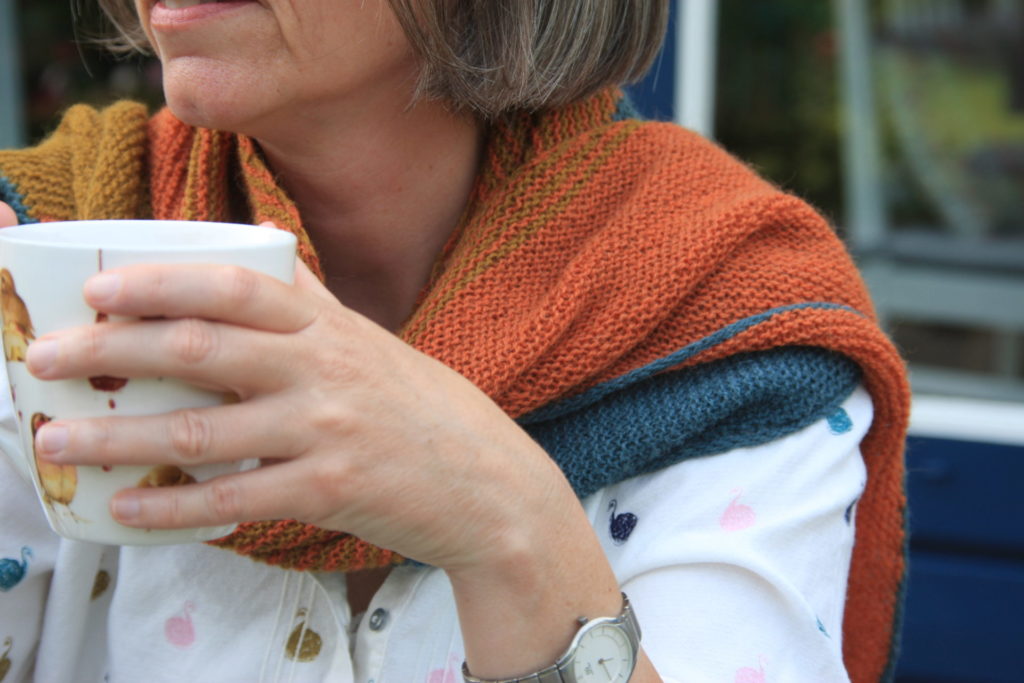
But wrapped around the neck, it is really cosy. Below you can see how the I-cord in a contrasting colour gives a nice crisp edge.
Needles: 4 mm/US 6 and 5 mm/US 8 (the thicker needle only for last stretch of I-cord)
Finished size after blocking: Wingspan 213 cm/84 in; Middle to tip: 57 cm/22.5 in
I think it’s a very wearable, good size shawl from just over 100 grams of yarn. For me, Stay Soft was a really, really enjoyable pattern to knit, in spite of (or perhaps rather because of) all the frogging and puzzling out how to get it right.
Phew! This may very well be my longest blog post to date. At least it was the most complicated one to compile. Thank you dear knitting friends and readers for giving me the motivation to do it.
I hope everything makes sense. If there’s anything that isn’t clear, or if you have any other questions, please leave a comment. I’ll try to answer as best as I can.
Thank you so much for posting this! I was completely stumped with how to finish the project until I read your post. Mt shawl is now almost ready for blocking!
It’s good to hear that my post was helpful. Enjoy wearing your shawl!
Yasss! Thank you again for posting about the last part of this shawl 🙂 You were so kind when I reached out to you by writing back with directions before your full post was done (and while you were on vacation no less). So, so appreciated!!!
My pleasure entirely. I love sharing the things I discover while knitting. And thank you, too. If it wasn’t for your question, I’m not sure I would’ve found the courage to write this post.
Ahhhhh!!! Thank-you!
I commented on the previous post before I found this. Beautiful work, thank-you for writing this.
Jen
I hope you’re able to finish this WIP now. And most of all that you can enjoy knitting the rest!
Thank you so much for this post. It was comforting to know what I was doing was correct but you saved me a lot of anguish over this project. So grateful for your time and effort
My pleasure!
You are a lifesaver! I was getting so frustrated with the last part, but now it all makes sense. Thank you!
I’m glad to have been of help. It’s a lovely shawl, but it puzzled me at first, too.
Thank you so much, wonderful work! I was getting frustrated about this last part of project. For me the pattern of Veera Välimäki is not well done, because many people have same problem to understand.
I’m glad my post was helpful and I hope you’ll enjoy wearing your shawl.
A little late to this pattern, but just stumbled across it in looking for an asymmetrical three color option for a yarn trio I fell for. Each skein is just 145yds, so I’m thinking through how to scale this. I have an equal amt of each color. Any insights on proportion for the solid and stripe sections? Also, so as not to run out of my CC2, would I just make the inc (that row 17 you note) less frequent? You clearly have a good sense of the construction, and I fear I’m not up for a big mental challenge after that last 2 years 🙂
Hi there. It’s a long time ago that I knit this, and it isn’t my design, but I took a look at my pattern notes for you. These are the amounts I used: MC 115 yds; CC1 273 yds; CC2 153 yds. In other words, you’ll have a bit of MC left over, will run short of CC1 and will not have quite enough of CC2. It all depends on the type of yarn you have, but supposing you have the same kind of yarn I used (Isager Alpaca 2, a thin fingering-weight), my advice is this. I wouldn’t change anything in the increases (because that would change the shape of your shawl.) Knit as per pattern until running out of CC1. You will probably not have enough of CC2, but will have some MC left, so work the last I-cord edge in MC. In theory this should do the trick, but don’t sue me if it doesn’t ;). Your shawl will be a little smaller, but you’ll use up almost all of your yarn. I hope that knitting all those rows of garter stitch will give you some new mental energy. And here is another idea: from this amount of yarn, you could also knit my cowl design Tellina, that can be found here on Ravelry.
Thank you for your thoughtful reply! I appreciate the detail very much.
Kindly,
Dana
I have to leave a comment. Because I really wanted to thank you!! This saved my life 😀
Glad to have been of help!
Row 19 says to K3, slide sts back on left needle. Do you then knit all to end of row and then start the I-cord bind off at the pointed end and proceed through CC2 and then the CC1 part? Please clarify for me. Thanks.
Your notes have been so extremely helpful. Thanks!
It’s a long time ago that I knit this shawl, and I don’t remember. But taking a look at the pattern now, I think you should take it literally. So for row 19: Knit 3 sts and slide them back on left needle – full stop. That’s it for row 19. Then proceed with row 20 etc. Good luck!
Thank you for writing this. I found this project half done from a long time ago and just got the the end section and thought “I don’t get it” Almost ripped the whole thing out but you saved it and me. Now I will finish it. Glad to have found this.
Thank you again.
That’s great! I’m glad to have been of help. Enjoy your shawl!
Thank you, thank you, thank you!!! I was stuck at just this point and you helped me figure it out!
Glad to have been of help 🙂
Thanks, this text was really helpful!
That’s good to hear!
I found this shawl pattern with yarn in mind and nearly passed up the pattern after reading all the comments. And then I found multiple references to your instructions. Thank you for taking the time to document your process, I now feel confident in picking this project up!
You’re welcome – I enjoyed knitting this shawl and writing about it. Hope you’ll enjoy knitting yours just as much.