Thank you so much for all your kind and supportive words after last week’s post, here and through other channels. While I’m writing this, we’re waiting for the plaster on our walls to dry with as many doors and windows open as possible. I’m using this quiet interlude before the next stage (ceiling repairs) for some focused work, and I’ve finally finished my pattern for a pair of fingerless mitts. Or rather, two pairs.
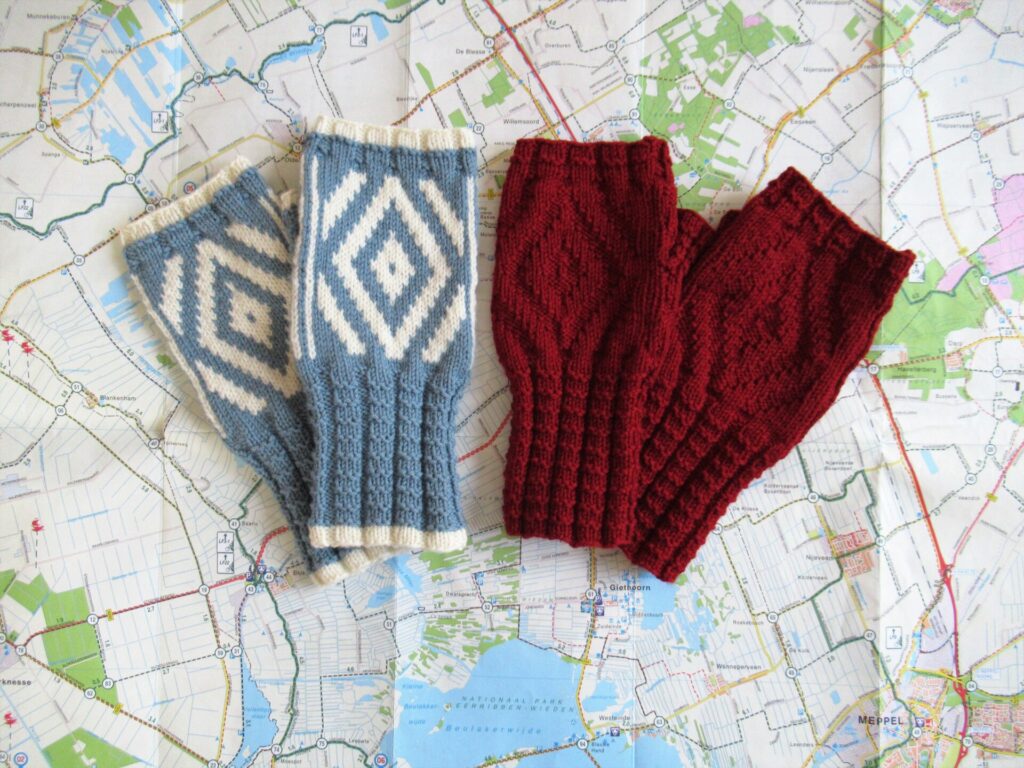
Meet the Gazelle Mitts!
I’ll explain why I photographed them on a cycling map and with a thermos flask further on. First a little about the design.
Taking the inherited knitting sampler I’ve written about before as a starting point, I began visualizing, drawing, thinking, calculating and swatching. After lots of swatches and prototypes I was ready to knit the final mitts in a single-coloured and a two-coloured version. I already had the yarn, but kept changing my mind about which colours to use for which version.
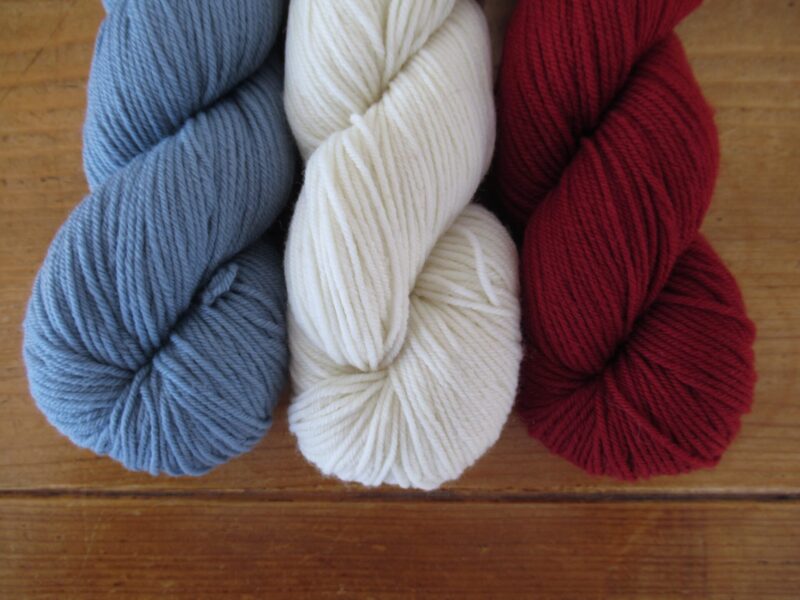
Red and cream together and blue on its own? Or blue and cream together and red on its own? In the end I asked your advice, and you were unanimous: Blue and cream for the two-colour version and red on its own.
So that is how I knit them.
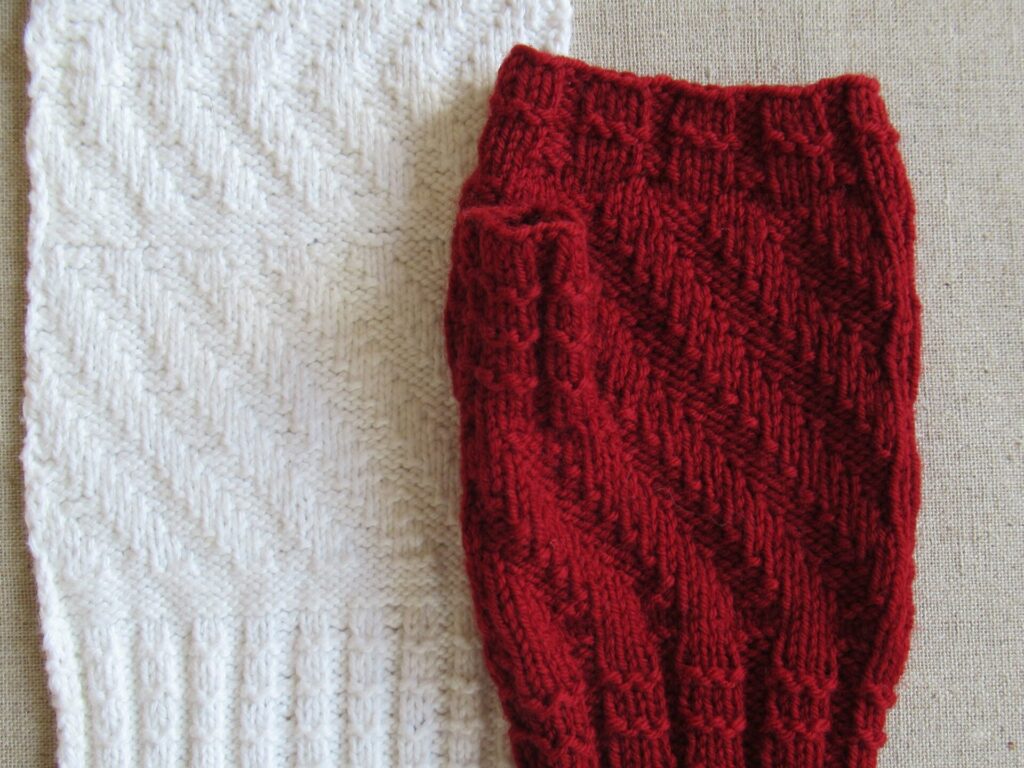
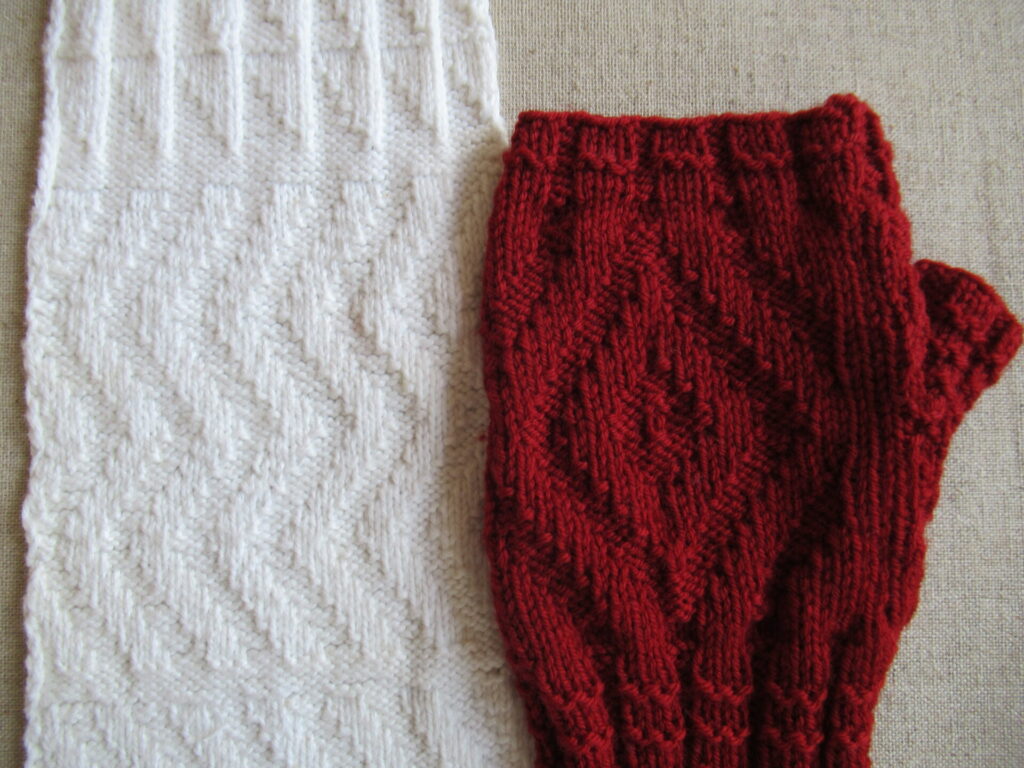
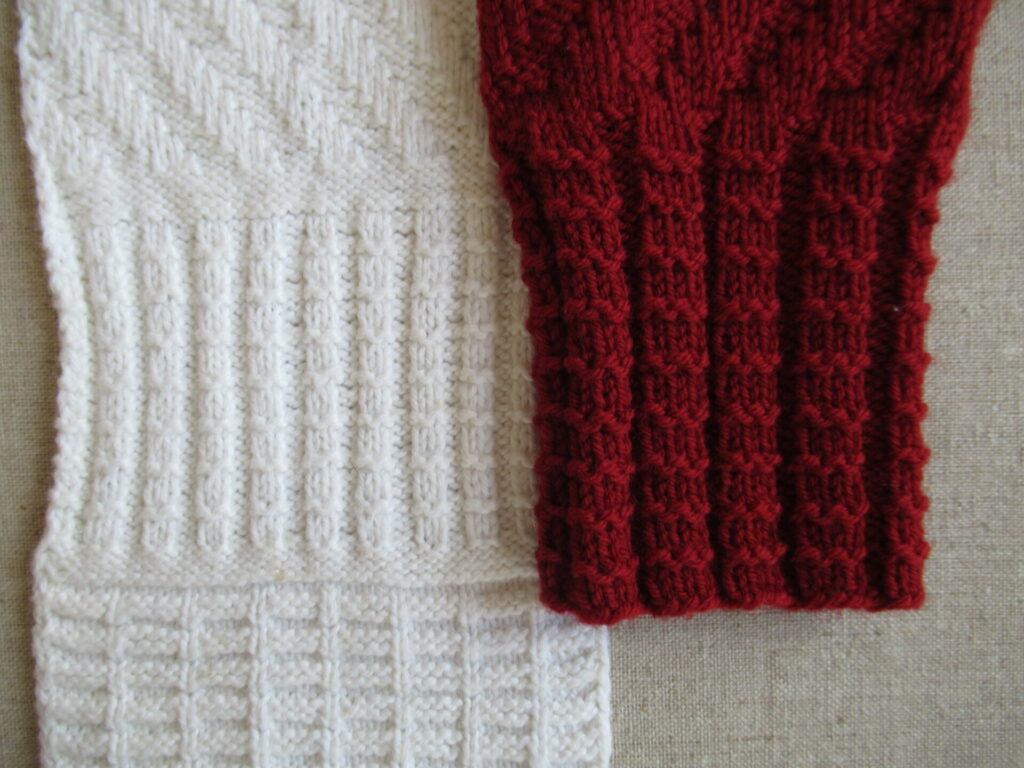
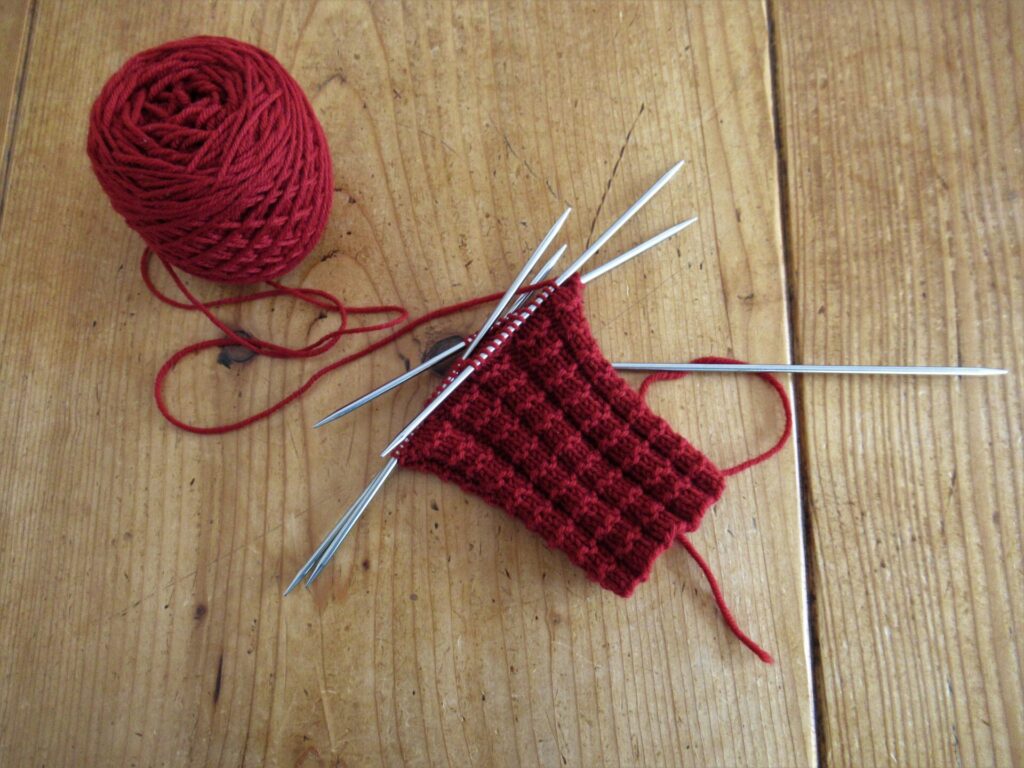
The red single-colour mitts combine three knit-and-purl stitch patterns from the sampler. For the palm of the hand, I used the sampler’s diagonals.
For the back of the hand, I took the zigzags and mirrored them to make diamonds.
And a two-by-two knit-and-purl rib with purl ridges was perfect for the cuffs and thumbs. Only I changed it into a three-by-two rib to link it up with the diagonals and diamonds.
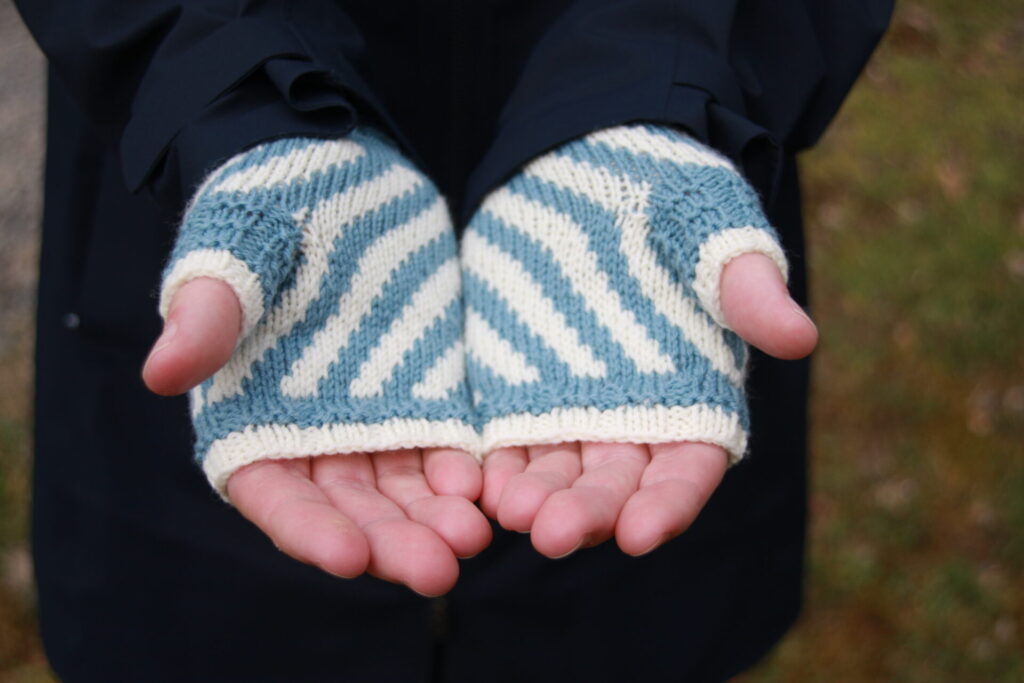
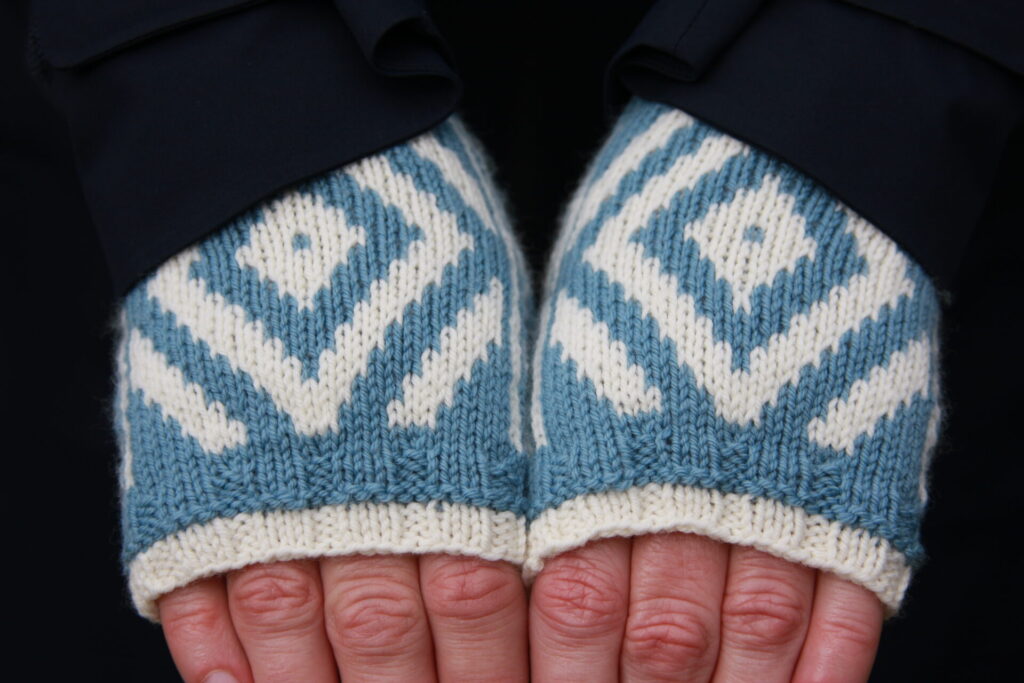
Although they look very different, the two-colour mitts are basically the same. They have the same diagonals and diamonds, and the same ribbing on cuffs and thumbs. Only this time instead of knit and purl stitches on the palm and back of the hands the patterns are knit entirely (no purling) and picked out in different colours.
Diagonals on the palms…
… and diamonds on the backs of the hands.
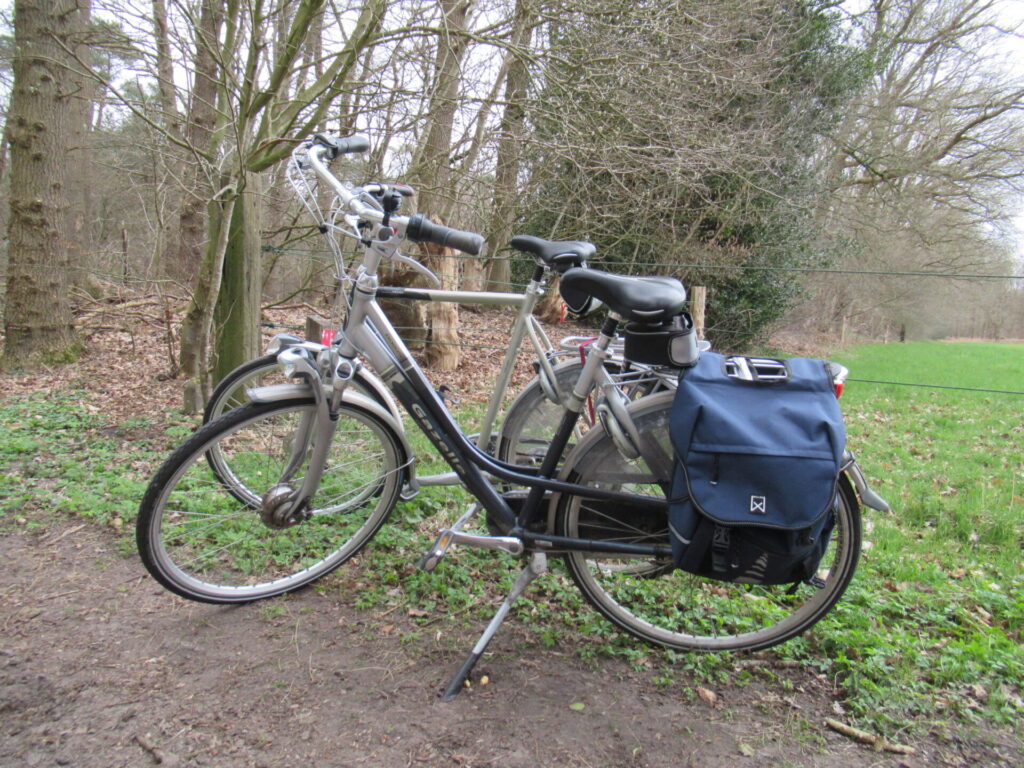
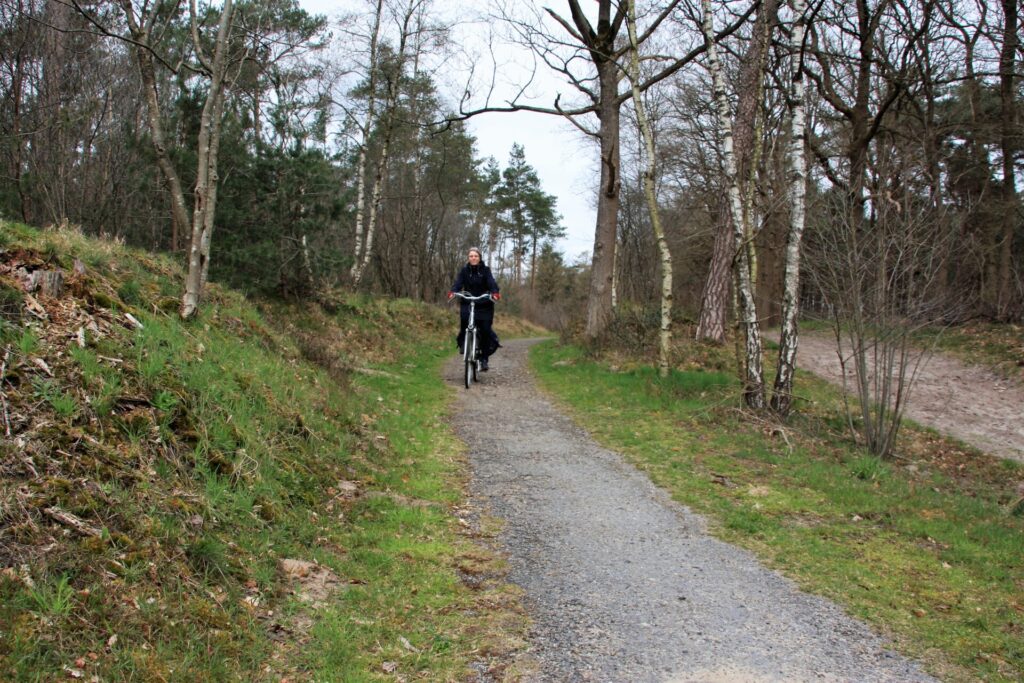
With bicycle rides on chilly days in mind, I named the mitts for my trusty Gazelle bicycle, my friend for over 15 years.
It gives me a sense of freedom and keeps me fit. I’m very much attached to it and not yet ready to trade it in for an e-bike like many people do nowadays.
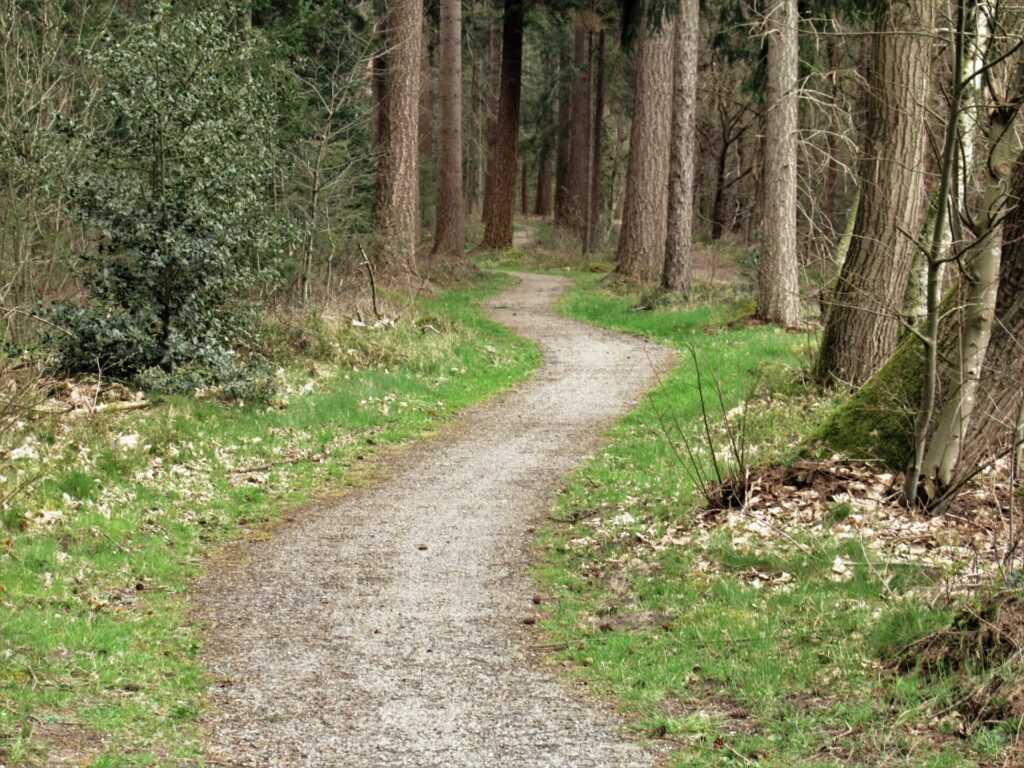
We (well, mainly my husband – thank you!) took most of the pictures for this post along one of my favourite stretches of bicycle track. It meanders through the wood just outside our village.
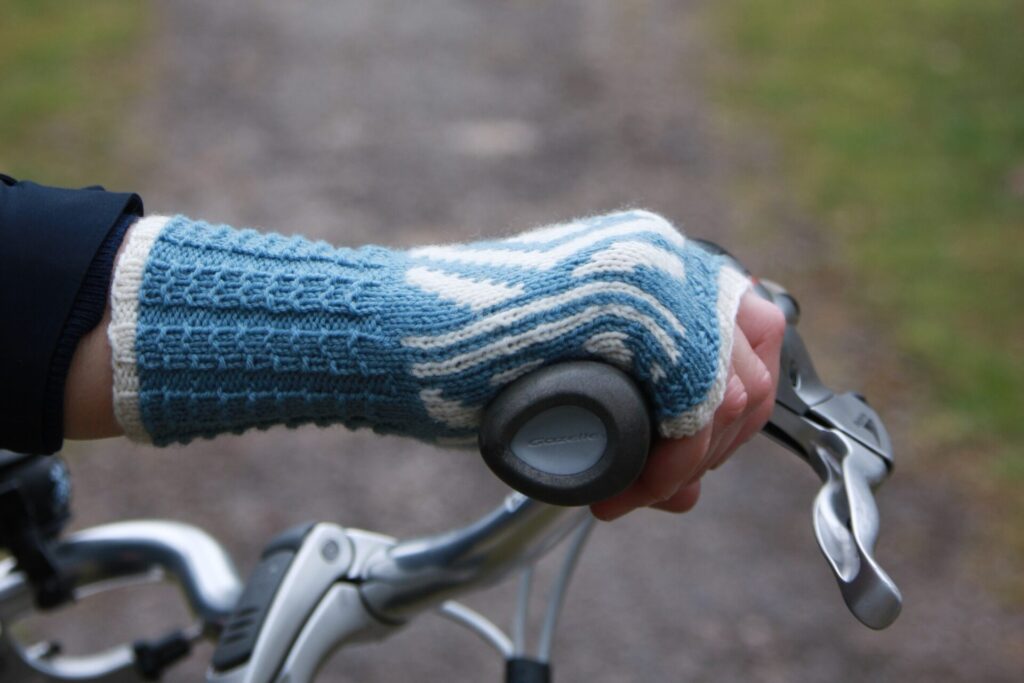
For the picture below, I’ve pulled up my coat sleeve to show you the nice and snug cuff.
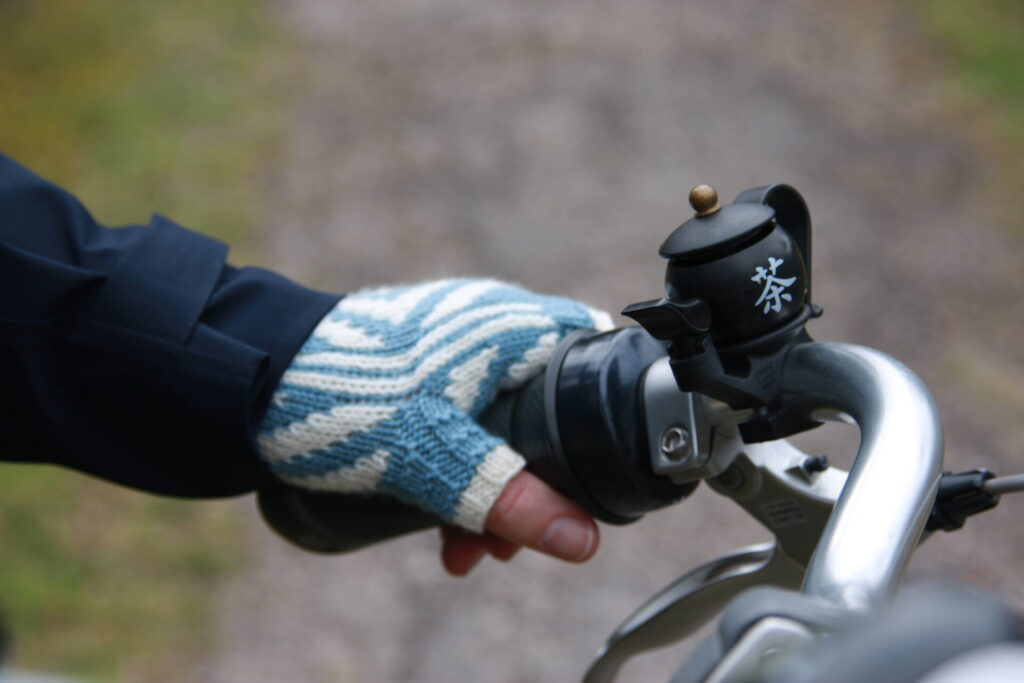
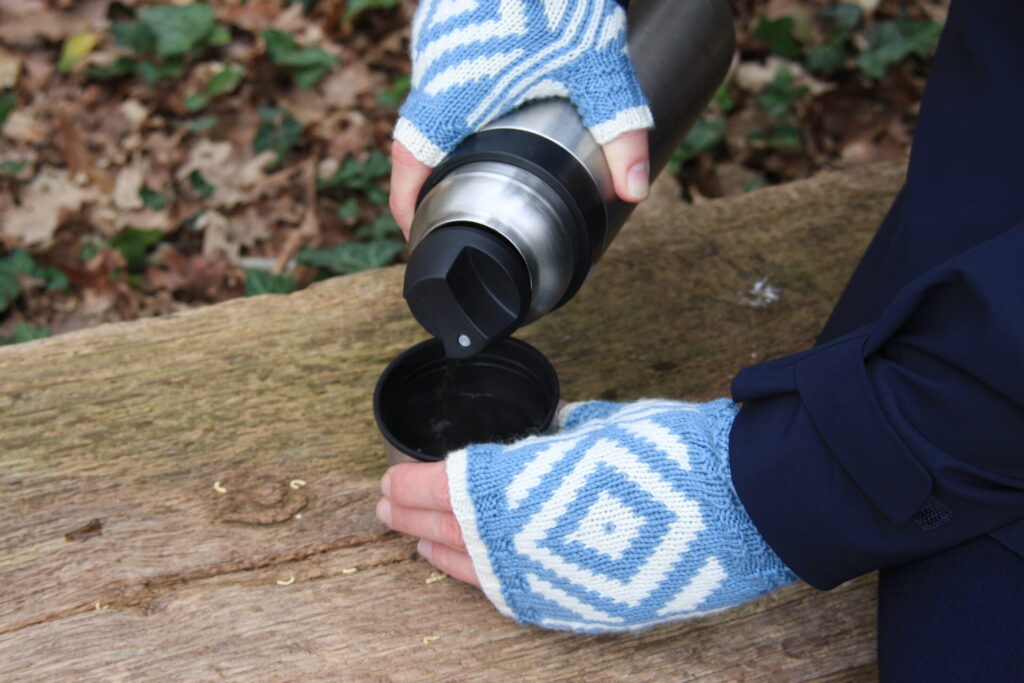
And here is a picture of my bicycle bell. It not only shows you the construction of the mitt’s thumb, but also tells you what my favourite beverage is. If I place my thumb on the teapot spout and release it, it gives off a sharp PING!
On longer bicycle rides, I often bring a thermos flask of tea. (Just for me – my husband prefers coffee.) Coffee-and-tea-to-go places have sprung up during the past year even around here, but they are still few and far between. And anyway I prefer my own.
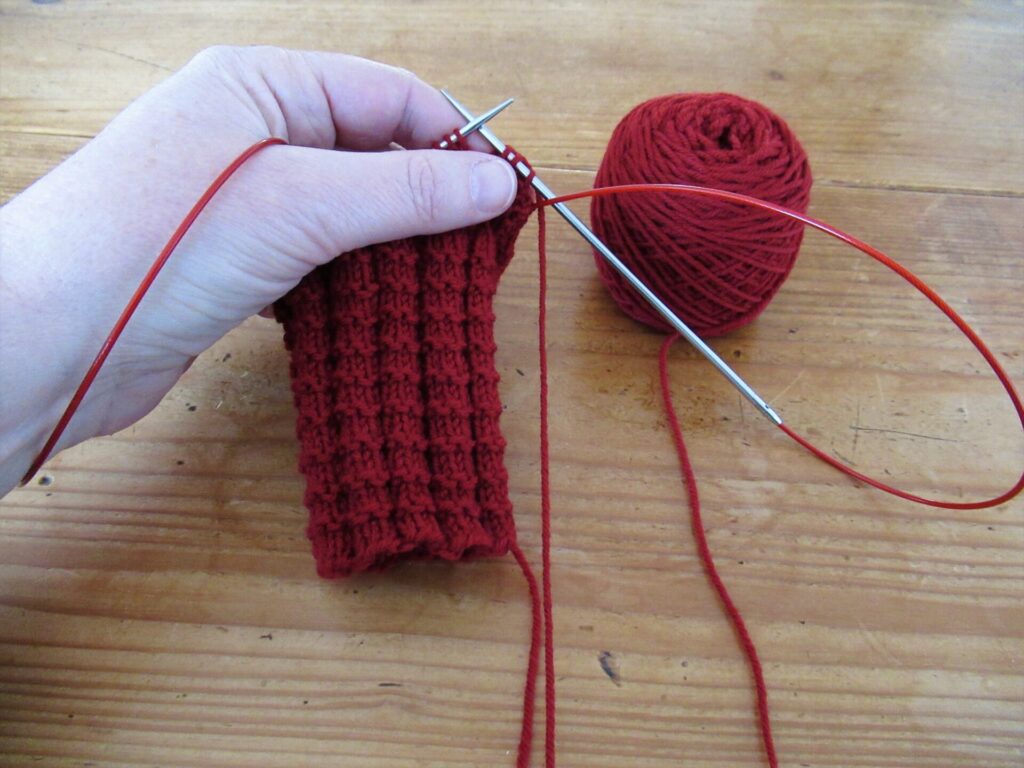
The Gazelle Mitts can be knit on a set of double-pointed needles or on long circulars using the Magic Loop method. Personally, I prefer double-pointed needles for the cuffs and thumbs…
… and the Magic Loop method for the hands.
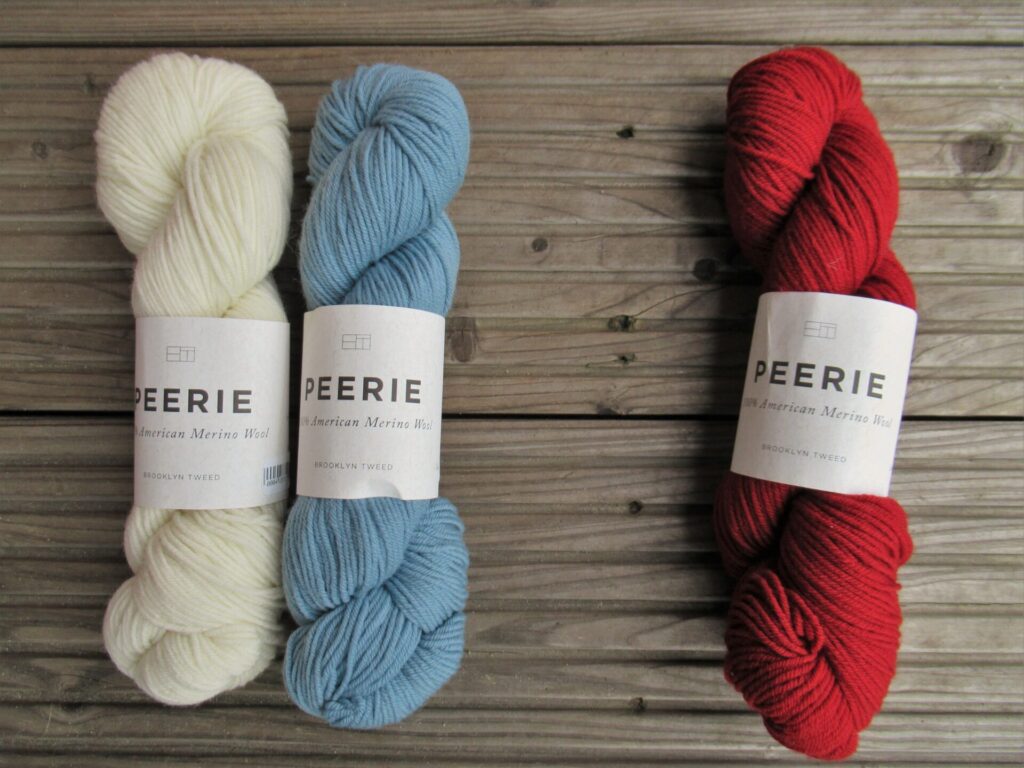
The yarn I’ve used is Brooklyn Tweed ‘Peerie’. One 50-gram skein for the single-colour mitts. And two 50-gram skeins in different colours for the two-colour version, with enough yarn left for a second pair with the colours reversed.
The Gazelle mitts can, of course, be knit in different yarns – I think that for instance many sock yarns are suitable. But should you decide to knit them, make sure your yarn is the same weight (fingering), and is smooth with a good stitch definition. And always check your gauge.
For those of you who’d like to make a pair,
The pattern for the Gazelle Mitts can be found here on Ravelry (available in English and Dutch, also to non-Ravelry members)
There is more information there on needles & notions, finished measurements etcetera. I’ve done my utmost to make the pattern as clear as possible. Apart from detailed instructions, photographs of the mitts, and charts for the diagonals and diamonds, I’ve also included a photo tutorial for the ‘afterthought’ thumb.
Well, that’s all about my Gazelle Mitts for now. If you have any questions, please leave a comment here or contact me through Ravelry (my Ravelry name is MerulaDesigns). As always, thank you for reading!
Nice mittens! I love how you used the same graphic pattern for the single coloured knit and purl version and for the two-coloured stranded version. Did you like the yarn?
Thanks! Yes, I loved the yarn! It is soft and smooth, but still, how shall I say it, with a certain bounce to it. And no irregularities, knots or anything. I first tried the mitts in Shetland yarn, but the stitch patterns didn’t show up very well. That’s when I thought of Peerie, and I’m very happy with how especially the knit-and-purl pattern stands out. It’s also great for colourwork, and there are so many colours to choose from. Unfortunately, no longer available from yarn shops in this country. (I bought mine on sale at Stephen and Penelope.)
Spectacular – very creative!!! Love them. Frogsalot
Thank you, Kathie!
Lovely mitts and a lovely bike path.
Thank you!
How lovely! Will certainly want to knit them!
Thanks, I’d be honoured!