Hello, and thank you so much for all your kind well wishes! For those of you with a similar bug: I hope you’ll get well soon. I’m not exactly brimming with energy yet, but grateful to be feeling much better, and glad to be able to pick up the thread of my blog, too.
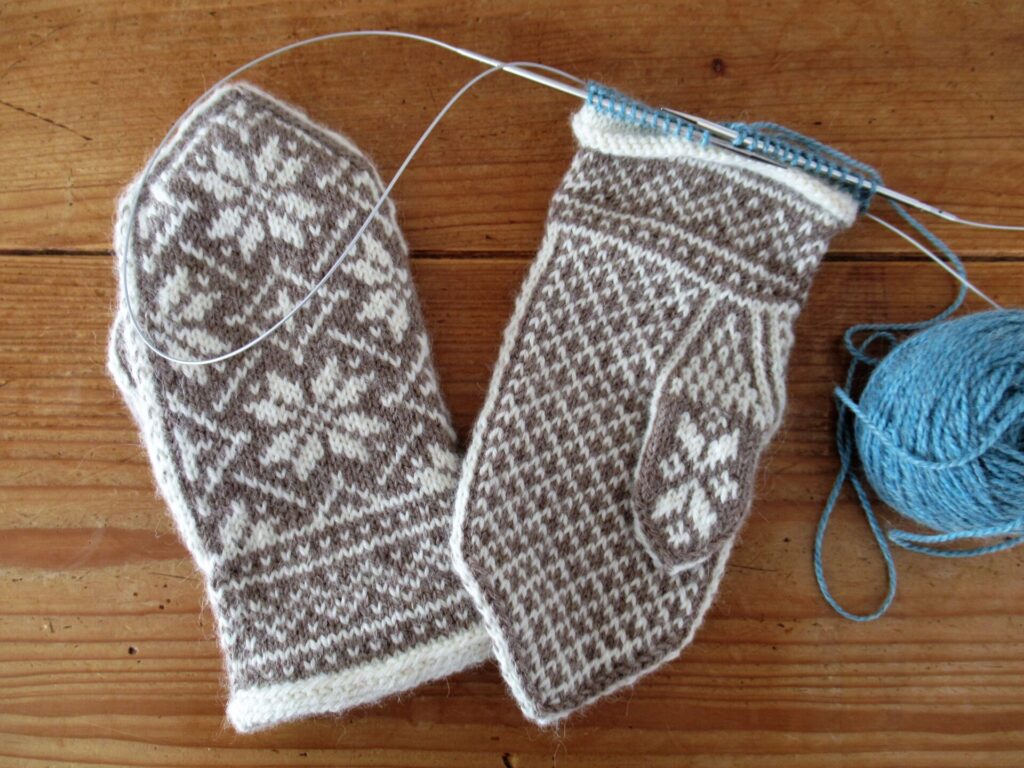
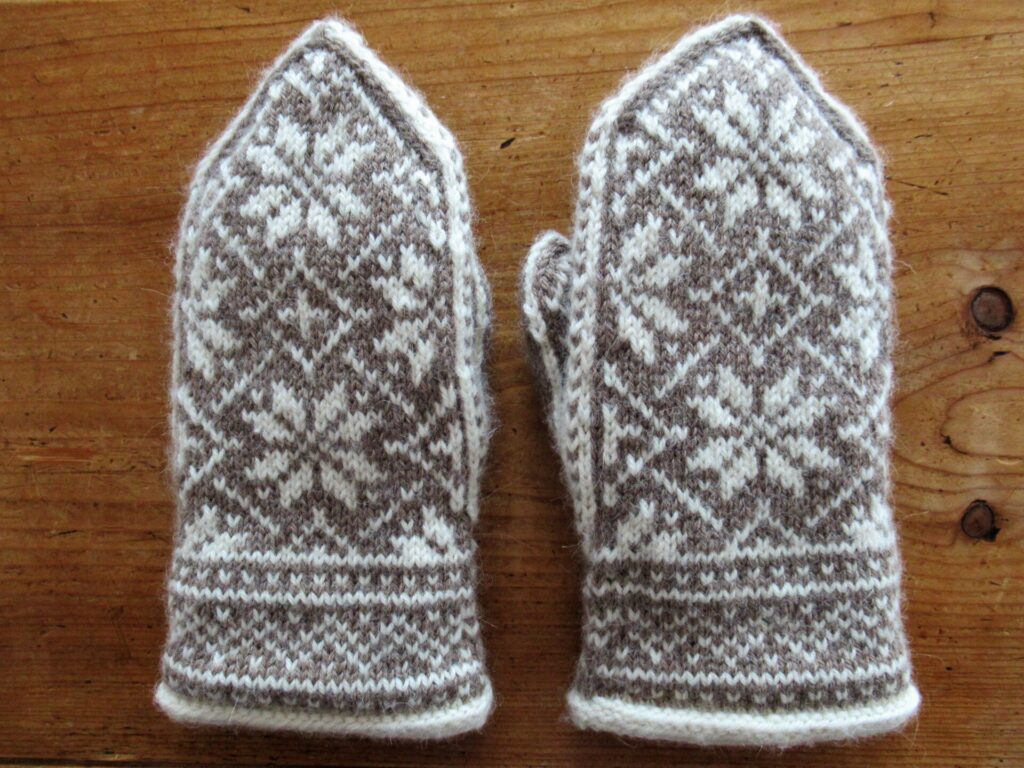
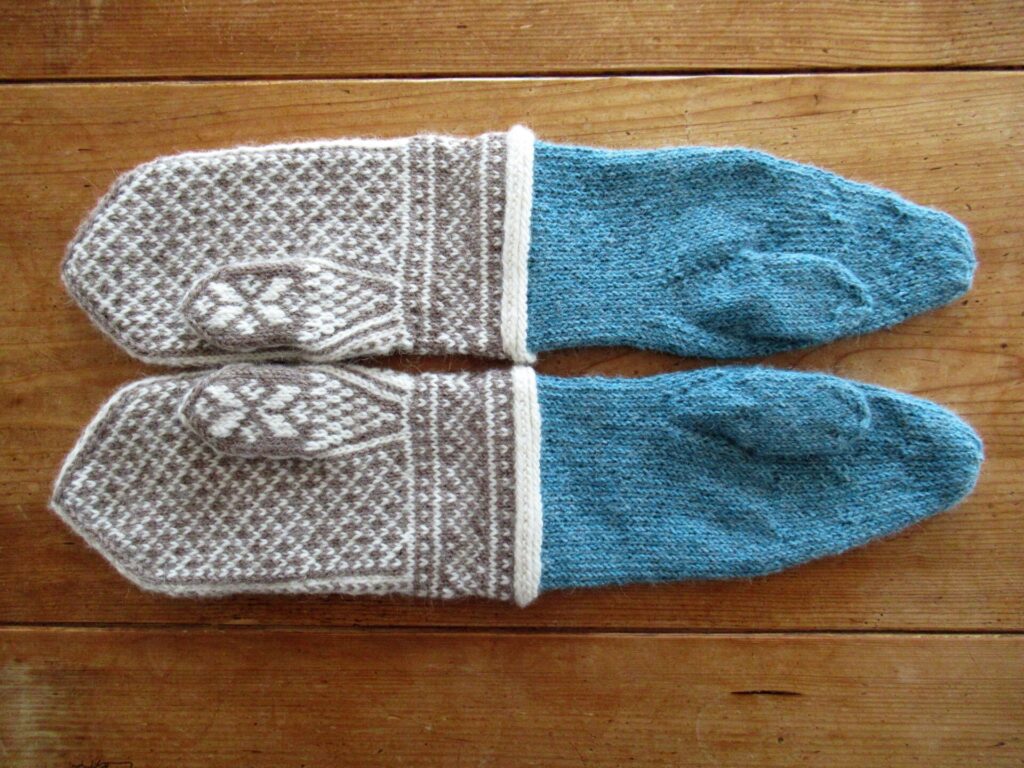
So, here is the post I’d planned to write before I fell ill, about a pair of mittens I’ve knit for our daughter and the lessons I’ve learnt from them. The first reason I chose these mittens is their beautiful design details. Nice braids and a zigzag pattern on the cuffs and 8-point stars on the top.
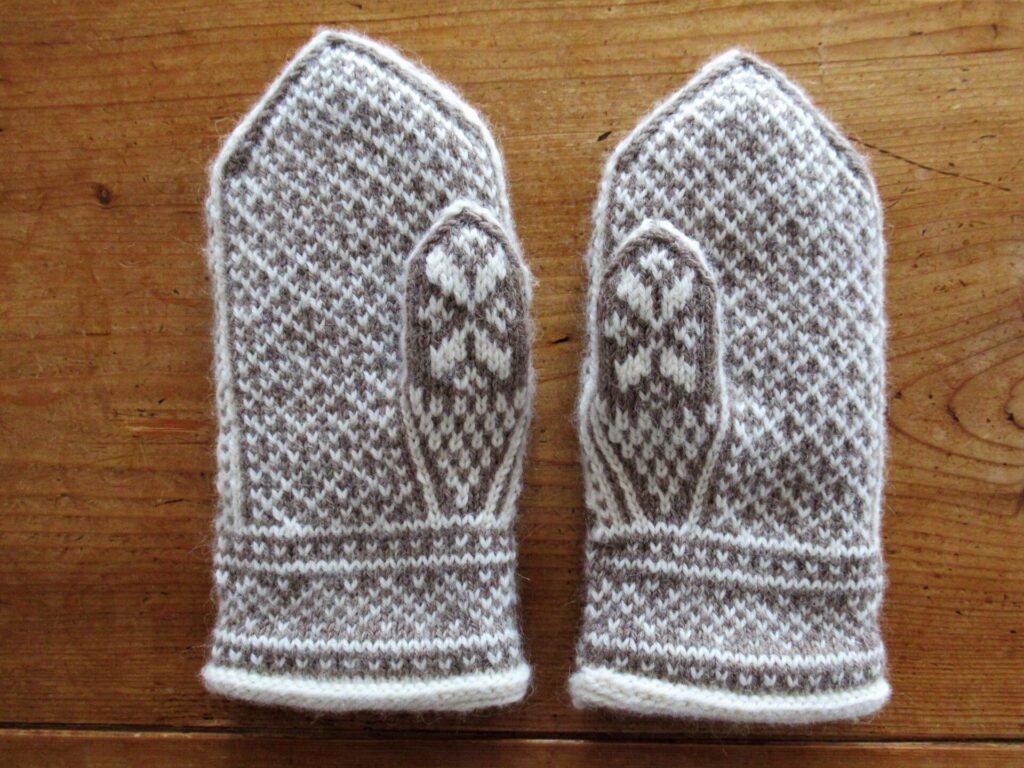
A diamond pattern on the palm and a lovely motif on the thumbs.
The funny thing is that these mittens have a decidedly Norwegian look, but were designed by someone from Sydney, Australia, of all places. Do Australians need mittens at all? I’ve only ever heard my Australian relatives talk about the heat. Google teaches me the first lesson.
Lesson 1: Australians rarely need mittens, but sometimes they may (some parts of Australia even get snow!)
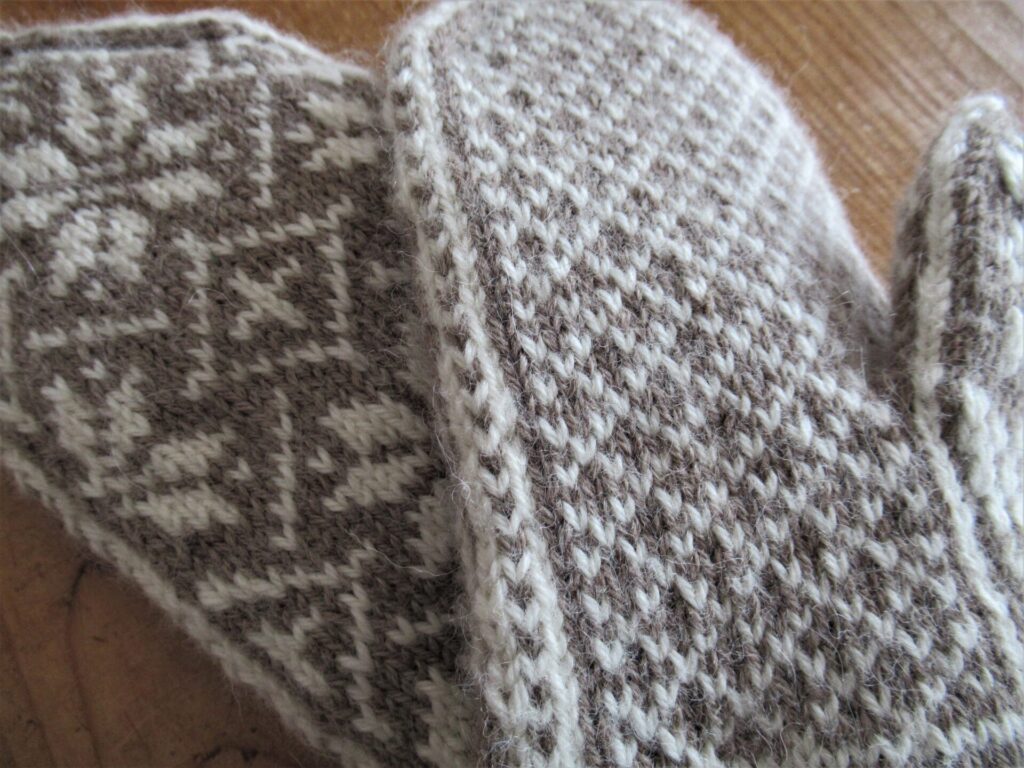
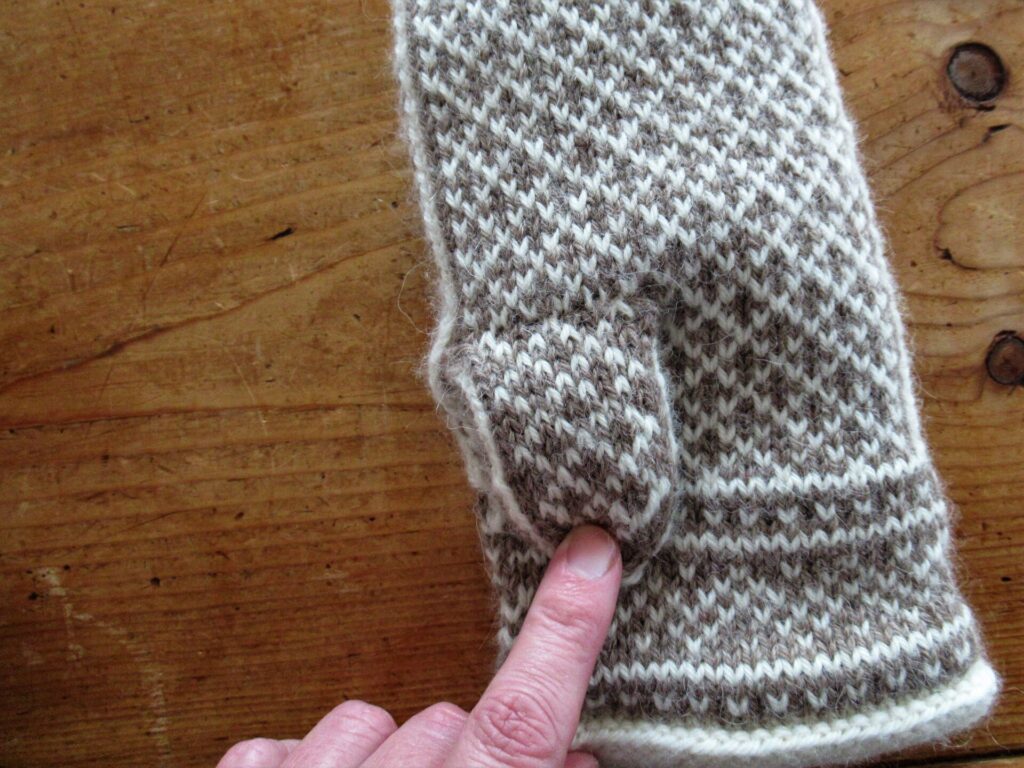
Around the entire mittens there is a decorative 3-stitch edge. I was afraid holes would form along the sides and at first pulled the threads tight. This made the stitches pucker and the brown Vs disappear in the white background – not nice at all.
Lesson 2: Gently does it – do not pull the threads tight when changing from one needle to the next on the sides of colourwork mittens, but gently guide one colour behind the other.
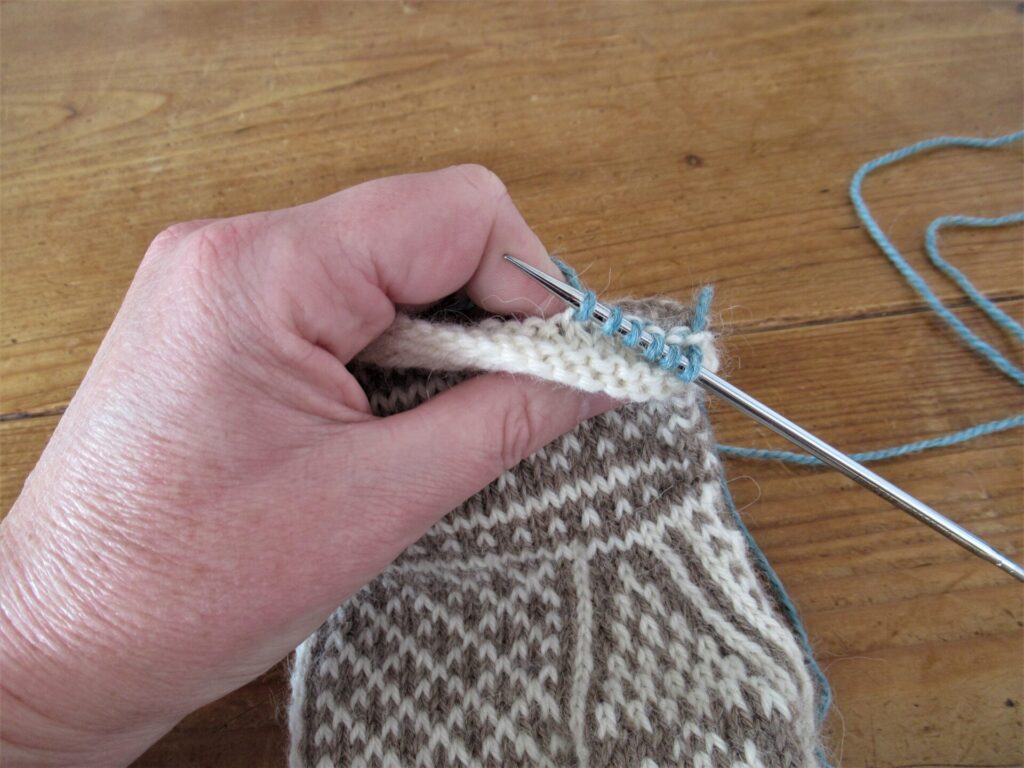
After finishing the hand of the outer mittens, stitches need to be picked up on one side of the thumb hole. For the first thumb, I just used my knitting needle. The result was okay, but not great. For the second thumb I tried something different.
Lesson 3: Picking up stitches for the thumb works best with a crochet hook – look how neat:
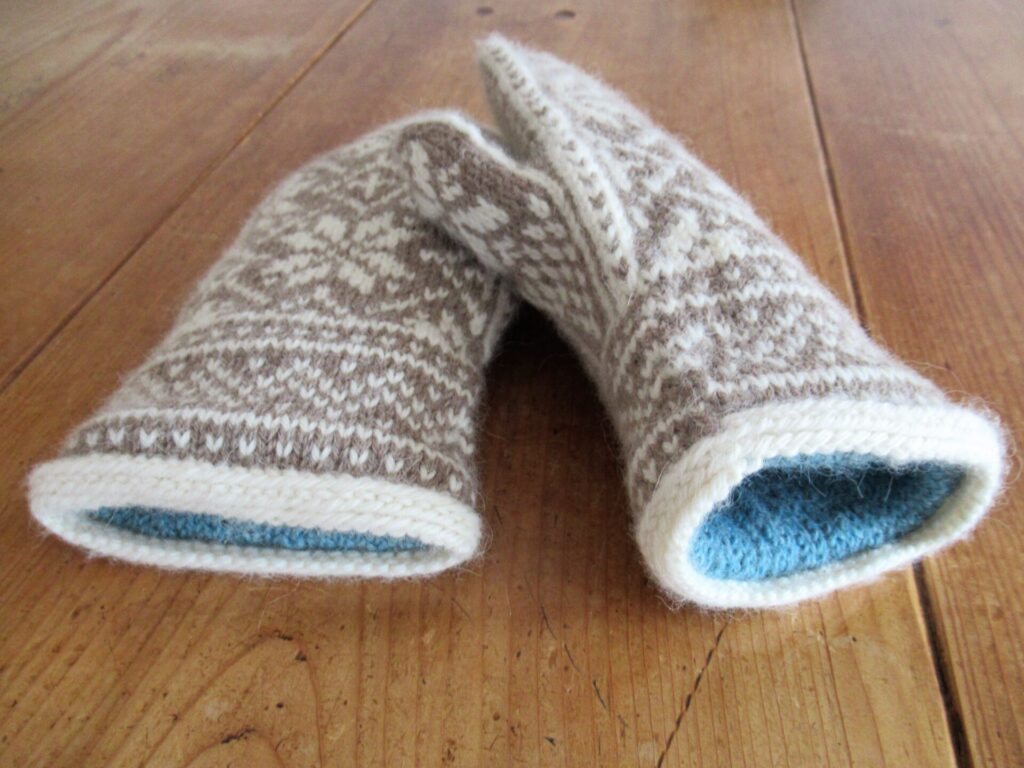
My second reason for choosing these mittens was that they are lined and therefore extra warm. For the outer mittens, the pattern had been perfectly clear. But when it came to picking up stitches for the linings I couldn’t make head nor tail of it. I spent a lot of time looking at other knitters’ Ravelry notes for clues, but couldn’t find anything helpful. And that brings me to the next lesson.
Lesson 4: When stumped, use your own common sense
The pattern said to pick up stitches ‘with right side of mitten facing’, but I couldn’t see how or where and picked up stitches on the inside. That worked out fine.
The instructions for the linings are not great. You need to turn the mittens inside out from time to time to check the length.
Following the instructions for the width and top, the linings became far too bulky and didn’t feel nice at all. So, I ripped them out and went down a needle size… Ripped them out again and made them shorter… Ripped them out again and tried a pointy top like the outer mittens. Nothing felt right… Ripped them out again and tried making the entire finger section of the linings narrower… Yes, finally they fit! They looked ugly and irregular, though…
Should I rip them out yet again and try different decreases? No! Nobody will ever see the linings. The most important thing is that they fit and feel nice.
Lesson 5: Not everything has to be perfect – sometimes good enough is good enough!
All in all, a great pair of mittens, and knitting them was an interesting process.
10 thoughts on “Lessons Learnt from a Pair of Lined Mittens”
Good to hear you’re feeling better again! These mittens are beautiful! I never tried picking up stitches with a crochet hook before, but I will sure try.
I’ve seen other use a kidsilk yarn for the lining, that’s surely a very forgiving yarn, as far as shape and size go. Maybe I should knit them for next winter…
I forgot to say, but the crochet hook I used was 2 size smaller than my knitting needle. Kidsilk would be so nice and soft for the lining.
Such incredibly beautiful work! A project like this would take me a year to complete. I marvel at those who knit so beautifully!
Well, they took me a long time, too, what with making them too small at first. And then knitting and ripping out the linings many times (and placing them in the naughty corner for a while). What works best for me with challenging projects like these, is knitting just a few rows every day. And have other, more relaxing projects alongside.
You made a lovely pair of mittens and I’m sure they’ll keep your daughter’s hands so warm. I really like your color choices. The blue for the lining is so fun, it’s sort of like a little gift, isn’t it?
I’ve wondered how knitting a lining like that would work, thanks for showing how you did it.
You’ve given me lots to think on, thank you!
Yes, the blue inside is a lovely little surprise, isn’t it? I’ve enjoyed writing about the details and am glad you enjoyed reading it.
The Northman mittens are worth the effort – I love my first pair and have another pair planned, this time in Lettlopi. I agree, the liner instructions were vague. Thank you for the tip on picking up the thumb w/a crochet hook. I’ll definitely implement that tip next time. I am so enjoying your blog – glad to have found you via the Ravelry ‘I Make Mittens’ forum.
Happy knitting and warm wishes from Colorado USA!
Ah, you made them, too! Now that I’ve finished them, I’d like to make another pair as well. Lett Lopi looks like a great yarn choice, and so many colours to choose from! It’s lovely to have you here!
Thanks for this post! And I am so glad to hear you are feeling better.
I have had a pair of lined mittens in my queue for years! And I have been thoroughly intimidated by the idea of lining. Your trial and trial again approach is encouraging me to get those yarns out and make those mittens!! Thank you!
And here I was, thinking this post might be a bit much. I mean, who but me wants so much detail about a pair of mittens? Well, apparently there are more people like me out there. Do get out your yarns – I know you can do it! And don’t give up after the first try. I’m looking forward to seeing yours take shape on Ravelry.