We’ve had a lot of rather gloomy days here lately. I don’t mean gloomy because of the current coronavirus situation, although there is that too, but literally so gloomy that we need to keep the lights on all day.
We haven’t actually had a lot of rain. It’s just that on many days it’s been cloudy and grey.
I don’t really mind, and even enjoy the quiet atmosphere of some of these days. For me, the problem is that there often isn’t enough light to take pictures indoors, while the table on the patio is too wet to spread my knitting out on.
But last Sunday suddenly the sun came out.
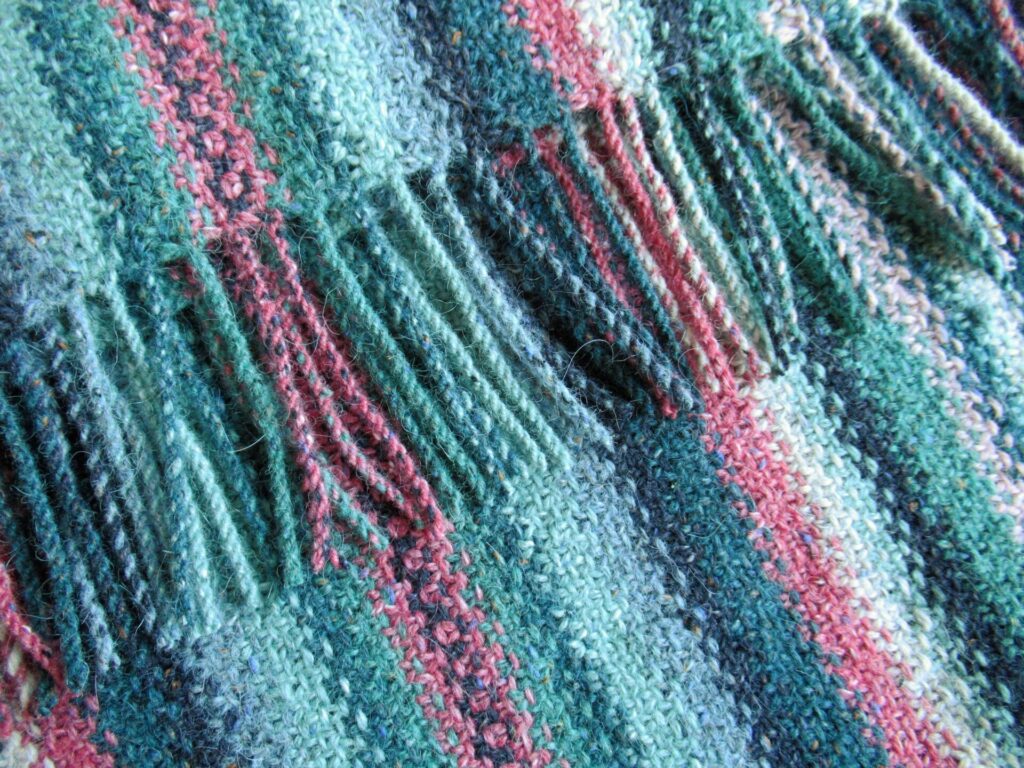
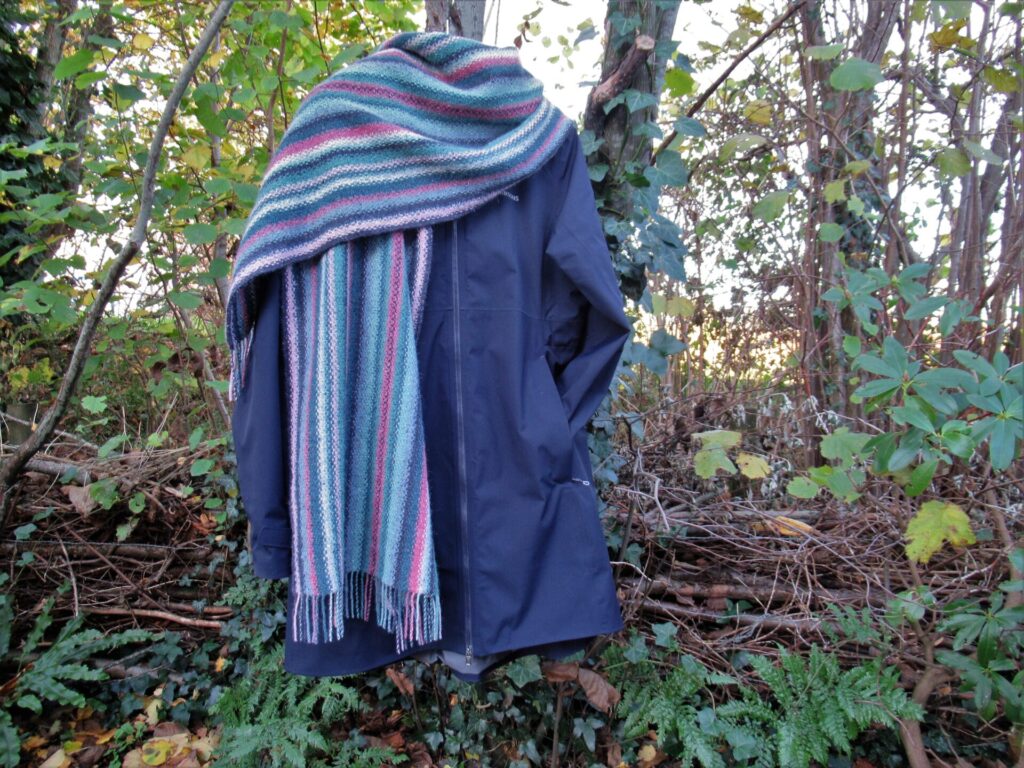
I quickly set to work, because I wanted to show you how to make a twisted fringe. I’d finished knitting my Striped Linen Stitch Wrap. In this project, every row starts and ends with a yarn tail. In the basic pattern these are knotted into a fringe, but a later adaptation has a twisted fringe and that was what I wanted to try.
The yarn I used was Rowan’s Felted Tweed, a blend of lightly felted wool, viscose and alpaca. Because I wasn’t sure if the technique would work for this combination of fibres, I tried it out on a swatch first, and yes, it worked! This is how it’s done step by step.
1) Pin the end of the wrap to blocking mats.
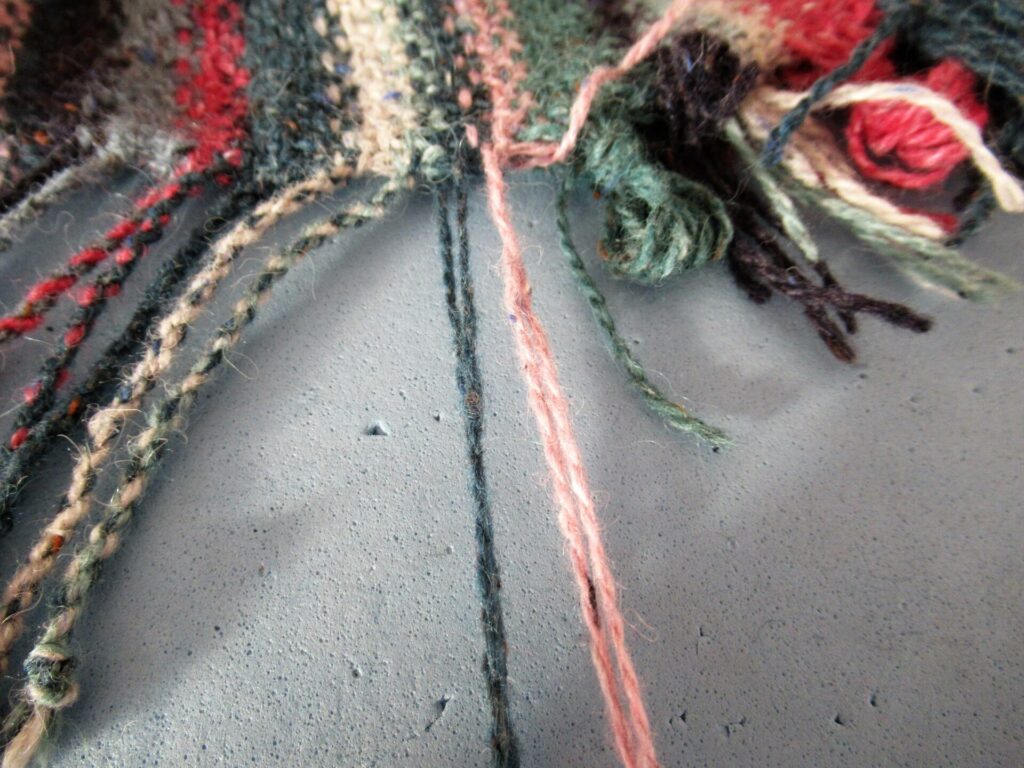
The yarn ends were tied into bundles during the knitting. These are now undone one by one.
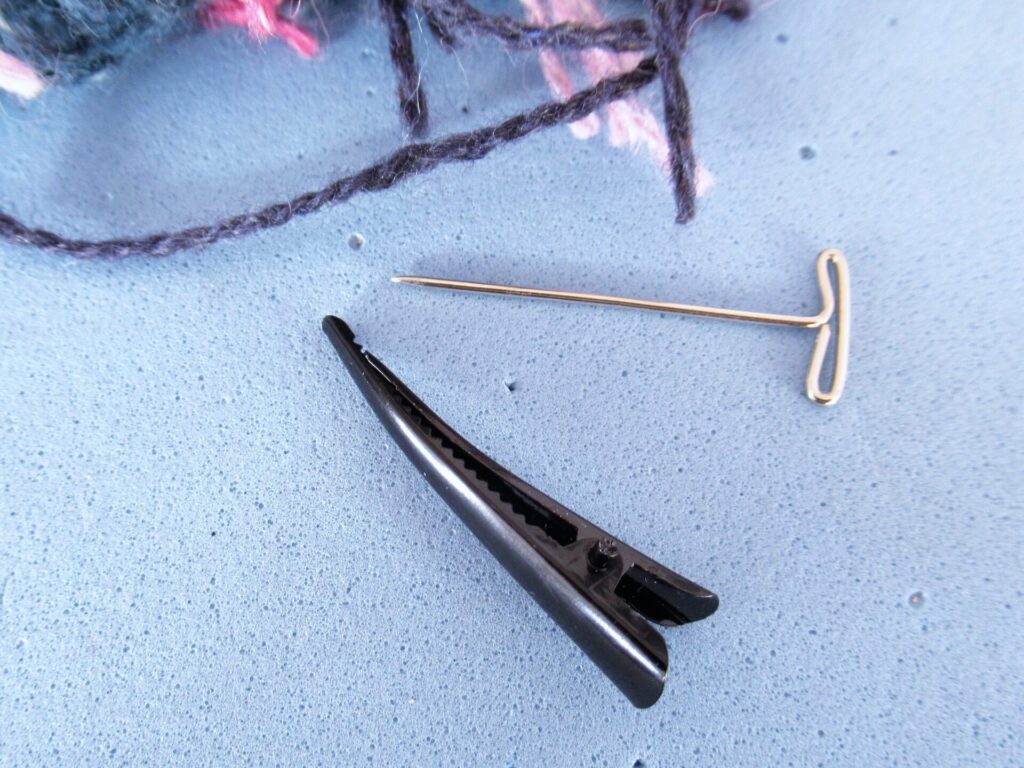
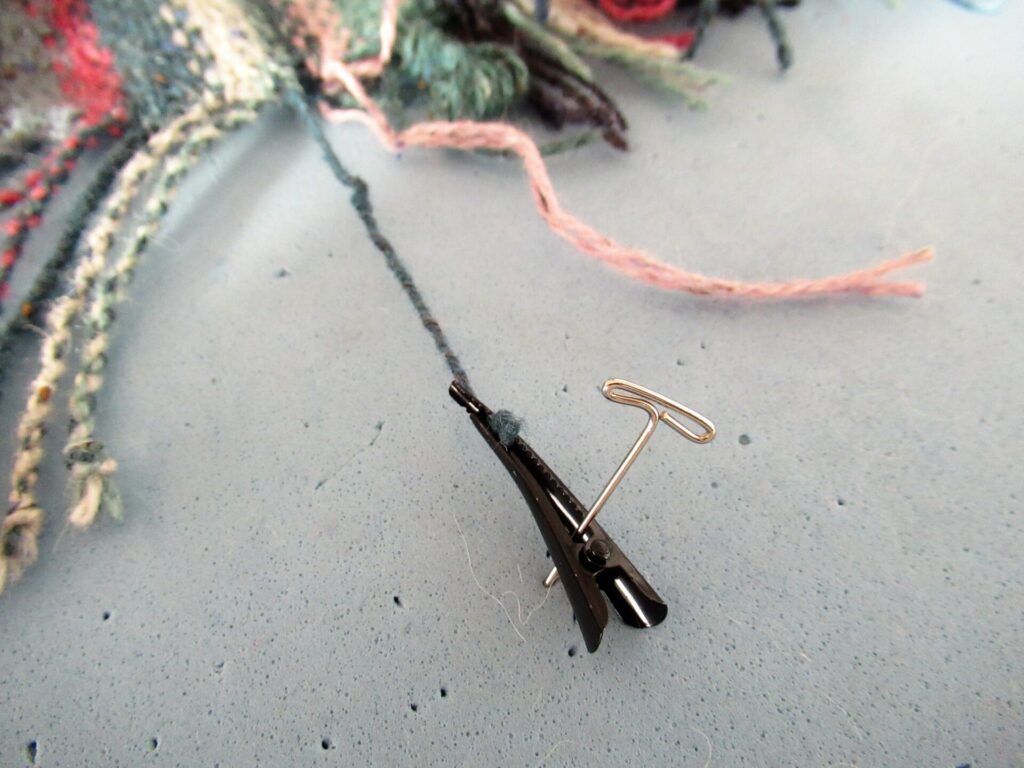
While twisting the ends, they need to be kept in place. The pattern uses a binder clip for this, but as I didn’t have any of those, I used a hair clip and a T-pin.
2) Undo a fringe bundle. Find the next 4 tails (they should be twisted in the order they were knitted).
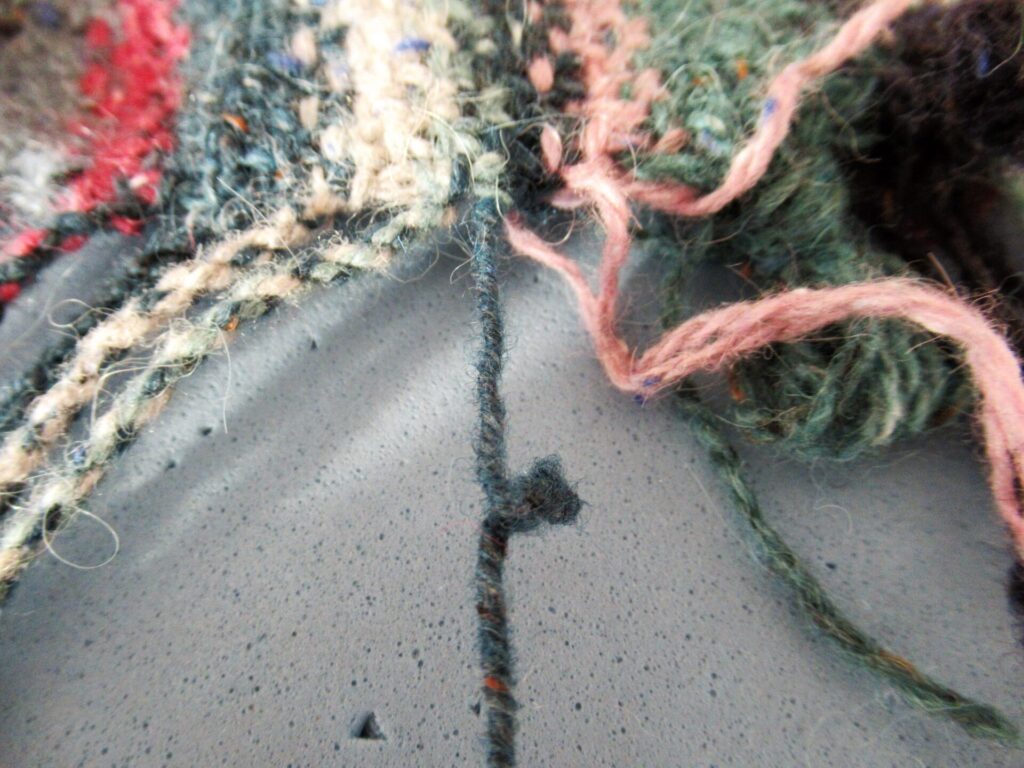
3) Twist the first 2 tails together in the same direction as the twist of the yarn (i.e. to the right). Continue until they are slightly overtwisted.
4) Secure with a clip and pin onto the blocking mat with a T-pin.
5) Twist the next 2 tails in the same way and hold. Unclip the first 2 twisted tails. Tie both sets of tails together with an overhand knot as close to the ends as possible and let go. They will now twist together. Smooth this twist by passing it between thumb and forefinger several times.
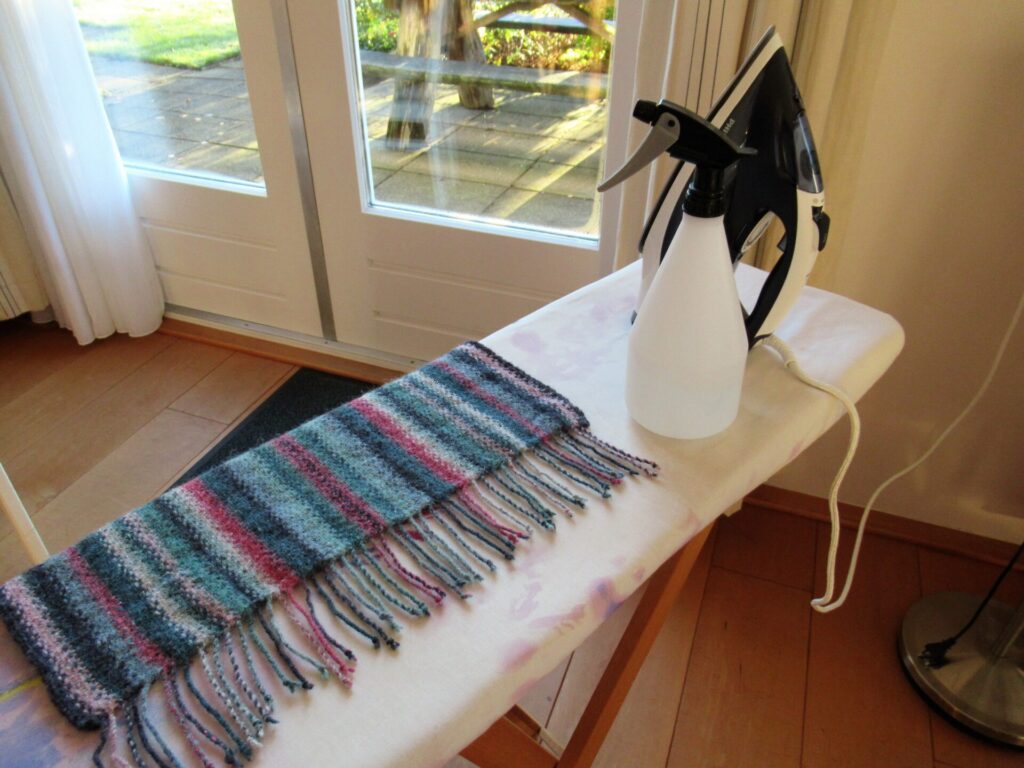
Continue like this until all yarn tails have been twisted. Then repeat steps 1-5 for the other end of the wrap. Remove the wrap from the blocking mats and place it on an ironing board. Comb out the ends so that they are straight and not crossing each other.
6) Spray the fringe with a plant mister.
7) Cover it with a clean, moist tea towel. (Make sure it’s an old one that won’t give off any colour.)
8) Then, with the iron on the wool and steam setting, press the fringe with lots of STEAM.
Repeat for the other end of the wrap and leave to dry thoroughly. The tails should now be slightly felted, preventing them from untwisting.
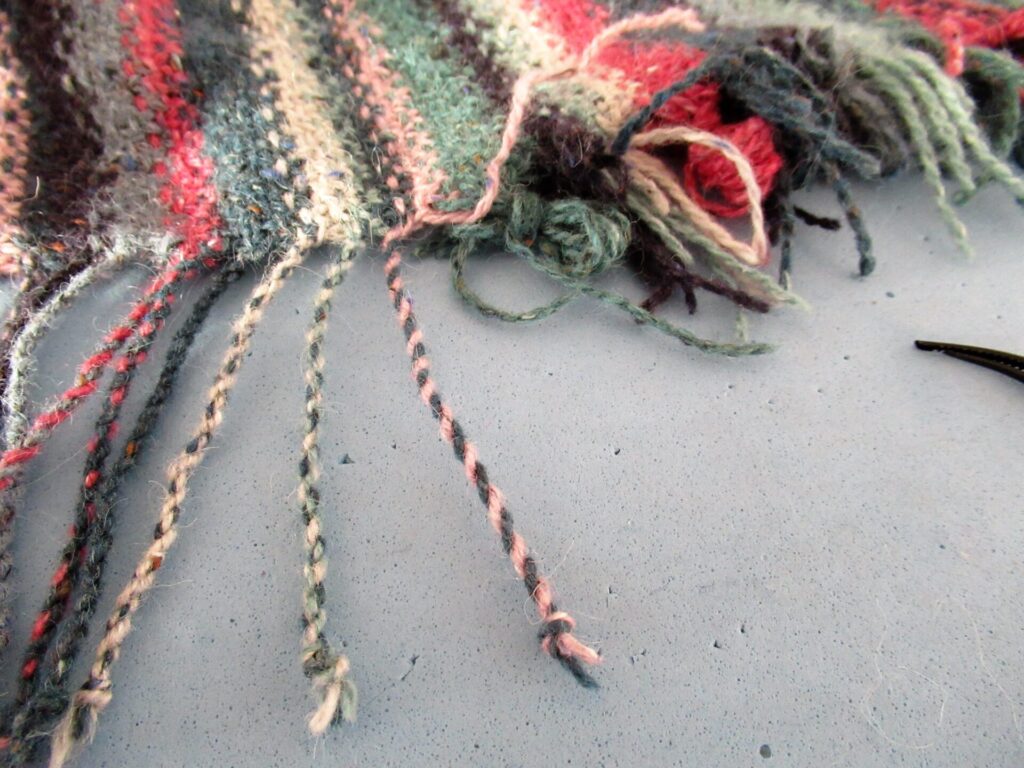
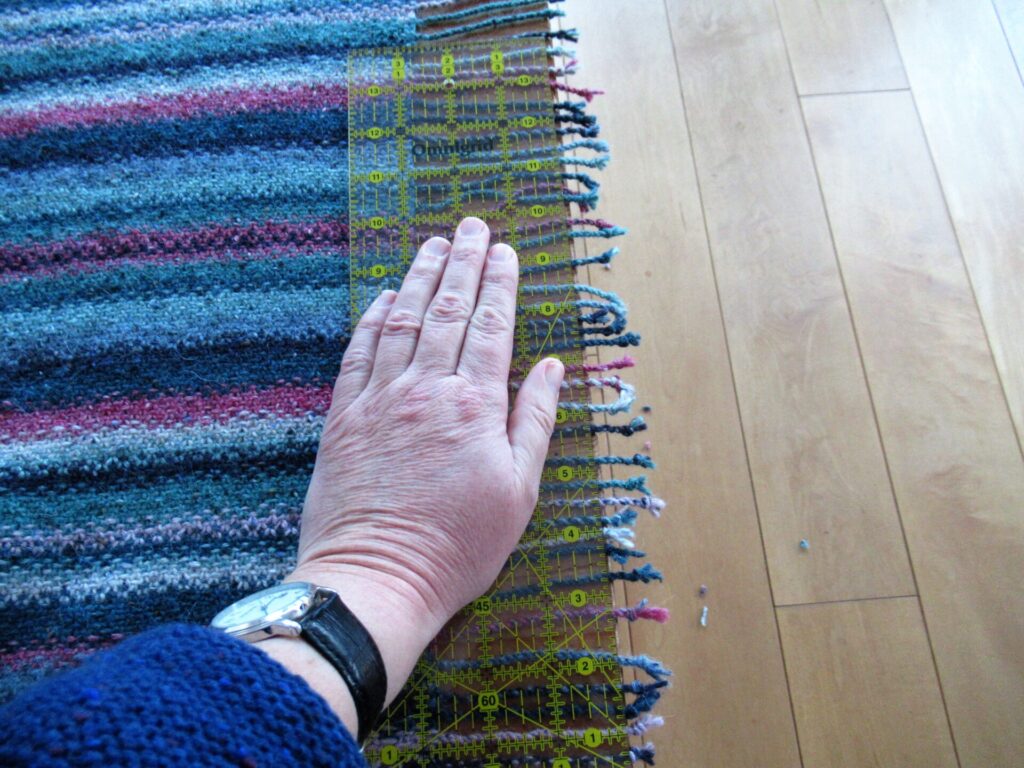
9) Place the wrap with one fringe on the end of a table top. Make sure that the wrap is placed straight and straighten out the tails. Then cut off the knots at the length of the shortest tail.
I used a quilting ruler to make sure I cut the tails off straight.
There, all done! This is a great finish for a scarf or wrap. It’s really lovely to see the colours combined differently in each tiny barber-pole tail.
I’m really happy with this wrap and at the same time slightly sad that it’s finished. Many of the things I knit are for others, but I’m keeping this one. I’ve loved working on it and will miss the soothing rhythm of slipping and knitting, slipping and knitting many, many stitches.
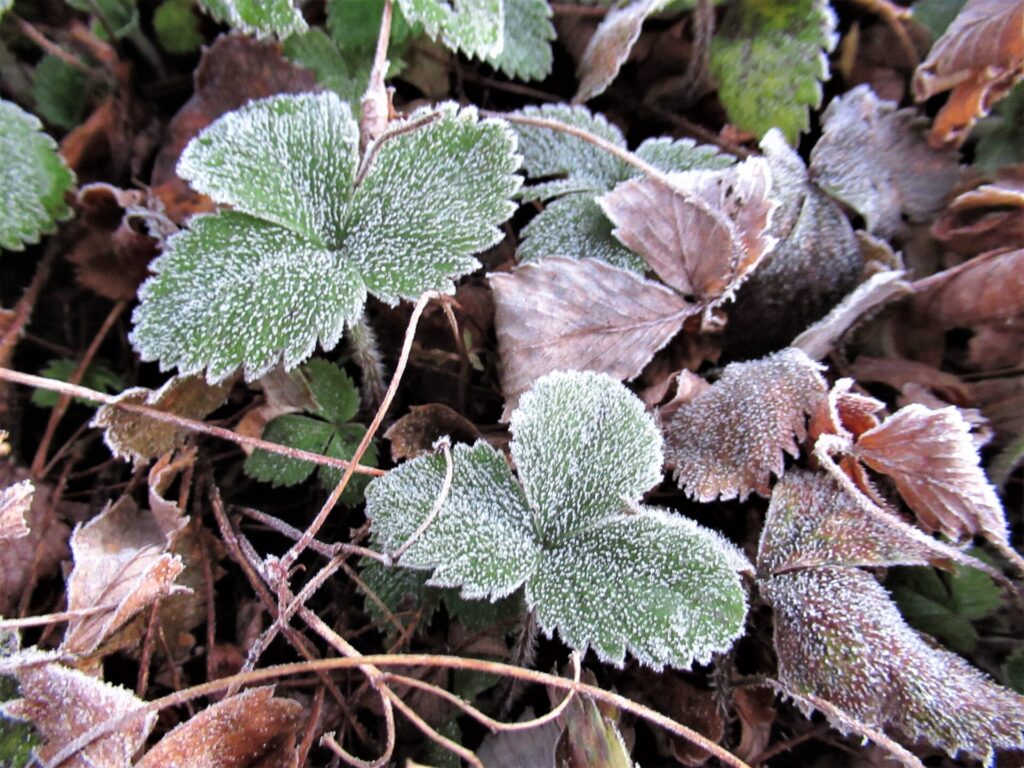
Now I’m hoping for colder weather so that I can wear it. It’s a strange autumn. The pelargoniums and lobelias in our outdoor pots are still flowering and it’s the end of November! Still, we’ve had some night frost…
… and more wintry weather is expected for this weekend.
In case you’d like to knit a wrap like this, the pattern is called Striped Linen Stitch Wrap & Scarf (there is also a smaller scarf version) and can be found here on the designer’s website and here on Ravelry. The free adaptation for the twisted fringe can be found here.
Well, I hope that just looking at this warm wrap with its colourful fringe has warmed and lifted your heart a little. Take care! xxx
12 thoughts on “Making a Twisted Fringe”
Prachtig zeg!
Dank!
Prachtige sjaal en wat een leuke techniek! Tijdrovend maar wel de moeite waard. Lijkt me leuk om eens te proberen en begrijp nu dat ik vooraf even moet kijken of het garen ervoor geschikt is. Ik vermoed dat garen dat geen superwash-behandeling heeft ondergaan, maar dat ook niet heel snel vilt een goed resultaat zal geven. Leuk!
En je sjaal is fantastisch mooi geworden.
Tijdrovend inderdaad, dat heb je goed gezien. Maar het is gewoon leuk om op deze manier extra aandacht aan een mooie afwerking te geven. Zeker eerst een proefje doen of het garen geschikt is, mocht je het ooit willen proberen. Dank voor het aandachtige lezen en je inhoudelijke commentaar.
Beautiful fringe! And a well done tutorial. Thank you!
My pleasure! It was a fun thing to do.
Marijke – Absolutely fabulous! Your fringe turned out perfect. I am not much of a fringe person, but I could live with it – and it really does add to this shawl – but that was a heck of a lot of work that was required to make the fringe – but you will have it forever and love it forever. Frogsalot
Thanks, Kathie Frogsalot! You’re right it was a heck of a lot of work. But a very enjoyable kind of work and really worth the time and effort.
Wat prachtig gemaakt!
Dank je, en wat leuk om je hier te zien!
Thank you so much for the instructions and pictures! This project is in my queue, and while the twisted fringe looks a touch daunting, it makes such a beautiful professional finish! Your projects are always so lovely, and I love the images you share of them.
My pleasure! The twisted fringe is really doable – all it takes is some (quite a bit of) time. All in all, this scarf/wrap is a very enjoyable project. It’s fun to see the colours blend in the linen stitch pattern.