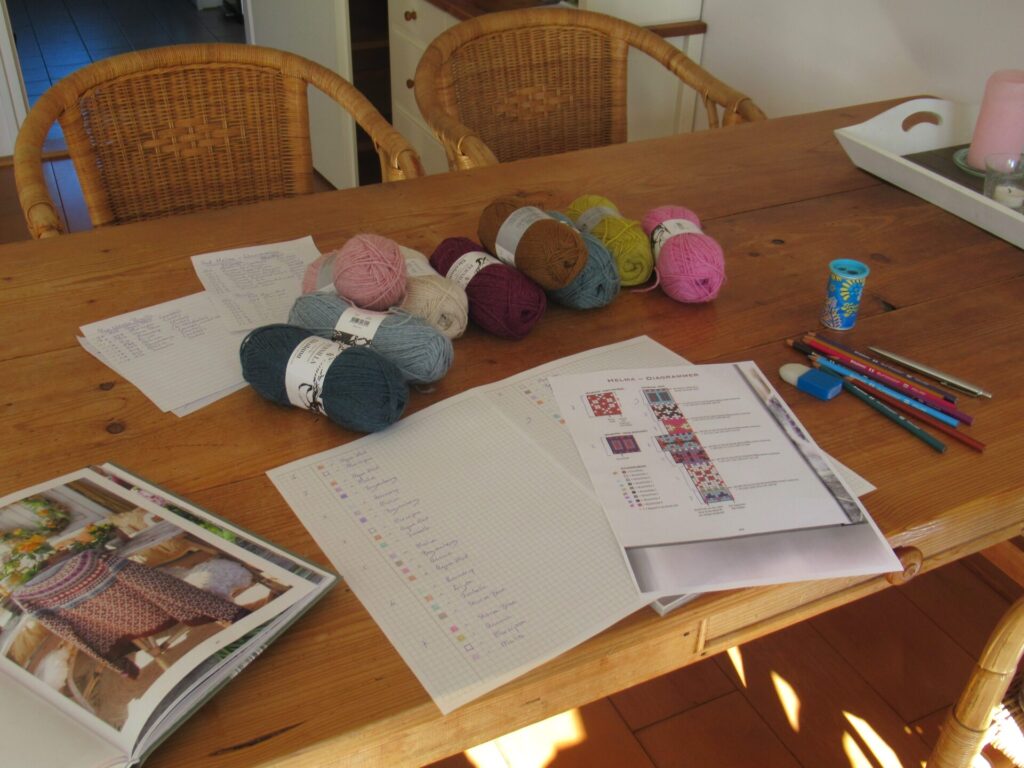
Today I’d like to talk a bit about the swatches I’ve knit for Helma, a cardigan with a stranded colourwork yoke in 9 colours and a 2-colour stranded all-over pattern on the body and sleeves. I hope this’ll be interesting not just for Helma knitters, but also for other stranded-colourwork projects.
I’ve been knitting two kinds of swatches: 1) Swatches to determine the colour distribution, and 2) Swatches to determine the tension/gauge. Let’s start with the first.
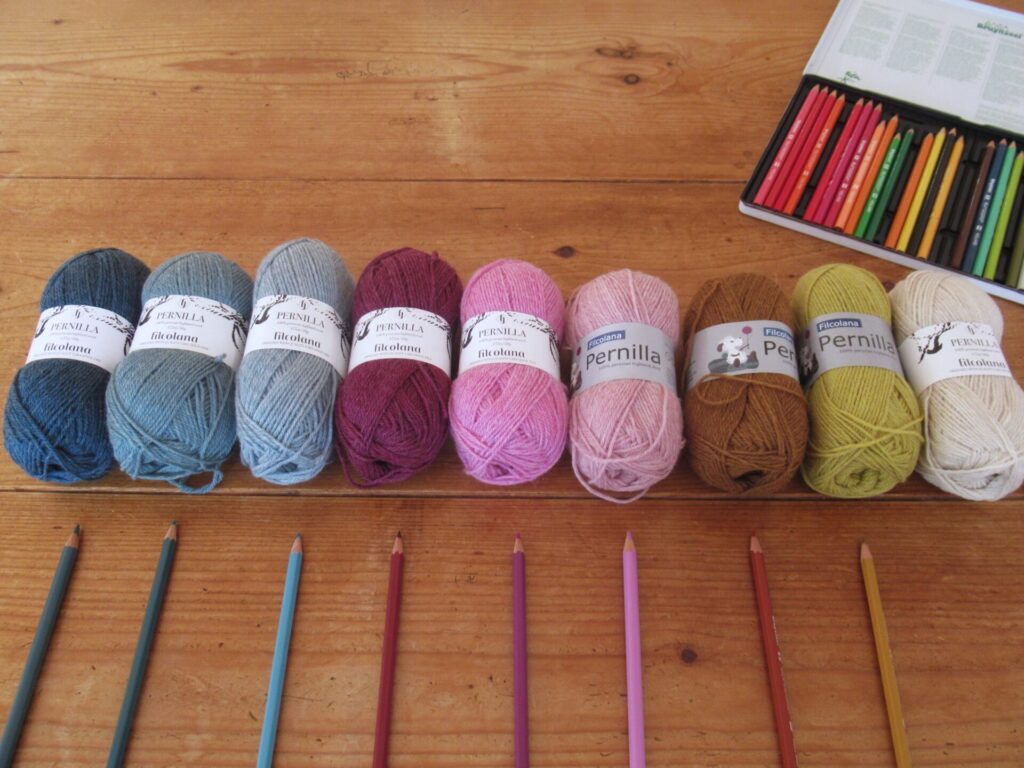
1) Swatches to determine the colour distribution Before I even started knitting swatches, I looked closely at the pattern’s colourwork charts to decide which of the designer’s colours I could replace with which of mine. I got out some coloured pencils in order to try things out on paper first.
This turned out to be so time-consuming, however, that I quickly gave it up. (I also have software for things like this, but somehow that didn’t quite work for me either.) By now, though, I had already discovered that simply substituting the same of my colours for the same of the designer’s colours everywhere wouldn’t always work. Because the designer used colours from 4 colour groups, and I chose colours from just 3 colour groups (see this post), there would not always be enough contrast in my version.
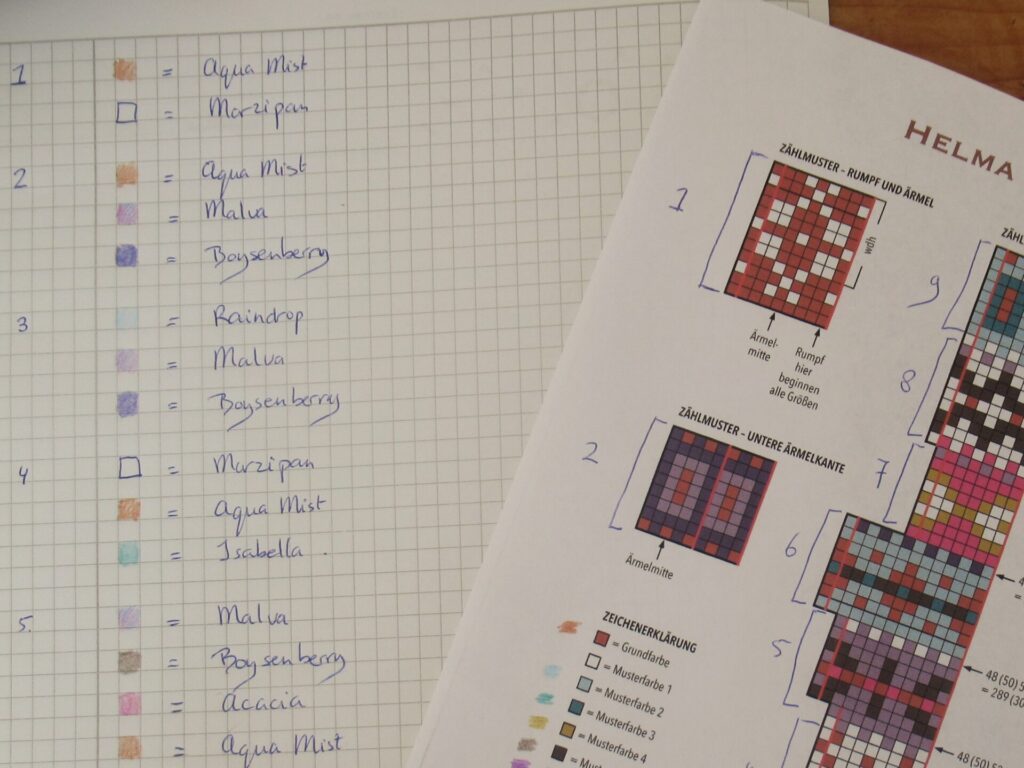
What I did next, was divide the yoke chart up into sections and look at colours for the sections separately.
The rules I set myself were:
Where the designer uses a dark colour, I’ll use a dark colour, too.
Where the designer uses a medium/brighter colour, I’ll do the same.
I’ll use ‘white’ (actually pale beige) in the same places the designer does.
For the designer’s ‘pop’ colour, I’ll also use my colour that pops out (yellow).
I’ll try to distribute my colours evenly over the yoke.
This way, I came up with a colour scheme for each section and wrote it down next to squares I coloured in with the original colours.
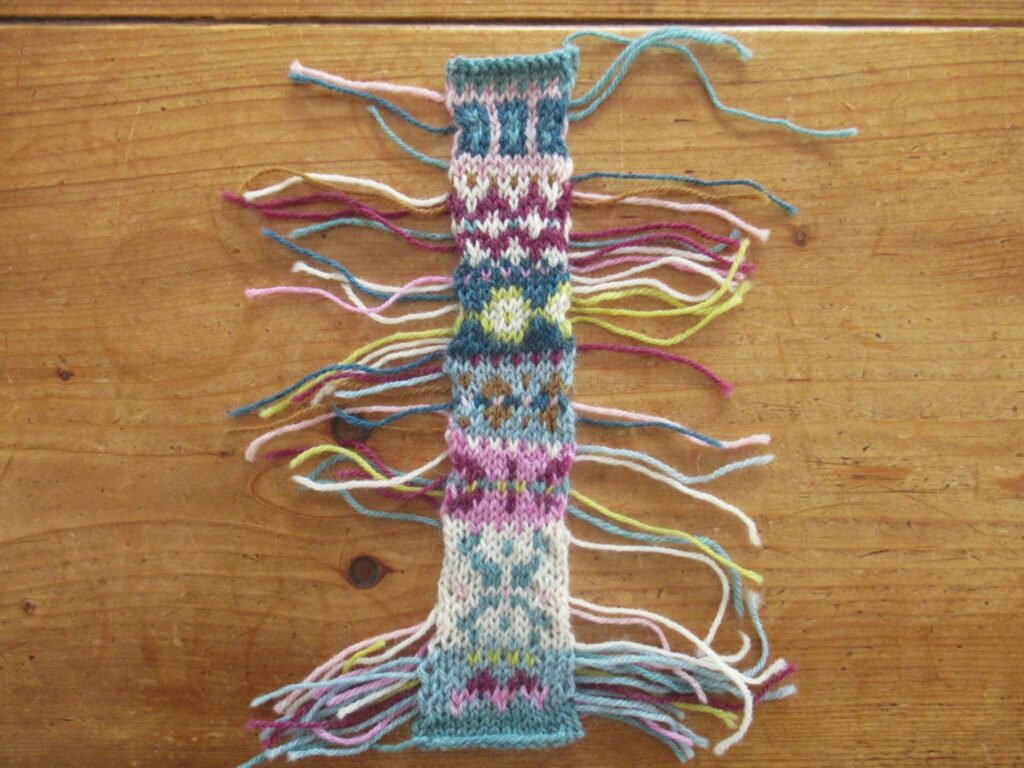
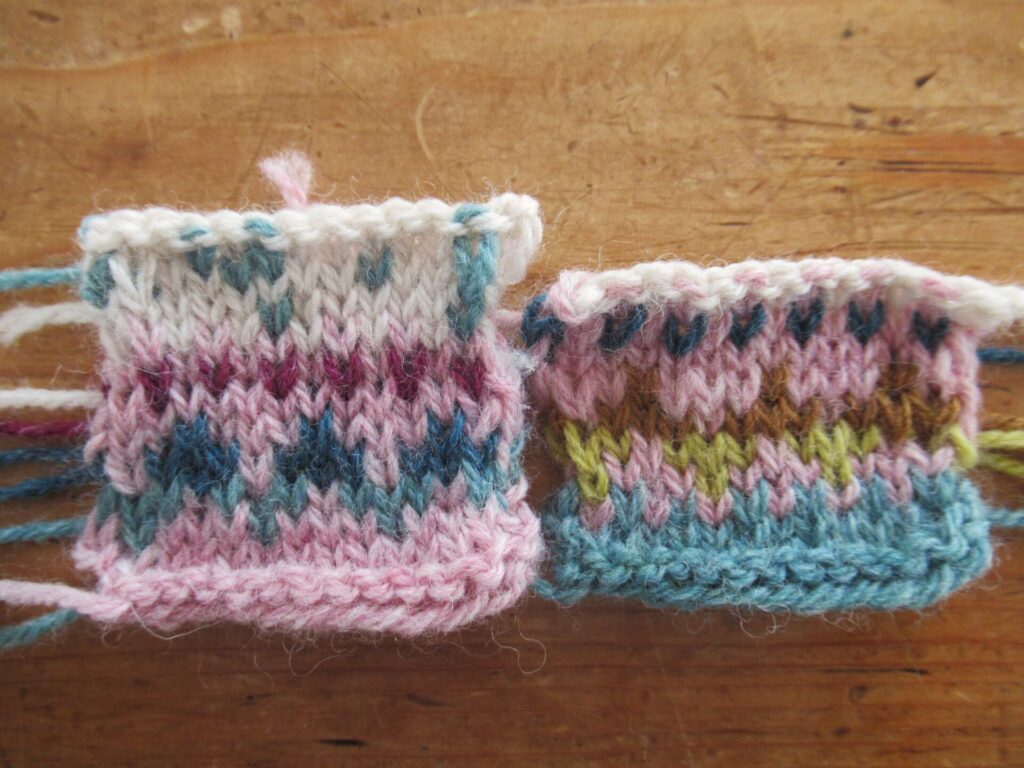
Now I was ready to start swatching. Not wanting to waste too much yarn or time, I made a narrow swatch (13 sts) for the entire yoke sequence.
Reasonably but not entirely happy with the colour distribution, I knit a couple of even stingier swatches for one section (bottom of swatch above).
Hmm, one of them definitely wasn’t an improvement and one of them was. I could also see from the rest of my long and narrow swatch that in some places colours just ‘disappeared’ and would have to be replaced with stronger ones. To solve this, I swapped colours here and there without trying them out, just noting them down on paper. So, that was the colours sorted. Next:
2) Swatches to determine the tension/gauge The cardigan is knit in the round, with only knit rounds (no purling). I’d have to mimic that in order to get a good impression of the gauge. A flat swatch knit back-and-forth wouldn’t work, because the way I knit, purl rows are always slightly larger than knit rows. In other words, I’d have to have all knit rows. As my gauge is always tighter knitting a small circumference (e.g. a sleeve) than a large one (a yoke or body), a small swatch knit in the round would not work either.
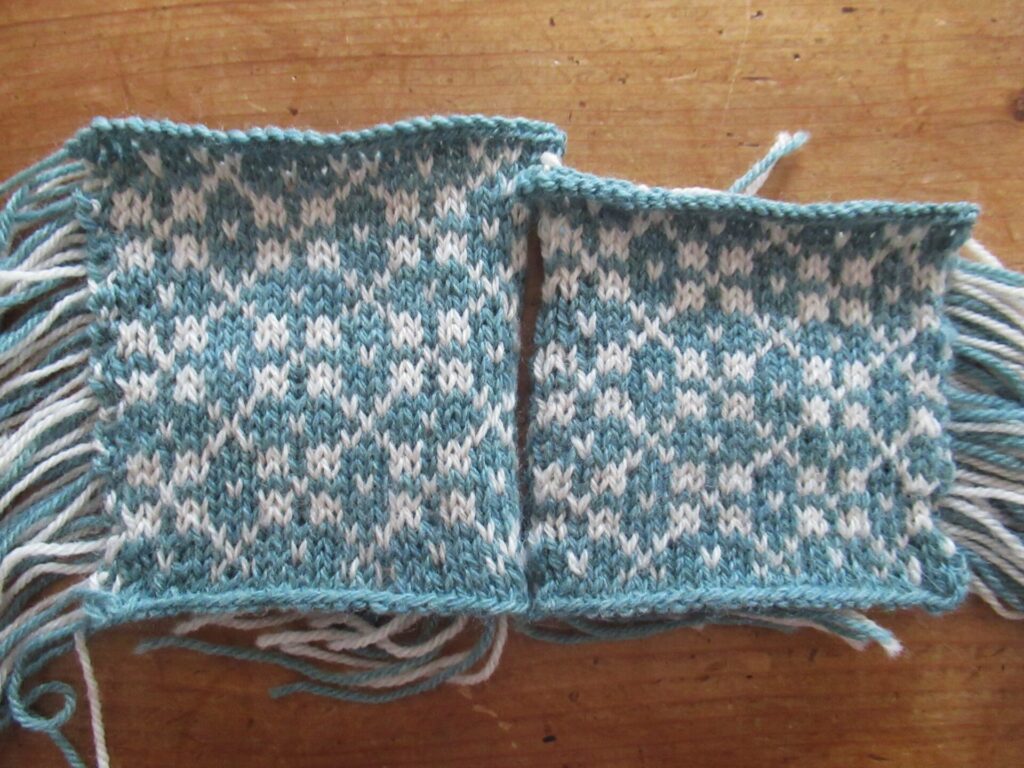
So, what I did was make a flat swatch knitting every row. This means starting every row on the right-hand side, breaking off the yarn at the end of each row and sliding the stitches back to the right needle tip. For me, the gauge of a flat swatch knit this way is similar to large circumference knitting in the round.
(I could have done that without breaking off the yarn, leaving a long float at the back, in order to be able to unravel the swatch and save yarn. Jared Flood calls this circular speed swatching. I find this extremely cumbersome, though, trying to get the floats long enough and not too long.)
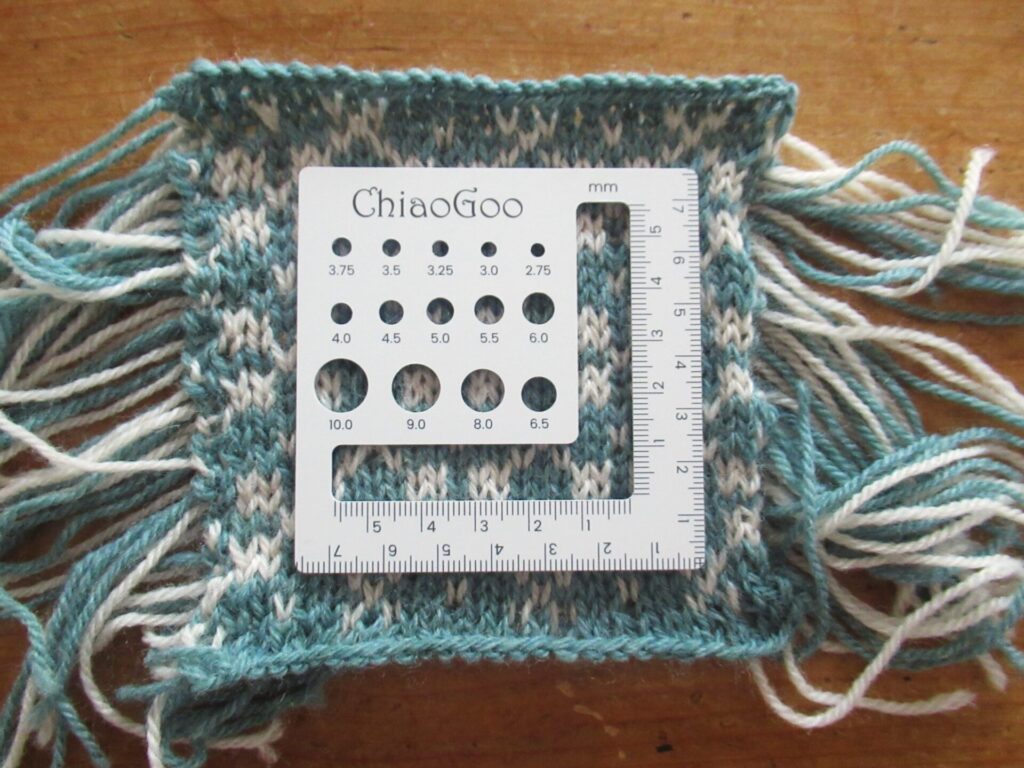
I do not mind swatching, but do not love it either and prefer not to make my swatches too large. In this case my swatch ended up smaller than the standard 10×10 cm/4×4”. As it happened, a dear knitting friend came for a visit last Friday and gifted me just the right tool for measuring small swatches (photo above). Thank you, L, it comes in very handy!
I really liked the fabric of my first swatch, but the gauge was way off. I was aiming for 24 sts to 10 cm/4”, but got 28 sts. That means that if I were simply to follow the pattern for, say, size L, I’d end up with a size S. So, I knit another swatch.
That was 26 sts to 10 cm/4”. Still too small. Going up to even larger needles would give a far too loose and open fabric. What to do now? I think I’ll go for a needle size in between the first and the second swatch to get the fabric I like. I’ll do some maths, and will then follow the instructions for a larger size that will (hopefully) result in a cardigan my size.
Phew! Explaining this concisely was really hard and I hope it all makes sense. Time to finally start on this project! I’ll try to find a less technical and more relaxing subject to write about for next time. Hope to see you again then!
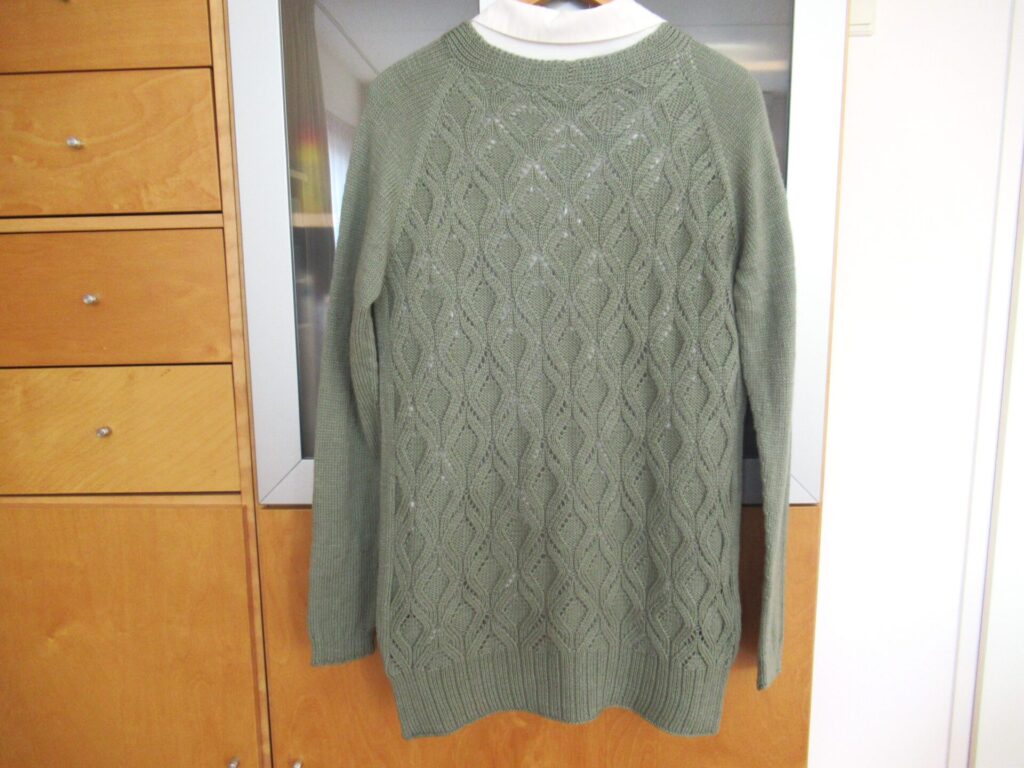
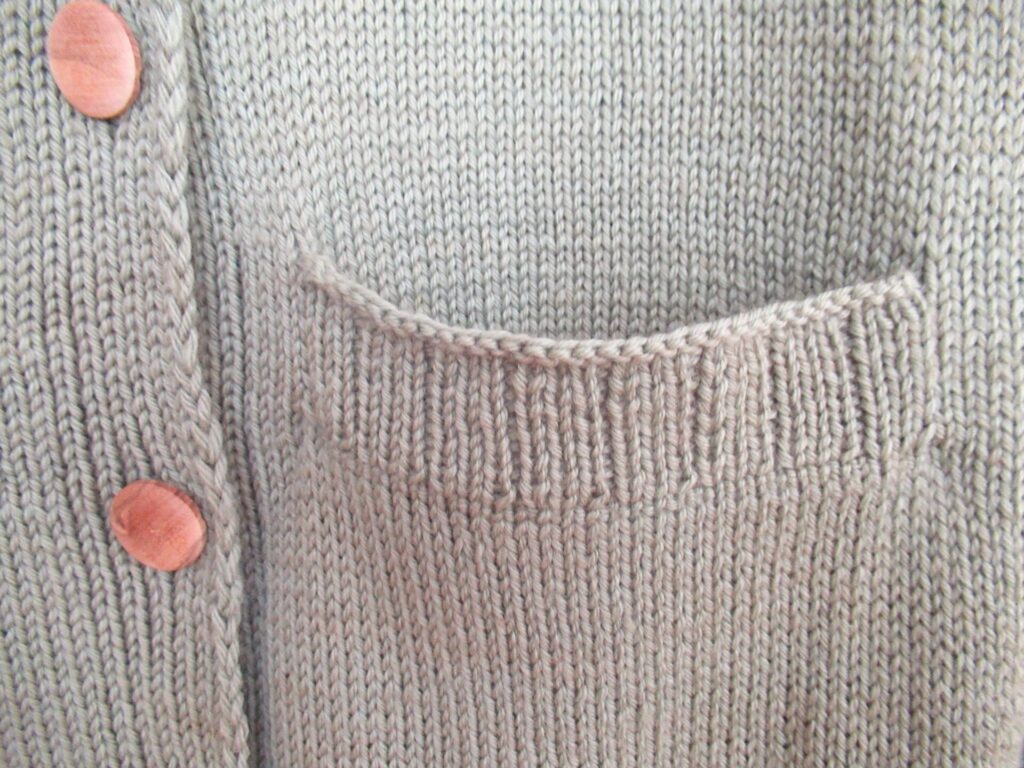
Hello! Last week was a bit of a whirlwind and I didn’t get round to composing a post, but this week things are back to a more even keel. In between everything else, I did manage to finally finish a cardi for our daughter. It’s Matilda Kruse’s Be Mine, a longish cardigan with pockets. Viewed from the front, it doesn’t look very exciting. But just look at the back – ooh là là! C’est joli, non? Isn’t it pretty?
Worked from the top down it was a lovely project that flew off my needles (I knit the body and sleeves in about three weeks). So why did it take me so long to finish? Well, two things: 1) the binding off and 2) the pockets.
First, the binding off. The pattern simply said, ‘Bind off all sts’, so that was what I did. Uh-oh, the ribbings curled upwards – not a nice look. Going onto Ravelry, I saw that several other knitters had had the same frustration. One even frogged all the k3, p1 ribbings and re-knit them in k1, p1. That would solve the problem, but I liked the way the pattern on the back merged into the ribbing too much for that.
So, I tried out just about every bind-off under the sun. Here are some of them, in case you are as pernickety about this kind of thing as I am:
K3, p1 as per pattern – curls up.
Entirely knit bind-off – even worse.
Picking up loops on the wrong side (video here) – interesting, but gives an unattractive thick welt.
Adding kfb increases (video here) – would be great for toe-up sock cuffs, but gave a wavy edge on this cardigan.
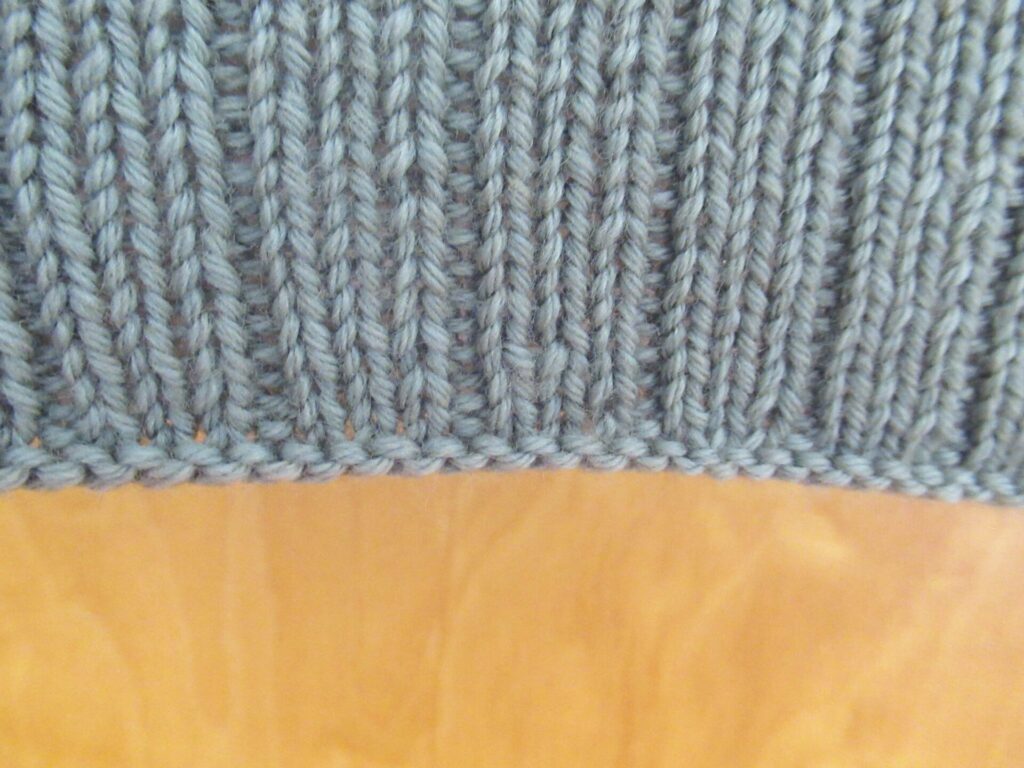
Purl bind-off on the right side – this is what I chose in the end.
Clearly visible, but at least it doesn’t curl up.
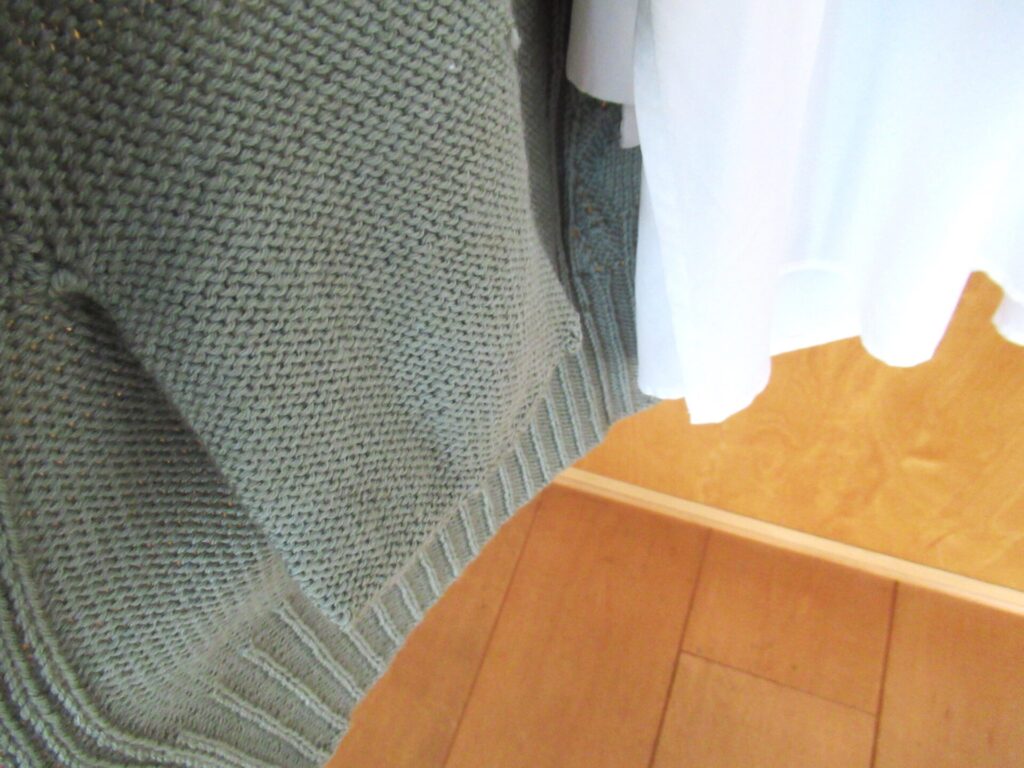
For the pockets I had knit in a piece of waste yarn that had to be unravelled later, with live stitches to be picked up on either side. Scary! What if the entire thing unravels? (It didn’t and was easier than I feared). The pocket is knit in the round and finished with a 3-needle bind-off. This means that it hangs loose on the inside of the cardi – can you see it?
After knitting the pockets, there were considerable holes on either side of them:
How to close those invisibly? Also, stitches had to be picked up for the pocket tops in a straight line, and the pocket tops had to be mattress-stitched onto the fronts. If I botched that, it would spoil the entire cardigan. In the end I just got on with it and am fairly happy with the result.
I hope the pockets won’t pull on the sides of the ribbed tops too much. If they do, I may have to reinforce them somehow on the wrong side.
The yarn I used for Be Mine was Rosy Green Wool’s sport-weight ‘Cheeky Merino Joy’ (100% Organic Merino extra fine; 100 g/320 m/341 yds) – finer sister of ‘Big Merino Hug’, which I used for my OXOX XL shawl. Both oh so soft and gorgeous to knit with. The shade our daughter chose is Reed:
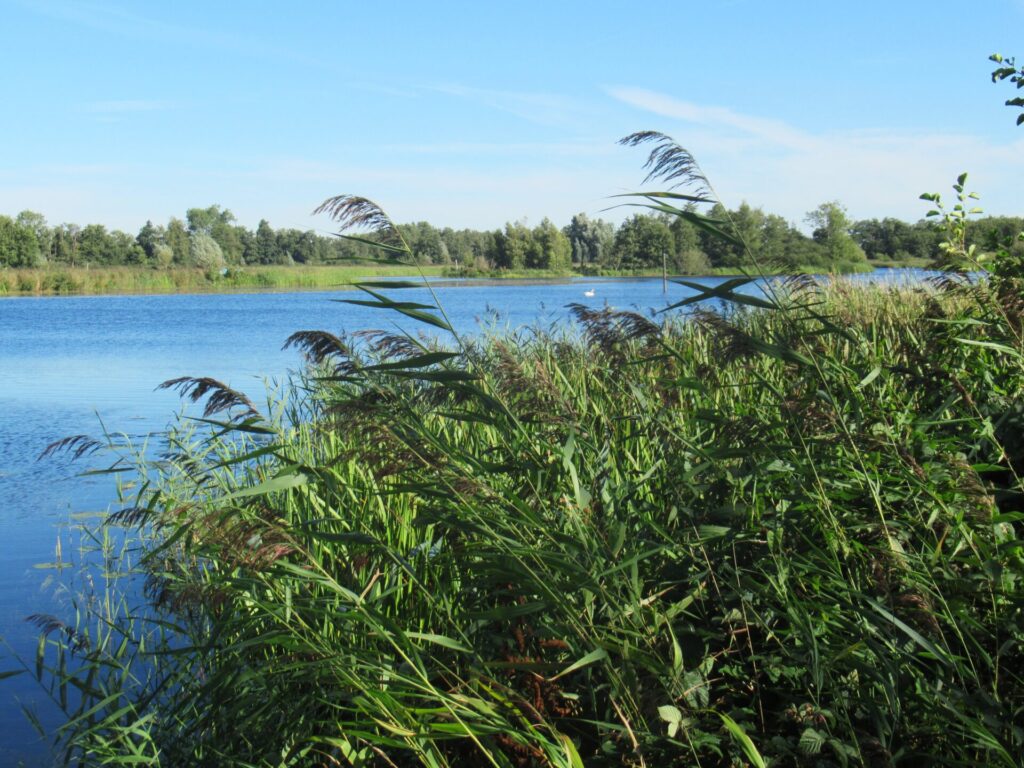
Reed? For this greyish green? Reed, with its feathery plumes, grows in every ditch and along just about every waterway and lake here. There are also extensive beds where reed is grown for roofing material. Reed can take on many colours.
In winter the dried stalks are a pale to golden yellow, depending on light.
In spring, the young reed leaves are a vivid, fresh green. And the dried reed stalks used for roofing gradually darken to brown.
But the greyish green of the Be Mine cardigan? Never! Well, perhaps in summer when the light is just right it can be said to have a greyish tinge.
Reed-coloured or not, this cardigan was a great knit and I hope it will bring the wearer much joy. I hope there is something on your needles that is bringing you joy, too, and hope to see you again soon. Bye for now!
Hello, and thank you so much for last week’s thoughtful comments. Taking your advice on board, I’m telling myself that it’s okay to be less productive for a while. Focusing on small and simple knitting projects for the time being seems like the best thing to do. Socks, and perhaps a small scarf or a pair of mittens – thank you for your ideas. And I hope to finally get round to some other crafts projects that have been patiently waiting.
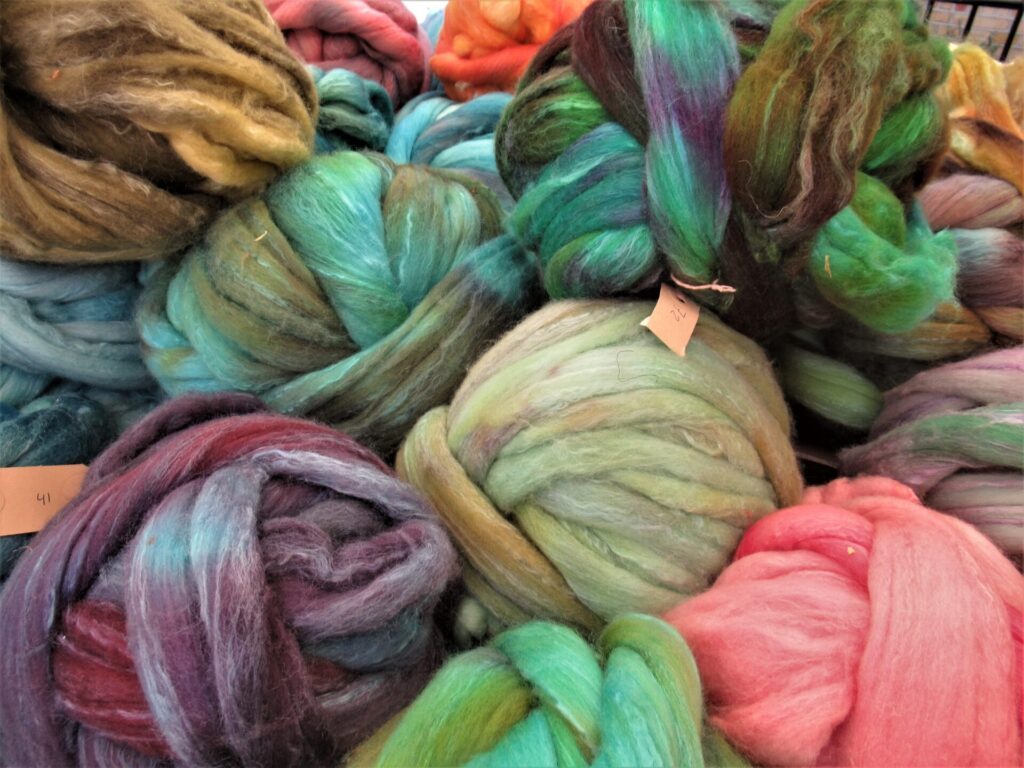
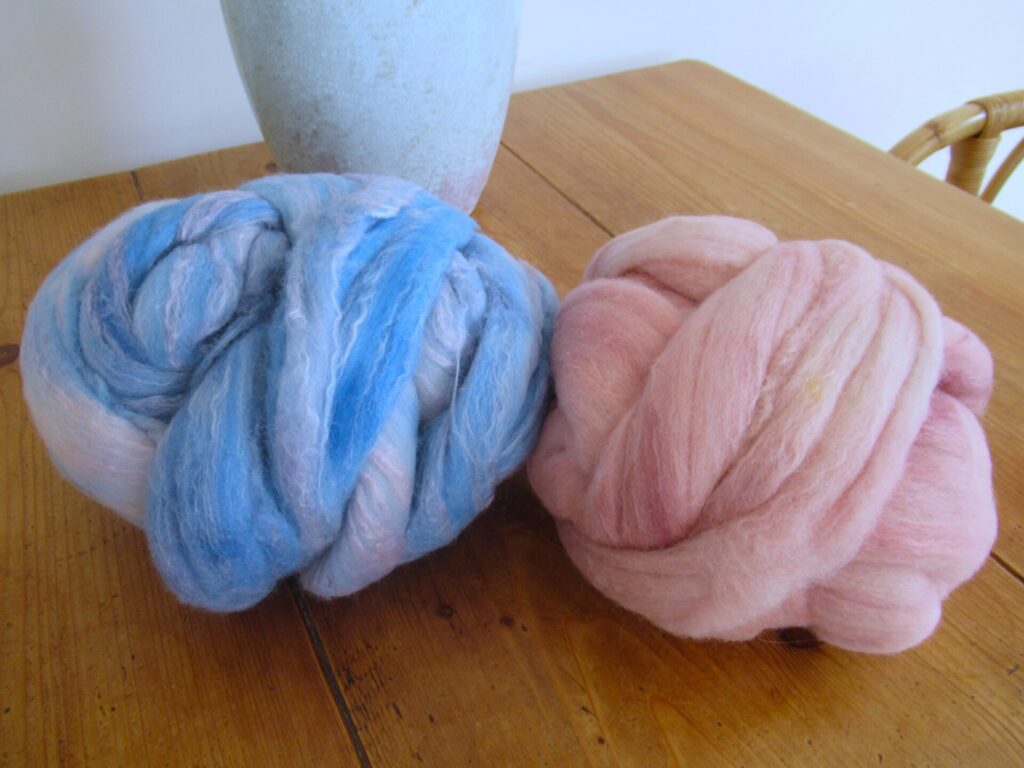
In 2023 I bought some spinning fibre at the wool festival in Joure, from the Q-Art stand that was filled with hand-dyed wool-and-silk in many colours:
Is there something there to your taste? Which would you choose? I chose two balls, together a little under 300 grams – these:
One a dusty pink, and the other the colour of the sky on some mornings and evenings: sky-blue pink.
I love these festivals so much, not just because of the lovely materials on offer but also because of the people visiting them, some of them imaginatively dressed. Take this person, all in white with a lace parasol, an antique-looking skirt, and ankle socks with lace. Even the text on the bag is carefully chosen: Once upon a time…
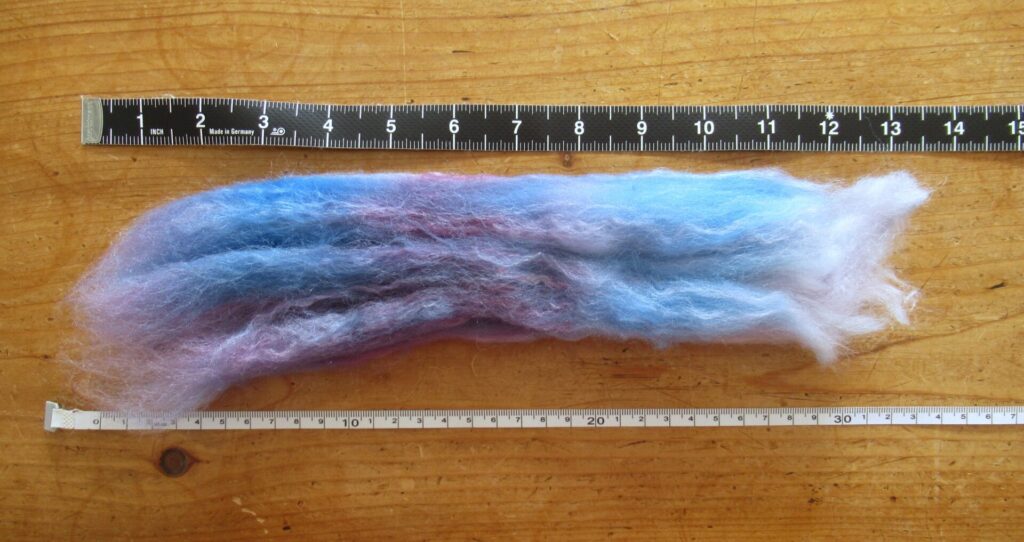
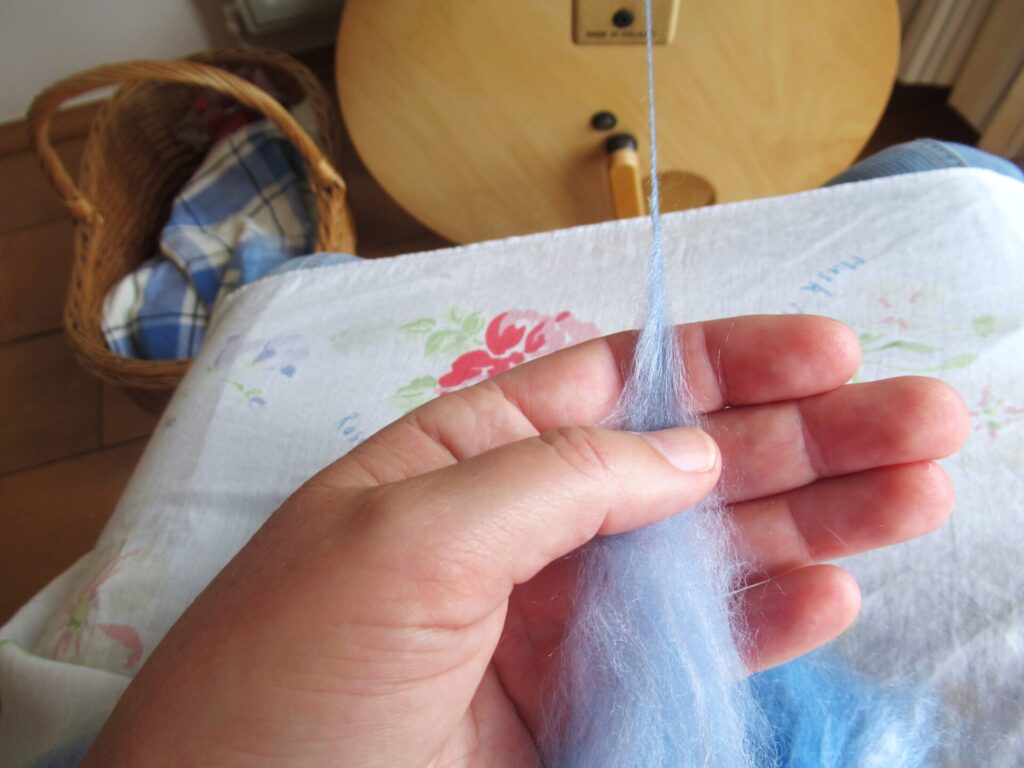
Well, back to spinning. I started with the sky blue-pink fibre, in this case pre-drafting it. I tear off about 30 centimetres (13 inches).
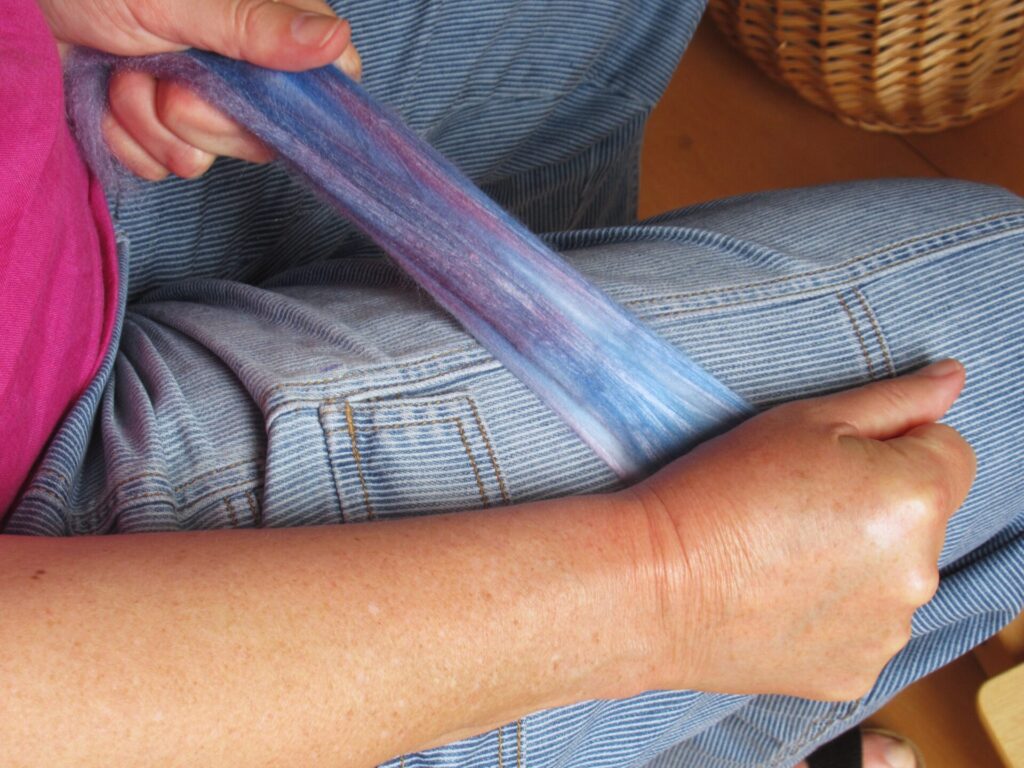
Then carefully pull on it with both hands.
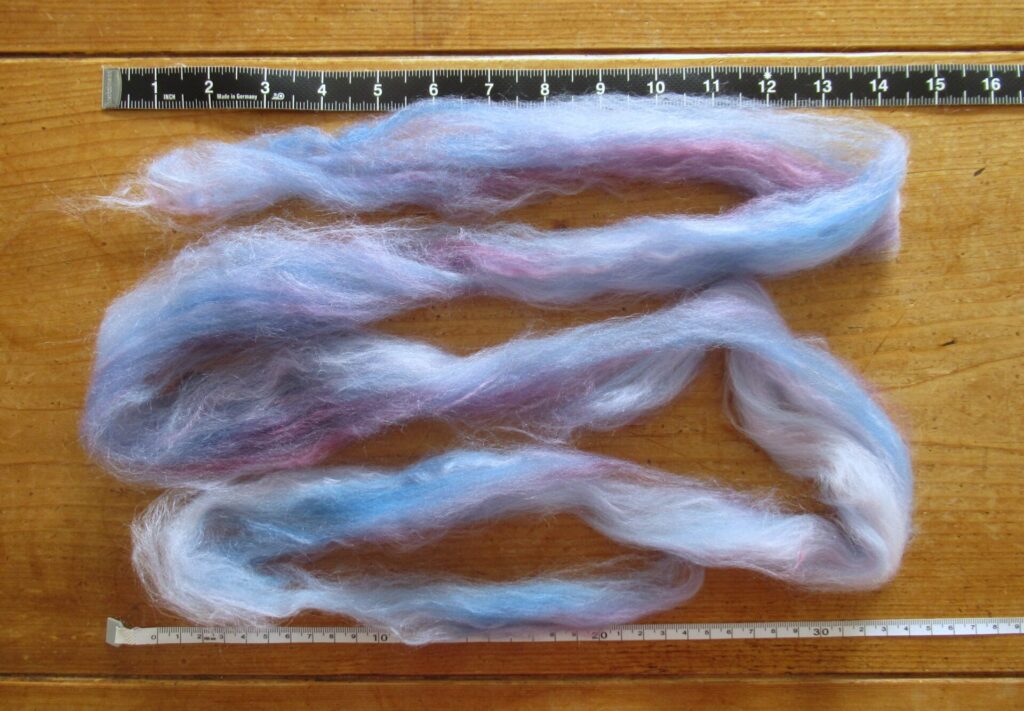
Pulling the fibre out more and more, bit by bit, moving my hands back and forth along its length while taking care not to pull it apart. Until it is about 4 to 5 times the original length.
This blends the colours a little more. And most of all it loosens the fibres, making for easier spinning. I spin it, then tear off another piece and repeat the pre-drafting process, spin that, etc.
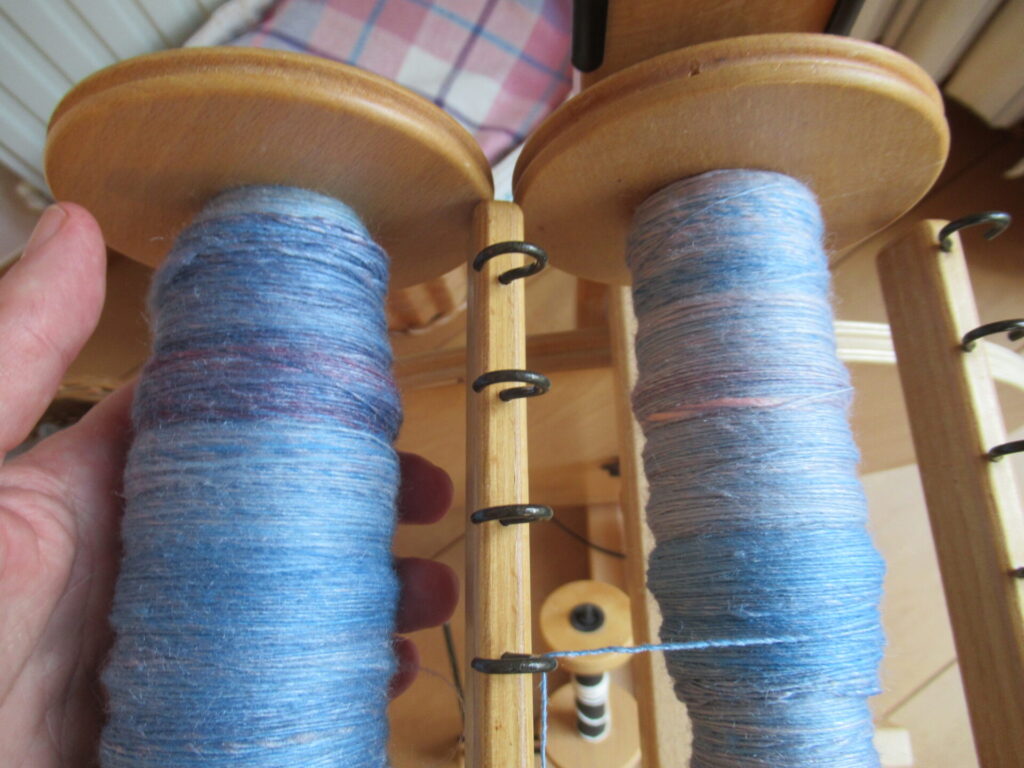
(I also spin with both hands, but do not always have an extra pair of hands handy for taking pictures.) After spinning all of the fibre, I’m going to ply it into a 2-ply yarn. I’m aiming for a sport-weight yarn, but always find the final weight hard to predict.
Do you spin, too? If not, why not give it a try? Once you’ve got the hang of it, it’s such a relaxing thing to do. Wool festivals and crafts fairs are ideal for trying out whether it’s something you might enjoy, without immediately investing in all kinds of materials and equipment. There are always people there who are happy to let you take place behind their spinning wheel and tell you what to do.
Well, that’s all for today. I hope there is something else to share here next week and hope to see you then!
Hello! I hope you’ve had an enjoyable Easter weekend. Or perhaps you’re even having a longer Easter break? For us it was a long weekend, with several little outings. On the Saturday we first worked in the garden, and in the afternoon I went cycling. It was a lovely, sunshiny day for a ride, with lots of blossoming trees along the way.
After a little under an hour, I arrived at my destination – Atelier Lindelicht. I’d come to collect my scarf that had travelled to several crafts fairs with Marianne. Her studio is always such a nice place to have a browse.
(The shawl with the crocheted border is from her hand-dyed Oda kit.)
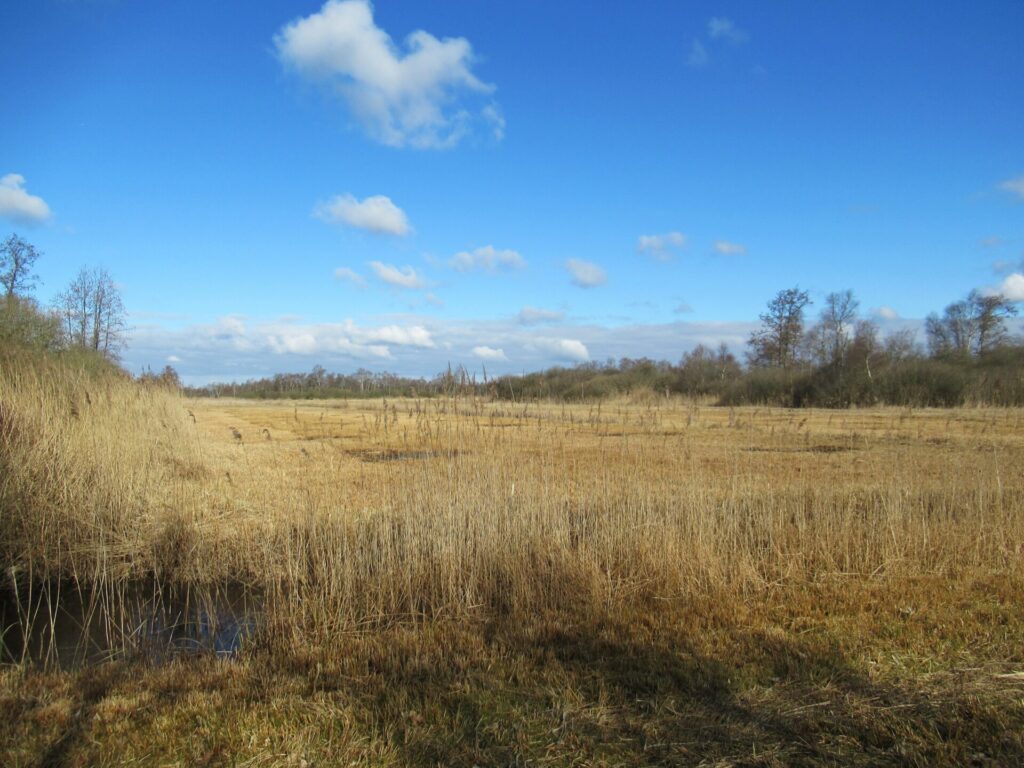
After a cup of tea and a chat, I took the long route home, partly through an agricultural area…
… and partly through a nature reserve along a river.
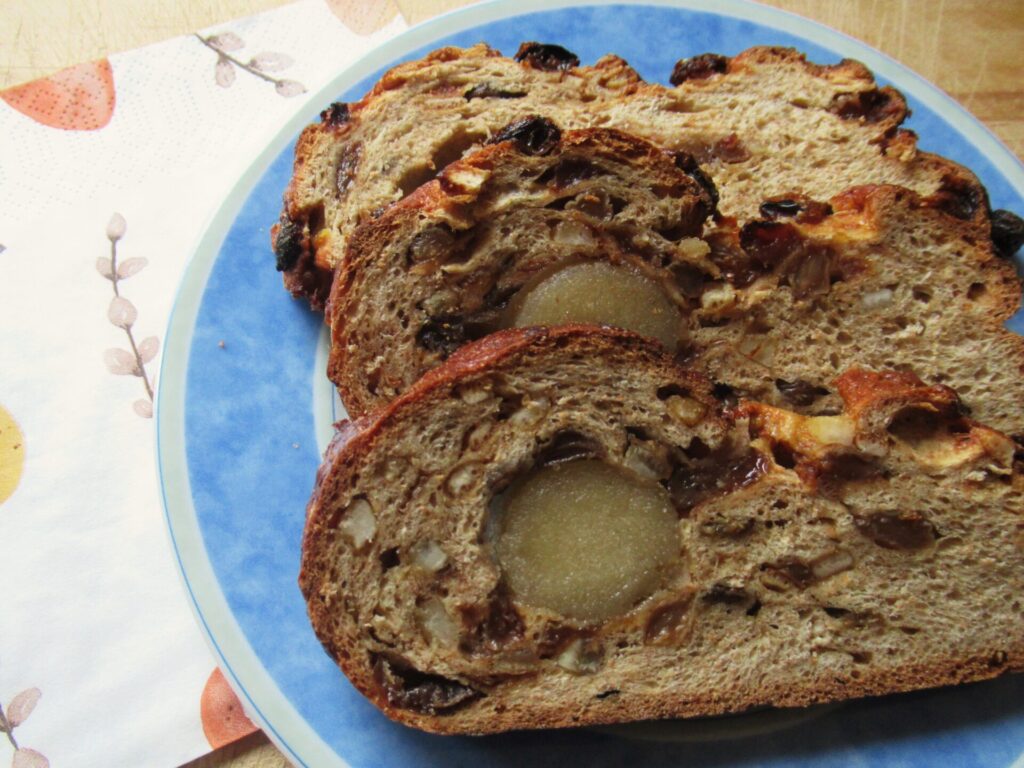
On Easter Sunday, we always have a special breakfast that wouldn’t be complete without my husband’s home-baked paasbrood, the traditional bread with a marzipan core that is basically the same as our Christmas stollen.
Our grandson got to try on his new Norwegian pullover and wanted to keep it on straightaway. Knit in a fine yarn, it took me longer than I’d thought. It’s the same number of stitches and the same number of rows as my own Sundborn cardigan.
It is a Nordsjøgenser, knit from Sandnes Babyull Lanett. (Pattern not on Ravelry; I wrote about the pattern booklet here.) It is knit from the bottom up, with the body and sleeves knit separately first. Then everything is placed on one needle for the raglan yoke.
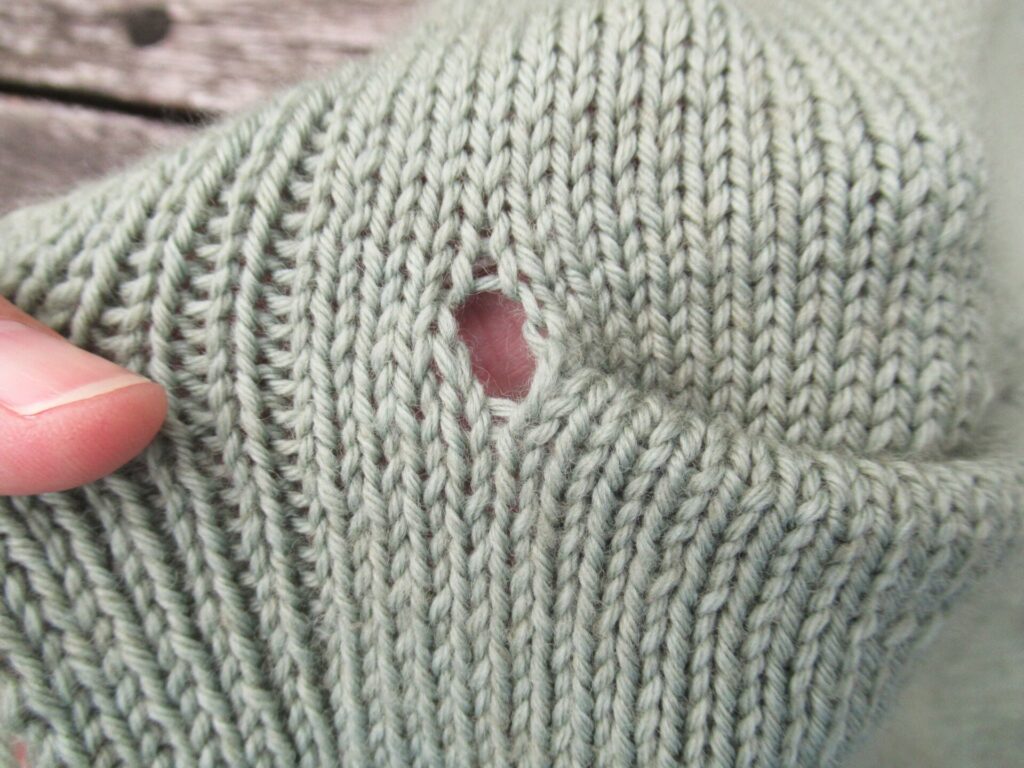
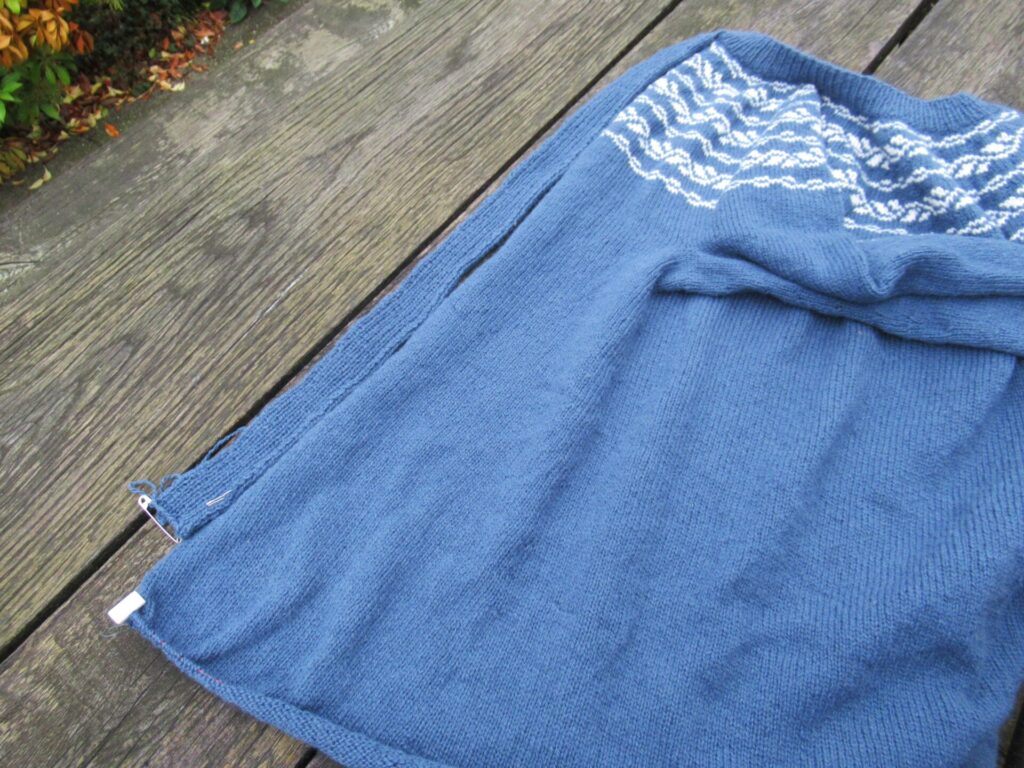
In the pattern, several stitches are bound off under the arms to be seamed later. I placed the stitches on pieces of waste yarn instead of binding them off.
This creates a big gap.
Here is how to close it:
1) On the wrong side, pIace the stitches from the waste yarn on two needles and bind them off with a third needle. Make sure to leave yarn tails of at least 4” (10 cm) at both the start and the end of the bind-off.
After binding off there are still fairly large gaps left on either side.
2) Using a darning needle, thread a yarn tail around one of the gaps and pull the gap closed.
3) Weave in the end and repeat on the other side of the bind-off.
Repeat steps 1 – 3 for the other underarm gap. I’ve closed underarm gaps in this way several times now and find it easier and neater than casting off under the arms and seaming the gaps.
Well, that was pretty technical. To close off and bring a smile to your face (or maybe even make you laugh out loud), here is a photo I took at a fair we also visited during the Easter weekend. Somebody had been knitting for many, many hours…
‘Var välkommen kära du, till Carl Larsson och hans fru!’ it says above the front door of Lilla Hyttnäs in the Swedish village of Sundborn. ‘Welcome to the house of Carl Larsson and his spouse!’ A warm welcome to the house that Carl and Karin Larsson made into such a special place, Carl with his paintings and Karin with her textiles.
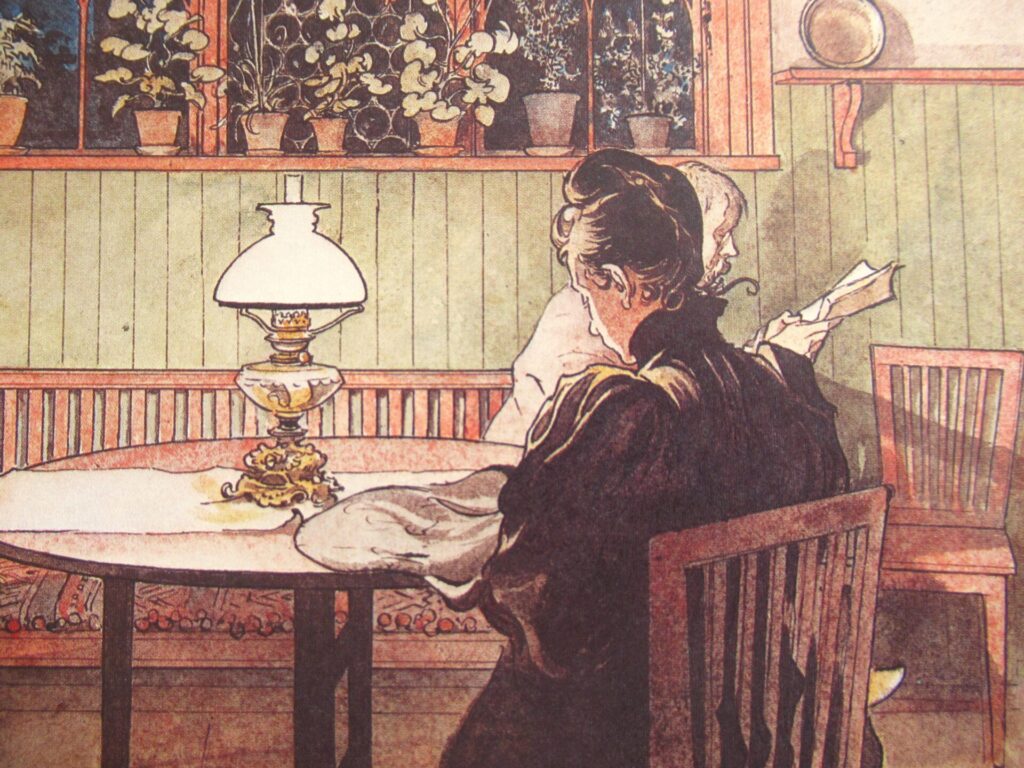
Carl and Karin in a detail of Carl's painting When the Children have Gone to Bed.
Carl is best known for his watercolours of family life at Lilla Hyttnäs. In the house itself, beside all kinds of other decorations, he also painted his family on walls and doors.
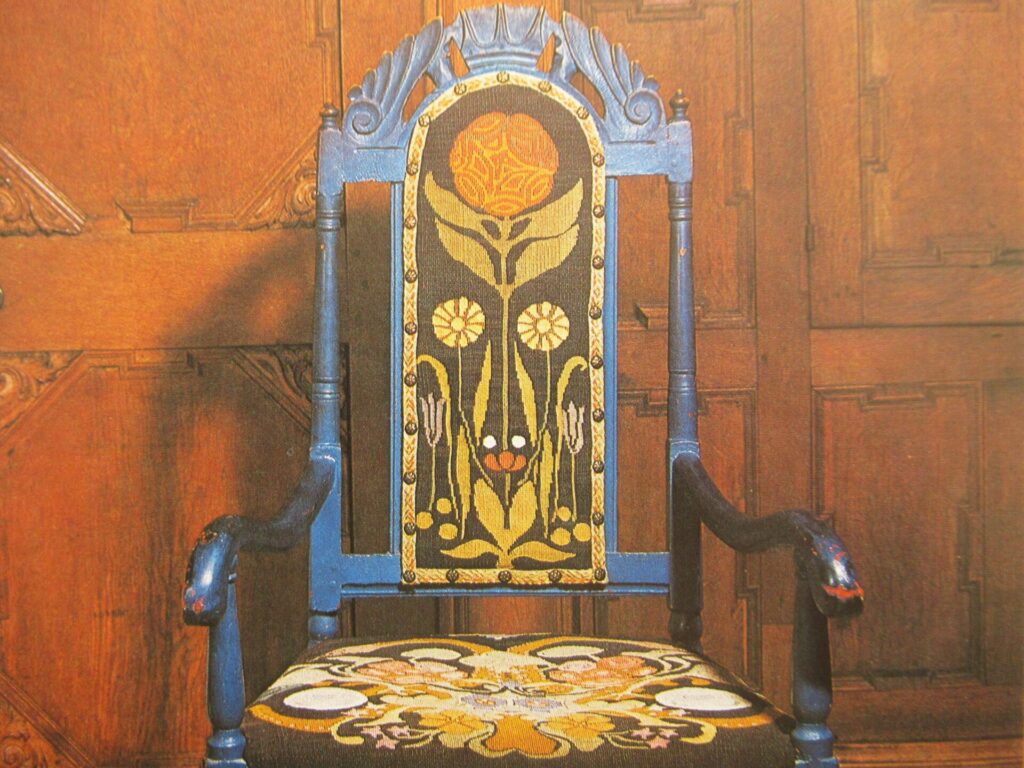
Karin was a painter as well, but after getting married and having children she poured all of her creativity into embroidery and weaving.
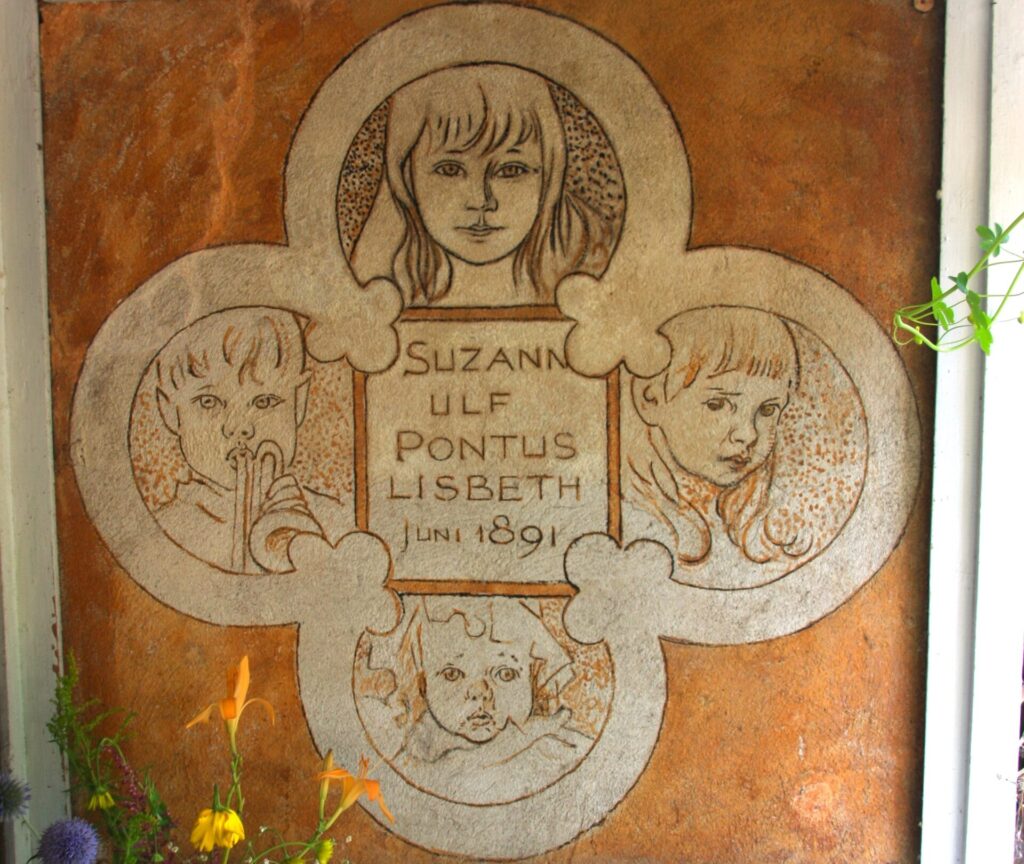
Walking through and around the house, I was amazed by everything they achieved while raising eight children. Below, a photograph of their living room from the outside, with a bird decoration by Carl between the windows.
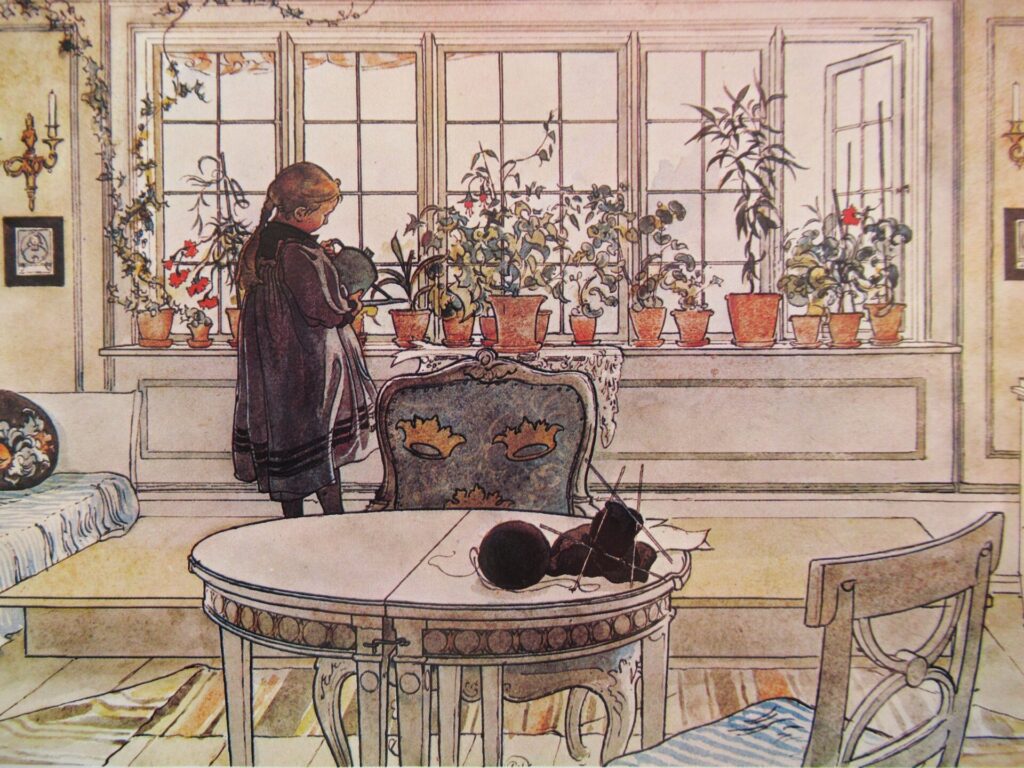
After my first visit, in the early 1980s, I had a postcard of one of Carls paintings on the wall of my 6 m2 student room for a long time. It was the well-known painting of the interior of the Larssons’ living room with one of the girls watering the plants.
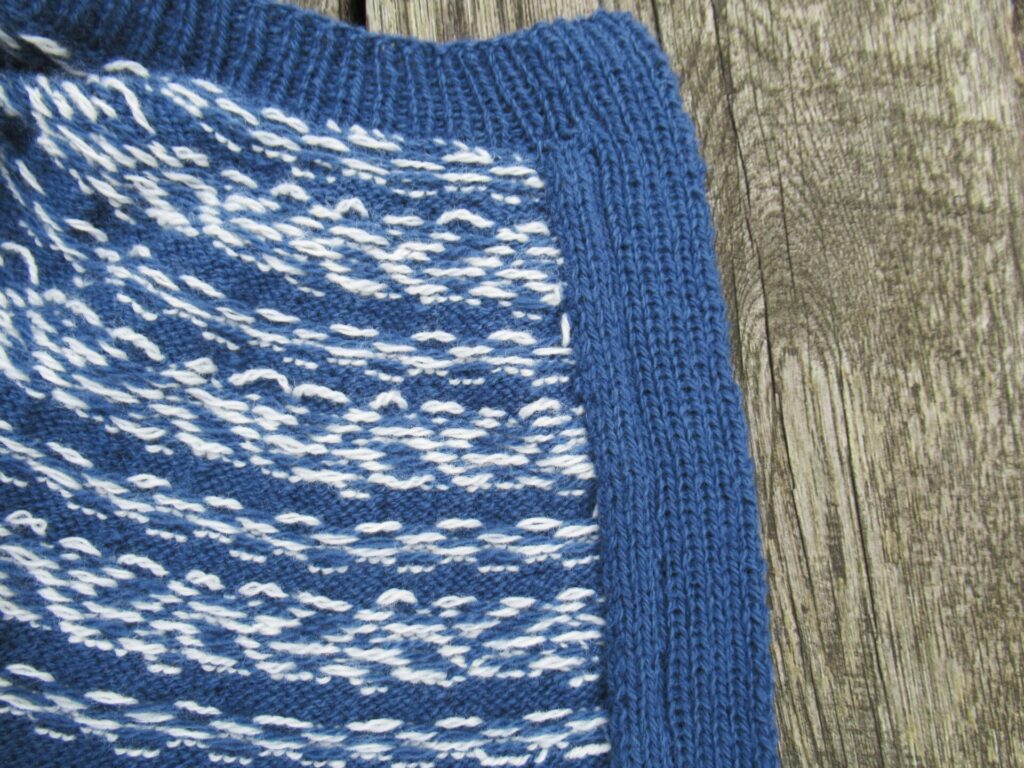
In her cardigan book Koftor, knitwear designer Maja Karlsson tells us that she spent some time at Lilla Hyttnäs studying the colours and patterns of Karins textiles, and that this inspired her Sundborn cardigan design. She photographed the cardigan in the same living room, with the model watering the plants just like the girl in Carl’s painting. The stars in the cardigan’s yoke echo the stars along the edges of Karin’s blue-and-white table cloth.
I thought it would be fun to photograph my Sundborn cardigan in the same way. Only in our own living room instead of at Lilla Hyttnäs. The little red wooden Dala horse on the window sill is a souvenir of my second, more recent visit to Sundborn. And now I also have the cardigan to remind me of that wonderful place.
At this point, I’ll say goodbye to the non-knitters among you. I quite understand that you’d rather do something else than read about cutting a pullover open to turn it into a cardigan. See you again next time!
A Hand-Sewn Steek
For those of you who are interested, let’s dive into steeking. In this case, I knit the button bands on first, before cutting the steek.
Instead of machine-sewn steek reinforcements, I wanted to use hand-sewn seams this time, but wasn’t sure how to go about it. Fortunately some of you came to the rescue. Helga checked the Swedish version of the pattern book and confirmed that the designer uses machine sewing thread. Angelique said that the seam might become too tight using machine sewing thread. I have never liked the idea of synthetic seams in my woollen sweaters anyway, so that was out. She also suggested trying things out on a swatch first, and that was what I did:
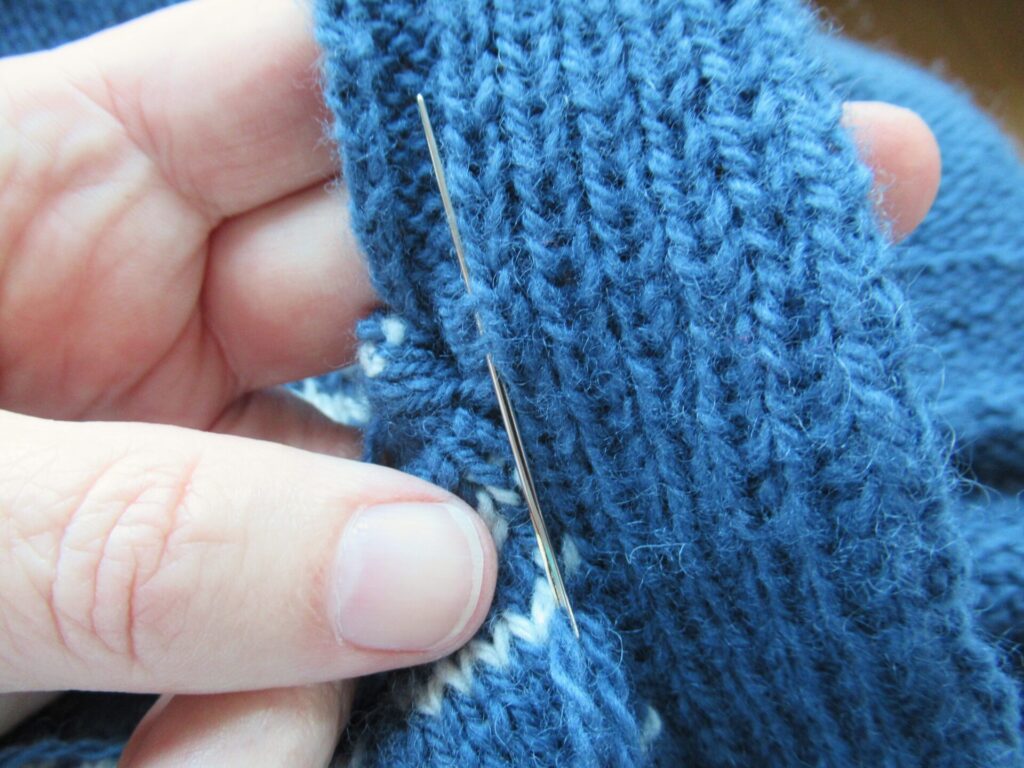
As an experiment, I sewed a back-stitch seam using the same yarn used for the cardigan (Léttlopi) on one side of the centre stitch and on the other using a thinner yarn (Jamieson & Smith 2-ply jumper weight). The Léttlopi was on the bulky side; the thinner yarn worked better, as L. had already predicted, so I used that on the cardigan.
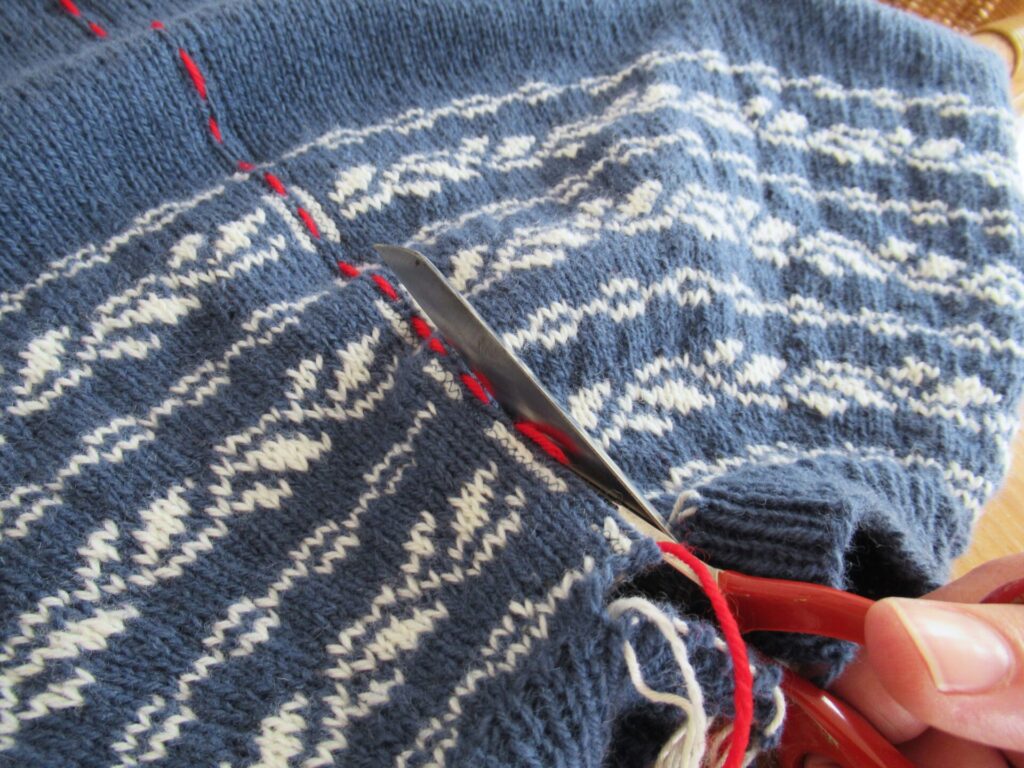
L. also advised ‘piercing every row’s stitches’ and to be on the safe side I did that as well. Then, using my small embroidery scissors and holding my hand between front and back, I cut the steek.
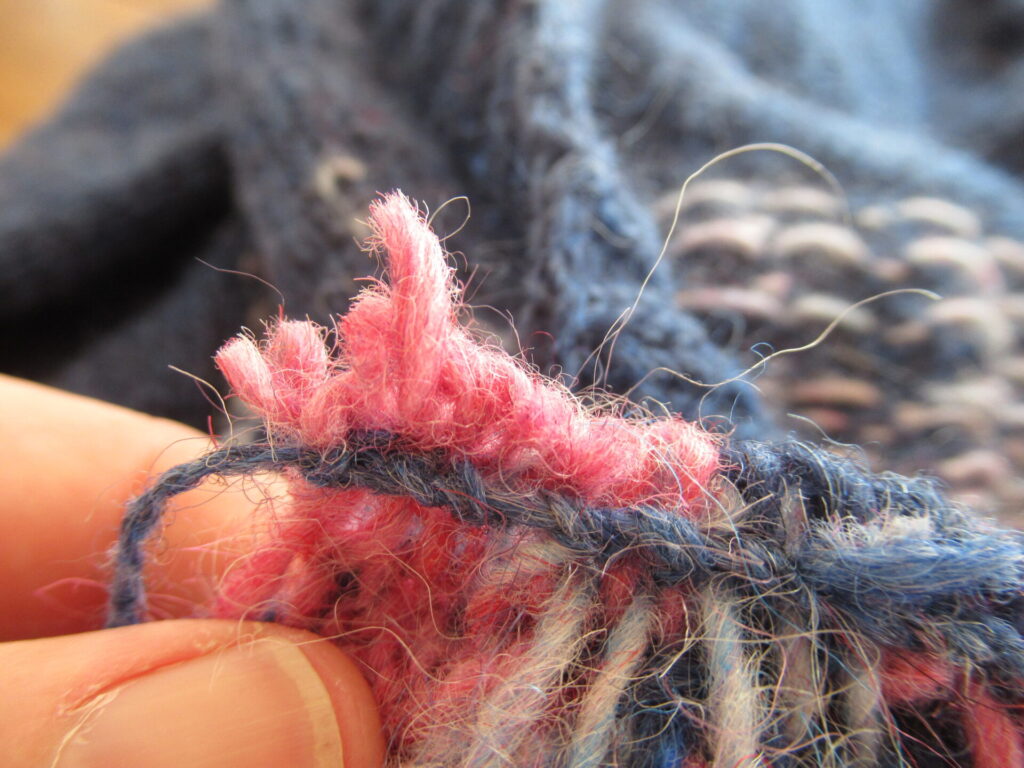
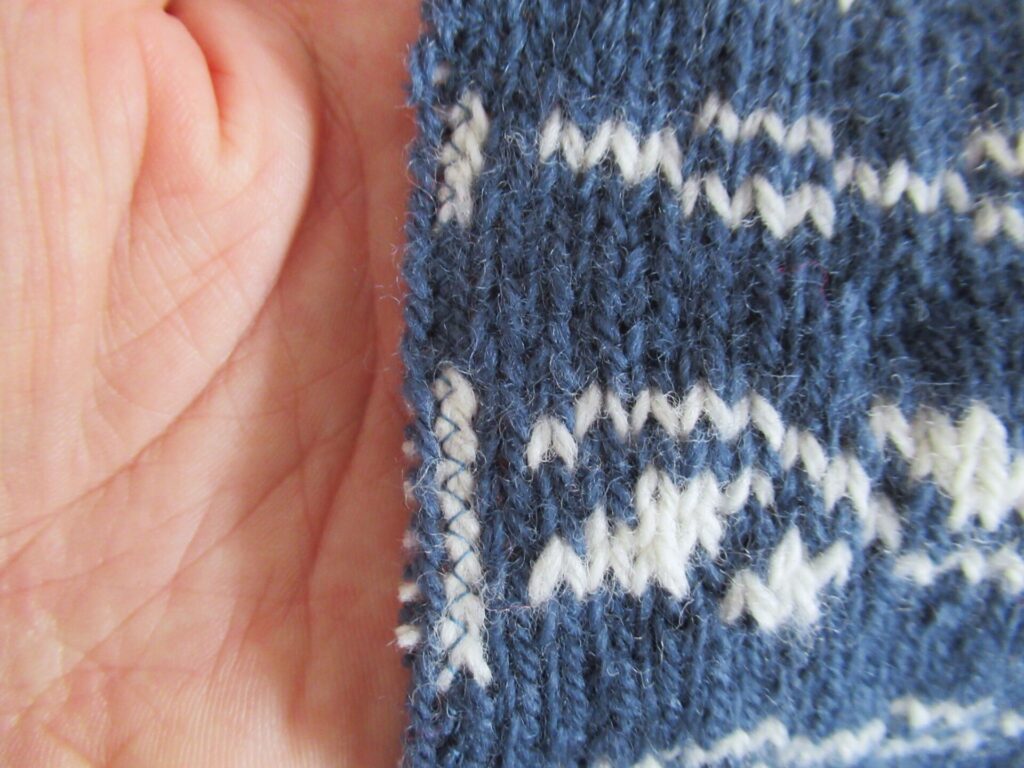
The steek stitches looked fairly stable after cutting. (Below, the blue line through the centre of the pink stitches is one of the hand-sewn seams.)
But I’m glad that I pierced through the yarn of the knit stitches while back-stitching the seams, because at the top end the knit stitches did fray. With the extra strong reinforcements they wouldn’t unravel any further.
Finally, the steek stitches were folded over and stitched into place using whip stitches on the inside. Very neat!
All in all, I’m very happy with this hand-sewn steek reinforcement. It is easy and relaxing to do, and doesn’t stretch the knitted fabric as machine stitching can do. No more machine-reinforced steeks for me from now on. Thank you for your advice Helga, Angelique and L.! And to all of you – thank you for reading on to the end!
Links:
Maja Karlssons cardigan book Koftor can be found here on Ravelry, and the Sundborn cardigan here. (It has been translated into English, German and Dutch.)
Lilla Hyttnäs is now a museum called Carl Larsson Gården. Although only Carl’s name is mentioned in the museum’s name, the museum’s website now pays equal attention to Carl and Karin.
Hello! I hope this finds you all well. Today, I’m diving deep into a knitting technique – one way of finishing a steek, with button bands with knitted-on facings. Perhaps you’re already familiar with steeking. If not, let me explain.
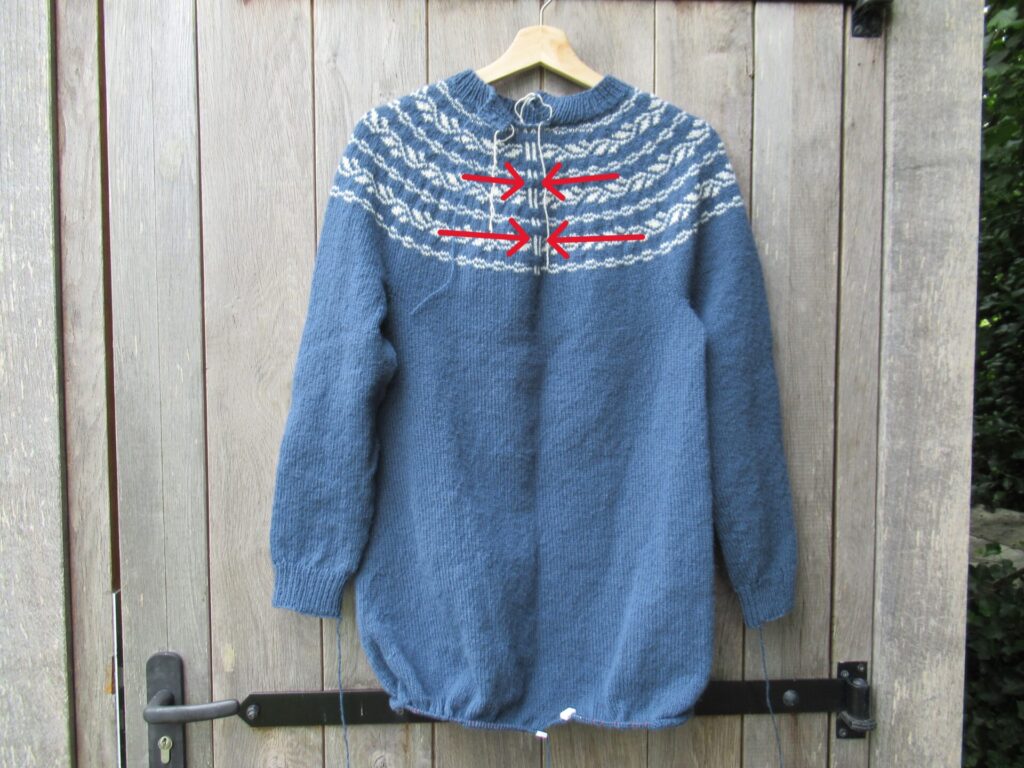
I have been knitting a long Norwegian cardigan top-down and in the round, with a stranded colourwork yoke. At first it looks like a long sweater or mini-dress. To become a cardigan, it must be cut open. And to that end, a ‘panel’ of several extra stitches (in this case five) is knit in the centre front. Together these stitches form the steek. In the yoke the steek is clearly visible (between arrows), in the body it is just five stitches like all the rest.
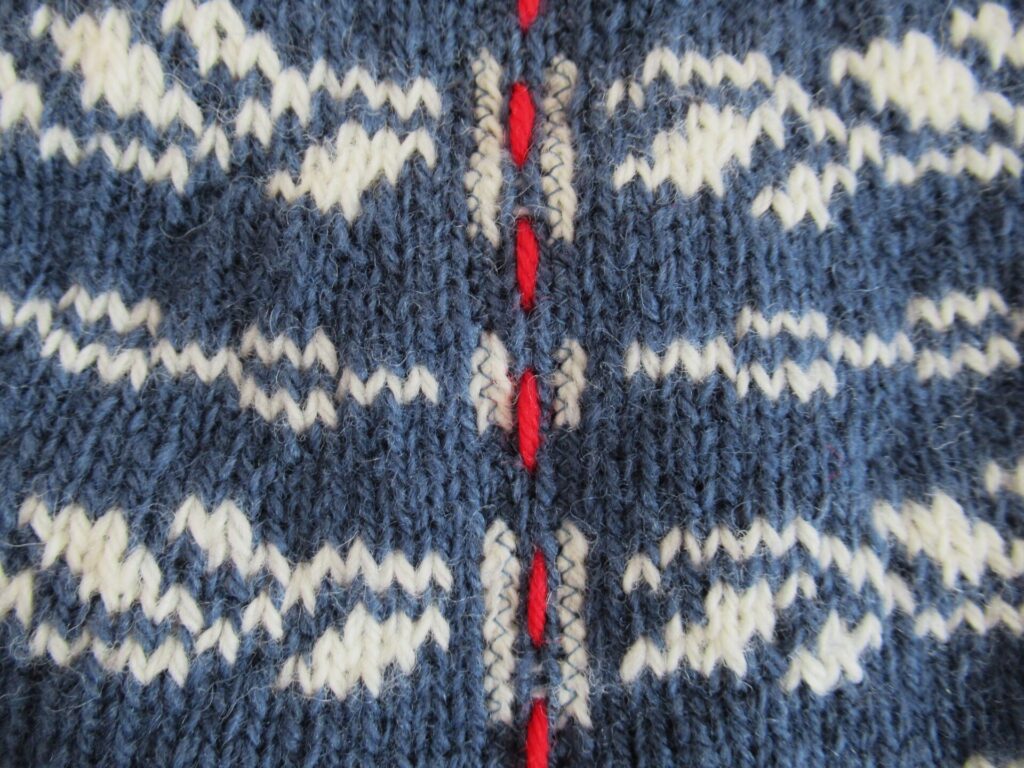
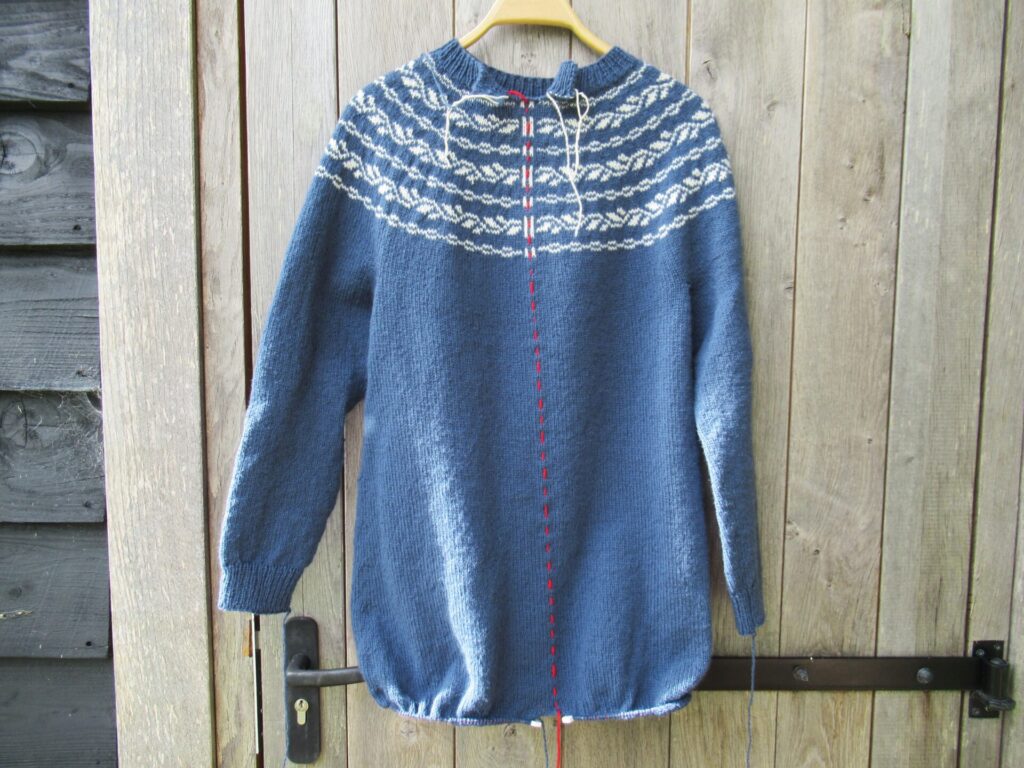
I marked the centre of the steek with basting stitch in red yarn.
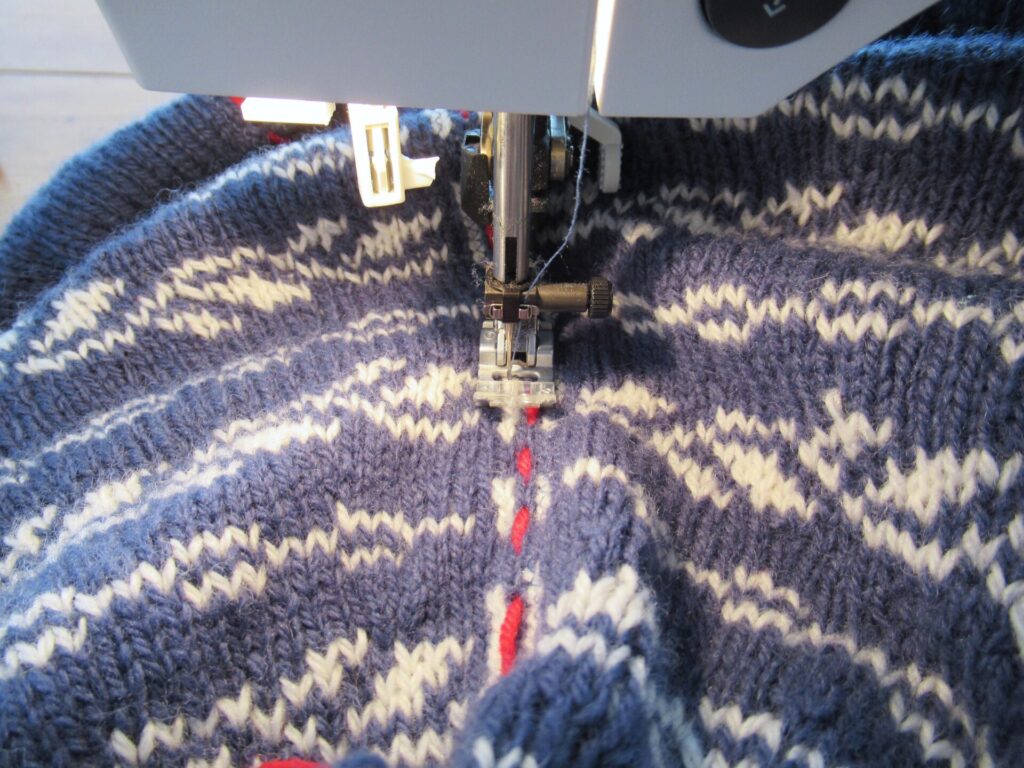
With my sewing machine, I zigzagged through the stitches on either side of the centre stitch, to prevent them from unravelling.
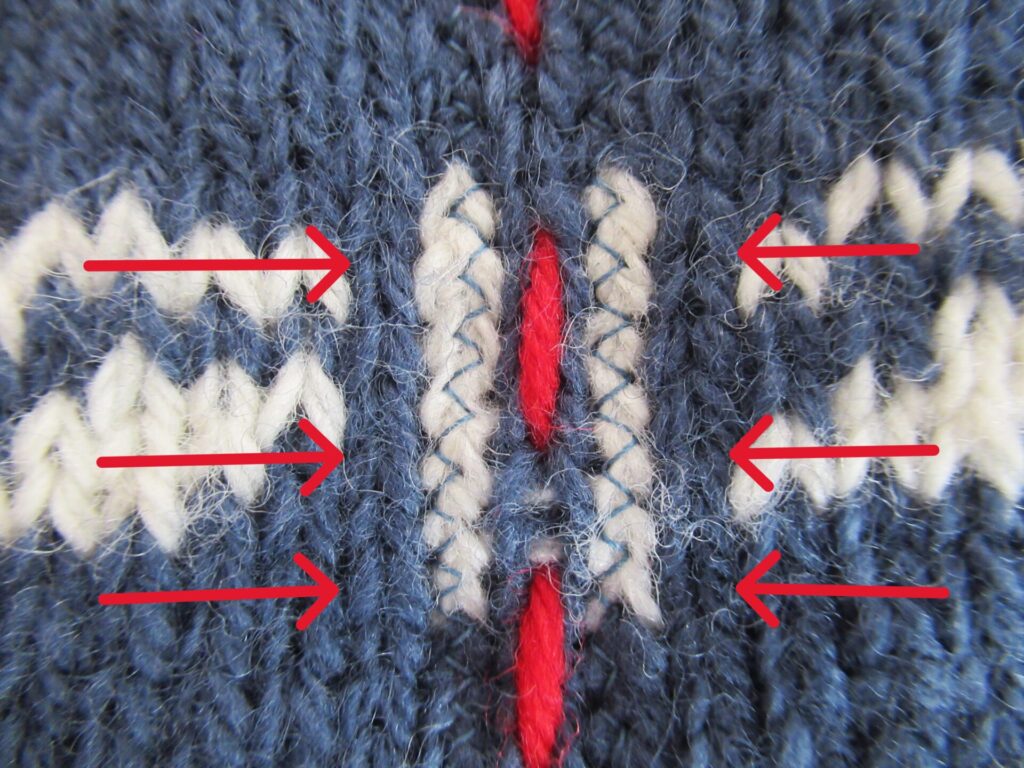
This is what it looks like after zigzagging.
The five stitches between the red arrows form the steek: the centre stitch with the red basting stiches down the middle, one stitch with zigzags on either side, and one more stitch on either side of that.
Then I took a deep breath and cut!
The zigzags keep the knitting from falling apart.
Now the button bands are knit. A little shorter than the fronts – they will be stretched out when they are sewn on.
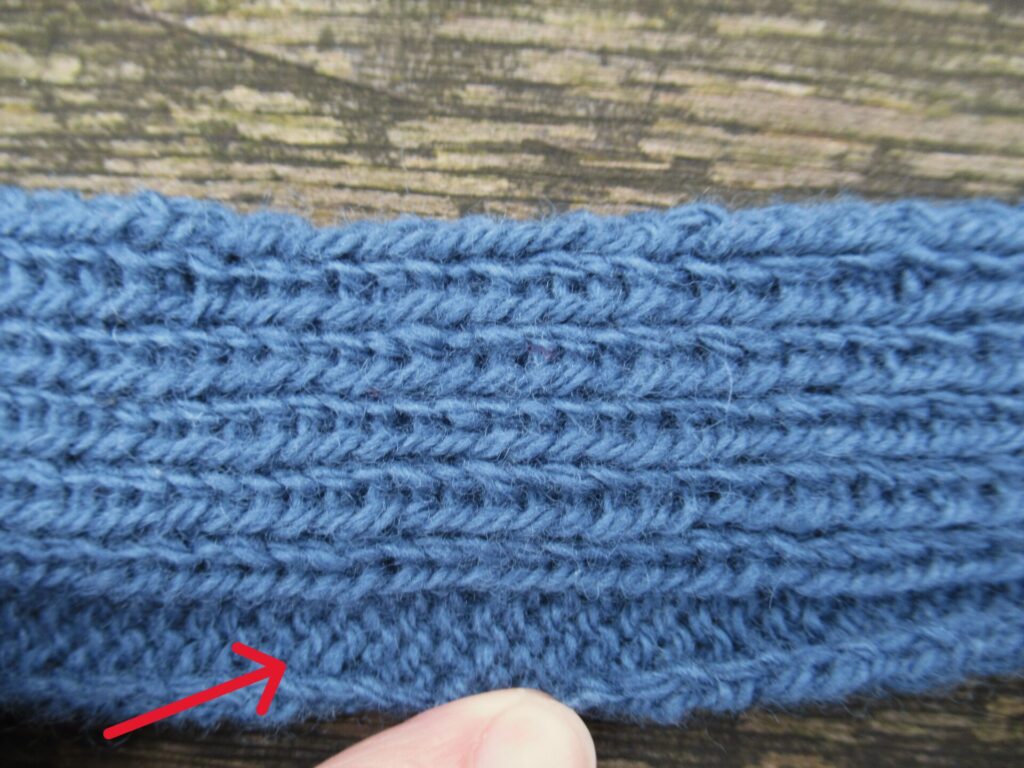
The steek stitches are folded to the inside when the button band is sewn on. For a tidy look, they need to be covered somehow. In this case they will be covered by a facing. The facing is knit on to the button band – four stitches in stocking stitch next to the ribbing (arrow below):
I pinned the button bands in place and sewed them on to the fronts with mattress stitch from the right side of the fabric, just like you would seam separate pieces of a sweater together.
After that, the facings need to be fastened to the fronts on the wrong side of the fabric with invisible stitches to cover the cut stitches of the steek. This takes time and patience. I did it in instalments. All in all, sewing on the button bands and sewing the facings in place took me at least two hours. And I have to say, it looks very neat! Can you see it? The button band to the right, with the 4-stitch facing to the left of it:
Hardest parts of the steeking:
Plucking up the courage to do it.
Not accidentally zigzagging the back of the cardigan to the front.
What I would do differently next time:
Weave in the ends before zigzagging the steek (loose yarn ends got caught between the zigzags).
Use a wider zigzag.
Finally, I knit on the lower ribbing. Now all the cardigan needs is a nice bubble bath and buttons. I hope I’ve shown and described the entire process clearly enough and given you the courage to maybe try steeking this way someday.
I’m off to the Handwerkbeurs now – THE knitting/crochet/embroidery/quilting event of the year around here. If I don’t forget to take photographs I’ll tell you about it next week. Hope to see you then. Bye!
Hello! Today I’m diving deep into double double decreases. If that isn’t really your thing, do scroll down for something completely different.
A Shoulder Problem
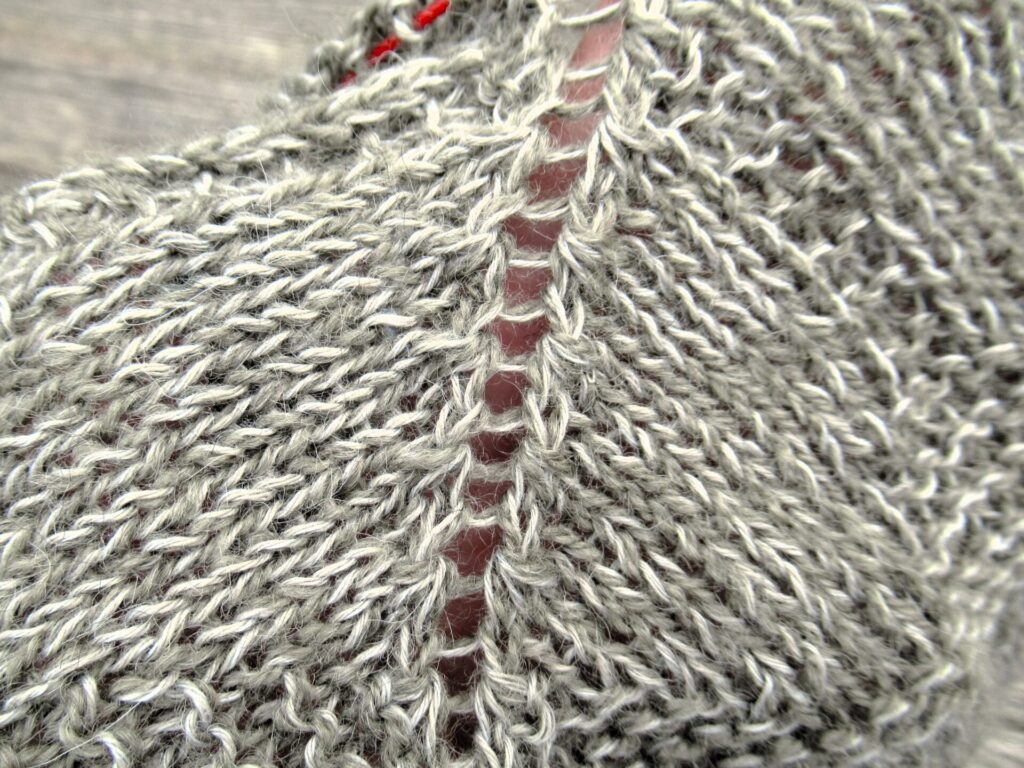
What exactly do I mean by double double decreases? And why am I diving into them? Well, it’s to do with the Lillebaelt pullover I’m knitting for our daughter. It is knit in one piece, without any seams. On the top of the shoulders, there are double decreases on either side of where otherwise the shoulder seam would be. No matter how tight I pulled the thread, I got a gaping ladder in between these double double decreases – look:
As the entire weight of the pullover hangs on this, I expect it will only get worse. Did the designer have the same problem or is it just me? Let’s take a look at the photographs in the book. Oh, ah, hmm, I see…
Or rather, I can’t see the tops of the shoulders at all. Oh well, I thought, I’ll pull the stitches together with a thread on the wrong side. But then a knitting friend came to visit, we looked at the problem together, and I decided to rip it out and find a more elegant solution.
Swatching to find a Solution
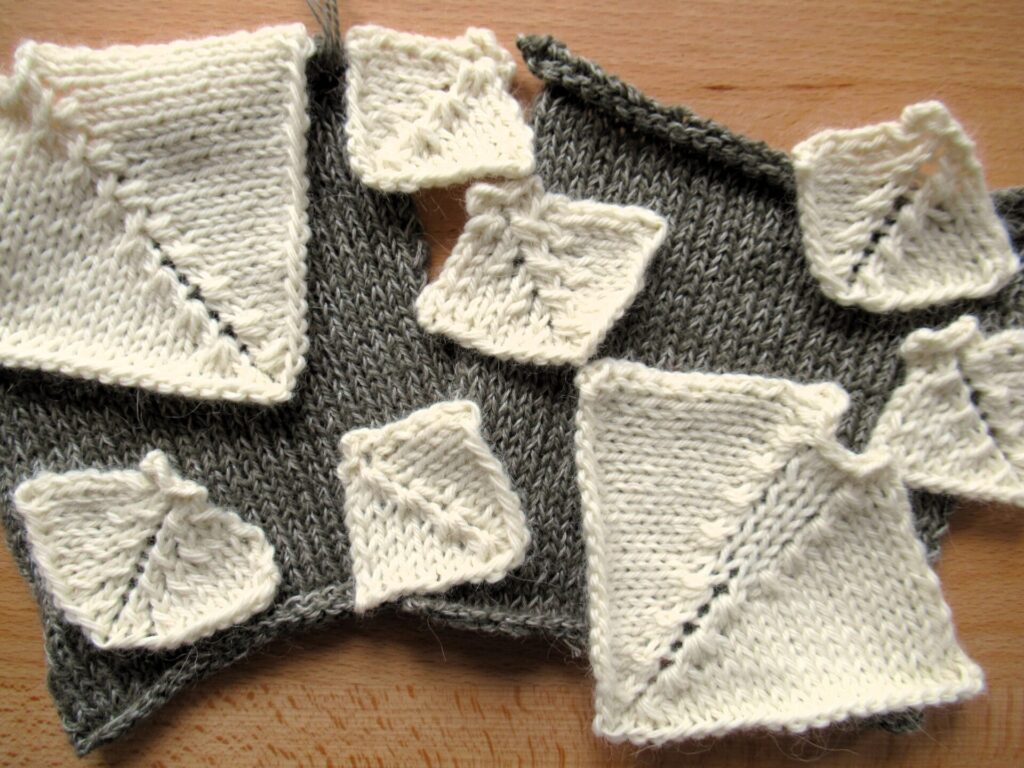
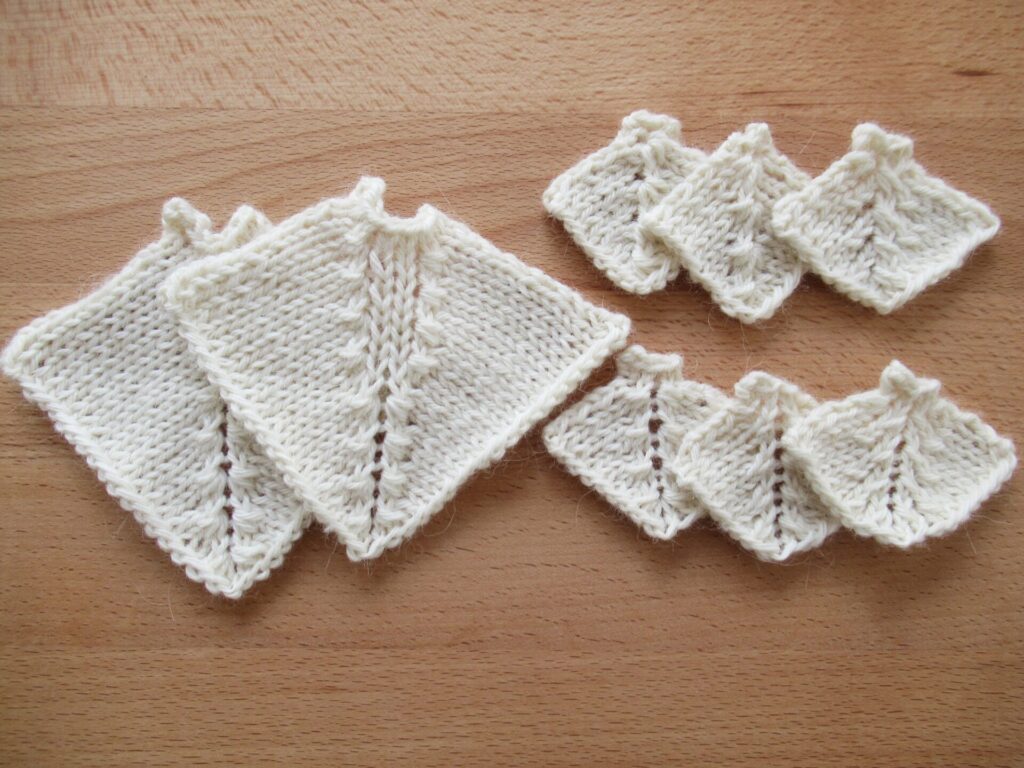
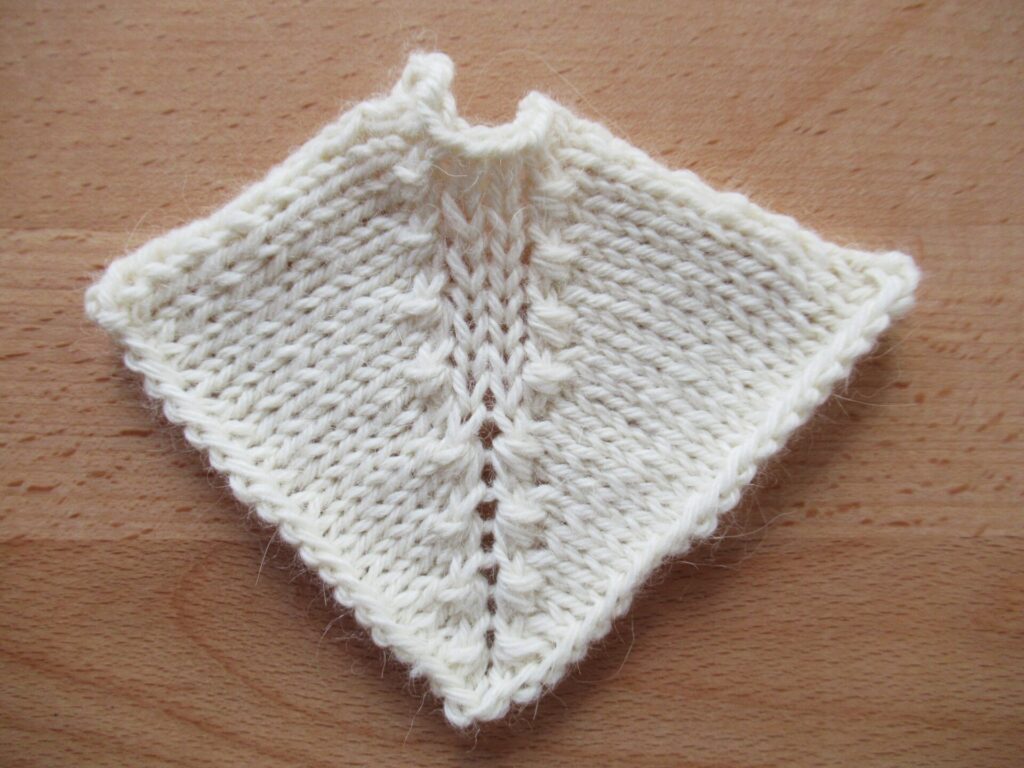
From a simple undyed DK-weight yarn, I knit swatches to try things out.
The pattern uses a left-leaning sssk on one side and a right-leaning k3tog on the other. What if I inserted two stitches between the two double decreases? Below, first the original double decreases with ladder, and then the same decreases with two stitches in between.
Interesting! The two centre stitches became very loose and open, again no matter how tight I pulled the yarn. So, not strong enough and not suitable.
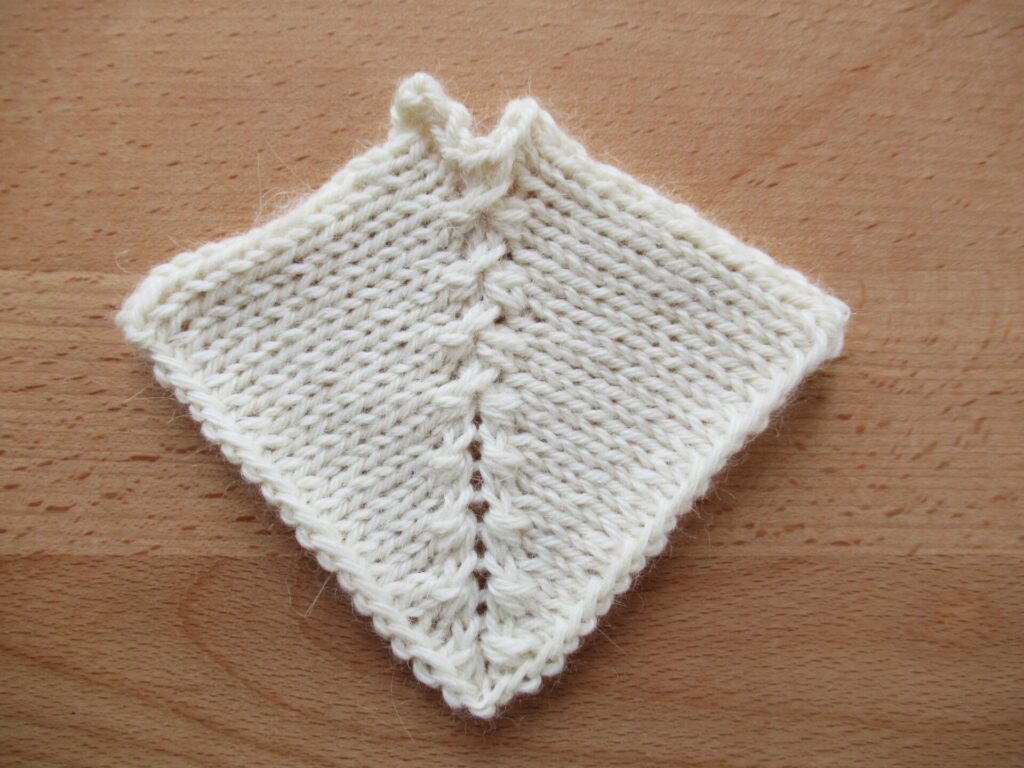
The double decreases were only done every other row. What if I crossed the two central stitches in the rows between the decrease rows? (Upper half of swatch below.)
Very decorative and also very strong. But the shoulder section is partly knit in the round and partly back and forth, meaning I’d need to do this partly on the knit RS and partly on the purled WS. And I’d also need to move the start of the row to a different place. Too complicated.
Next I tried out different double double decreases – different ways of reducing two clusters of 3 sts to 1 st each. No joy – ladders appeared in all of them.
Okay, so what if I approached it differently? Basically, I needed to get rid of 4 sts on each shoulder. What if I reduced 5 sts to 1 in one go? I tried three different ways of doing this out. Very nice, no ladders and strong enough for the shoulders, but…
Sadly there were numerous buts. These decreases used an odd number of sts, so I’d need to change the number of sts in a round/row. Plus they were asymmetrical. Besides I’d need to move the start of the rounds/rows to a different place. And the shoulder section was already complicated, with its knit-and-purl stitch pattern knit partly in the round and partly flat.
A Waste of Time?
So….. I’ve decided to go back my original plan: work the double double decreases complete with ladder, and pull the stitches together with a thread on the wrong side afterwards. I needn’t have ripped all those rows out after all. What a waste of time! Or was it? I’ve learnt a lot about double double decreases, other multiple stitch decreases and their pros and cons. For me, that was worth the time.
And now for something completely different
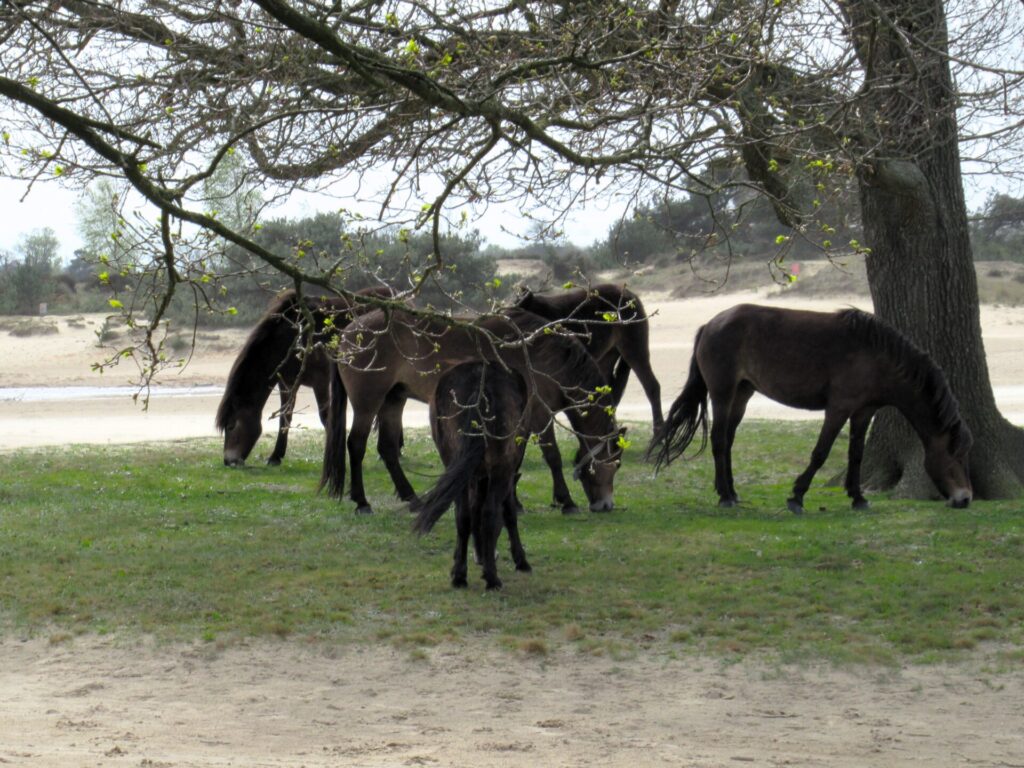
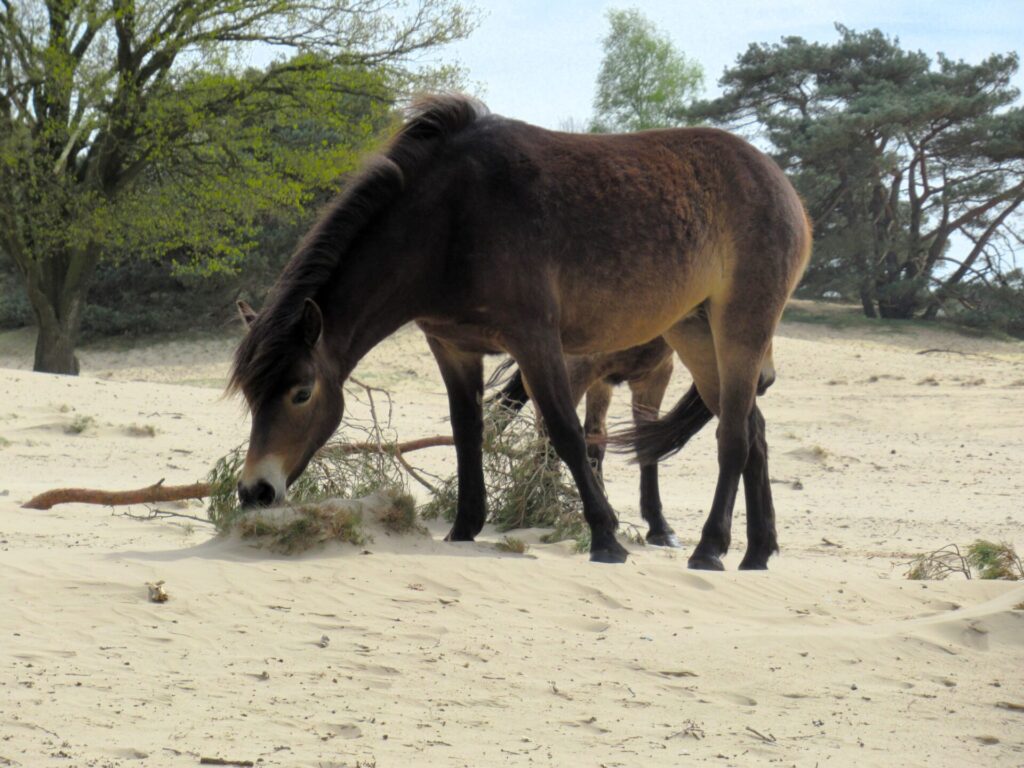
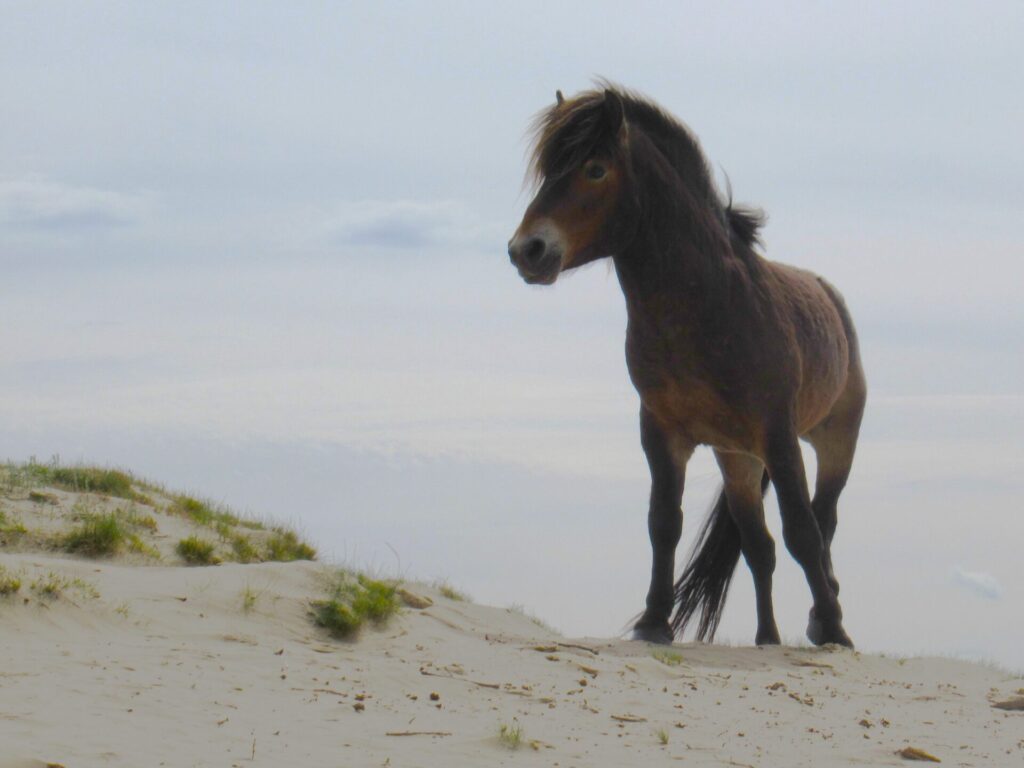
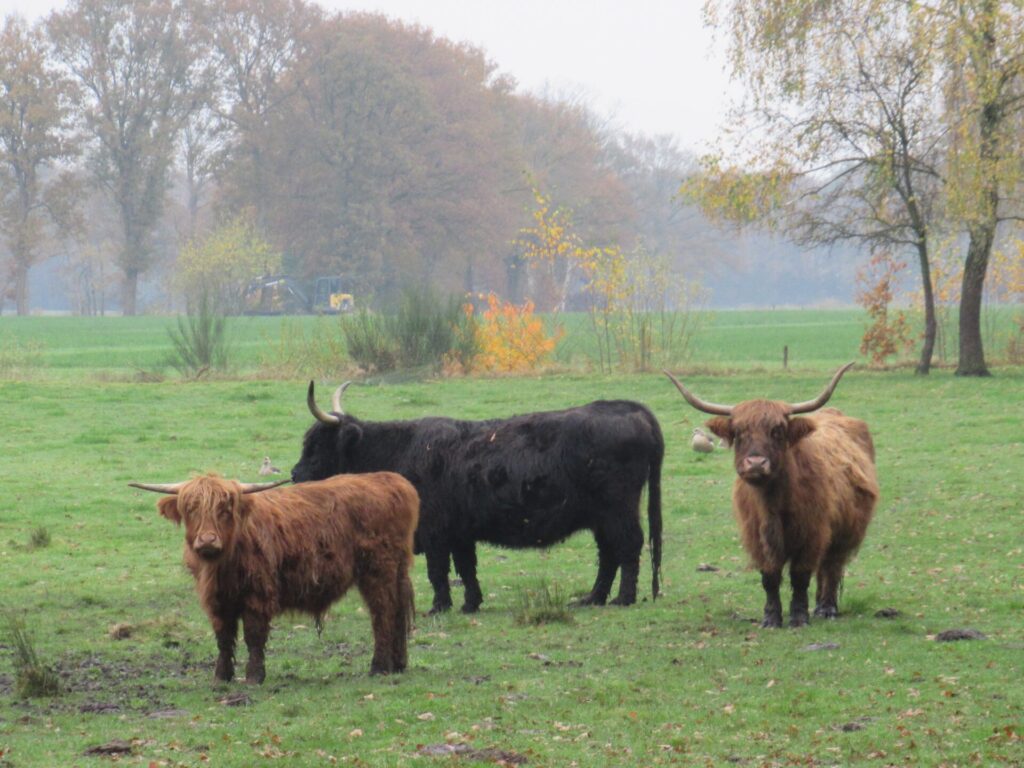
After looking at my knitting problem and having a lovely lunch together, my friend and I went for a walk in a nature reserve called Kale Duinen (Bare Dunes). And guess what we saw?
A herd of wild Exmoor ponies! Aww, they look so sweet, with those pale markings around their eyes and muzzles.
But towering above you on a sandhill, they look powerful and imposing, too. Better not come too close.
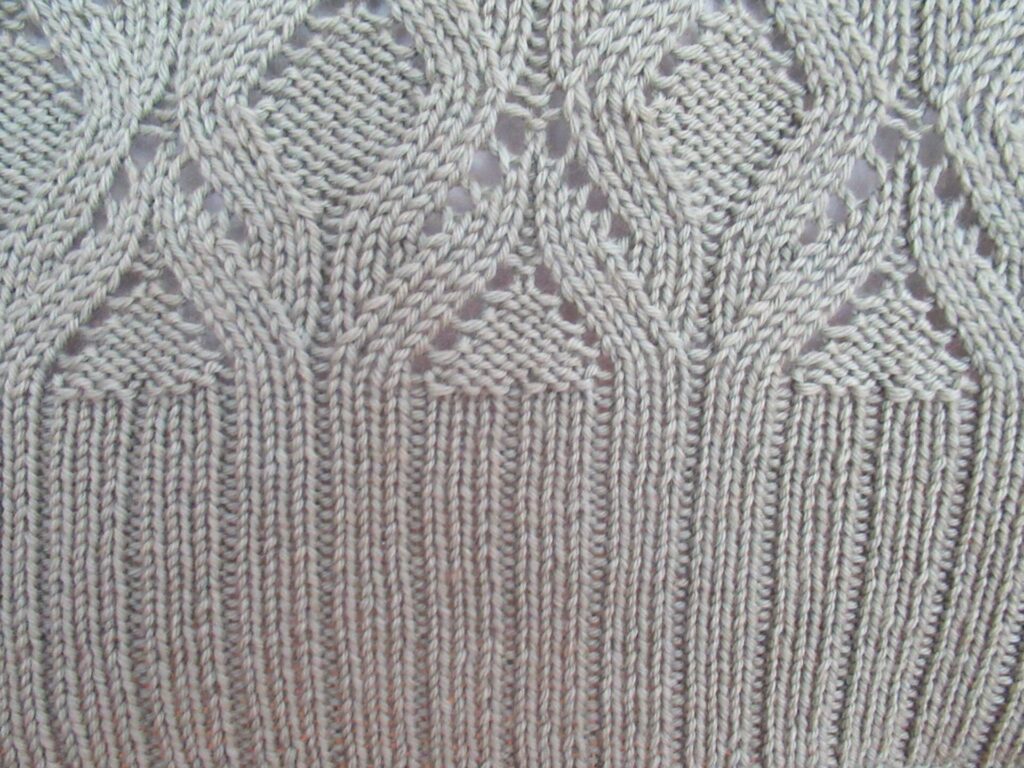
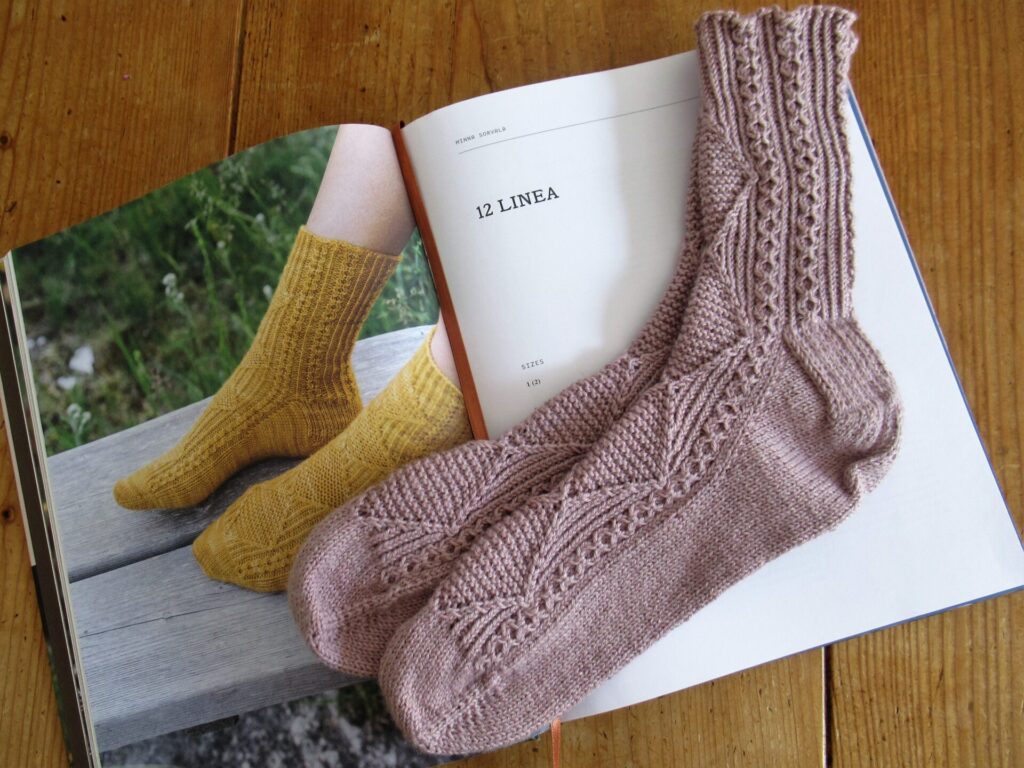
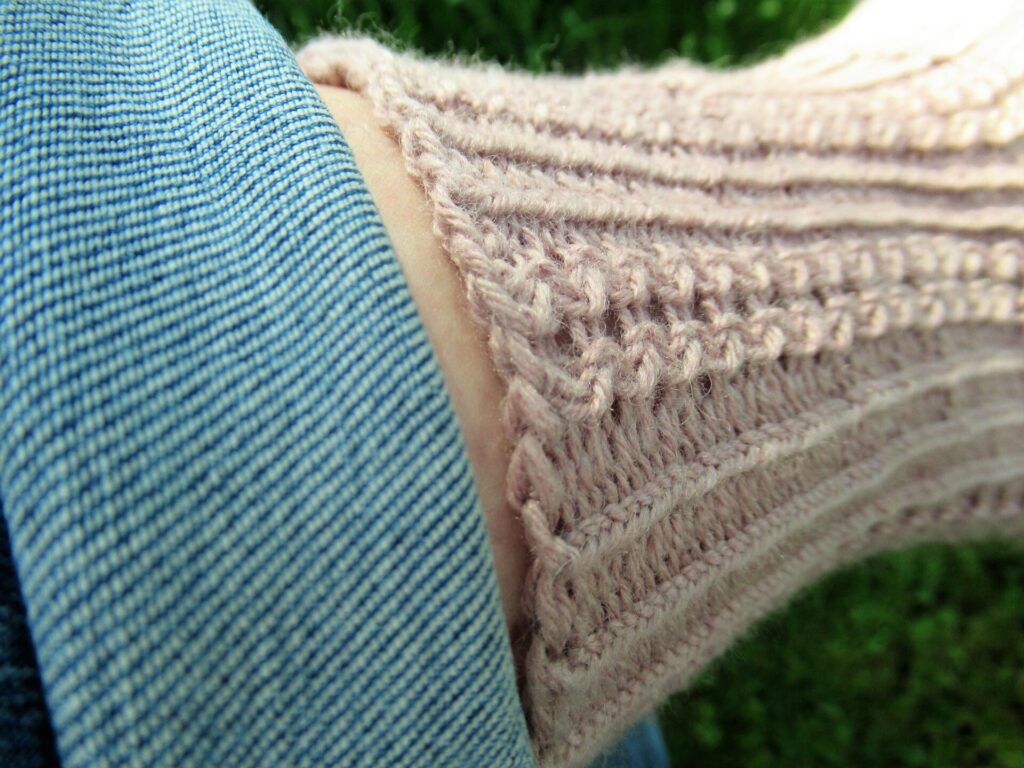
While I’ve been out and about quite a bit over the past few weeks and had to squeeze in some work, too, there was also plenty of time for knitting. One project that has recently slid off my needles is a pair of Linea Socks. It’s the second pair I’ve made from that beautiful book 52 Weeks of Socks.
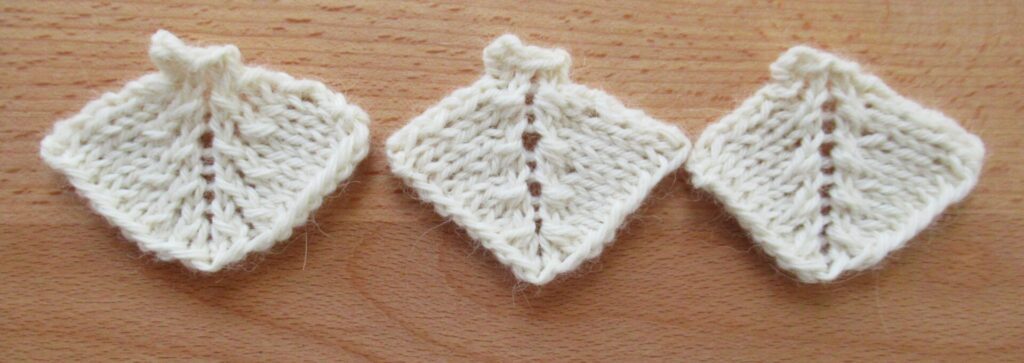
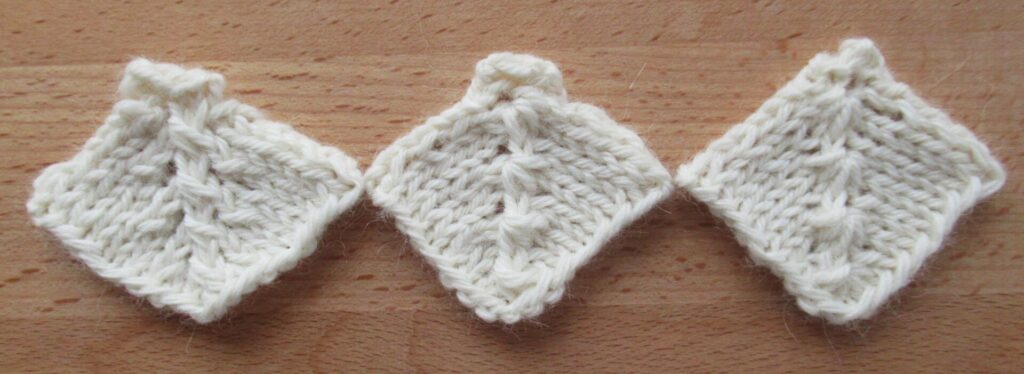
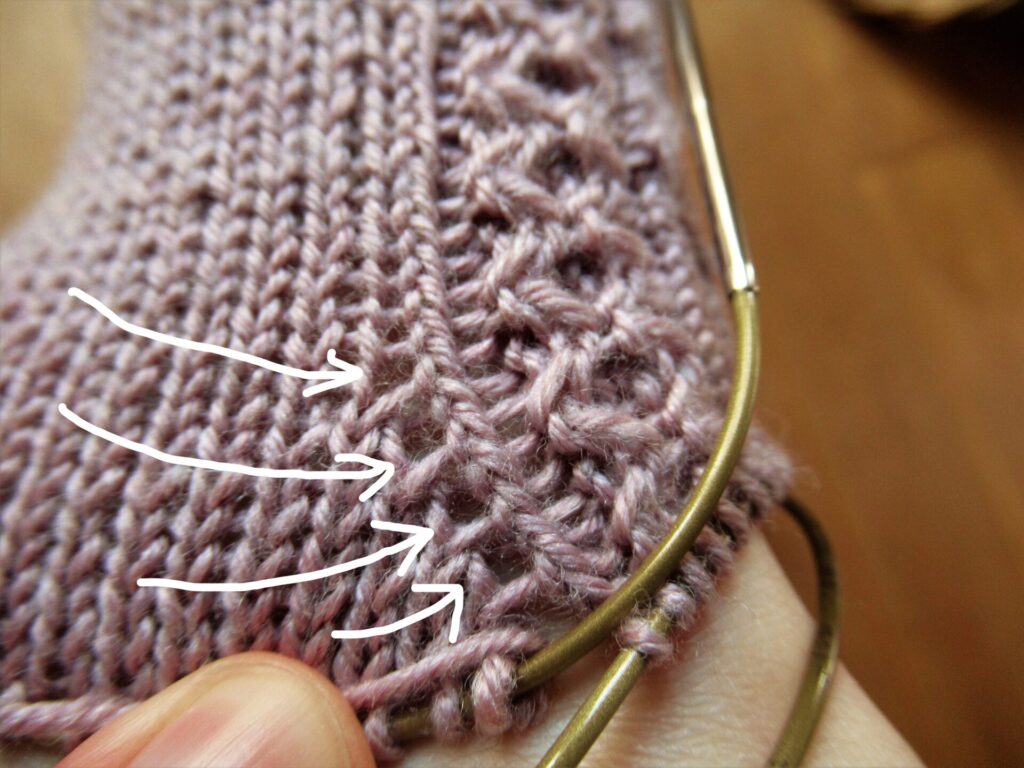
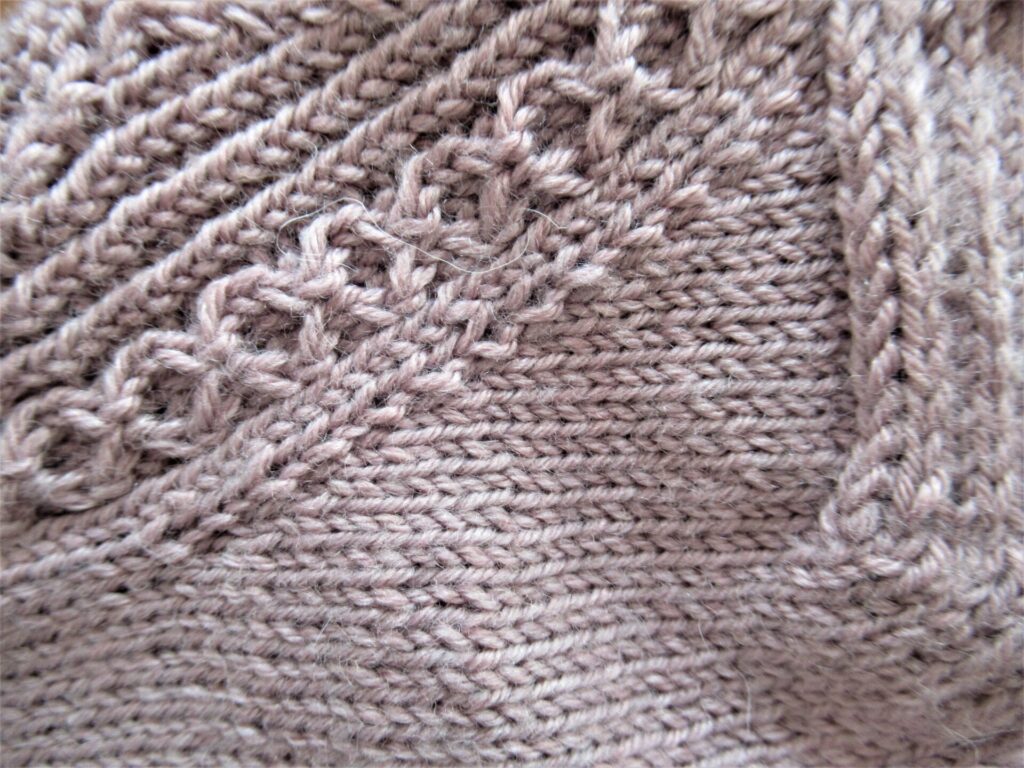
This design, by Finnish designer Minna Sorvala, has diamonds on the top of feet and legs, flanked by columns of twisted stitches and small honeycomb cables.
I felt rather daunted at the start, but knitting four rows here, six rows there and just following the clear instructions and the chart the socks grew more quickly than I expected. While knitting, I took some photos of interesting details, hoping my pictures and notes will be of use to anyone else who’d like to make the same socks.
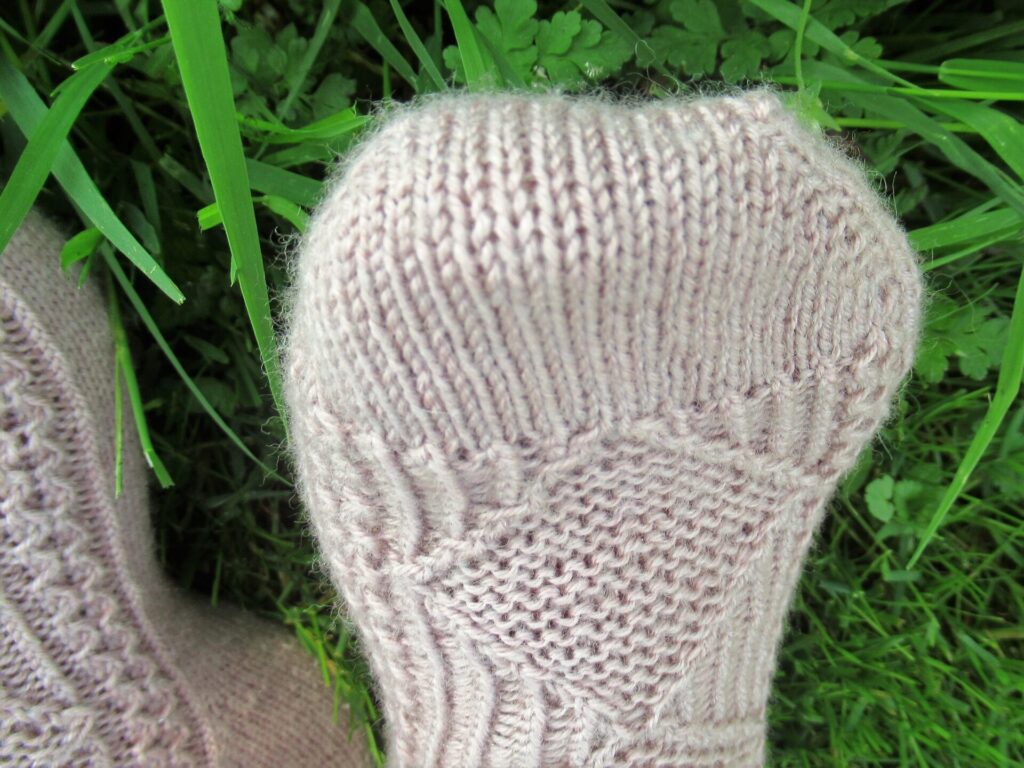
The Linea Socks are knit from the toe up and have a fairly blunt toe. Using a circular needle, I cast on with Judy’s magic cast-on. (There are many videos explaining this technique clearly, like this one.)
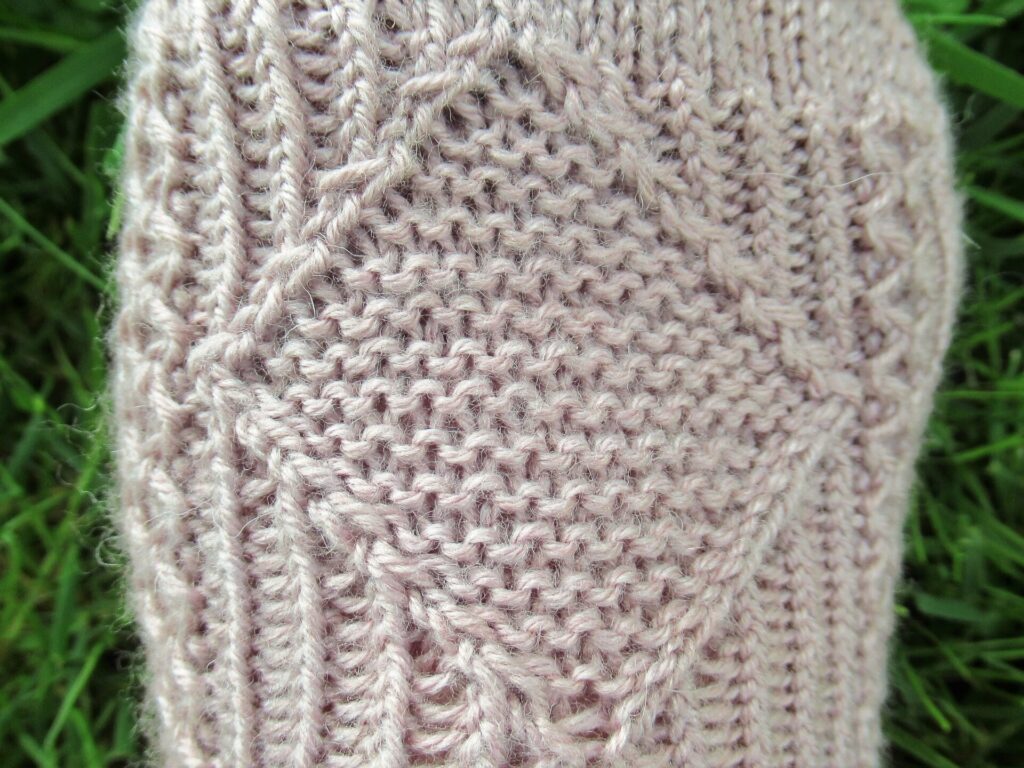
These are socks with a gusset, which imho makes for a much better fit than gusset-less socks. In the pattern, the increases for the gusset are made between the top and bottom needles. At first, I followed the pattern, but got holes.
This was not what I was looking for, so I ripped back a few rows and made the increases one stitch from the sides. Much better.
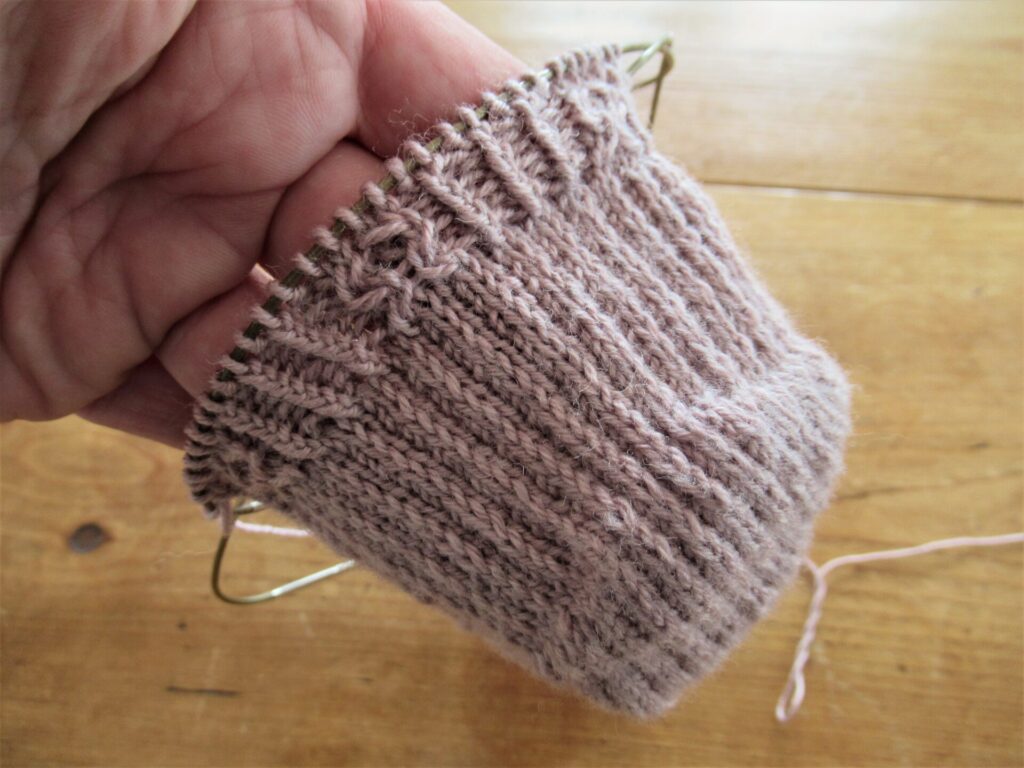
The heels of the socks are reinforced using a pattern of slip stitches. I hope you can see it in the photo below.
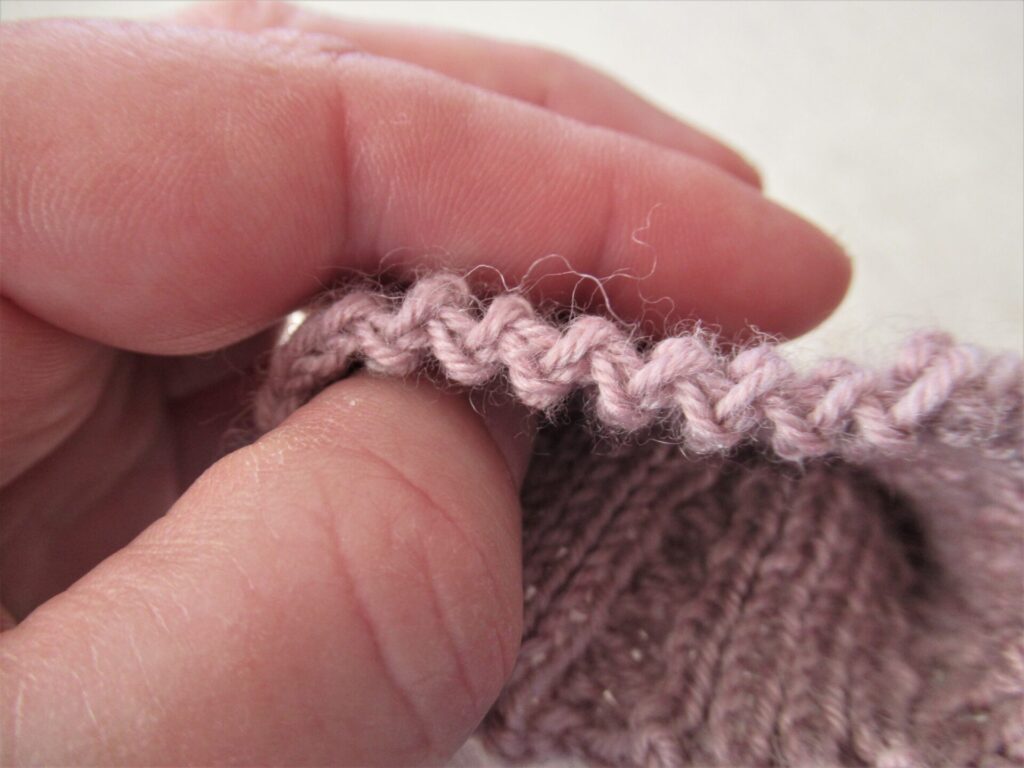
To bind off, I used Jeny’s Surprisingly Stretchy Bind-Off. (For a long time I called it Jenny’s bind-off, but it really is Jeny with one n – a good video here). How wonderful to be immortalized like Judy or Jeny for inventing a clever knitting technique! Unstretched, this stretchy bind-off is zigzaggy along the ribbing at the top.
Stretched when worn, it looks neat and feels comfortable.
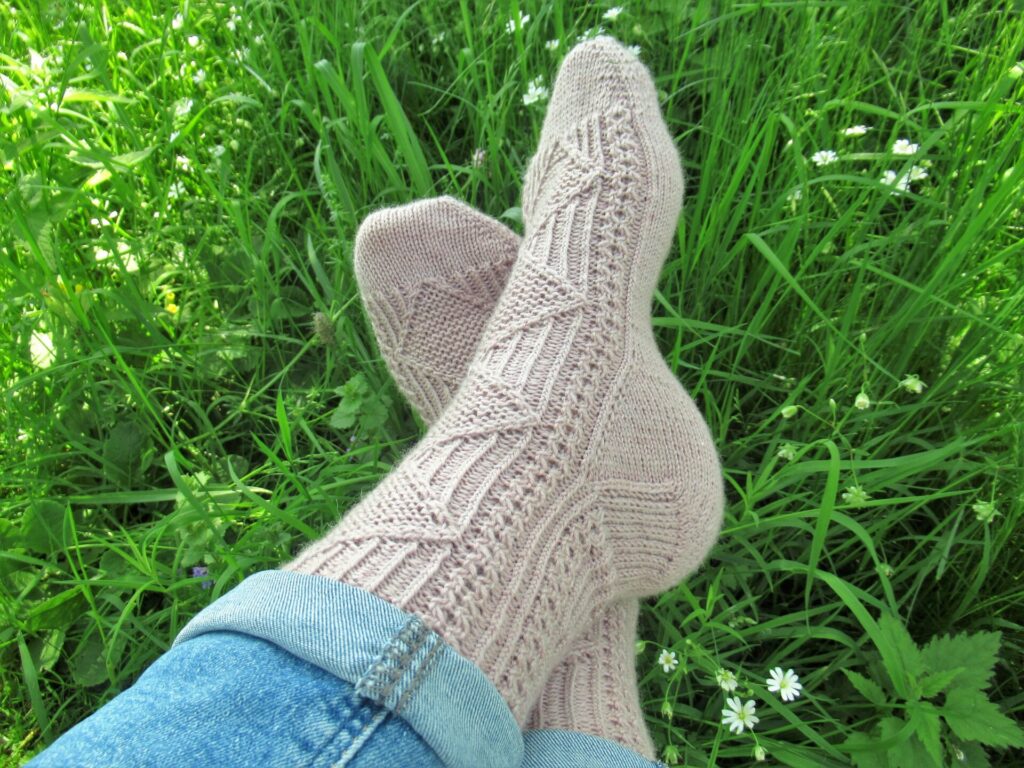
And here they are all finished – my Linea Socks.
There is one tiny error in chart B, for the back of the leg. The second stitch from the left should be knit through the back of the loop, instead of worked like an ordinary knit stitch. For the rest, the pattern is very clear and the Linea Socks were a joy to knit.
These socks remind me of a series of funny old cartoons – La Linea. It’s amazing how much can be done with one simple line. It’s just like knitting, really – one thread, endless possibilities.
We’ve had a lot of rather gloomy days here lately. I don’t mean gloomy because of the current coronavirus situation, although there is that too, but literally so gloomy that we need to keep the lights on all day.
We haven’t actually had a lot of rain. It’s just that on many days it’s been cloudy and grey.
I don’t really mind, and even enjoy the quiet atmosphere of some of these days. For me, the problem is that there often isn’t enough light to take pictures indoors, while the table on the patio is too wet to spread my knitting out on.
But last Sunday suddenly the sun came out.
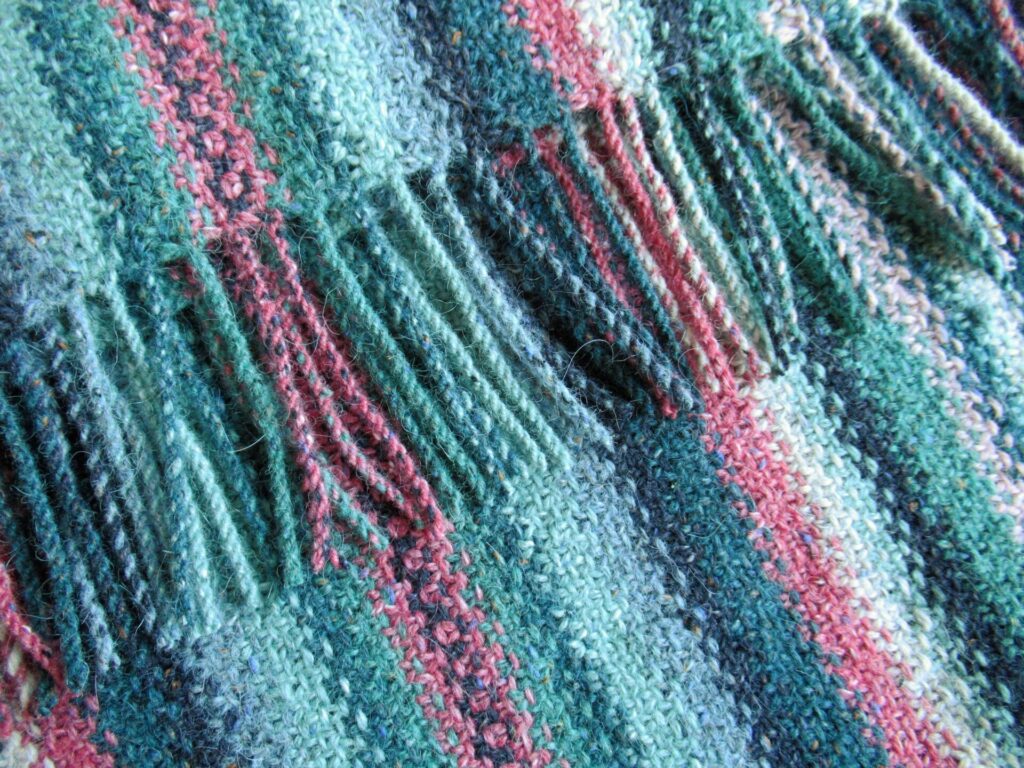
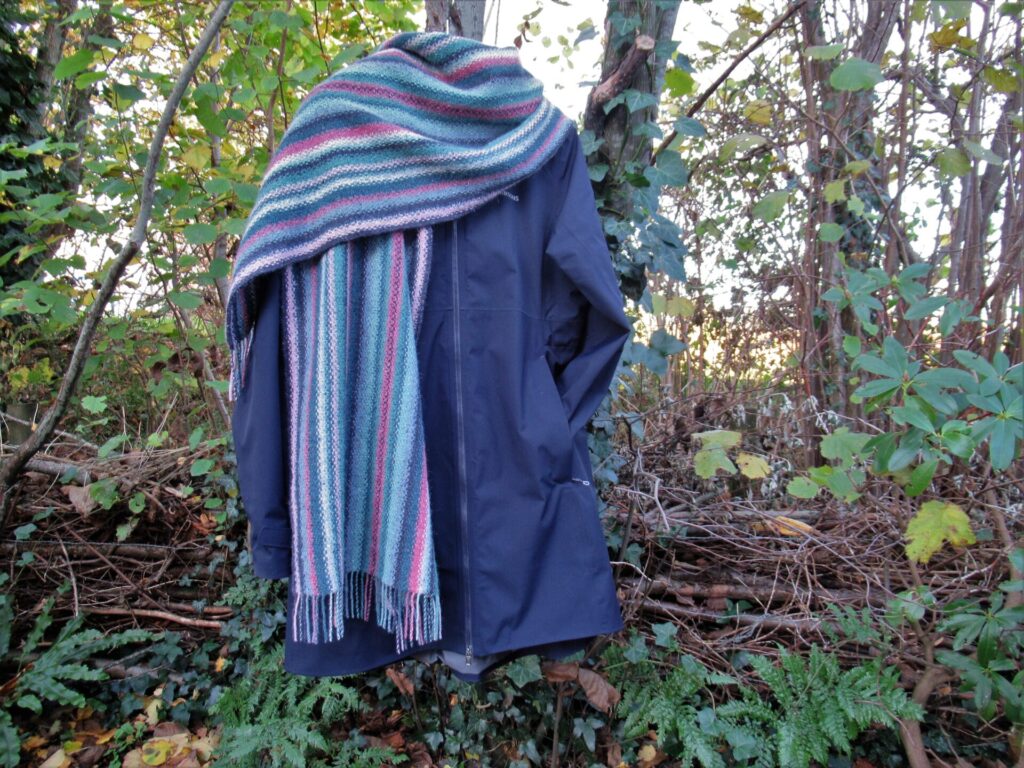
I quickly set to work, because I wanted to show you how to make a twisted fringe. I’d finished knitting my Striped Linen Stitch Wrap. In this project, every row starts and ends with a yarn tail. In the basic pattern these are knotted into a fringe, but a later adaptation has a twisted fringe and that was what I wanted to try.
The yarn I used was Rowan’s Felted Tweed, a blend of lightly felted wool, viscose and alpaca. Because I wasn’t sure if the technique would work for this combination of fibres, I tried it out on a swatch first, and yes, it worked! This is how it’s done step by step.
1) Pin the end of the wrap to blocking mats.
The yarn ends were tied into bundles during the knitting. These are now undone one by one.
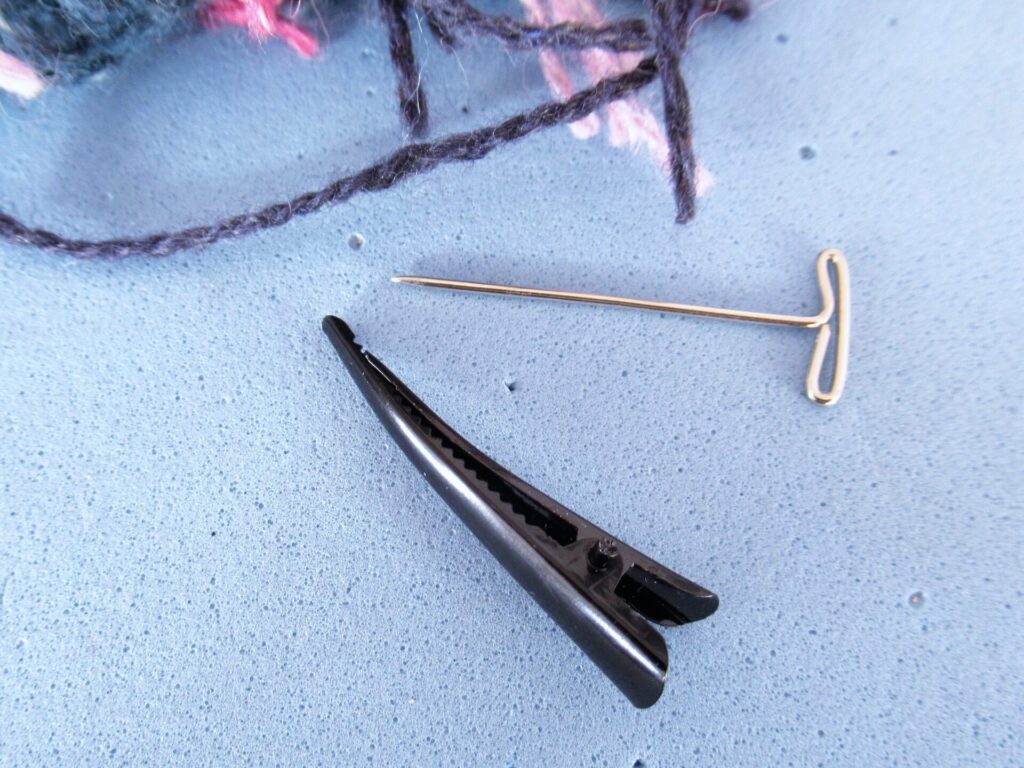
While twisting the ends, they need to be kept in place. The pattern uses a binder clip for this, but as I didn’t have any of those, I used a hair clip and a T-pin.
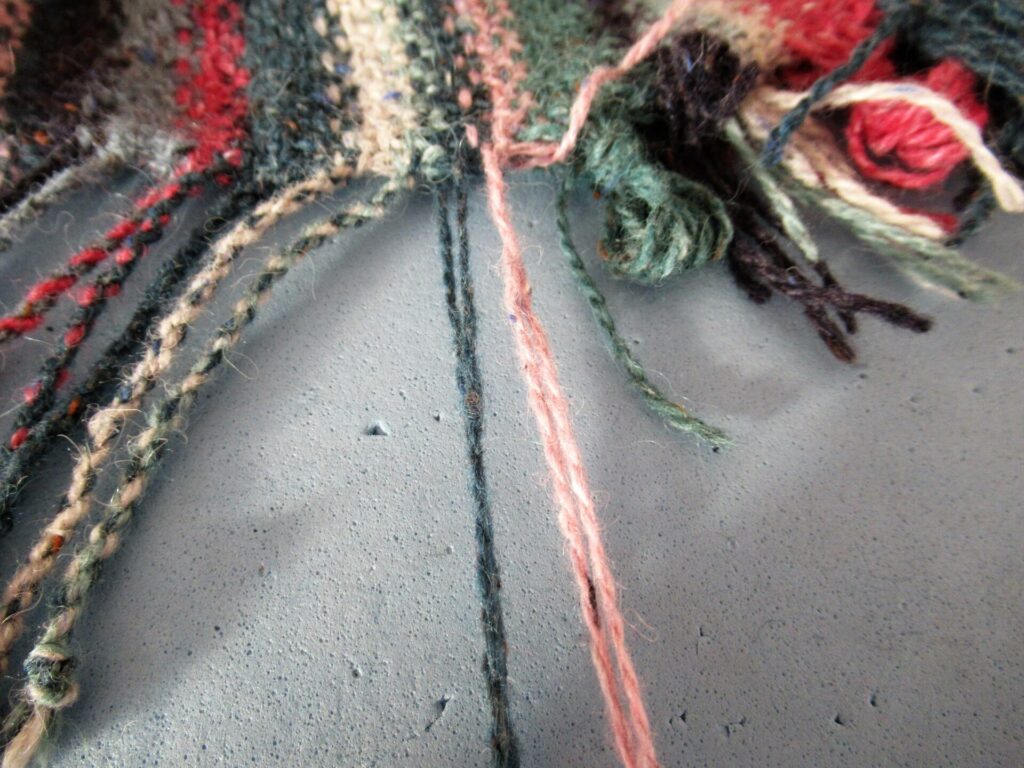
2) Undo a fringe bundle. Find the next 4 tails (they should be twisted in the order they were knitted).
3) Twist the first 2 tails together in the same direction as the twist of the yarn (i.e. to the right). Continue until they are slightly overtwisted.
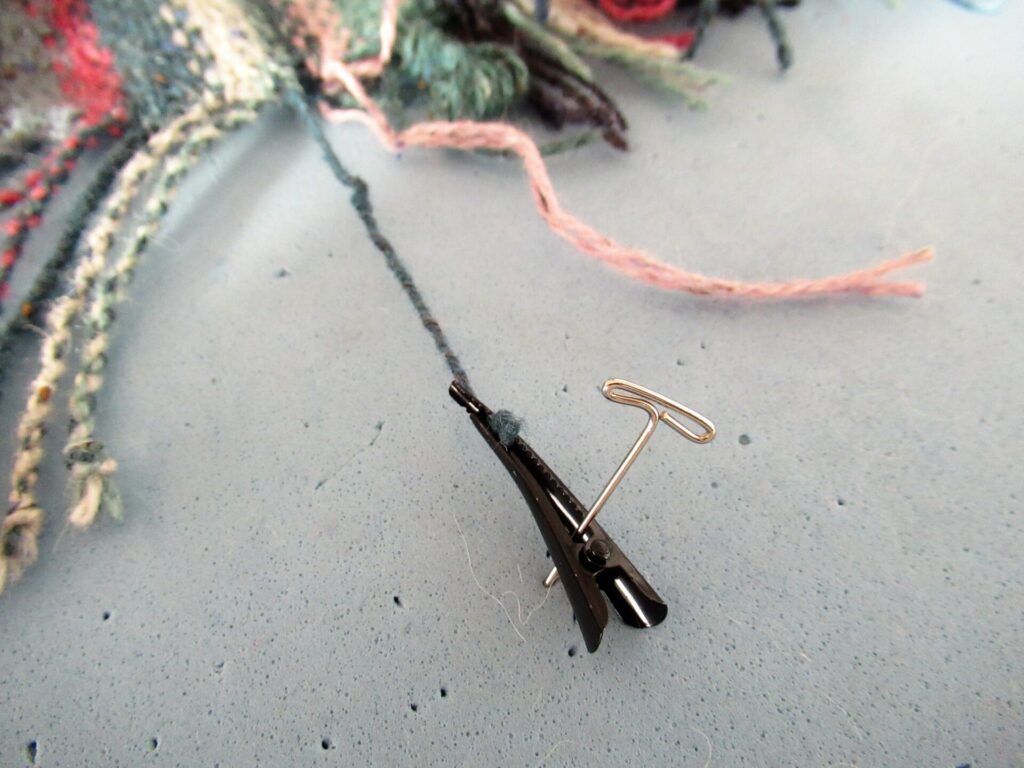
4) Secure with a clip and pin onto the blocking mat with a T-pin.
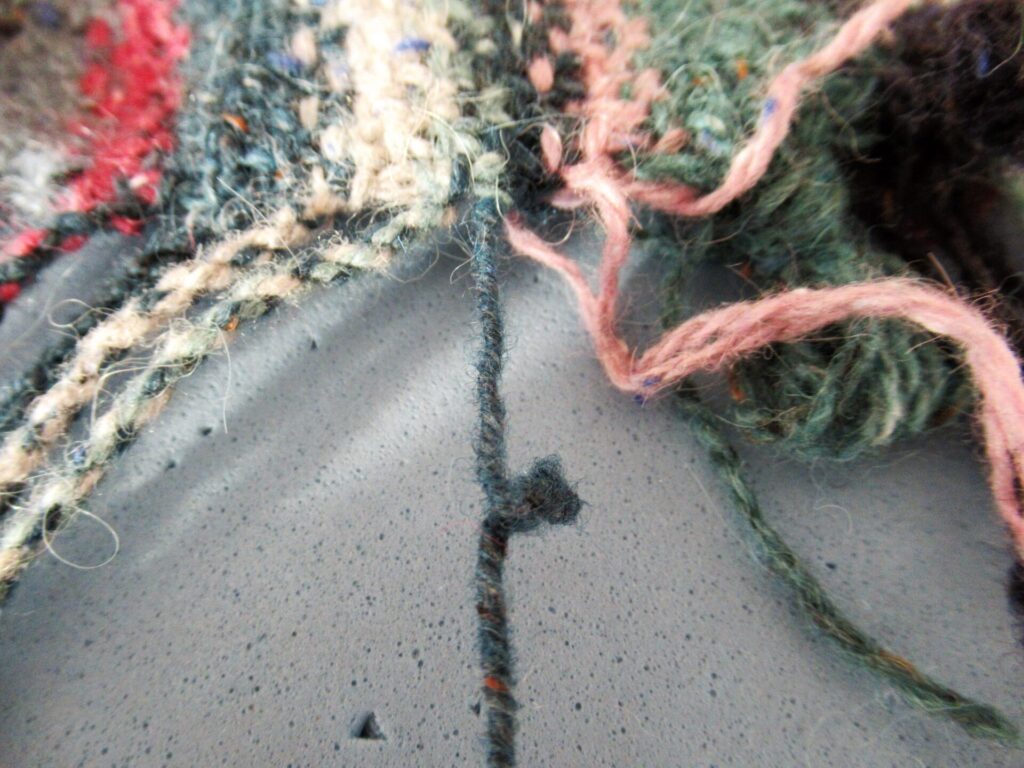
5) Twist the next 2 tails in the same way and hold. Unclip the first 2 twisted tails. Tie both sets of tails together with an overhand knot as close to the ends as possible and let go. They will now twist together. Smooth this twist by passing it between thumb and forefinger several times.
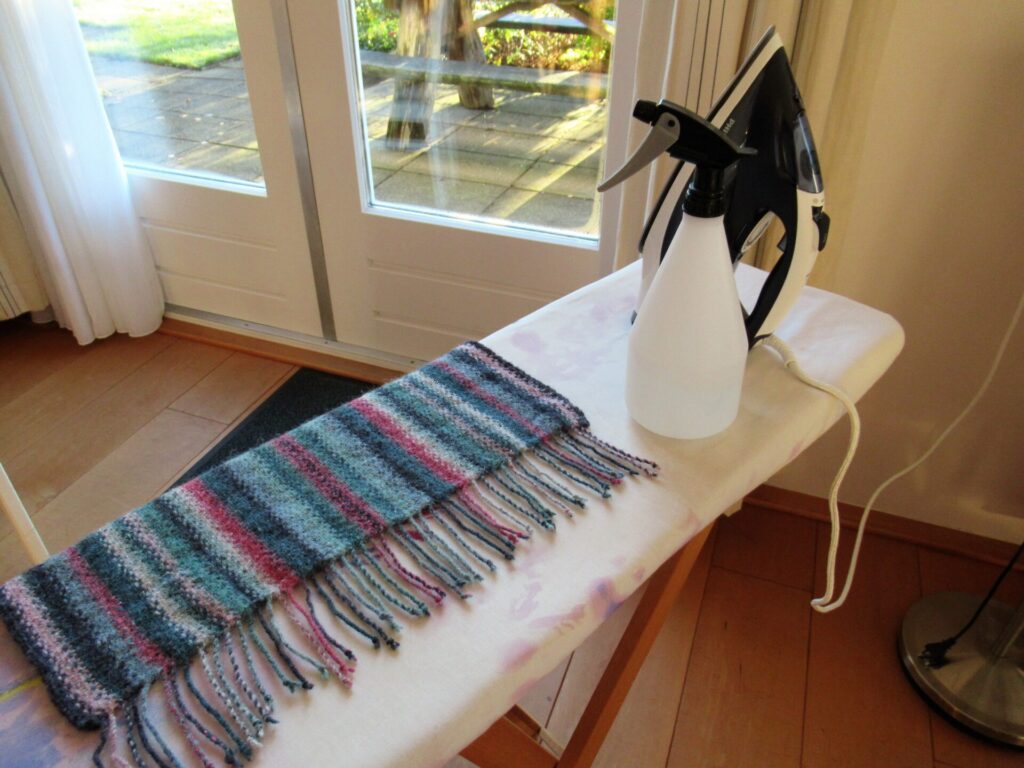
Continue like this until all yarn tails have been twisted. Then repeat steps 1-5 for the other end of the wrap. Remove the wrap from the blocking mats and place it on an ironing board. Comb out the ends so that they are straight and not crossing each other.
6) Spray the fringe with a plant mister.
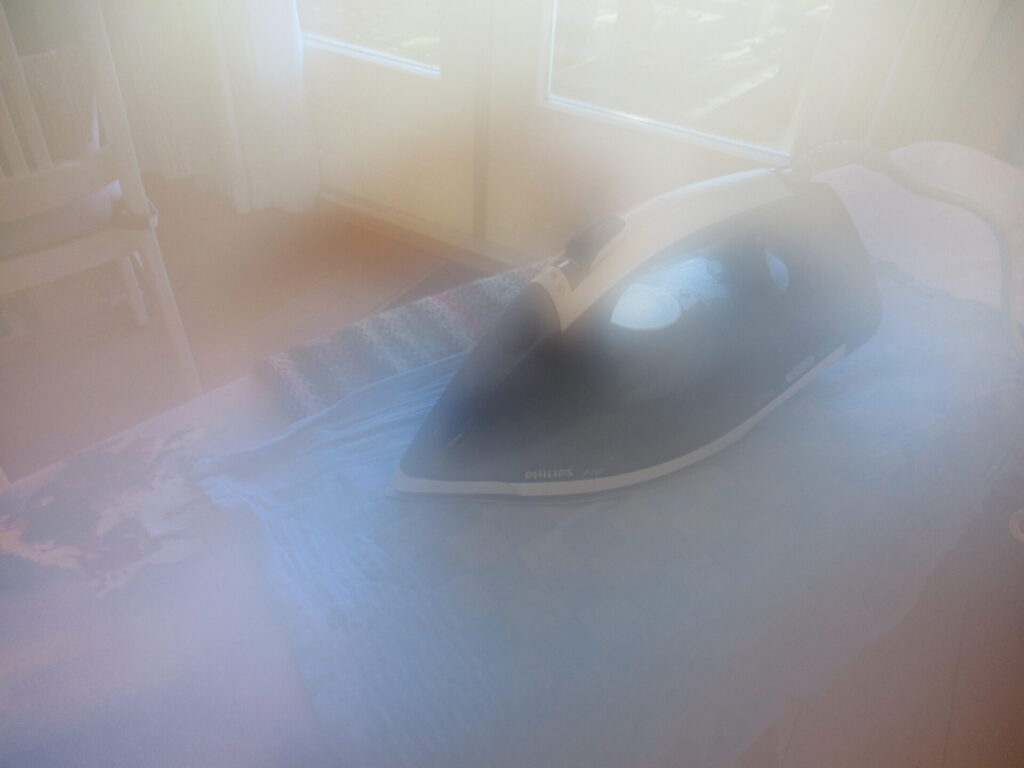
7) Cover it with a clean, moist tea towel. (Make sure it’s an old one that won’t give off any colour.)
8) Then, with the iron on the wool and steam setting, press the fringe with lots of STEAM.
Repeat for the other end of the wrap and leave to dry thoroughly. The tails should now be slightly felted, preventing them from untwisting.
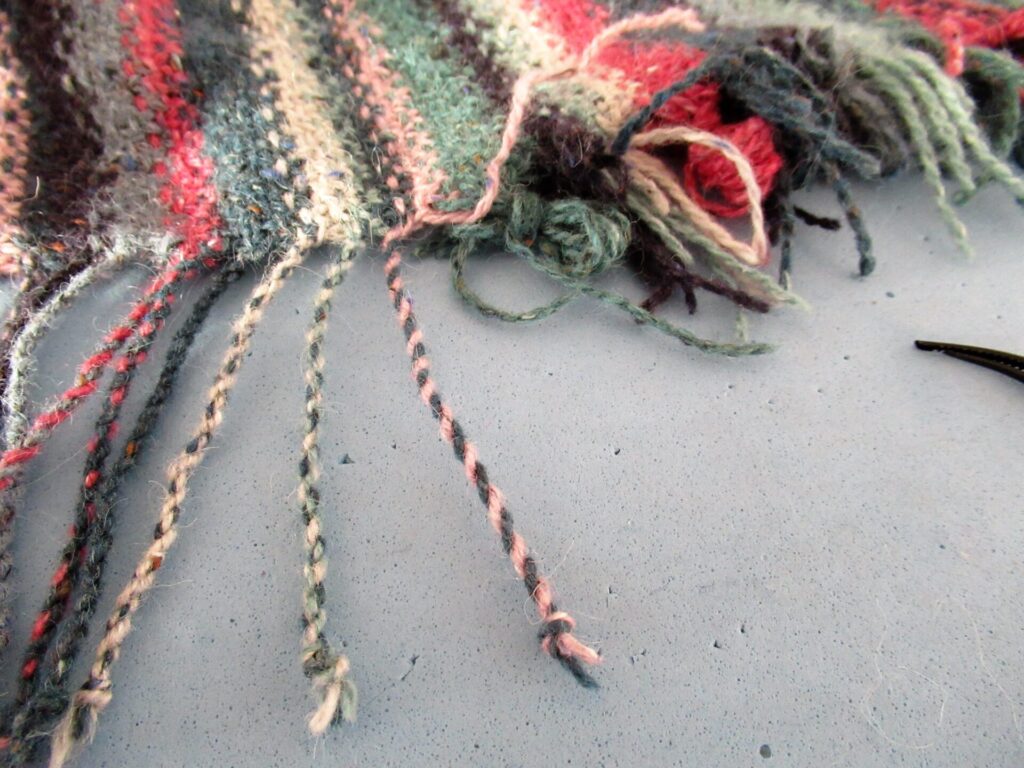
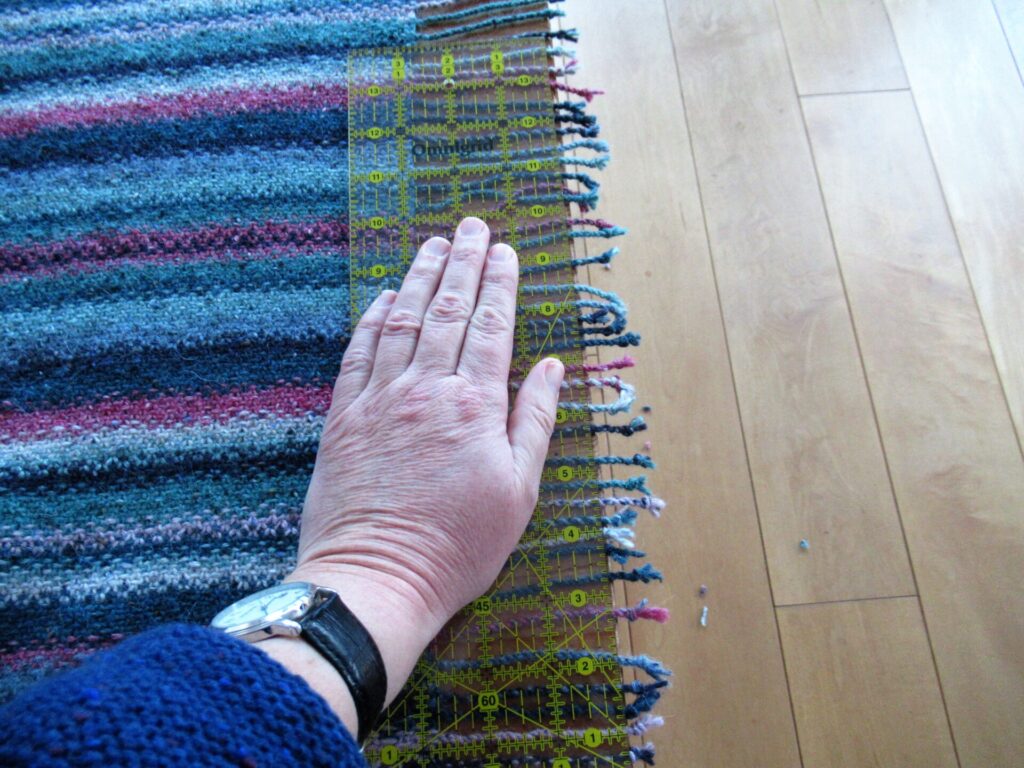
9) Place the wrap with one fringe on the end of a table top. Make sure that the wrap is placed straight and straighten out the tails. Then cut off the knots at the length of the shortest tail.
I used a quilting ruler to make sure I cut the tails off straight.
There, all done! This is a great finish for a scarf or wrap. It’s really lovely to see the colours combined differently in each tiny barber-pole tail.
I’m really happy with this wrap and at the same time slightly sad that it’s finished. Many of the things I knit are for others, but I’m keeping this one. I’ve loved working on it and will miss the soothing rhythm of slipping and knitting, slipping and knitting many, many stitches.
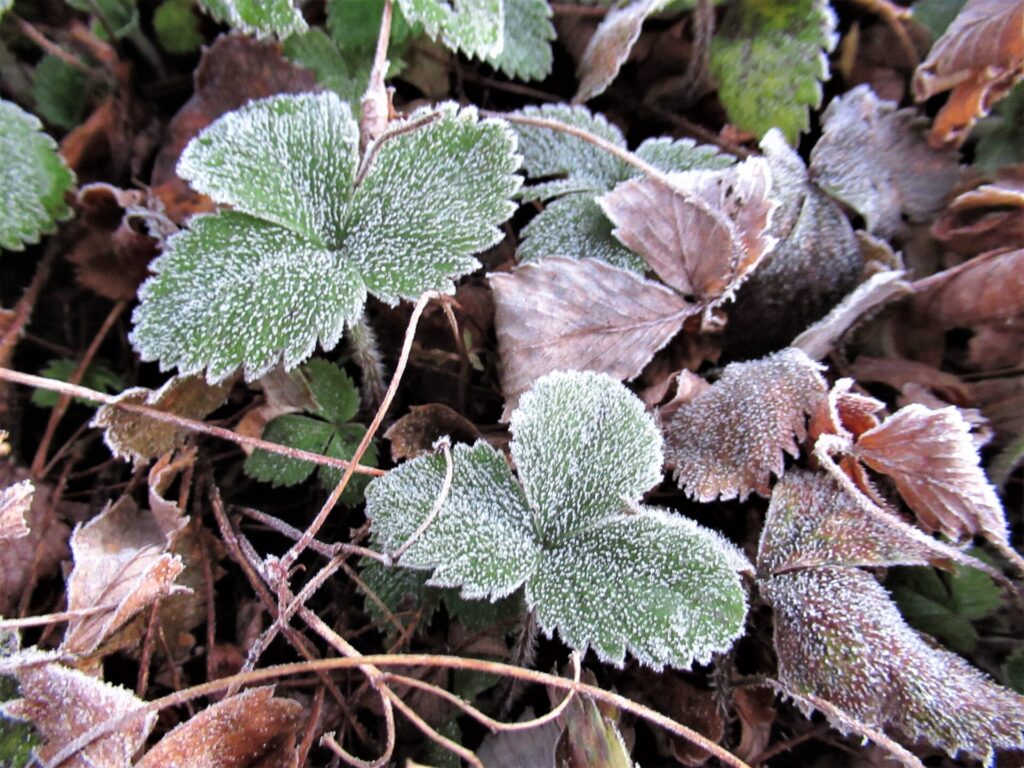
Now I’m hoping for colder weather so that I can wear it. It’s a strange autumn. The pelargoniums and lobelias in our outdoor pots are still flowering and it’s the end of November! Still, we’ve had some night frost…
… and more wintry weather is expected for this weekend.
In case you’d like to knit a wrap like this, the pattern is called Striped Linen Stitch Wrap & Scarf (there is also a smaller scarf version) and can be found here on the designer’s website and here on Ravelry. The free adaptation for the twisted fringe can be found here.
Well, I hope that just looking at this warm wrap with its colourful fringe has warmed and lifted your heart a little. Take care! xxx
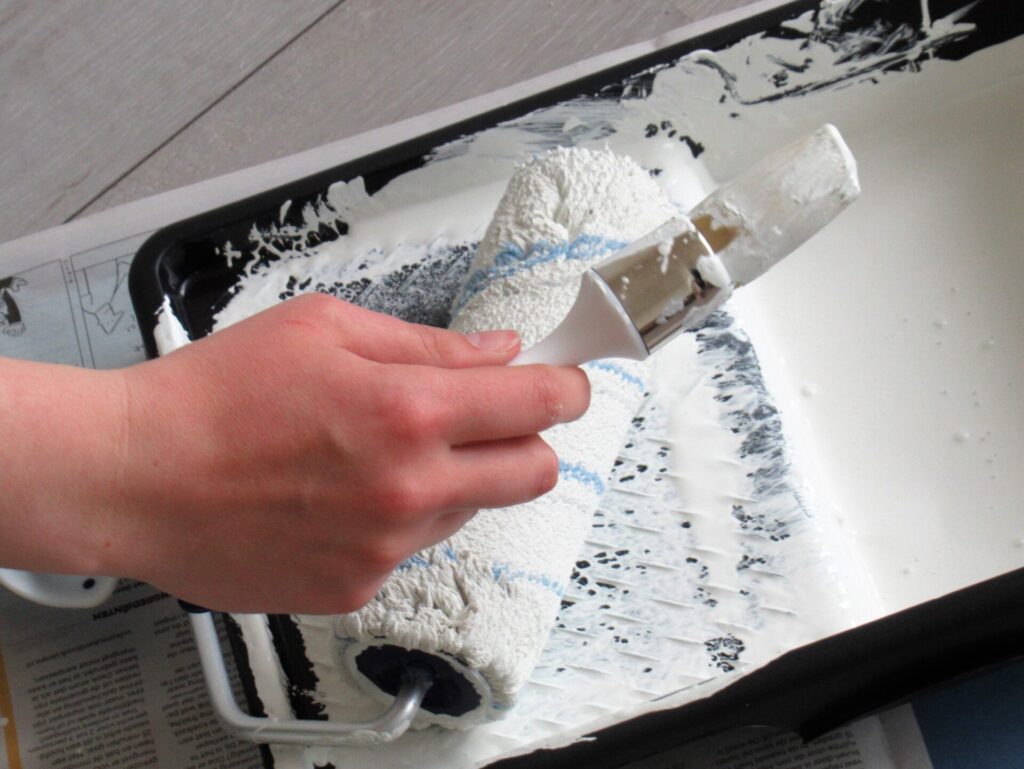
It’s good to be back here after a busy and bumpy couple of weeks. What with several ups and downs, keeping up with everyday life, and helping our daughter and her boyfriend husband paint their new home…
…there hasn’t been much progress on the knitting front. All I’ve done is knit row after comforting row on my Striped Linen Stitch Wrap.
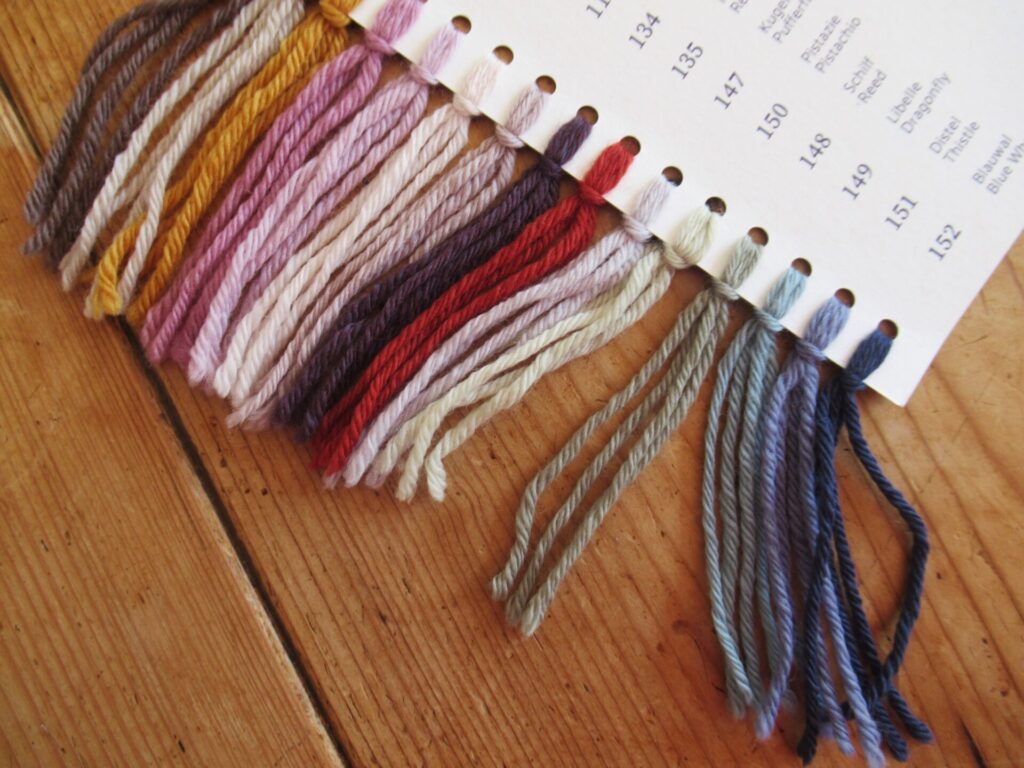
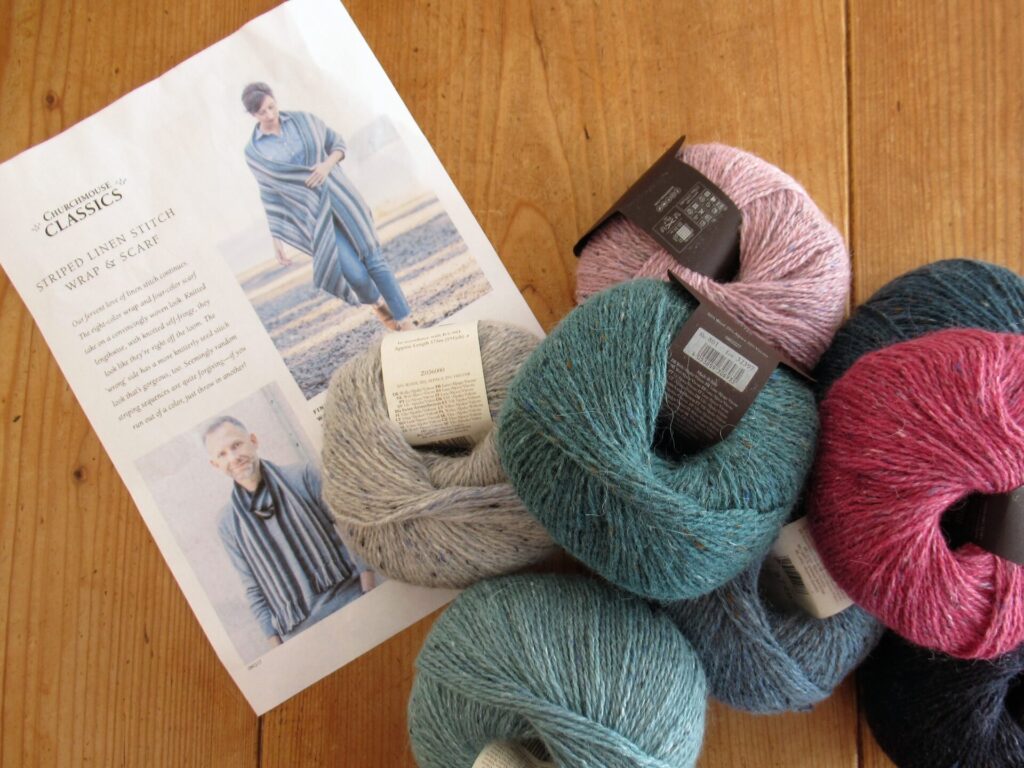
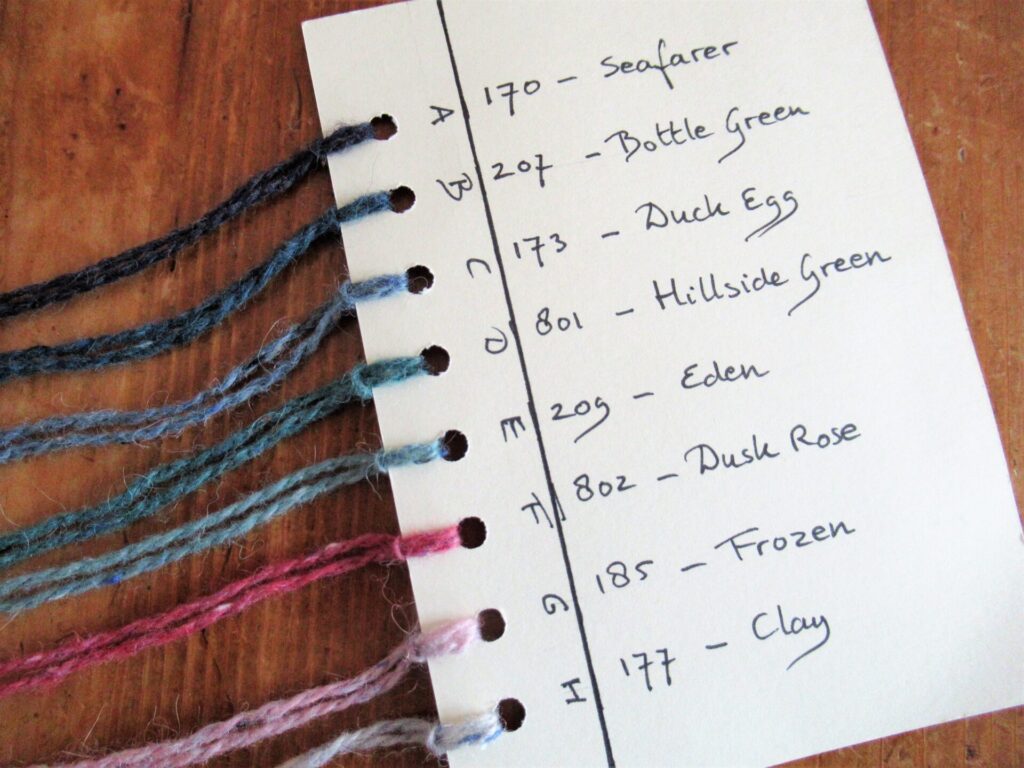
So, I thought I’d write about that a bit. I’m knitting it in 8 colours of Rowan Felted Tweed. Different colours from the ones used in the pattern, but I’ve tried to find the same balance between darker and lighter shades. I chose 5 blues/greens, 2 pinks and 1 grey.
Because some of the blues and greens are hard to distinguish in the evenings, I decided to make a colour card, similar to embroidery floss organizer cards. With the colours from A-H with their names on the front…
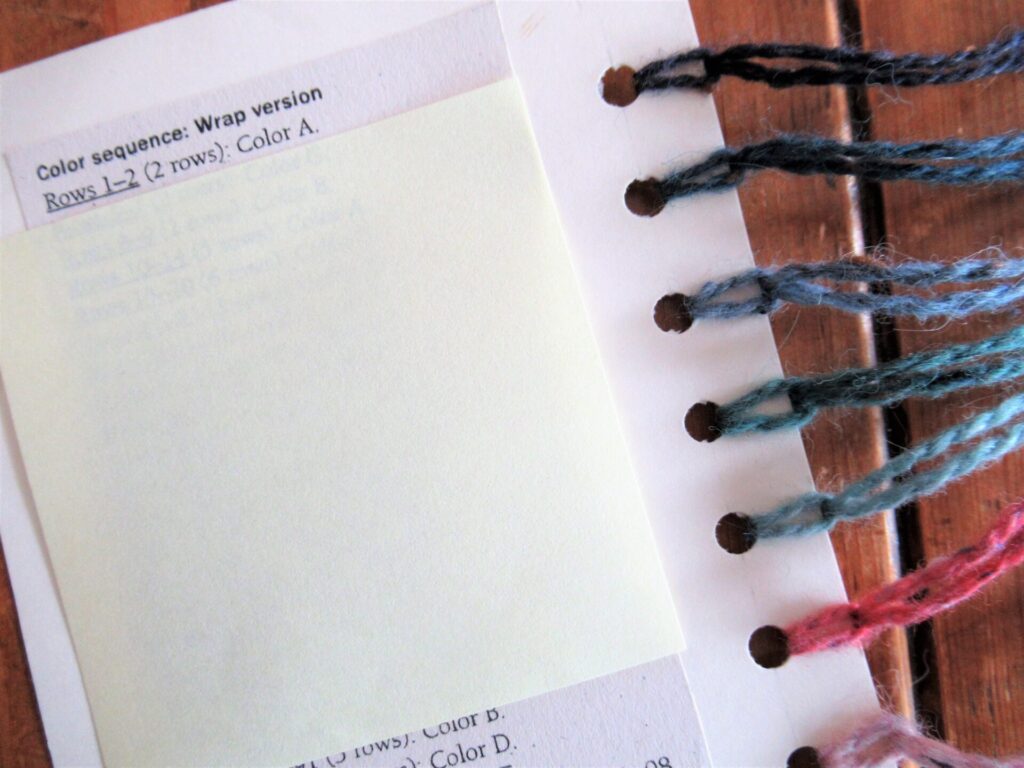
… and the description of the stripe sequence cut out from the pattern glued to the back. I’m using a sticky note to keep track of where I am in the pattern.
Making the card was a fun little project, and it turned out to be a handy tool. A great idea for multi-colour knitting, if I say so myself. I used a standard blank 10.5 x 5 cm (5¾ x 4¼”) correspondence card, measured out the places for the holes with a ruler and pencil, and punched the holes with an ordinary 2-hole punch held at an angle to make one hole at a time.
This linen stitch wrap starts with a provisional cast-on, which will be unravelled later to knit an I-cord along the entire length. I think the best-know type of provisional cast-on is picking up stitches from a crocheted chain – the method I used for my Thús loop.
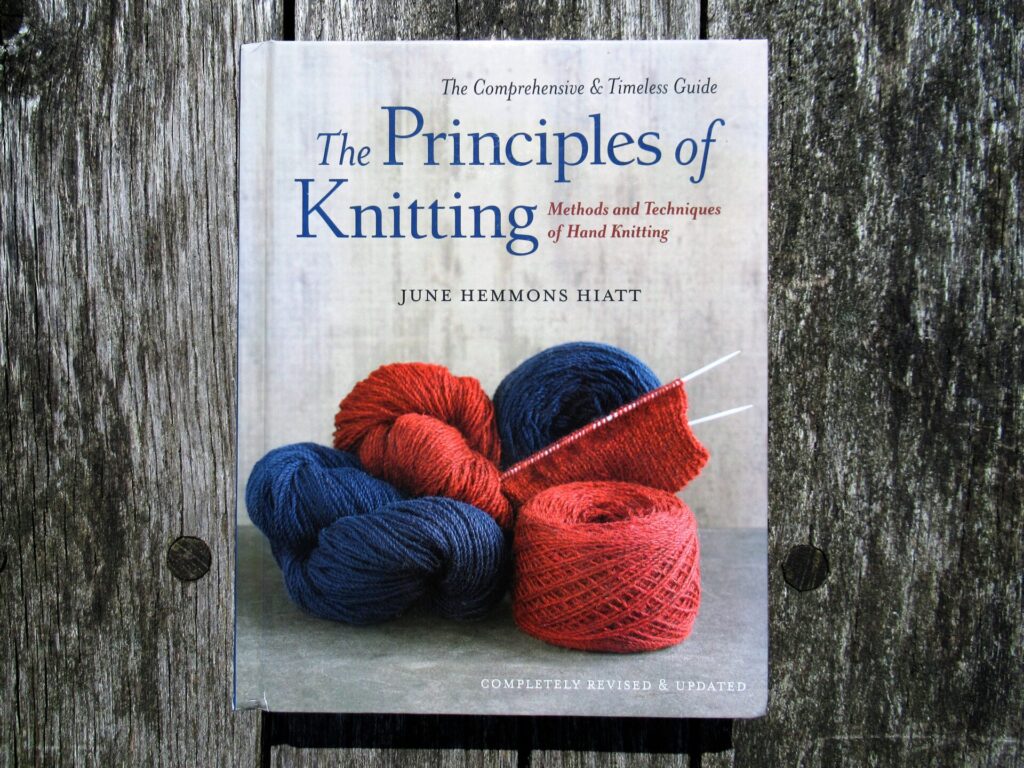
The method used for this wrap, just called ‘provisional cast-on’ in the pattern, is a little more sophisticated. In June Hemmons Hiatt’s 2 kg/712 page tome The Principles of Knitting it is called ‘Hook and Needle Chained Cast-On’.
If you’re like me and are interested in all kinds of cast-ons and bind-offs, edge stitches, increases and decreases, etc. etc. this is definitely a book for your Birthday or Christmas wish list.
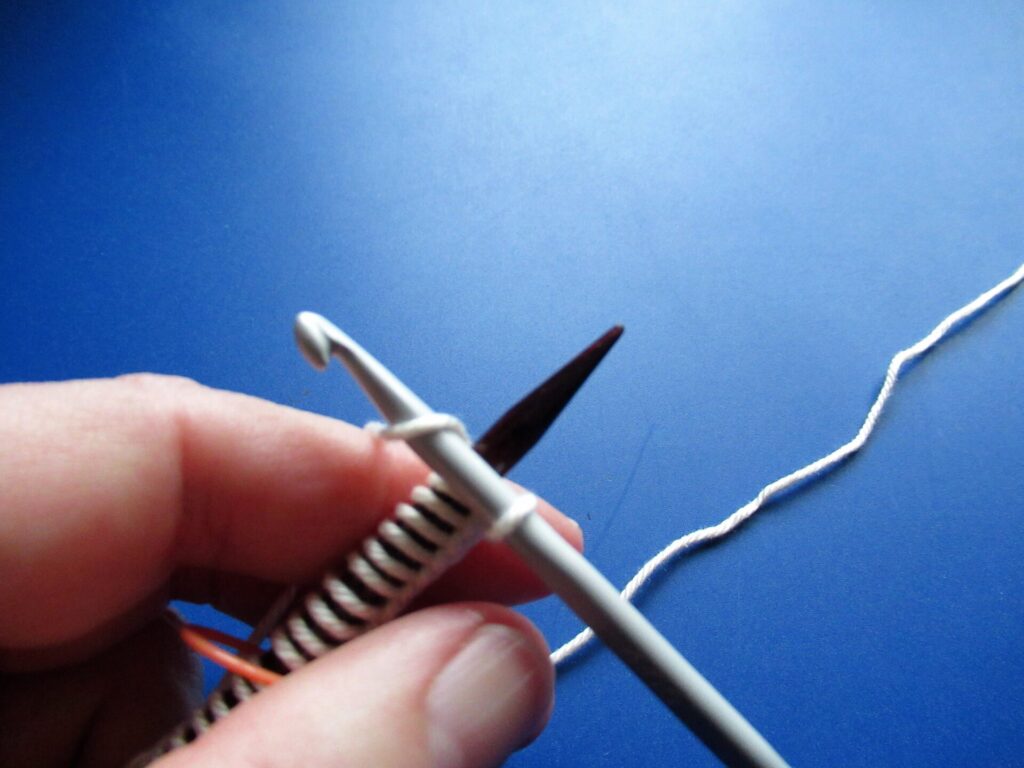
I’ve taken pictures of the Hook and Needle Chained Cast-On as I went along, hoping it might be helpful and interesting to other knitters. The method uses a knitting needle, a crochet hook and a piece of smooth waste yarn. This is how it’s done step by step.
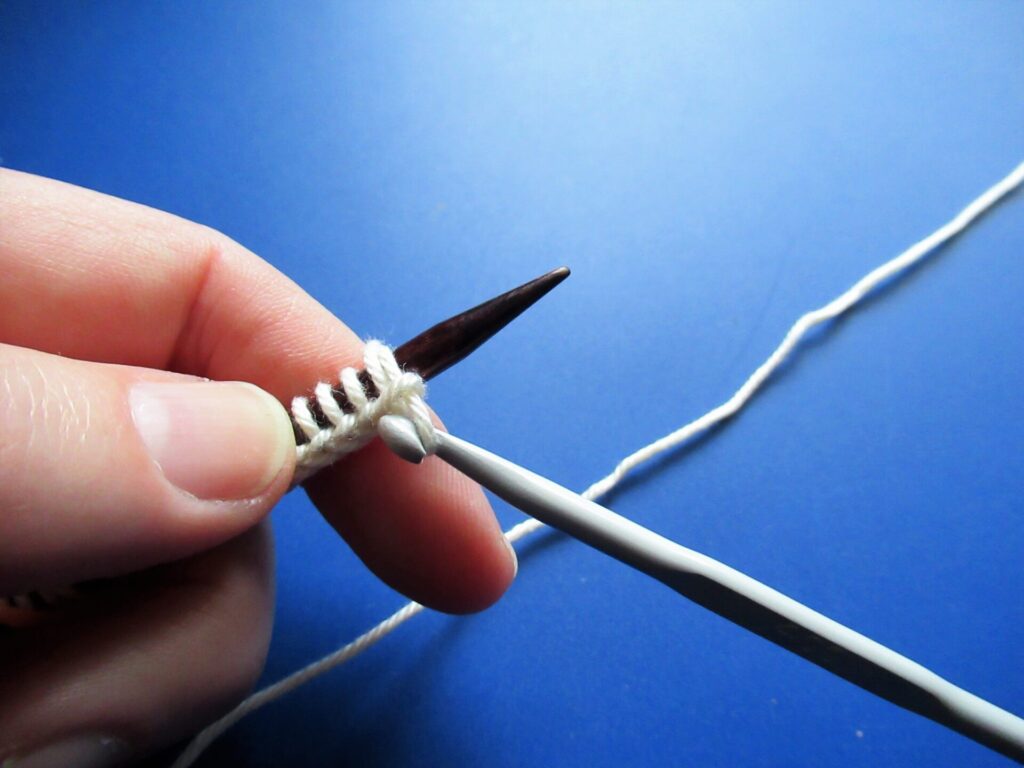
First of all, make a slip knot in the waste yarn and place it on the crochet hook. (I took my pictures after I already had a few stitches on my needle.)
Hold the knitting needle in your left hand, crochet hook in your right hand, and waste yarn over your left index finger. Knitting needle and hook form an X. The crochet hook is in front and the yarn runs behind the knitting needle.
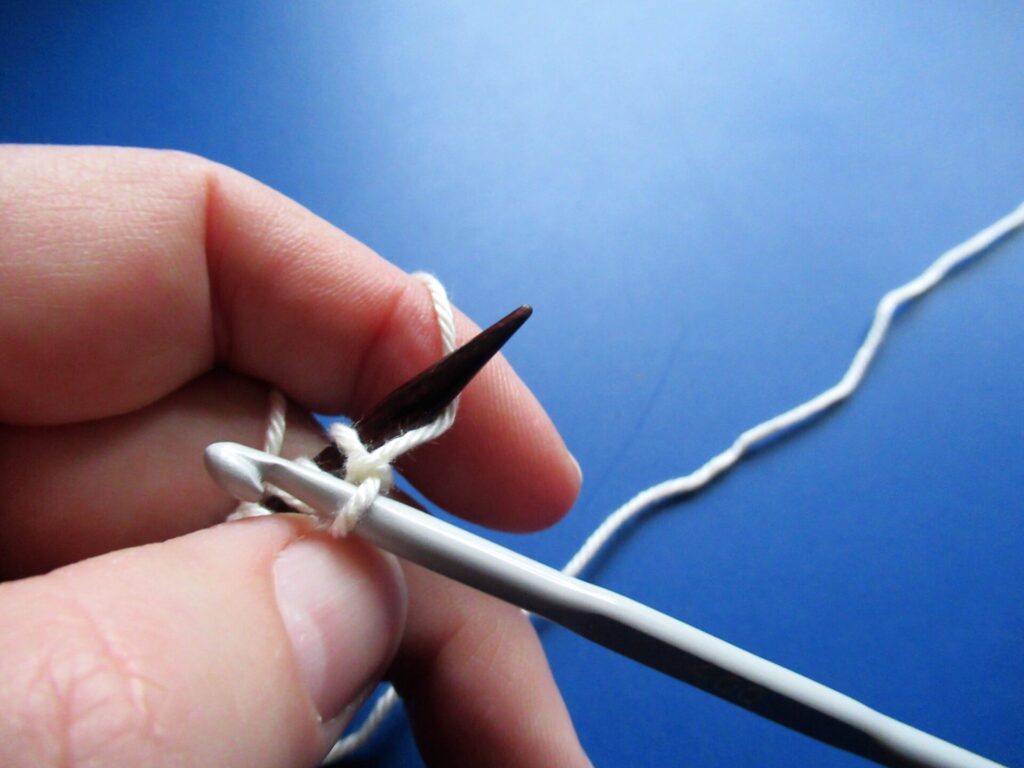
Wrap the yarn around the crochet hook…
… and pull the yarn through the loop.
With your finger, or with the help of your hook, return the yarn under the needle and to the back. Now it is in the same position as in step 1.
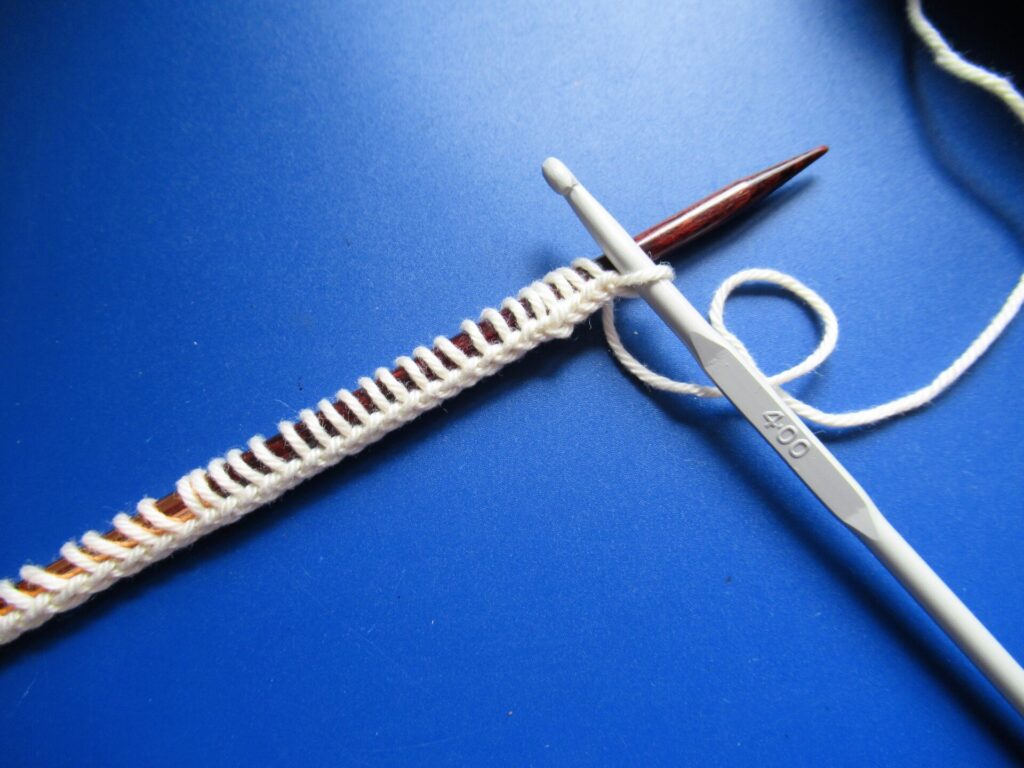
Repeat steps 1-4 until the required number of stitches is on the needle. The stitches end up on the needle like any knitting stitches, with a neat row of chains running along the length of the knitting needle. This is very easy to unravel later on.
For my wrap, I needed to cast on 400+ stitches. I didn’t time myself, but I think it took me about two hours. Phew! But I know it’s worth the time and effort.
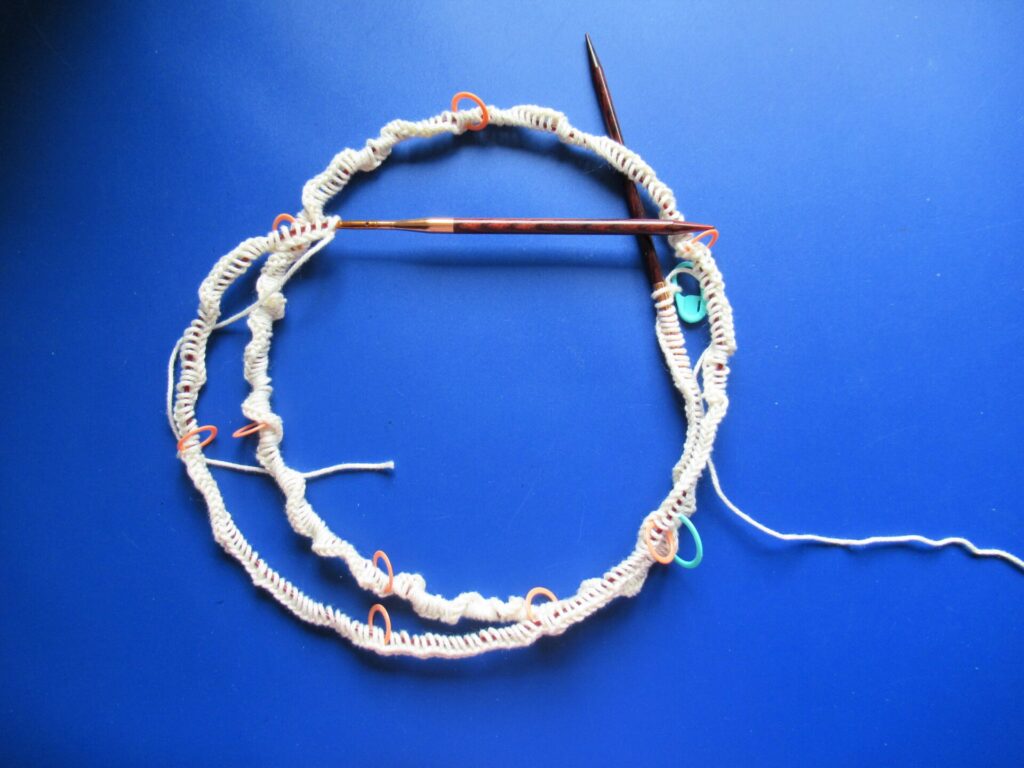
The stitch markers (picture below) are there to make counting this large number of stitches easier. I removed them as soon as I started knitting.
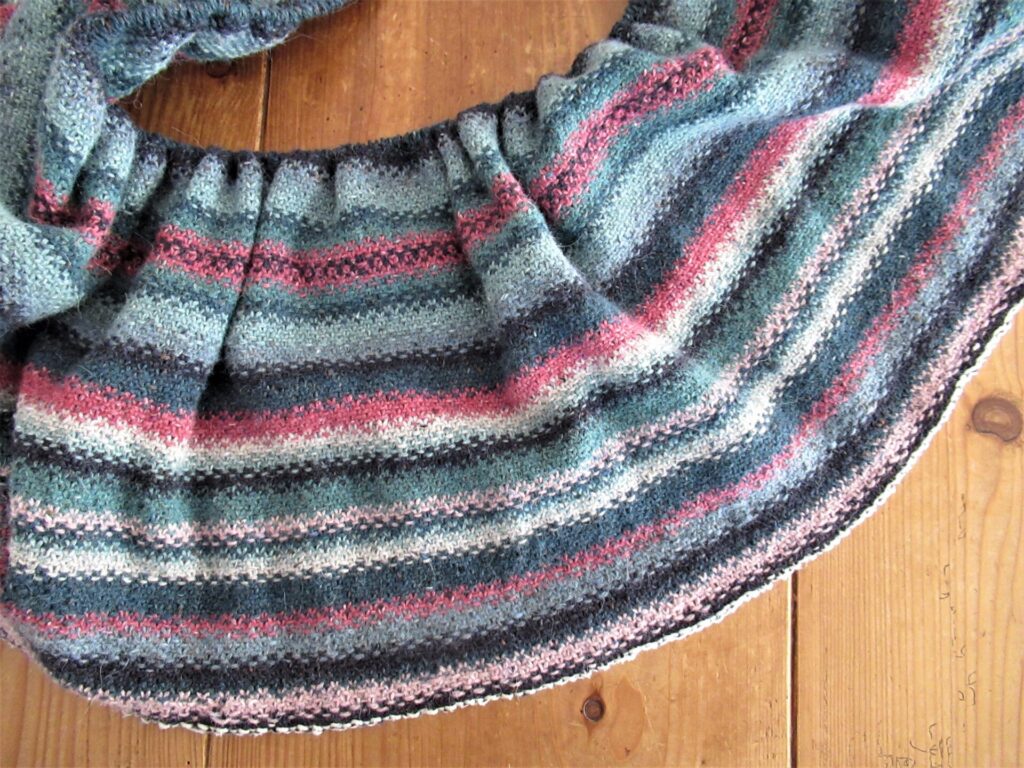
This was meant to be a project I would only work on in between projects requiring more attention. But the long rows of linen stitch are so addictive that I’m over halfway already. The white stitches along the bottom are the provisional cast-on.
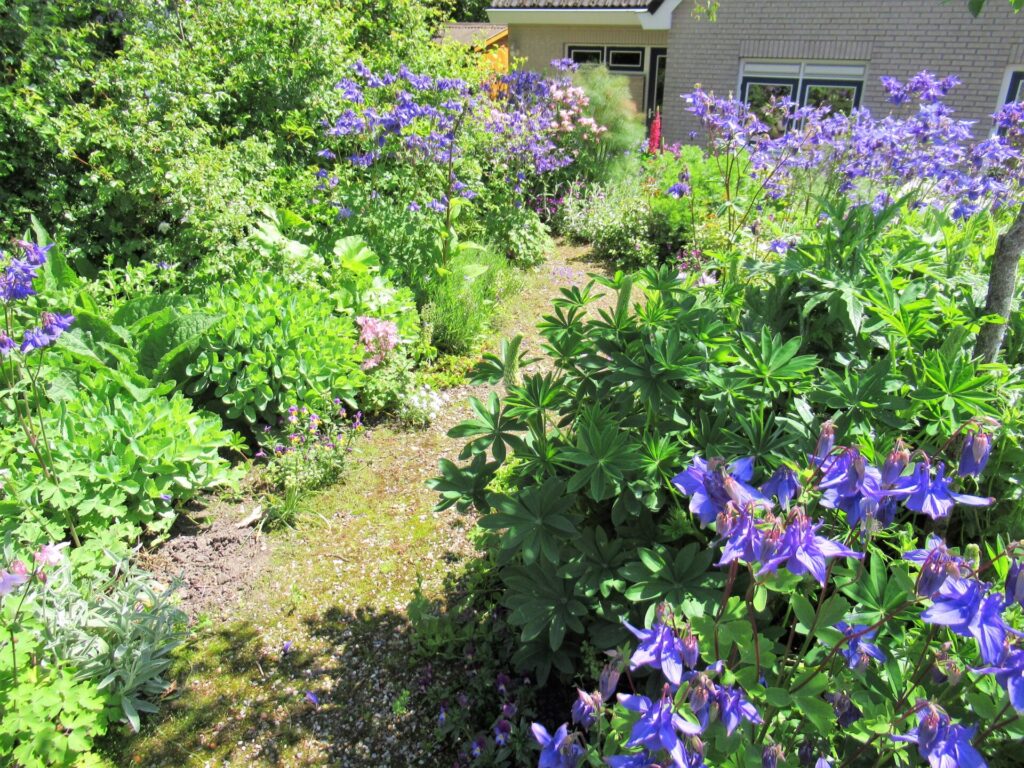
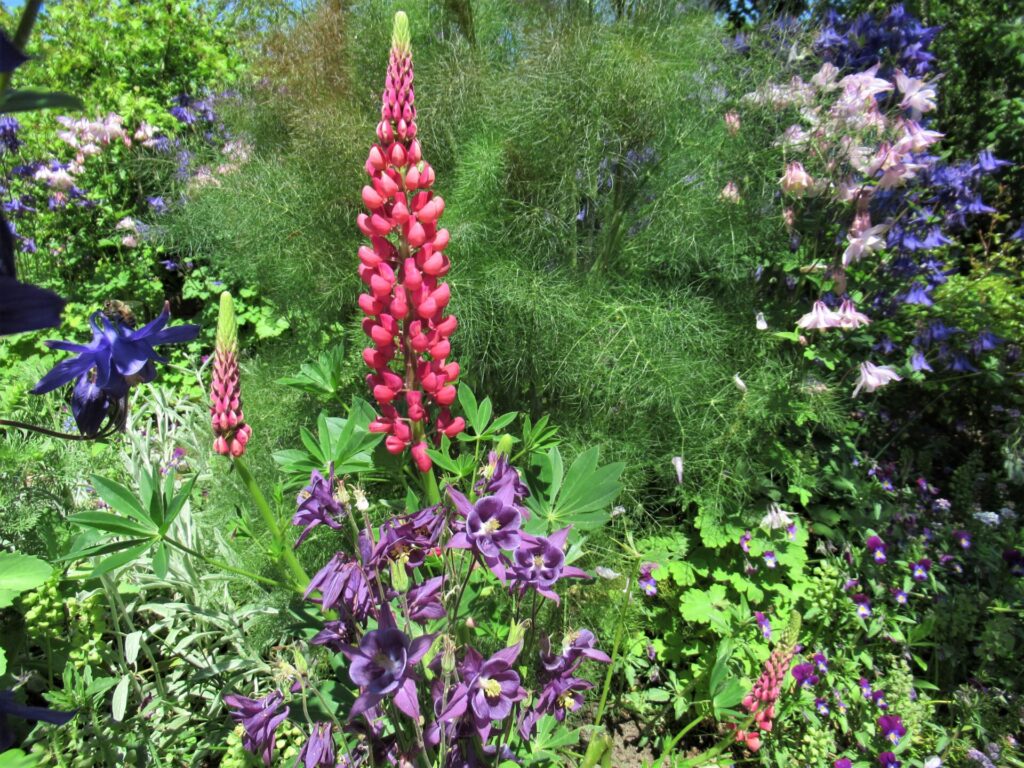
I’m going to put it aside for a while now, though, because after a rainy and cold spring, it suddenly feels like summer! Thanks to all of the rain, our front garden is a sea of lush greenery, with white, pink and purple aquilegias…
… and here and there a lupin.
It’s far too hot to have a large woolly wrap on my lap now. My mind is already bubbling with ideas for projects for summery temperatures, but I also think I should finish a few things before I start anything new. Last week, I thought I had run out of ideas and things to write about, and now I don’t know what to do first or last. I’m so glad it was only a temporary slump.
I hope your life is moving along without too many bumps in the road. See you again next week (if I don’t get held up or sidetracked again)!