Finishing – weaving in ends, sewing seams – is my least favourite part of knitting. I’d rather start something new. So, while some people have skeletons in their cupboards, I have UFO’s (UnFinished Objects). Like a sweater with one sleeve, cardigans with just the buttons or pockets to sew on, a colourful scarf with a thousand ends to weave in, that sort of thing. Most UFO’s become FO’s in the end, but for some it takes a long, long time.
Now I’d like to mend my ways. I didn’t want to leave our daughter waiting for her new Granite cardigan for ages, so as soon as I finished knitting all of the pieces, I blocked them. Usually I don’t do this with garments, but only with lace shawls and other things that need opening up.
I gave the pieces a good soak, spun them lightly in the spin-dryer, and laid them out flat on my blocking mats – with blocking wires along the longest sides – and pinned them into place. I didn’t stretch them hard at all (as I would a lace shawl) but just to the size indicated in the schematics.
The pattern (Granite from Kim Hargreaves’ book Grey) said ‘Press all pieces with a warm iron over a damp cloth’. I gave it a try, but it soon became clear that that wasn’t going to work. As I wrote in another post, the combination of yarn and stitch pattern made the knitted fabric bunch up terribly. I could stretch it out in every direction, but it sprang back as soon as I let go.
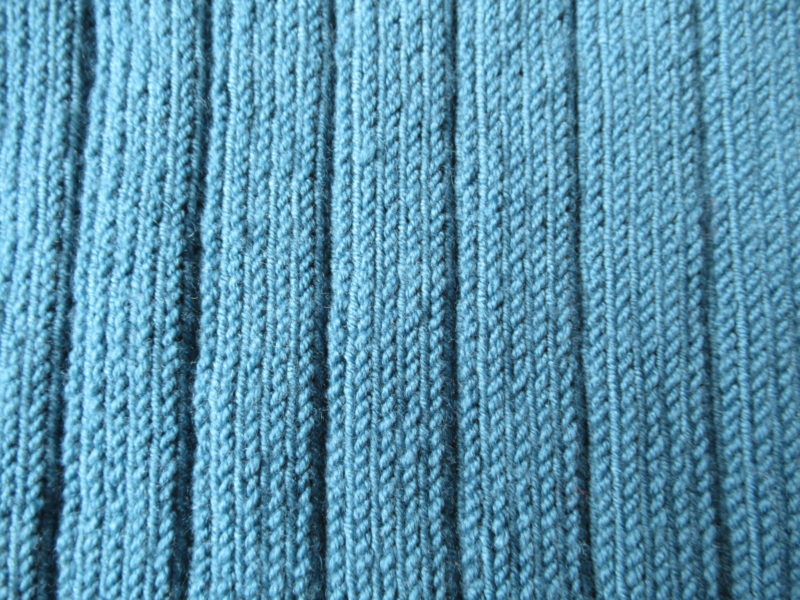
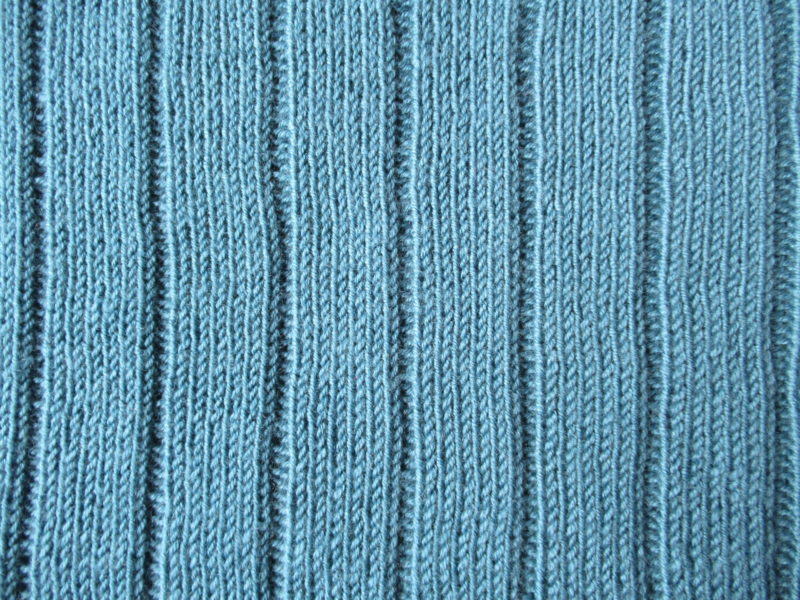
I took some pictures of the knitted fabric before and after blocking, to show what the blocking did:
Before blocking
After blocking
The fabric underwent a transformation. Dry it was elastic and springy. Wet it was limp (I have no other word to describe it). I tried to block the pieces very carefully to correspond with the sizes in the diagrams. Widthwise this was no problem, but lengthwise it was. They were much longer! The back and fronts were longer, the sleeves were longer, the armholes were wider. Yikes! Well, there was nothing I could do about it at this stage.
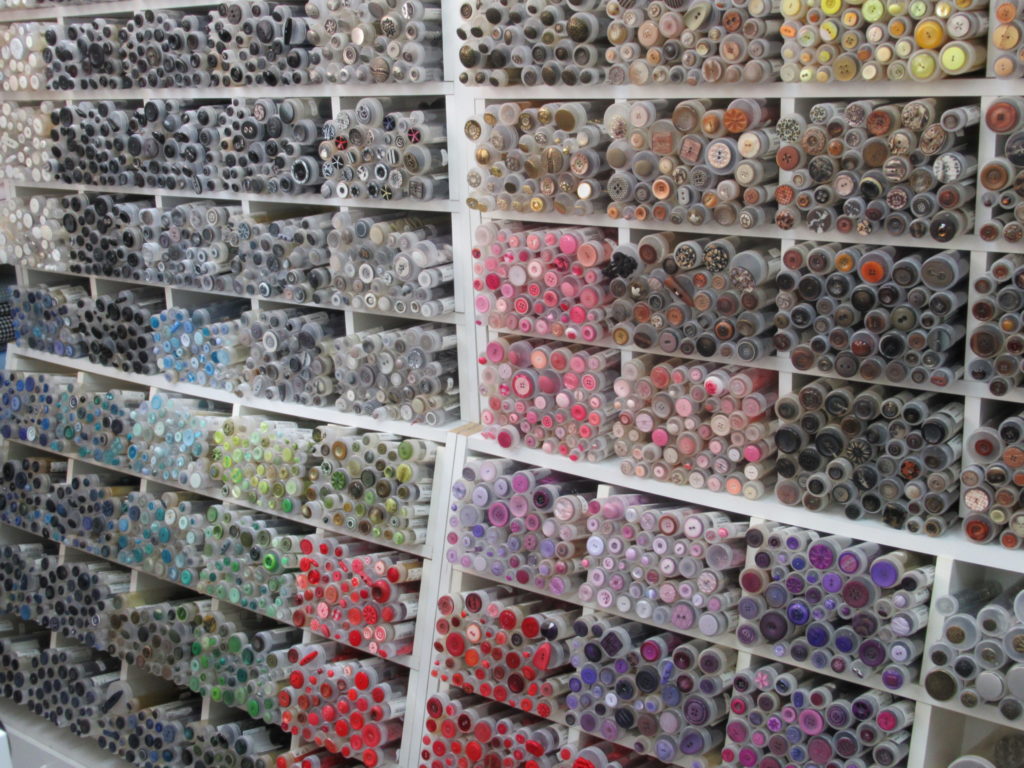
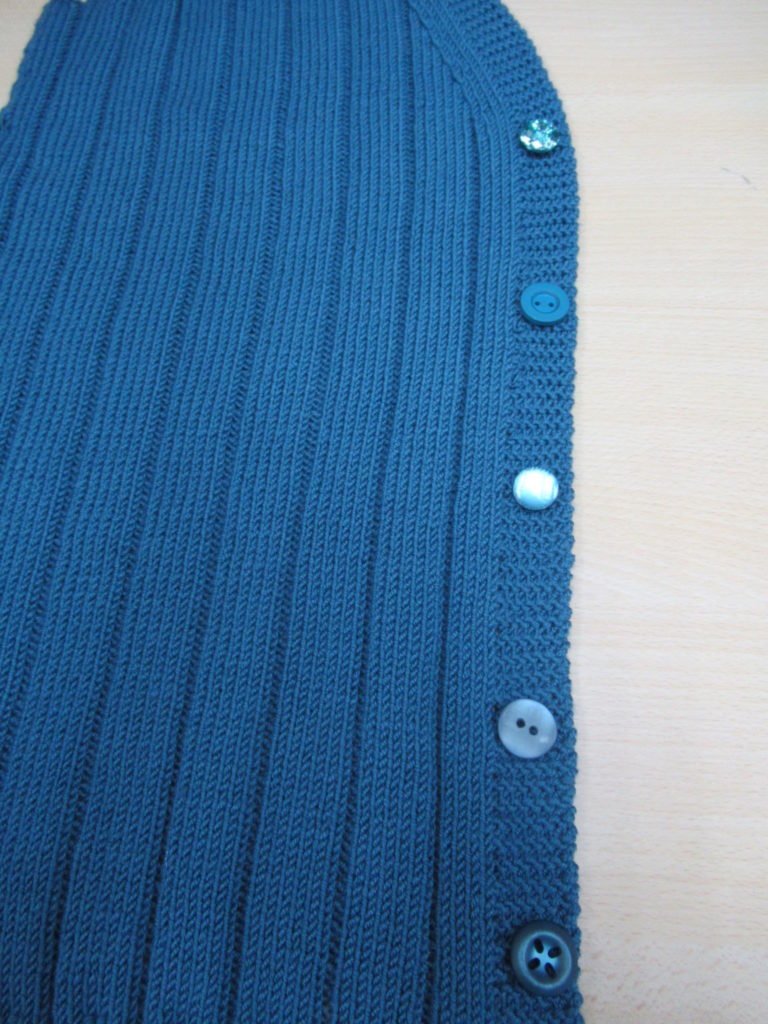
While the pieces were drying, I went looking for buttons. Now that is a part of the finishing process that I do like! I visited a great little haberdashery shop, with an impressive wall of buttons:
I zoomed in on the blue-green section and found several buttons that looked suitable. I spread the cardigan front out on the counter and placed some on the button band.
Now which one to choose?
The top button: too blingy The second button: hmmm, maybe The third button: too small The fourth button: too dull The fifth button: yes, I think this is perfect!
And then the two shop ladies (both several decades younger than me) had their say: It’s for your daughter, isn’t it? I wouldn’t choose the fifth button – that’s the granny option. (Ouch!) Take the second one. Much better!
Taking another look, I knew they were right. So, the second button from the top it was. Thanks for your help girls!
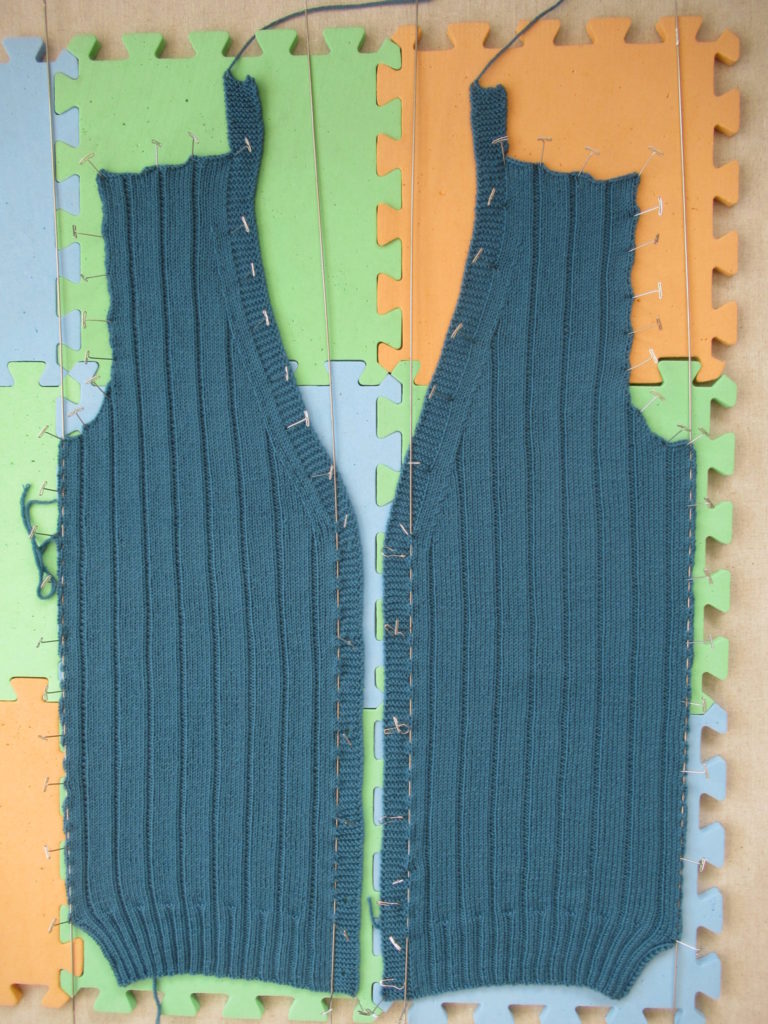
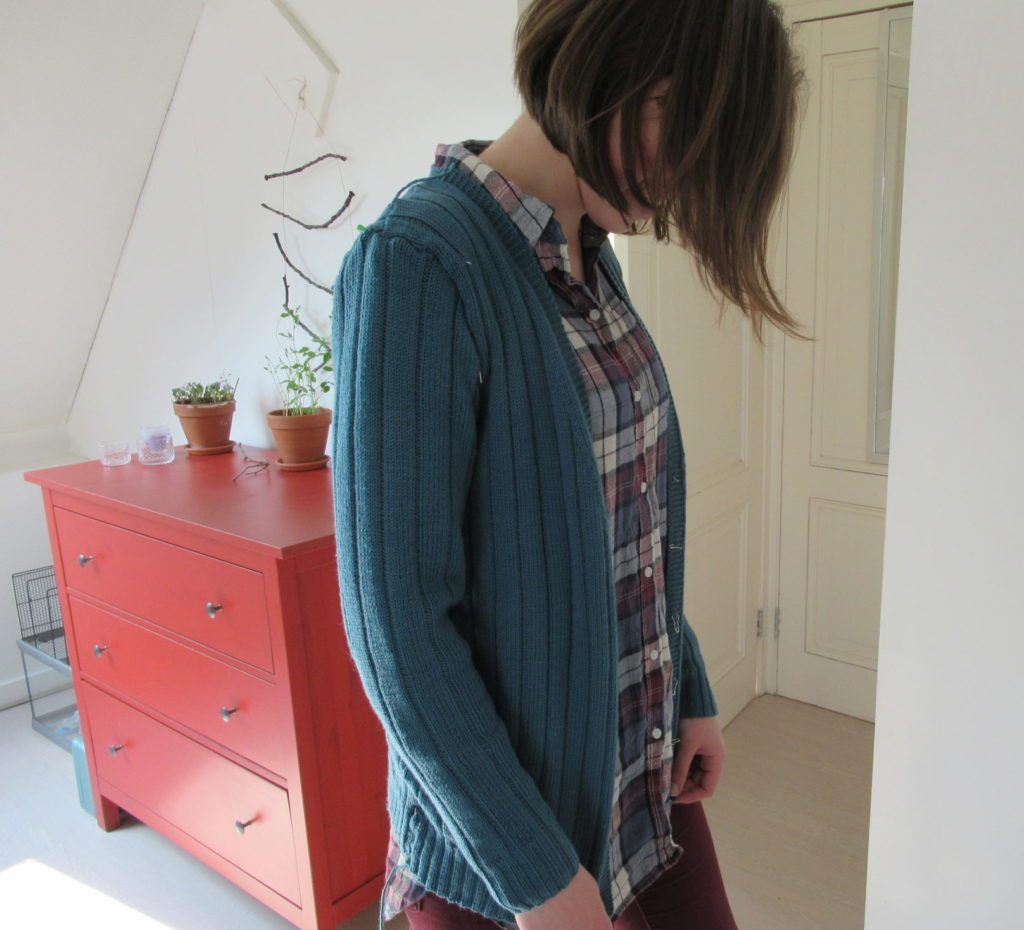
When they were dry, I didn’t sew the pieces together. I just pinned them, because I expected I’d have to rip them back and shorten them. But magically the cardigan fit!
The sleeves were the right length and the armholes were just right. The body was slightly longer than planned, but that was fine.
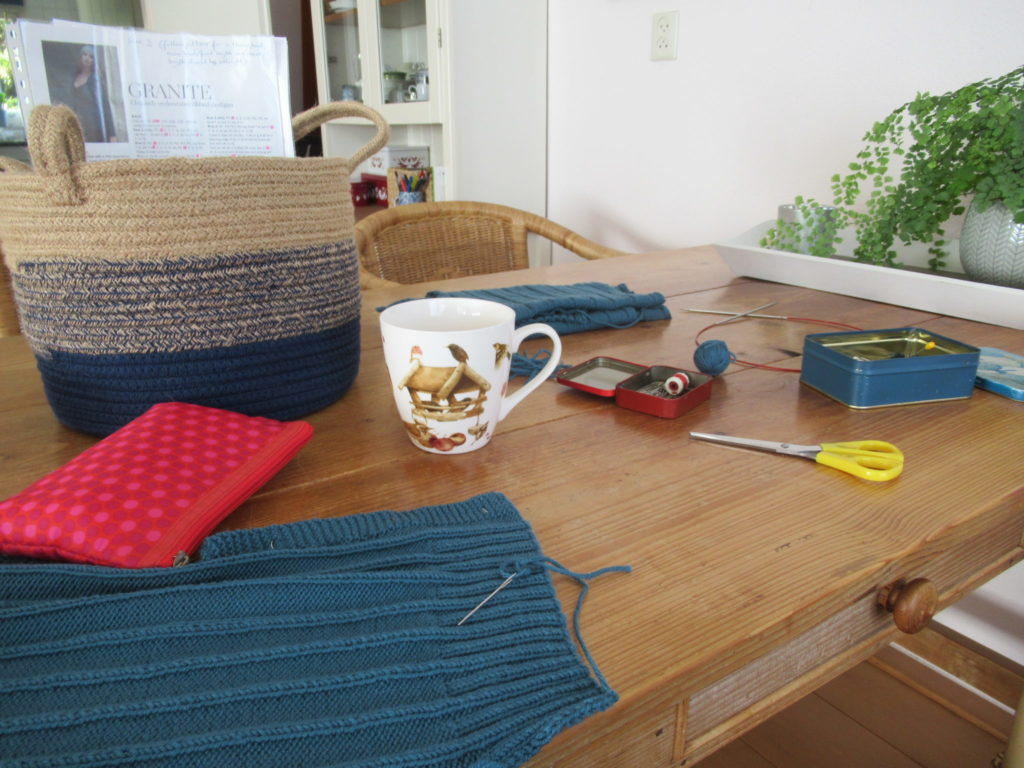
Now I could set about sewing everything together. How could I make that unpleasant task more pleasant? Well, I collected everything I needed in a basket, put on a nice bit of music, lighted a scented candle and treated myself to a special cup of tea.
I also promised myself that I didn’t have to do it all in one sitting. Half an hour here, 45 minutes there, and before I knew it, it was finished.
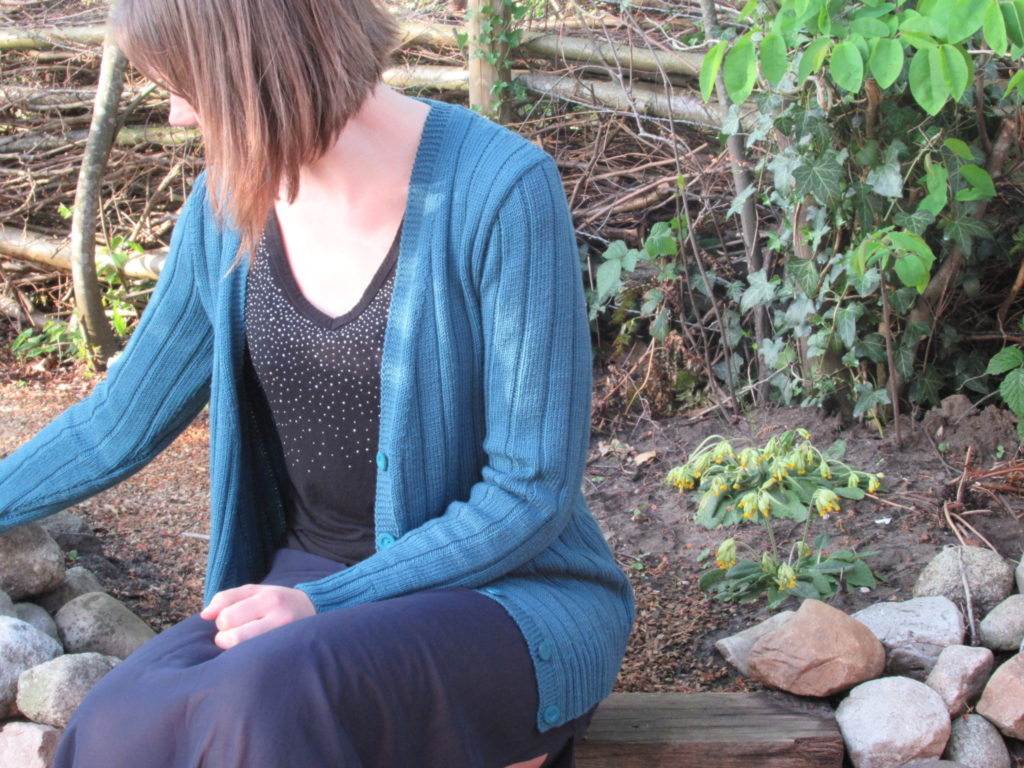
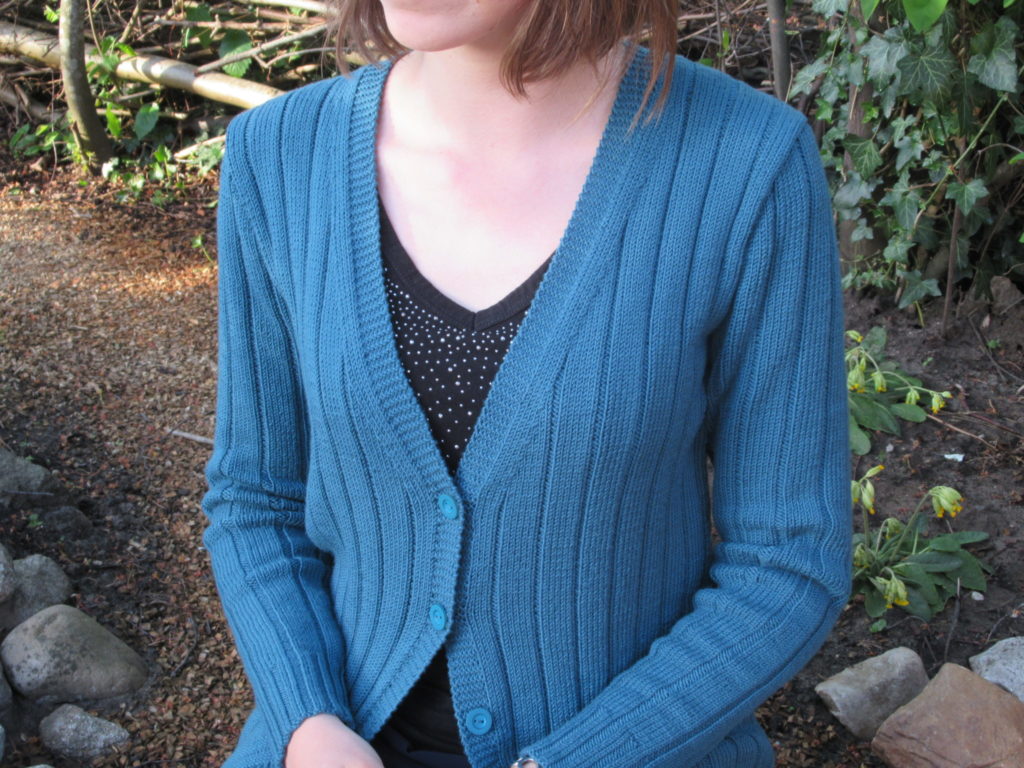
During a lightning visit from our daughter, we did a quick photo shoot:
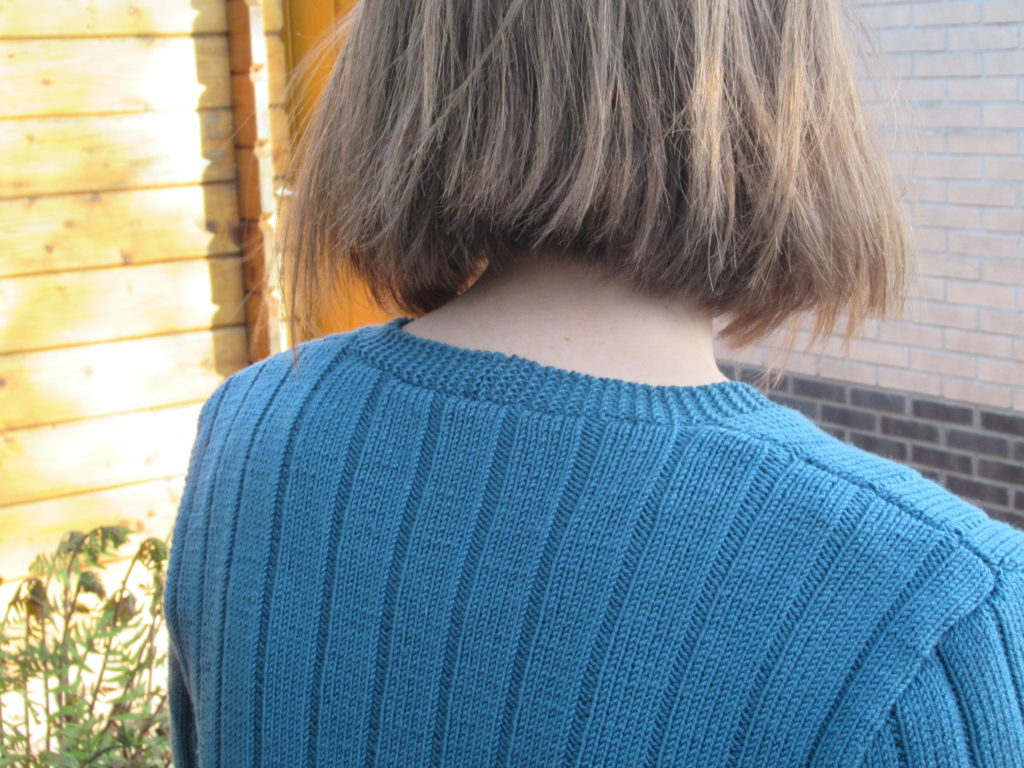
I joined most of the seams with an ordinary back stitch (on the wrong side), but for the band at the back of the neck I used a mattress stitch on the right side of the fabric. That way I was better able to see what I was doing, and got a flatter seam. I’m very happy with how this worked out:
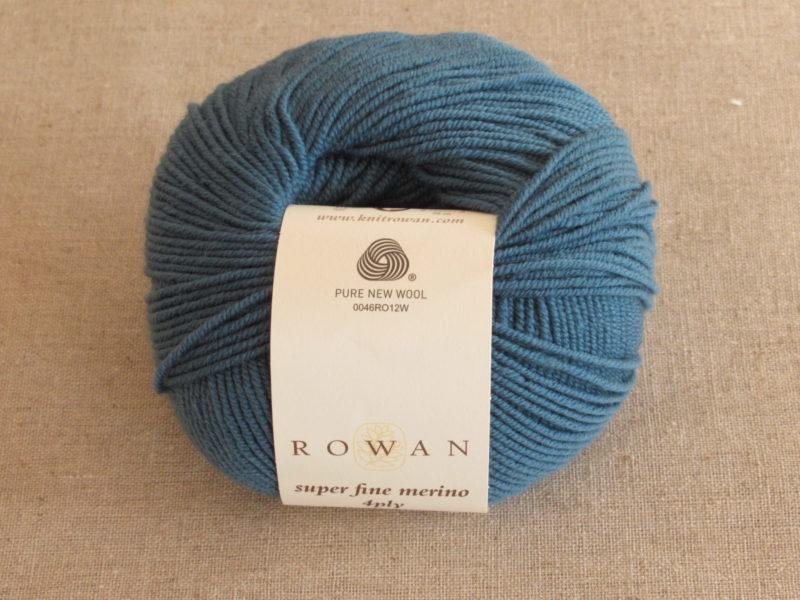
Taking beautiful photographs is a skill/art I need to practice a lot more. As you can see in this post alone, the colour of the yarn looks different all the time. In reality it is a medium dark teal (blue-green). The yarn I used is Rowan ‘Super Fine Merino 4-ply’:
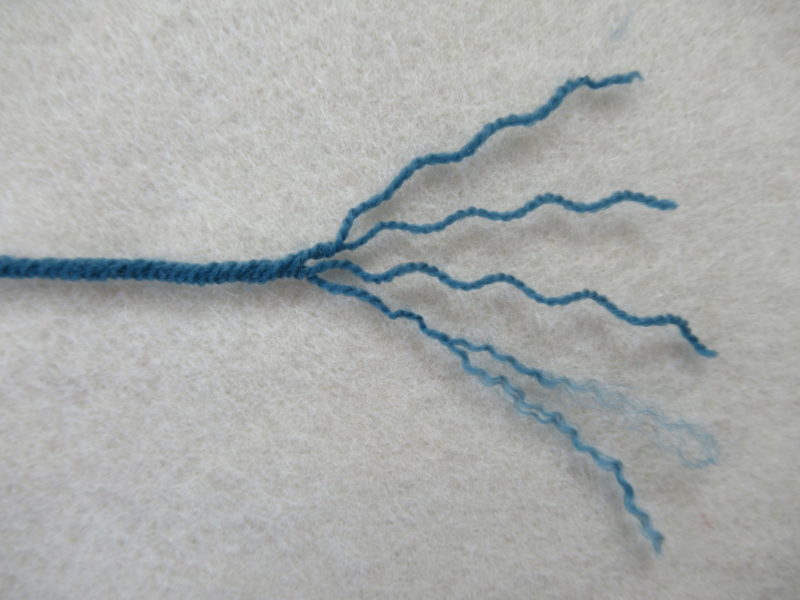
As the name suggests, the yarn consists of 4 plies. Each one of these plies consists of 2 plies again, as you can see in the picture on the right. This construction makes the yarn very elastic, which caused some of the troubles I experienced.
I wouldn’t recommend this yarn to a beginning knitter, because it is very hard to get the measurements of the knit right, and also because it is easy to stick one’s needle into the yarn and miss one or more of the plies while knitting.
But all in all I’m really, really happy with it. After washing and blocking, the fabric is beautifully soft and smooth, with a subtle gleam, and a wonderful drape.
Here’s one last photo, which shows up the pretty decreases along the neckline very well.
Thank you for reading. I know I’ve gone rather more into technical detail than I’ve done so far. I hope it was interesting nevertheless. If you’re a Ravelry member and would like even more details (yarn quantities, needle sizes etc.) you can find them here on the project page.
Now on to something new!
7 thoughts on “Finishing Granite”
I don’t think the fifth button type was really all that “granny”, so don’t worry. But those you chose in the end are perfect. As is the cardigan! It’s ideal to put on when it gets a bit chilly in the evenings. Thanks! 🙂
Het vest is mooi geworden en wat een verschil voor blocking en erna. Precies pas en echt supermooi, hier zal je dochter wel blij mee zijn.
Het staat jou ook heel goed!
Dank je. Blocking maakt inderdaad een groot verschil; het breisel wordt er veel egaler van.
Mooi vest en staat uitstekend. En voor de link naar de fourniturenwinkel!
Leuk, hè? Ik vind het altijd een feestje om iets uit te zoeken in de knopensnoepwinkel.
It’s a beautiful cardigan and thanks for sharing your journey, it helps me to learn.
Thank you! There’s always something new to learn – I’ve learnt a few things along the way too.