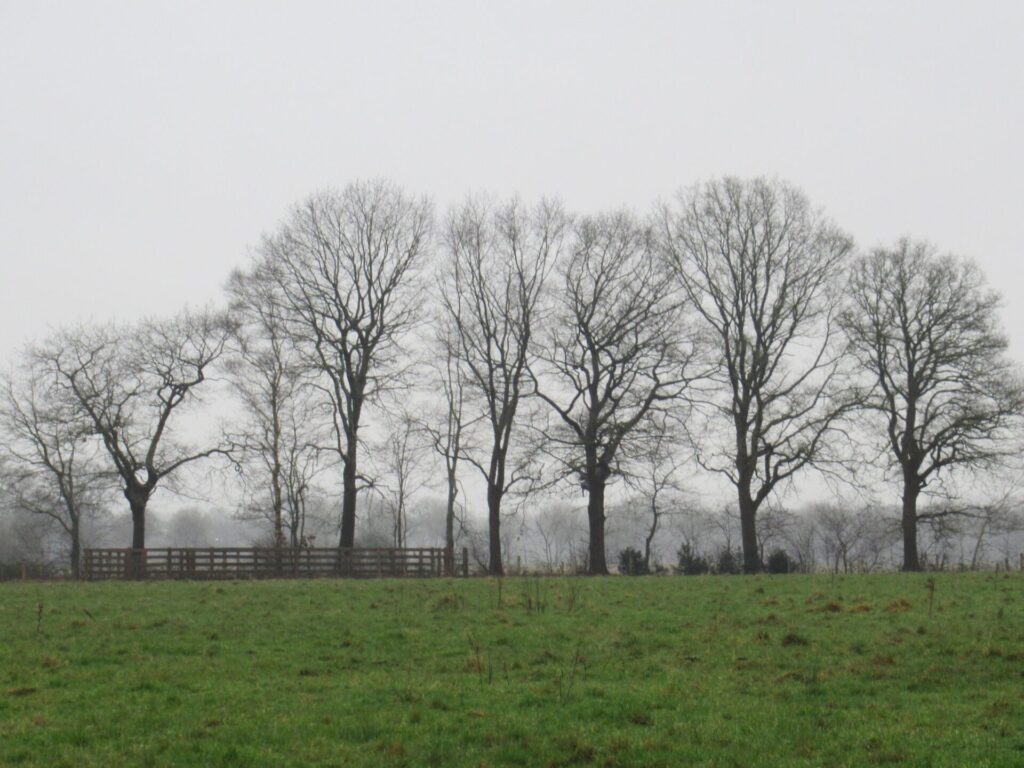
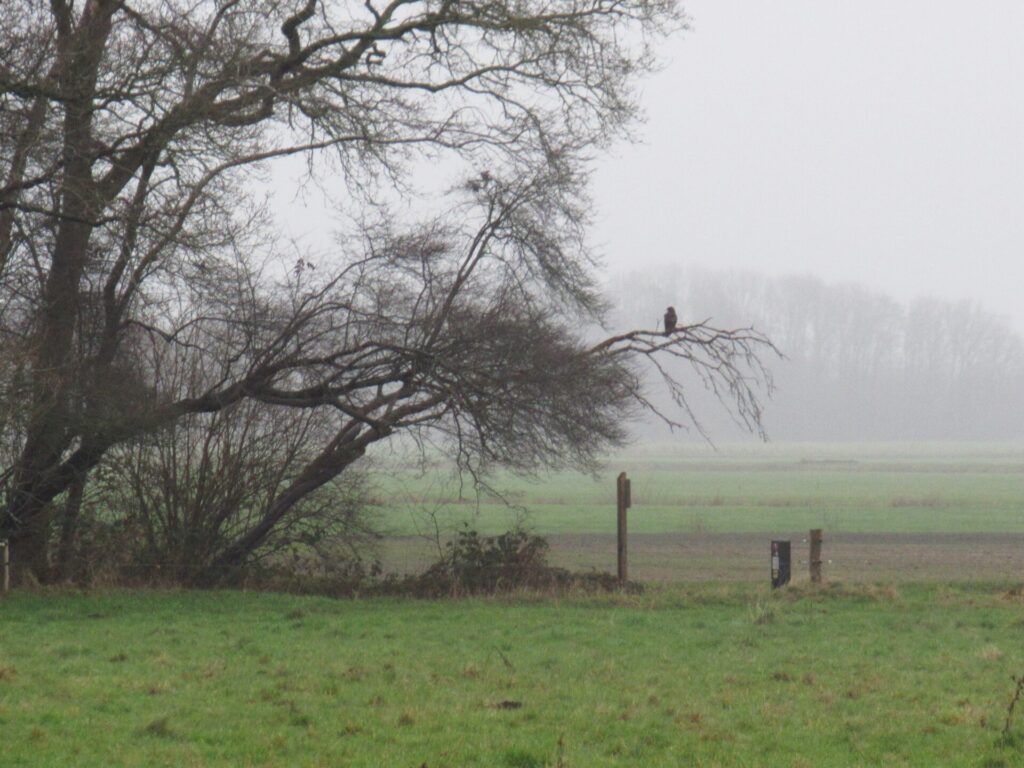
Hello! How I would have loved to write a really wintry post today, with photographs of a snowy landscape with a bright sky, or of frozen lakes and canals with people ice skating. But alas! It’s grey here. Very grey.
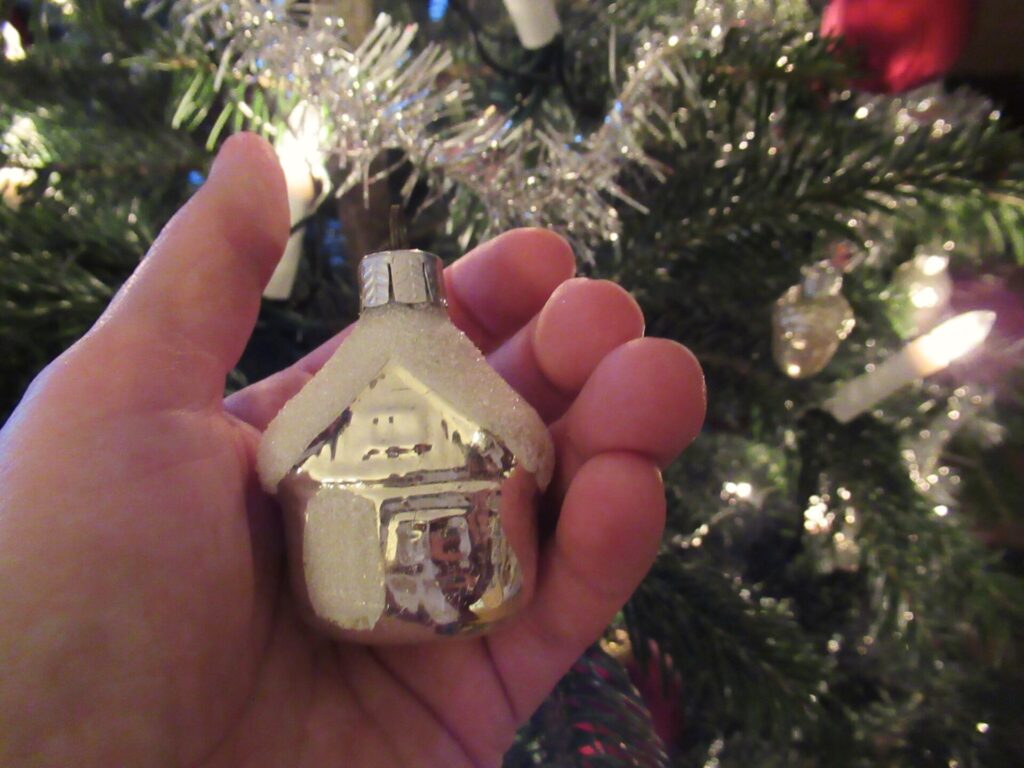
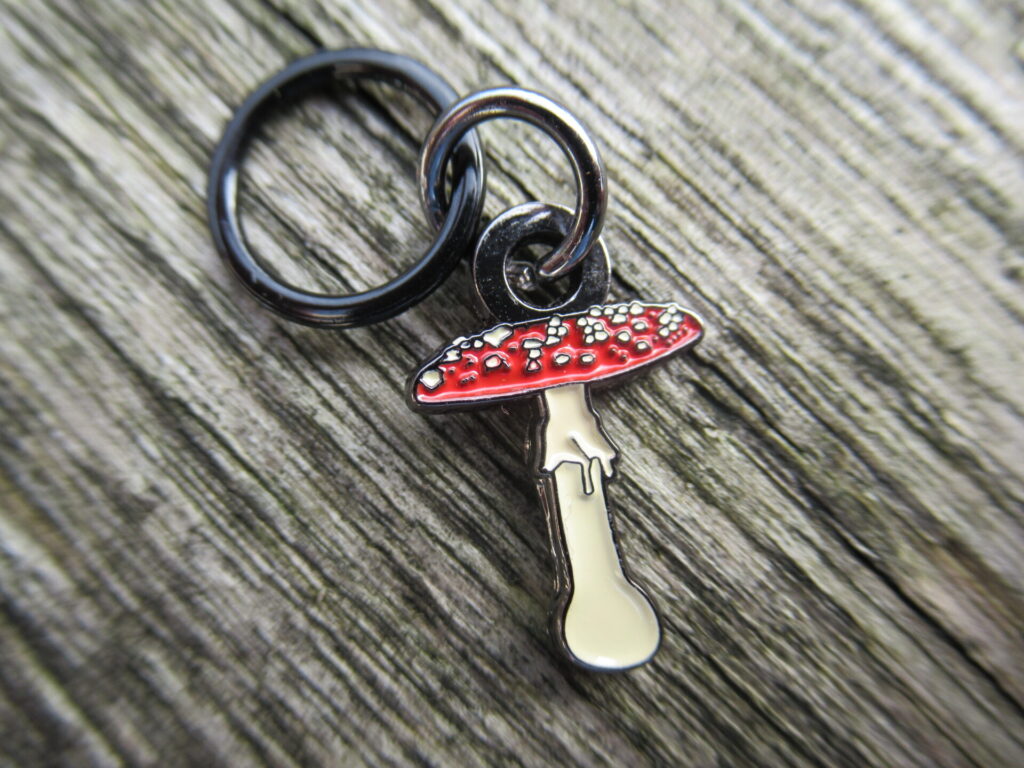
And wet and dark. Ah well, it is often like this in the weeks before Christmas. I’m fine with it really, and go out for a walk every day no matter what the weather. At home it’s cosy, with candles everywhere and the Christmas tree in the living room. On Saturday I found this new (second-hand) addition to it.
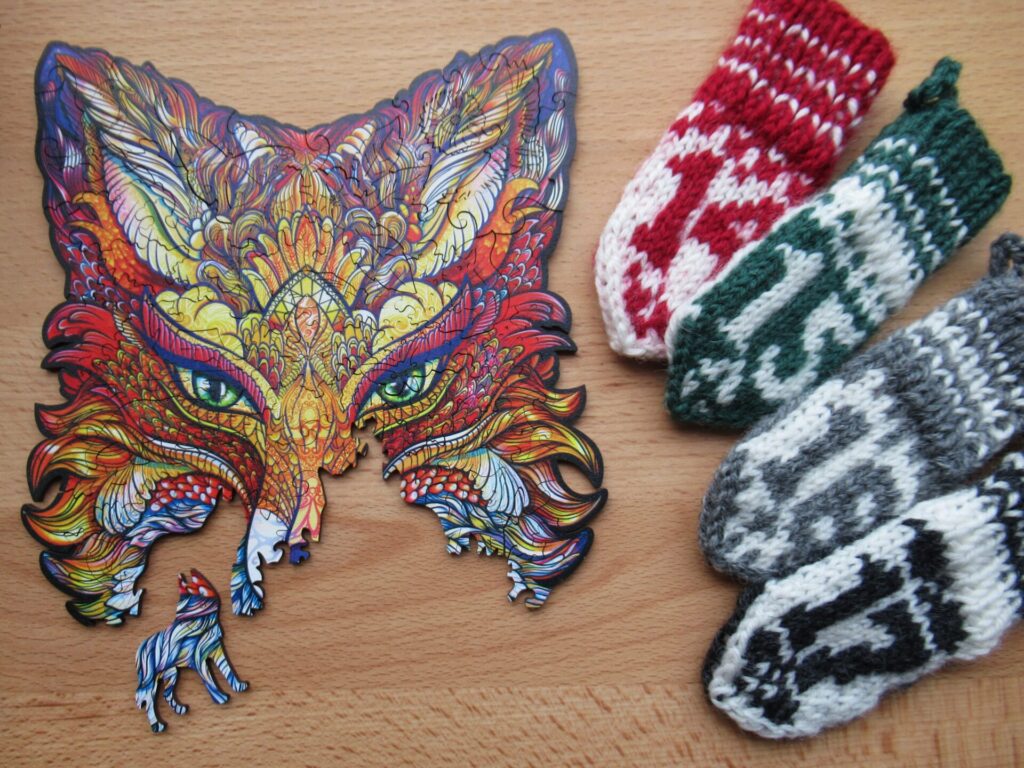
Every morning, I start the day by adding a few pieces to a wooden puzzle. Our daughter put them in the Advent calendar mittens I gave her last year (described in this post). I can see this becoming a tradition, with the mittens going back and forth between our homes every year.
It’s an amazing puzzle. At first I thought it was going to be a star, but now I can see that it is becoming an animal head (a fox?). There are all kinds of animals, birds, flowers and leaves hidden in it. One of the pieces in mitten number 17 was a wolf.
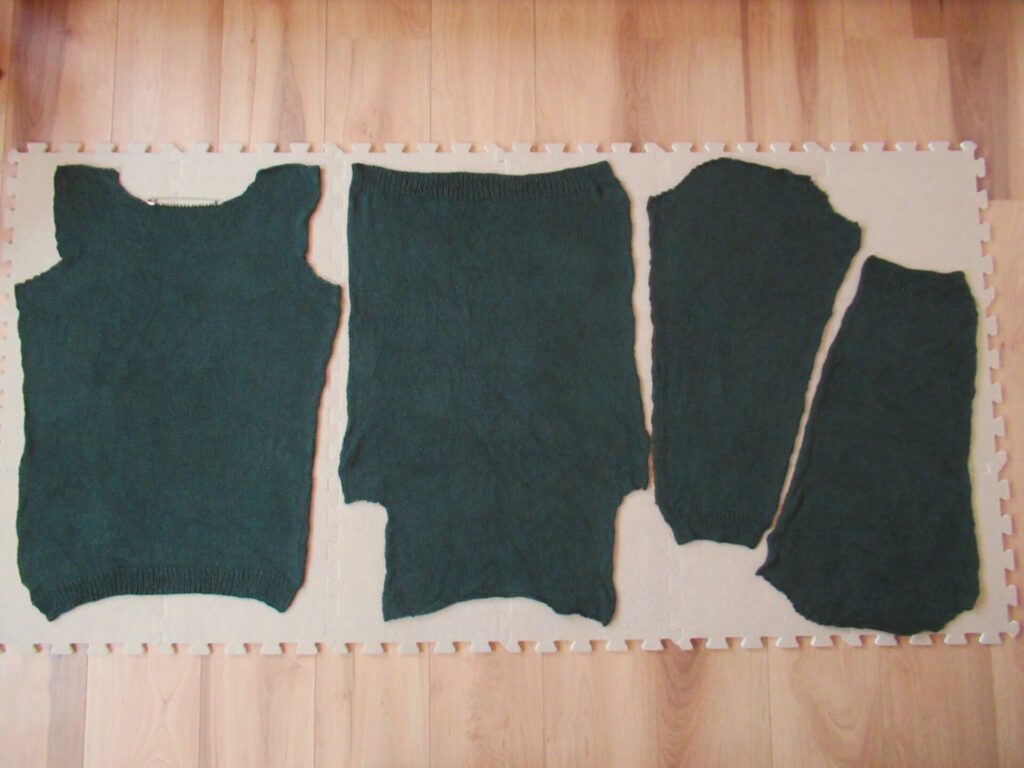
This autumn, there hasn’t been anything interesting like the Advent mittens on my needles. I just didn’t have the energy or the spirit. Instead, I’ve been knitting lots of simple things: A garter stitch scarf and 1×1 ribbed hat for a niece who is leaving for Stockholm in January, and a stocking stitch pullover for our son-in-law. The pullover pieces are now drying on blocking mats.
I didn’t use a pattern, but simply improvised. (Yarn: Rowan Softyak DK – shade 240 Pasture.) If I get a move on, I should be able to finish it before their Christmas visit.
I’ve also been knitting some simple 4-ply socks. (Pink-brown pair: Lang SuperSoxx Berry – shade Raspberry; Blue-grey ones: Rellana Flotte Socke Patagonia Männersache – shade 1730.) I simply love knitting simple socks.
Tomorrow it’s the winter solstice, in five days’ time it’s Christmas, and in only eleven days it’s New Year’s Eve. In previous years, it was often on the very last day of the year or a couple of days earlier at most that I suddenly thought, ‘Oh, another year has rushed by and what have I actually done with it? And what about the coming year?’
This year, inspired by Leo Babauka’s Month of Reflection, I’ve been pondering these questions during the entire Advent period. That doesn’t mean that I spent a whole month sitting cross-legged on the floor, but I did take some time here and there to reflect on 2024 and set intentions for 2025. Leo’s four-step approached really helped me structure my thoughts, because they can get seriously tangled.
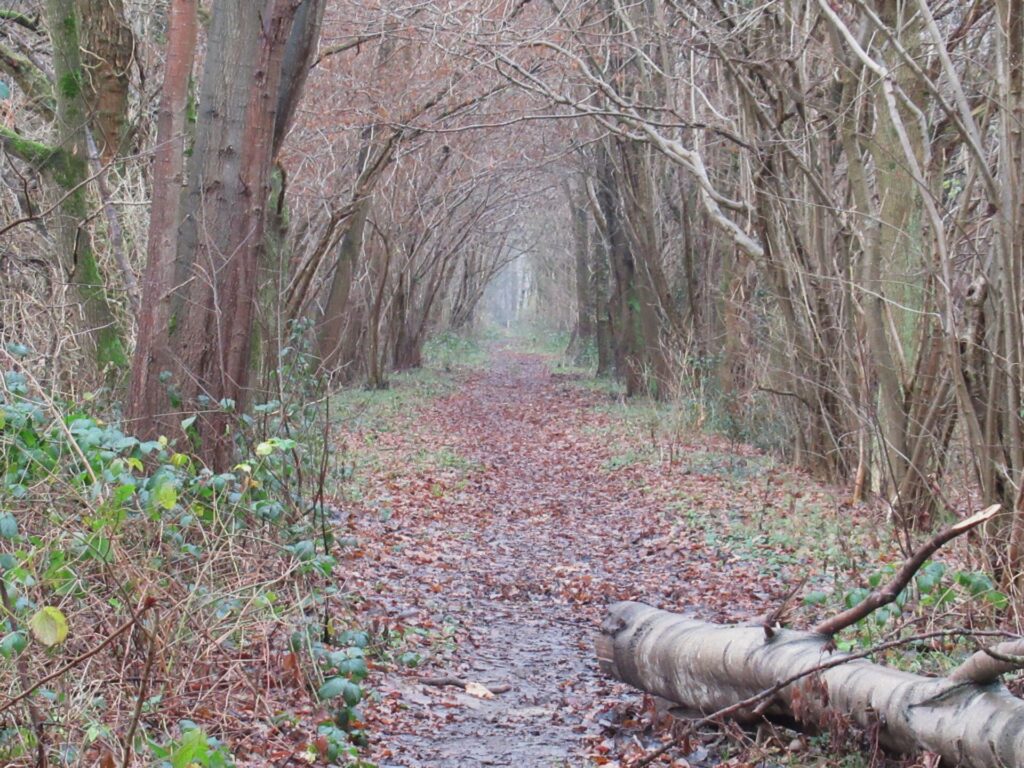
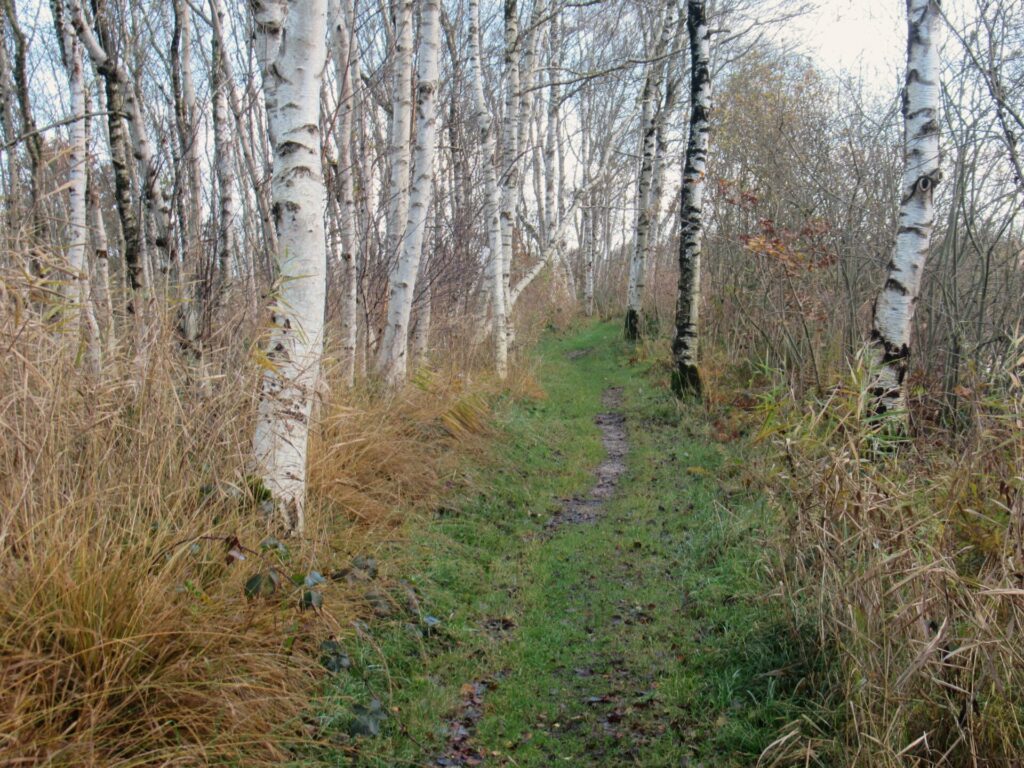
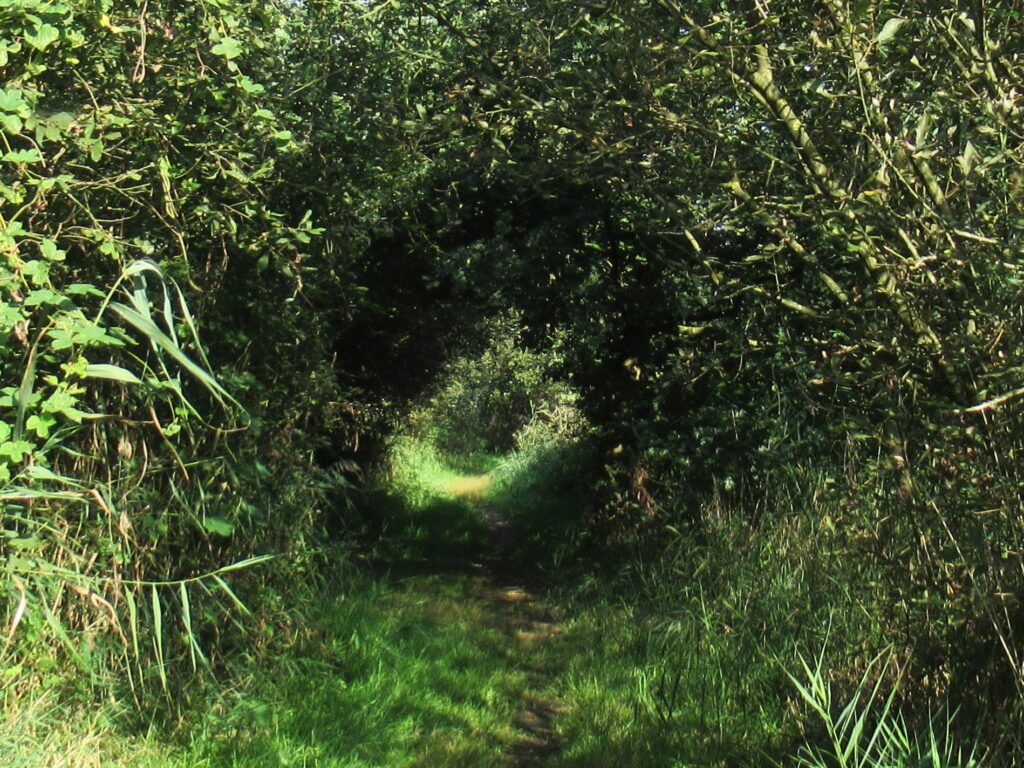
It has helped me see the path ahead of me more clearly.
(In springtime this particular path is bordered by a carpet of wood anemones – see this blog post).
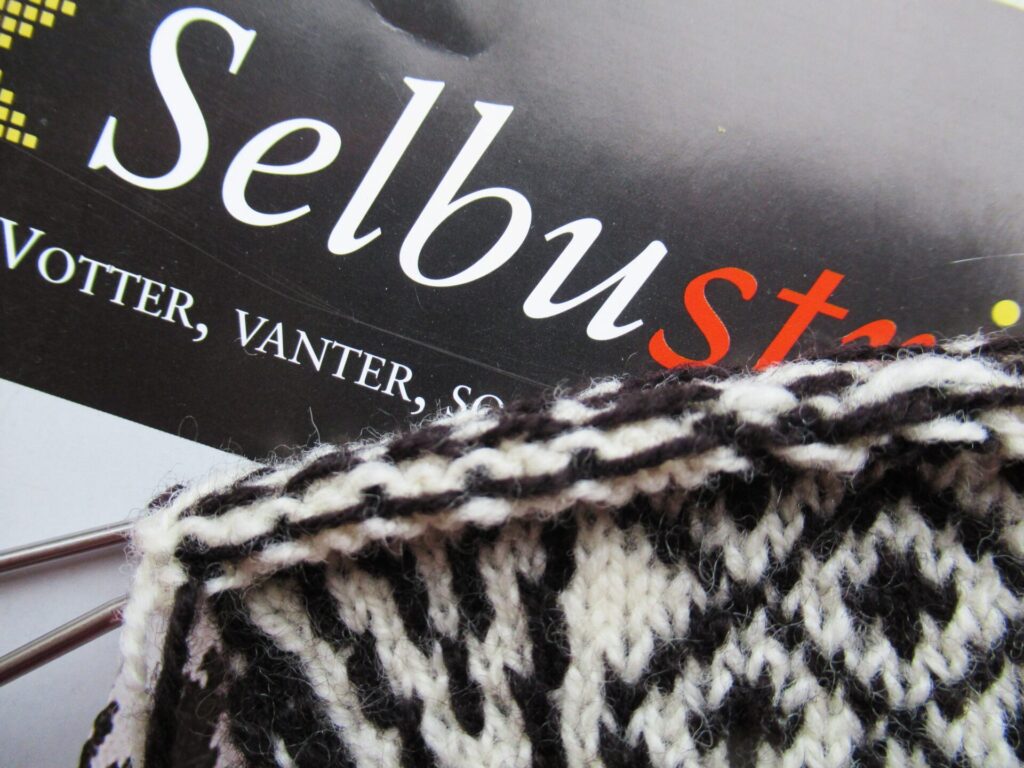
I’m really looking forward to the festive season and 2025 now, and have already started on a pair of Selbu mittens…
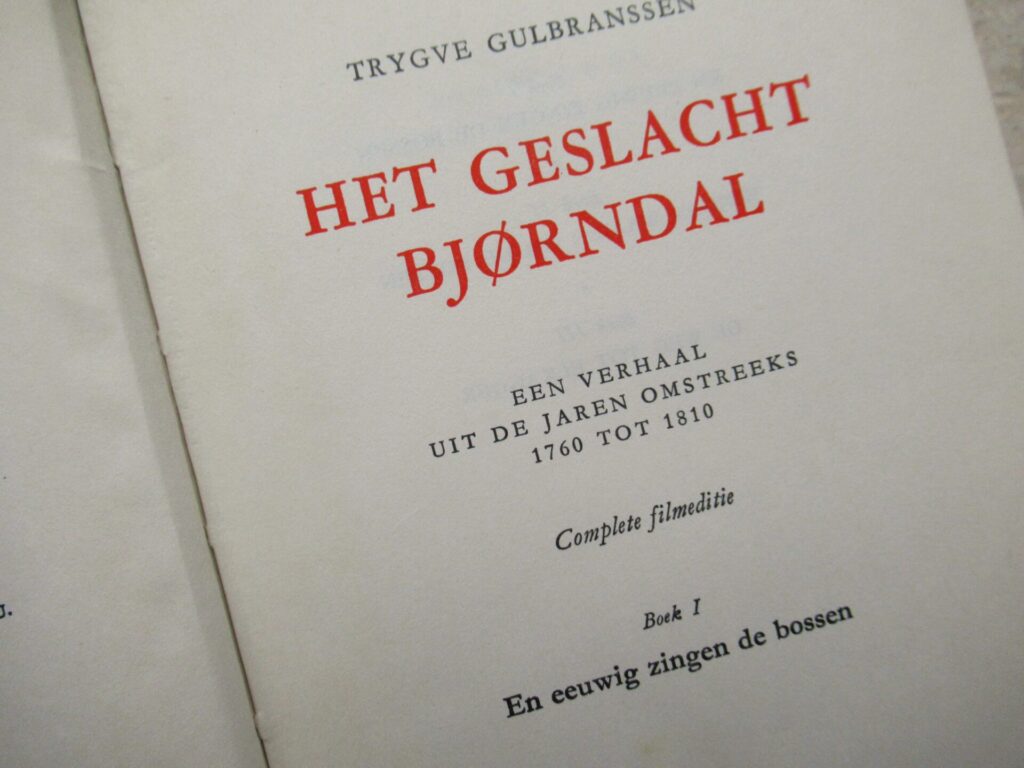
… and found a Norwegian book to read alongside.
Another small felt kit lies waiting to be made into a butterfly…
… and I am brimming with many more ideas for things to make and write about in the coming year.
I’m taking some time off now to knit, read, sew, rest and be with my loved ones. I wish you a lovely and peaceful festive season, with plenty of time to be with the people you love best and to do some of the things you love doing most. Thank you for visiting me here and I hope to see you again early next year!
To close off, here is a picture of the most beautiful Christmas wreath I’ve seen this year, glowing golden amongst all the damp and greyness.
Hello! With Christmas less than a fortnight away, there is something utterly un-Christmassy I’d like to share with you today – a butterfly story.
It all started with the scarf version of my Seventh Heaven pattern. For this version, I used two different colourways of Schoppel Zauberball Crazy. One of them was inspired by and named after a butterfly called Kleiner Fuchs in German (EN small tortoiseshell; NL kleine vos).
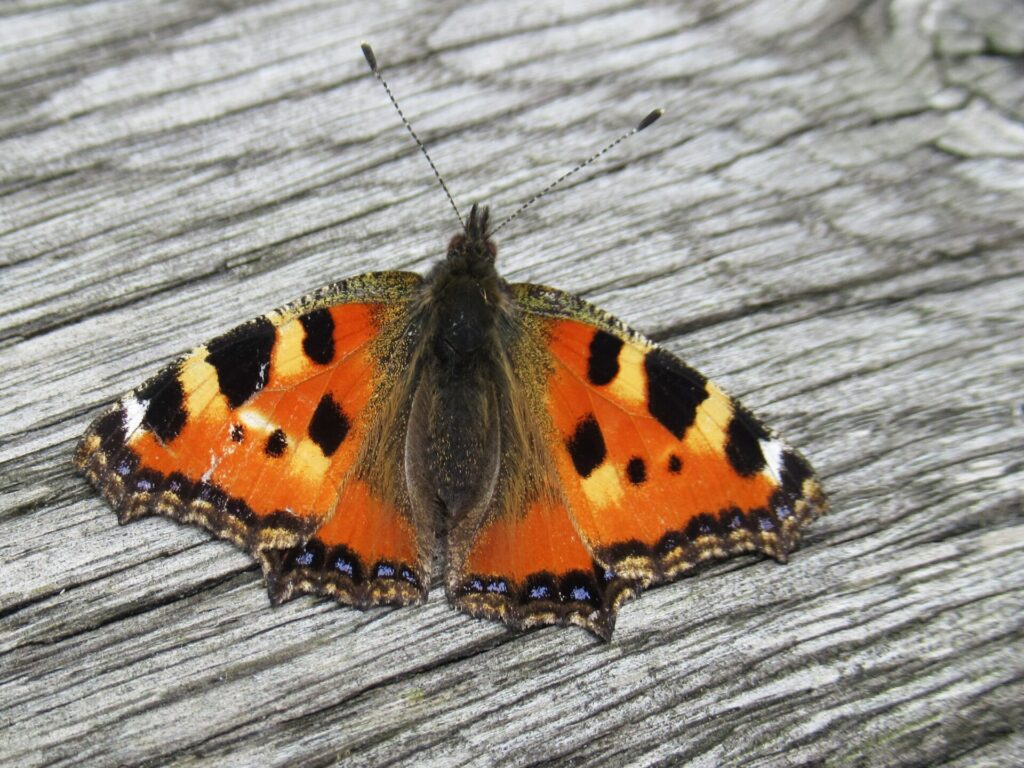
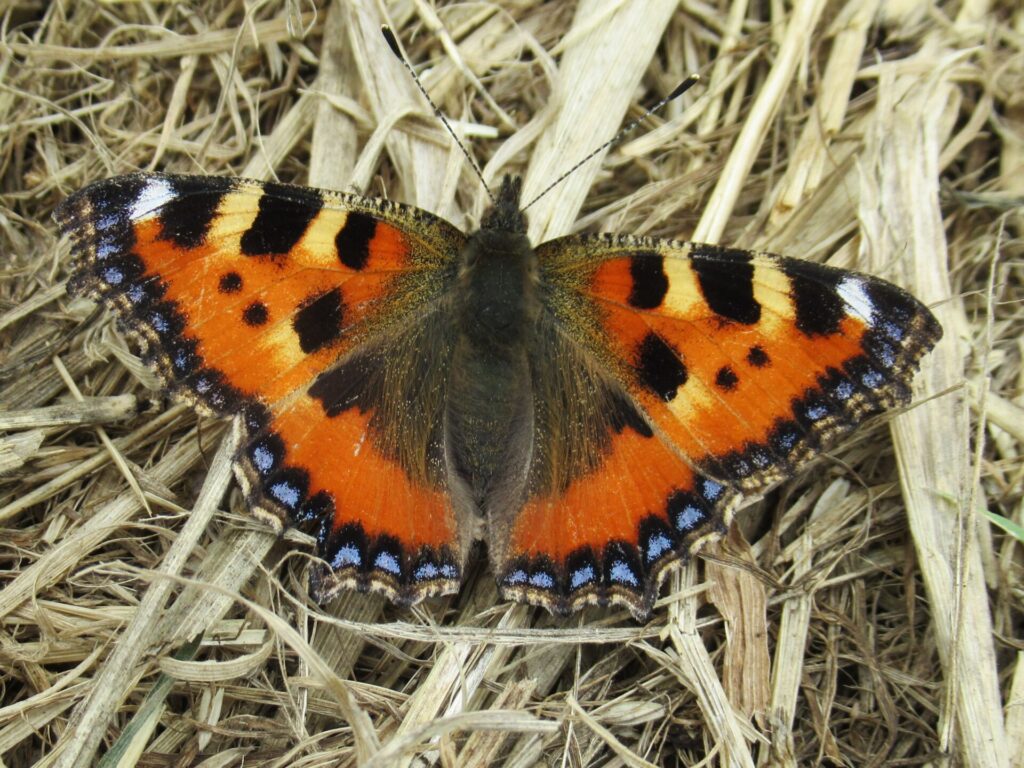
While I was photographing the rolled-up scarf, look who was coming for a visit:
A small tortoiseshell landed on our picnic table for a spot of sunbathing!
I love these beautiful creatures, and I know someone else who does, too. Her studio isn’t far from here. Would you like to join me for a visit? Following cycle tracks through the wood, country lanes through farmland, crossing a busy road, more country lanes… there we are.
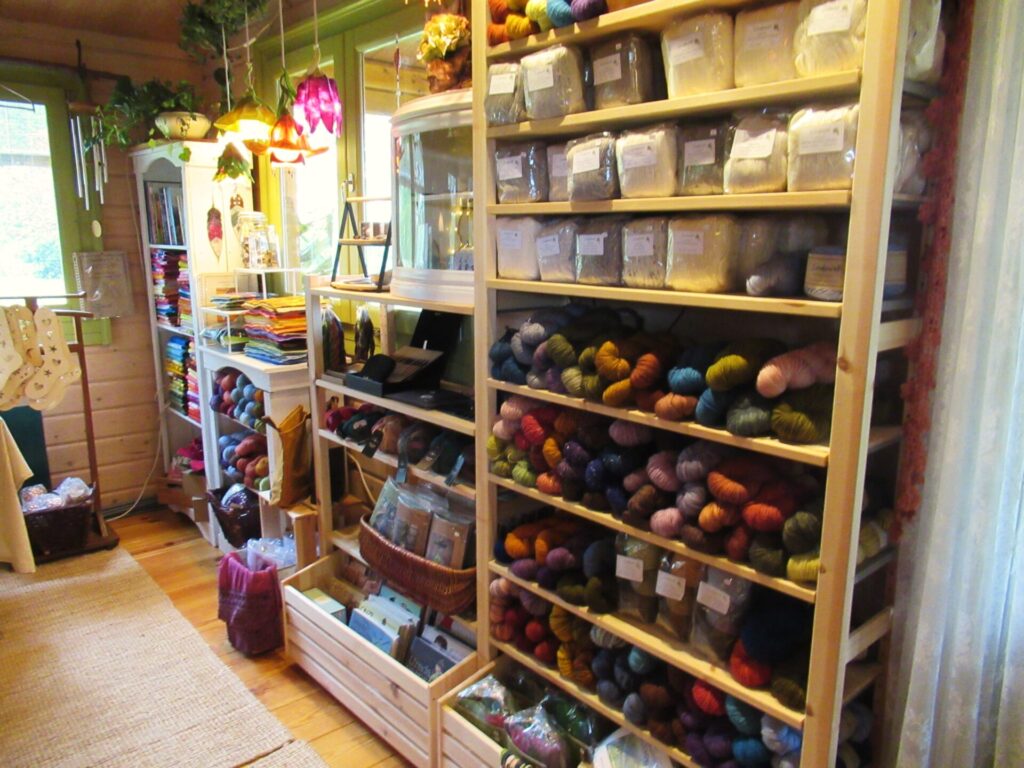
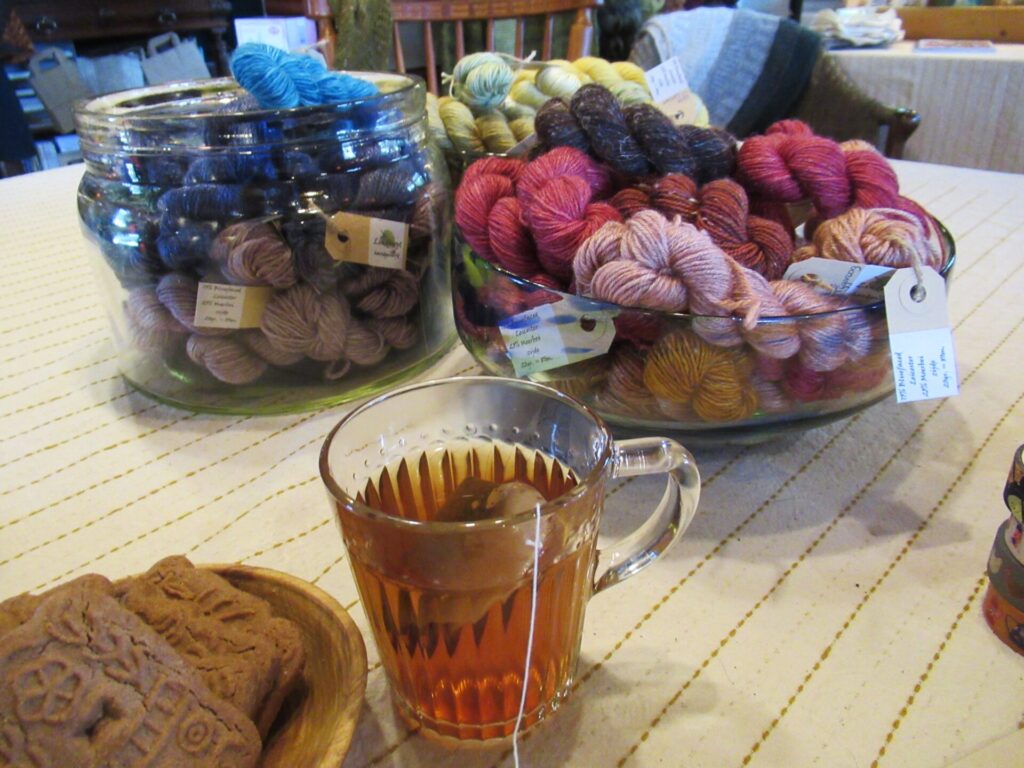
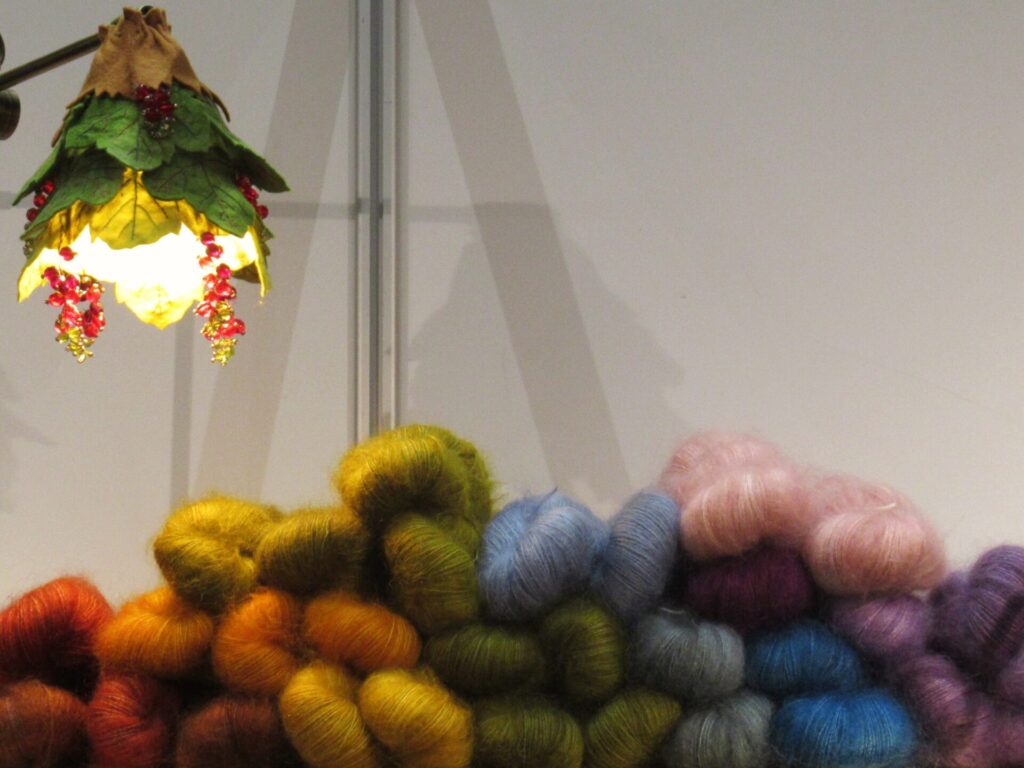
Marianne dyes yarn in gorgeous glowing colours.
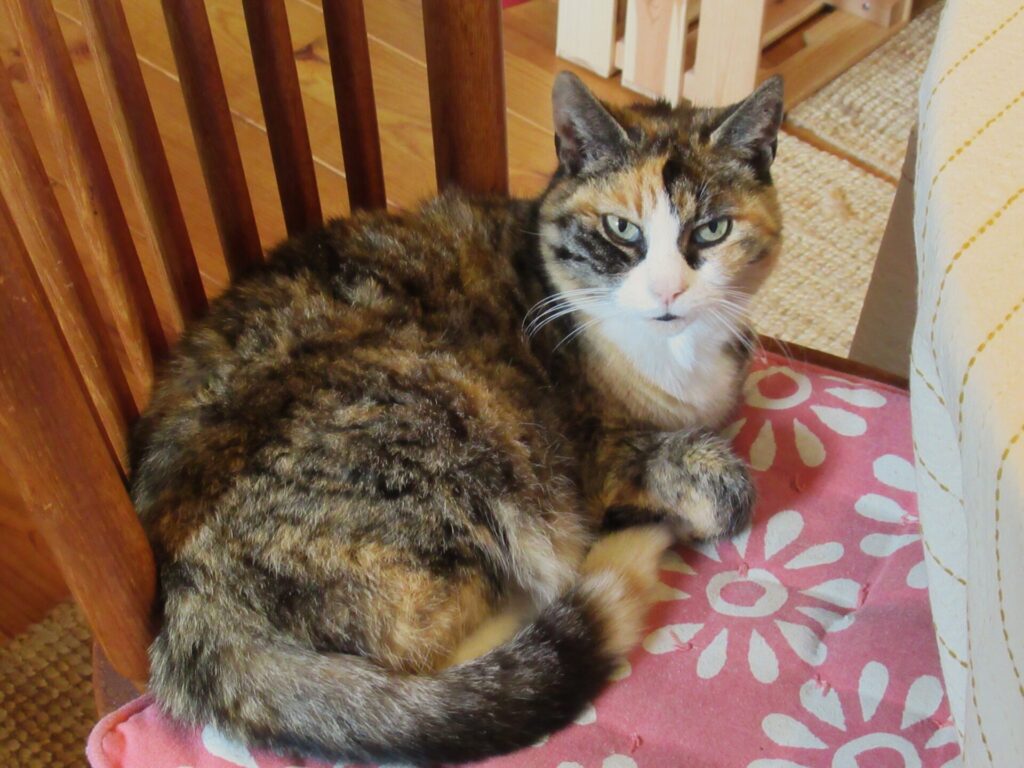
Her studio, called Lindelicht, is a Scandinavian-style wooden building with a welcoming atmosphere. Hello kitty-cat!
Tea, biscuits, bowls filled with mini-skeins – so very cosy.
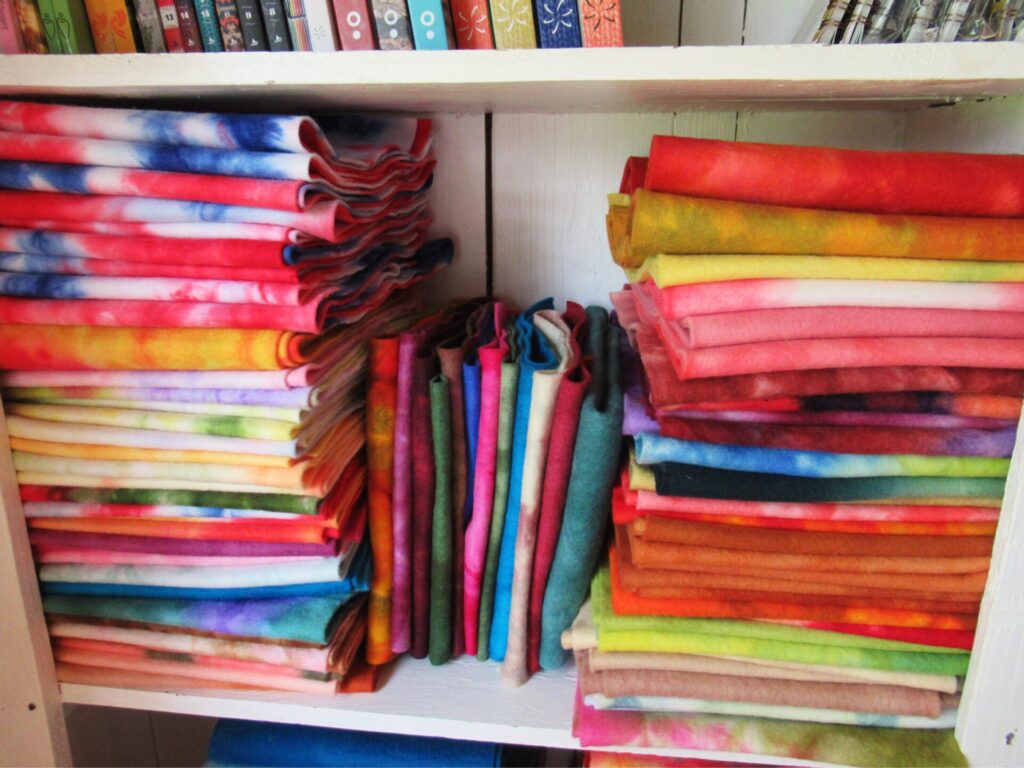
Besides the yarn shelves, there is also a shelf filled with felt. I don’t know the English word for this type of felt. It is a mottled wool felt that is called sprookjesvilt (fairytale felt) in Dutch.
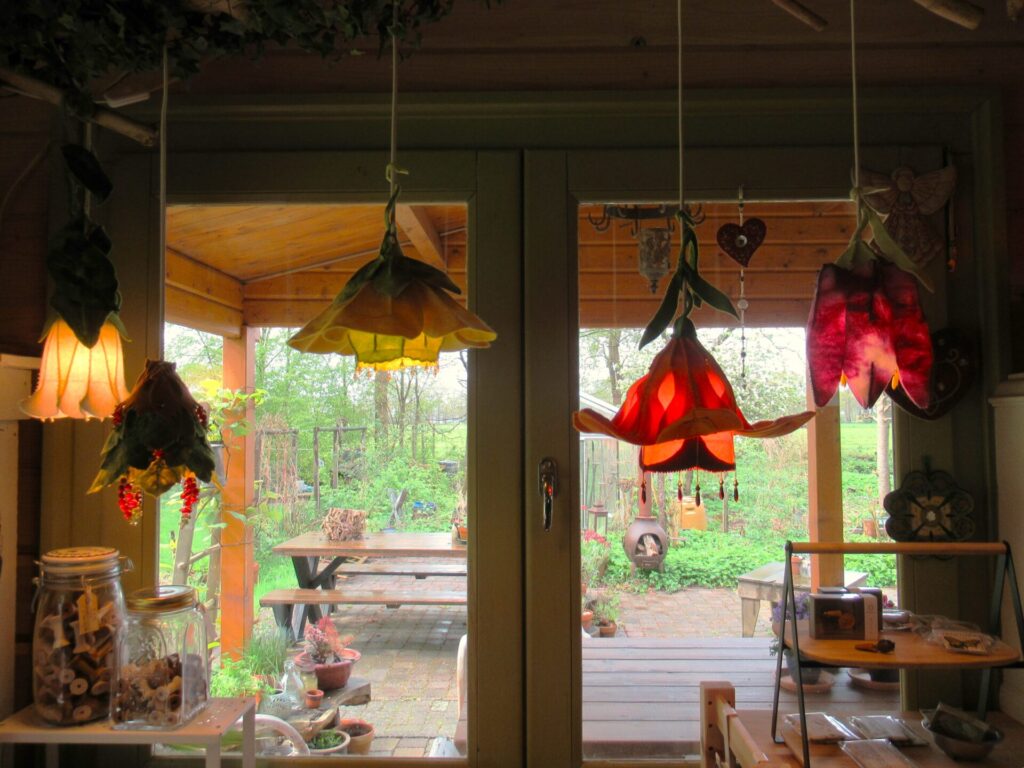
Marianne uses it to make figures for the seasonal table and her flower-inspired lamps.
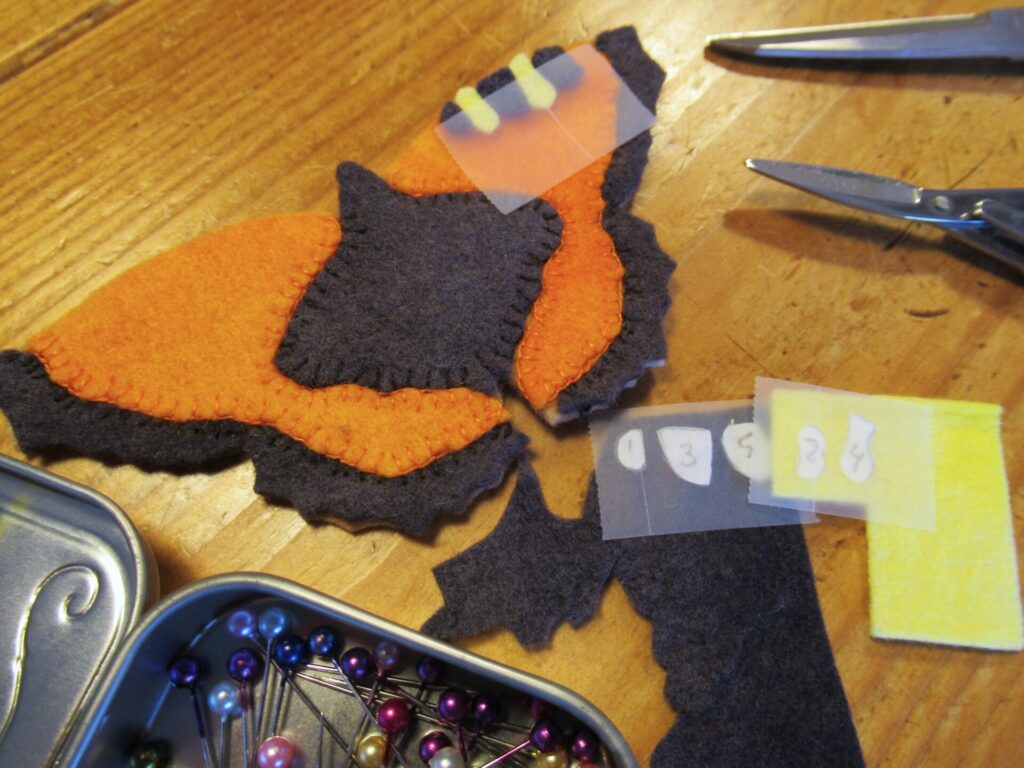
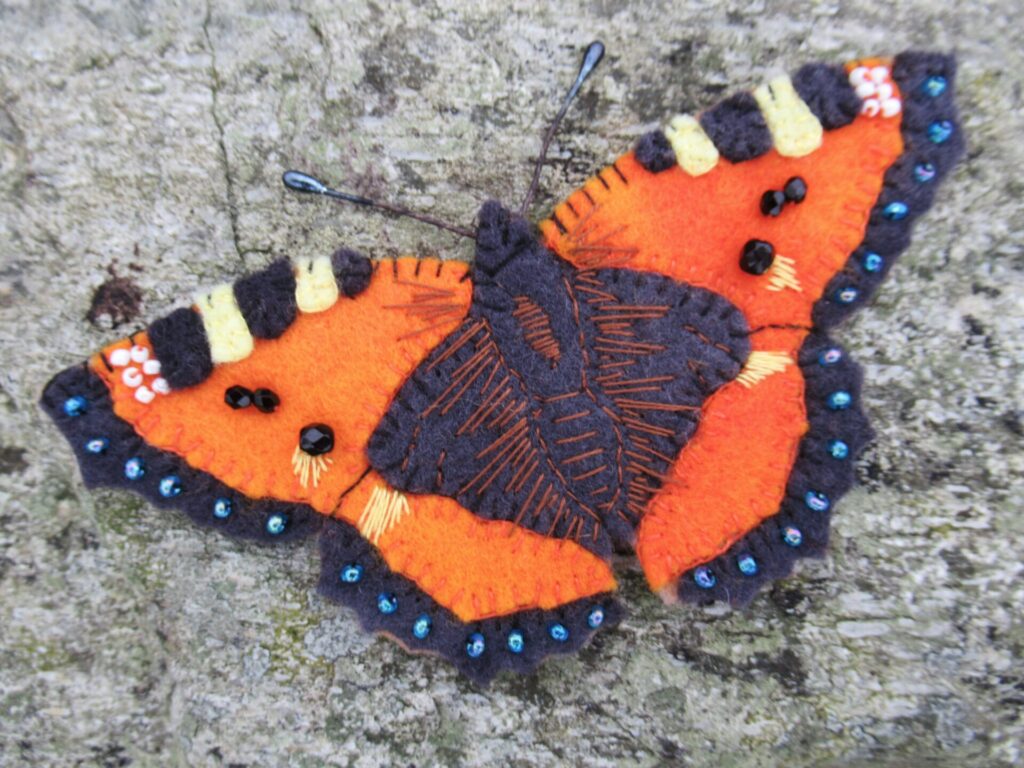
She also uses it for her butterfly kits. To date, she has designed 16 different ones. I started with the fairly simple cabbage white before making the fiddlier small tortoiseshell. Instead of pins, I used Scotch tape for the smallest elements.
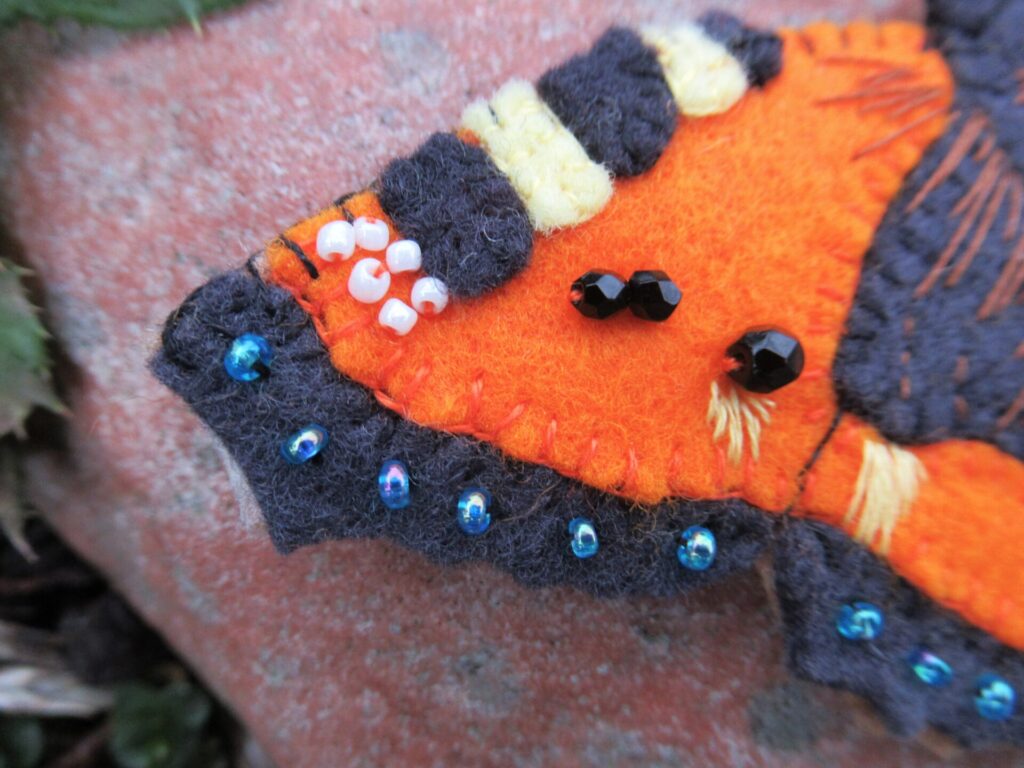
I made it over the course of a week – an hour here, 30 minutes there. It’s a lovely little project to sew, embroider and embellish with beads. With a wingspan of 11.5 cm/4.5” the felt small tortoiseshell is about twice the size of a real-life one, but otherwise I think it’s an excellent likeness.
What I love about this project is how it made me look at the small tortoiseshell more closely than I’ve ever done before. For the first time, I noticed the long hairs along the sides of its body, the stripes on it’s antennae and the blue spots all along the edges of the wings. I feel I’ve got to know this butterfly that I’ve known all my life even better.
Thinking that some of you outside the Netherlands might like to make a felt butterfly, too, I asked Marianne if she also sends her kits abroad. Her answer was, ‘Yes, no problem. But do tell them that the instructions are in Dutch!’
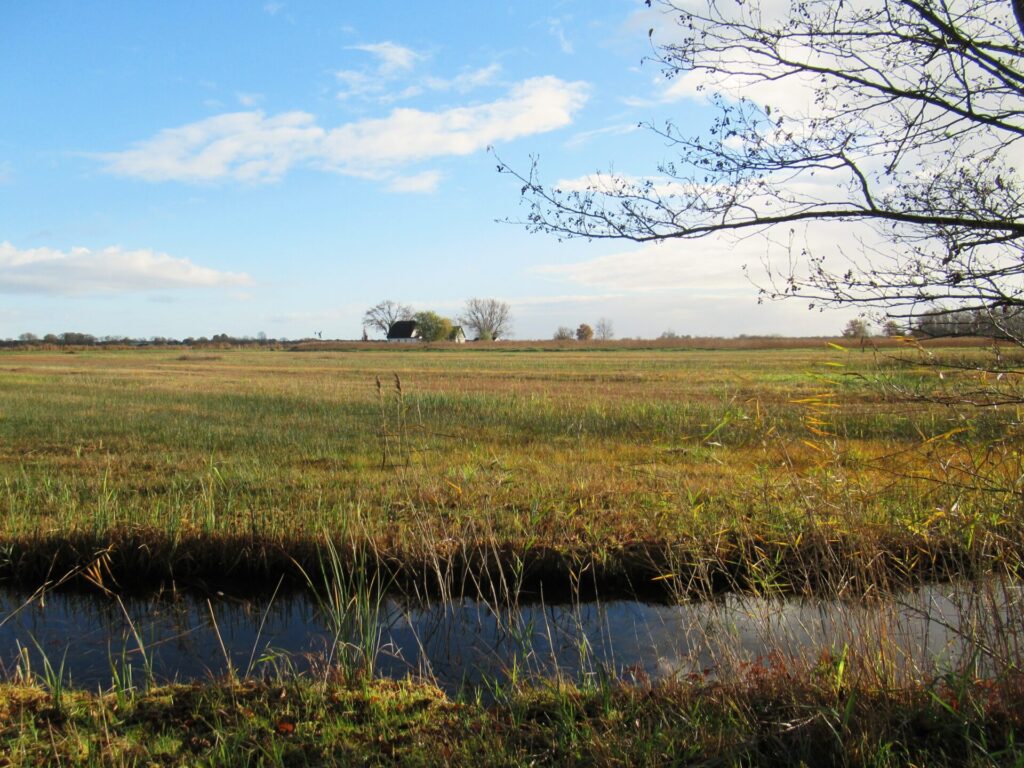
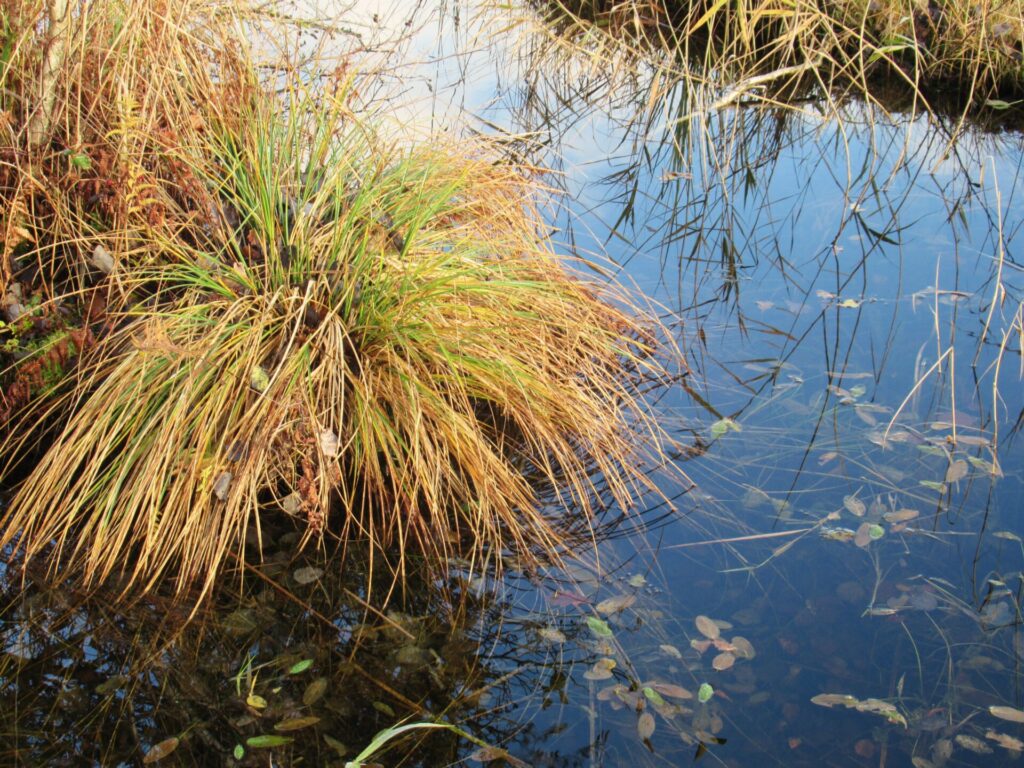
The weather has been a mixed bag here lately – something in between autumn and winter, with quite a bit of rain and wind, but some sunnier days as well. On a chilly day with rain showers interspersed with sunny spells we went for a walk in the nearby wetland area.
It’s quiet at this time of year, and the colours are subtly beautiful.
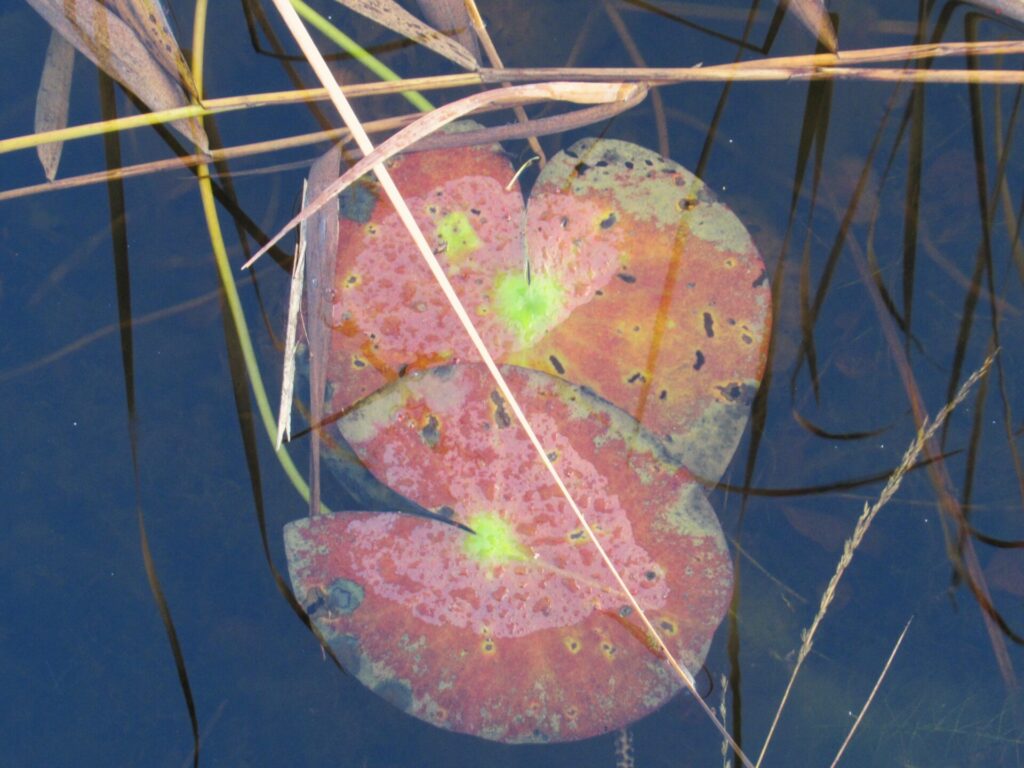
I never really noticed before that water lily leaves have autumn colours, too, just like the leaves on trees.
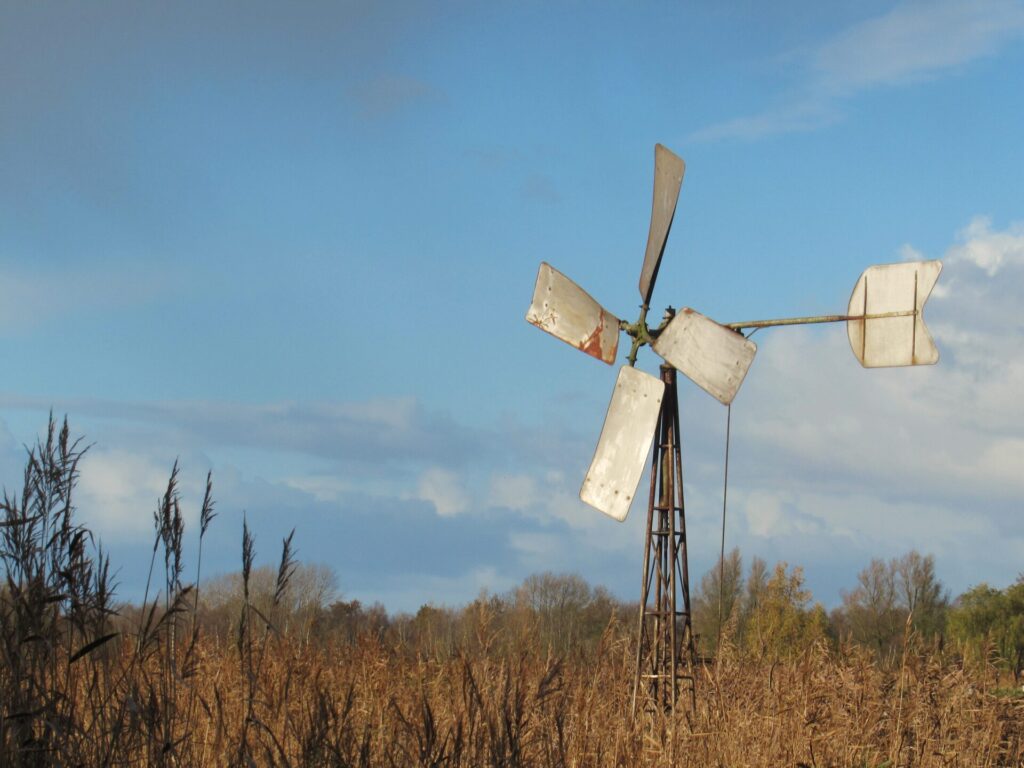
Small metal windmills are used for managing the water levels. The land needs to be wet enough for reed and other plants to grow, but not too wet for reed mowing and haymaking.
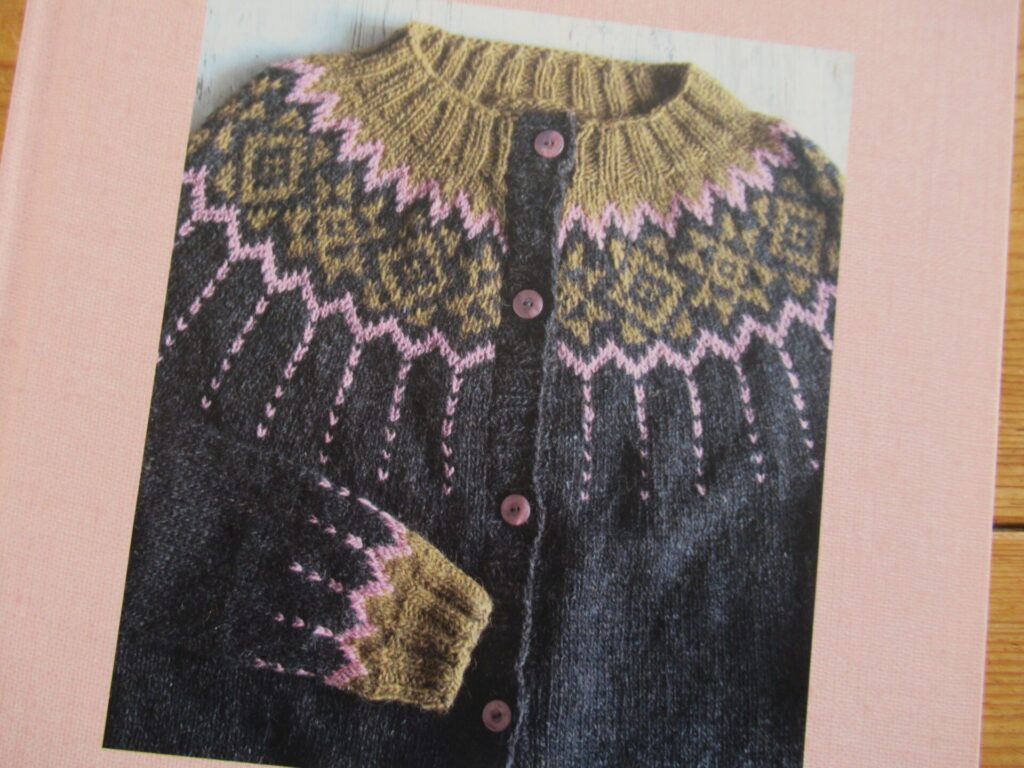
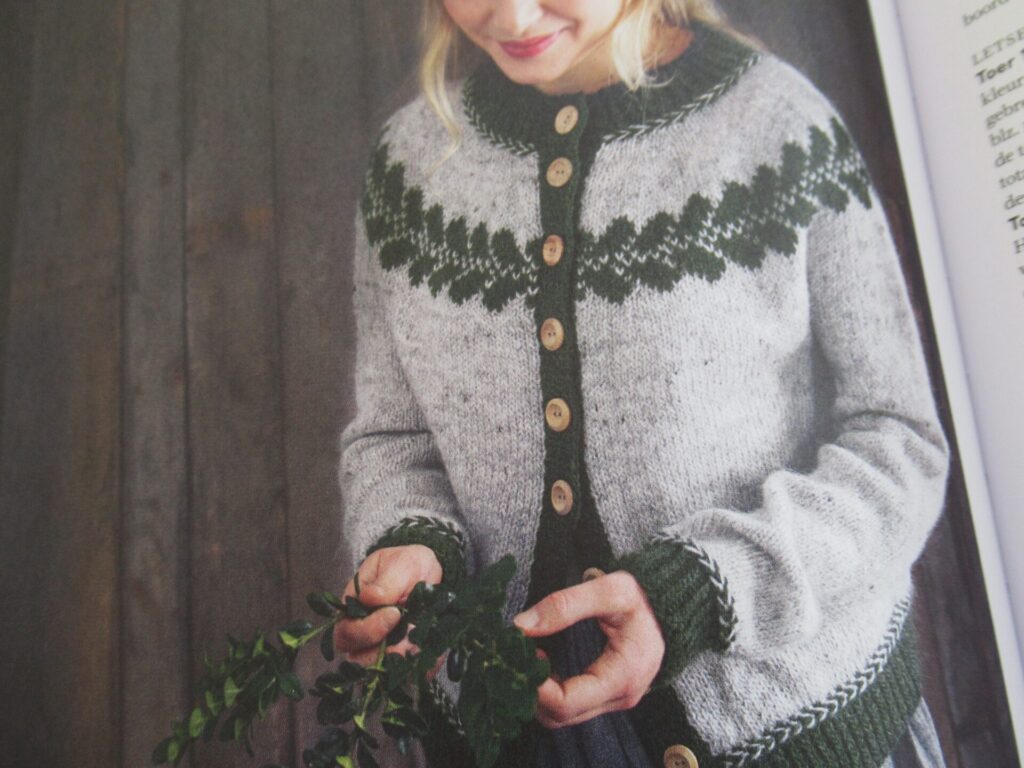
During these walks the exercise keeps me warm. But at home, working at my computer, I often get chilled to the bone. In other words, I could do with a warmer sweater than the ones I usually knit, like Sundborn – the cardigan on the front cover of the Swedish cardigan book I brought home from the Handwerkbeurs:
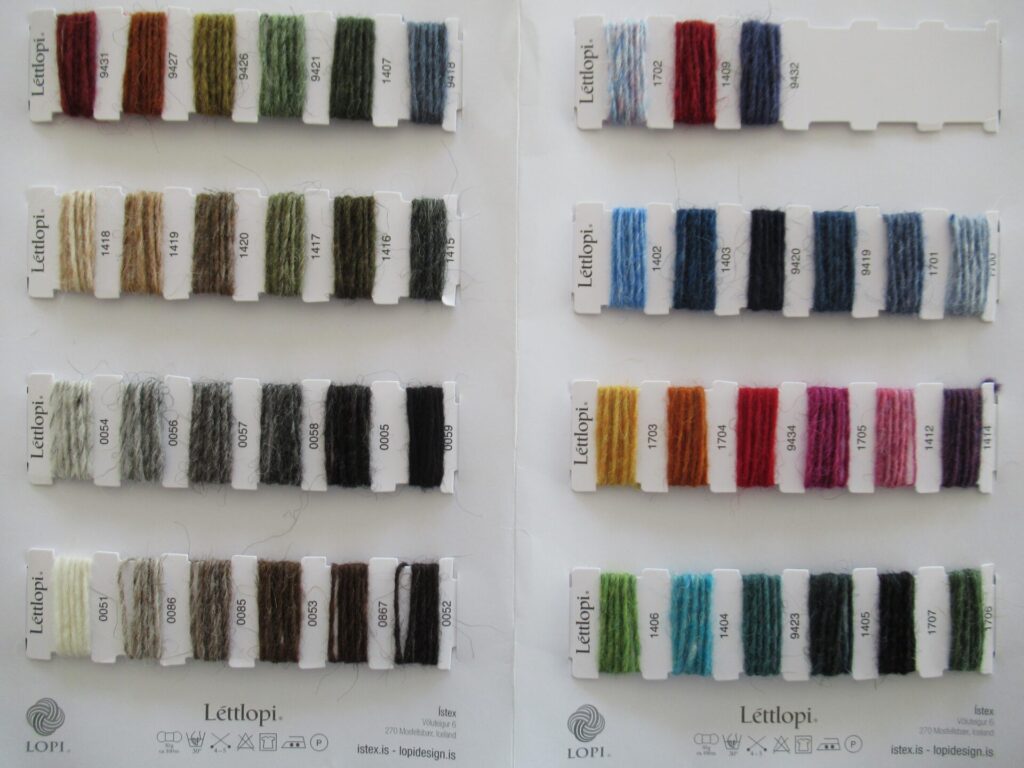
It is knit from Léttlopi, just like several other cardigans in the book. Léttlopi is an Aran-weight Icelandic yarn I’ve had my eye on for ages. It is warm, affordable and comes in a large range of beautiful colours. But it feels so rough and scratchy on the skein that I thought I’d never be able to wear it.
I’m very sensitive to itchy yarn. Clothing labels can drive me crazy, synthetic fibres bring out patches of eczema, and I’ve had to part with several hand-knit sweaters because they itched so much I just couldn’t wear them.
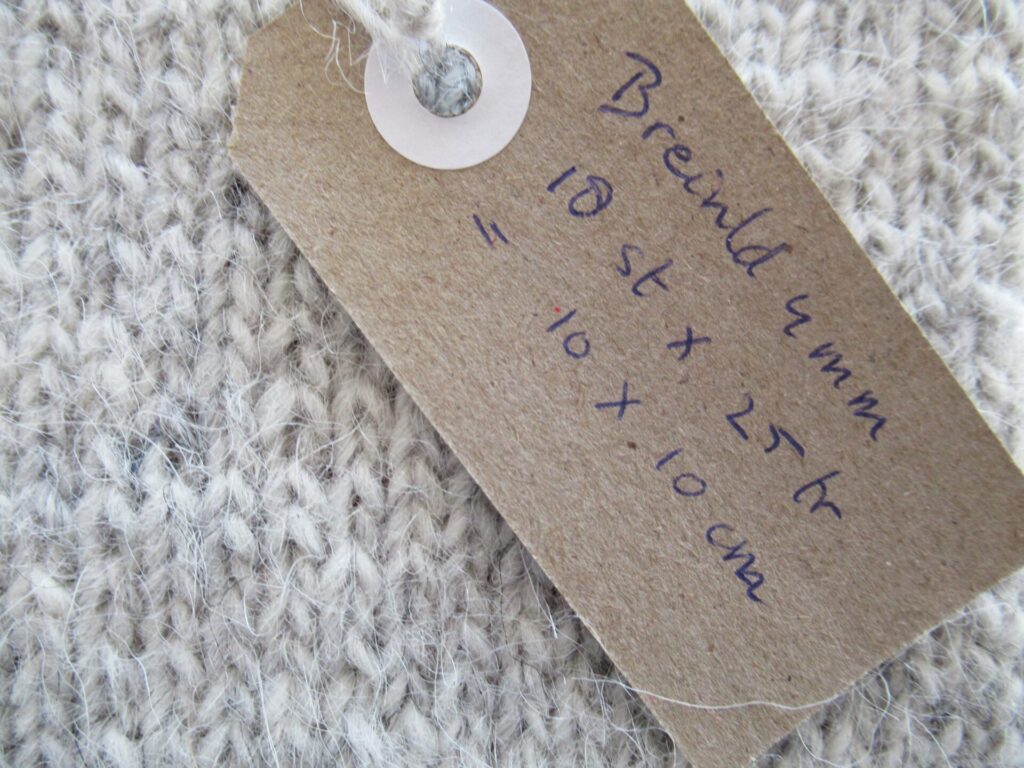
I’ve heard good stories about Léttlopi, though, and oh, those gorgeous heathered colours! So, I prudently bought one skein and knit a few swatches to get to know it better.
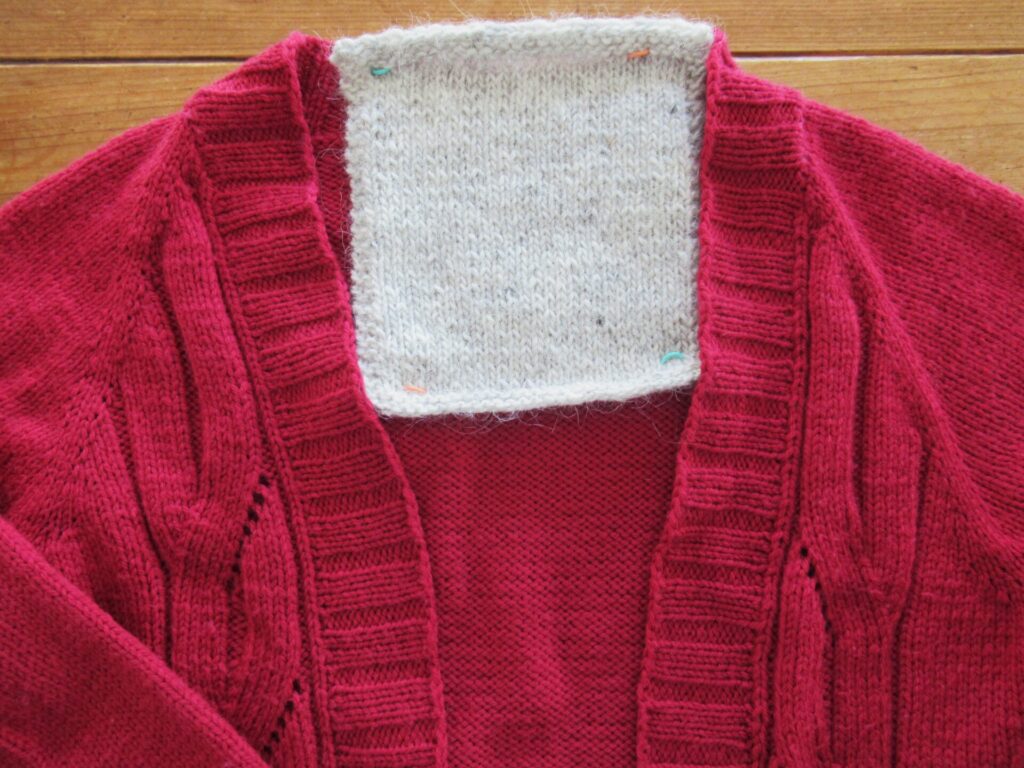
The swatches felt a little softer after a Eucalan bath, but still pretty rustic (can you see the hairs?). I decided to ‘wear’ one of them for a day and first pinned it to the inside neck of my red cardigan.
No itching in my neck or between my shoulder blades after an entire morning. Then I wore it on the inside of my elbow (a very sensitive spot), between my cardi and my shirt sleeve for several hours. Still no itching. Finally I wore it inside my shirt sleeve, on my bare(!) skin, for several more hours. And strangely it didn’t itch at all! Yay! Now, what colours to choose? Subtle ones, like those of our countryside in autumn and winter? Or brighter ones reminiscent of summer skies and flowers?
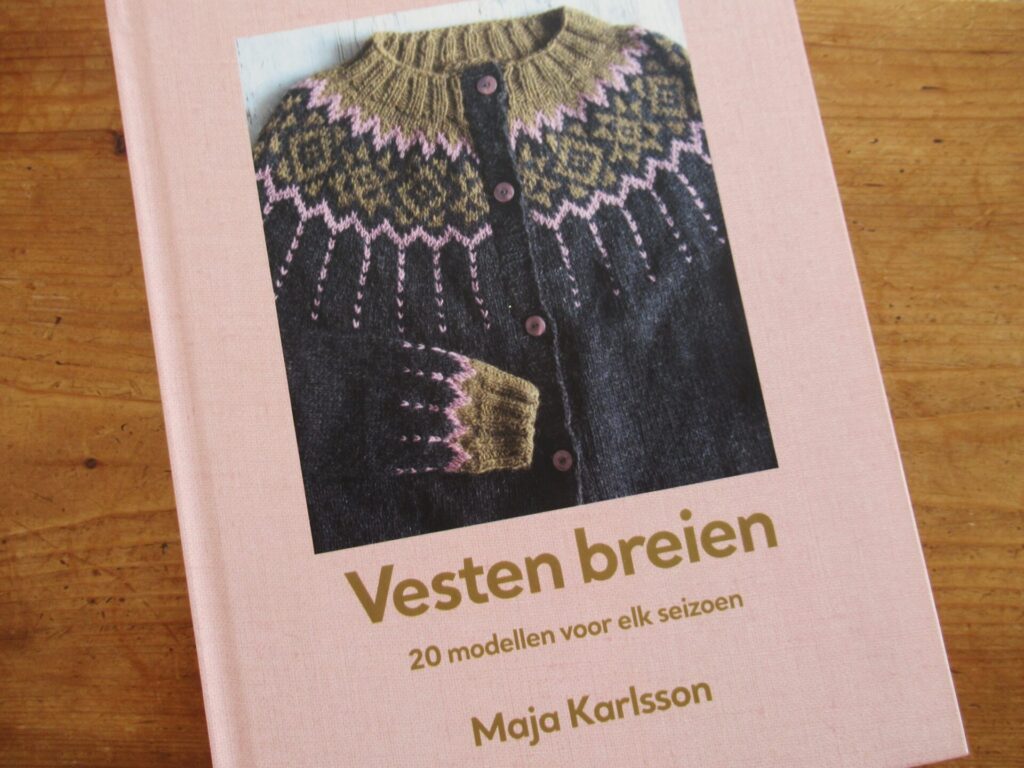
I’d also love to make a cardigan from Maja Karlsson’s cardigan book for my daughter, knit from the same yarn – this one:
I’ve given her a Léttlopi swatch, so that she can try it out and for herself answer the ultimate question about knitting yarn – does it itch?
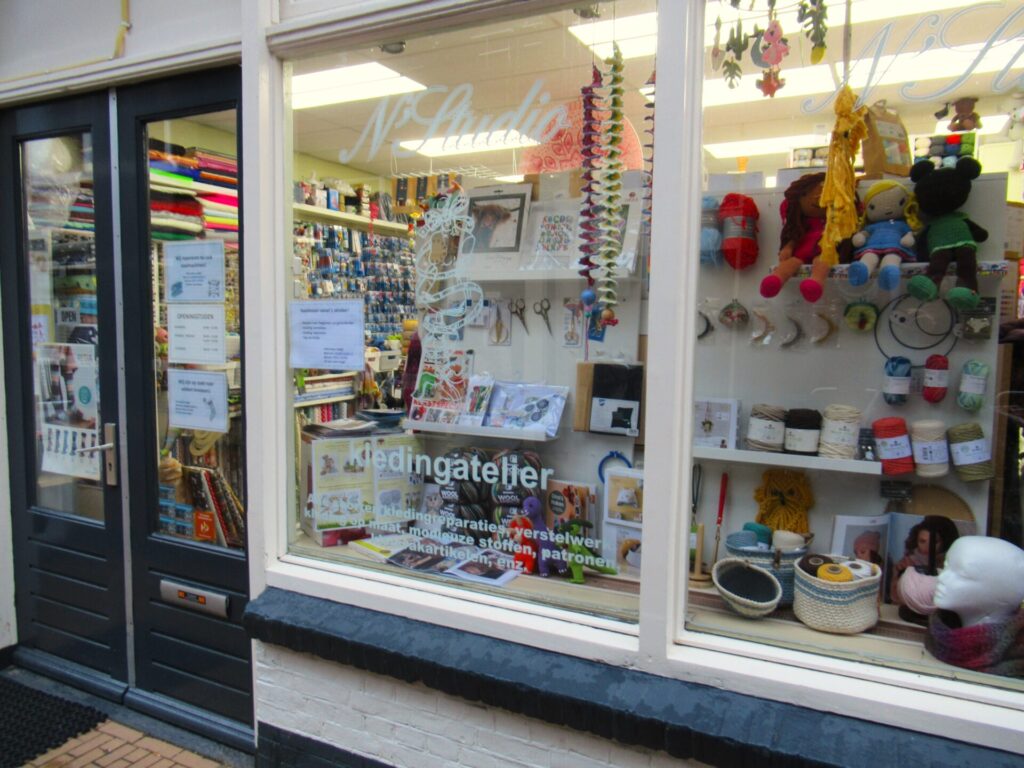
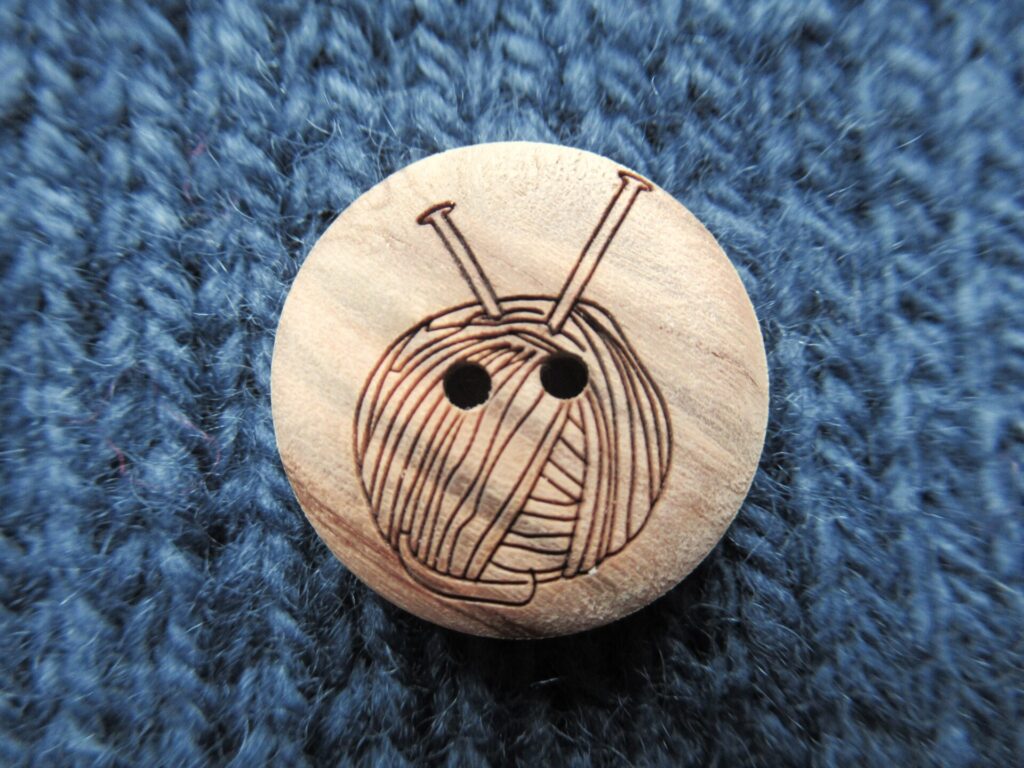
Hello! Can you smell the scent of spices wafting to you from my kitchen through the internet? I’ll give you the recipe further on, but first I’d like to talk a bit about buttons. My Norwegian cardi still needed buttons, so I went to a nearby haberdashery shop. On a drizzly morning, when everything else in the street was still closed, it was a haven of colour and cosiness.
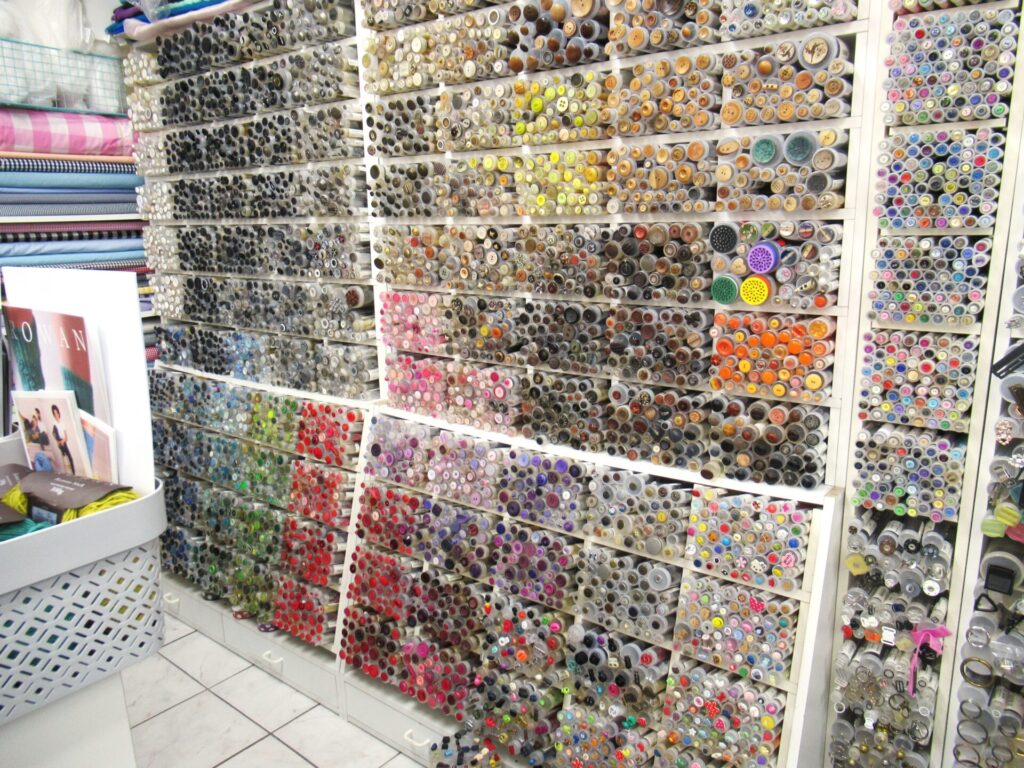
It is a tiny shop, crammed with sewing and knitting notions, tools and yarns. And they have a fabulous button wall.
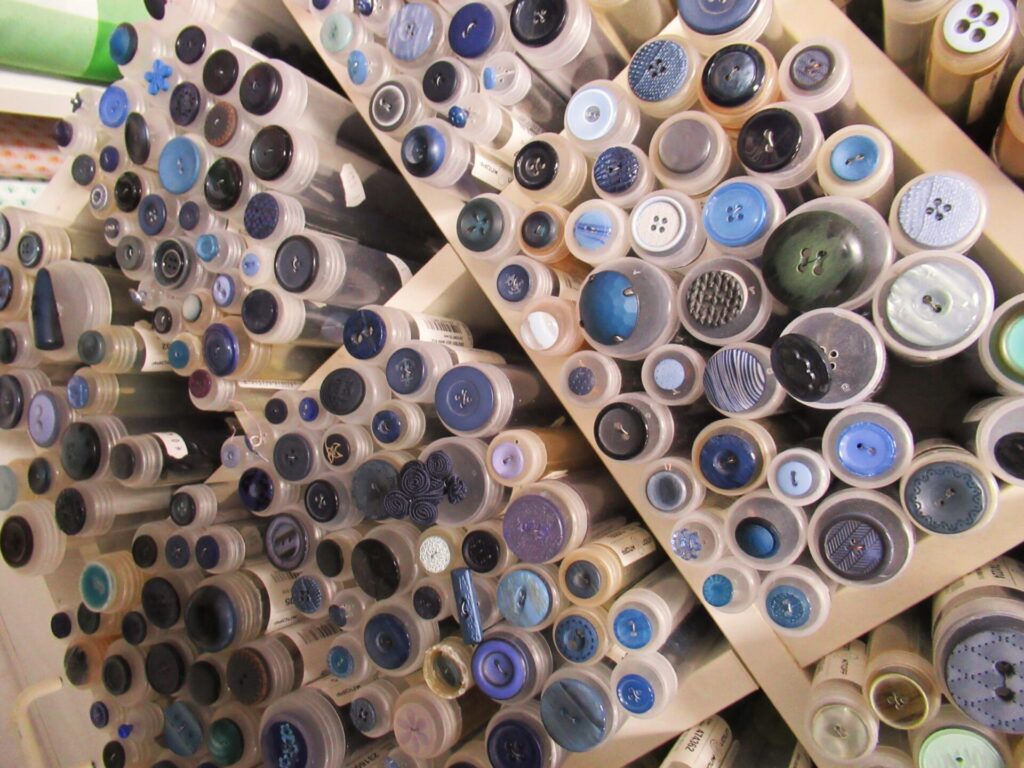
The cardigan I knit is a kind of greyish, fairly dark blue. So, I first looked at blue buttons.
I found some in the right size that matched my yarn exactly, but… they looked a bit dull. Looking at the wooden button section for something more exciting, I fell in love with these – aren’t they fun?
The cardigan I sewed them on to is the Lang Yndlingskofte from Kofteboken 2 (this beautiful Norwegian book can be found here on Ravelry). It’s the cardigan I steeked in this blogpost. The yarn I used is CaMaRose ‘Økologisk Hverdagsuld’ (100% organic wool, 150m/164yds/50g). It is warm and light, and became very nice and soft after washing. A really, really lovely yarn. I’ve shortened the cardi by 10 cm/4 inches, but it is still fairly long and would also be great worn with a dress.
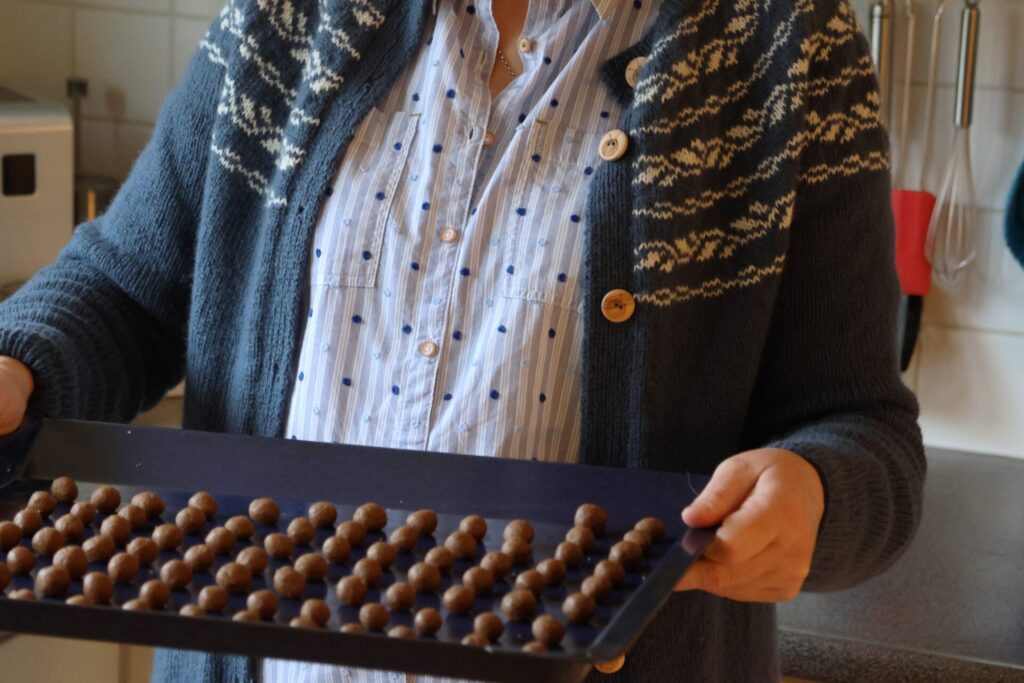
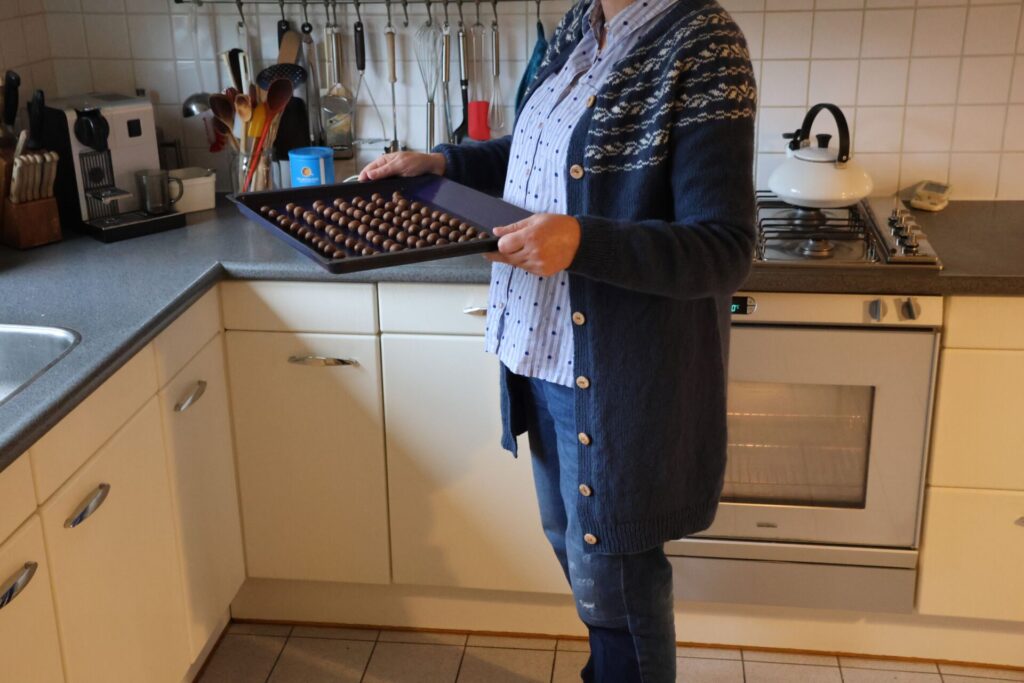
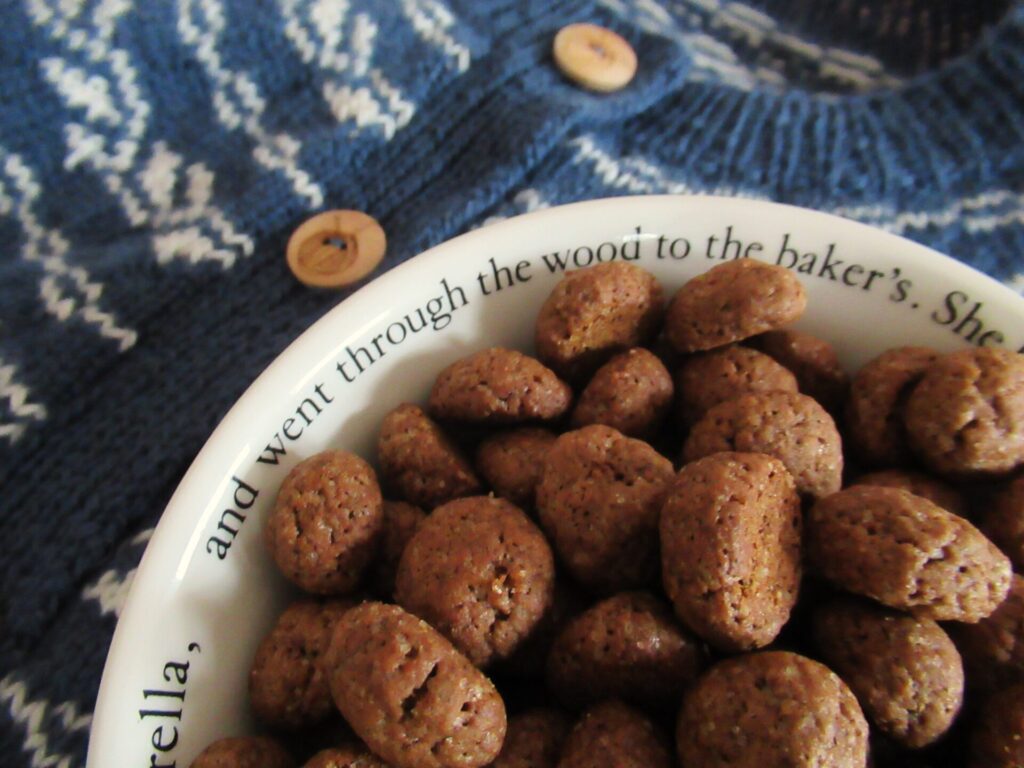
So, what is that on the baking tray I’m holding in my hands? Kruidnootjes! Kruidnootjes (literally: spice nuts) are a traditional Dutch Sinterklaas treat. In the Netherlands, Sinterklaas is celebrated with gifts on December 5th, the eve of Saint Nicholas’ Day. Three weeks before the day, the venerable Sinterklaas arrives in the country by steamboat. We welcome him with special songs, and in the weeks leading up to the celebration we eat tons of kruidnootjes. They’re great to bake with children. Here is my recipe:
Kruidnootjes
(makes about 100)
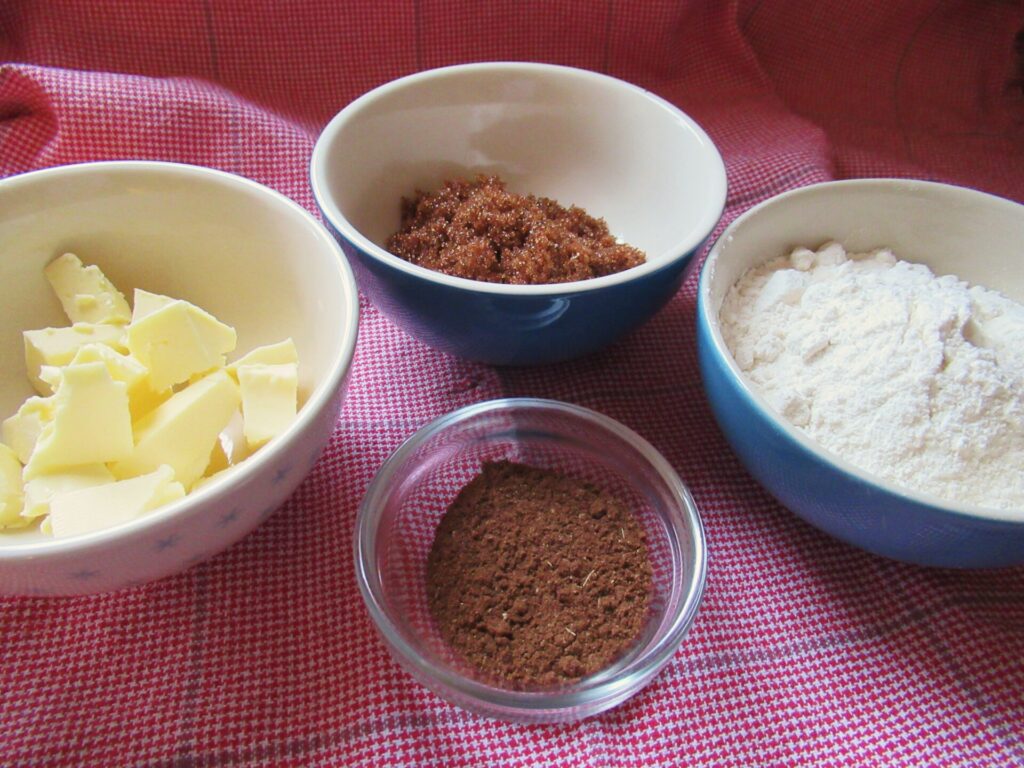
Ingredients:
100 g self-raising flour
50 g dark brown muscovado sugar
40 g unsalted butter (softened)
1 tablespoon mixed spice*
A pinch of salt
2 tablespoons milk
*The Dutch spice mix used in this and other traditional recipes is called speculaaskruiden. It does not always have exactly the same ingredients, but is usually a blend of: ground cinnamon, coriander, aniseed, ginger, nutmeg, cardamon and cloves. Sometimes it also contains pepper or allspice. If you can’t get speculaaskruiden where you live, why not make your own? A beautifully illustrated recipe can be found here.
Method:
Knead all the ingredients together by hand until they form a ball. Wrap the ball in clingfilm and place it in the fridge for 30 minutes.
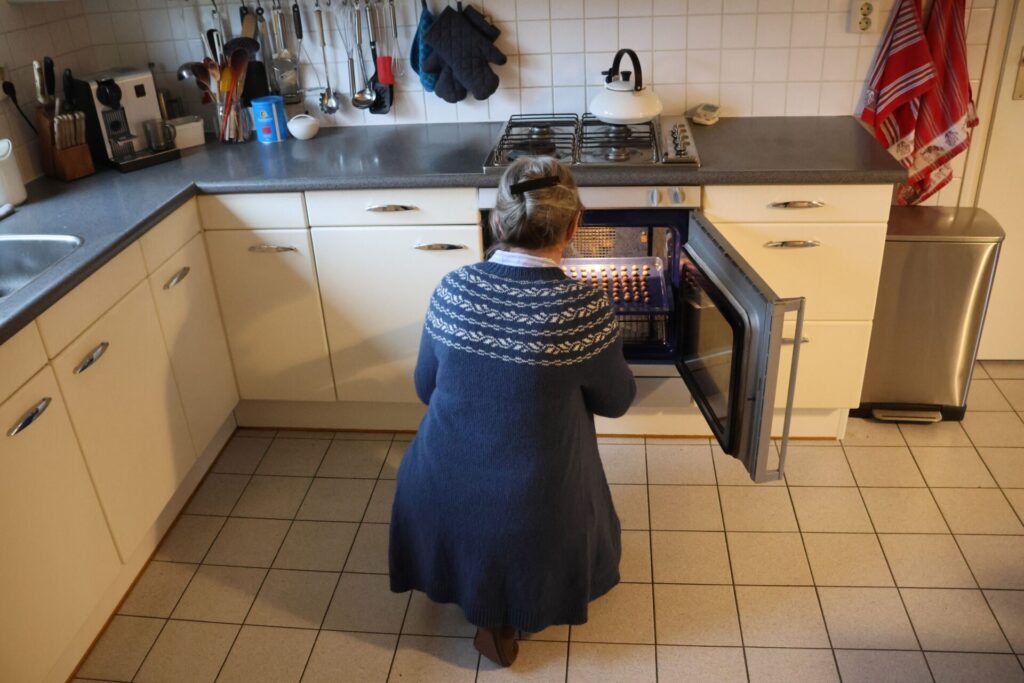
Preheat the oven to 175˚C/345˚F (hot air: 160˚C/320˚F)
Roll the dough into about 100 small balls (approx. 1.5 cm/½ inch in diameter). Place them on a lightly greased baking tray.
Place them in the oven…
… and bake for 20 minutes.
Leave to cool until they are nice and crunchy.
Eat straightaway or store in an airtight container
Hello! Together with a friend, I visited the Handwerkbeurs last weekend – the textile crafts show of the year here. I came home feeling incredibly inspired and thought I’d share some of that inspiration with you. There was lots of lovely weaving, felting, crochet and quilting, too, but I’ll focus on yarn and knitting. Plus a few other things that made me stop, stare and think, ‘maybe, someday…’ Let’s start with some yarn.
The yarn at the top of this post and in the photo below was dyed by Marianne of Lindelicht. She dyes yarns in beautiful jewel tones:
I absolutely love her yarns. Marianne’s studio is close to my home, and I sometimes visit her on a Saturday, when her studio is open. I’ll tell you about that some other time. She sells most of her yarns only at markets and fairs, but her sock yarns are available online (as well as other lovely things).
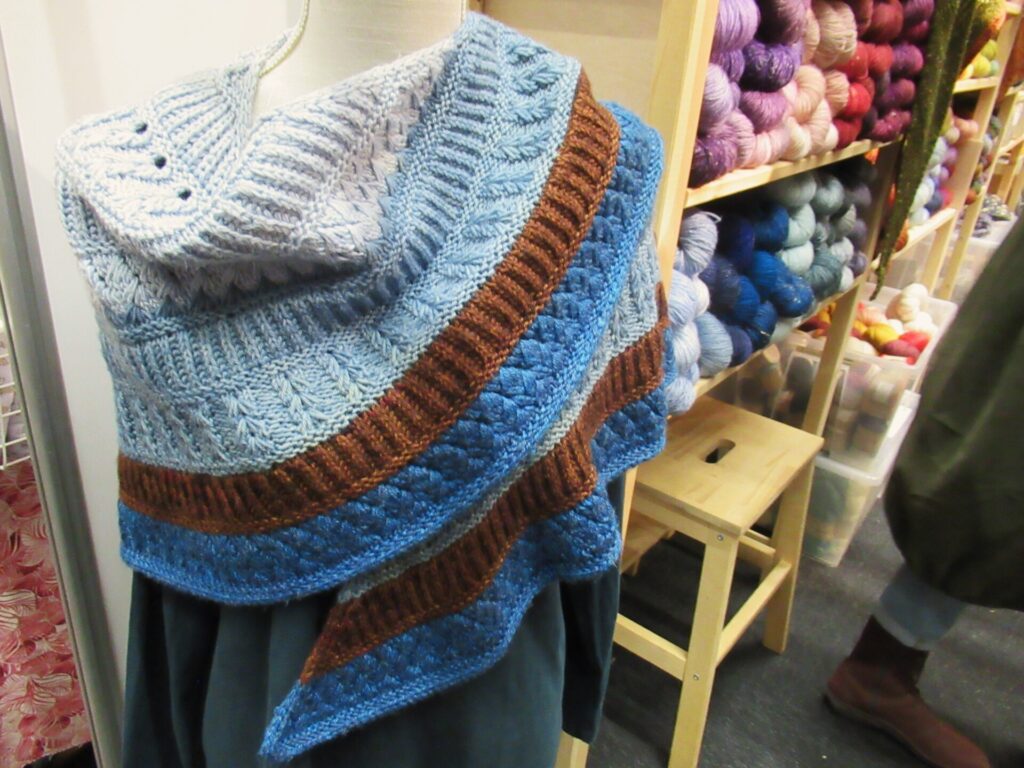
The mannequin in her stall is wearing the Briornate Shawl designed by Stephen West – so many interesting stitch patterns:
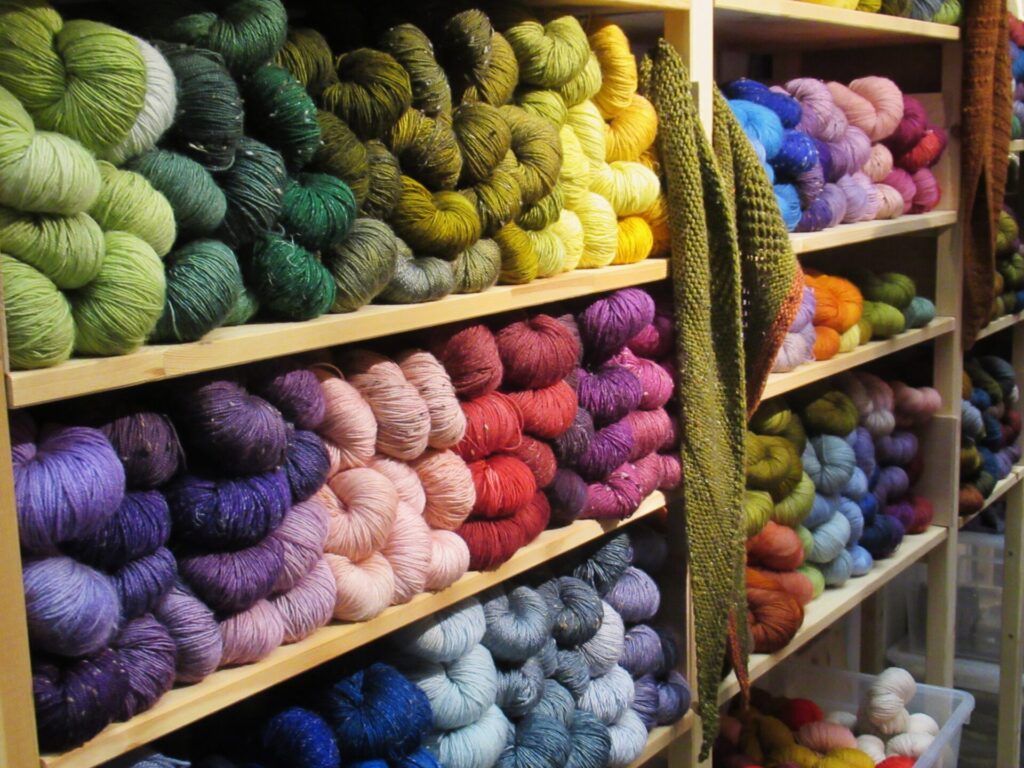
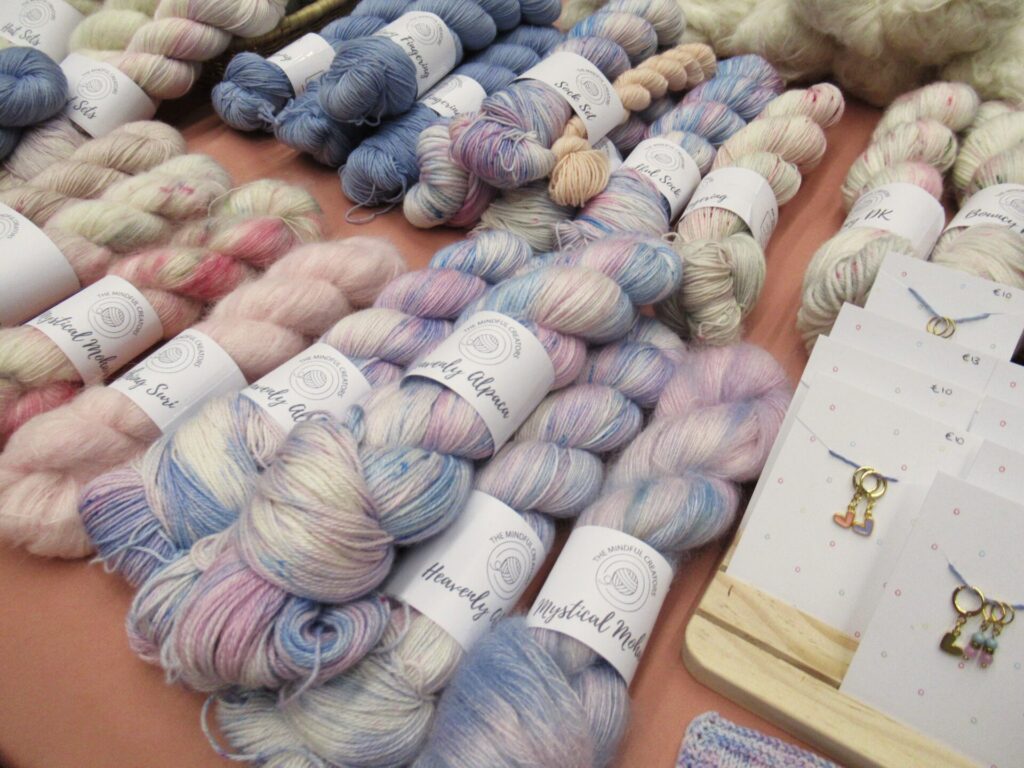
The yarns below were dyed by someone else – totally different, but equally beautiful:
It’s fun to see how every dyer has their own signature. These sweet pastel shades were dyed by The Mindful Creators. This young dyer, Fem, told me that she doesn’t have standard shades she dyes, but collections she develops around a theme. If I’m not mistaken the soft shades above are from her ‘Dearest Gentle Yarn Lover’ collection.
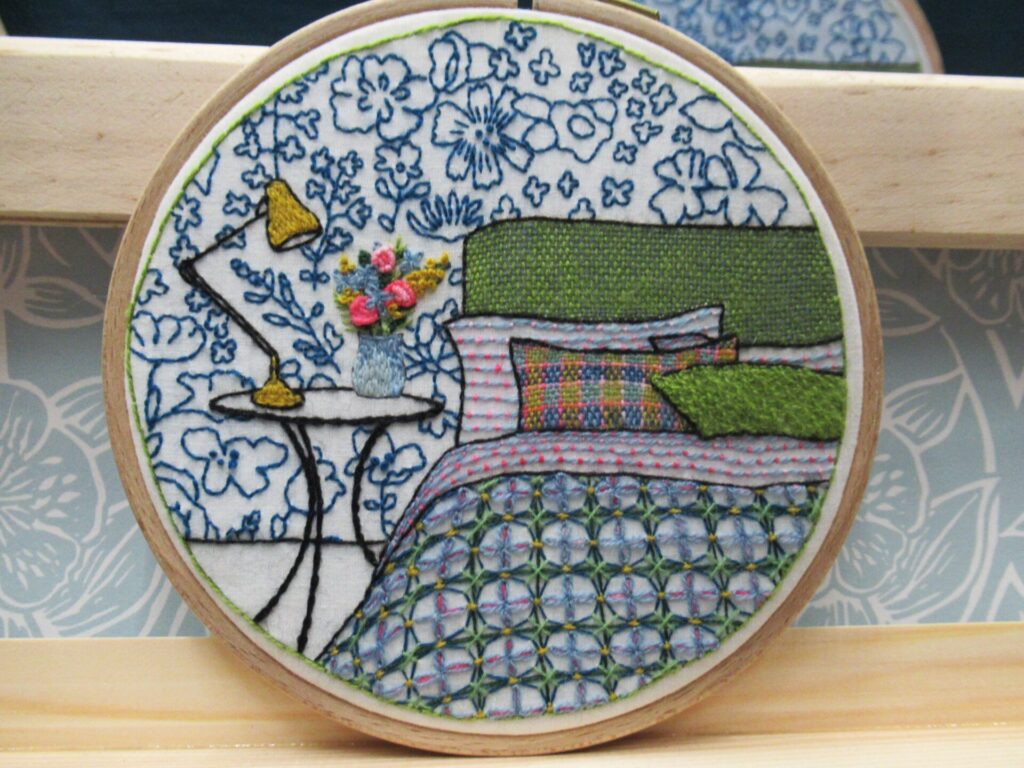
It struck me how several young stall holders with new businesses have a slightly different approach from the older generations. They seem to operate not so much by intuition, but from a carefully thought-through idea. It leads to very tasteful results, I have to say. Take this designer of embroidery kits:
She is called Karin Fast, and her designs are centred around themes like ‘rooms’, ‘seasons’ and ‘textures’. Very clever and so pretty.
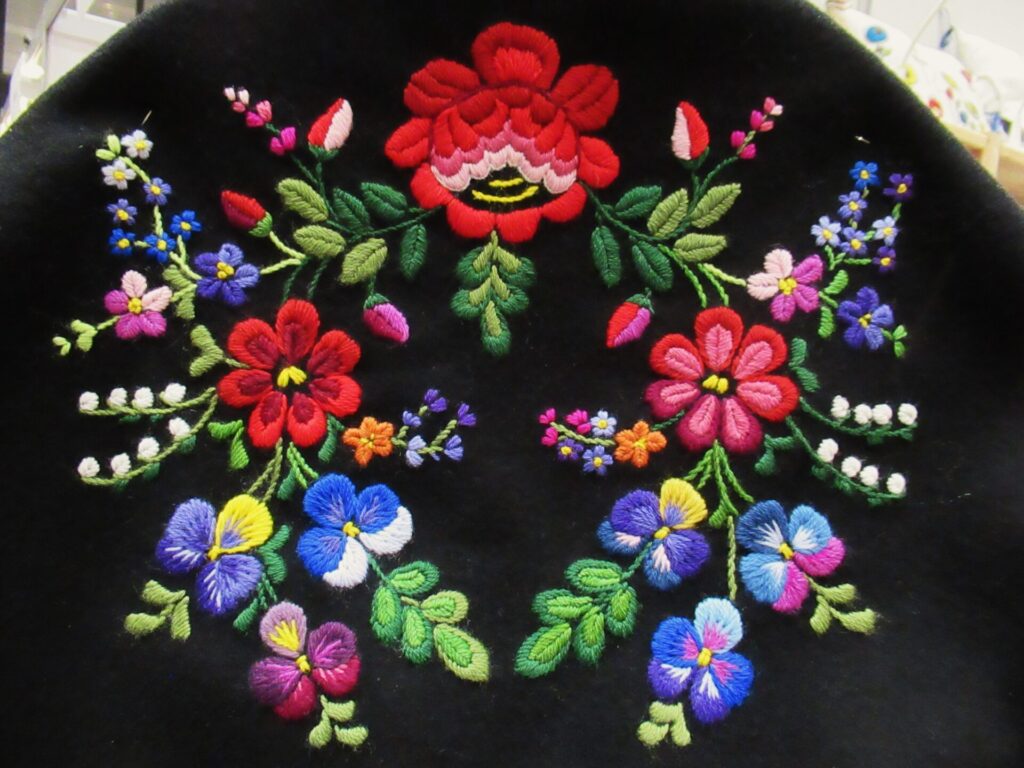
Every now and then, I do a small embroidery project, mainly because I love working with lots of colours.
The embroidery floss above is silk. The mother-and-daughter team behind Batts and Threads have provided me with some lovely knitting yarn and spinning fibres in the past, and are now branching out into embroidery.
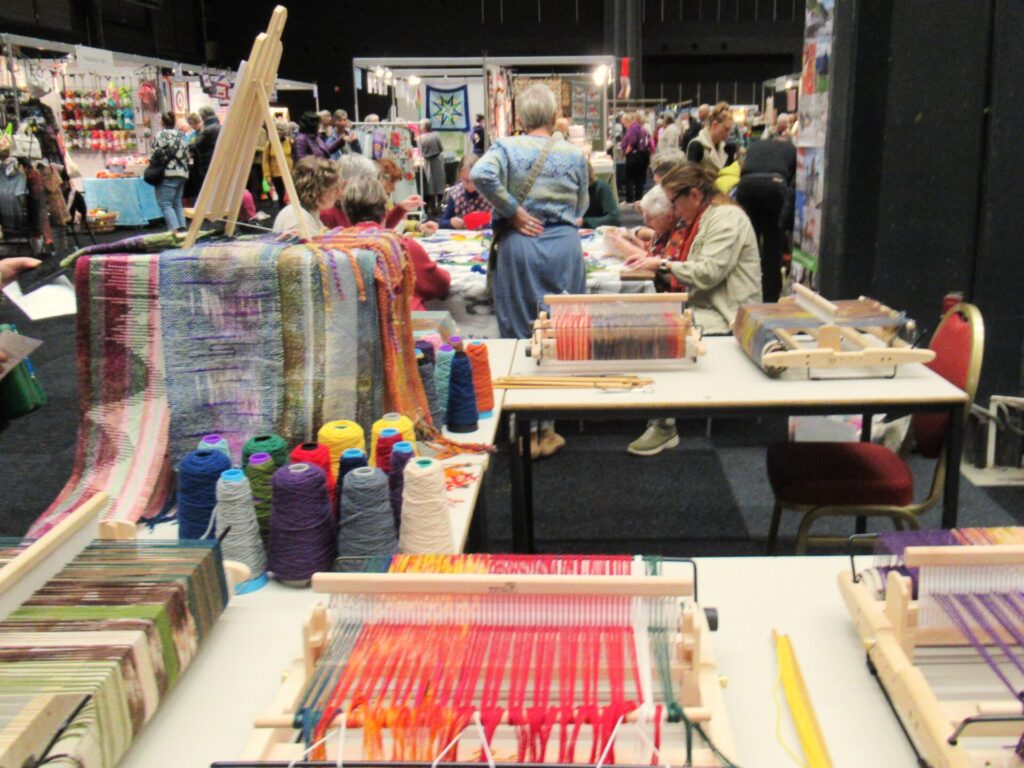
The Handwerkbeurs hosts workshops in many techniques – weaving, felting, embroidery, quilting, knitting, dyeing, spinning…
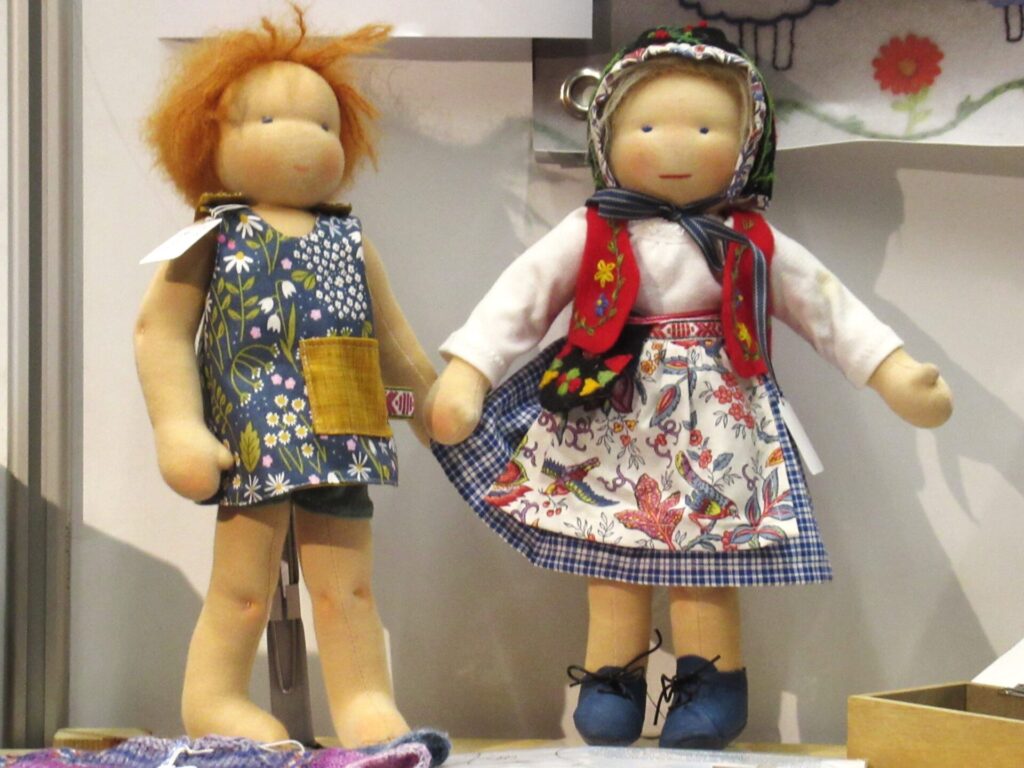
This year, I just browsed around, but another time I attended a short workshop in Swedish embroidery led by Ditta Blom of Blomsterstuga. That’s one of those things that make me think, maybe, someday… That, and these darling dolls in their summer dress and Swedish costume.
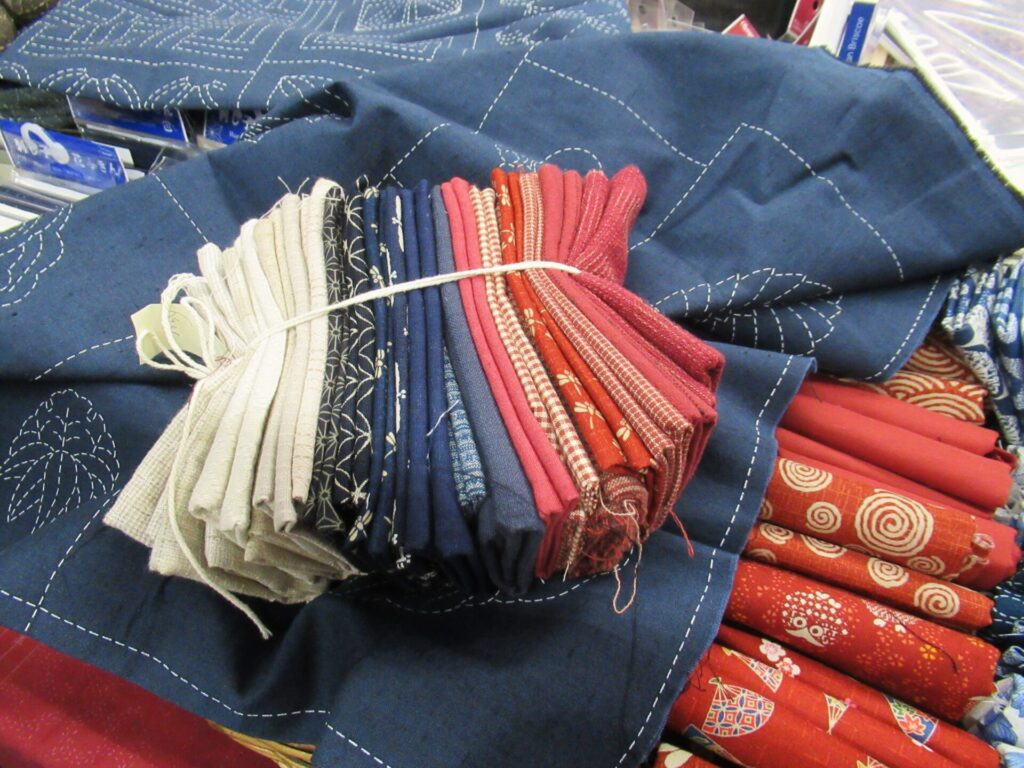
Many people want to go travelling when they retire. I want to stay at home and make things. And now and then leave home to take a workshop or course. Something else on my list of techniques to try is sashiko. Quiltwinkel Marij specialises in sashiko and Japanese fabrics:
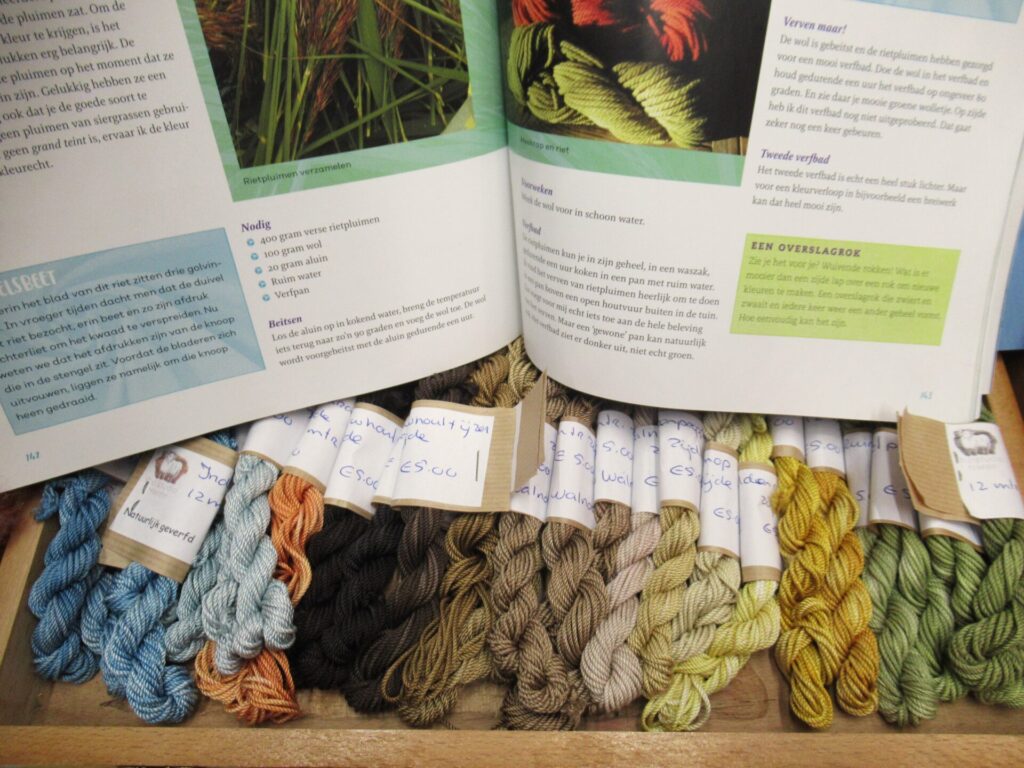
Well, time to steer back to yarns and knitting. There were also a couple of stalls with naturally dyed yarns. One of them is Wolstudio Haren, where you can go for e.g. dye stuffs, fibres, spinning wheels and courses. They have published Kleurenpracht met Kruidenkracht, an interesting-looking book about the use of herbs for dyeing (yarn, fabrics, ecoprinting) and wellbeing (in Dutch).
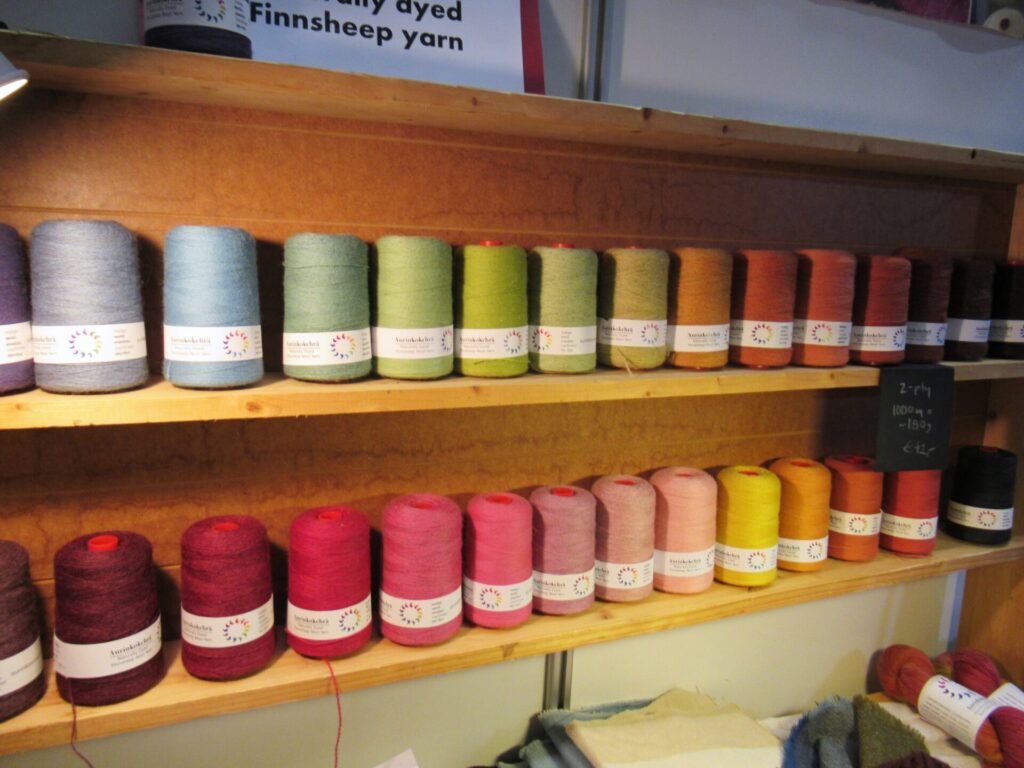
There were also people all the way from Finland with their naturally dyed yarns. Aurinkokehrä dye wool from Finnsheep in a fabulous range of colours:
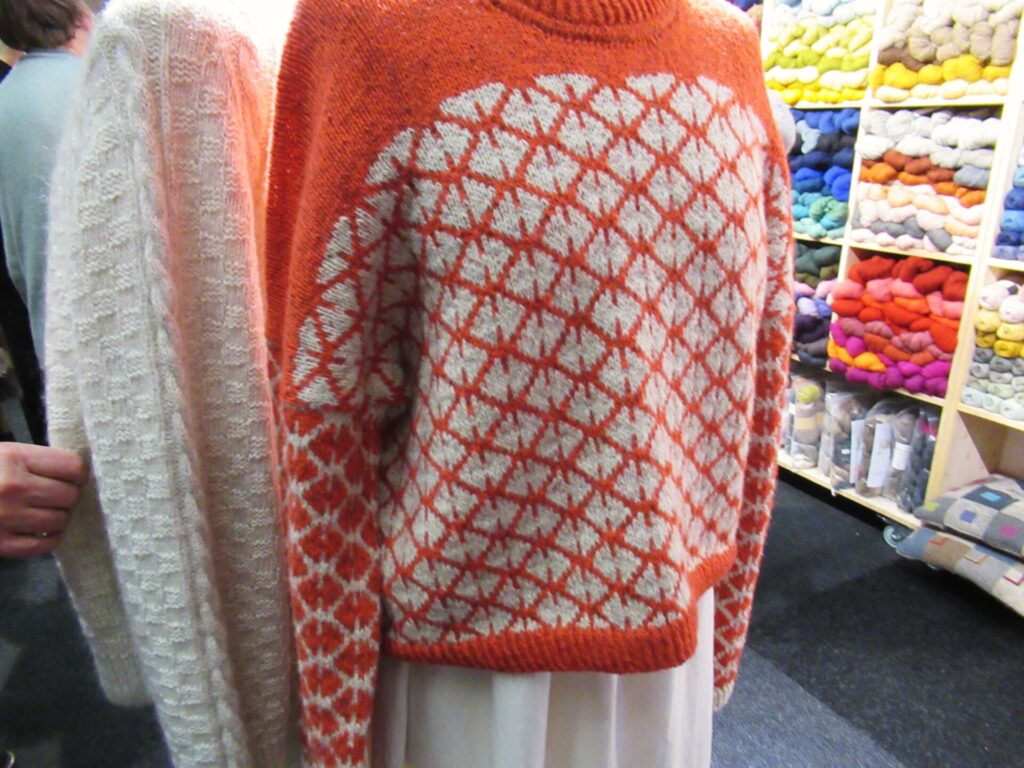
Besides yarns, there were also many sweaters and shawls to inspire us. Here are a few. The Aase sweater from Isager, with just visible on the left in cream the Gerda Sweater and Skirt:
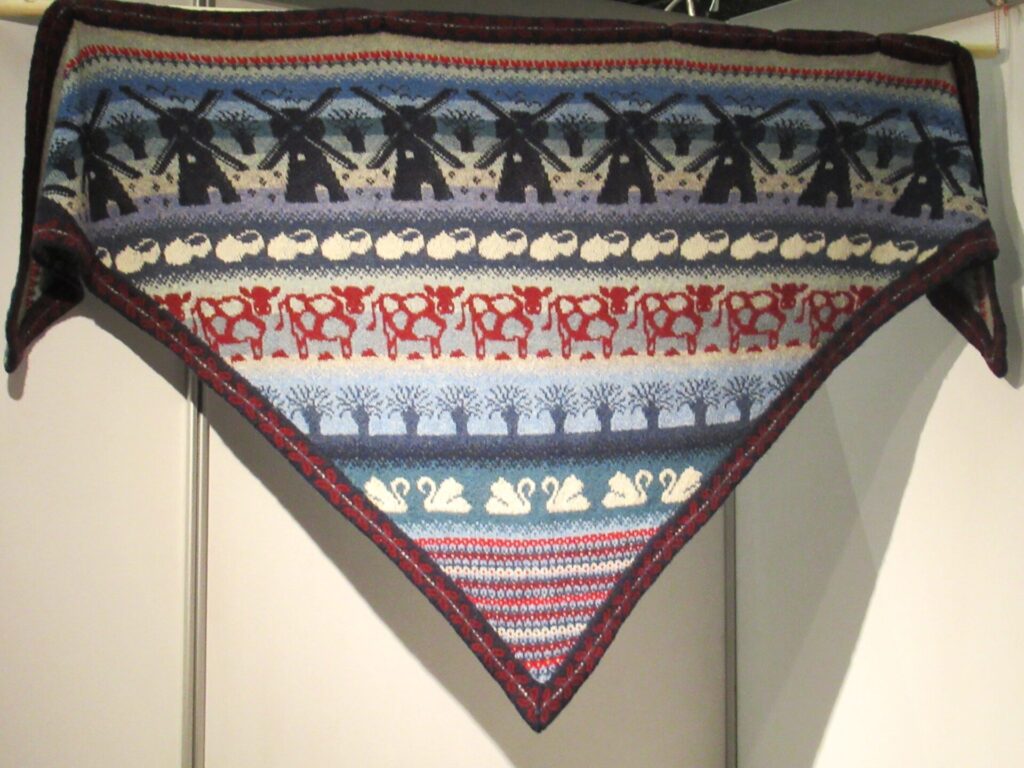
The Kinderdijk Shawl, with Dutch icons like windmills, wooden shoes, cows and polarded willows:
Wow! That’s another one for my maybe-someday-list.
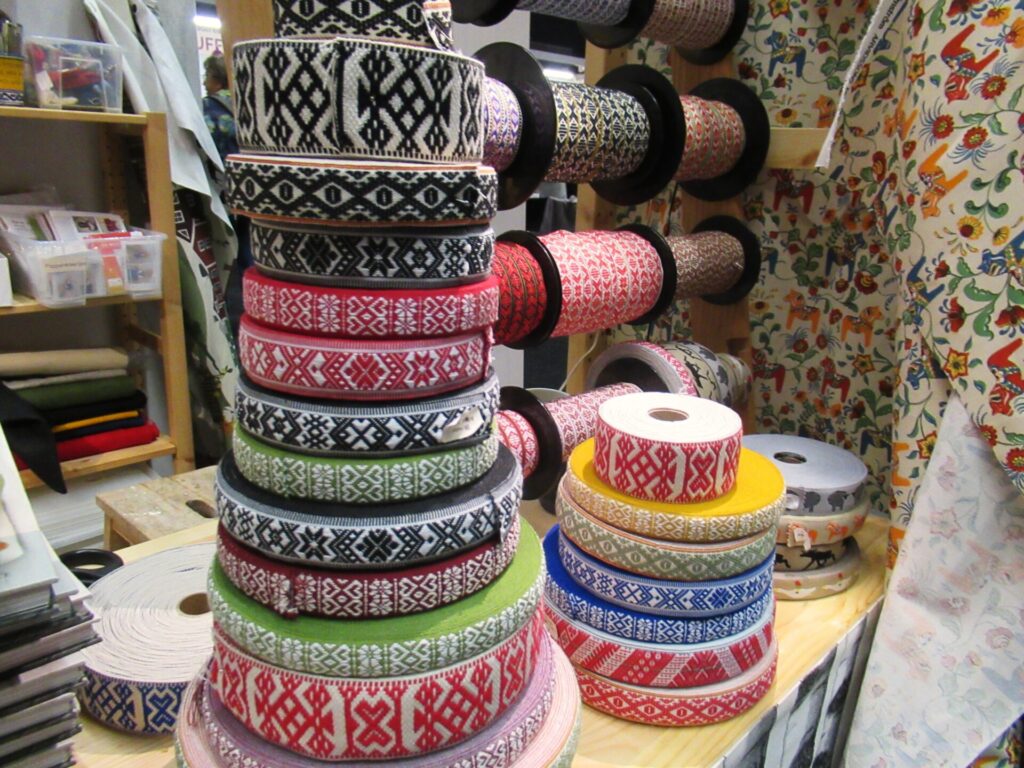
Strangely enough, I didn’t buy any yarn. What I came home with, were two gifts that I can’t show you, several lengths of Swedish ribbon…
… and this book:
A Very Beautiful collection of 20 cardigan patterns by Maja Karlsson. Original Swedish title: Koftor. Just appeared in Dutch: Vesten breien. English edition: Cardigans. German title: Schwedische Strickjacken für jede Jahreszeit. It can be found here on Ravelry, unfortunately with photographs of just 6 of the designs. I hope to tell you more about it later.
I realize that I may be sending you down a huge rabbit hole by adding all these links, but it’s a very nice kind of rabbit hole. It is also my way of saying ‘thank you’ to the lovely people behind all these small (often one-woman) businesses that provide me with the inspiration and materials I need for making things. Thank you, too, for stopping by, and I hope to see you again soon!
Hello! I hope this finds you all well. Today, I’m diving deep into a knitting technique – one way of finishing a steek, with button bands with knitted-on facings. Perhaps you’re already familiar with steeking. If not, let me explain.
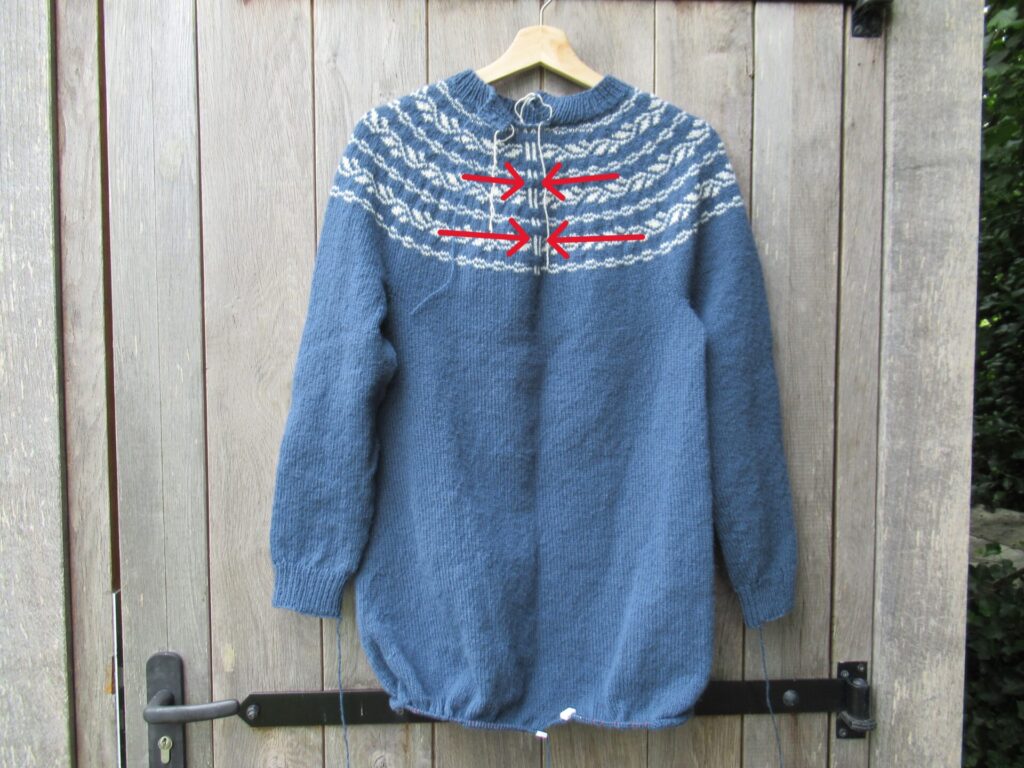
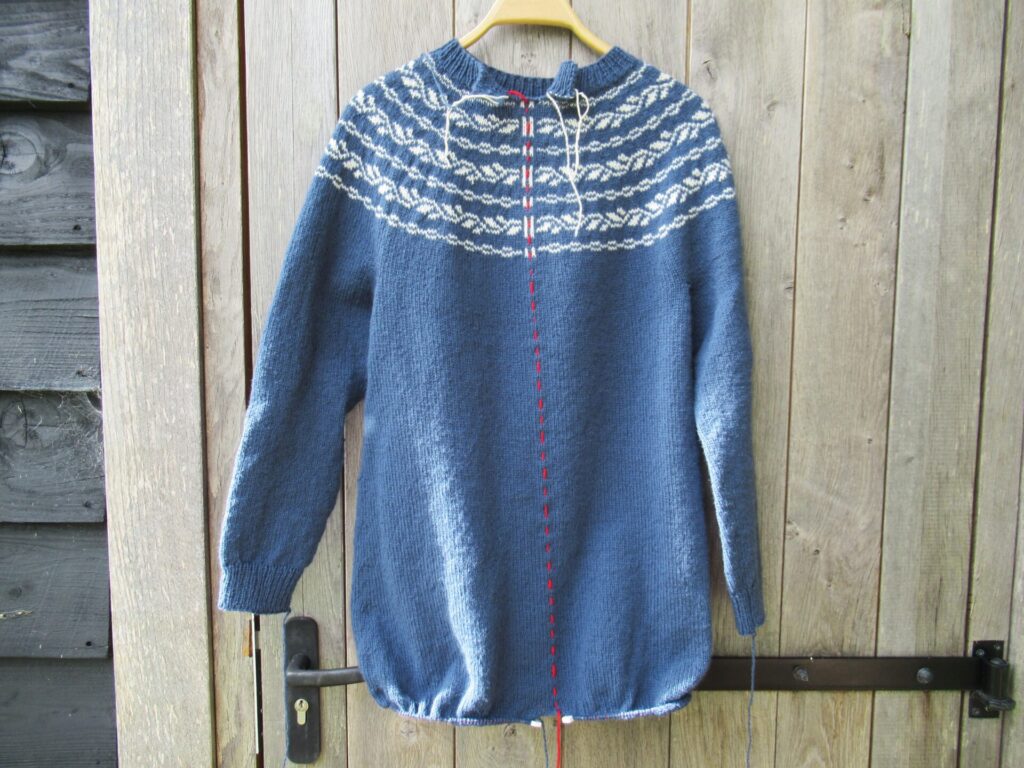
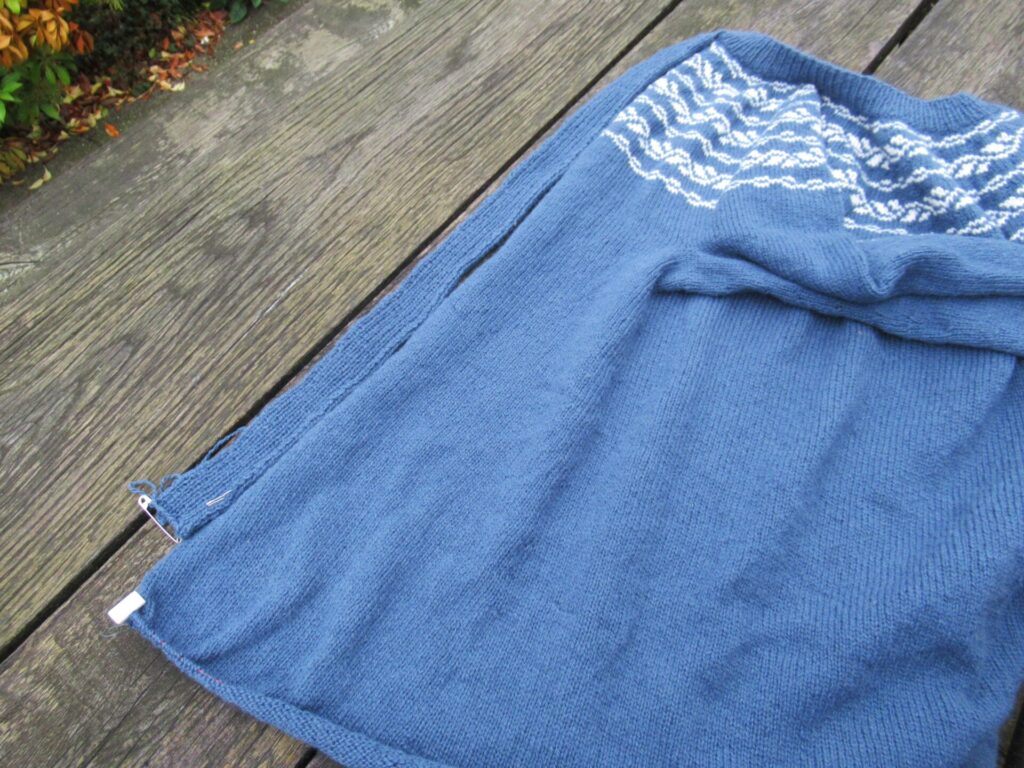
I have been knitting a long Norwegian cardigan top-down and in the round, with a stranded colourwork yoke. At first it looks like a long sweater or mini-dress. To become a cardigan, it must be cut open. And to that end, a ‘panel’ of several extra stitches (in this case five) is knit in the centre front. Together these stitches form the steek. In the yoke the steek is clearly visible (between arrows), in the body it is just five stitches like all the rest.
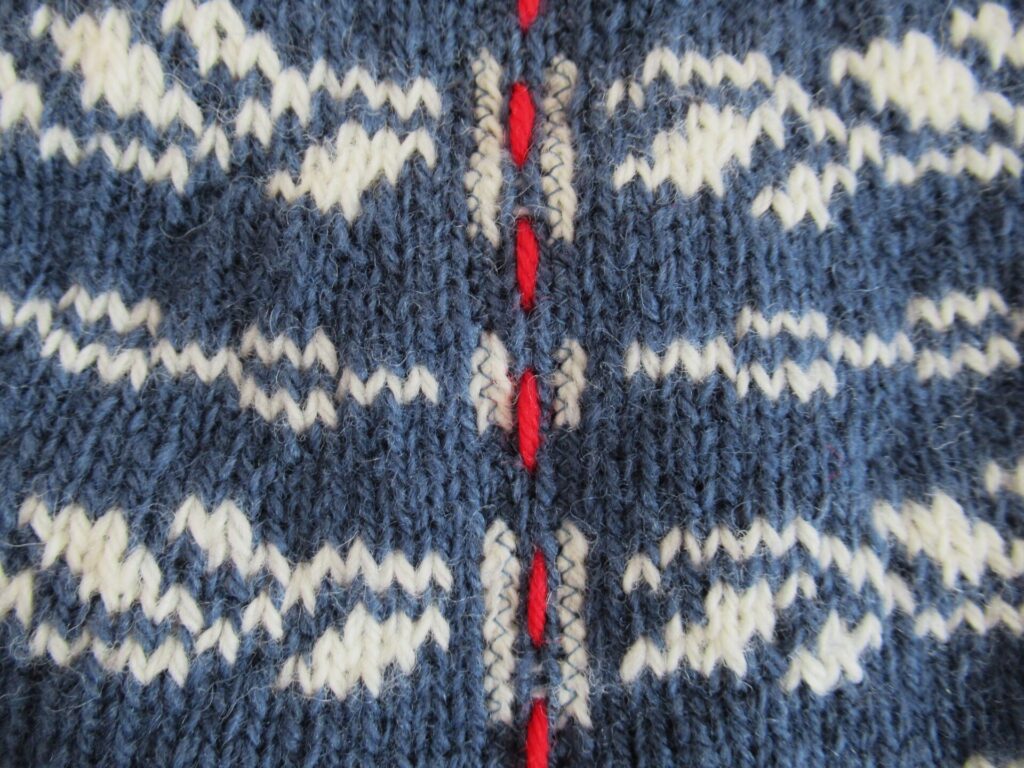
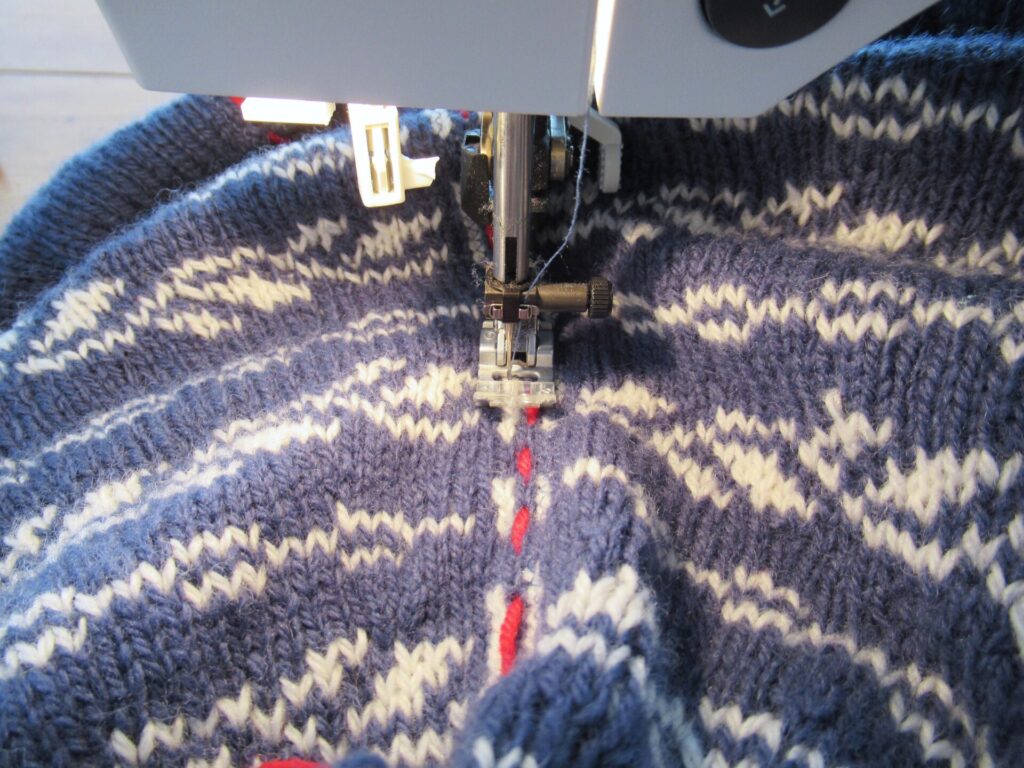
I marked the centre of the steek with basting stitch in red yarn.
With my sewing machine, I zigzagged through the stitches on either side of the centre stitch, to prevent them from unravelling.
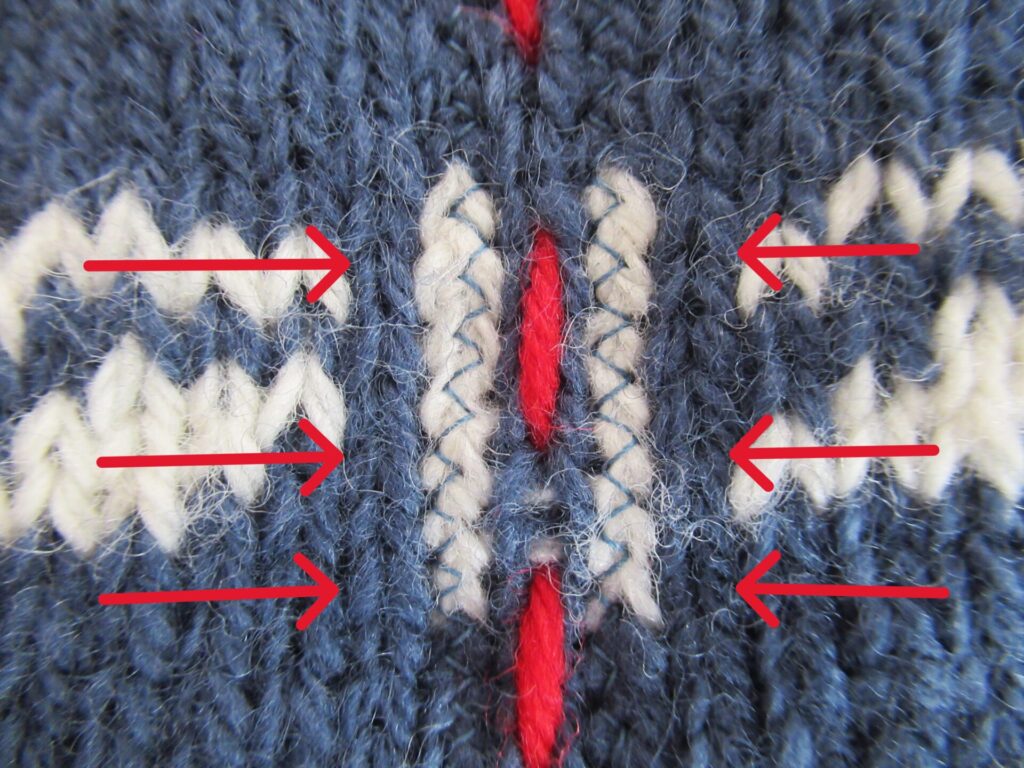
This is what it looks like after zigzagging.
The five stitches between the red arrows form the steek: the centre stitch with the red basting stiches down the middle, one stitch with zigzags on either side, and one more stitch on either side of that.
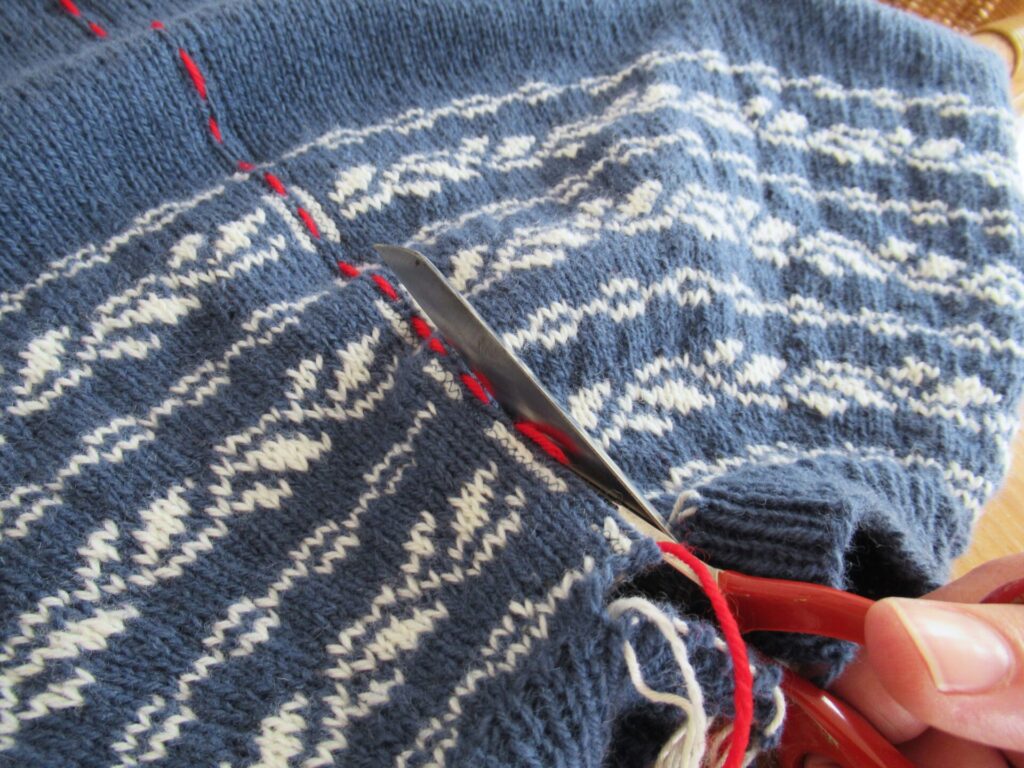
Then I took a deep breath and cut!
The zigzags keep the knitting from falling apart.
Now the button bands are knit. A little shorter than the fronts – they will be stretched out when they are sewn on.
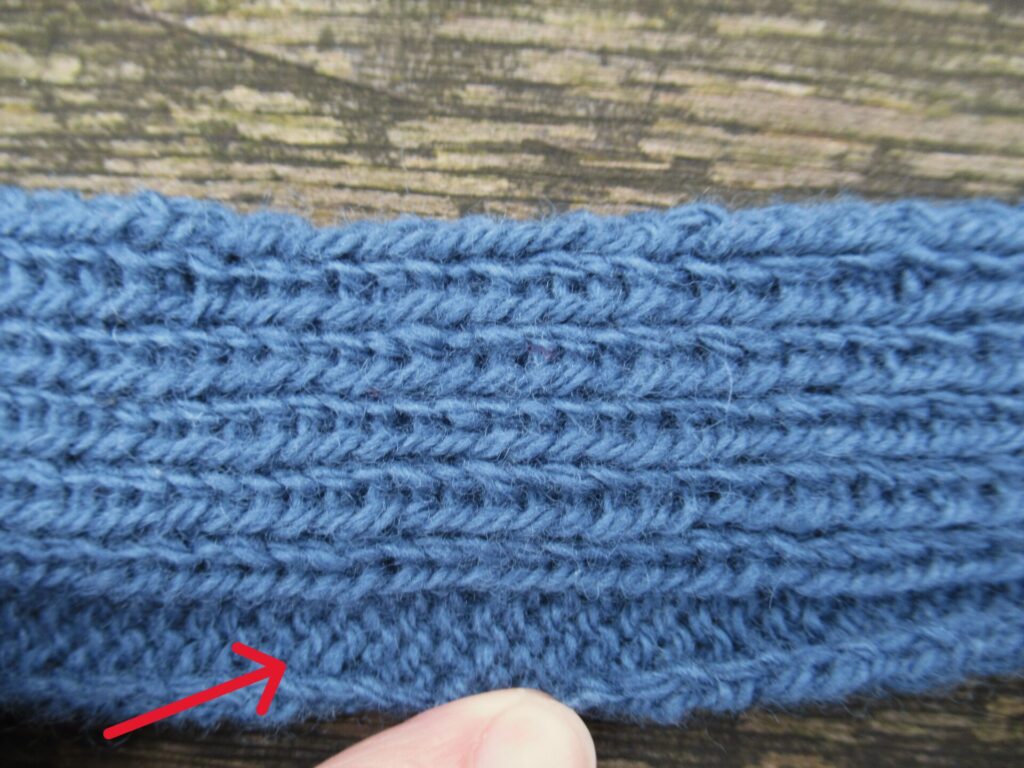
The steek stitches are folded to the inside when the button band is sewn on. For a tidy look, they need to be covered somehow. In this case they will be covered by a facing. The facing is knit on to the button band – four stitches in stocking stitch next to the ribbing (arrow below):
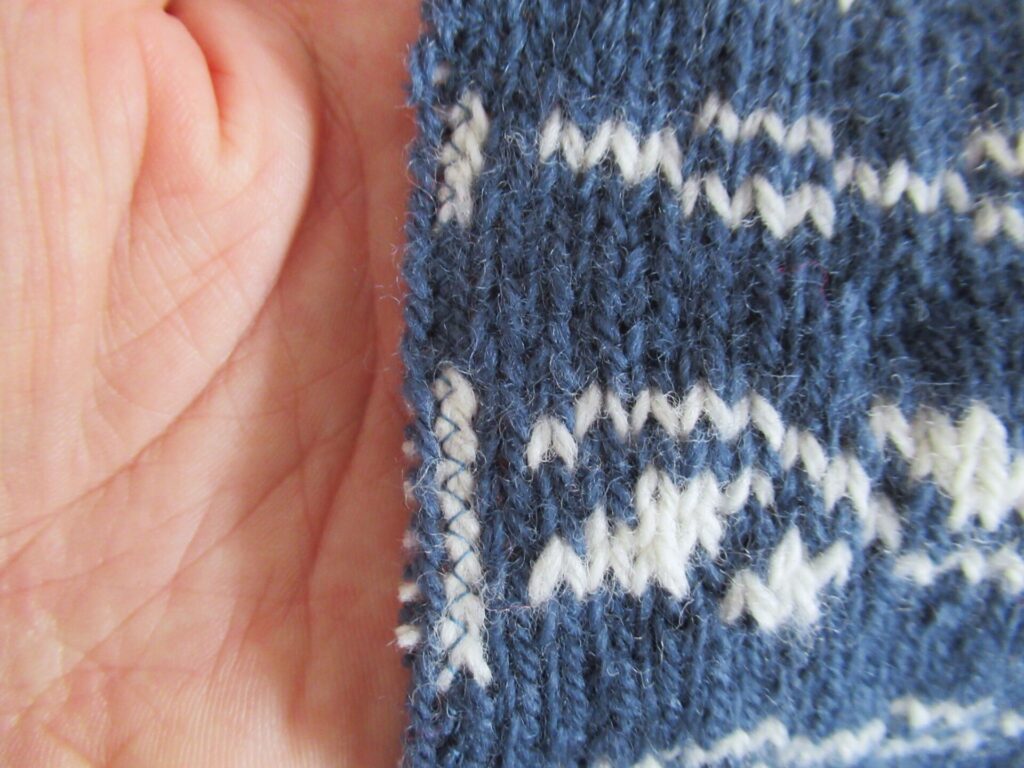
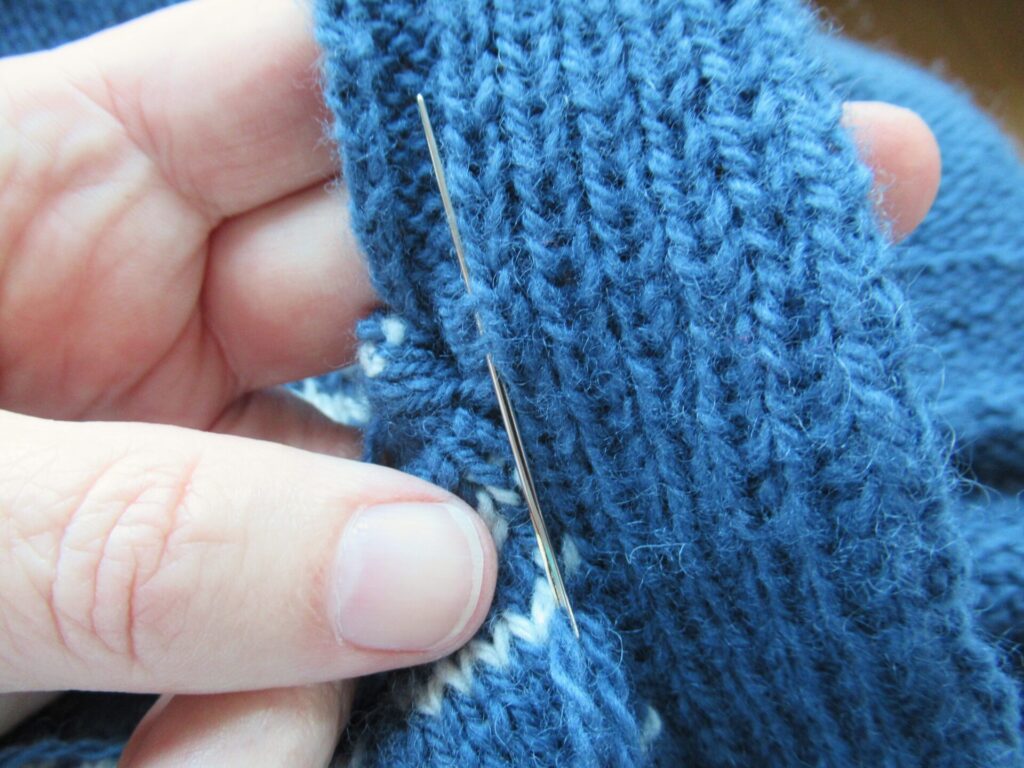
I pinned the button bands in place and sewed them on to the fronts with mattress stitch from the right side of the fabric, just like you would seam separate pieces of a sweater together.
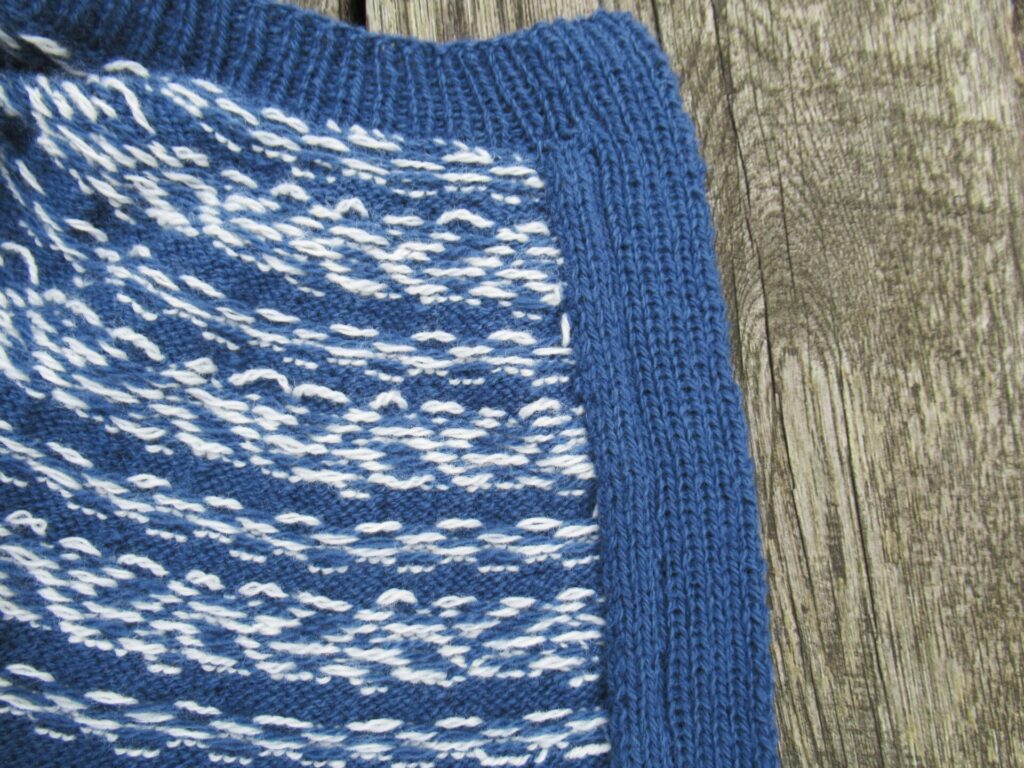
After that, the facings need to be fastened to the fronts on the wrong side of the fabric with invisible stitches to cover the cut stitches of the steek. This takes time and patience. I did it in instalments. All in all, sewing on the button bands and sewing the facings in place took me at least two hours. And I have to say, it looks very neat! Can you see it? The button band to the right, with the 4-stitch facing to the left of it:
Hardest parts of the steeking:
Plucking up the courage to do it.
Not accidentally zigzagging the back of the cardigan to the front.
What I would do differently next time:
Weave in the ends before zigzagging the steek (loose yarn ends got caught between the zigzags).
Use a wider zigzag.
Finally, I knit on the lower ribbing. Now all the cardigan needs is a nice bubble bath and buttons. I hope I’ve shown and described the entire process clearly enough and given you the courage to maybe try steeking this way someday.
I’m off to the Handwerkbeurs now – THE knitting/crochet/embroidery/quilting event of the year around here. If I don’t forget to take photographs I’ll tell you about it next week. Hope to see you then. Bye!
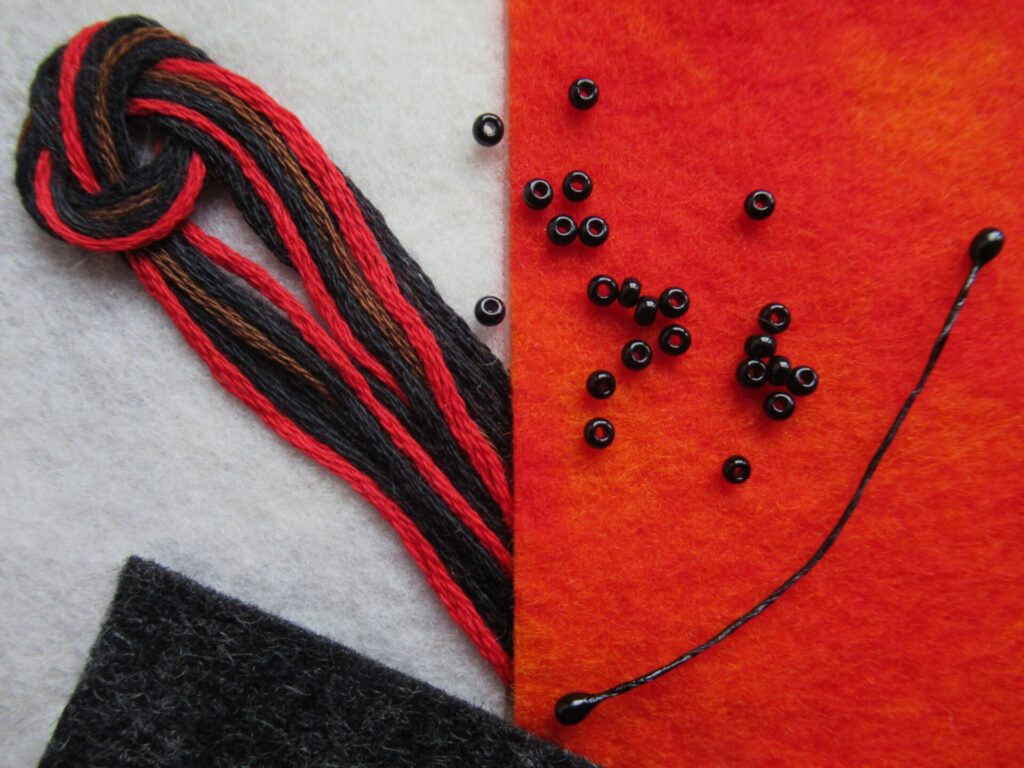
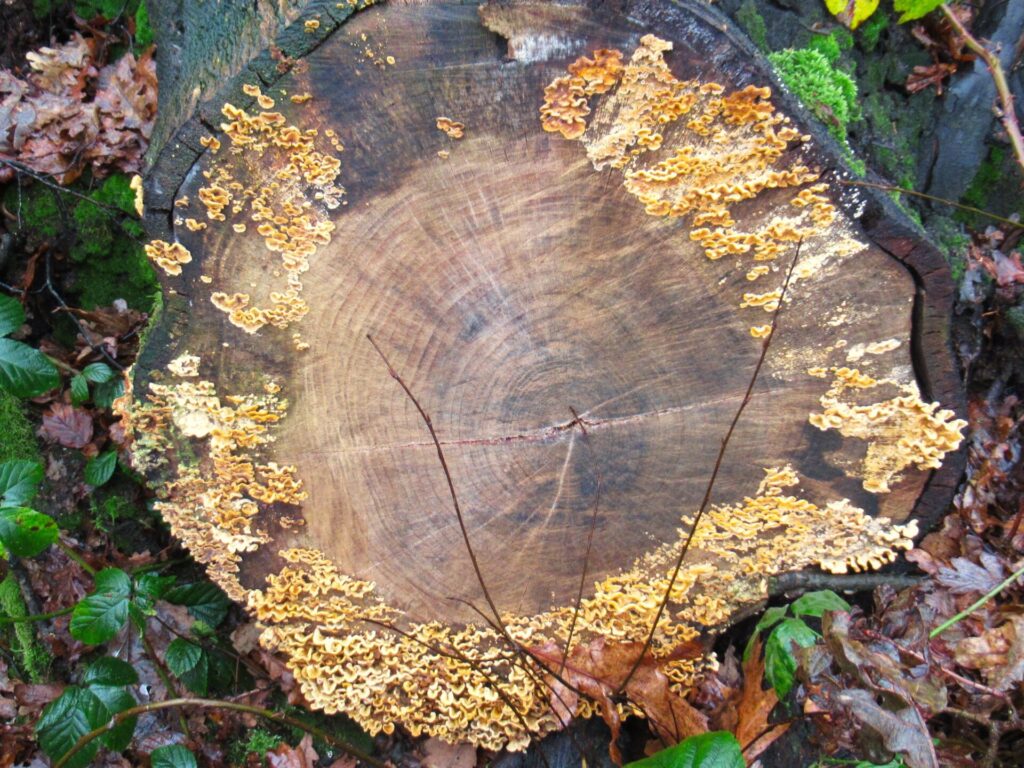
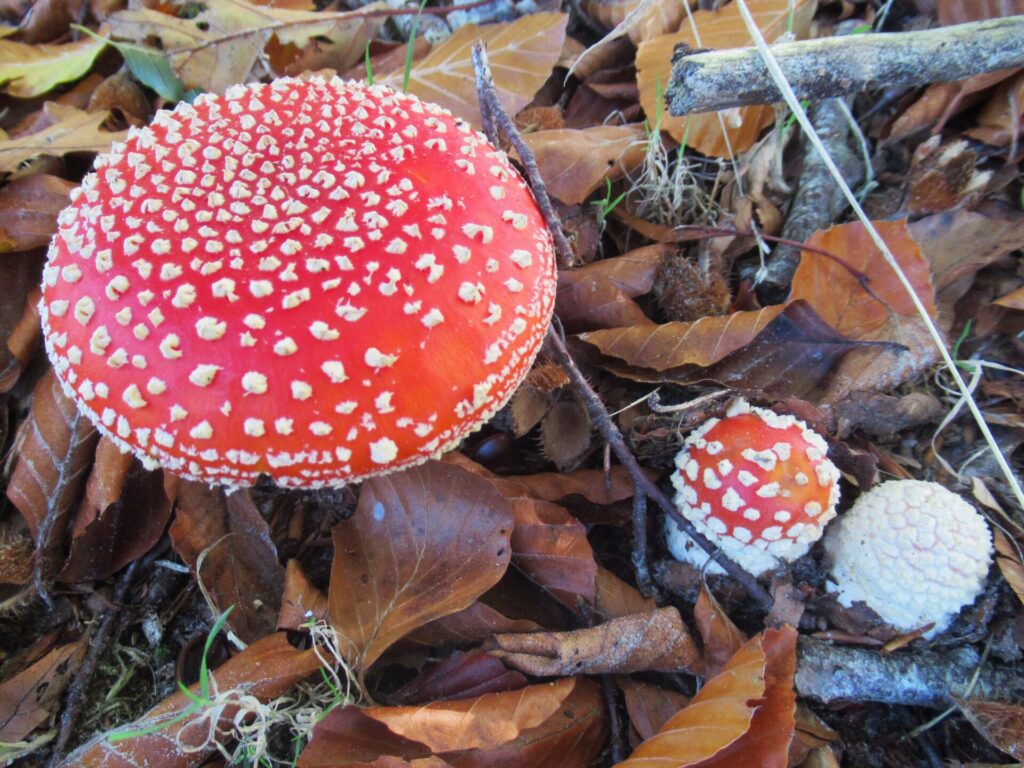
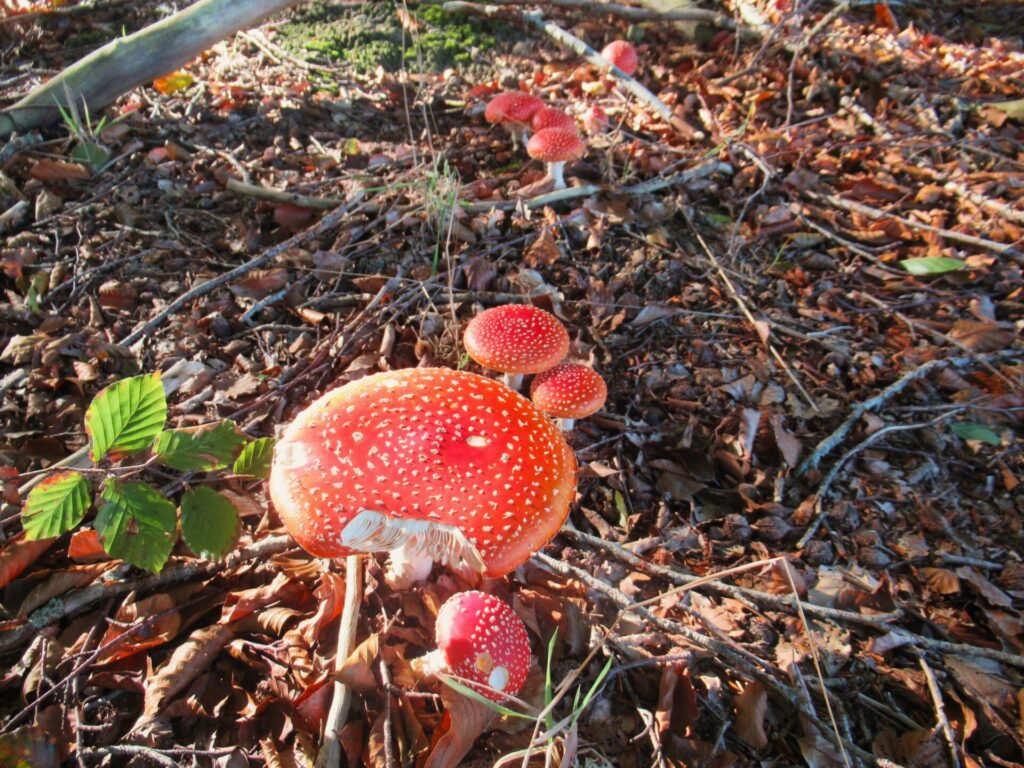
Hello! Sitting down at my computer to write this, it occurs to me that every story can be told from different angles. I could choose to make today’s post into a blood-curdling story, with ghost rows (boo!), yarn the colour of blood, a ripped-off limb and nightmare-inducing toadstools. But I think the world is scary enough as it is without me adding to it, so I’m choosing to write a comforting tale instead.
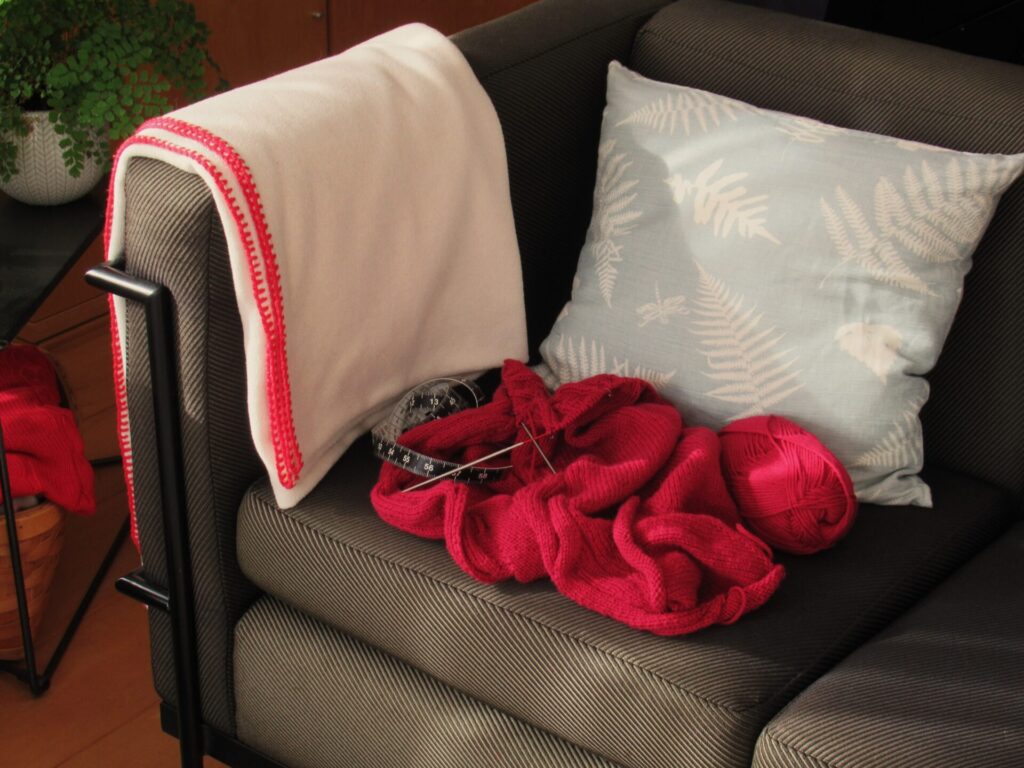
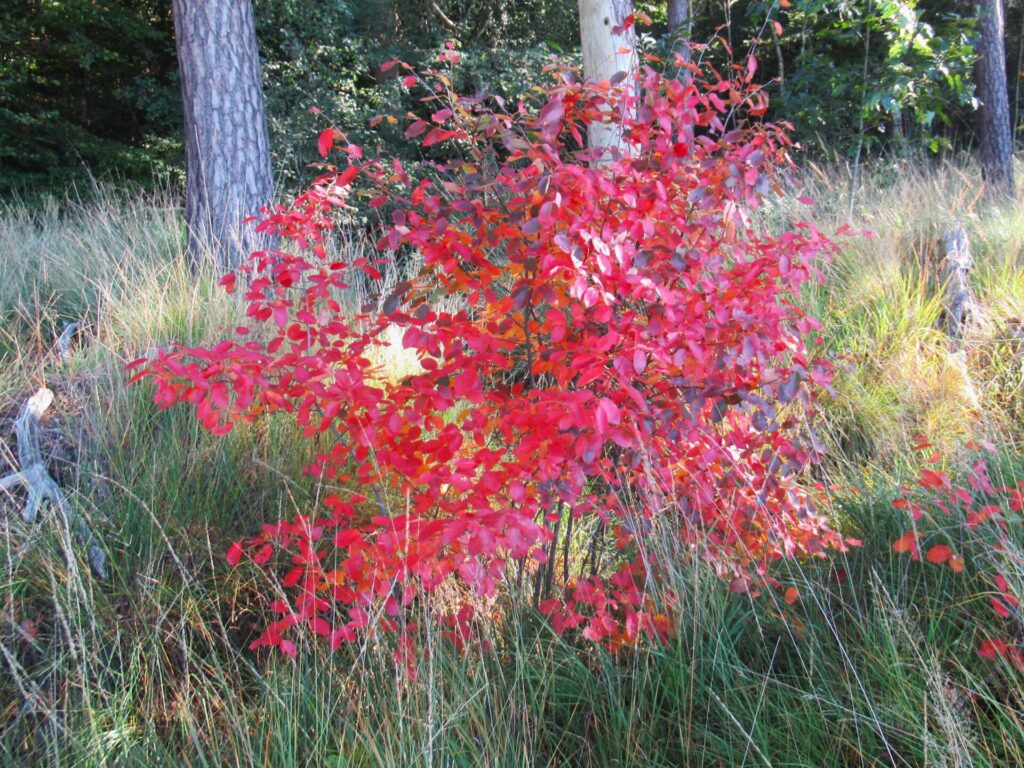
Once upon a time, in a small low-lying country, there was a woman who was feeling miserable on a personal level and filled with worries about the world. Blue was her favourite colour, followed by green and pink, but now she was suddenly longing for something red.
Well, yes, that’s lovely, but not exactly what she meant.
Very nice, too, but that wasn’t what she meant either.
What she was longing for was red yarn for something simple and comforting to knit. Fortunately she knew that if she climbed the stairs in her very own home, turned right and then left at the top, she’d come to a portal leading to a secret hoard of yarny treasures. And lo and behold, she found exactly what she wanted – six 100-gram skeins of worsted-weight red wool. With a little techno-wizardry, the perfect pattern landed in her in-box and she could start knitting.
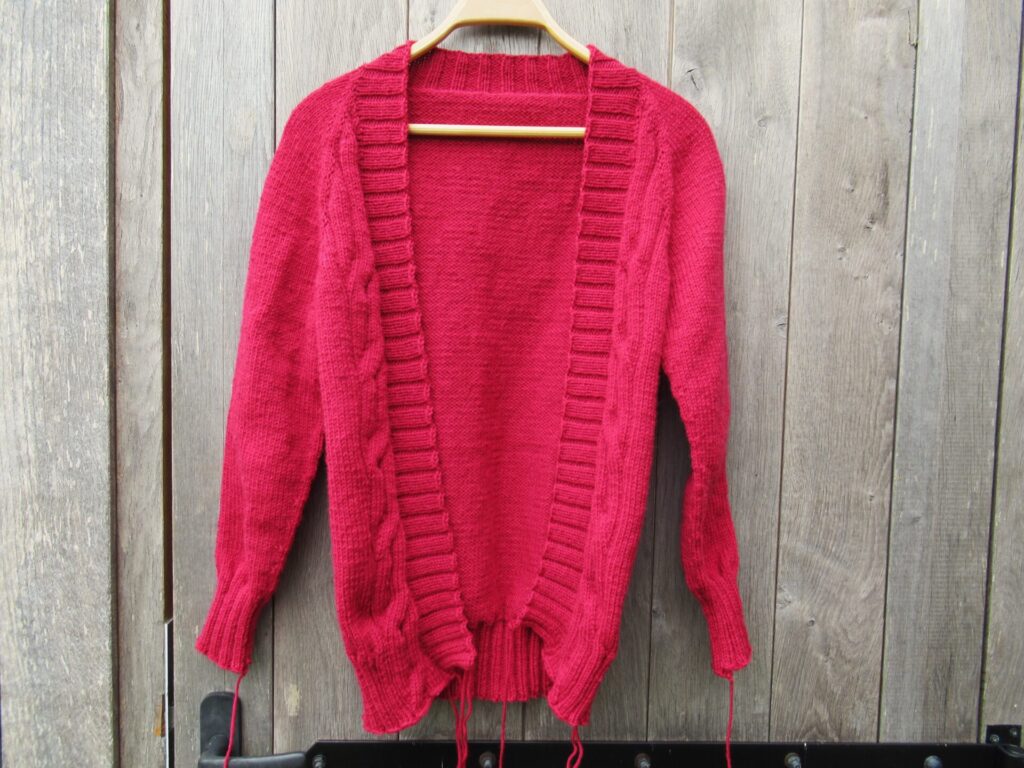
The pattern designer said this top-down and seamless cardigan could be knit in 4 days, but the woman in our story didn’t have magic flying needles and it took her a couple of weeks longer. Partly because after she’d knit the first sleeve she realized it was far too tight, had to rip it out and re-knit it using a larger needle. Would she never learn that she always needed to go up a needle size for sleeves knit in the round? Still, fairly quickly it was finished.
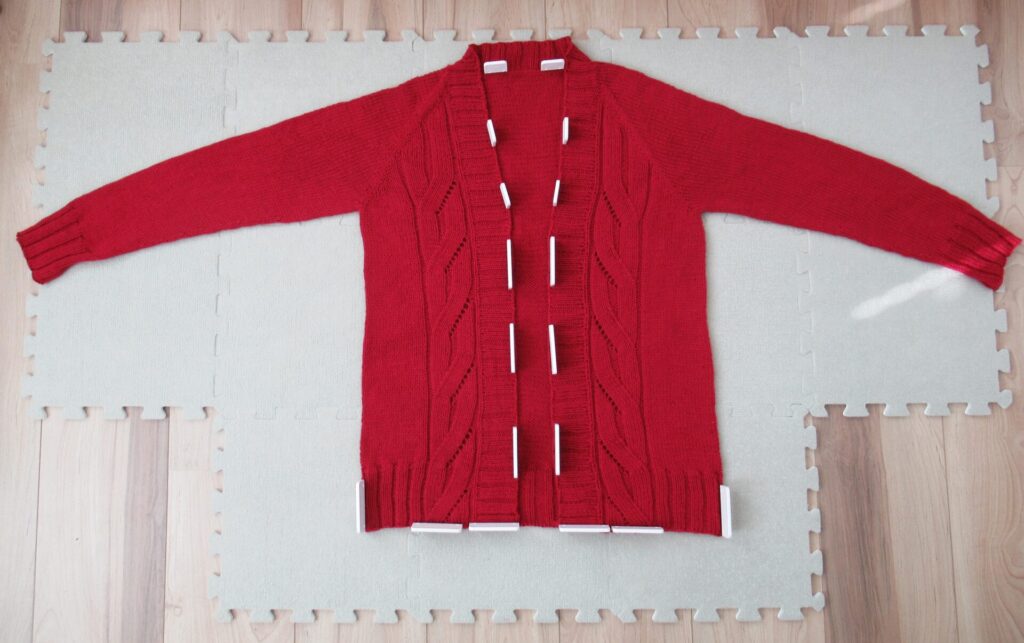
But, oh, how disappointing. It didn’t look nearly as nice as the designer’s cardi and the front bands seemed far too short. Maybe it needed a good soak and some blocking magic?
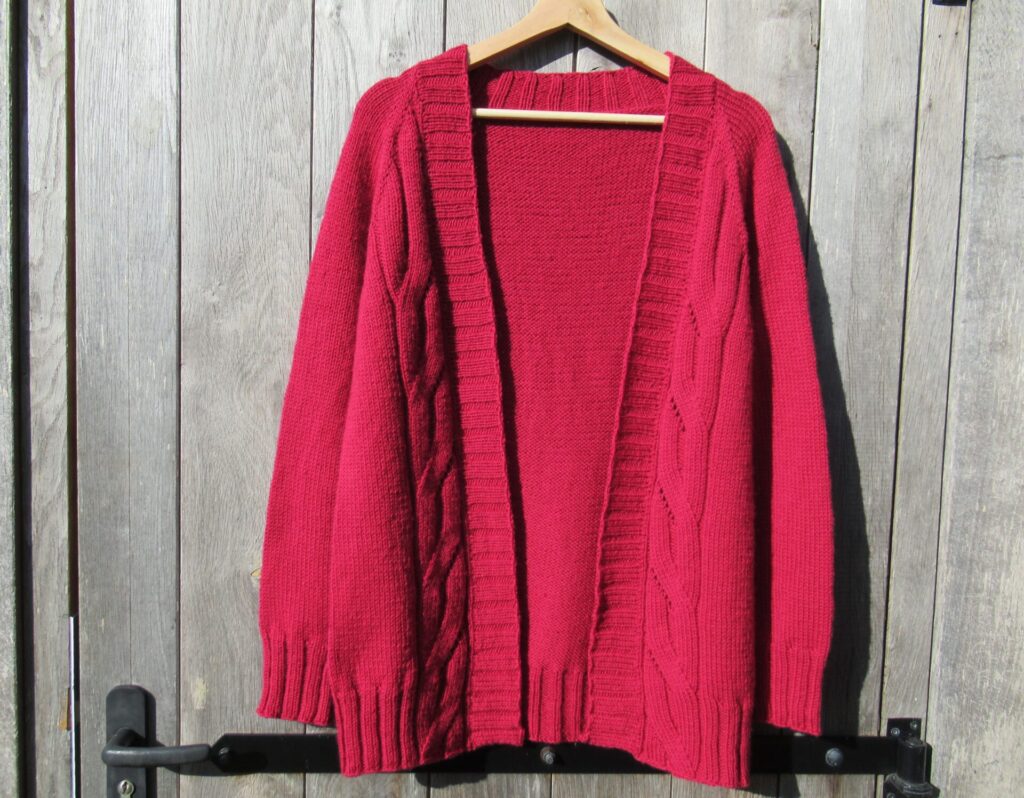
Ah, yes, much better. Now the wave pattern along the fronts looked lovely, and the front bands were the right length, too.
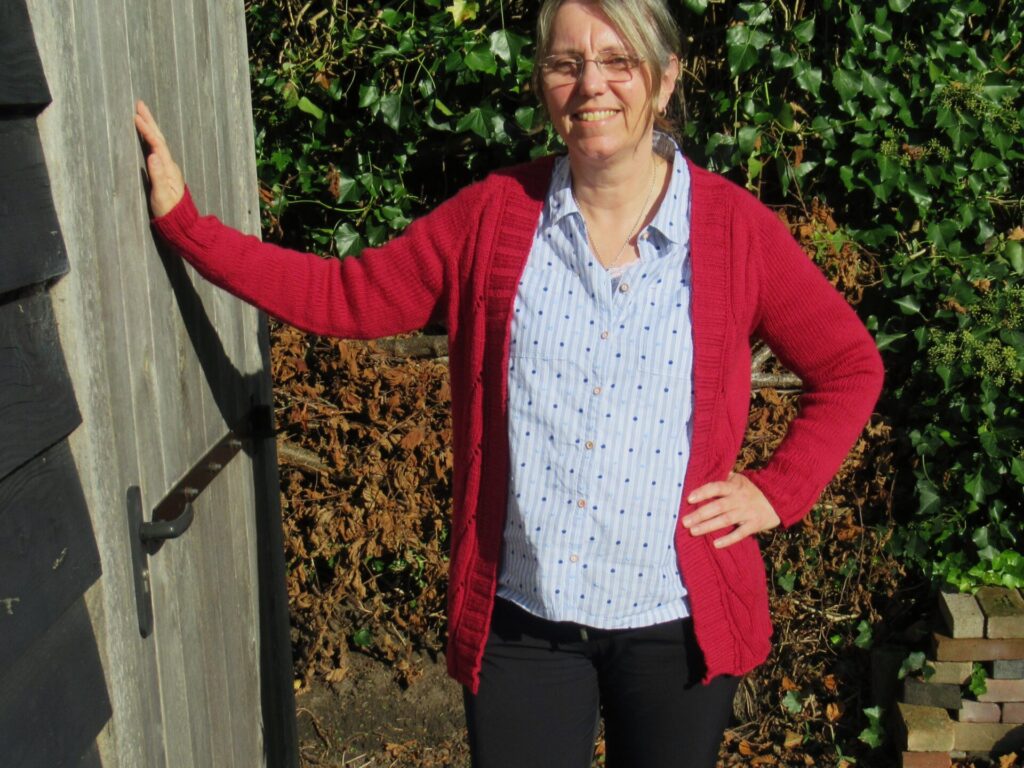
The cardigan is designed to be worn open, with quite a large gap between the fronts. The woman in our story wanted a little more coverage and made hers one size larger than recommended. She also lengthened the cardi by approx. 5 cm/2.5” and gave it long sleeves instead of ¾-length ones. Even though she didn’t feel in the least like a fairy-tale princess, she thought it would be useful to have her picture taken to show you what it looks like when worn:
Unable to get the correct row gauge (instead of 24, she got 27 rows to 10 cm/4”), the woman inserted several extra rows without increases (called ‘ghost rows’ by the designer) into the raglan, because otherwise it would be too tight. She was afraid these rows would spoil the nice and regular raglan slant, but they didn’t show at all.
Blue would always remain the woman’s favourite colour, but red was just right for this cardi – and for this time of the year, too.
Knitting the red cardigan had not magicked all the woes and worries of the world away, but at least it had been peaceful and its gentle magic had made the woman feel better inside.
In case you could use some of this kind of magic, too, here are some links:
Hello and thank you so much for your condolences. I really appreciate your warm words of comfort. I’ve been away from here for longer than expected, because apart from dealing with a loss, we also had to deal with Covid for the first time. In medical terms we had a mild case, but still it was no joke. Not the happiest of times, but I’m well on the mend now, back to knitting and ready to pick up the thread of my blog. More about knitting over the coming weeks. Today, I first have something else for you.
Before my life ground to a halt we spent a weekend in Limburg, the southernmost region of the Netherlands, visiting friends and doing some sightseeing along the way. For me it’s like being in a different country and I thought you might enjoy some pictures.
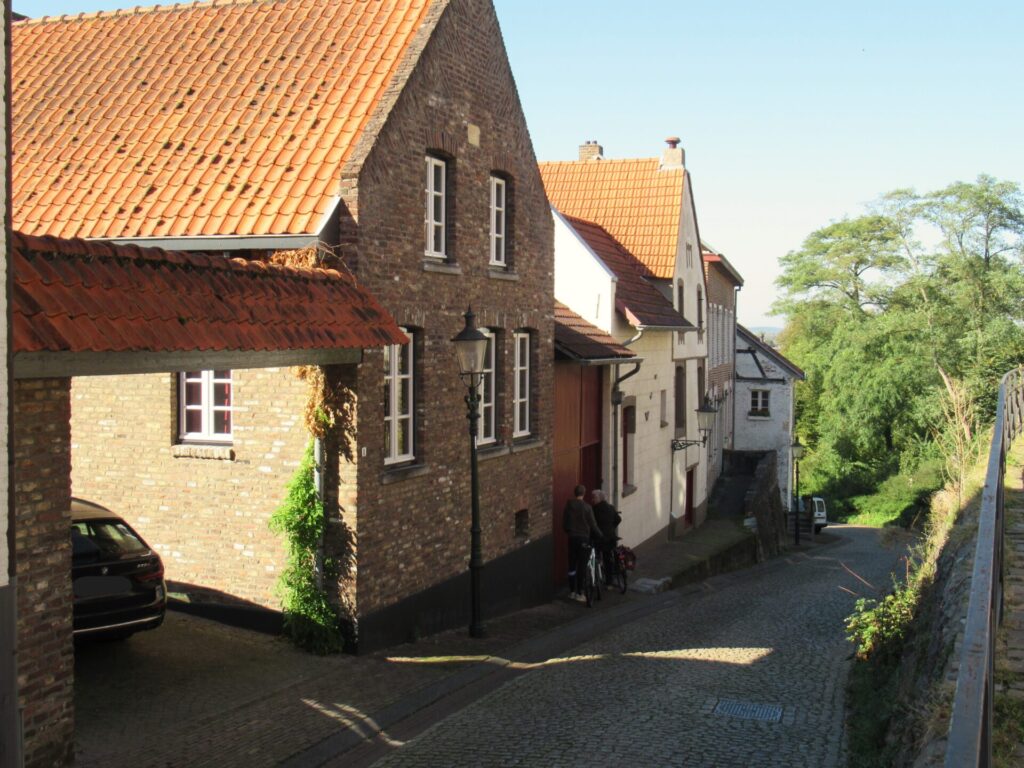
For the last lap of our journey, we left the motorway and stopped off in Elsloo, a village with a very picturesque old centre.
As you can see in the two photos above, it’s quite hilly here (at least by Dutch standards). It’s not just the landscape that is different from where we live, but the architecture, too. Some of the lovely old houses along the cobbled streets are built around a square courtyard – something you don’t see in our part of the country at all.
Steps lead up to the catholic Augustinus church.
And to the left of the steps stands the most spectacular house of the village – the Schippershuis. Skipper and stone trader Jan Conincx had it built in the early 17th century. He must have been an extremely wealthy person. Creative and imaginative, too, judging by the patchwork of stones and bricks on the tall front of his house.
Just imagine living in a house with such a long history. Interesting and lovely, but also rather dark inside, I expect. It has a basement with two tiny red doors. What would you do with a windowless basement like that?
With good lighting and perhaps a trompe-l’oeil window painted on a wall it might make a great crafts room with lots of space for storing yarn (one can but dream). It is close to the river Meuse but will never be flooded, because it is situated far above it. The sign on the wall tells us the street is called Op de berg (On the mountain).
From the top of the ‘mountain’, at the end of the road, we can look out over the river Meuse. It is narrower than I expected. On the other side a village with lots of white houses, wind turbines, a motorway.
We ate our sandwich lunch in the castle grounds (the castle is now a hotel.)…
… and then drove on to the village of Simpelveld, to visit De Schat van Simpelveld (the Simpelveld Treasure), a convent museum with an amazing embroidery collection. Even for someone who isn’t particularly interested in ecclesiastical embroidery (me) or any embroidery (my husband) it was fascinating. The embroidery was extremely fine and beautiful. I didn’t take any pictures but will give a couple of links at the end of this post so that you can see for yourself.
Upon arrival at our friends’ place we talked, talked and talked enjoying each other’s company and a delicious home-cooked dinner, but before that we went for a walk, enjoying the late afternoon sun on trees in their early autumn finery,
passing an old watermill…
… and finding a plant we didn’t know yet – the yellow-flowered teasel (NL: Slanke kaardebol).
The larger wild teasel is also called fuller’s teasel and was used in the wool industry in the past. Maybe this smaller one was, too, who knows?
It’s so good to be back here on my blog, choosing photographs and words to share with you. I’m easing in with some light-hearted travel talk today and hope to be back with some ‘serious’ knitting and other woolly posts next week, the week after next, the week after that, and… Thank you for reading!
Oh, and here are the promised links:
Do take a look at this wonderful blog post about the embroidery at the convent in Simpelveld with lots of great photographs. Looking at the close-up photos you’ll understand why the nuns’ embroidery is called needle painting.
The museum website De Schat van Simpelveld can be found here.
Hello! Just popping in here with a brief message today. A close family member of ours passed away suddenly last week. Sad and shaken, I feel unable to come up with anything inspiring to write about at the moment. On the one hand I don’t want to bother you with my personal affairs, but on the other I don’t want to stay away here for weeks on end leaving you wondering. Don’t worry, I’m basically all right and just need some time.
I missed the Dutch Knitting & Crochet Days this year. For a lovely impression do head over to my friend Froukje’s blog. She also writes about the embroidery-on-knitting workshop she took while she was there.
I hope all is well with you and hope to be back here soon with some woolly inspiration. Take care! xxx
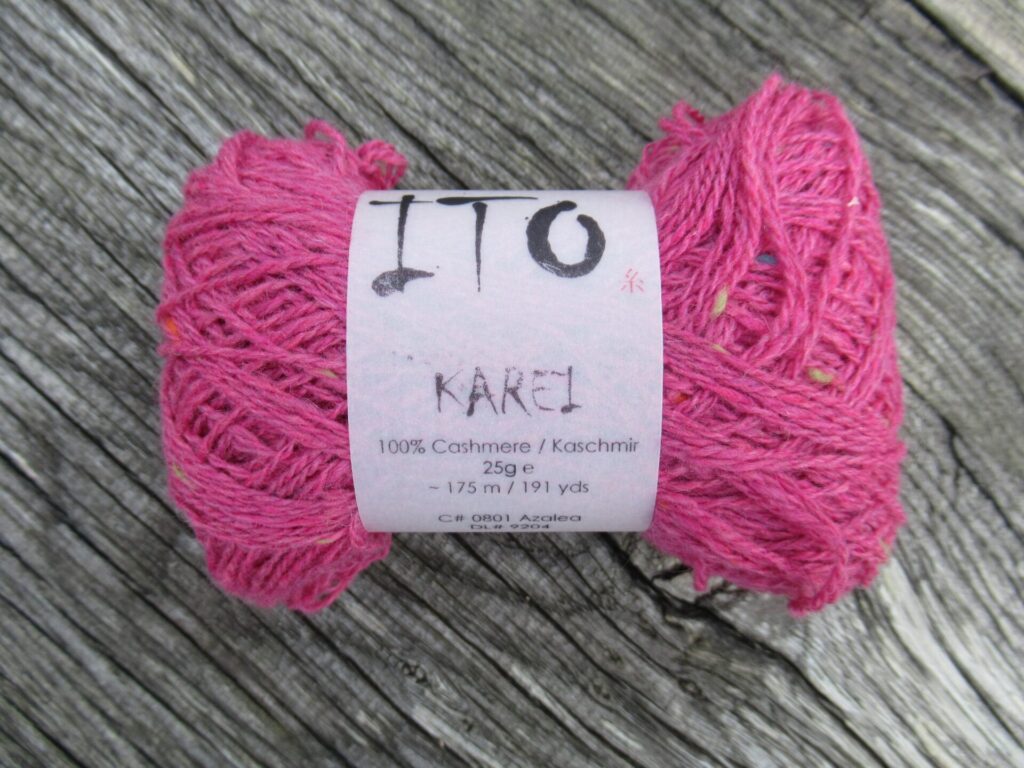
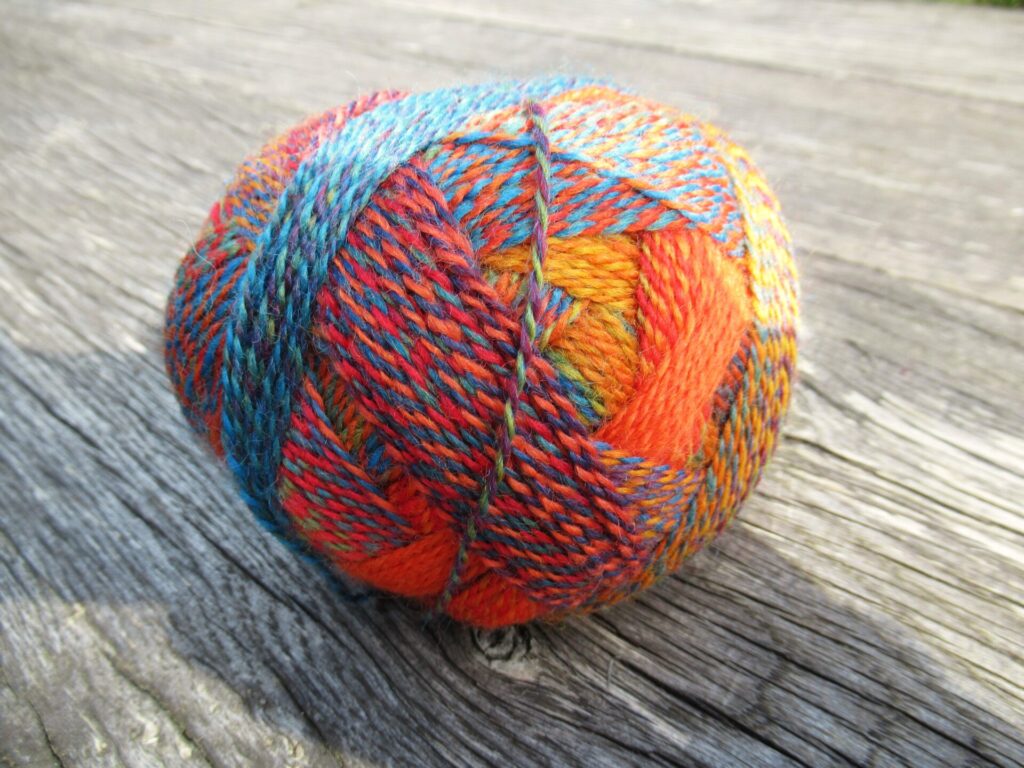
Hello! Do you ever order yarn online? If so, how do you choose? Have you had any disappointments? I find it tricky and prefer to purchase my yarns at brick-and-mortar shops – a far nicer experience anyway. But what if you don’t have any shops nearby or they don’t have what you’re looking for? What if you’ve read about, say, a gorgeous lace-weight tweed yarn (a rarity) that would be perfect for the scarf you want to knit? How do you find out which shade would be right for you? Screen images can be so deceptive.
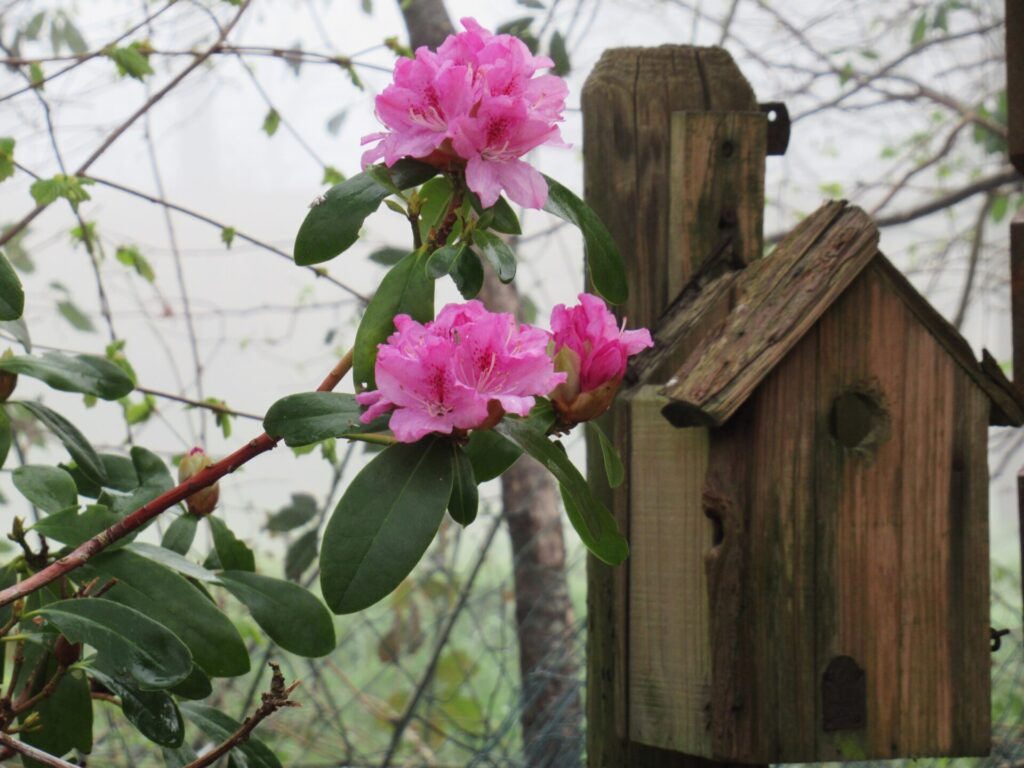
I was thinking of pink. The yarn I had in mind had only one shade of pink, called Azalea, that looked very different on different websites. Looking at pictures of azalea gardens online was lovely, but didn’t really help – so many shades of pink azaleas!
Nezu Shrine Azalea Garden in Tokyo | Photo by Susann Schuster via Unsplash
In the end I took the risk and – phew – it was a kind of pink I liked. (I later found out that I could have returned the yarn if I hadn’t been happy with it.) The pink looks different in many of my own photos, too. This one comes closest to the real colour (at least on my screen):
It is almost like the pink of the flowers on the straggly little azalea bush in our garden, but slightly warmer (plus it has turquoise, yellow and orange tweed flecks).
In my experience the photos on yarn manufacturers’ websites are often the most reliable.
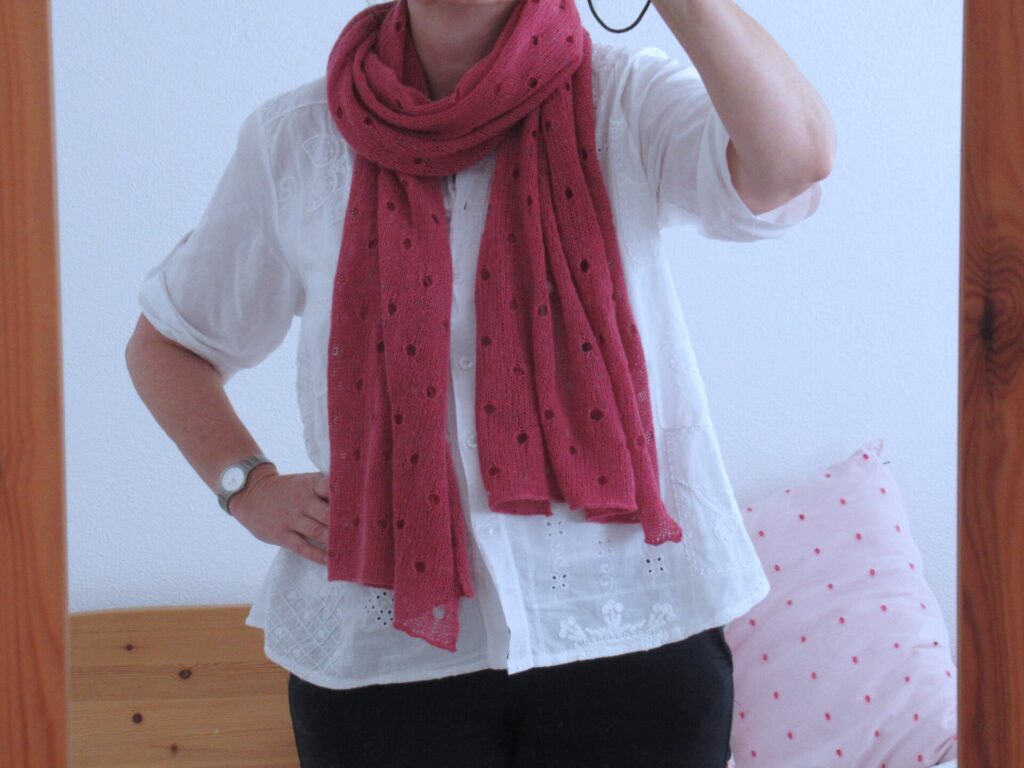
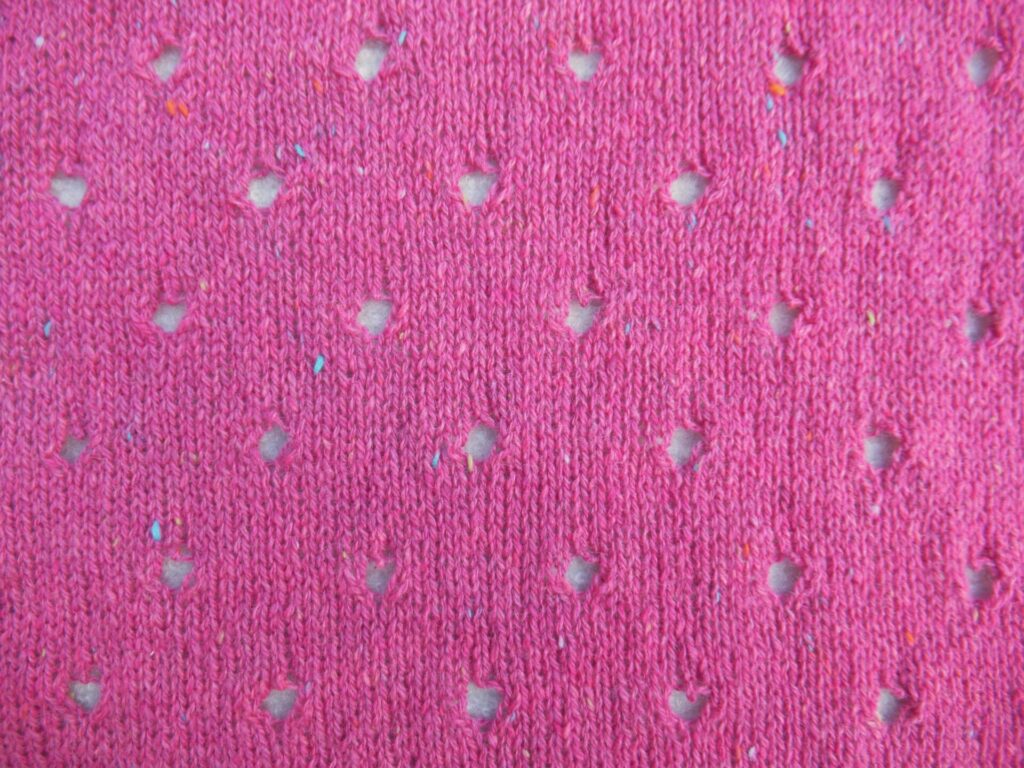
The scarf-in-progress accompanied me everywhere I went over the past five months or so and what a lovely, relaxing project it was. This is what it looks like finished (only the pink isn’t quite right):
It’s airy, floaty and very, very soft.
Project details: Pattern: Polka Dot Scarf Yarn: 6 x 25 g/175 m/191 yds Ito ‘Karei’, shade Azalea Finished size: 56 cm/22” wide x 2.05 m/80¾” long Needles: 3.75 mm/US 5 (and 4.5 mm/US 7 for bind-off)
I thought I’d briefly discuss several special techniques used for this scarf below. I realize not everyone will find the finer details of finishing as fascinating as I do. Or maybe these are things you already know as an experienced knitter. I quite understand that you may not feel like reading this to the end. So, before I move on to the techniques, I’m wishing you a lovely weekend, and hope to see you again next week!
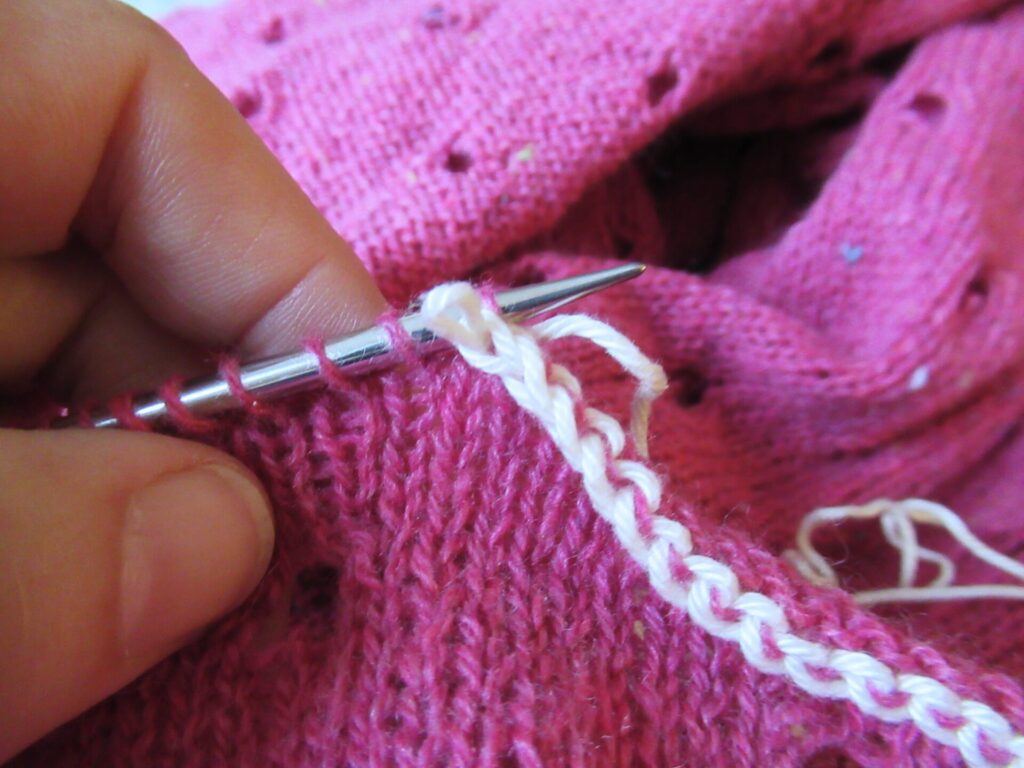
Provisional cast-on with I-cord bind-off
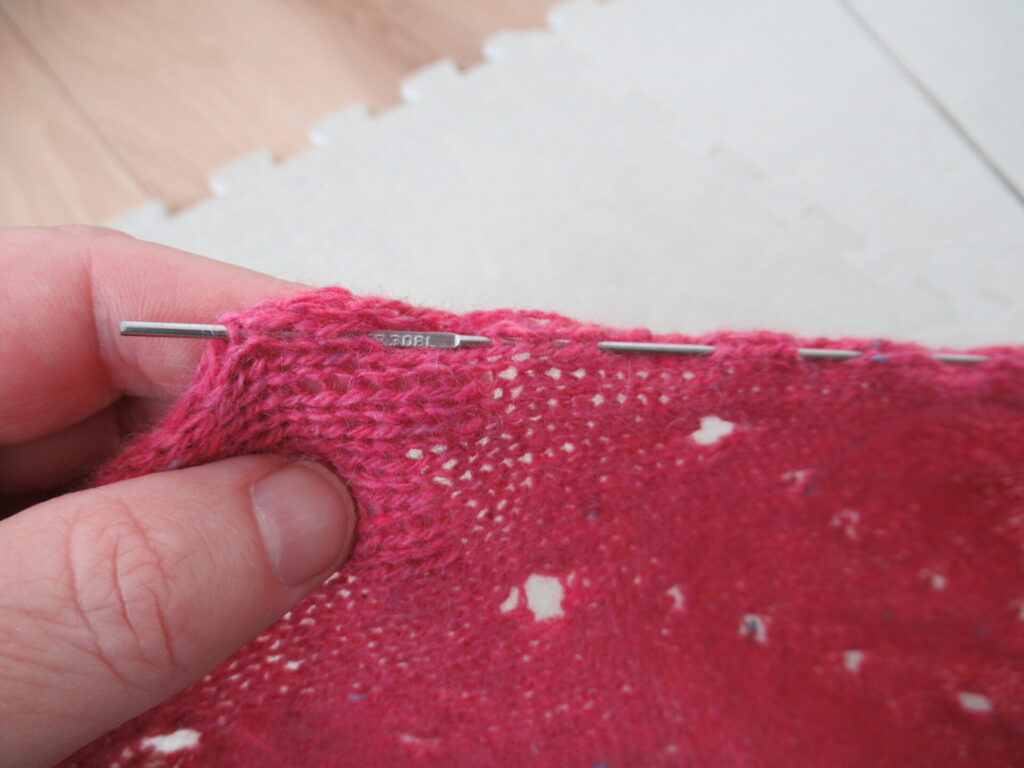
The Polka Dot Scarf starts with a needle-and-hook provisional cast-on. I have described this technique in detail here. When the scarf is finished, it is bound off with a narrow I-cord (described clearly in the pattern). Then the provisional cast-on is unravelled and the stitches are put back on the needle:
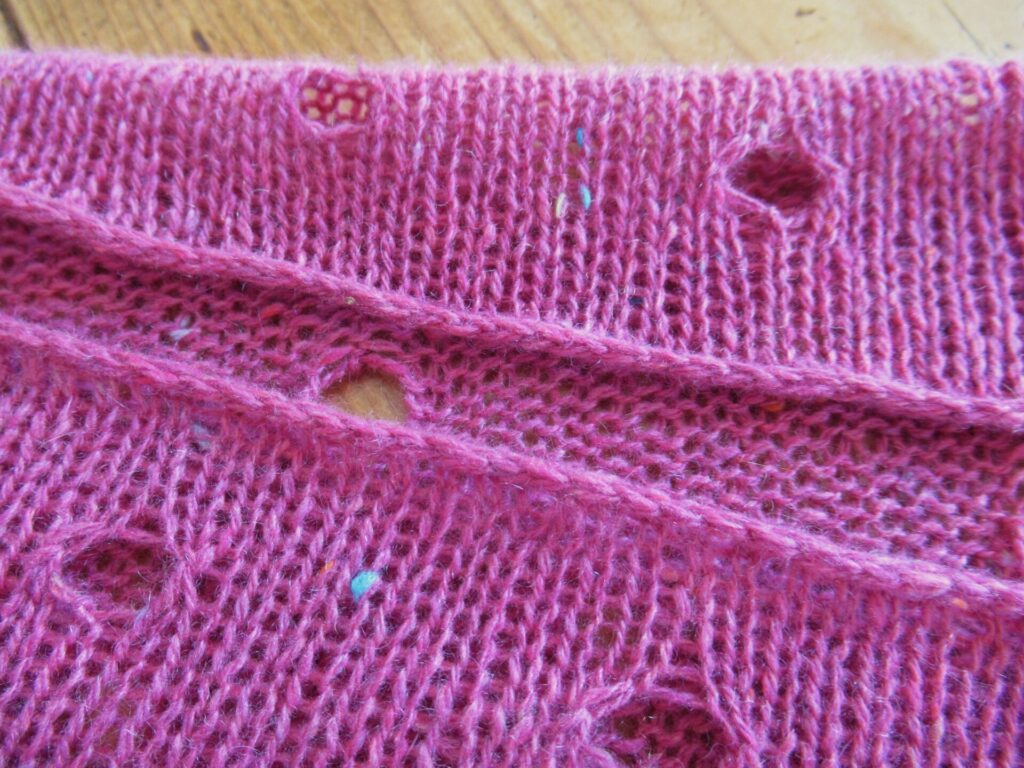
This end of the scarf is also bound off with an I-cord. This isn’t absolutely necessary. It would be totally okay to use an ordinary cast-on and bind-off. But it just looks so much nicer to have both ends of the scarf exactly the same with a lovely little I-cord. Below the scarf is folded over so that you can see both ends with their I-cords:
Sewn yarn join
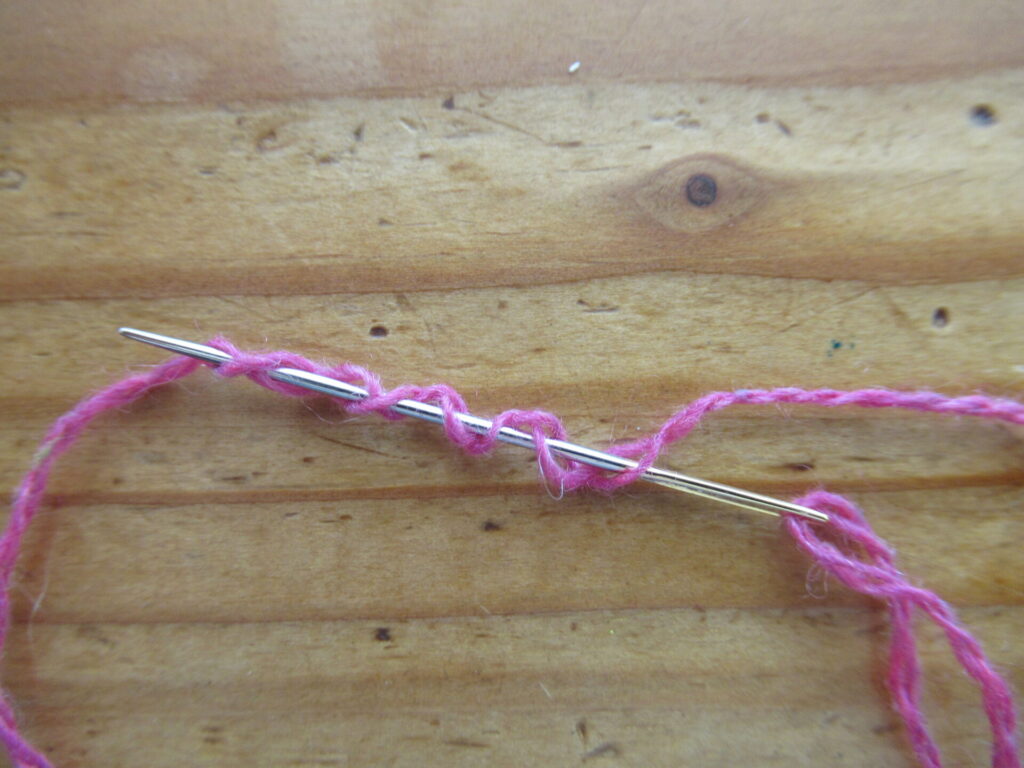
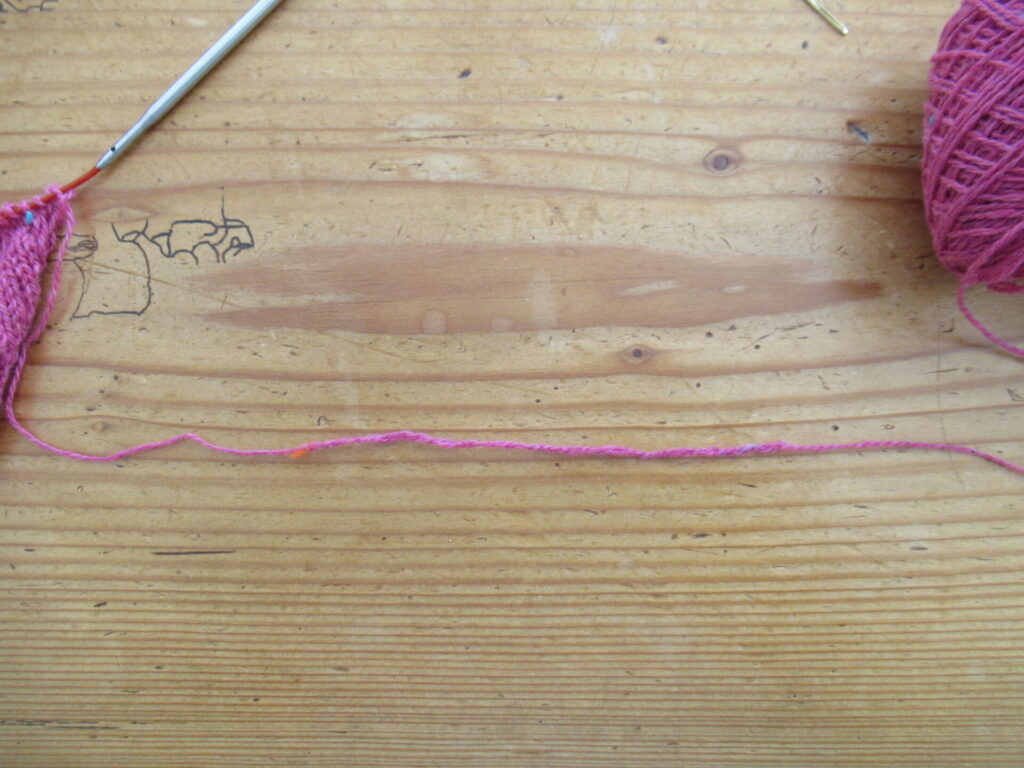
To start in a new skein, I’ve sewn the ends of the ‘old’ and the ‘new’ skein together like this. When you have about an arm’s length of the old yarn left, thread the tail through a darning needle. Now ‘sew’ the tail up and down back through the same yarn end for about 10 cm/4”:
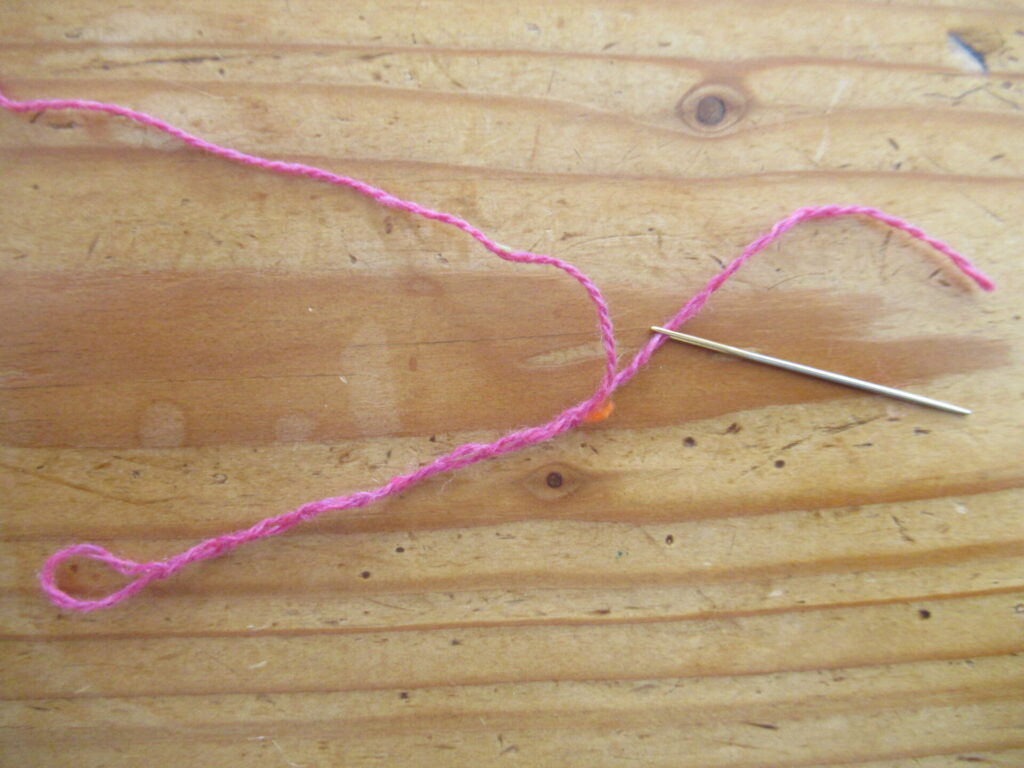
Pull the needle and thread through, leaving a loop:
Now thread the beginning of the new yarn through the needle. Pass it through the loop of the old yarn and ‘sew’ the tail through the new yarn thread – you now have this:
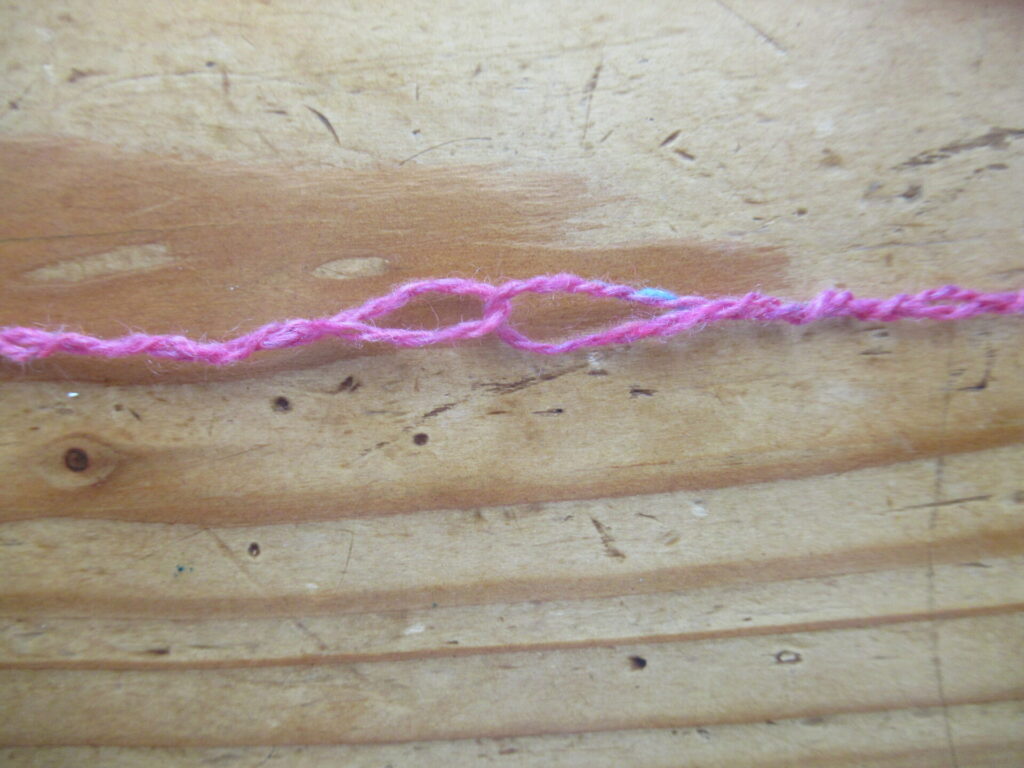
Finally, carefully pull on both ends so that the loops almost disappear, smooth out the yarn and cut off the extra yarn ends. Tadaa! Can you see the join? It’ll be as good as invisible in the knitted fabric.
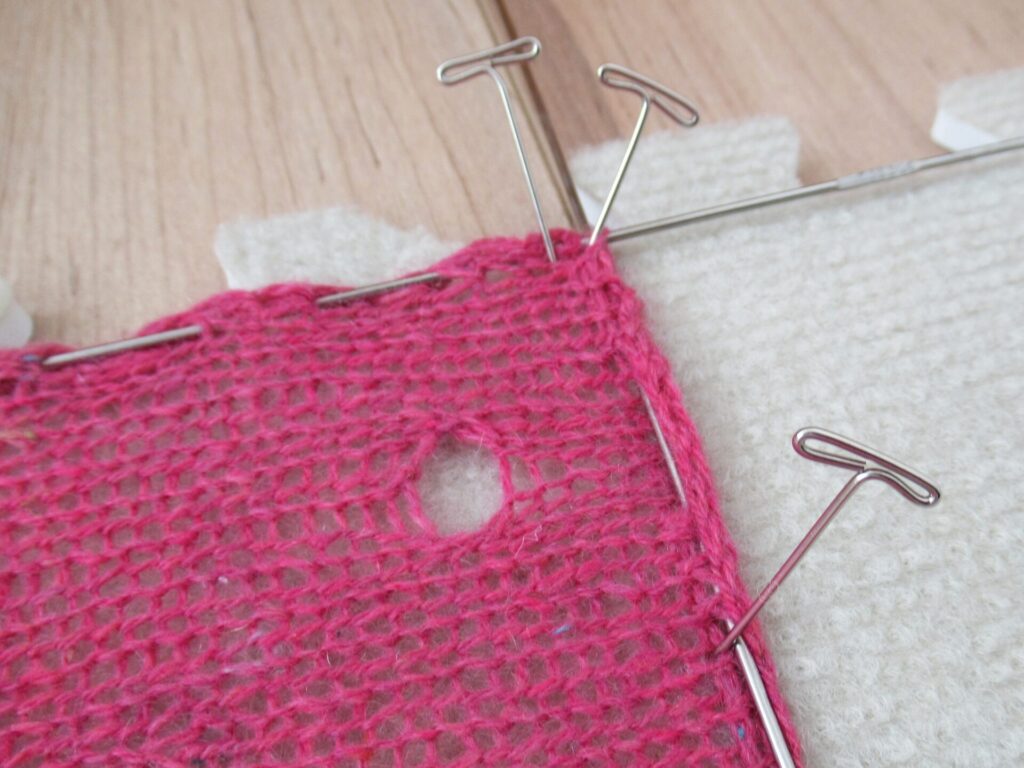
Blocking
In my humble opinion, blocking is absolutely essential for lace scarves. It makes all the difference between frumpy and floaty. You’ll need: no-rinse wool wash, blocking wires and (rustproof) T-pins. Blocking mats are nice, too, but you can also block on a (spare) bed.
Soak your scarf/shawl in the wool wash for about 20 minutes. Remove from water and squeeze out most moisture. Roll in a towel and squeeze to remove more moisture. (I have a separate spin dryer, put my scarf in a lingerie bag and spun it very briefly instead of using a towel.) Next, thread the blocking wires through your knitting along the edges, as if you are sewing a running stitch.
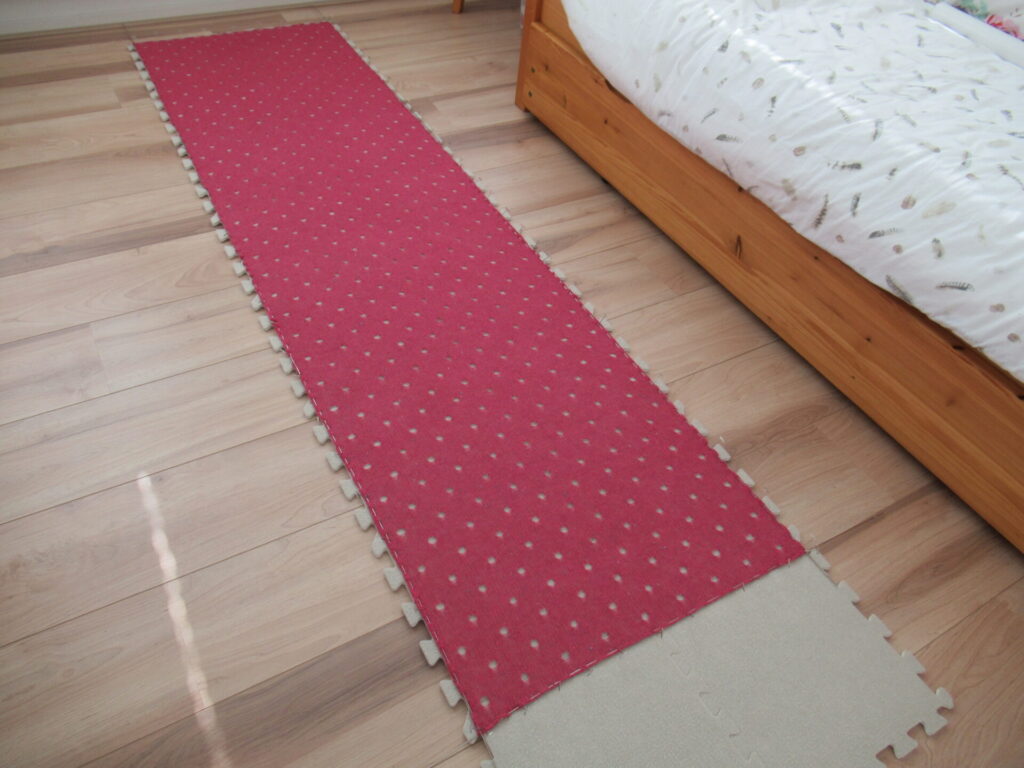
Stretch out your scarf and pin in place with T-pins.
Leave to dry (lace scarves will usually be dry within 12 hours), unpin and remove blocking wires. Blocking is soooo worth the effort!
Before blocking
After blocking
I hope this all makes sense and is useful. If you ever have any questions, do let me know!