Hello dear readers. I’m so glad you’re here today, because I have something to celebrate. And it wouldn’t be much fun without you to celebrate it with.
Today, it’s been exactly a year since I started blogging!
I’m usually more of a behind-the-scenes kind of person, so for me, showing myself and the things I do here has been a real adventure. On the whole, despite some jitters now and then, it’s been a very interesting, fulfilling and enjoyable journey. What I’ve enjoyed most of all is looking at the world around me through the lens of my camera and writing about the things I do and love in my own words. As a translator, I always worked with other people’s thoughts and words, and it feels wonderfully liberating to be able to do my own thing here.
I expected to be doing this more or less for myself, at least during the first year or so, but to my surprise and delight I actually seem to have some readers already. Thank you so much for spending some time here, for reading, and for all of your kind comments!
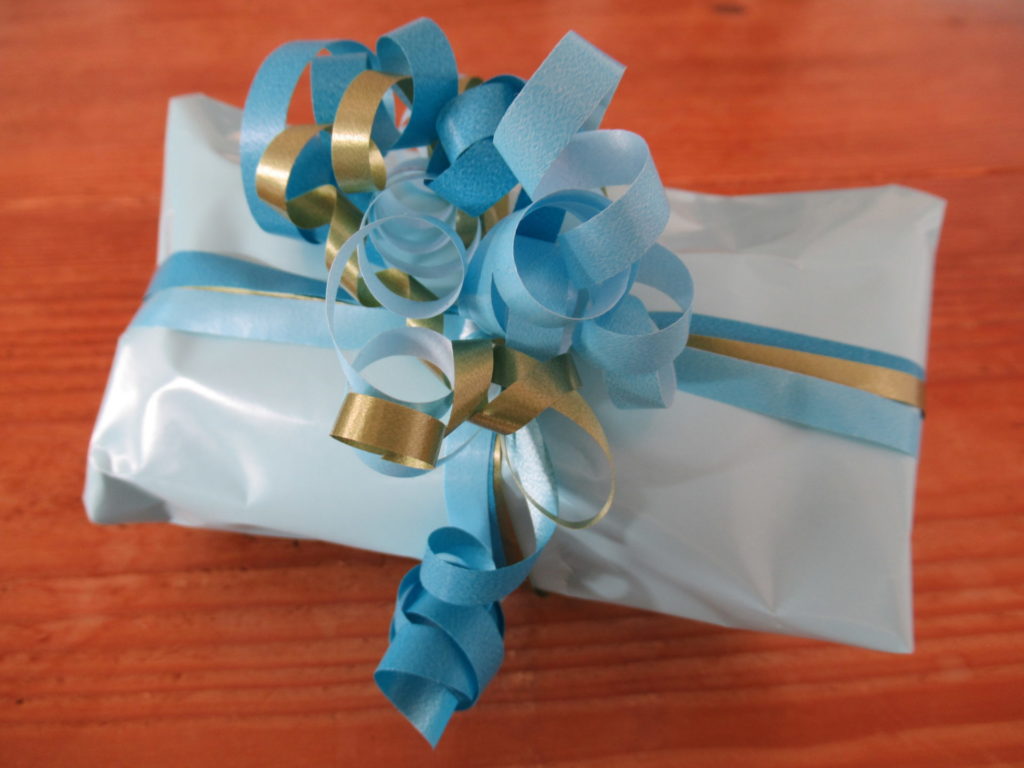
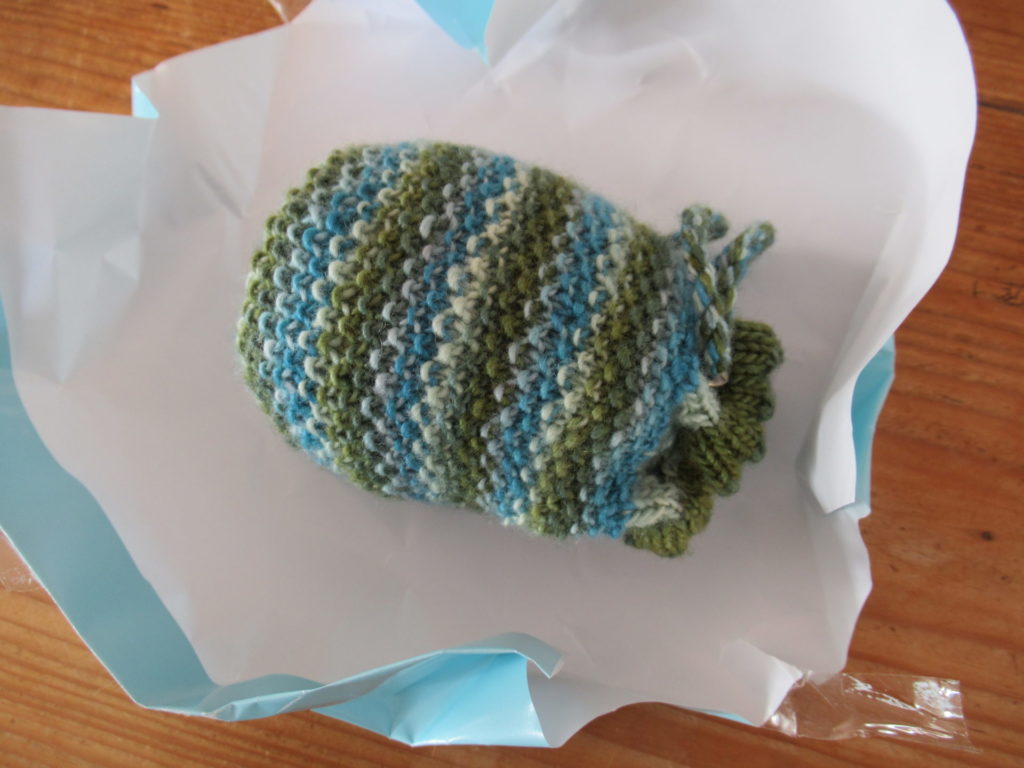
To show my appreciation I’ve made a small gift for you. I’ve learnt a lot during the past year, but what I haven’t learnt yet, is how to post things in 3D, so that you can unwrap it yourself. So I think I’d better do it for you, shall I? Here we go:
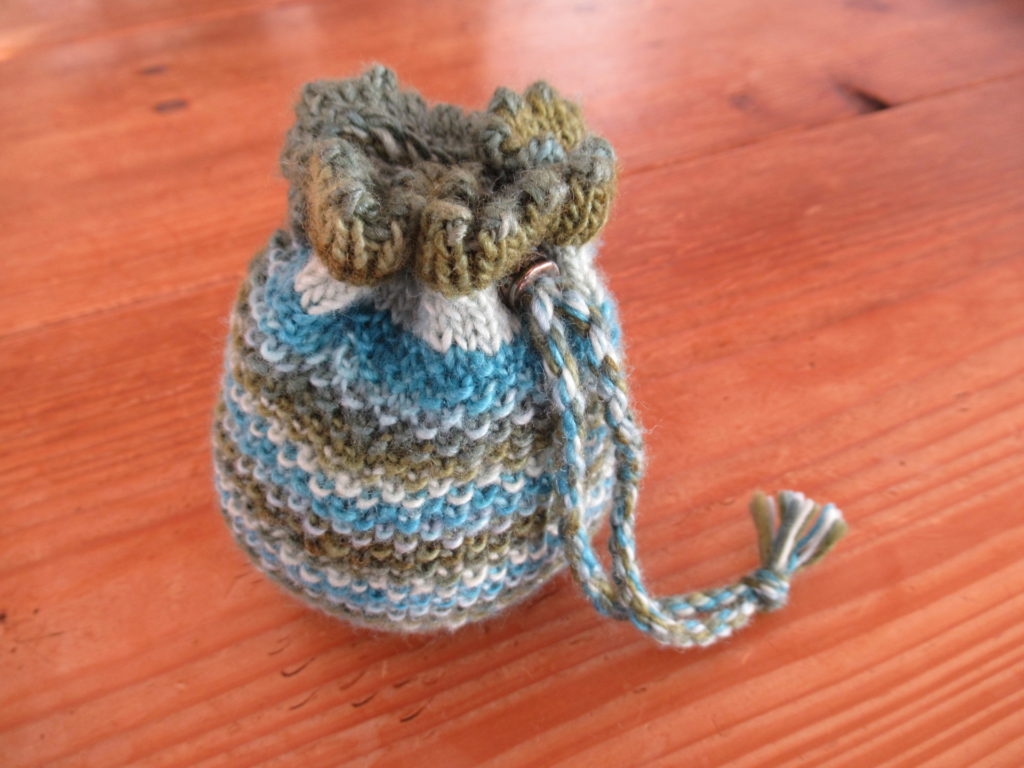
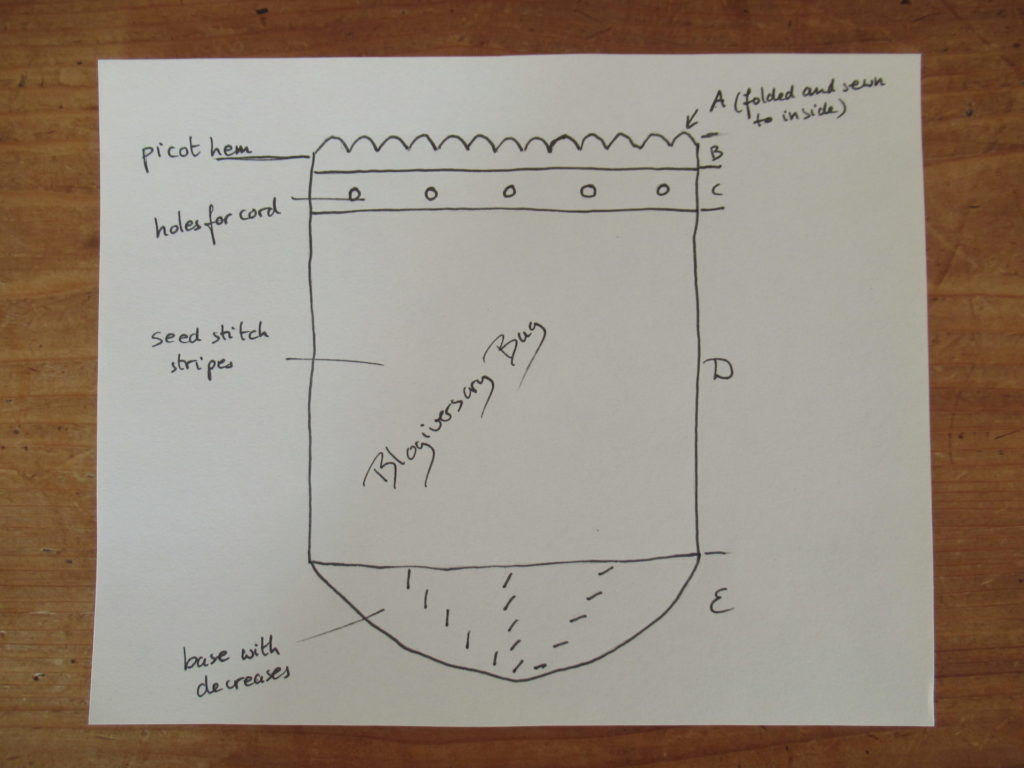
It’s a small knitted drawstring bag. Or rather, the pattern for a small knitted drawstring bag.
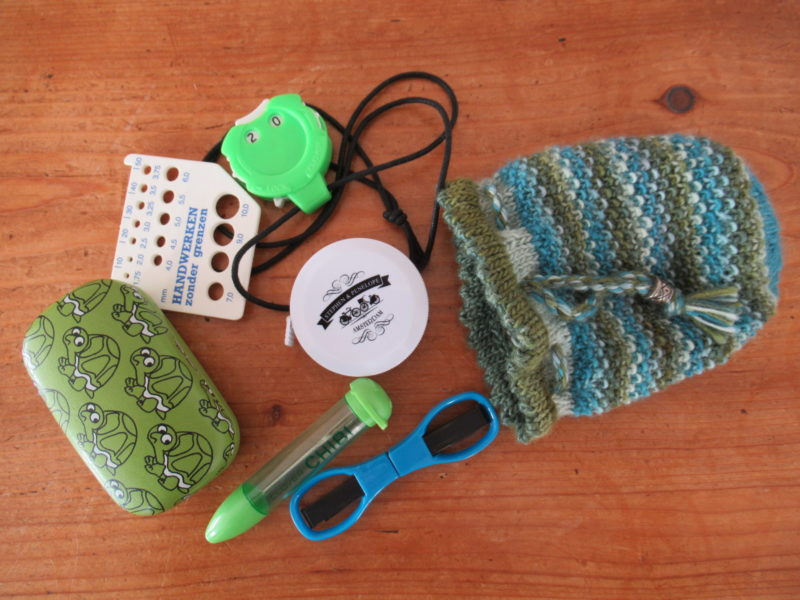
To give you an idea of the size and what you could use it for, here it is with some knitting tools I stuffed into it. It may look incredible, with all these things spread out beside it, but the bag really is big enough to hold them all. (It isn’t quite as magical as Hermione Granger’s bag in Harry Potter, though. I tried to stuff a tent and a few sets of spare clothes in, but that didn’t work.)
Pattern notes
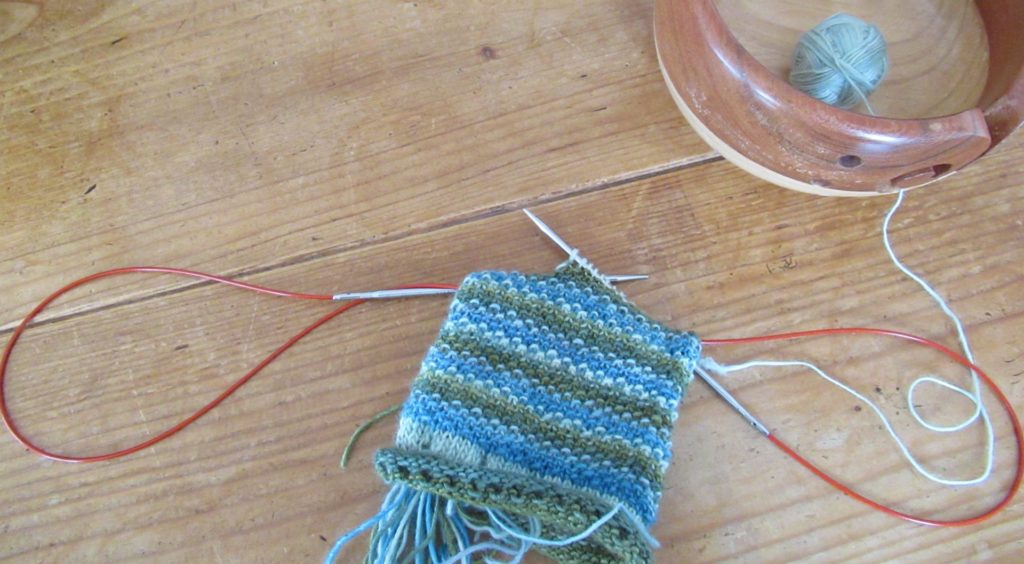
The Blogiversary Bag is worked in the round from the top to the bottom, using a long circular needle and the magic loop technique. If you’re unfamiliar with this technique, you can find a short and simple video showing how to do it here on YouTube. Alternatively, you could use a set of double-pointed sock needles.
This isn’t a very difficult project, but some experience with knitting in the round will help. If you can knit socks, you won’t have any problems with it. Knitting it in a single colour will make it easier, because adding in new colours every few rows is a bit fiddly.
The bag starts with several rows in stocking stitch and a row of eyelets that are folded down and sewn to the inside to make a picot hem. For the sake of clarity I’ve divided the instructions up into 5 sections (A-E, see drawing below).
Gauge: 27 sts x 40 rows = 10 x 10 cm (4” x 4”) in stocking stitch worked in the round.
Finished measurements: Top to start of base 11 cm (4½’’); width 20 cm (8’’) around; base diameter 7 cm (2¾’’).
Yarn, needles and notions
Needles: 3.5 mm (US 4) circular knitting needle at least 80 cm/32″ long.
Notions: Tapestry needle, 1 bead with a 5 mm hole (optional).
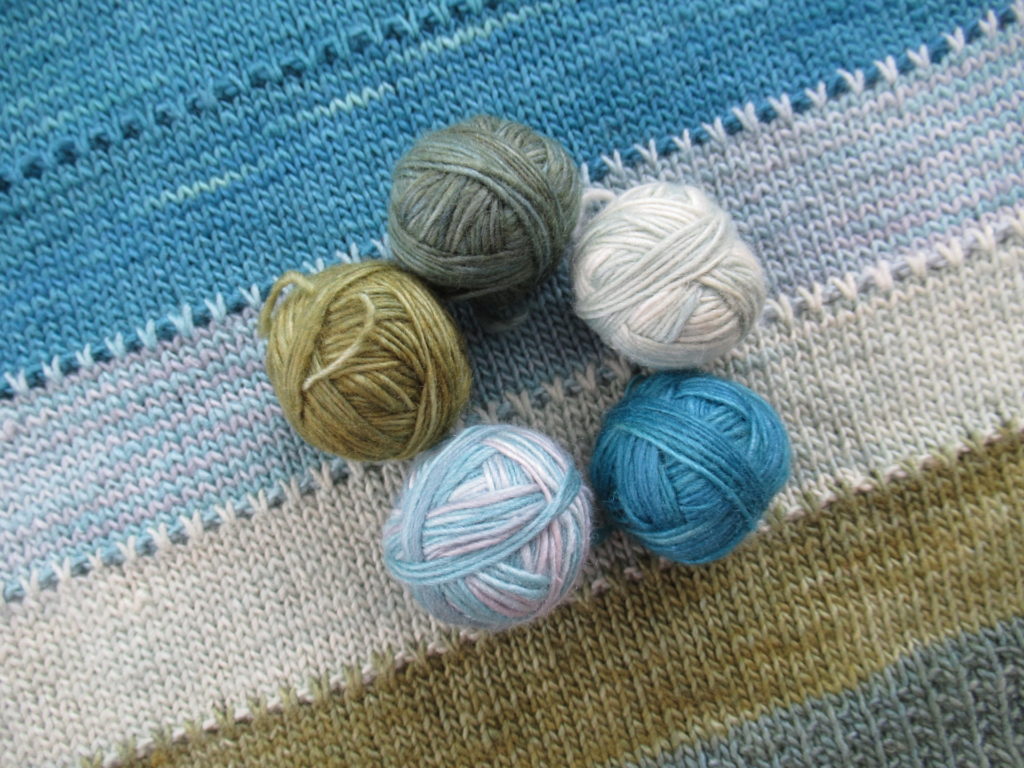
Suggested yarn: A total of approx. 17 g of fingering-weight yarn in 5 colours, for instance Manos del Uruguay ‘Fino’ (70% wool; 30% silk; total yardage/weight approx. 450 m/490 yds/100 g). I used some left-over yarn from Tellina, the simple cowl I made earlier this year, in the colourway ‘Flora’, in this order:
Colour 1: Tincture (darkest green)
Colour 2: Velvet Pincushion (medium green)
Colour 3: Crystal Goblet (pale green)
Colour 4: Folly (dark turquoise)
Colour 5: Watered Silk (pale turquoise)
I used a little more of colours 1 and 4 (approx. 4 grams each) than of the others (approx. 3 grams each).
This is an ideal project for playing with all kinds of left-over bits of yarn. I think it will also work very well in a self-striping (sock) yarn – that will save weaving in a lot of ends! You may have to choose a different needle size, though, and the bag may turn out bigger or smaller.
Abbreviations: K = knit K2tog = knit 2 stitches together P = purl Rnd(s) = round(s) st(s) = stitch(es) yo = yarn over
Instructions
Section A: Cast on 56 sts with colour 1. Rnd 1-4: Knit. Rnd 5: *K2tog, yo; repeat from * to end of rnd.
Section B: Change to colour 2 and knit 5 rnds.
Section C: Change to colour 3. Rnd 1 and 2: Knit. Rnd 3: *K4, K2tog, yo; repeat from * to last 2 sts, K2. Rnd 4 and 5: Knit.
Section D: Change to colour 4. Rnd 1: Knit. Rnd 2: * K1, P1; repeat from * to end of rnd. Rnd 3: *P1, K1; repeat from * to end of rnd.
Repeat rounds 2 and 3 nineteen times more in the following stripe sequence: 2 rnds colour 5; 2 rnds colour 1; 2 rnds colour 2; 2 rnds colour 3; 2 rnds colour 4, ending with 2 rnds in colour 5.
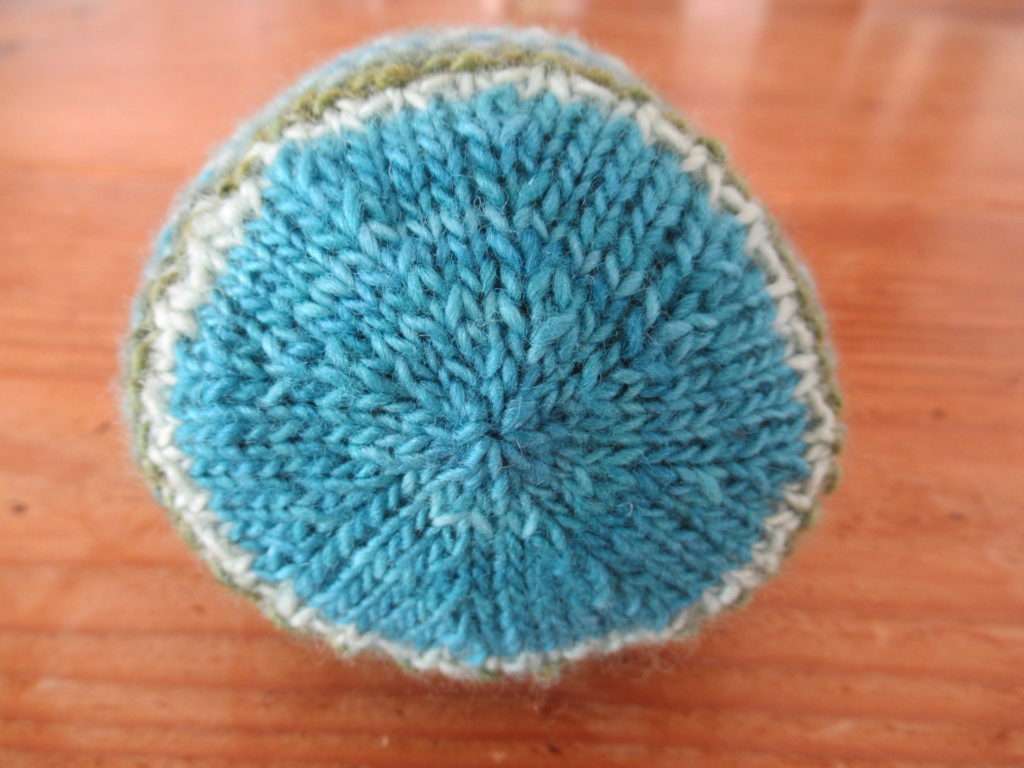
Section E: Change to colour 4. Rnd 1 and all odd rnds: Knit. Rnd 2: *K2tog, K5; repeat from * to end of rnd. Rnd 4: *K2tog, K4; repeat from * to end of rnd. Rnd 6: *K2tog, K3; repeat from * to end of rnd. Rnd 8: *K2tog, K2; repeat from * to end of rnd. Rnd 10: *K2tog, K1; repeat from * to end of rnd. Rnd 12: *K2tog; repeat from * to end of rnd.
Cut yarn. With the tapestry needle, thread yarn through the remaining 8 sts. Fasten off.
Finishing
Weave in all ends.
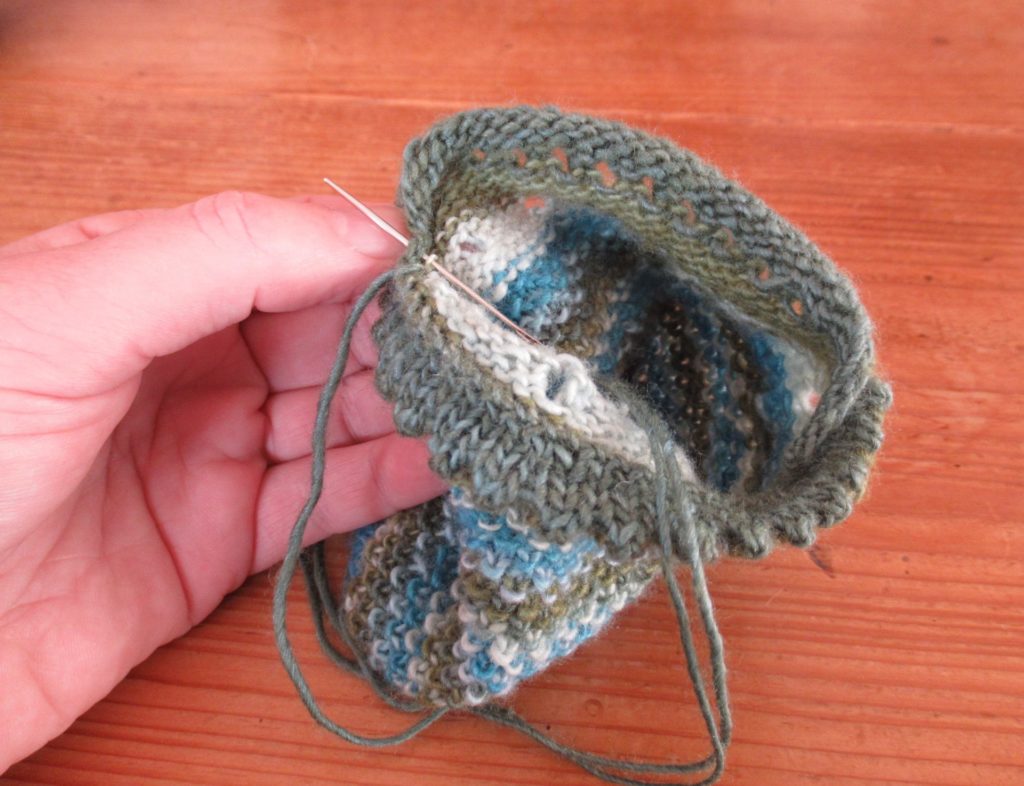
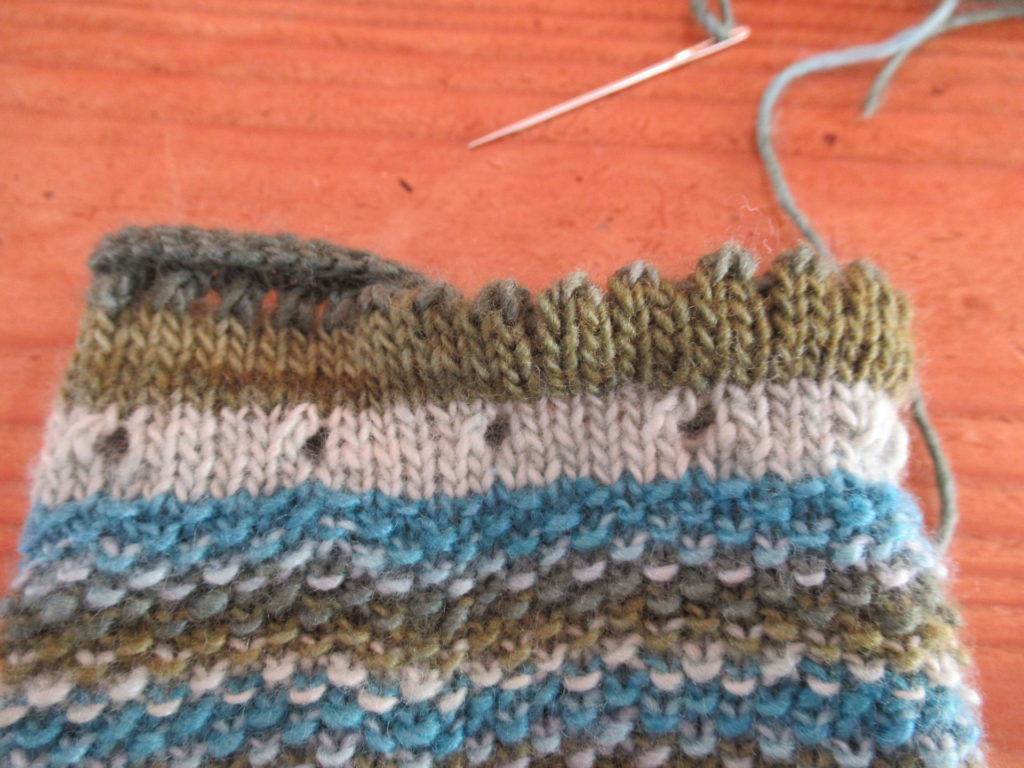
Fold section A to the inside halfway through the eyelets and sew in place with small invisible stitches.
Below there’s another picture of this step, showing what the top looks like before (left) and after hemming (right).
The cord
Thread a cord of approx. 40 cm/16” long through the holes. Use either I-cord, twisted cord, or some shop-bought cord or ribbon.
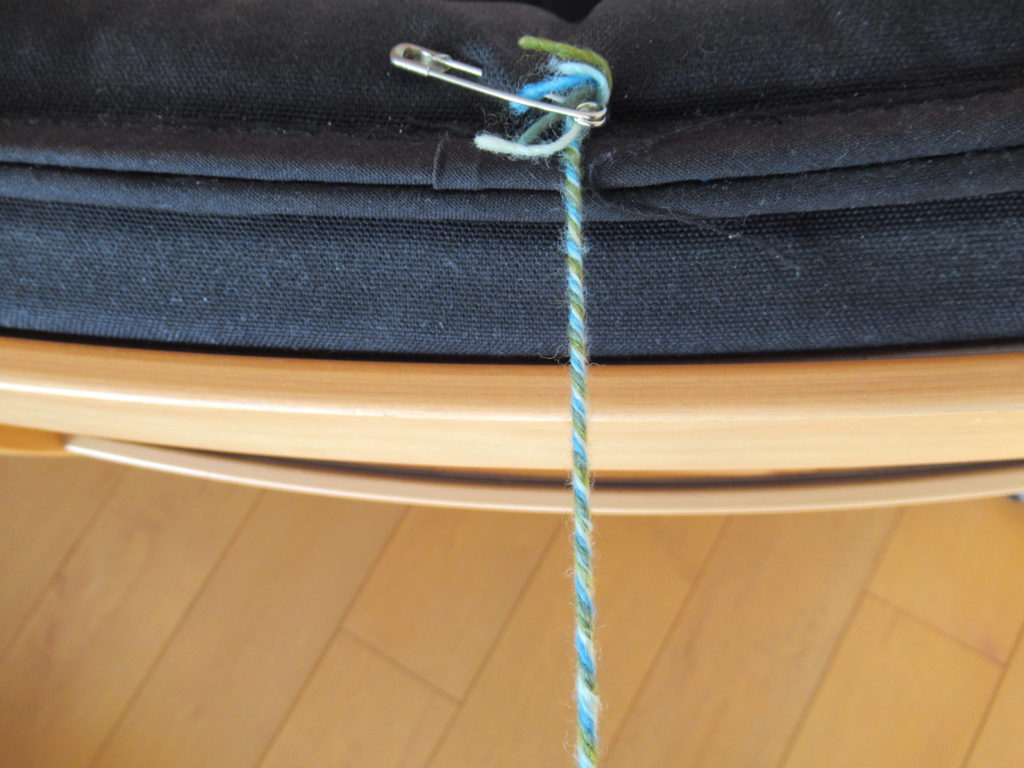
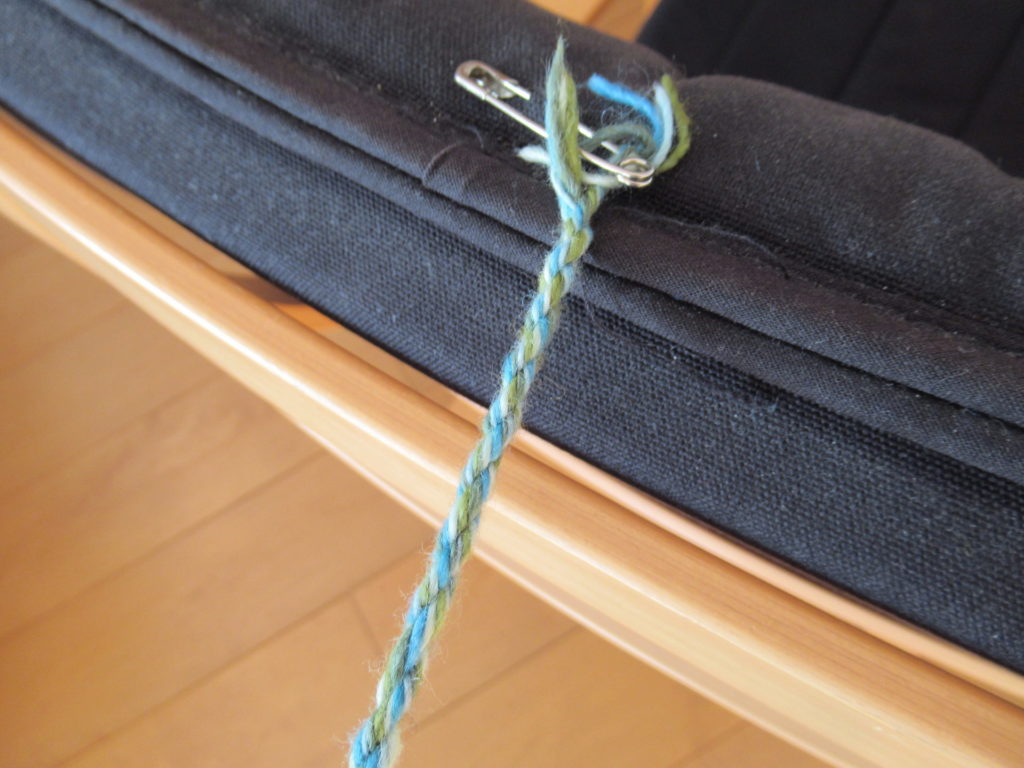
A twisted cord like the one I used, can be made as follows:
Cut five 1 m/40” lengths of yarn in each of the 5 colours.
Make a provisional knot at one end and fasten it with a safety pin to a heavy object, like a chair.
Twist the threads as tightly as possible.
Place your index finger in the middle, fold in half and let the doubled threads twist around each other, smoothing with your hands, if necessary.
Remove safety pin and thread the cord through the holes.
Untie the provisional knot and thread both ends through a bead, if you like. This makes a nice closure, but is not absolutely necessary.
Knot both ends of the cord together and cut off to a nice little tassel.
And that’s it, the Blogiversary Bag all done.
I hope you’ve enjoyed that. If you have any questions about the pattern, please leave a comment and I’ll try to answer as well as I can.
I’ll also add the Blogiversary Bag as a free pattern to Ravelry, so that you can add you own projects there if you like.
Knitting for others can be a pleasure all around, with the emphasis on CAN. I know that it can also lead to uncertainty, frustration and stress (on the part of the knitter) and embarrassment (on the part of the recipient). For handknit gifts to be a success, it’s important to choose well.
I’ve been thinking about what ‘choosing well’ means in this context. A lot of things went through my mind, like choosing the right colour, yarn, size, or type of project. I could write several blog posts on the subject, but basically it is all very simple. I think it all comes down to 3 things:
Only knit gifts for people who will really, really appreciate them (don’t waste your precious knitting time on others – buy them something)
Always take the recipients’ tastes and preferences into consideration (if you’re not sure, ask!)
Never knit anything that you don’t enjoy knitting
And for me, personally, there is one more thing that is very important:
Take your time
I need to be careful to avoid unrealistic deadlines. When knitting becomes a race against the clock, it becomes a chore instead of a joy. So whenever I’m unable to finish something in time for, say, a birthday, I just buy something else or write a card, and tell the person that the handknit gift will be finished soon.
Keeping these principles in mind, I have had a great time knitting warm and woolly gifts over the past few months. I haven’t photographed everything, but here are some pictures of a shawl and a pair of mittens that I knit for our daughter.
The Shawl
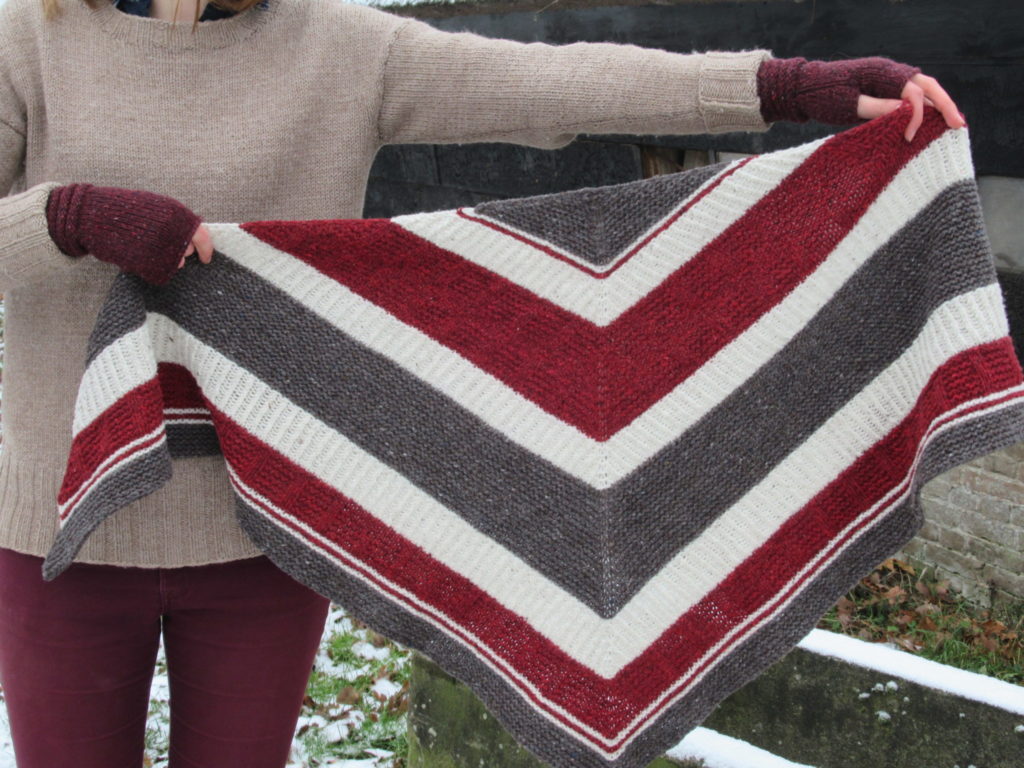
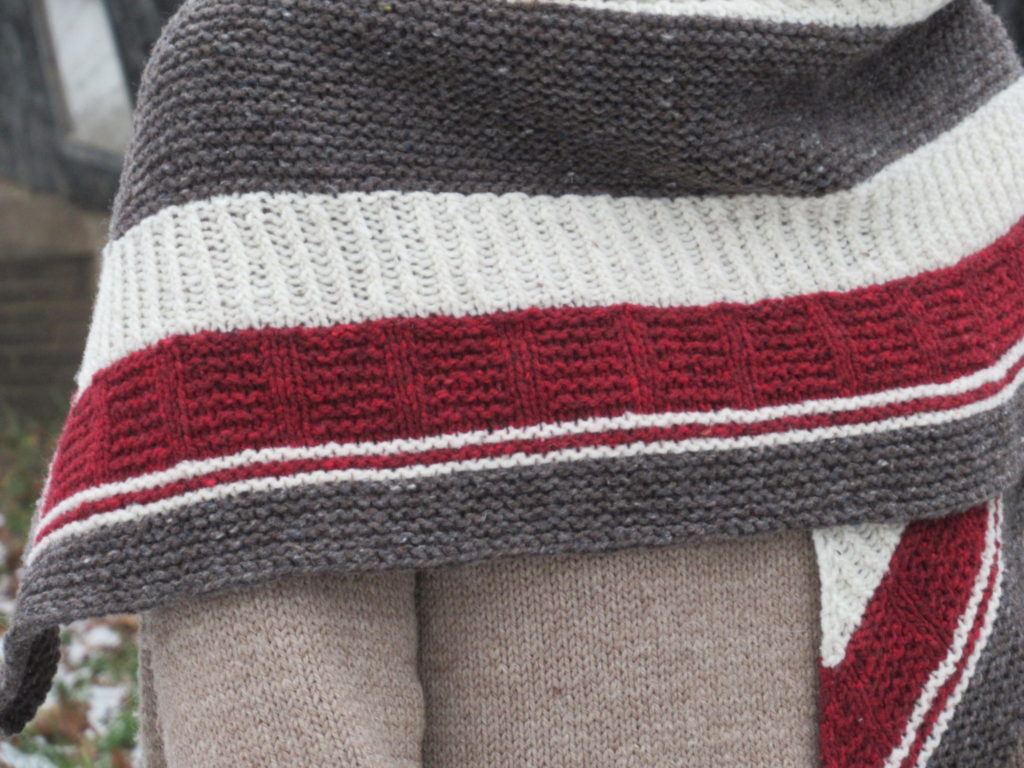
For the shawl I used a pattern called Bradway. It is a fairly quick knit on 5 mm (US #8) needles. The triangle starts with just three stitches and is knit from the middle of the top outwards. It has wide and narrow bands in three different stitch patterns, as the photo below shows from close up:
There are bands in garter stitch, twisted 1/1 rib and ’tiles’ consisting of knit and purl stitches. I was a bit worried that the twisted rib sections would be tighter than the other stitch patterns so that the sections next to them would pucker, but that did not happen at all.
I was not happy with the increases used in the pattern (they did not look good on the reverse side) but that was easy to modify. And the bind-off technique used by the designer was too tight to my taste, so I used a stretchier lace bind-off. (More details about these modifications on Ravelry.)
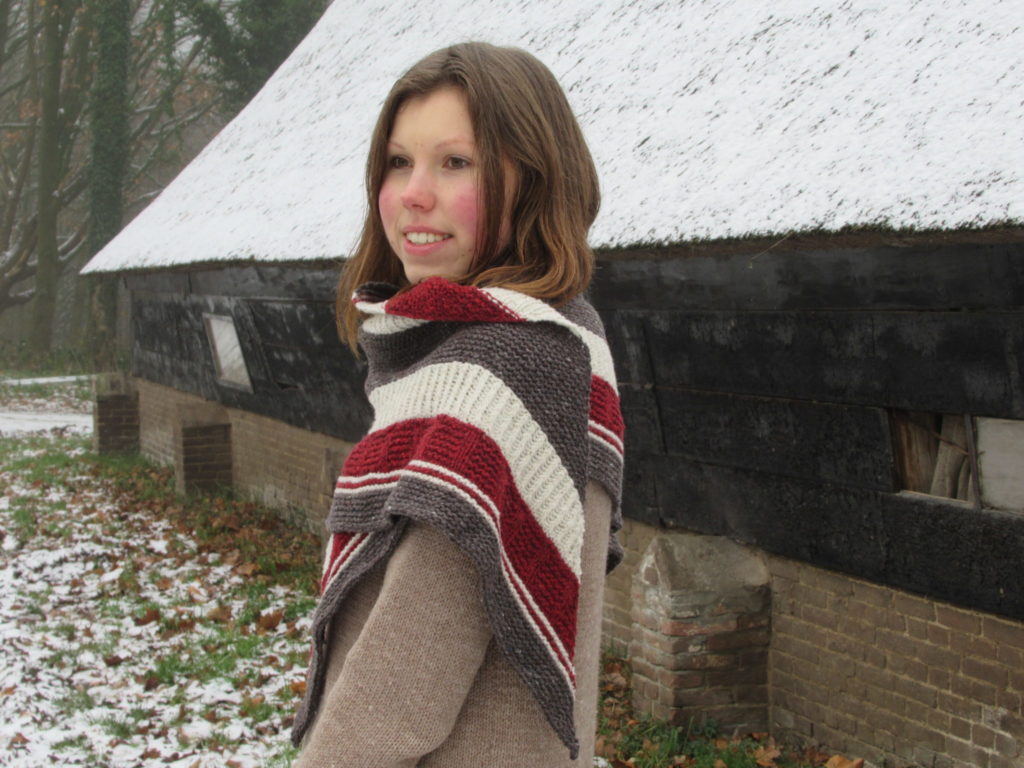
Bradway is not huge, but big enough to wear wrapped around the neck as a cosy scarf with a winter coat.
The Yarn
I knit Bradway in Brooklyn Tweed Shelter, a yarn that I have been wanting to knit with for ages. It is a gorgeous rustic tweed yarn. For us, in the Netherlands, it is rather expensive, but in my humble opinion it is absolutely worth the price. The colours are fabulous and vibrant, and the tweedy flecks add another dimension. I chose Truffle Hunt (brown), Fossil (natural white) and Long Johns (red).
What struck me while I was knitting with Shelter, was that each of the three colours had a different character. The red yarn (Long Johns) was slightly thinner than the other two as well as more uneven, with thicker and thinner parts.
Looking at the natural white (Fossil) and brown yarn (Truffle Hunt) I could not see any differences, but to my hands they did feel very different. Truffle Hunt somehow felt less supple and the knitted fabric also looked denser than the other two colours. I even wondered if I should use a different needle size. The differences are probably due to the red being dyed and the white and brown being undyed as well as from different fleeces. In spinning I’ve noticed this phenomenon of different colours having different properties, too, even though the wool is from the same sheep breed.
Having said that, the differences did not bother me in the finished shawl. The yarn softened up nicely after a good soak. And blocking evened out any irregularities.
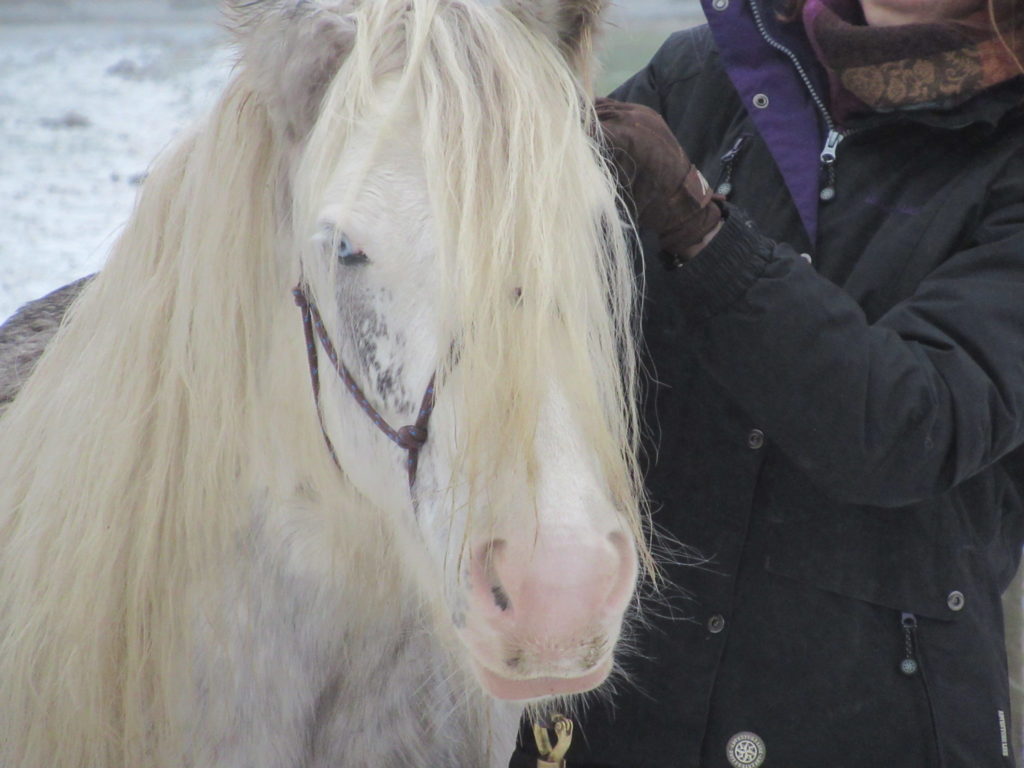
The Horse
The horse? What horse? Well, we decided to combine the photo shoot for this blog post with a visit to our daughter’s horse. She’s so sweet and photogenic. I just couldn’t resist including a picture of her here, in between all the knitting. I hope you don’t mind. Hello Silver!
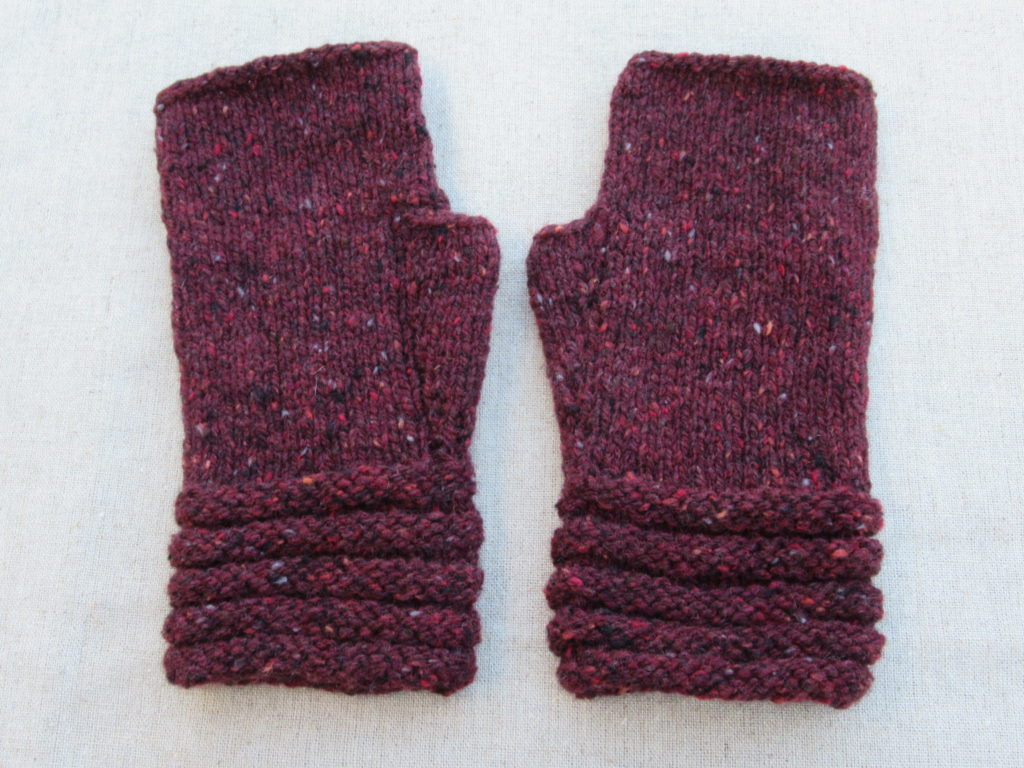
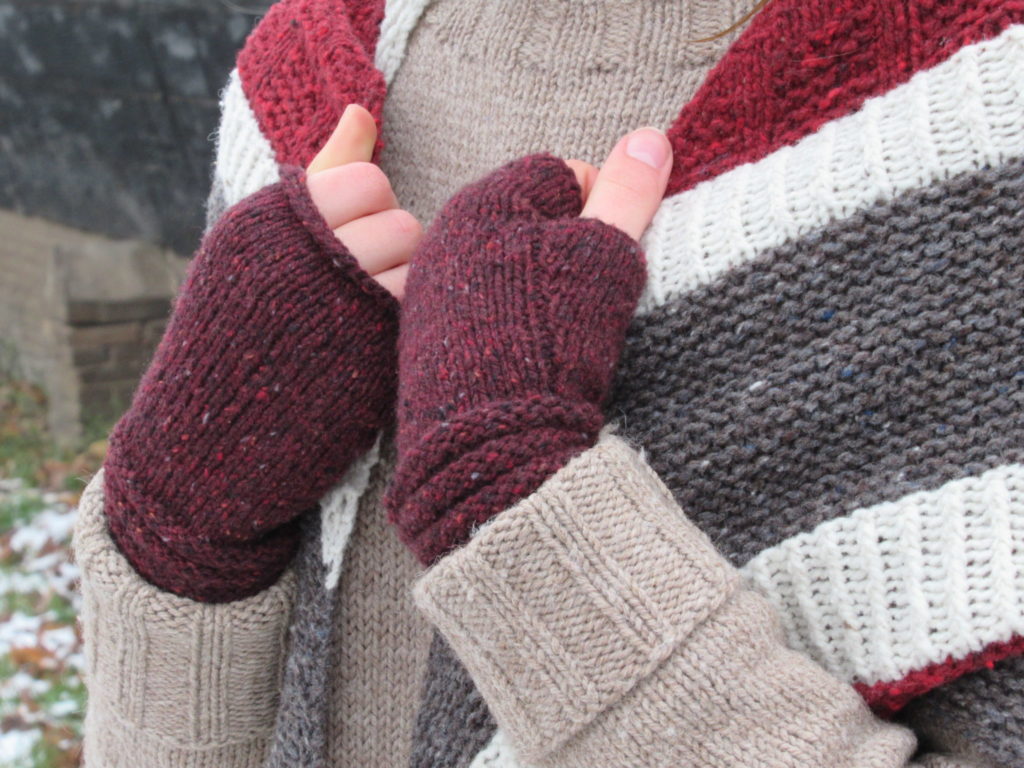
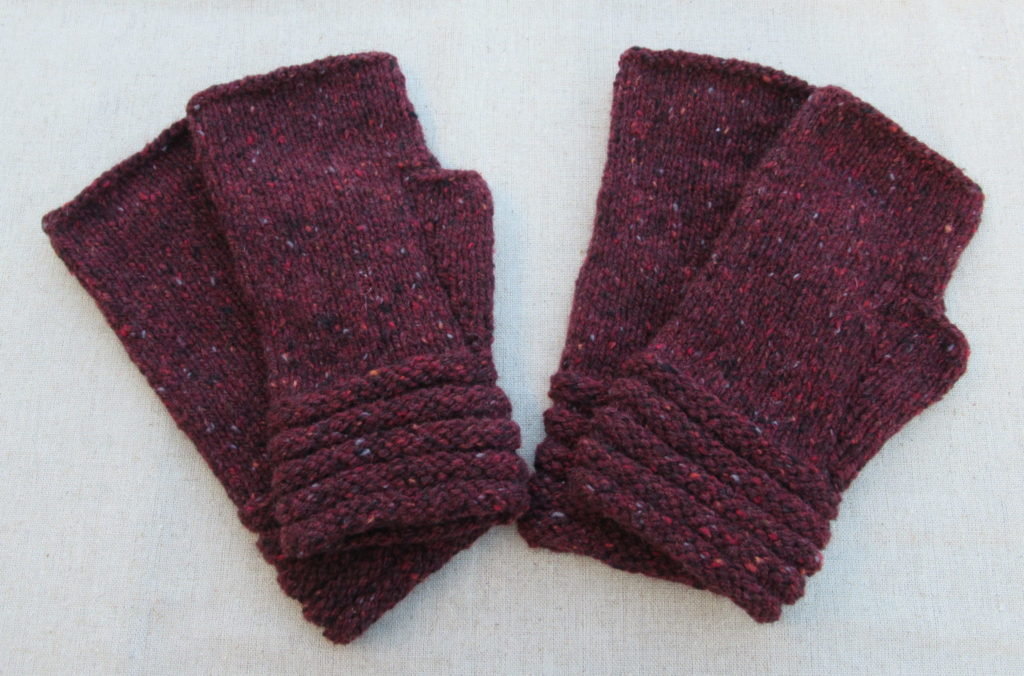
The Mittens
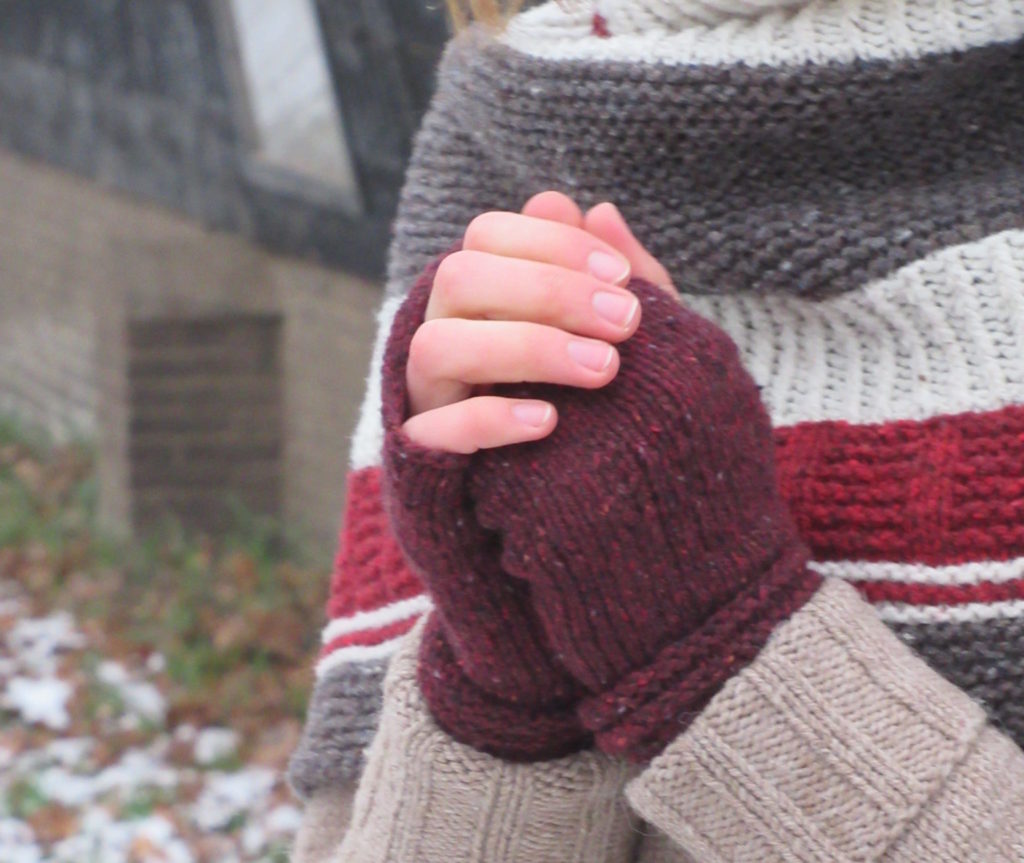
Now, onto the mittens. I’ve knit these Welted Fingerless Gloves several times before, in different yarns. It is such a quick and satisfying knit. Not difficult at all, and just the kind of small project for indulging in a really special luxury yarn (I used Rowan Cashmere Tweed).
‘Welted’ refers to the welts in stocking stitch (US: stockinette stitch) and reverse stocking stitch around the wrist. The really special part about these mittens is the thumb. Actually, they do not have a knitted on thumb, but just a kind of large button hole, which makes them easy to knit and fit perfectly. What I also like is the nice, knitterly detail of a row of purl stitches along the thumb gusset (see photo below).
In fact, I did not knit one but two pairs of the same mittens. The other pair was for the dear daughter of one of my very best friends. I can see her wearing them walking to the bus stop on her way to uni on chilly mornings.
The big gift-giving month of December is over, but I am knitting still more gifts. I have just finished a super soft alpaca cowl and am knitting two more pairs of fingerless mittens, this time for our lovely niece. If you read this, dear niece, the first pair of mittens (the pink ones) is almost finished. Not quite in time for your birthday, but I’ll mail them to you soon!
I’m always on the lookout for new ideas for doable knitted gifts. So, if you have any tips, please let me know. Is there a favourite pattern that you knit again and again?
For us, Christmas is not about presents. Our big gift-giving moment is on December 5th, the feast of Saint Nicholas. For us, this time of the year is about celebrating togetherness, darkness and light, and good food. And for me, it is also a time to reflect, rest, read and knit.
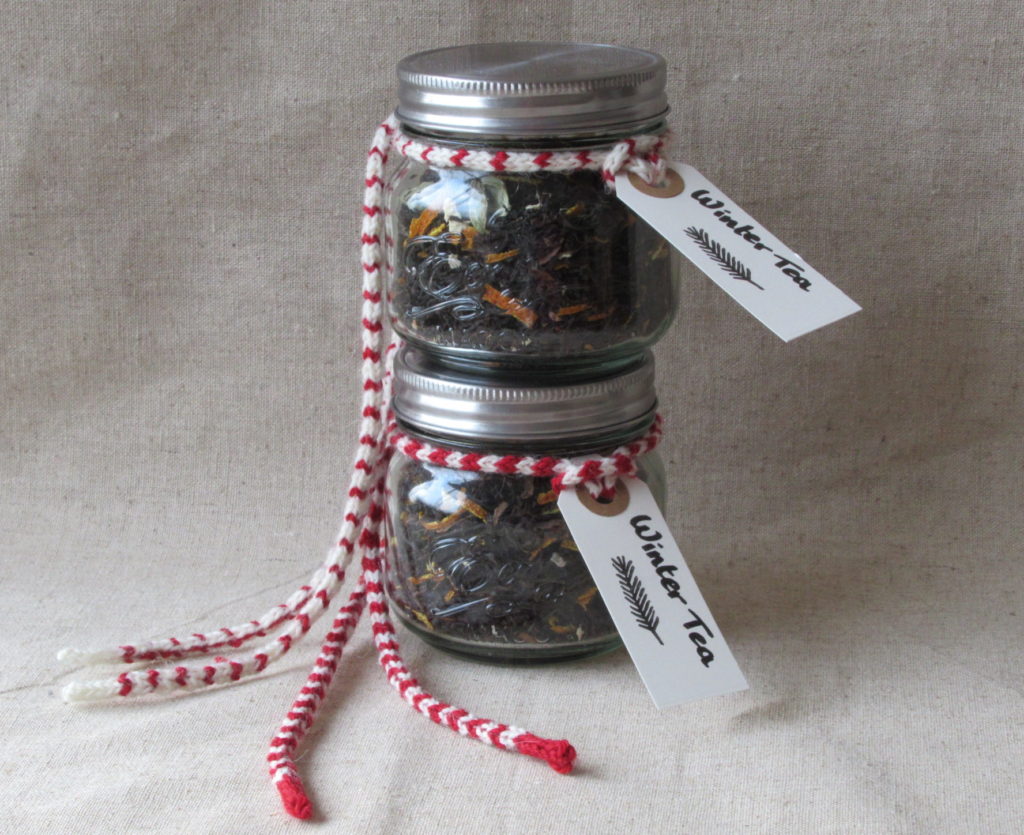
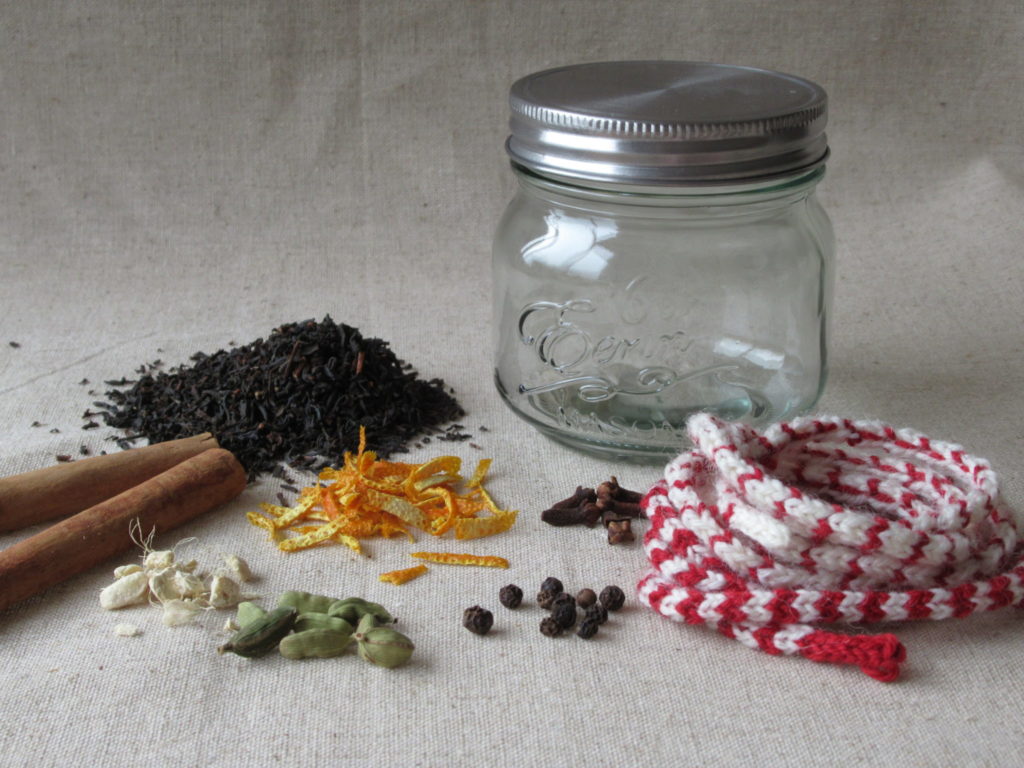
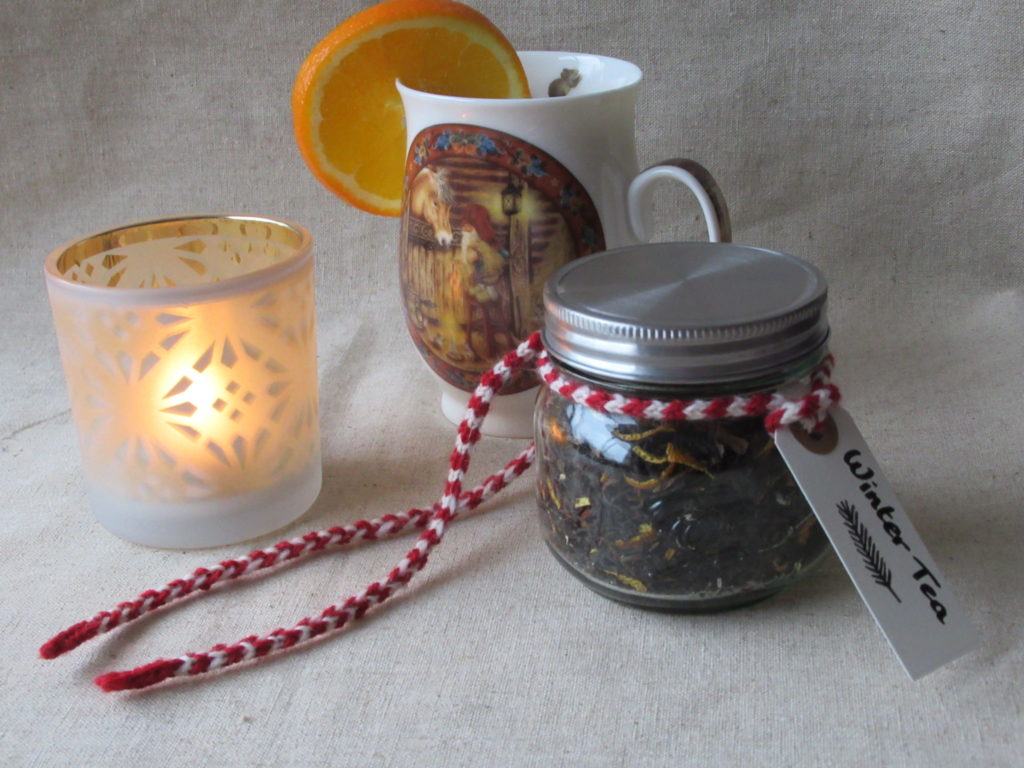
Still, there is always someone who could do with a small present – a host, someone who has moved house, or ‘just’ a dear friend. For such occasions I have made some warming Winter Tea, with orange zest and spices. I’ve written the recipe down and included it further on in this blog post.
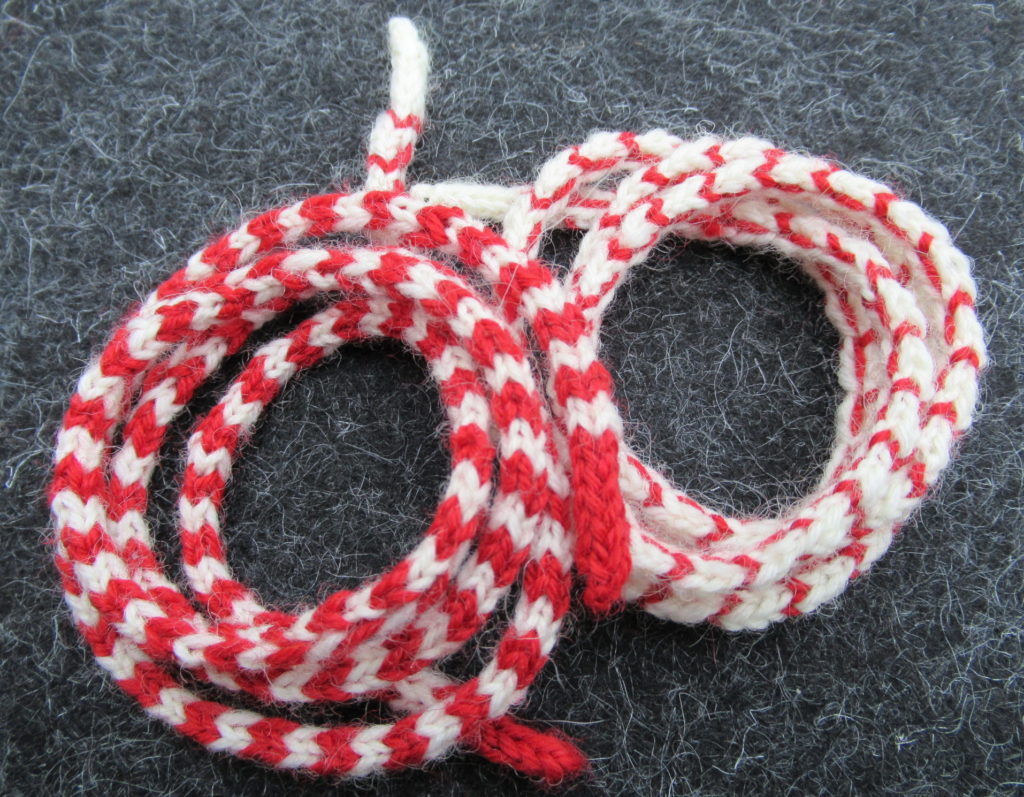
Making the tea is really nice, cutting and drying the zingy orange zest, crushing the spices, and mixing the fragrant blend. But what is even nicer, is knitting the cords to decorate the jars. It would be much quicker to use string, raffia or ribbon, of course. But knitting this cord is so much fun and brings a quirky, personal touch.
I-cord
This type of knitted cord is usually called I-cord. Why? Something to do with iPhones and iPads perhaps? No, as it turns out, the ‘I’ stands for ‘idiot’. This cord is so easy to knit that every idiot can make it. I-cord was made famous by the innovative knitting teacher Elizabeth Zimmermann, and can be used in many different ways – along the edges of knitted fabrics or separately, like I used it here.
For a cord like this you’ll need some scraps of fingering-weight (sock) yarn in two colours and two double-pointed knitting needles (I used 2.5 mm).
Knitting the I-cord:
Cast on 1 stitch
Knit into the front, the back and the front of the stitch (= 3 stitches)
DO NOT TURN! Move the needle from your right to your left hand and slide the stitches to the right tip of the needle.
Knit the 3 stitches, pulling the yarn firmly (but not too tight) at the first stitch.
Repeat steps 3 and 4 to the desired length. (I knit to about 70 cm/28 inches).
To cast off slip the first stitch, knit the next two stitches together, pass the slipped stitch over this stitch, cut the thread and pull it through the last stitch. Weave in ends.
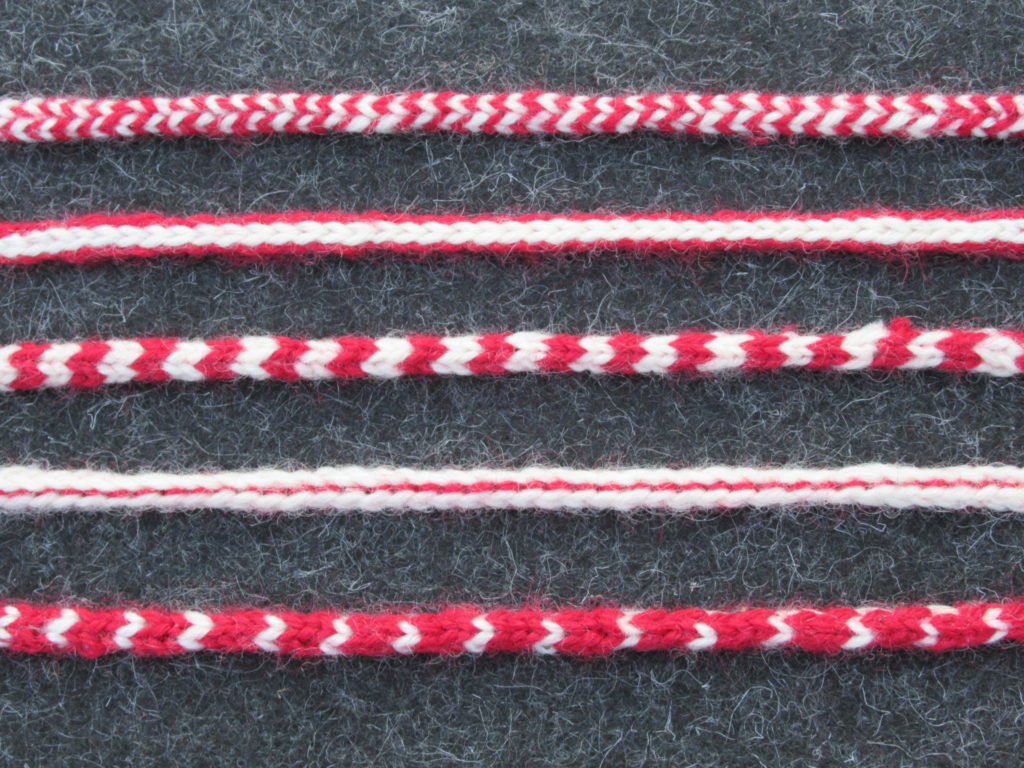
For the cord on the left in the photo above I knit 2 rows red and 2 rows natural white. For the cord on the right I alternated 3 rows natural white with 1 row red.
And then I played some more with the yarn:
It’s amazing what you can do with just 3 stitches and 2 colours of yarn. The hardest thing about I-cord is keeping an even tension. Don’t worry too much about that, though. Nobody will notice. As you can see from the photo above, my tension is not all that even. But do you notice that looking at the I-cords on the jars? Not really.
Winter Tea Recipe
You’ll need:
Dried zest of 1 orange (see below)
100 grs black tea (e.g. Ceylon)
8 cloves
1-2 cinnamon sticks (depending on size)
15 cardamom pods
10 black pepper corns
2 teaspoons dried ginger
To dry the orange zest, preheat the oven to 100 °C / 210° F / 90 °C fan. Peel the orange thinly using a potato peeler. Cut the zest into tiny strips. Spread the strips of zest out on a baking tray and place in the oven for about 1 hour, until completely dried out and brittle. Leave to cool.
Break the cinnamon sticks into pieces. Crush the spices (not the orange zest!) using a pestle and mortar. Use some force, but not too much. The spices should still be recognizable and not pounded to a powder.
Mix the spices with the tea and the dried orange zest and fill into jars. (This quantity is enough to fill two 240 ml jars.)
Make a nice gift tag and fasten it with your I-cord.
The tea is even better served with a slice of fresh orange.
Last but not least
Remember to take some time to make yourself a cup of tea, sit down, sip and relax.
I wish you a very happy and peaceful holiday season and look forward to seeing you again (in real life or here) in the New Year!